
Planning a trip to Vietnam seems intimidating at first: the country is deceptively large, with so many incredible sights to see spread out all the way from north to south.
Of course, Saigon (Ho Chi Minh City) and Hanoi loom large on your itinerary wishlist, but other destinations – from Phu Quoc islands in the south to Da Nang and Hoi An and Hue on the central coast to Sapa and Halong Bay in the North – also beg for inclusion on the itinerary.
Add to that a perplexing currency with way too many zeros, a tonal language that’s hard to learn, and a visa requirement for virtually all visitors and you may be a bit overwhelmed with both excitement and confusion when it’s time to plan a Vietnam trip.
But planning a trip to Vietnam doesn’t have to be incredibly difficult, and it’s worth every minute of planning.
I’ve traveled there twice and I’ve spent a total of 5 weeks exploring the country and seen so many incredible places in the country. It’s one of my favorite countries in Asia by far, with incredible food, kind people, beautiful landscapes, and did I mention the food?!
So with all that being said, I’ll walk you quickly through the steps to planning a perfect trip easily through this Vietnam travel checklist, so you can tackle your trip planning one step at a time.
Planning a Trip to Vietnam in 10 Simple Steps
Step 1: Check visa requirements
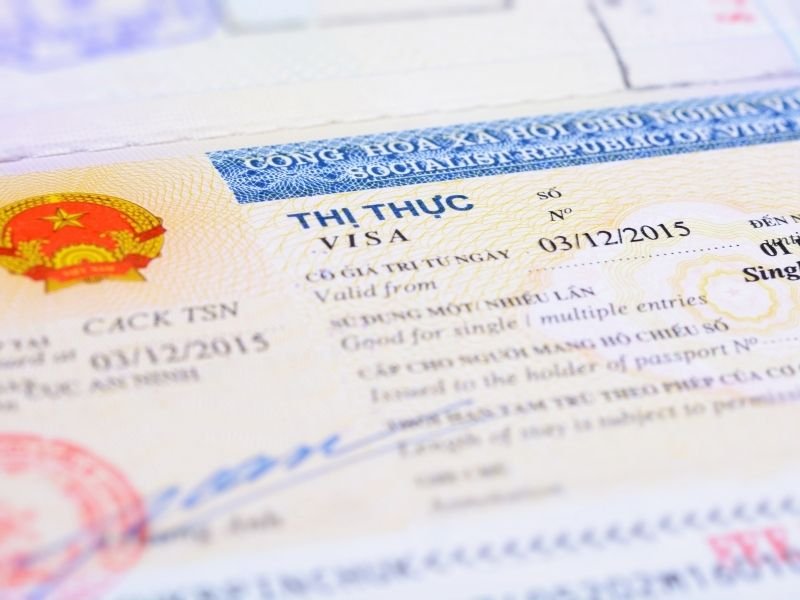
One of the first places people get intimidated when planning a trip to Vietnam is that many countries who aren’t used to needing a visa to travel suddenly do.
If you’re American, European, Canadian, or Australian, you may find yourself in a visa process for the first time in your life!
Only a handful of fellow Southeast Asian countries are visa-free (plus Chile, as an interesting outlier!), and some European countries are visa-free only if your trip is less than 15 days. If you’re unsure if you need a visa or not, research the destination for your nationality.
However, don’t get too stressed: the Vietnam visa process is actually rather easy, and you can now apply for the e-visa online.
The e-visa takes 3 days to process and costs just $25 USD for a single-entry visa valid for 30 days. If doing a simple single-entry e-visa, you can just proceed straight to immigration with your e-visa without needing to pick up your visa on arrival.
If you need a multi-entry visa, you will need to apply for the visa on arrival online ($25-50 USD depending on country), and you can pick it up when you arrive at the airport in Vietnam.This is the process I did on my last trip to Vietnam, and it only took about 30 minutes at the airport.
Step 2: Book your tickets
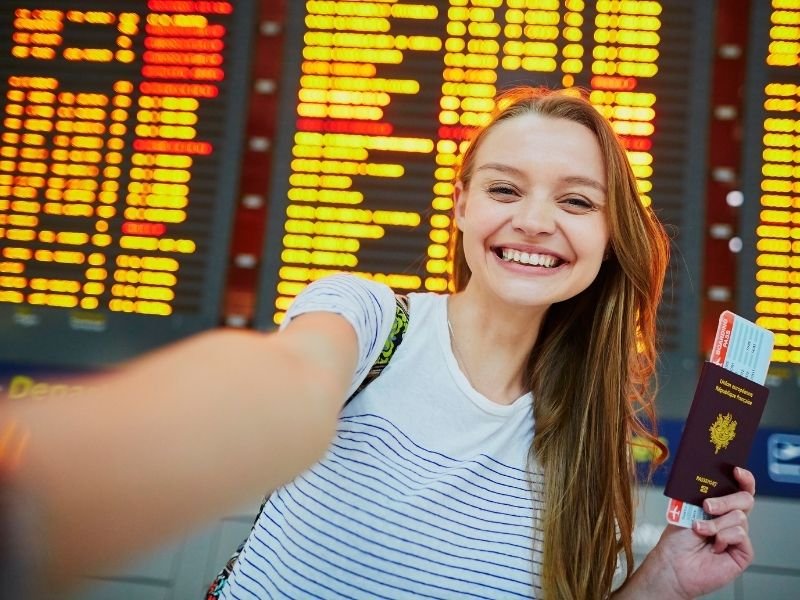
Once you’ve got your e-visa all sorted, it’s time to figure out your flights! The main airports in the country are Ho Chi Minh City / Saigon and Hanoi. I suggest looking into flights into both locations, though arrival in Ho Chi Minh City from overseas tends to be cheaper. You can find more information about Vietnam’s different airports here.
On my last trip to Vietnam, I booked a ticket from Sofia, Bulgaria to Ho Chi Minh City, Vietnam via Qatar Airways for approximately $550 USD roundtrip.
I generally use Google Flights searching for flights as I find their search engine to be the most intuitive, but Skyscanner has good search functionality as well.
You may want to take this time to decide if you want to book tickets for any travel within the country as well. Vietnam is a long, long country: the road distance between Ho Chi Minh City and Hanoi is 1,700 km, a 31 hour drive in Vietnam traffic terms!
(Oh, and side note: you probably shouldn’t plan to drive in Vietnam if you want to stay sane. That’s best left to professionals – and the Vietnamese!)
So if you want to visit both the northern and southern parts of Vietnam, you’ll probably need at least one or two domestic flights as well. But we’ll get into this a bit in the next section.
Step 3: Decide your Vietnam itinerary!

This is the most fun part, but it can also be the most overwhelming: planning your Vietnam itinerary!
I’ll throw out a few suggestions for you based on my own time there.
If you only have one week in Vietnam, I suggest sticking to the Northern part of Vietnam. Fly into Hanoi and spend at least 3 days there, and plan for day trips or overnight trips to Ha Long Bay and/or Sapa, depending on your preferences.
If you have two weeks in Vietnam, I would suggest doing the North and Central part of Vietnam. Take your Hanoi-Halong Bay-Sapa itinerary and add Hue (optional), Da Nang, and Hoi An to it.
If visiting Hue, you can take an overnight train to save time, taking an overnight train from Hanoi to Hue, and then a daytime train from Hue to Da Nang, which is in my opinion one of the prettiest train rides I’ve ever taken!
If you have two weeks in Vietnam but can’t imagine skipping Saigon, you could also spend one week based around the North and then fly down south for a few days in Ho Chi Minh City and the Mekong Delta.
I absolutely love Ho Chi Minh City and spent three weeks there, but I admit it’s light on sights compared to Hanoi and other places in the North of Vietnam. It’s really cool if you want to see the heart of modern Vietnam and the country’s biggest metropolis, but if you’re more interested in landscapes and historic sights, I’d suggest spending more time in the North.
If you have three weeks in Vietnam or even a month, that’s perfect! You won’t have to make any concessions and you can visit pretty much all of the major destinations in the country if you don’t mind zipping around the country by train and plane quite a bit.
Step 4: Budget your trip

A trip to Vietnam can really be on any budget spectrum. If you’re on a tight budget, it’s one of the most budget-friendly places you can travel – but if you love a bit of luxury, you certainly will be able to indulge in that in Vietnam as well.
If you’re backpacking the country, you can definitely travel for about $20 USD a day, and on $30 USD a day you’ll be living like a king (think private room in a hostel and 3 meals out a day). It’s a pretty comfortable country to backpack in, and when I traveled Vietnam on a budget, I never felt like I was making any big sacrifices.
If you have a mid-range budget, you’ll be able to enjoy the country even more on $50-75 USD a day per person. Think 4-star hotels for $30 a night for a couple, amazing massages for $10-15 an hour, and eating in upscale restaurants instead of street food for a handful of meals (though of course, no matter your budget, you should definitely indulge in the street food scene! It’s one of the best parts of Vietnam!).
If you have a luxury budget, the sky’s the limit! Stay at the finest hotels, take only private tours, eat at the finest restaurants, and you’ll still find yourself struggling to max out your credit card.
I recommend deciding in advance what you want to spend in total, breaking that into a per-day, per-person cost. Allocate about 1/3 of that for accommodations, 1/3 for activities, and 1/3 for incidentals and extras like shopping, transportation between cities, and meals. That should give you a good benchmark for how to budget for Vietnam.
Step 5: Plan Your Activities

I love and hate tours in Vietnam.
On one hand, the tours save you a lot of hassle that would be nearly impossible to surmount independently: you probably don’t want to drive in Vietnam, and public transportation can be a tough nut to crack.
On the other, tours often can feel like you’re being ferried around from one point of sale to the next, often with uncomfortable experiences along the way, like an unexpected captive animal encounter or a really pushy market experience.
Despite my reservations with some of my Vietnam tours, I do recommend booking tour experiences while in Vietnam. It saves unbelievable time and headache, and it does provide a lot of local insight: just be prepared to dislike about 10% of your itinerary and you’ll be much happier having that baseline expectation.
Best Tours in Hanoi
Best Tours in Hoi An
Best Tours in Ho Chi Minh City
Step 6: Book your accommodations

Next step is to plan where you’re going to stay! This will depend largely on your budget and itinerary.
Keep in mind too when booking accommodations that many Vietnamese cities are very large and spread out! Location is important, so I recommend sorting your searches by closeness to a desired central attraction.
For example, Ho Chi Minh City has 24 districts – and District 1, the central district, is huge! I was staying in District 1, but I was still about a 30-minute walk or 20-minute cab ride to the central area with the Independence Palace and Notre Dame Cathedral.
Hanoi is similar, and it’s easy to accidentally book something on the other side of the city! So I suggest searching by location first and then amenities second. While transportation around Vietnam is inexpensive, it is time-consuming and occasionally frustrating due to all the traffic, so I suggest being as close as possible to the heart of the action!
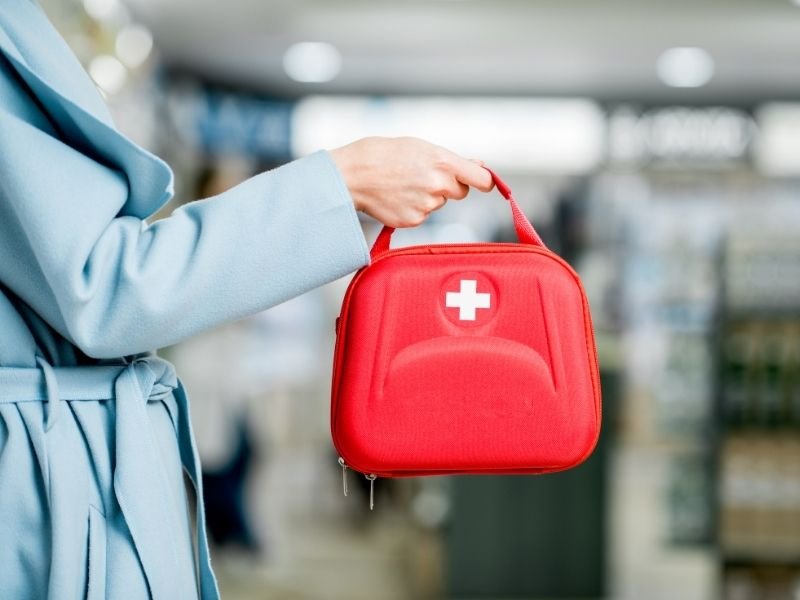
Step 7: Research any vaccinations you may need & prepare a travel medicine kit
I’m American, so the CDC is my guideline when checking travel vaccinations for international travel. The website recommends checking that you’re up-to-date in terms of boosters for the following common vaccinations: measles-mumps-rubella (MMR), tetanus, chickenpox, and polio. This is standard for any trip.
They also recommend Hepatitis A and typhoid, both of which can be gotten from contaminated food or water.
If you’re traveling in rural areas of Vietnam, you may need to take anti-malarials. However, malaria is not present in any of the cities, and it’s rare in the Mekong Delta area, so it’s unlikely that you would need anti-malarials. I’ve never taken anti-malarials in Vietnam. Bug bite prevention is likely enough.
You should, though, pack your own travel medicine kit! While you can find pharmacies in Vietnam, you may not find the exact brands you want or it may be frustrating to deal with a language barrier while feeling ill.
My travel medicine kit always includes stomach tablets like Pepto-Bismol, motion sickness pills, painkillers, and rehydration packets. I also include sunscreen, mosquito repellent, a topical antibiotic, a few alcohol wipes, and band-aids in my mini kit.
Also, research a few private hospitals before going. My first trip to Vietnam, my friend got really bad food poisoning and needed to spend a few hours in the hospital with an IV drip. It was stressful trying to find the information at the moment to get her to the right place where we knew they would speak English and we wouldn’t have any communication problems.
It’s unlikely you’ll get sick on your trip, but having the name of a hospital in each city you plan to visit in case of emergency will ease your mind.
Step 8: Pack your bags!
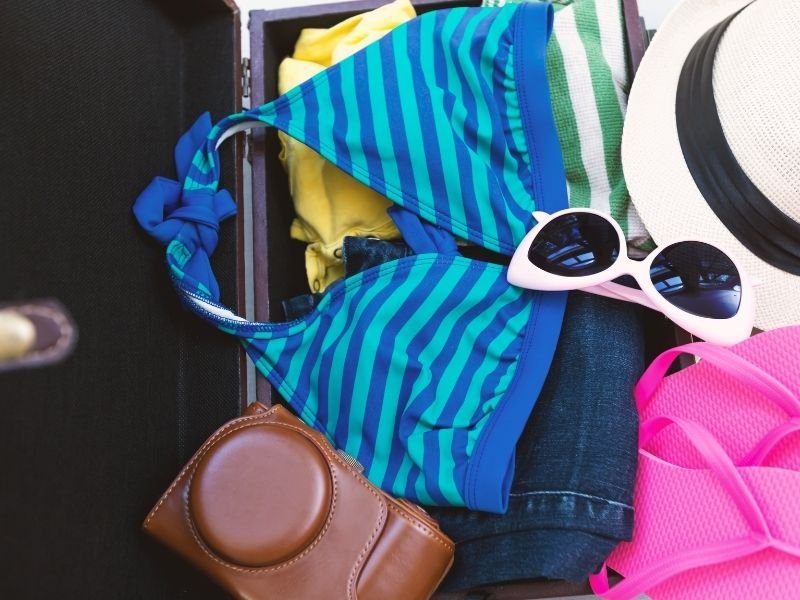
It’s almost time to go – so logically, next step is to start packing for Vietnam!
I won’t get into it in too much detail here as I have a detailed packing list for Vietnam here, but I’ll give you a quick rundown here.
Depending on where you’re going in Vietnam and when, you’ll likely pack quite differently. In summer in Vietnam, almost everywhere is hot – though in Sapa, you might find it can get quite chilly (I found myself wishing I had a heater one night in August!), and air conditioning in vehicles can be intense, so you’ll definitely want to pack a few cozy things to warm you up, even if most days will be sticky and humid.
Waterproof shoes and a waterproof jacket are essential for downpours which happen all throughout the year in Vietnam. Trust me when I say I’ve never seen rain like I have in Vietnam, and you don’t want to be wearing sneakers when you’re suddenly ankle-deep in rain!
If you’re visiting Vietnam in winter (December-March), you’ll need cool-weather clothing for the North, though the South will still be quite humid and hot.
Keep in mind that Vietnamese people tend to dress a bit on the conservative side and don’t love it when people show tons of skin, so aim for loose, flowy fabric rather than short shorts and skimpy tank tops. It’s actually more comfortable to wear and it’s more respectful to the culture.
Finally, Vietnam is absolutely notorious for its pickpockets. I was nearly pickpocketed in broad daylight walking in a park in Hanoi – luckily, my friend noticed the guy grabbing for my backpack and literally swatted his hand away!
I recommend this backpack with locking zippers which is made by PacSafe. It has some great security features: metal mesh under the surface that makes it slash-proof, inter-locking zippers that can then be threaded into a hard-to-open clasp, and RFID blockers so no one can steal your card data. It’s also very subtle and doesn’t look like a tempting, expensive bag, while also having visual cues that say “I’m hard to steal from, and frankly not worth it”. I’m obsessed.
Another safety note: one of the most common crimes in Vietnam is mobile phone theft, particularly by people on scooters who will snatch your phone on a street corner and zoom away. Never look at your phone while facing the street. I always found a discreet area and turned to the wall while I checked something on my phone.
Step 9: Prep for your arrival
There are a few things you should do prior to arriving in Vietnam that will make your trip start off on the right foot.
1) Download Google Maps offline for the city you’re arriving in. Just in case you don’t have data or don’t buy a SIM card right away, it’s extremely helpful!
2) Book a shuttle to get you to your hotel to save you stress and time. Here’s a trusted shuttle option from Hanoi Airport and one from Ho Chi Minh City Airport.
3) Buy a SIM card online in advance so you can easily access data while you’re traveling.
4) Have some cash in USD in case you have any issues with withdrawing money from the ATM upon arrival, or if you get flagged for fraud. Try to avoid this by notifiying your bank of your travel plans before leaving.
Step 10: Don’t forget travel insurance!
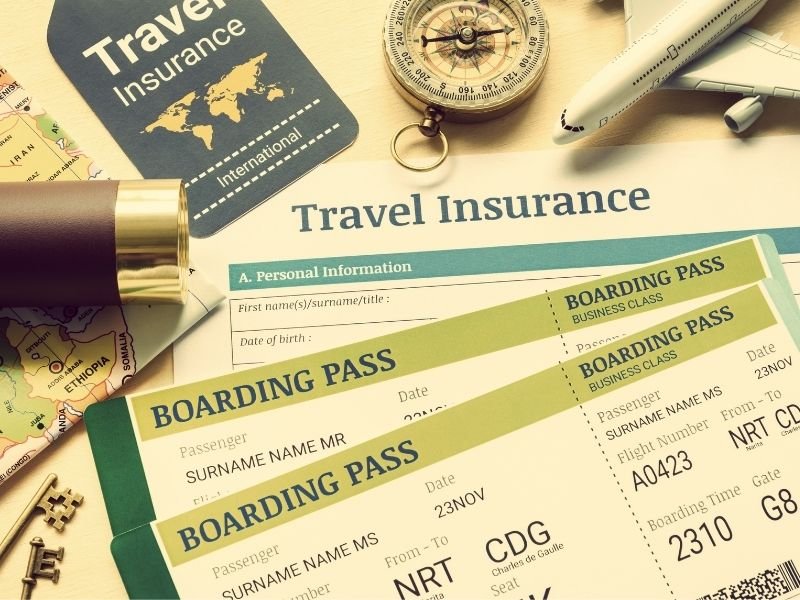
This is last on this list so that it’s first in your mind: you really ought to have travel insurance for your trip to Vietnam!
I’ve been a customer of World Nomads for years, and I love the peace of mind it gives me in case an emergency, accident, illness, or theft impacts my travels.
While Vietnam is a very safe country to travel overall, there are risks inherent to everyday travel, as well as a few risks specific to Vietnam (namely, food poisoning and pickpocketing/phone theft), and travel insurance backs you up in all those cases.
Get a free quote for your trip here.
Allison Green is a former teacher who has been travel blogging since 2016. She has a Masters in Teaching and a B.A. in English and Creative Writing. Her blog posts merge her background as an educator with her experience traveling to 70+ countries to encourage ethical, meaningful travel. She has been a speaker at the World Travel Writers Conference and her writing, photography, and podcasting work has appeared in National Geographic, CNN Arabic, CBC Canada, and Forbes, amongst others. Now a full-time traveler, she has lived in Prague, Sofia, New York City, and the San Francisco Bay Area.