


The Only Southwest Road Trip Itinerary You Need
Planning an epic road trip through America’s Southwest? You’ll be richly rewarded with insane Martian-esque landscapes, beautiful national parks, empty stretches of road, and stunning sunsets.
I’ve highlighted all the best on and off the beaten path adventures so you can create a Southwest road trip of your dreams.
This itinerary for the American Southwest starts and ends in Las Vegas, Nevada, taking you through six national parks and a handful of state parks and national monuments along the way.
Get ready for the USA road trip of a lifetime — this Southwest road trip is truly one for the bucket list.
How Long Do You Need For This Southwest Itinerary?
This Southwest itinerary should take you from 10 days to two weeks to complete.
However, if you were pressed for time, you could certainly condense it to a one-week road trip or hit a few highlights in just 5 days, though you would definitely need to cut out quite a few things.
As written, this road trip will take you through six national parks, three state parks, a handful of national monuments, and through hundreds if not thousands of miles of untamed landscapes. We saw one national park in Arizona and all five national parks in Utah.
If you were trying to condense this Southwest road trip into just five days, I’d make it go from Las Vegas to Zion to Bryce to Page to Sedona and back to Las Vegas via the Hoover Dam.
Extending this Southwest Road Trip
If you have even more time? There’s so much more to road tripping in the Southwest that you could tack on, or even go slightly beyond the Southwest itself.
You can also easily add on a little Western road trip from Vegas to see some of California’s famous parks (Joshua Tree and Death Valley come to mind) or swing up north after Moab to visit the famous Yellowstone National Park.
New Mexico with its beautiful White Sands National Park and Carlsbad Caverns National Park, plus its beautiful cities of Sante Fe, Taos, and Albuquerque, are also a great idea.
Personally, we swung north and east after Moab and went up to Denver and Boulder for a few days before heading back to Las Vegas to drop off our rental car.
However, considering the drive from Moab is about 8 hours, you may want to break it up with some time in Grand Junction or somewhere else in Colorado if you choose to continue eastwards. We just took the long driving day and took turns driving, but if you have only one driver, you may want to break up the journey.
Tips for Saving Money on this Southwest Itinerary
To save money, be sure to buy an Annual Pass for the national parks– you can easily purchase an America the Beautiful park pass online at REI.
For $80, you have unlimited entrances to all US national parks (and monuments, forests, seashores, etc — over 2,000 protected lands) for one vehicle for a year!
Seeing as national parks cost anywhere from $10-30 to enter, with most near the $30 side of the spectrum, you’ll definitely save money by buying an annual pass.
Another way to save money is to travel by campervan or RV, eliminating or reducing your accommodation costs.
There is free camping in BLM (Bureau of Land Management) land across most of the Southwest. I have a guide to free camping in Utah, which will cover most of this Southwest itinerary.
If you prefer the amenities of a maintained campground, you still won’t pay too much, as paid campgrounds are typically around $30 per night.
Finally, another big way to save money if you’re not going with a campervan is to book your car rental in and out of the same place — when I was researching, I found Las Vegas to have the best options, followed by Phoenix, which isn’t on this itinerary but would be an easy swap.
Not sure where to get the best deal on your rental? I’ve rented cars dozens of times through various search engines and have settled on Discover Cars as the best car rental search engine – it searches over 500 trusted rental companies to find the cheapest price for your rental! Compare prices for car rentals in Las Vegas here.
Southwest Road Trip Itinerary
Stop One: Las Vegas, Nevada
My Southwest road trip itinerary has you starting in Las Vegas for a variety of reasons: the first being that renting a car in Vegas is loads cheaper than renting in most other places along this American Southwest itinerary.
You can also rent an RV in Las Vegas and use that as your transportation and accommodation all in one!
The second reason being that flights to Las Vegas are often incredibly affordable — my flight from Vegas to San Francisco was only $32 on Southwest, which even includes a bag!
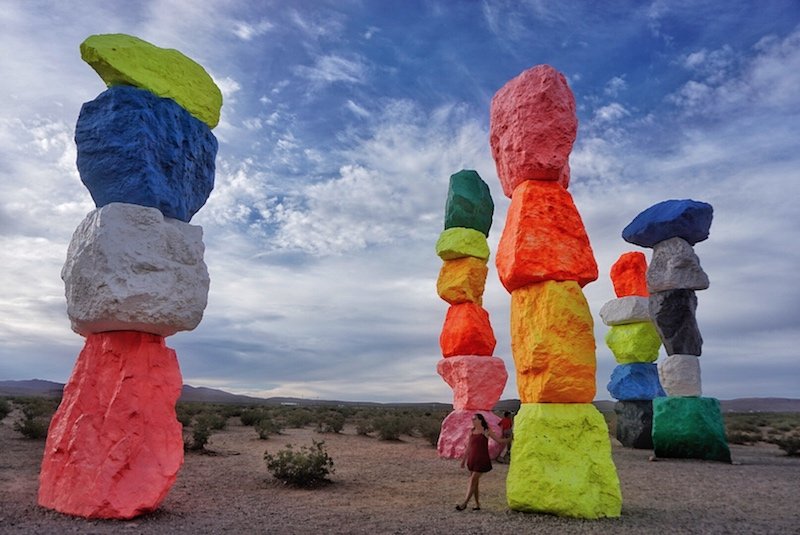
While in Vegas, check out the Seven Magic Mountains about 20 minutes outside of town – it’s a fabulous art installation by Swiss artist Ugo Rondinone, which will be dismantled at the end of 2018.
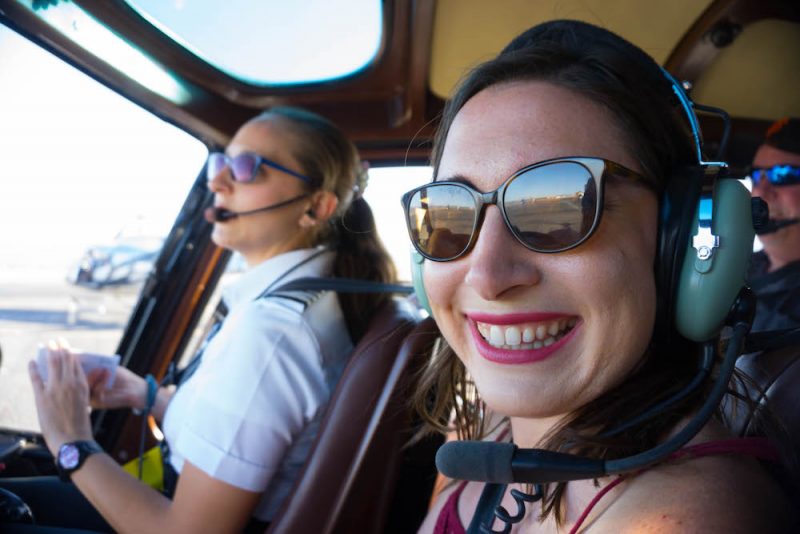
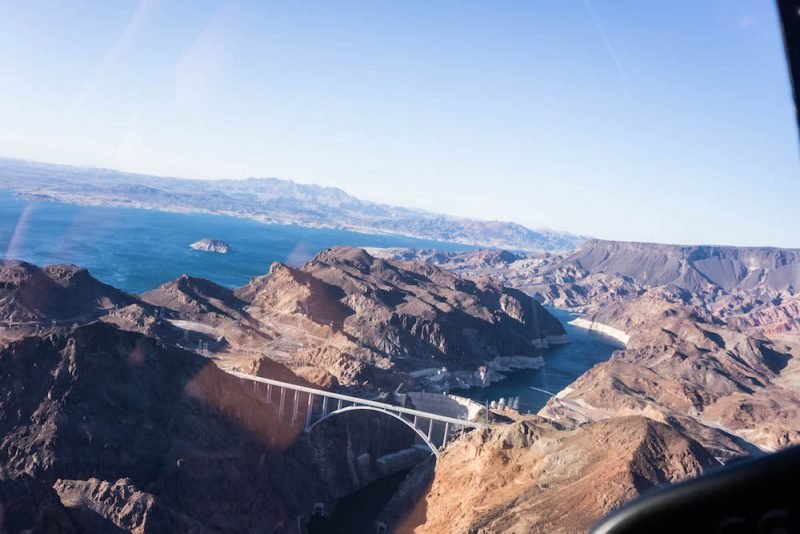
If money permits, there’s no better way to get excited about the landscape you’re about to see than to take a helicopter tour from Las Vegas.
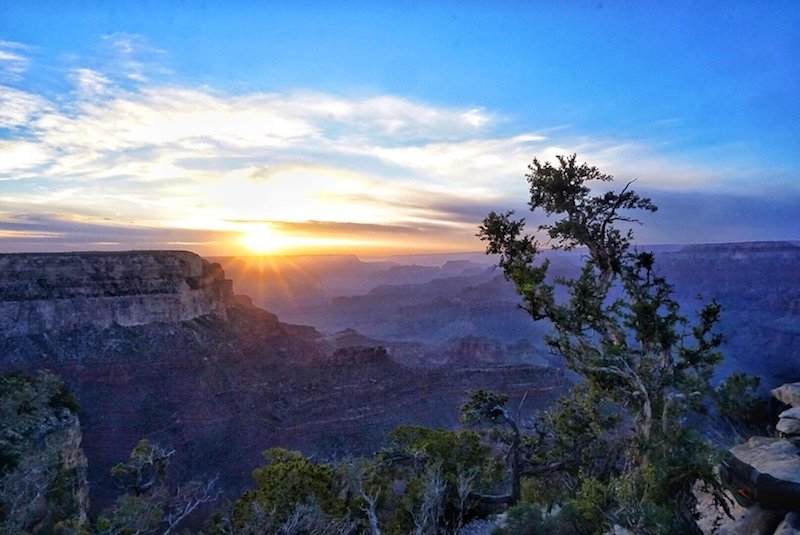
There’s a variety of helicopter tours you can take from Vegas, each offering a completely unique landscape. If budget allows, I strongly recommend taking a flight over the Grand Canyon.
You’ll get to see the Hoover Dam, Lake Mead, and an extinct volcano on your way to the Grand Canyon — the 7th natural wonder of the world!
You can opt for an aerial-only flight (which is more affordable) or a canyon landing tour that stops 3,500 feet below the Canyon Rim, right next to the beautiful Colorado River. Both are a great choice — it depends on how badly you’d like to land at the bottom of the canyon!
Book your flight to the Grand Canyon — aerial-only or canyon landing!
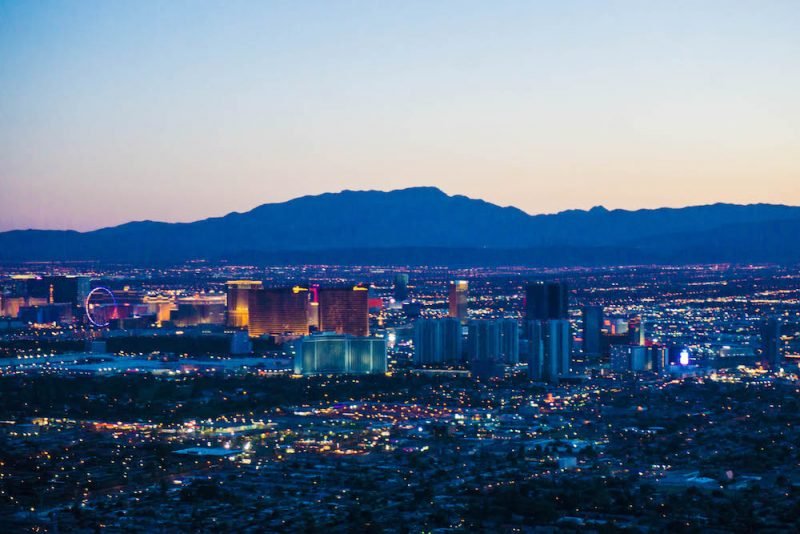
But if you’re on a tight budget in Vegas and still want to ride in a helicopter, there are several more affordable rides you can do, including a nighttime flight over the Las Vegas strip!
A short helicopter flight over the Las Vegas Strip just after sunset as the lights come down over the city is an incredible experience, and one I won’t soon forget. I was surprised at how breathtaking it was even after having my breath taken away seeing the Grand Canyon… but the Las Vegas Strip did not disappoint!
You can opt for a night flight with a romantic dinner or for the more budget-friendly helicopter over the Vegas Strip tour.
With prices for the latter just around $100 per person, it’s a great way to experience the high life (literally) without breaking the bank or needing to strike it rich at the slots before booking!
Book your helicopter tour over the Strip — budget or with luxury dinner option
Recommended photo spots: Anywhere and everywhere, really! A helicopter ride will give you stunning views; The Bellagio, the W, the Wynn, and pretty much anywhere on the Strip are also great places for photos.
Recommended accommodations: The W is the funkiest boutique hotel in all of Vegas — perfect for the ‘gram! The rooms are over the top and ridiculously outlandish, the staff is amazing with their personalized recommendations and greetings, and the calm of the pool there compared to at the SLS (which you can also visit if you stay at the W) was an awesome oasis in the middle of crazy Vegas. Can’t rate highly enough! Check prices, ratings, and availability at The W here.
Stop Two: Valley of Fire
About 45 minutes from Las Vegas is what I deem to be the most underrated spot on this entire Southwest road trip: the Valley of Fire State Park.
I literally have no idea why this isn’t a national park — it’s so massive and the vistas are so spectacular that it surely deserves the title.
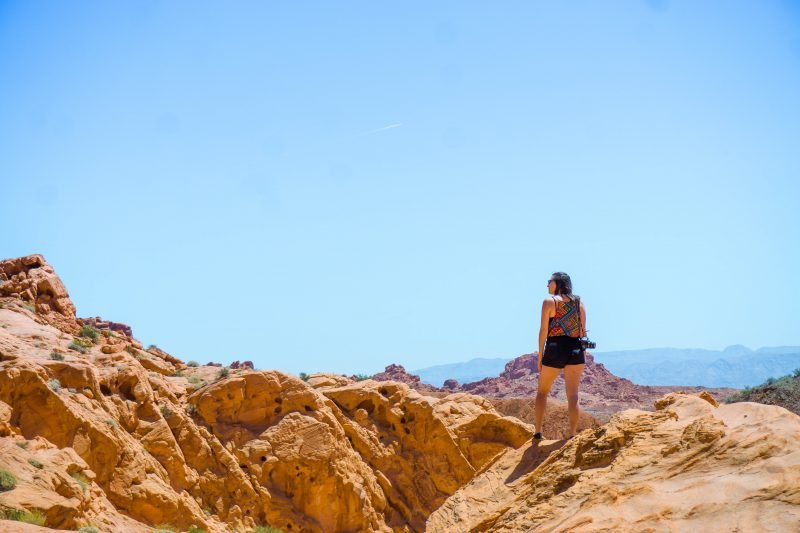
That said, the fact that it’s only technically a state park will serve you well, as despite its proximity to Las Vegas there were very few people at the park.
While you could do this independently, I actually did a day trip to the Valley of Fire with Pink Jeep Tours and I can’t speak more highly of it — I definitely recommend it if your budget allows.
We absolutely maximized our time there and got to see all the best parts of the park with expert narration (and a wicked sense of humor!) along the way. It was pretty much a perfect day out.
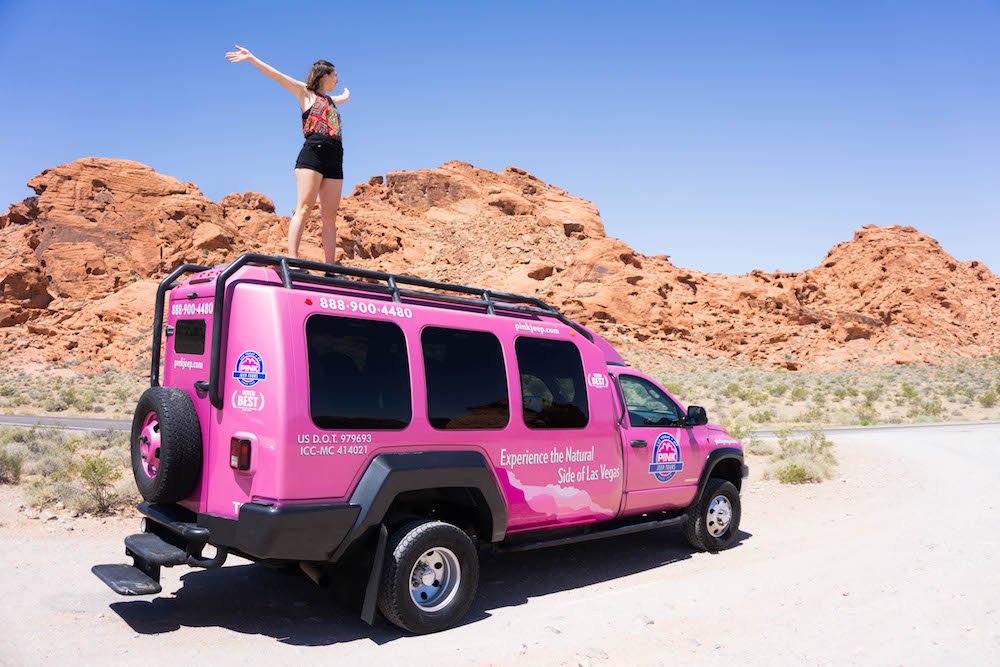
Since we had so much driving along the way later on in the trip, it was nice to start off the trip at a slow pace and not have to handle the driving and planning ourselves for the Valley of Fire.
As it’s just 40 minutes outside of Vegas, it’s an easy and logical day trip if you’re wanting to spend a few nights luxuriating in Vegas before heading out on your Southwest road trip adventure of a lifetime.
I’d recommend the tour, as it’s what we did and loved it, but you can also DIY a day in the Valley of Fire if you have budget constraints.
Recommended photo spots: Rainbow Vista trail, The Beehives, Elephant Rock, Balanced Rock, pretty much anywhere with an open road!
Recommended accommodations: Overnight somewhere in Vegas; we loved our stay at The W (find rates & availability here) but there are a ton of other budget-friendly options available in Vegas.
You can also camp inside the park, first come first serve, but get here early if you plan to do that as spots go fast!
Stop Three: Hoover Dam
After visiting the Valley of Fire, you’ll need to route back via Vegas on your way to the Hoover Dam. This is right on your way to Flagstaff and the Grand Canyon – no circuitous rerouting required – so you might as well see one of America’s biggest engineering marvels.
The Hoover Dam used to be the tallest dam in the world when it was first built, but it’s since been overtaken by a dam I’ve never heard of until researching this post, located in Tajikistan.
The most amazing fact (to me at least) about the Hoover Dam is that the concrete holding up is still not dry all the way through!
At its base, it’s a massive 660 feet thick — the equivalent of two back-to-back football fields!
Scientists say it’ll take 125 years for it to dry all the way through; at only 80 years since its construction, we’ve still got 30 to go.
Recommended photo spots: The dam, obviously; the Pat Tillman memorial bridge
Recommended accommodations: No need to stay overnight – this is best done as a quick stop off on the way to Flagstaff and/or the Grand Canyon.
Stop 4: Flagstaff, Arizona (the Grand Canyon & Sedona)
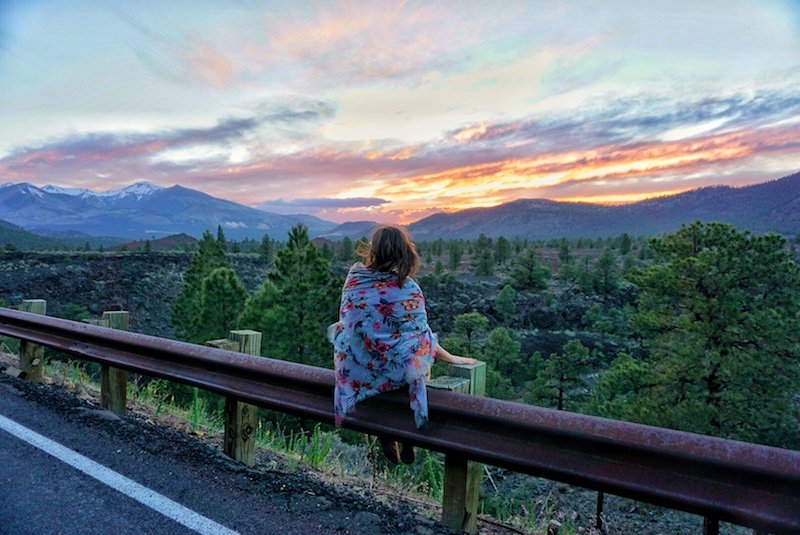
Flagstaff is a perfect base for further road trips in the Southwest USA.
That said, Flagstaff on its own has plenty to write home about — don’t miss Sunset Crater Volcano National Monument, with its beautiful landscape and exciting lava trails.
But perhaps the best thing about Flagstaff is its proximity to some of Arizona’s greatest attractions.
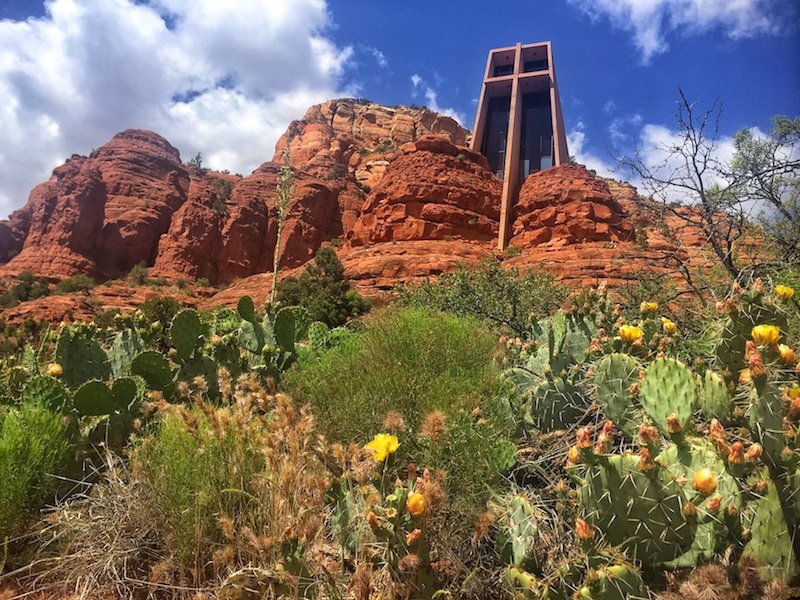
30 minutes through a winding national forest, you’ll find Sedona — one of Arizona’s most scenic places, and a must on any Southwest US road trip itinerary.
If you have time, it’s worth giving at least a full day for exploring Sedona, or even following my 2 day itinerary to exploring Sedona’s best sights.
For the purpose of this post, I’m suggesting Sedona as a day trip from Flagstaff, but you could easily spend more time in Sedona if you wish.
Check out the stunning red rocks arching into the sky, and be sure not to miss the opportunity to go for a hike or to visit the Church of the Holy Cross — a stunning chapel quite literally built into the side of a mountain.
I didn’t have time in Sedona to go on the original Pink Jeep Tour (the same company as I went with on my Valley of Fire tour) but if I did, I absolutely could have gone on this off-roading 2-hour scenic rim tour.
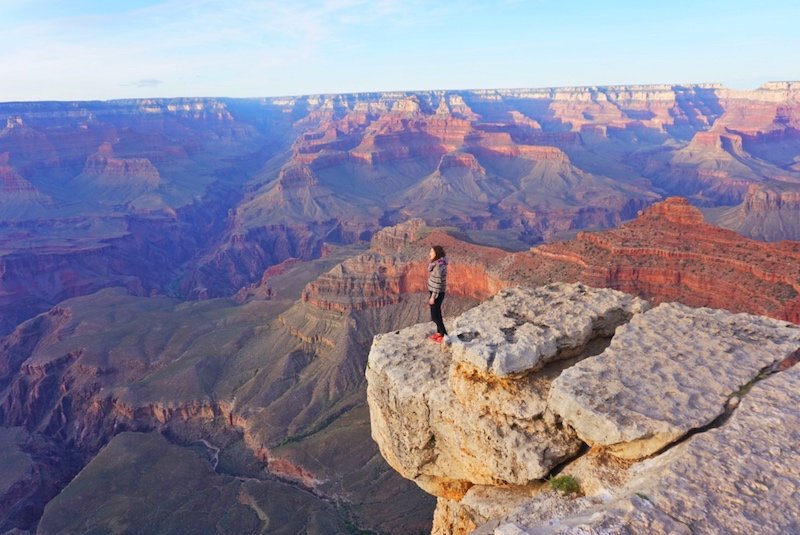
Sedona is great for a day trip, but the main attraction when visiting Flagstaff is the South Rim of the Grand Canyon, which is a mere 90 minutes away.
I picked the South Rim for this itinerary because it works better with the itinerary, but you could also add on the North Rim between Page and Bryce Canyon. (Here’s how to pick between the two).
No amount of preparation can truly ready you for the grandeur of what it’s like to stand at the edge of this canyon in person.
I even flew over the Grand Canyon in a helicopter a few days prior to seeing it from the edge.
While the helicopter ride was an absolutely amazing experience, truly nothing beats standing at its edge and seeing its vastness from ground level. If you can see it both ways, do! But don’t underestimate the power of seeing it from ground level with your own eyes. It’s breathtaking.
The easiest way to see the Grand Canyon is to drive there from Flagstaff, about 90 minutes each way, which is what we did.
However, I didn’t realize at the time that there was a really cool historic scenic train that runs right from Flagstaff to the Grand Canyon! If you’re into train history and old, nostalgic train rides, this may be a really cool experience for you to have. You can book it online here.
Recommended Accommodation: When I was in Flagstaff, I stayed at the Hilton Doubletree in town. With free (warm!) cookies upon check-in, large rooms, and an in-house restaurant, it’s a comfortable and affordable crash pad between adventures and it’s much cheaper than staying in either the Grand Canyon or Sedona. Check prices, rates, & availability here.
Stop 5: Page, Arizona (Horseshoe Bend, Antelope Canyon, & Lake Powell)
Page, Arizona has some of the most spectacular sights in all of the American Southwest, all in a tiny little town.
For one, Horseshoe Bend, one of the most iconic photography spots in the entire Southwest US, is located a mere 3 miles down the main highway.
But the main draw to Page is the stunning Antelope Canyon. Broken into two parts, Upper and Lower, we opted for the Lower — having heard that it has more vibrant colors, as opposed to Upper which is famous for its sunbeams much-loved by photographers.
Upper is more popular (and thus more expensive and more crowded) than Lower, plus it requires advance reservations.
Chronic underplanners as we are, we opted for Lower, as we were able to book next-day tickets quite easily.
The information online is a bit out of date; there are now two tour companies operating tours to Lower Antelope Canyon.
Ken’s Tours charges $20 as far as I know, Dixie Ellis’ $25; plus the $8 tribal lands fee. We went with Dixie Ellis’ Lower Antelope Canyon Tours as the line was shorter and highly recommend the experience.
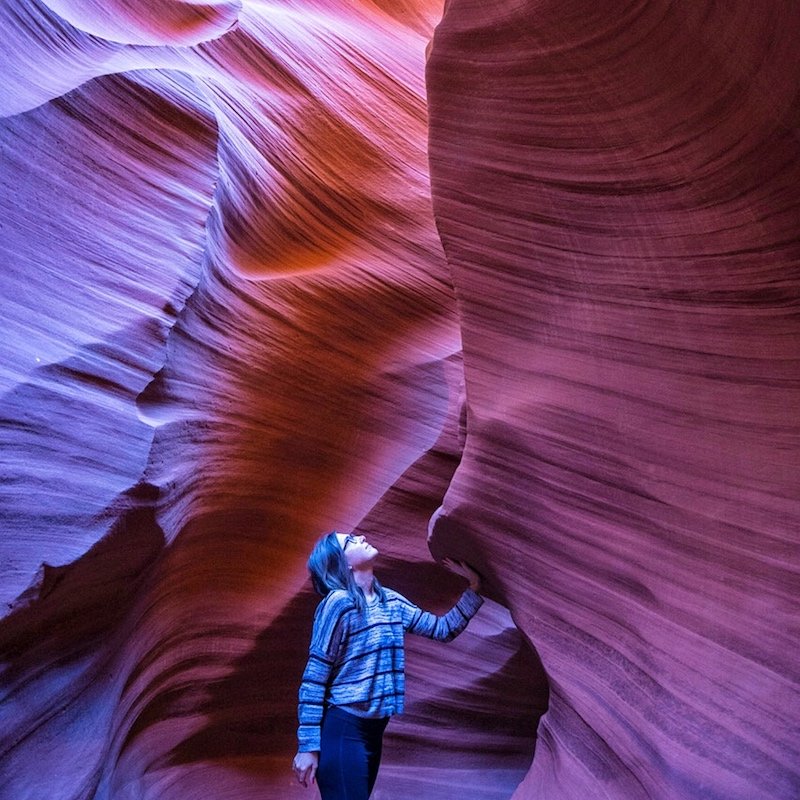
Be aware that this is an incredibly popular tour on everyone’s Southwest itinerary no matter what tour company you go with, and you will be waiting in line quite a bit – not to mention the waiting you’ll have to do in order to snap photos without people in them. However, it’s entirely worth the experience in my opinion!
Horseshoe Bend is a bit less crowded than Antelope Canyon, mainly because it’s more spacious. We actually went three times in the span of 24 hours seeking the perfect shot.
Sunrise is fantastic because so few people are there, although the sun rises on the opposite side of the bend so if you’re looking for sunbursts, you’re better off at sunset. Midday, you’ll see a wild array of colors that you can’t quite see during sunrise/sunset, so it’s worth a separate trip just for that as it’s not so far away from Page
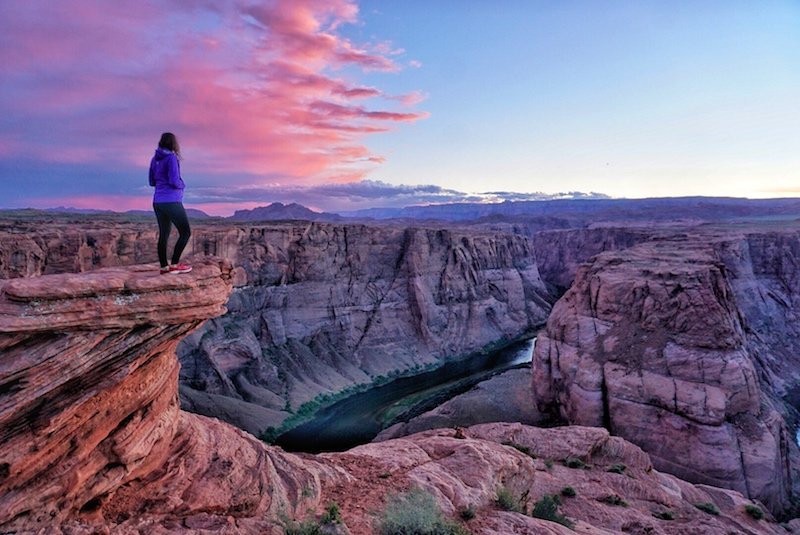
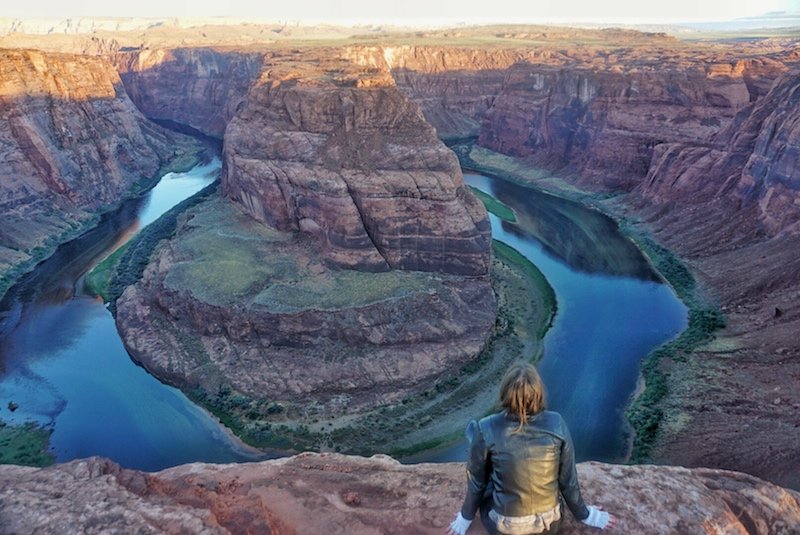
While sunset is the most crowded at Horseshoe Bend, it’s also the most magical. As a bonus, if you scrabble up the rocks a bit, you can quite easily get epic photos with no one else in the shot!
A clever way to escape the Horseshoe Bend hoards? Fly over it by helicopter (which seems to be a running theme of this post — sadly, I didn’t have the chance to do this, though. Next time!) You’ll also get to see Lake Powell — more on that in a second.
Finally, as if I haven’t written enough about Page to fill an entire blog post all on its own, you must check out Lake Powell.
This lake is simply stunning, with glassy blue water amidst a desert landscape. You can rent a paddleboard and check out the lake at your own speed, or go to one of the many viewpoints to see it from above.
Recommended photo spots: Horseshoe Bend, Lower/Upper Antelope, Lake Powell, Wahweap Overlook
Recommended accommodations: We stayed at Hampton Inn & Suites in Page – Lake Powell and highly recommend it. The rooms are large with plenty of space to work and relax in, with all the comfortable amenities you’d expect like a fitness room, a heated indoor pool, a Jacuzzi (perfect for sore legs after hiking all day!).
Breakfast was also delicious and included in the price of the room. It also couldn’t be any closer to Horseshoe Bend, just three miles and a quick five-minute drive down the road.
If you’re planning to visit Horseshoe Bend multiple times for the perfect photo like we did, it’s an awesome place to base yourself because as soon as you leave the parking lot you’re already on the road to Horseshoe Bend! Check rates, prices, & availability here.

Stop Six: Kanab, Utah
On the way from Page to Utah, you can go two different ways. We actually did both as we did a huge circle from Page to Kanab and back all in one day when we couldn’t go to Antelope Canyon as planned, so I can report on each way!
The first way, via I-89, you’ll pass a view of Lake Powell at Wahweap Overlook before making your way to the Visitor Center of Grand Staircase-Escalante National Park.
Stop off at the visitor center in Big Water, Utah and maybe you’ll be lucky enough to meet a man who discovered a brand new species of dinosaur! He is really lovely and fun to talk to, so definitely stop by if you can.
On the way to Kanab, you can stop off to do the Toadstools hike — a short one-hour roundtrip hike that ends in a truly Martian landscape. Quite off the beaten path of most people’s typical Southwest road trip itineraries, and well worth the stop!

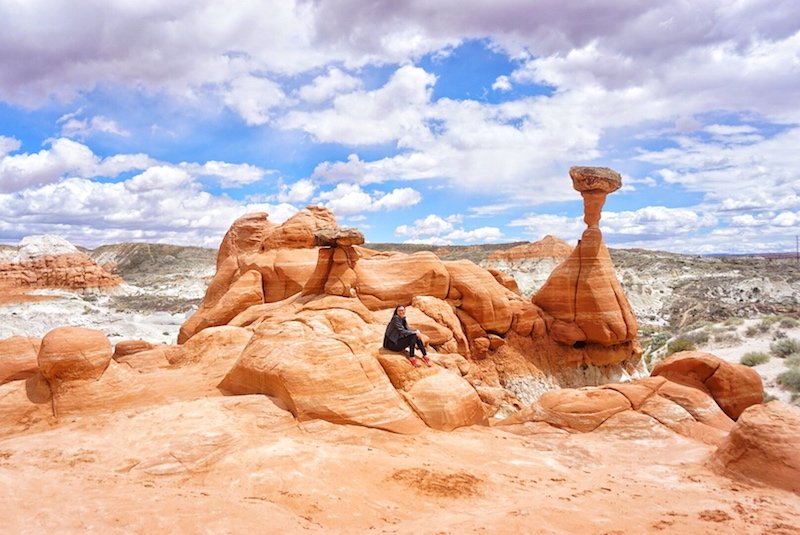
“Toadstools” are formed when rain makes boulders fall from cliffs and land atop softer rocks, creating mushroom-looking rock structures. They look manmade but they’re entirely natural!
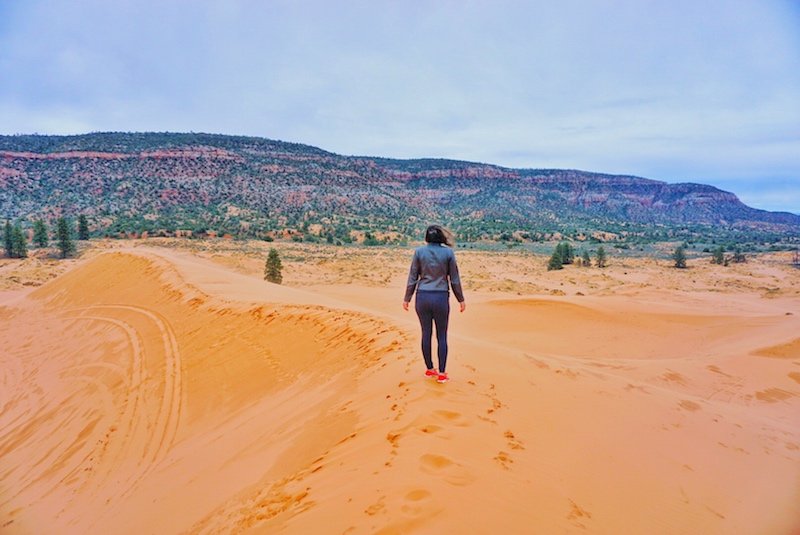
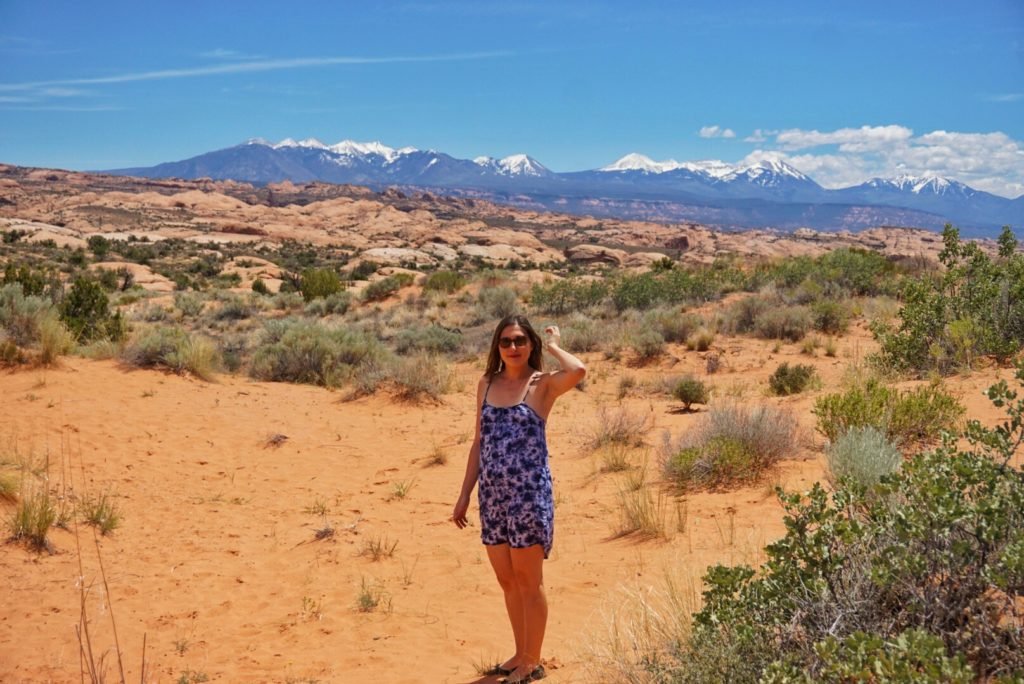
After passing Kanab, quickly grab lunch somewhere before making your way to the Coral Pink Sand Dunes State Park.
This little-visited park has sand dunes that look as if they’re straight out of the Sahara — all against the backdrop of some legendary Utah mountains.
This park is so close to Zion that I don’t know why it’s more popular, but you definitely should have it on your Southwest itinerary — all the better for you to snap some epic photos without the crowds!
With the clouds, it looked more orange than pink, but on a sunny day, I’m sure the sands are more true to their name.
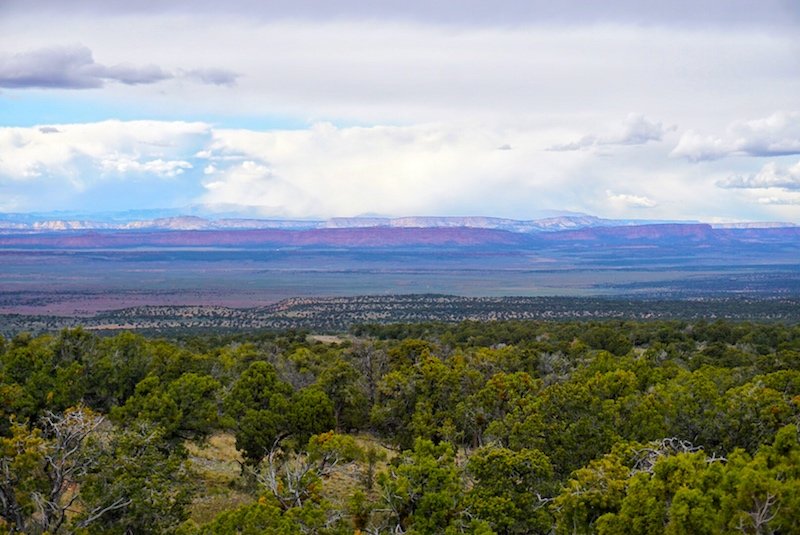
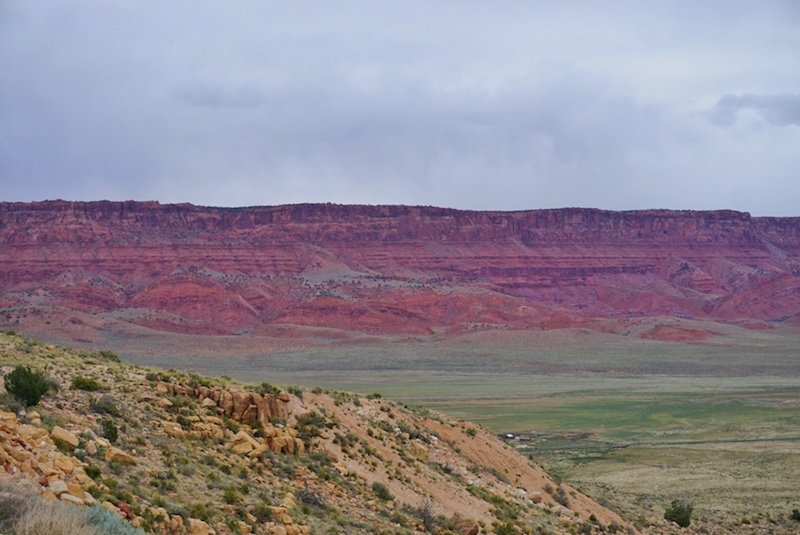
If you go the other way from Page via the longer but more scenic route (I-89A), you can go over a beautiful mountain pass filled with lush evergreen trees and stop at the Vermillion Cliffs viewpoint and LeFevre Overlook.
There, you can see four plateaus that make up the “Staircase” of Grand Staircase-Escalante in a variety of hues — including chocolate brown, vermillion, and purple (two of the plateaus was unfortunately covered by some clouds when we were there!)
While you’re in Kanab, you’re so close to Zion, but I urge you to skip it — for now — in lieu of visiting it on your way back to Las Vegas!
Finally, Kanab is also a good stopping point if you are testing your luck for permits for the Wave in Arizona, as the Grand Staircase-Escalante National Monument Visitor Center visitor center here is where you would need to get your permit.
Your chances are low, but it’s worth a try!
Recommended photo spots: Lefevre Point, Vermillion Cliffs overlook, Toadstools, Coral Pink Sand Dunes State Park
Recommended accommodations: We didn’t stay in Kanab during this trip because we went back to Page in a giant circle (which we don’t recommend — it was only our poor planning that had us doing so!), but Canyons Boutique Hotel would have been a great choice if we did.
With a 8.9 rating on Booking, spacious rooms, nice décor, and a central location, it’s the best choice in town. Check prices, reviews, and availability here.
Stop Seven: Bryce Canyon National Park, Utah
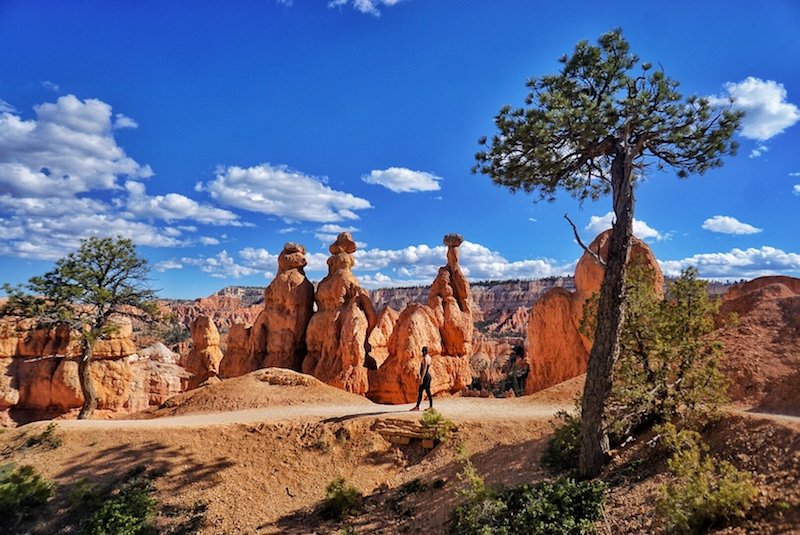
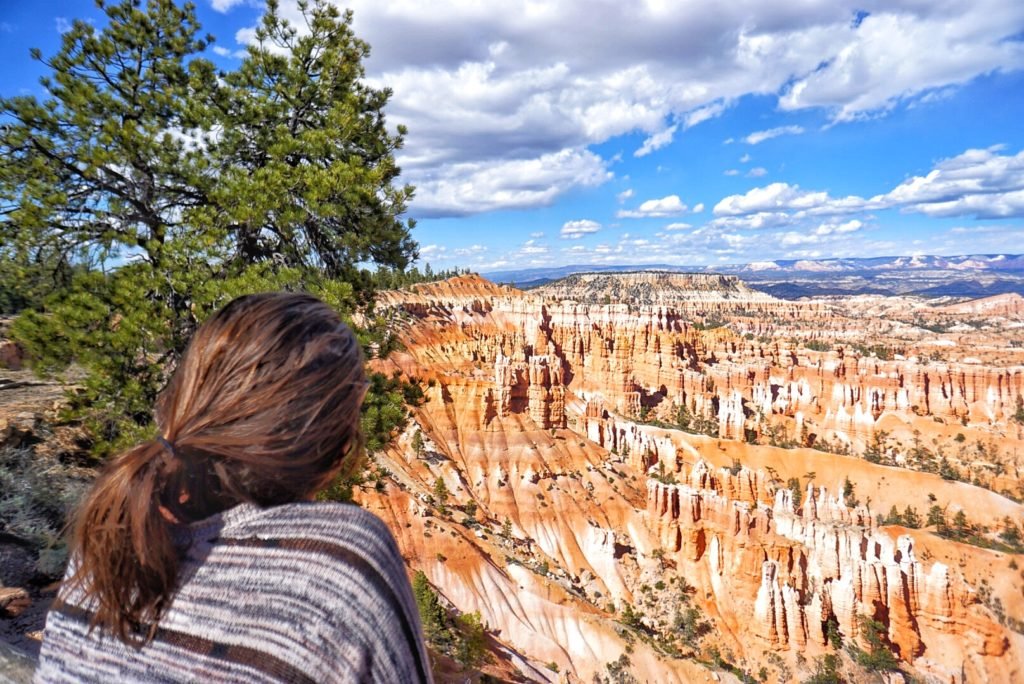
Bryce Canyon is truly one of the most memorable stops on any Southwest US road trip itinerary. For one, it has its distinctive hoodoos which you’ll be hard-pressed to find anywhere else in the world in such number and scale.
Hoodoos (also called “fairy chimneys”) form when the water from melting snow seeps into the cracks of the rock and freezes overnight. Bit by bit, the cracks expand until large chunks of rock fall away, leaving pillars in their place.
Hoodoos form all over the world, but there are thousands of them at Bryce Canyon, partly because the elevation is so high (around 8,000 feet!) that the melt-freeze cycle happens at least 200 nights per year
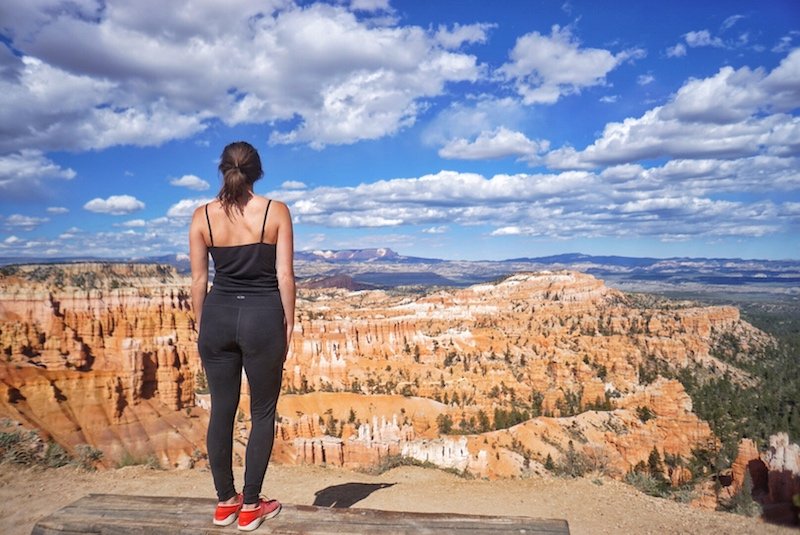
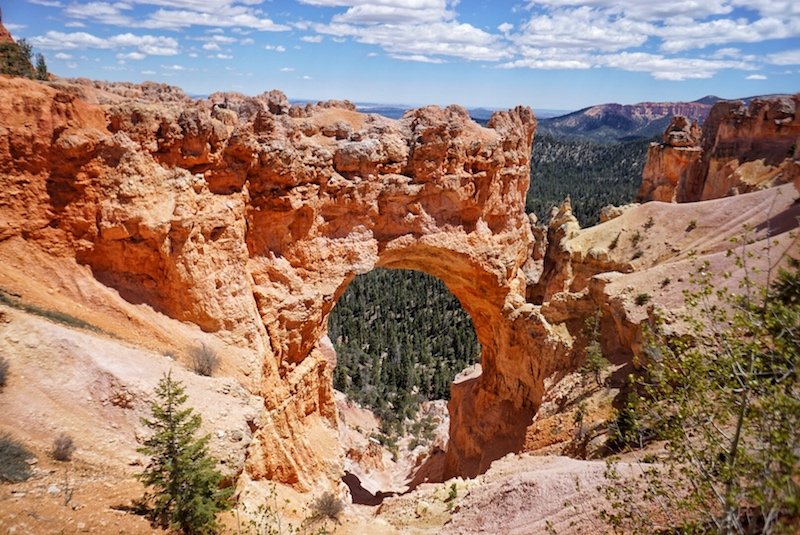
We just drove to a few different viewpoints in the park — Natural Bridge, Sunset Point and Inspiration Point — and then did the Navajo Loop Trail, which filled about a half-day in the park.
If you’re looking for a creative yet structured way to spend some time in Bryce Canyon National Park, you can do an ATV ride, a horseback ride through Red Canyon, or join a hiking tour.
Recommended photo spots: Queen’s Garden Trail, Navajo Loop, Inspiration Point, Natural Bridge, and Sunset/Sunrise Points.
Recommended accommodations: Bryce Canyon doesn’t have the most exciting options for accommodations.
We didn’t stay overnight here, as we just visited for a day, but if we had, something simple but comfortable like a Best Western is probably your best bet. Check prices, ratings, and availability.
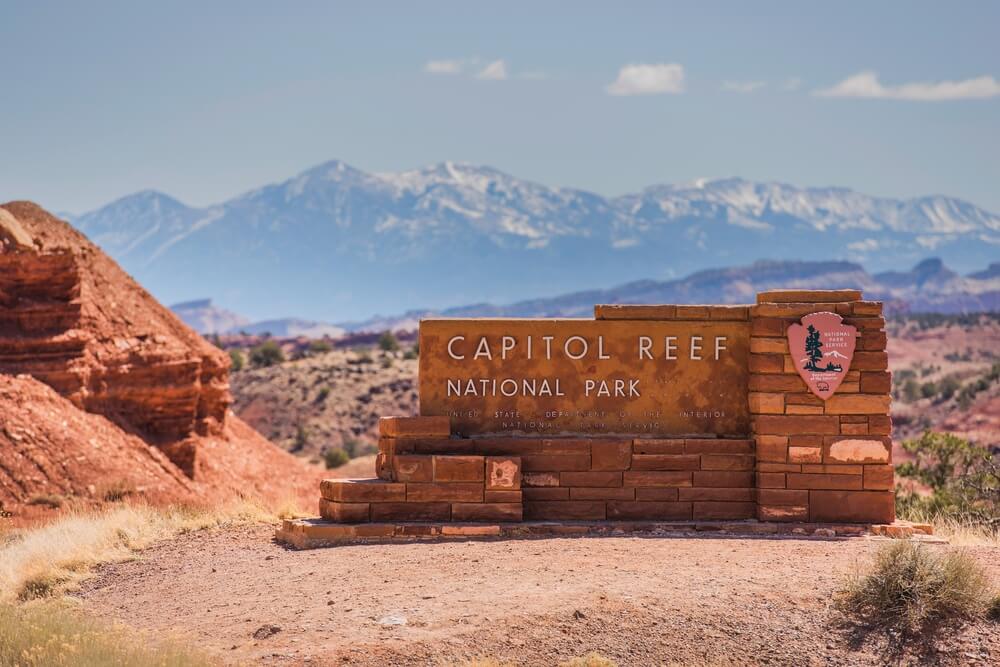
Stop Eight: Capitol Reef National Park
On your way to Moab from Bryce, you can take a scenic route passing through Capitol Reef via Highway 12, which I highly recommend.
The least visited of Utah’s staggering five national parks, it’s not quite as epic as Zion or Bryce but it has its own charms. It’s worth a quick stop as you pass through, at the very least.
Recommended photo spots: The cute barns and old schoolhouse on the main road, the Scenic Drive, Panorama Point, Cassidy Arch, Temple of the Moon and Sun, Chimney Rock.
Recommended accommodations: The best — and in my mind, only! — place to stay in Capitol Reef is in the Capitol Reef Resort. They have covered wagons and tipis for a themed stay, as well as standard rooms and cottages for a more traditional hotel experience. Book a stay at the Capitol Reef Resort here.
Extra Stop: On your way between Capitol Reef and Moab, you’ll have the opportunity to stop off at Goblin Valley State Park!
Frankly, we were exhausted and gave it a pass this trip, but it’s definitely on the list for my next Southwest itinerary!
Stop Nine: Moab, Utah (Canyonlands, Dead Horse Point, and Arches)
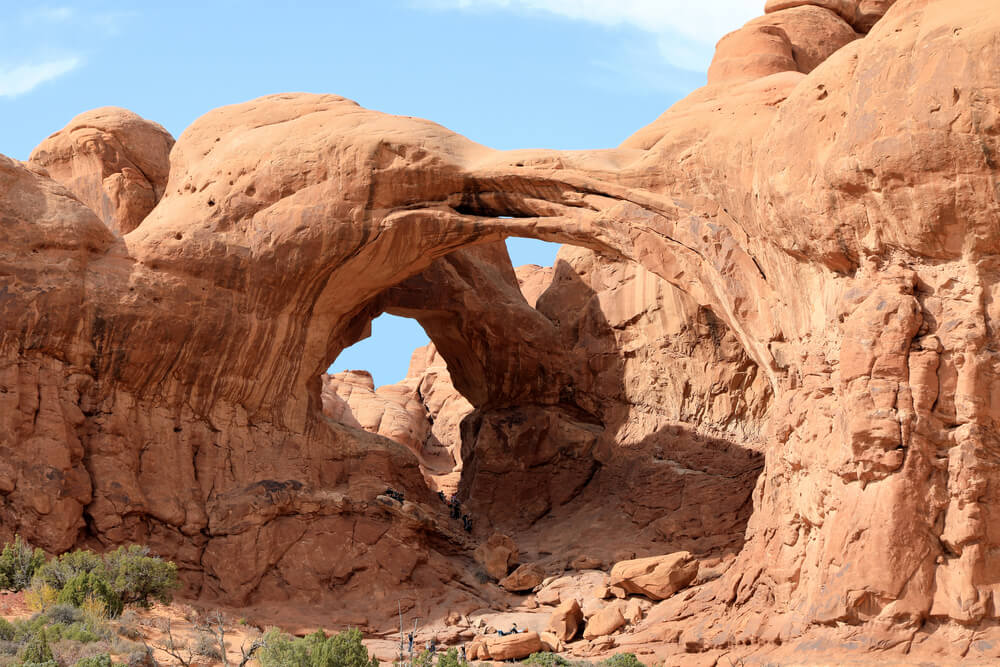
Ah, Arches National Park. With its famous Delicate Arch which is featured on the Utah license plate, this is one of the most famous national parks in the US, and a must on any Southwest road trip itinerary.
In addition to the Delicate Arch hike, you should also be sure to see the North & South Window arches, the Double Arch, and the Turret Arch.
If you want to dedicate two days to Arches, follow this detailed Arches itinerary which will explain exactly what to do with your time there!
The Devil’s Garden trail was closed when we visited, but you should definitely check it out if possible — it’s supposed to be a stunner.
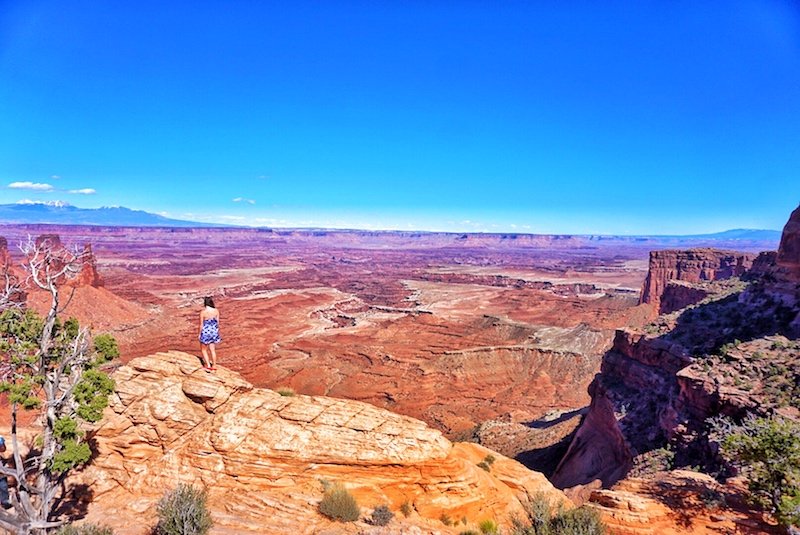
Also near Moab is the Canyonlands National Park, which I actually preferred to Arches (blasphemy, I know – but I hate crowds). It was super immense, with really colorful rocks and huge canyons, and far fewer people.
There are two entrances to Canyonlands, both of which are quite far from each other.
One is Islands in the Sky, and this is the one that’s closer to Moab (and also Dead Horse Point State Park, another must-see on your Southwest road trip).
The other section, Needles, is rather far away, and suitable if you’re staying longer in Moab.
We didn’t get a chance to visit Needles on this trip, but we weren’t disappointed with the taste of Canyonlands we got at Islands in the Sky — not at all.

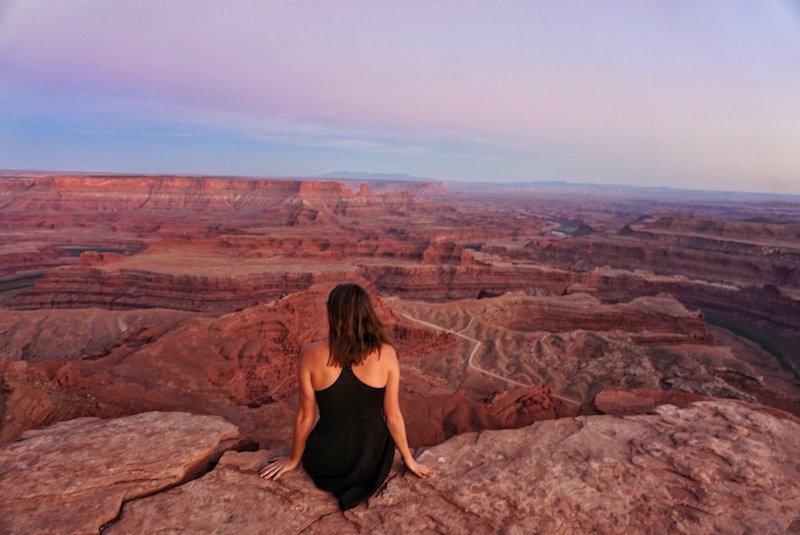
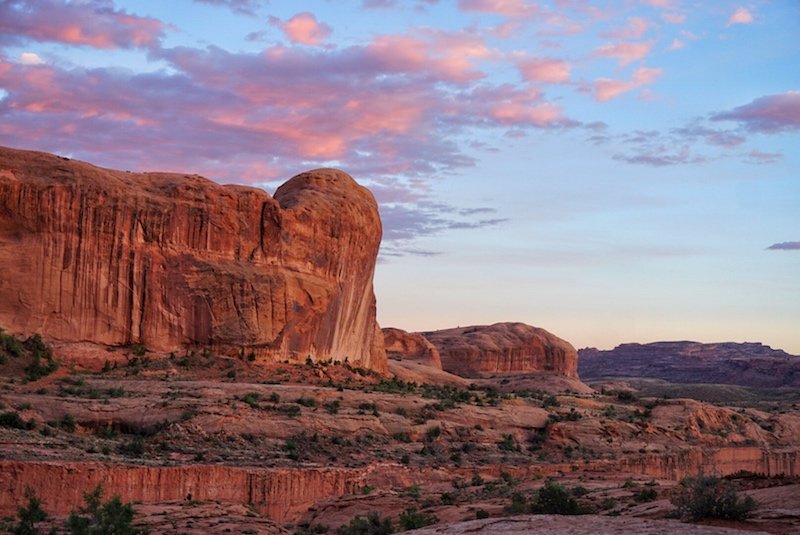
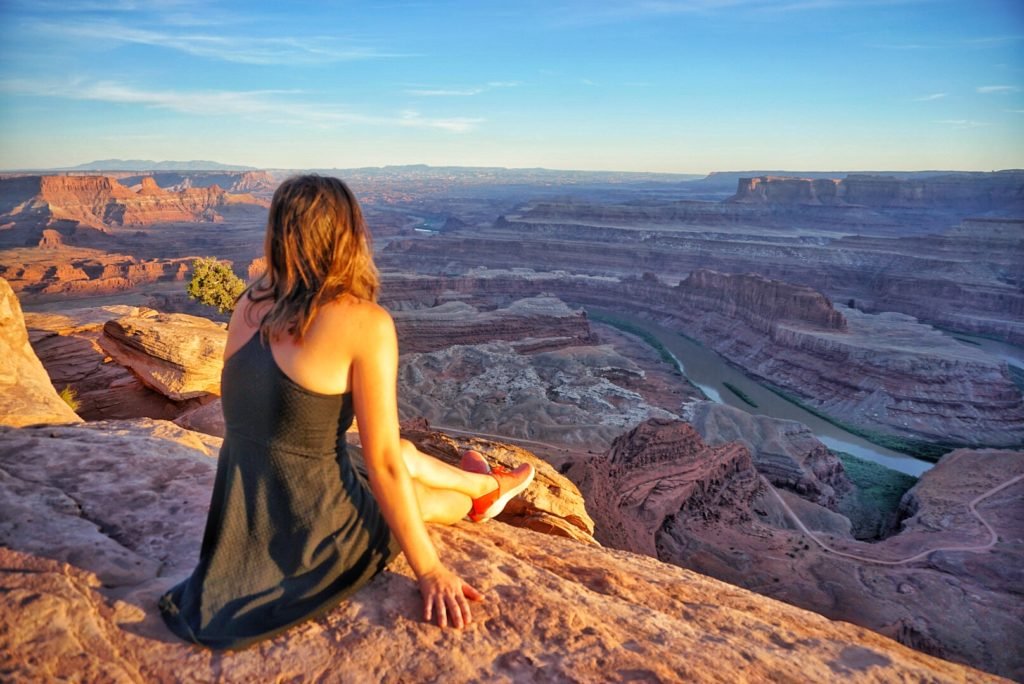
Other spots you can’t miss in the Moab area include Dead Horse Point State Park, a place much more beautiful than the name suggests!
It’s right on the way from Canyonlands – Island in the Sky, so it’s a good idea to go there for sunset after visiting Canyonlands in the late afternoon.
Here, the Colorado River winds and rips its way through a valley, like a combination of the Grand Canyon and Horseshoe Bend all in one.
It’s absolutely stunning at sunset, although sunrise is supposed to be even better. I never woke up early enough to see for myself.
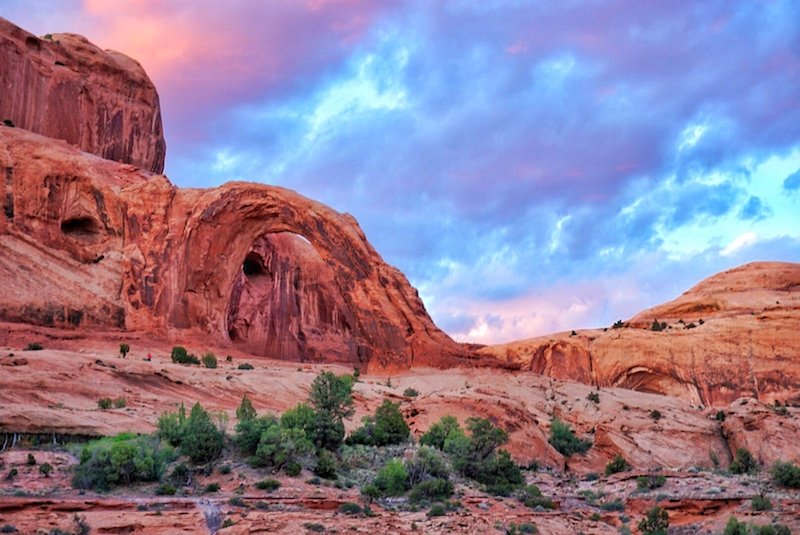
Finally, the Corona Arch is a great sunset spot that’s a bit of a hidden gem compared to the crowds you’ll find around Dead Horse Point and Arches.
Make sure you arrive there with about an hour to spare, as the hike is one hour on a not super well-marked path, and make sure you leave before it gets too dark!
We missed the sunset by at least a half-hour and ended up walking back in the dark because we didn’t give ourselves enough time for this hike (#travelbloggerfail) but we at least made it in time for some super pretty cloud action!
Bring a headlamp if you do this hike, trust me — it’s not fun navigating back in the dark with just your cell-phone as a light source.
There are some other great things you can do in Moab if you have the time — as if having two national parks and a state park in your backyard isn’t enough choice!
For an adventure rush, go rafting on either class I and II rapids or III and IV rapids on the Colorado River or hit the ominously-named Hell’s Revenge ATV trail which crisscrosses a rugged terrain in ATVs until you hit the Colorado River.
Book a rafting tour (class I & II), a tougher white water rafting tour (class III & IV) or an ATV tour!
Not into heart-stopping adventure? There are also more leisurely ways to relax in Moab, such as taking a 3-hour jet boat cruise to Dead Horse Point State Park along a peaceful stretch of the Colorado River, checking out side canyons and marveling at the canyon walls which reach 2,200 feet above your head.
Alternately, if you need some R&R after several long days of driving and adventuring, there are tons of great spas in Moab catering to soothing tired and aching muscles! Sorrel River Ranch and Spa Moab are two great choices.
Recommended photo spots: Mesa Arch (sunrise is supposed to be fantastic as the sun will rise directly through the arch!) in Canyonlands NP as well as the scenic drive pulling over at the various viewpoints, Delicate Arch and the other arches (North & South Window, Double, Turret) in Arches NP.
Outside of these national parks, be sure to also visit Dead Horse Point State Park (please don’t miss this!!), and Corona Arch. Be sure to give yourself enough time in Moab, it’s stunning! At least 3 days is a good start.
Recommended accommodations: Moab is a bit expensive compared to other places on the Southwest itinerary. If you are looking for a decent but budget-friendly place, book well in advance as the best-priced places book up quickly.
For people on a budget, I’d suggest the Aarchway Inn is just a tiny bit outside of Moab and has gorgeous settings with that classic Utah red rock all around, a lovely swimming pool, and well-appointed rooms. Check out rates, reviews, and availability here.
If you want a world-class stay, try glamping! Under Canvas Moab knocks it out of the park in terms of comfort, style, and entertainment, and is frequently cited as one of the best glamping lodges in the entire United States.
Stop Ten: Zion National Park
I recommended skipping Zion initially and saving it for the end because it’s probably one of the most epic national parks in all of the United States, and you’ll want a cool place to stop on the long drive between Moab and Las Vegas.
It’s a great way to end your Southwest road trip with something memorable, and it’s a great stopover on the way between Moab and Vegas.
If you’re at all into hiking, the Angels Landing hike is truly a can’t-miss experience.
Climbing up 1,500 feet over a grueling two hour hike (the last half mile of which is up rocks, which you have to use chain handrails to ascend) is not easy — but no epic view really is.
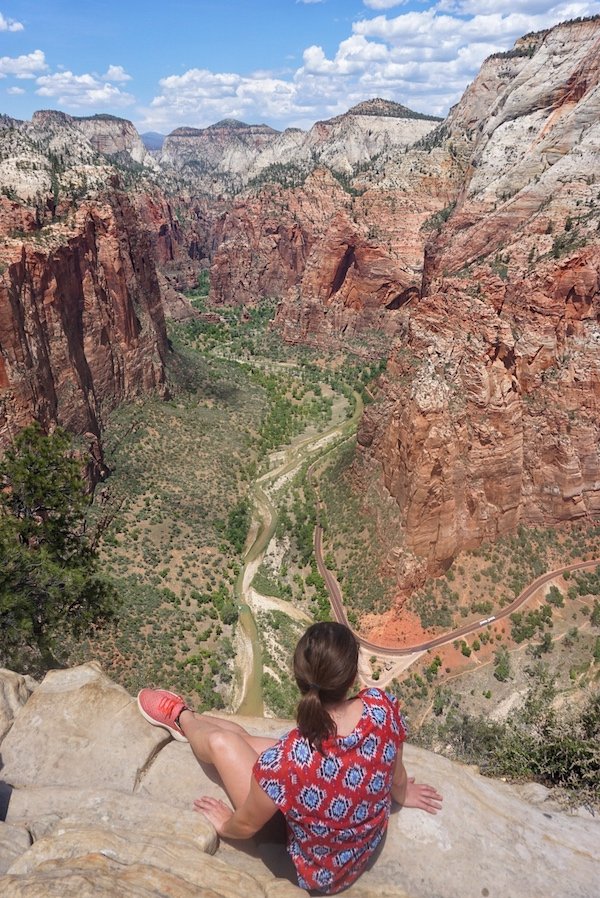
I feel compelled to leave an important safety note about this photo.
Angles are deceiving – there was a larger chunk of the rock edge beneath me which is obfuscated a bit by the high camera angle of this shot. I scooted around while maintaining at least 3 points of contact at all times to be safe. I never stood close to the edge, only scooted on hands and knees.
Still, I posed for this photo 3 years ago — after seeing so many articles in the last few years about selfie deaths, I wouldn’t pose the same way now, but I’d choose to leave a few feet more room between myself and the first edge.
Please be careful when posing on Angels Landing and never do anything you don’t feel comfortable with, especially in pursuit of a good picture! You will likely be exhausted from the hike in the heat, so you won’t have the best balance or judgment. Be cautious and respect your body’s limits. Always be on the safe side.
If you have more time, be sure to check out The Narrows, a hike that can take up to a full day wading through water through a beautiful slot canyon. You can also opt to do a shorter hike and turn around before the endpoint.
We didn’t have time for this, as we were flying out of Vegas later that evening, but it’s on my bucket list for my return to Zion. There are some other shorter hikes in Zion that are also fantastic if you’re too afraid of heights to take on Angels Landing.
Recommended photo spots: the top of Angel’s Landing OR Observation Point (higher and harder hike), Emerald Pools, Watchman, the Narrows
Recommended accommodations: We stayed about 45 minutes outside of the East Ranger Station at Zion Backcountry Yurt, with insane views of the Milky Way surrounding us. Book way in advance on Airbnb (you can find it here).
It’s also common to stay by the West Ranger Station, close to Springdale, but expect to pay a pretty penny for the privilege. The best combination of proximity, value, and high-quality amenities is at Driftwood Lodge about a mile outside the center of Springdale. Check prices, reviews, and availability here.
After Zion, head back to Vegas, return your rental, and marvel at all your photos from the trip of a lifetime!
IMPORTANT NOTE: Don’t forget to travel with travel insurance, especially on a trip involving lots of driving and hiking! You want to be covered in case of an accident or medical emergency. I use and highly recommend World Nomads for their easy purchasing, extensive coverage, and low prices. Get your free quote here.
What to Pack for a Southwest Road Trip
Not sure how to handle packing for a long road trip? I have a full guide to how to pack for a road trip, but I’ll briefly go over the essentials here!
Essentials
Car documents and license: This should be rather obvious, but you’ll need your license, car documentation, and insurance papers (both car insurance and travel insurance) ready for any road trip you take.
Travel insurance: If your road trip includes going to another state or country where you are not insured locally, you may need travel insurance in order to cover you in case of an incident. I use and recommend World Nomads.
Roadside emergency kit: If traveling with your own car, you should already have one of these kits, including (but not limited to) a reflective triangle, rain poncho and emergency blanket, safety vest and whistle, etc. If renting a car, ask if they provide one and if not, bring your own roadside emergency kit that also includes a first aid kit.
Spare tire & tire changing kit: Having a spare tire isn’t much good if you don’t have a jack or kit to change out the tire. Make sure your tire changing kit is complete (or buy your tire changing kit before you head out), and make sure you know how to use it!
Flashlight or headlamp: In case you get somewhere poorly lit after dark, have an emergency in the night, or just go on a sunset hike and need to light your way back, a flashlight or headlamp is key (and make sure to bring some extra batteries, too!) I suggest a rechargeable headlamp like this — it’s a great travel must-have that I find myself using more often than I’d expect.
Car charger and phone mount: Navigating, picking tunes, taking photos: your phone battery goes fast on a road trip, so don’t forget a car charger. I like this dual purpose phone mount and charger! Don’t forget any and all USB cords you might need to for your charging needs!
A road trip playlist: I’d argue this is as essential as anything else on this list! Make sure you download it before you go so that you’re not dependent on data, as a few stretches of this Southwest road trip do go through service deserts.
Hygiene and Safety
Alcohol wipes: Be sure to bring some Lysol or alcohol wipes. These are hard to find currently in the current context, so I’d suggest buying alcohol prep pads, as these seem to be the safest source of 70% isopropyl alcohol wipes. Be a decent person and only buy one box. Do not hoard anything — these alcohol wipes are needed by many people with chronic health conditions such as diabetics. One box will more than suit your needs.
NOTE: Use alcohol wipes or prep pads ONLY on high-touch surfaces as needed and not excessively — soap and water should be your primary line of cleaning and defense. Only use these when not otherwise possible, such as when at a gas station or using a touchpad at an ATM or grocery store.
Hand sanitizer: Sources of hand sanitizer and soap cannot always be guaranteed, and there may be times where it is difficult or less safe to go to a public restroom. It’s better to try to source hand sanitizer in a store from a trusted brand, but in the absence of that being possible, this brand available online looks to be safe, FDA-approved, and with a high-enough level of ethyl alcohol to be safe.
Spare liquid soap: Liquid or bar soap should be chosen over hand sanitizer whenever you have access to water. It’s safer and easier to get ahold of proper soap. Some gas stations, park bathrooms, etc. may not be well-attended, so bring some spare liquid soap with a locking top or a bar of soap in a Ziploc baggie just in case. Be sure to wash your hands for 30-40 seconds, including every part.
Face mask: When in places where distancing is not possible, you will need to wear a face mask to keep yourself and fellow humans safe. I suggest KN94s as opposed to cloth masks when possible, as these offer you (and your fellow humans) the most protection. They’re the Korean equivalent of the N95, and they work quite well. Unfortunately, the N95 is still in short supply and should be reserved for health care workers, unless you’re lucky enough to already have your own personal supply of N95s from a previous need.
Extra water: Be sure to have a few gallons of extra water in your car for emergencies — especially since this road trip through the Southwest covers a lot of harsh desert climates. Whether it’s replacing the water to cool down your engine or emergency drinking water if you’re stranded, it’s a cheap and simple thing to add to your road trip packing list with no downside.
Extras
Snacks: I fully believe the adage “It doesn’t matter how old you get, buying snacks for a road trip should always look like an unsupervised 9-year-old was given $100.” Pro tip: mix salty and sweet — too much of one or the other is a no go. I like having things like KIND bars, trail mix, chips when I need something salty, RXBar protein bars, etc. for my trip
Toilet paper or Kleenex: Good for poorly stocked roadside bathrooms or other emergency needs.
Basic medicines: Any prescription medicine you need, plus motion sickness tablets, ibuprofen/paracetamol, and Pepto-Bismol tablets for upset stomachs.
Rehydration packets: I always pack some rehydration packets with me on my travels as I’m prone to getting dehydrated and getting headaches, and they’re a lifesaver. I recommend these ones.
Travel towel: Great for a quick dip, toweling off after a rain storm, having a spare towel in case of a poorly stocked hotel or Airbnb, a microfiber travel towel is a road trip must pack.
Bug spray: So necessary in the summer months! I love this lemon eucalyptus-based mosquito repellent. If I get any bites, I use this After Bite itch eraser, which instantly soothes mosquito bites.
Sunscreen: Did you know you should always wear sunscreen while driving? The windshield doesn’t protect you against all UV rays — while they protect against UVB rays (which cause sunburn), most do not block UVA rays, which cause aging and skin cancer. This is the sunscreen I use on my face daily, and I use a cheaper basic sunscreen for my skin. No matter your skin tone or race, you need sunscreen!
Lip balm with SPF: I love this key lime-flavored Sun Bum chapstick!
Sunglasses: Bring your favorite sunglasses plus a cheap spare pair as backup — driving without sunglasses = absolute misery.
Travel pillow: If you have someone to divvy up driving duty with, this is a comfortable must-have for kicking back and enjoying your time off! I like this cozy memory-foam travel pillow, because it comes with an eye mask if you want to take a quick nap!
Battery pack: The Anker external battery pack is a travel must. While you can charge your phone while driving, you may want to charge other devices — a camera, someone else’s phone, portable speakers, an e-reader — as well.
Insulated travel mug: A Contigo travel mug is leakproof and pretty much indestructible — and they’re inexpensive to boot. This one is vacuum-insulated and fits standard cupholders easily, great for early morning coffee to power up your road trip. It’ll also be a good thing to bring along on any sunrise hike to keep you warm!
Refillable water bottle: Get a refillable water bottle and either refill it from your extra-large water containers mentioned above or fill up in sinks and fountains along the way. This one is insulated, stainless steel, and convenient to drink from
Day pack: This Osprey day pack is a perfect size. Plus, it’s designed by a company that specializes in ergonomic solutions for backpackers and multi-day trekkers, so you know it’ll be comfortable.
Camera: For years, I’ve relied on my Sony A6000 to take nearly-professional quality images, and the photos you see in this post were almost exclusively taken on this camera! I truly believe this camera is the perfect middle-ground above a smartphone yet below the 5-figure kits that most photographers use. Don’t forget extra memory cards – I only use 64GB Sandisk memory cards.
Toiletries
Wet wipes: These biodegradable wet wipes are easy on the environment and your skin, with aloe vera and Vitamin E.
Vaseline: For fixing flyaway hairs to helping chapped or burned lips to soothing hands or chub-rubbed thighs (ladies, if you know, you know)… I always make sure I travel with Vaseline!
Haircare: Whatever you need to travel with. I just bring a brush and hair ties and shampoo, but your hair needs may be different than mine!
Other basic toiletries: Body wash, shampoo, conditioner, razor, shaving cream, deodorant, toothbrush and toothpaste, face wash, any sort of face cleansing or anti-acne products, moisturizer, body lotion, makeup, etc.
Clothing
Hiking Clothes: Depending on the time of year you do this Southwest road trip, you’ll want to bring either shorts or leggings, long-sleeve or short-sleeve hiking clothes.
Jeans and Ts: Good for non-hiking days and just basic walking-around-town days.
Comfortable hiking shoes: Absolutely necessary for tougher hikes and strongly recommended for even shorter hikes like Angel’s Landing. While tennis shoes may work, hiking shoes are safer.
Sandals: Great for being able to kick them on and off in the car and suitable for shorter walks to observation points, overlooks, etc. I use Birkenstocks.
Rain jacket: It does rain even in the desert! I love the Marmot PreCip rain jacket (there’s a women’s version and a men’s version) and I actually used mine twice on my Southwest road trip.
Dress up clothes: In case you want to have a few nice meals out, you’ll want to bring some nicer clothes as well.
Allison Green is a former teacher who has been travel blogging since 2016, visiting 75+ countries in total. She has a Masters in Teaching and a B.A. in English and Creative Writing. As a former educator, she merges her writing and educational experience to encourage ethical, sustainable travel. She has been a speaker at the World Travel Writers Conference and TBEX. Her writing, photography, and podcasting work has appeared in National Geographic, CNN Arabic, CBC Canada, and Forbes, amongst others. When she’s not on the road, she lives in Bangkok, Thailand.
This is a great itinerary for the South West but you are missing New Mexico and southern Colorado! I love Northern New Mexico – Santa Fe is such an amazing city, plus Bandelier National Monument, Taos, Ghost Ranch and Ojo Caliente are also definitely worth visiting. Mesa Verde in southern Colorado is a definite south west highlight for me too.
I definitely am! I’ve never been to New Mexico, believe it or not! And I visited Colorado briefly (Denver and Boulder) but didn’t get to see much of it. Adding this all to the agenda for an upcoming road trip. I really want to do New Mexico and Texas 🙂
how long did this trip take you? and how do you think it will be in mid march?
Hi Sophie! This trip took about 10 days. In mid-March, it’ll be pretty cold and certain parts at high elevation (Grand Canyon, Bryce Canyon, Flagstaff) will definitely be cold and may be snow. We went in May and it was pretty chilly in some parts. There’s a chance of snow in high elevation but you also may be just fine 🙂
Allison, do you think including New Mexico in this trip is reasonable, if other things were to be left out (and if so, what would you leave out in order to add New Mexico in)? Thanks! I’m Kathleen, from Maryland (near DC).
Hi Kathleen! It is definitely reasonable, but I would leave out Moab (Arches/Canyonlands). Way too far in the wrong direction! I’d route it like this, instead: Las Vegas–> Zion –> Bryce –> Page –> Monument Valley (which I didn’t get to see on this trip!) –> Santa Fe/Albuquerque/whatever you want to see in NM –> Flagstaff & Grand Canyon –> Las Vegas.
I haven’t been to New Mexico yet, though, so I can’t offer more advice than that. You may have to cut off some things depending on how much time you have. I think 1-2 days in each place is fine, but it is a lot of driving (but you won’t mind because the drives are so beautiful!).
This is a great guide! I plan on visiting a lot of the parks in Utah in June, and this was very helpful.
Thank you Mary Ellen! Glad to hear it was helpful. Hope you enjoy your trip, June is a perfect time to go! I went in May and it was just a tiny bit cold but June should be nice and warm.
Hi Allison,
Thanks so much for all the info! I’m doing a similar route in September and am wondering what kind of car you drove? Trying to cut down costs and economy/sedan rentals are always the cheapest but I am wondering if it is practical or if we should go with a larger option
Hey Kayleigh, you’re welcome! You will definitely be fine with an economy/sedan. We just had the cheapest option because it was quite expensive 🙂
Okay great to know! Thanks for the response and all of your tips 🙂
Happy to help!
Hi Allison,
any tips on a shorter roadtrip? Maybe 3-4 days in September.
Hi Karin, yes, there’s still a lot you can do! I would do Las Vegas to Flagstaff/Sedona, then over to the Grand Canyon, then over to Zion National Park before heading back to Vegas.
Hi Allison,
What time of year do you recommend going on this roadtrip? Is there any months to avoid? Thanks for all the great info!
Hi Shannon! Many of these places are at high elevation and therefore not recommended in the winter. I would say any time from late April to mid October would be ideal 🙂 It’ll be too cold most of the rest of the year and a big risk of snow making these parts unpassable without proper snow tires, etc.
Hi Allison, Thanks for all the great info. We are heading to the Southwest for the first time next May. I have a reservation in Sedona for a week and want to use that as our hub. Will fly into Las Vegas as recommended and rent a car. We can stop overnight on our way to Sedona and also on our way back to Vegas. What do you suggest we definitely should see?
Flying into Vegas and using Sedona as your hub, I’d recommend the Hoover Dam, the Grand Canyon, Flagstaff, and Page (Horseshoe Bend + Antelope Canyon + Lake Powell). That should all be doable in a week and everything is driving distance from Sedona to be done in a day, but it’ll mean some back-and-forth driving.
You should also try the north rim of the Grand Canyon. There are a lot less tourists and the Lodge is fantastic.
Yes, if we had more time, we definitely would have seen the North Rim as well 🙂 Thanks for the tip!
Hi we are newbies when it comes to traveling period. We are going to Fly into Las vegas November 26th , spend the night there and then rent an RV until Dec. 1 back to las vegas and then fly back home on the 2nd, I would love to see the grand canyon and horseshoe bend/antelope. Would this be ok during this time? Any suggests would be greatly appreciated.
Hi Michelle, Horseshoe Bend and Antelope Canyon should be fine. The Grand Canyon is high altitude so there is a risk of snow. I’ve never driven an RV or driven in this part of the world during the winter (I did this trip in May) so can’t offer any specific advice.
Hi Michelle, Great blog and pictures!
We’re planning a trip to UT and have 6/7 days. Looks like we should book our flights in/out of Vegas. What should be not miss/fit into our shorter trip? Thanks!
Hi, this is Allison – Michelle’s another commenter. If you’re flying into Vegas and only have 6-7 days I’d skip Moab/Arches/Canyonlands and do some of Arizona instead. Vegas->Grand Canyon->Page->Bryce->Zion->Vegas would be doable in your time frame. Have fun!
Hi Allison, is there a chance of a winter trip in the area? I see half the places aren’t doable due to cold temperature, are there other places that would replace them for a 10 day winter getaway?
Hi John, in cold weather I think you could still do Valley of Fire, Vegas, Page (Horseshoe Bend/Antelope Canyon) but I’d skip Zion, Bryce, and Grand Canyon/Flagstaff as all are pretty high altitude and likely to have snow that makes hiking difficult. Perhaps you could combine with Joshua Tree or Mojave Desert in California as well, but I’m not that familiar with that part of California though I would guess the weather would be pretty decent.
Hello! Really enjoy your blog. My family and I with 3 kids are planning to arrive in PHX on Sat and leaving out of PHX Friday afternoon. Could you suggest an ideal itinerary that would make most use of our time? Kids are older so they can walk/hike.
Thanks in advance!
Hi JS! I’d go Phoenix – Sedona – Flagstaff – Grand Canyon – back to Phoenix, or if you want to be more ambitious, Phoenix – Sedona – Flagstaff – Page – Zion/Bryce – Grand Canyon – Phoenix, which would be busy and plenty of driving but doable 🙂 Not sure though how the weather is now so you’d want to check that!
Thanks so much for this. We’re hoping to sort a 3 week trip around these sort of areas, so your info, pics, suggestions, etc are great help! 🙂
You’re welcome Steve! Enjoy!
Hi ALison, great blog and some great suggestions, we will be travelling in a 9mtr RV from 6th Dec > 20th ’19 from Vegas drop off at Denver, it looks like on the map you either do GC or Bryce etc alt you do them all in a big loop? we plan on heading to NM – then thru Colorado to Denver, will all the National Parks be open this time of the year,? Mese Verde will this be open? do the roads get blocked if too much snow or do you just need chains? any advise would be great. Kim
Hi Kim! Thank you! Sounds like a great trip. I did them in a loop because I returned to Vegas but if you were returning in Denver I’d do GC, Zion, Bryce, in that order. I don’t know about that time of the year as my trip was in May – you’d have to check out the national park websites – and not sure about snow either, I’ve never driven in it before (I’m a Californian!) and I wouldn’t want to give you any wrong advice. Sorry I couldn’t be of more help!
Hello! This trip looks fantastic. I had some slight differences in what I wanted to see and was hoping you could help me with the best layout for a Southwest trip. I want to travel from Vegas back to Vegas and I have a 14 day window. I would like to visit the Grand Canyon, Monument Valley, Hoover Dam, Flagstaff, Sedona, Yosemite National Park, 4 Corners, Great Basin National Park, Salt Lake City, Hot Springs NV, and possibly Roswell, NM and Carlsbad Caverns. As I have not traveled in the Southwestern states very much it is hard to envision the layout of this trip. Can you please help me understand the best order to see these things. Thank you in advance.
Hi Tonya. Sounds like a memorable trip!! I haven’t been to most of the places on your list so I’m having trouble imagining the layout. I’d cut out Yosmemite and Carlsbad as they’re the most out of the way. I’d go in a circuit from Vegas to Arizona then up to Utah and down through 4 Corners / New Mexico then cut across Arizona again, picking up any places you missed on the first go through. I hope that helps!
Hi Allison! Great blog and it looks like you planned most of my trip. My mother and I are flying into Vegas on 8/24 and doing a 2 week tour before we head back on 9/7. We are both pretty heavy and out of shape, but want to make the most of what we can. I’d like to add Joshua Tree Nat. Forest and hit up Sequoia in a big loop. Any suggestions on what we should skip or plan extra time for. We want to see lots of canyons, but ones that require moderate hiking would probably shorten our trip. Thanks for any input you can provide!
Hi David! That sounds like a fantastic trip – I would love to visit Joshua Tree and Sequoia! I feel like such an inadequate Californian that I never visited either (blame my parents as i moved away when I was 17!). I would skip Moab as it’s the furthest away and many of the best views in Arches and Canyonlands require a hike. Zion has lots of easy hikes as does Bryce. Horseshoe Bend, Antelope Canyon, Grand Canyon, Hoover Dam etc are all pretty much just drive up and explore.
Hi! Inspiring. Any tips for December trip. We will arrive in vegas on the 20th and stay there for 2 nights and then we return home from Phoenix on January 3rd.
Hi Brendlaiz – unfortunately, I haven’t done this trip in winter so I don’t have any firsthand knowledge, but snow is definitely possible, especially at higher altitudes (Grand Canyon, Bryce National Park, Zion NP) so be careful with that. Be prepared to drive in snow or change plans around and dress very warm!
hi Allison, Thanks for this great info. We are planning a 2 week trip in June, flying into and out of Vegas. Two nights in Grand Canyon, but the rest is wide open. I’d like to do some hiking. Would appreciate your input for our trip. Possible itinerary. Thanks!
Hi Eileen – unfortunately with coronavirus at the moment it’s quite hard to say what will and won’t be open, so I imagine it may be a bit difficult to plan right now – fingers crossed the situation improves soon!
Hey, just curious why you chose to circle back to Vegas instead of heading to Salt Lake City? I’m thinking that’d be less drive time to an airport.
Oh absolutely, SLC would be a lot more direct — but there are oftentimes really high fees for a one-way rental, and multi-city plane tickets tend to be more expensive as well. So I did it this way to save money and to save readers money 🙂
Hi Allison,
I have read you blog….well I’m embarrassed to say how many times. I am planning our family trip (2 weeks). We are flying into Vegas and out of Vegas. I was wondering how long did you stay in Flagstaff area, then move up to the Grand Canyon/Antelope Canyon area?
Sorry for the delayed reply! I stayed in Flagstaff for two days (during which I did a day trip to the Grand Canyon) and then Page/Antelope Canyon area for two days. Just a note that the Grand Canyon is closer to the Flagstaff area which may help for planning. I was on a fast-paced schedule so I didn’t have much time!
Hi Allison,
Me, my sons, and I are planning a trip out West but only have 7 days :(. We we thinking of flying from Chicago to Phoenix and renting a car there and driving back home. We wanted to do Grand Canyon, Antelope Canyon, Arches, Yellowstone, and Mount Rushmore, then home. Are we crazy or can this be done and still be enjoyable lol?
Hi Lauren, I think that sounds pretty ambitious but it’s doable. What your definition of enjoyable is varies though so personally this wouldn’t be enjoyable for me! I recently did Yellowstone -> Arches -> Bryce -> Grand Canyon -> Las Vegas -> Yosemite -> San Francisco in as many days and it was pretty rough and didn’t get to see much. I’d suggest a 7 day trip flying into Phoenix and following my Arizona itinerary.
Hello!
I am planning a trip for my family and I was curious as to what you would recommend for a reasonable budget? We are a family of 6 planning to fly to Vegas, rent a large vehicle, and stay in moderately priced accommodations. Not including the flights, accommodations and car rental…what other expenses are there? I looked at antelope canyon which I want to experience and the prices are steep. Is that the only spot that isn’t included in the national park pass/and or free? I understand if we want pink keep yourself or AtVs, that’s extra…I’m just curious if any of the other spots charge like antelope canyons does. Thank you, just trying to frame out a budget!!
Hi Carol! Antelope Canyon charges a high price for land use permits as it is on a Native Navajo reservation and this is how they provide for their community. All the state parks have a separate fee (per vehicle not per person) which is usually under $20 for a car. Dead Horse Point SP is $25 I think. The other places should be included on the NP pass or be free, or have a small charge for parking. I hope that helps with planning your budget! Aside from that I would also budget for food if you are eating out your meals, gas, and any other incidentals or souvenirs you may want. Enjoy your trip!
Loved the pictures, etc. but couldn’t fine a map showing each place and route. Thanks
I didn’t create a map for this post because I have so many options/alternatives and additional add-ons and side trips… you’re welcome to plug into what you want into a multi-stop Google map and create your own custom itinerary from the suggestions you like best!