

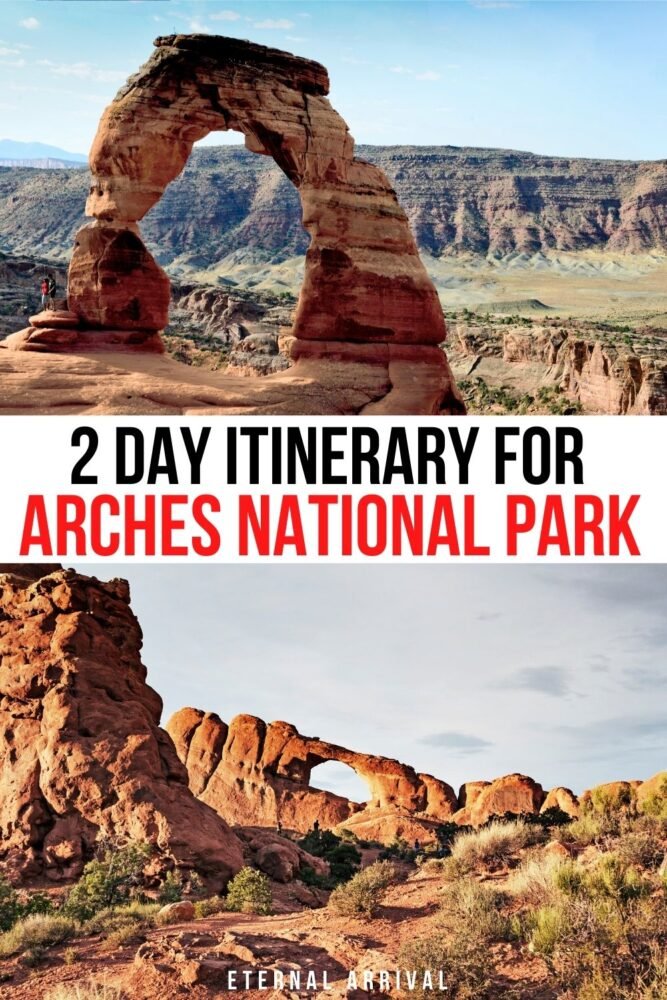
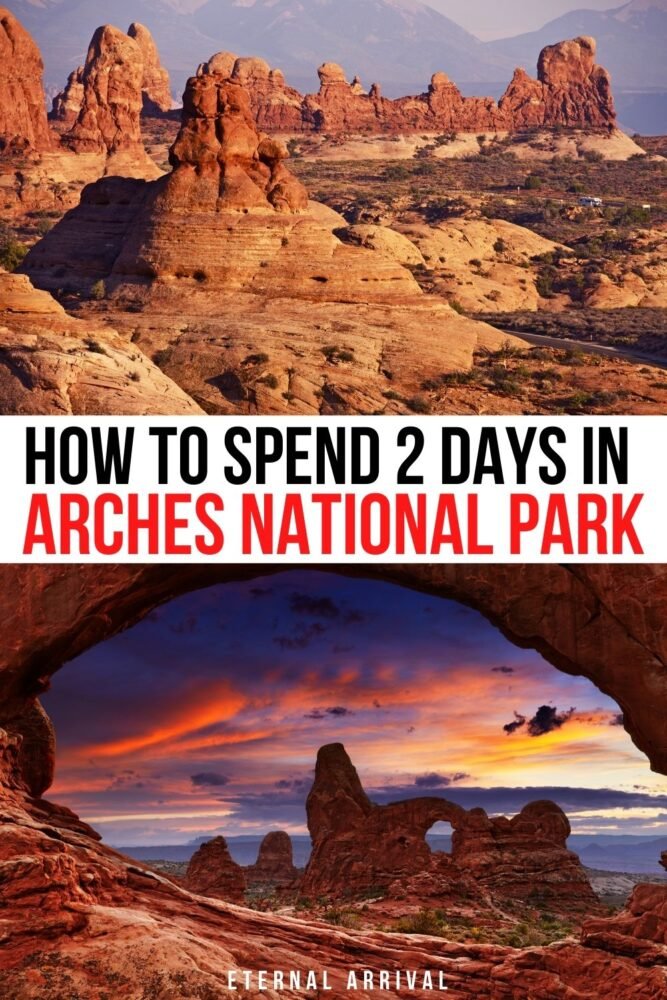
Your Perfect Arches Itinerary: 2 Days in Arches National Park
The perfect desert adventure is waiting for you in Moab, Utah, at Arches National Park!
This outdoor playground is home to the highest density of natural sandstone arches in the world: we’re talking over 2,000 documented to date!
Full of breathtaking red rock features and scenic hiking trails, Arches National Park is sure to impress every US national park enthusiast.
But there’s a lot to see here, spread across 50+ miles of roads, and it can get overwhelming to plan the perfect route to hit all of the bucket list musts in Arches National Park.
Don’t sweat (save that for when you hit the trails!) — we’ve broken down the top things to do in Arches National Park, day by day, into this easy two-day Arches itinerary!
Travel Tips for Arches National Park
Go early. This is one of the most popular national parks in the Southwest, so don’t expect solitude. Usually, there is a line to enter the park starting as early as 9 AM.
Try to get an early start on both days, since you only have two days in Arches. Aim for at least one day where you wake up early enough for a sunrise hike!
Be sure to have a car. Arches National Park does not have a bus or shuttle system, so you’ll need a car to access the trailheads and viewpoints in this itinerary. If you’re not driving to Arches from your home state, you’ll likely want to fly into Salt Lake City and rent a car there — flights to Canyonlands Regional Airport are expensive and rentals are limited there.
Not sure where to get the best deal on your rental? I’ve rented cars dozens of times through various search engines and have settled on Discover Cars as the best car rental search engine – it searches over 500 trusted rental companies to find the cheapest price for your rental! Compare prices for car rental from Salt Lake City here.
If you don’t have a car, plan tours. It is possible to do Arches National Park without a car, but you’ll want to book some tours of the National Park and some Moab activities in order to fill up your itinerary.
Slather on the sunscreen. Arches National Park is hot, hot, hot in the summer! Be sure to apply sunscreen at least 10 minutes before a hike, and reapply every two hours or so (or more if you’re sweating a lot).
Don’t forget exposed skin on the back of your body, like the back of your next, behind the knees, lower calves, etc! This is where I typically end up burned when I’m not diligent.
Bring a lot of water. As mentioned in the previous point, Arches gets quite hot in the summer season and it can be quite easy to get dehydrated.
In every road trip packing list, I make sure to impress upon how important it is to have a large supply of water in your car just in case of an emergency.
Define your accessibility needs. Not all of the park is accessible to people with mobility limitations. The following places are wheelchair accessible: Park Avenue Viewpoint, Balanced Rock Viewpoint, Lower Delicate Arch Viewpoint, and Wolfe Ranch Cabin.
There is an accessible campsite at Devils Garden (#4H) and the Visitors Center and the restrooms are accessible all throughout the park.
It’s best not to bring your pet. Arches National Park is not a particularly dog-friendly national park. Dogs are not permitted on hiking trails or at overlooks, nor in the backcountry, which basically eliminates all of this itinerary!
Dogs are only permitted at the Devils Garden campsite, picnic areas, and along paved roads. If traveling with a pet, check out these other dog-friendly hikes in Moab.
Where to Stay when Visiting Arches National Park
We give some details on campsites below in the itinerary, but if you’re not planning to camp — or the campsites in Arches are all full — here is where we suggest you stay in Moab!
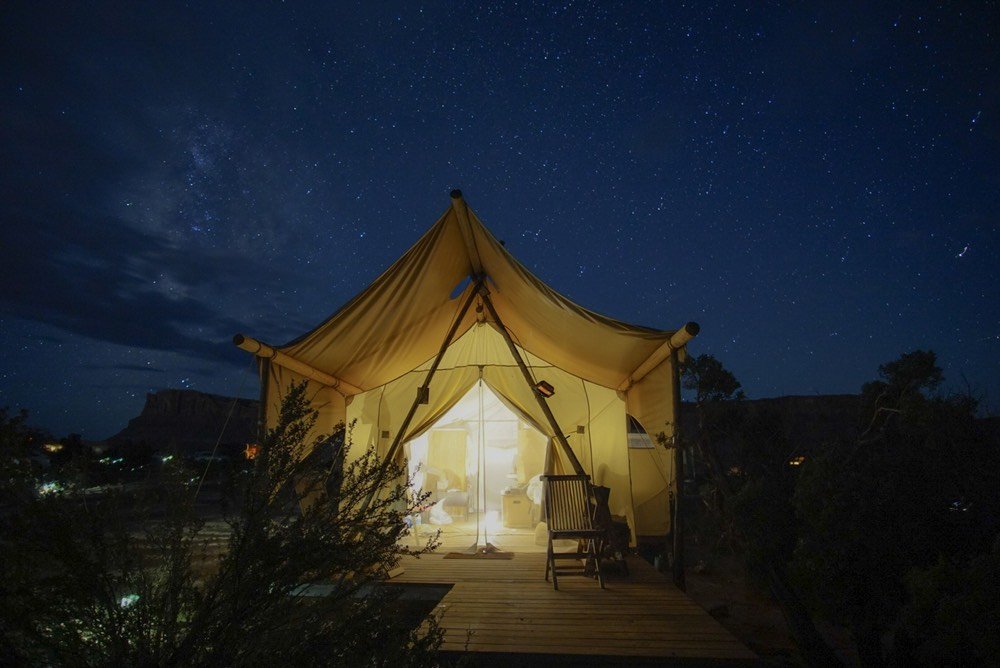
GLAMPING | Not into full-on roughing it and camping? Glamping is the perfect middle ground where you can experience comfort and ease while also being in nature. Under Canvas Moab knocks it out of the park in terms of comfort, style, and entertainment, and is frequently cited as one of the best glamping lodges in the entire United States.
BUNGALOWS | The charming Moab Springs Ranch has private bungalows that are the perfect place to stay in Moab if you want more privacy than the typical hotel. Each bungalow has its own little terrace, and each room has A/C, TV, a kitchenette and dining area, and a private bathroom. The property also has a restaurant, garden, and BBQ facilities on-site.
INN | For a rustic stay that nonetheless has all the amenities you need, Red Stone Inn is a fantastic choice. Rooms all come with a kitchenette, AC, TV, and en-suite bathroom. In terms of shared amenities, there is a hot tub and free WiFi throughout the property.
5 Things Not to Forget to Pack for Arches
Sunscreen. I’m weaning myself off of chemical-based sunscreens, especially if I’m doing any water activities like rafting or swimming. I love SunBum SPF 50 with Vitamin E as it’s all-natural and moisturizing without feeling icky and sticky.
Hydration backpack. You’ll want to rehydrate a lot while hiking in Arches, especially if visiting in the summertime! I recommend bringing a hydration pack like this Camelbak which you can wear on your back and sip water from, totally hands-free. It has a zipper pocket so you can throw in other essentials — car keys, cell phone, granola bars, etc. and use it in place of a day pack.
Hiking boots. This Arches itinerary includes a number of hiking trails that are rather rocky and uneven, and having ankle support is really key in these instances if you don’t want to roll an ankle and ruin your trip.
I love my pair of Ahnu hiking boots (for women) and for men, I suggest these similar Keen boots. Whatever boots you pick, be sure to break them in with a hike or two before heading to Arches.
Hiking socks. Don’t forget to pack hiking socks! Regular old cotton socks in hiking boots can lead to massive amounts of blisters — I’ve learned this lesson firsthand, unfortunately! Moisture-wicking hiking socks are cheap but can save your vacation. These DriTech socks are a great and inexpensive option, or you may want to invest in some merino wool quick-drying socks.
Headlamp. Because this Arches itinerary includes some sunset hikes and sunrise hikes, you’ll need a headlamp like this one. Trust me, as someone who hiked back from a sunset hike at Corona Arch in the dark without a headlamp, you’ll absolutely want one! A smartphone flashlight won’t cut it.
Day One of Your Arches National Park Itinerary
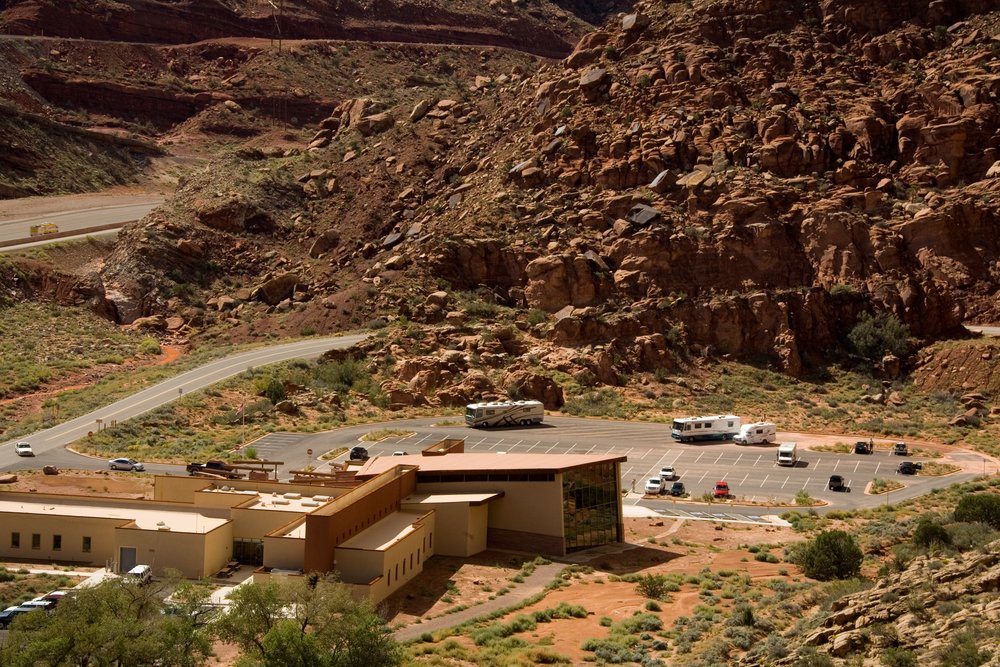
Start the day at the Arches National Park Visitor Center.
Time to get ready for a full day exploring the beautiful red rock landscapes of Arches.
However, the rugged landscape that makes up the 119 square mile park is more fragile than you may think!
Luckily, the Arches National Park Visitor Center near the entrance station is well-equipped to provide information about park stewardship.
They also offer important insider details on how to access and appreciate the park’s many famous attractions.
Also, they’ll let you know of any important closures. For example, on my last visit, unfortunately, the Devil’s Garden was temporarily closed.
The visitor center is also a great place to top off all your water bottles! Although there are fill stations sprinkled throughout the park, it’s important to carry plenty of water at all times.
Summertime temperatures often exceed 100ºF/38°C, so proper hydration while tackling this Arches itinerary is extra important — especially if you’re hiking a lot!
Begin your exploration at the Moab Fault Overlook.
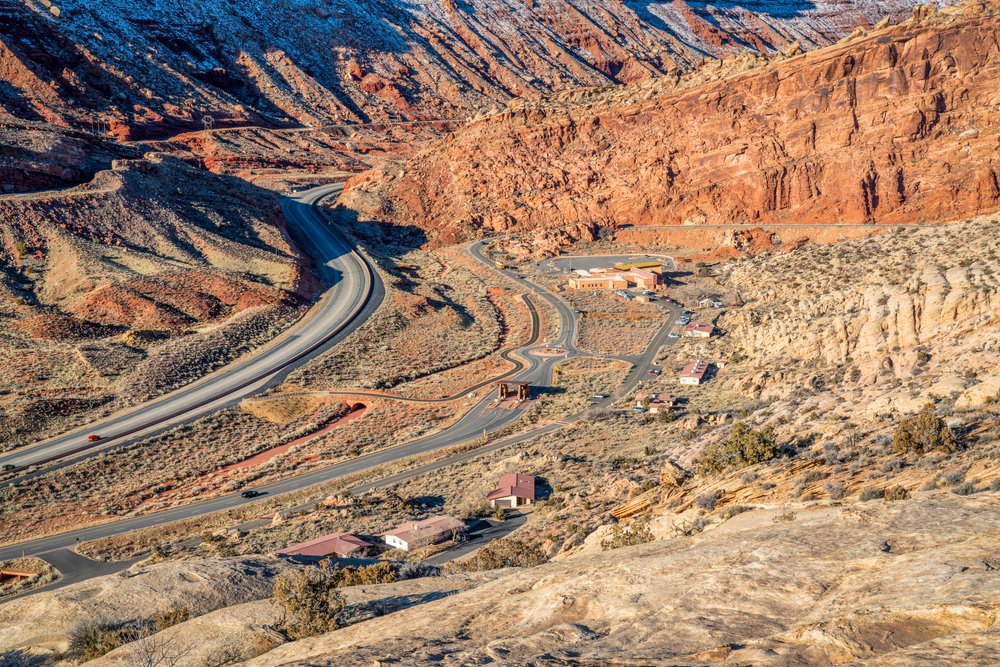
As you continue into the park from the visitor center, you will begin to gain elevation.
Look around at the sandstone features as you make the switchbacks above the park entrance.
To the left, you will see three pinnacles called the Three Penguins. Can you make out the penguin shapes?
The turnout for the Moab Fault Overlook will be one of the first viewpoints in the park on the right side of the road.
Check out the impressive fault and read through the helpful interpretive signs to understand the tectonic plates and how they have impacted the beautiful Utah landscape.
Hike the scenic Park Avenue Trail.
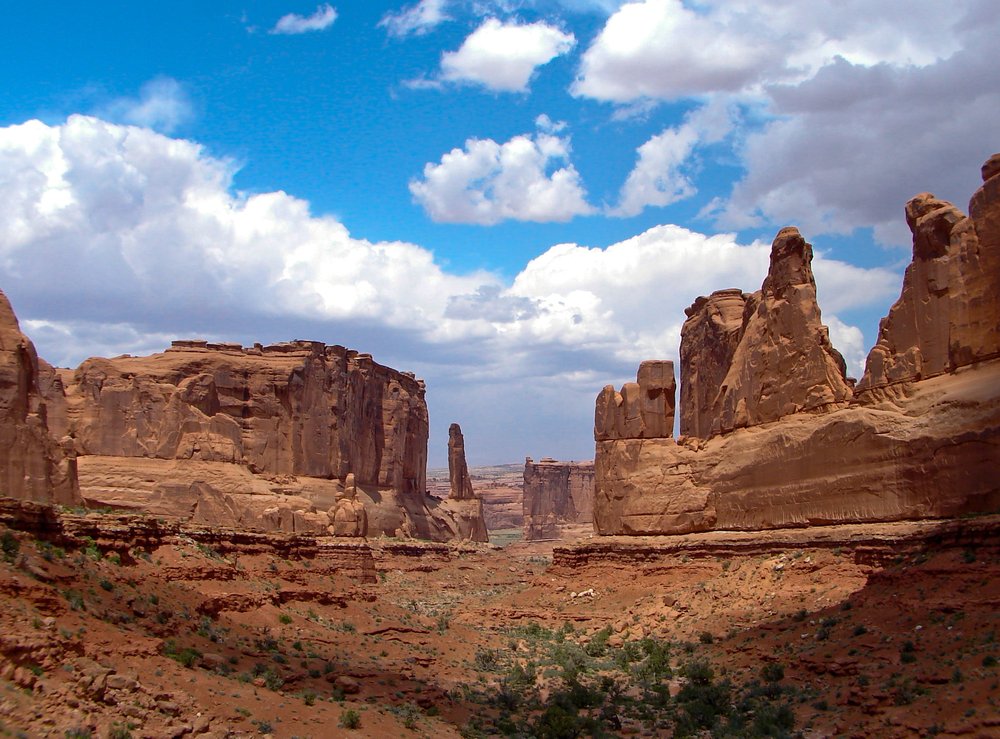
From the Moab Fault Overlook, continue on the main road to the Park Avenue Trail and Viewpoint.
The views are epic right from the parking lot — this stop makes a great backdrop for a group photo, even if you’re not planning to do a hike!
Park visitors that are unable to hike long distances can enjoy an amazing lookout here. The first section of the hiking trail is paved to be wheelchair and stroller accessible.
For those who wish to continue past the paved section, the trail leads toward the astonishing Courthouse Towers in the distance.
The 2-mile out-and-back trail takes hikers to the canyon floor for a close-up of the various towers and fins!
The trail connects with the main road at the 1-mile turnaround point, so it’s possible to arrange for a private shuttle.
If you want to arrange a shuttle, be sure to do it in advance, especially if you don’t want to hike back to the Park Avenue Trailhead or if you are trying to save time on this Arches itinerary to maximize your trip!
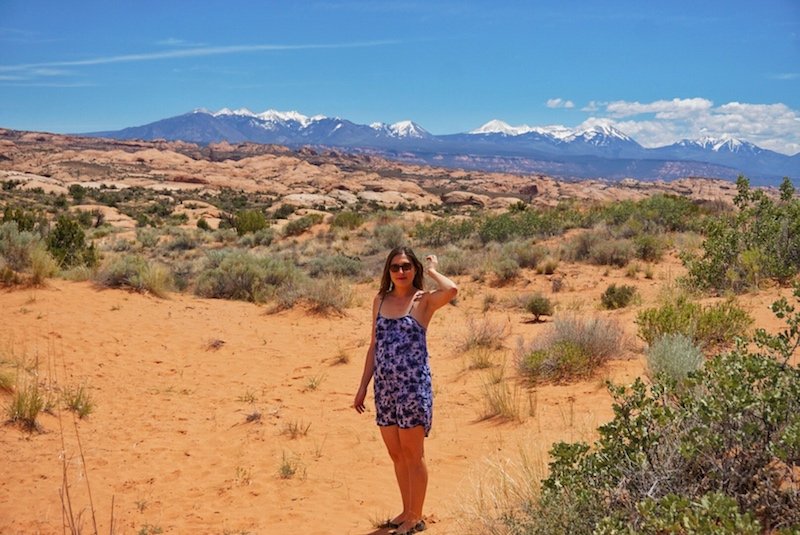
Gaze at the La Sal Mountains Viewpoint.
After a nice walk through the sandstone monoliths, head back to the main road and stop at the La Sal Mountains Viewpoint.
There’s not much of a trail here, but it’s a nice place for scenic views with some interpretive posters to read through.
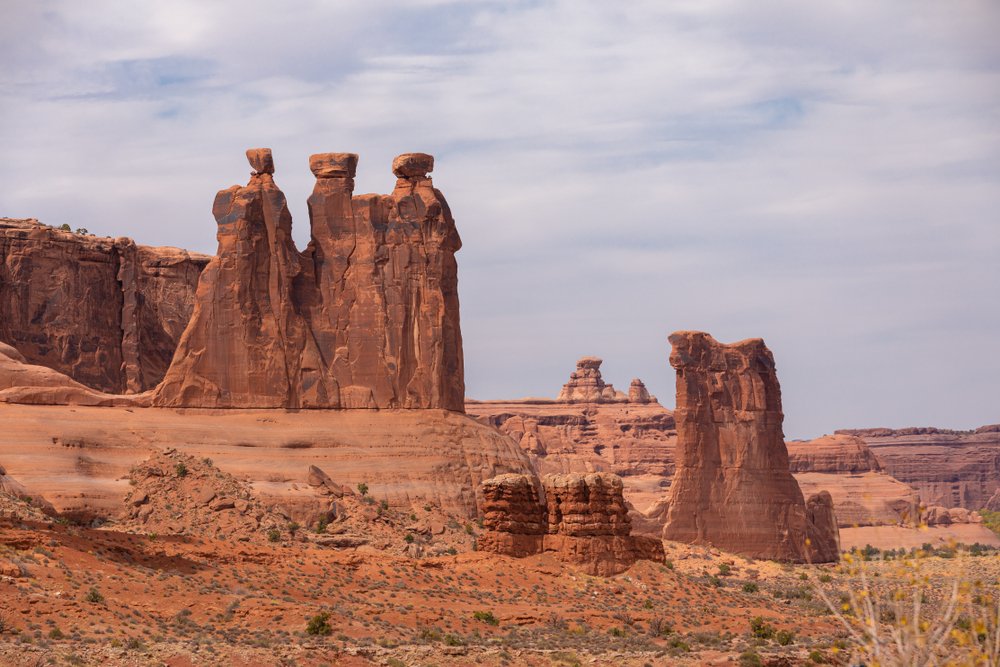
You’ll also be able to spot the Three Sisters rock formation here, one of the most beautiful landmarks in Arches National Park!
The La Sal Mountains that you can see in the distance are about 20 miles south of Moab and are the second-highest mountain range in Utah.
They offer great recreation opportunities for locals and visitors with skiing in the wintertime! But in summer, boy, do they make one beautiful backdrop.
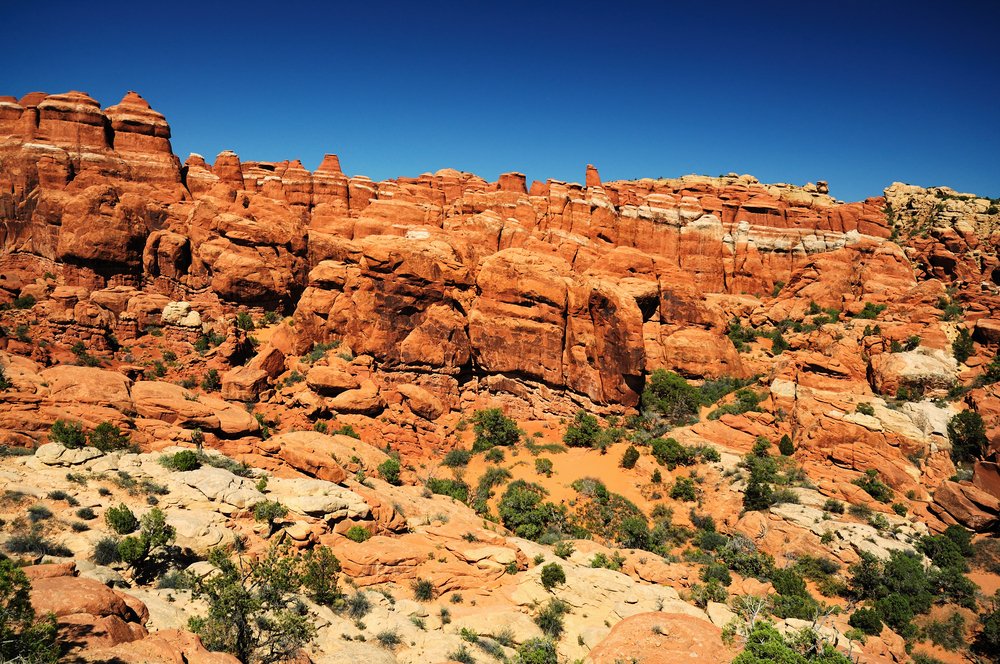
Visit Arches’ very own ‘Great Wall’.
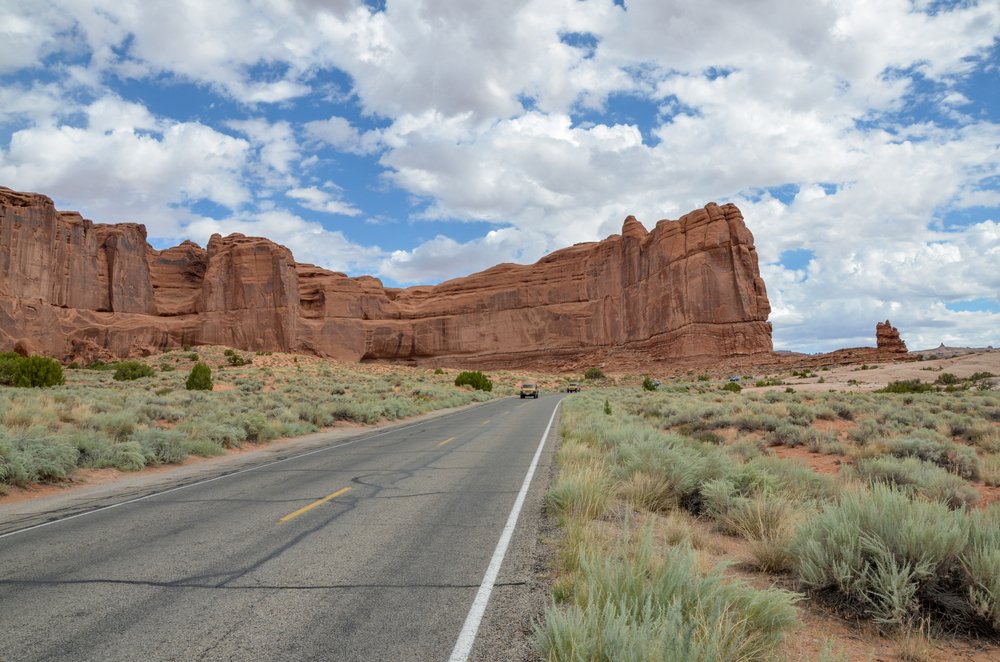
This feature isn’t quite the same as the great wall you may be thinking of on the other side of the globe. It is, however, really beautiful and impressive!
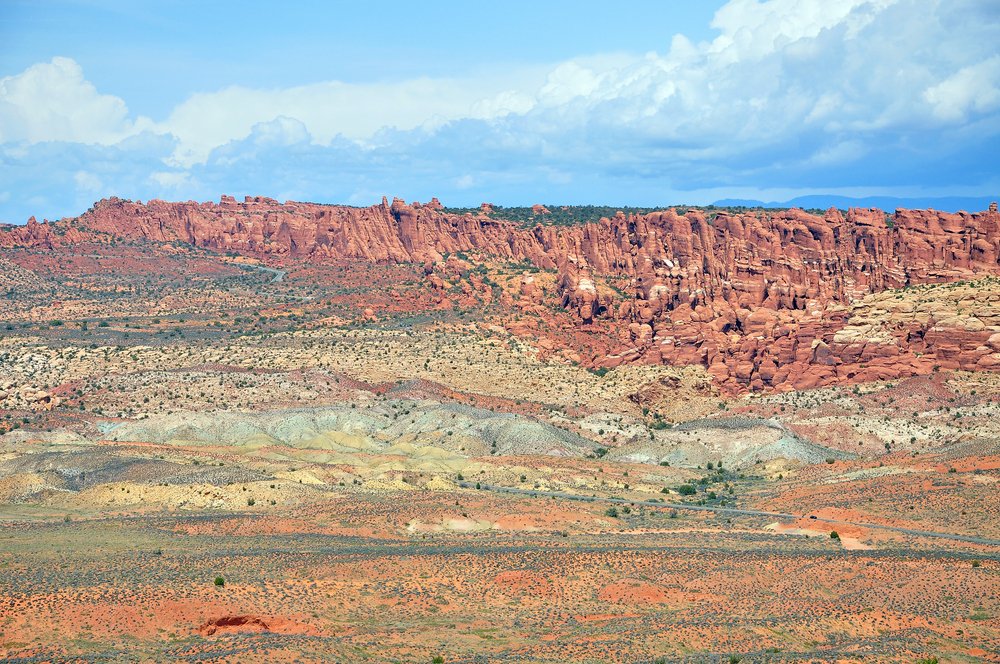
The Great Wall in Arches National Park is a towering row of naturally formed sandstone cliffs and towers.
Take in a drive-by view of this phenomenal feature or stop at the Petrified Dunes Viewpoint.
From the designated viewpoint, you can see the Great Wall in the distance and the petrified dunes with the La Sal Mountains in the background. It’s picture-perfect!
Hike to the viewpoint at Balanced Rock Trail.
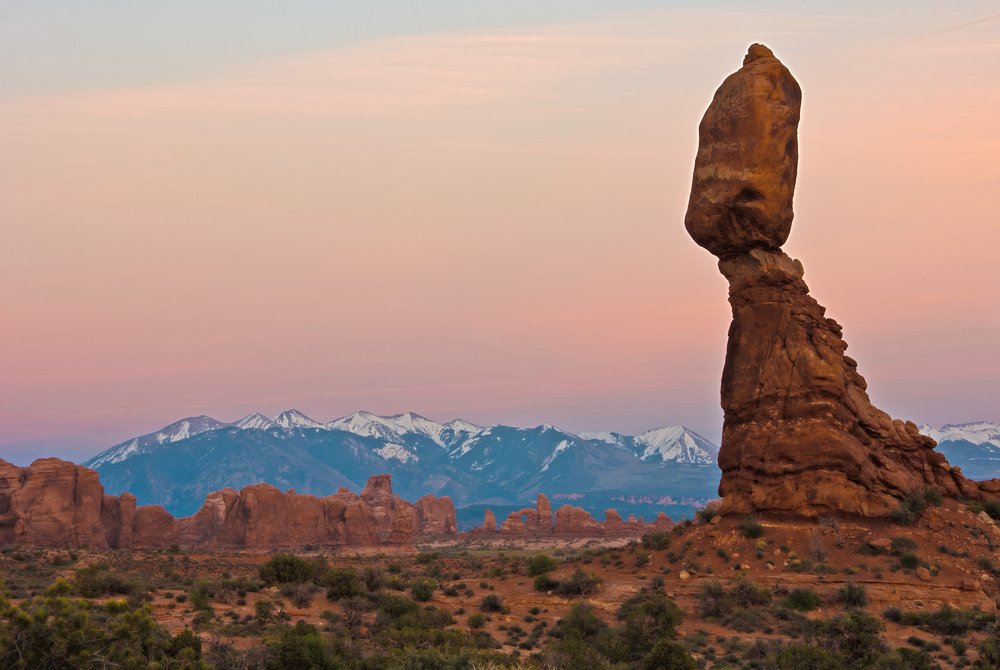
This next tower is going to blow your mind! If you’re looking closely, you can even spot it as you drive to the trailhead…
Continue past the Great Wall on the main road until you see the well-marked parking area for the Balanced Rock Trail on the right.
Near the trailhead, there are bathrooms and a nice picnic area. Take some time to regroup, hydrate, and refuel with a well-deserved picnic lunch before you head out on a hike to Balanced Rock.
Feeling rejuvenated? Good!
Now, it’s time to get a closer view. The short and easy 0.3-mile scenic loop will take you around the base of the iconic feature.
This rock formation, known as a hoodoo (the likes of which you’ll see all over Utah, in particular, Bryce Canyon National Park) appears to be balancing a bolder that is 55 feet in diameter.
The total height of the structure is 128 feet!
Explore the Windows Section of Arches National Park.
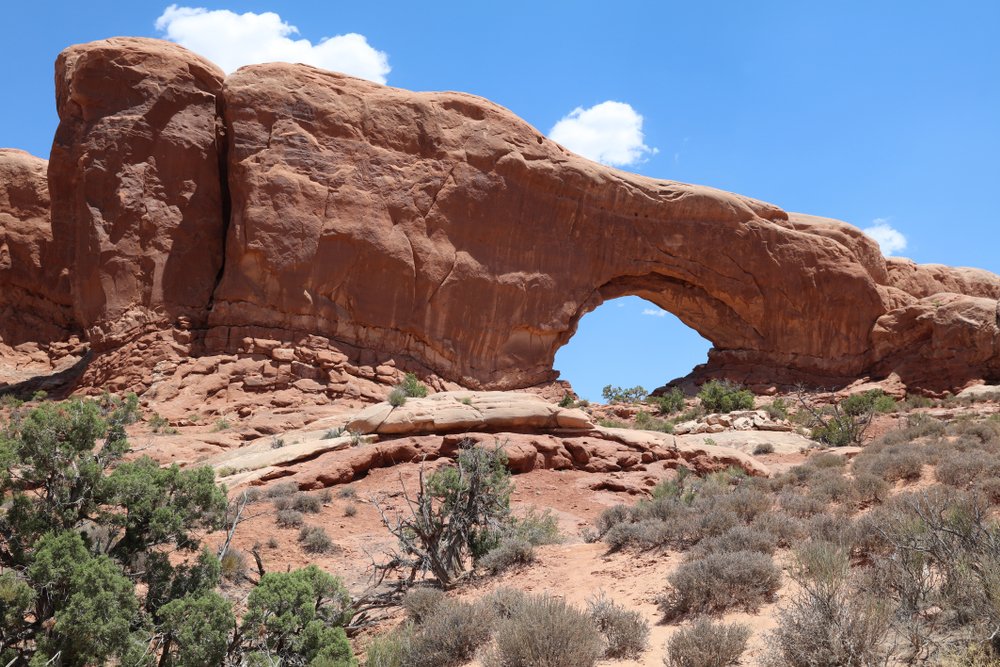
Not far past the Balanced Rock Parking Area is a side road marked with signs leading to The Garden of Eden, Double Arch Trail, and The Windows Section.
The first hike takes off at the very end of the side road. Park in The Windows Section Parking Area and look for signs that lead to The Windows Trail.
The Windows Trail is an easy 0.65-mile loop that takes hikers to the North Window and South Window (nicknamed ‘the Spectacles’ for its unique shape).
The hike finishes off with an up-close view of Turret Arch. You can take epic photos of Turret Arch through the North Window for a beautifully composed shot.
As another option, hikers can take Windows Primitive Loop Trail for an alternate view of the North and South Windows.
Truth be told, all the trails are all scenic in this section of Arches National Park!
Hike the Double Arch Trail.
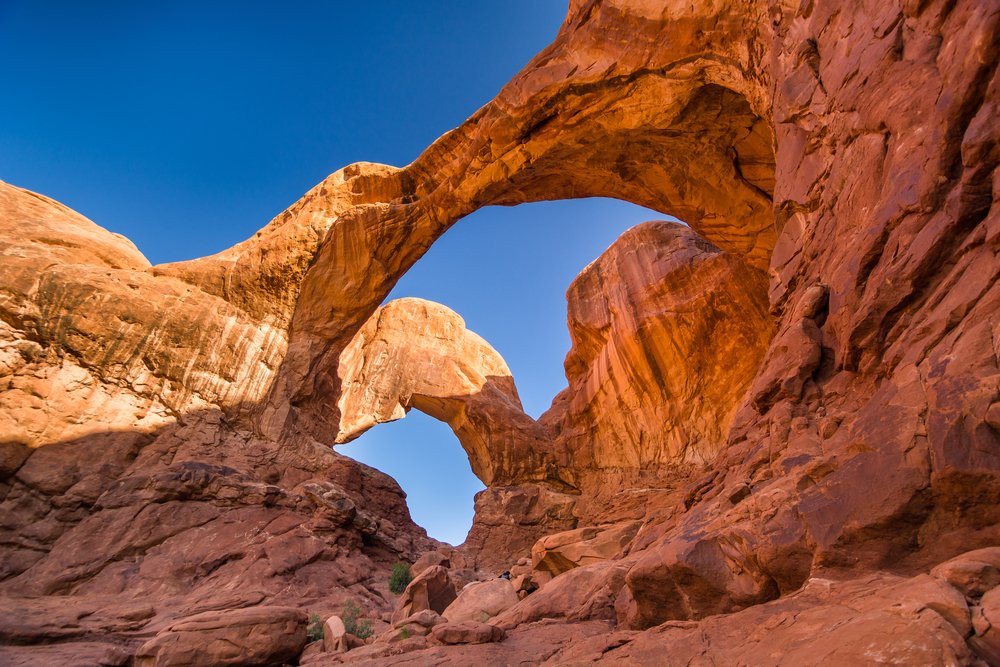
The second trail that you must hike on this side road is the Double Arch Trail.
The Double Arch Trailhead Parking area is just a short drive from the Windows Section, so it’s great to pair these two Arches activities back-to-back.
Set aside ample time to explore this next arch and don’t forget your camera!
This easy 0.25-mile hike begins in a cool desert forest of juniper trees. Continue on the trail until you come to the unmistakable Double Arch! There’s nothing quite like it.
Set up camp at Devils Garden Campground, if camping.
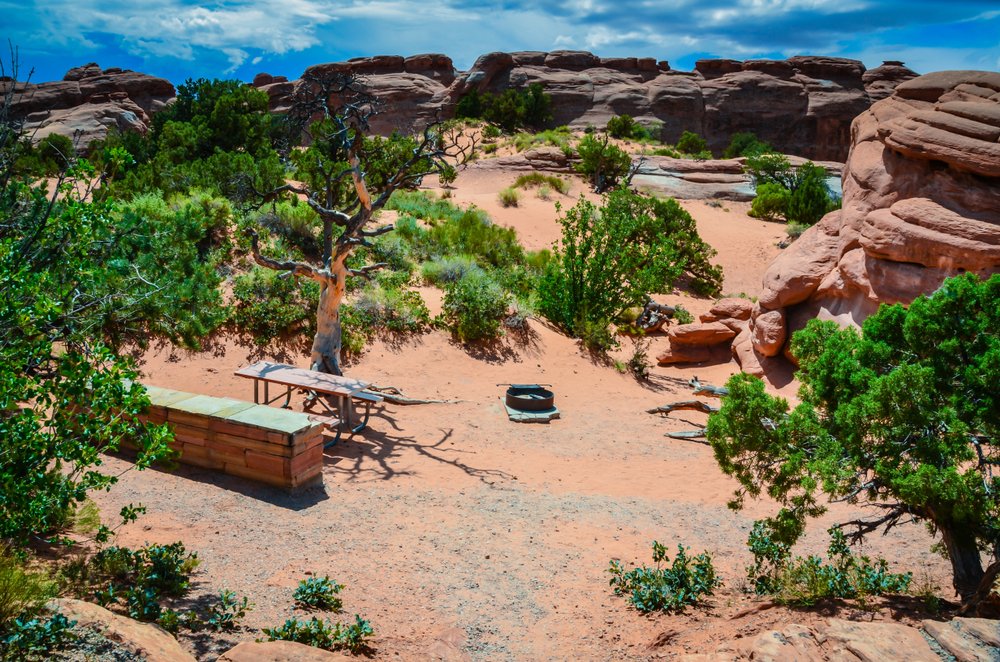
A fun-filled day in Arches National Park is best rewarded with an overnight at Devils Garden Campground. It’s also the only campground in Arches proper.
As the only campground in Arches, you’ll want to book it well in advance online at recreation.gov!
Bookings open six months in advance ($20 site fee), and so you’ll want to book as far in advance as time allows if you are trying to camp within the park.
There are only 50 sites in all of Arches National Park for camping, and it is full pretty much every day between March 1 and October 31, when it is by reservations only.
If Devils Garden is all booked up, you may want to check out the Slickrock campground outside of the park.
Not trying to camp? Refer back to the top of the post where we suggest places to stay in Moab, and skip forward to the sunset hike in the next section. After that hike, you’ll return to your hotel.
Located right inside the park, this campground makes a perfect starting point for your next day’s adventures. The sites in this campground are all well laid out providing some shade and red rock views.
It’s also a great place for stargazing in Arches!
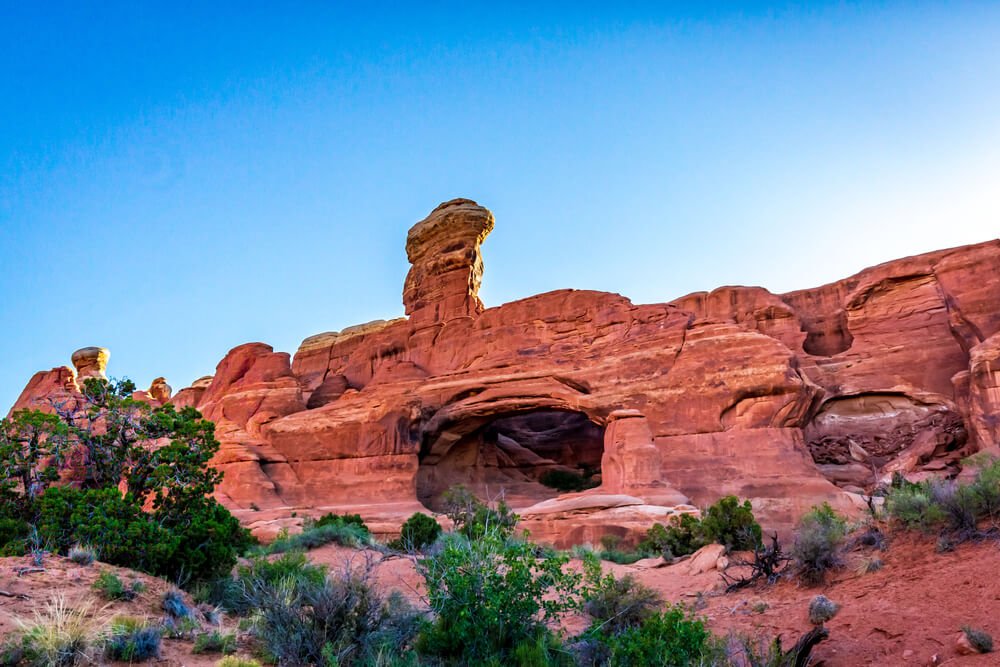
Take in the sunset at Skyline Arch.

Did you think you were done for the day? No way! Arches National Park is famous for its glowing golden hour!
Right from the campground, take the short and easy walk over to the Skyline Arch. The round trip walk will be less than 0.5 miles from the trailhead.
If you have extra time, you could also tack on the short 0.3-mile hike to Sand Dune Arch, located just a short walk from the Skyline Arch.
However, if you have to pick one, Skyline is better at sunset.
If you brought your headlamp along, stick around for the star show. The uninterrupted night sky is sure to reveal some stellar views of the Milky Way.
That’s officially all for day one. Now, it’s time to rest up for an early start!
Day 2 of your Arches Itinerary
Catch sunrise on the Broken Arch Trail.
Rise and shine!
Grab your headlamp, camp stove, instant coffee, and a breakfast bar for the trail, because this is a sunrise you will not want to miss. Mornings are hard, I know, but this will be 100% worth it.
Right from the campground (or driving in from your hotel), hop on the Broken Arch Trail.
The arch is located less than a mile from the trailhead, and it offers a perfect spot to sit and brew some morning coffee as you watch the sun come up over Arches National Park.
This is one of those great short hikes with an epic reward, especially if you time it for sunrise.
From Broken Arch, you can complete the loop to pass by Sandstone Arch on your way back to the campground or go back the way you came. The distances are about the same.
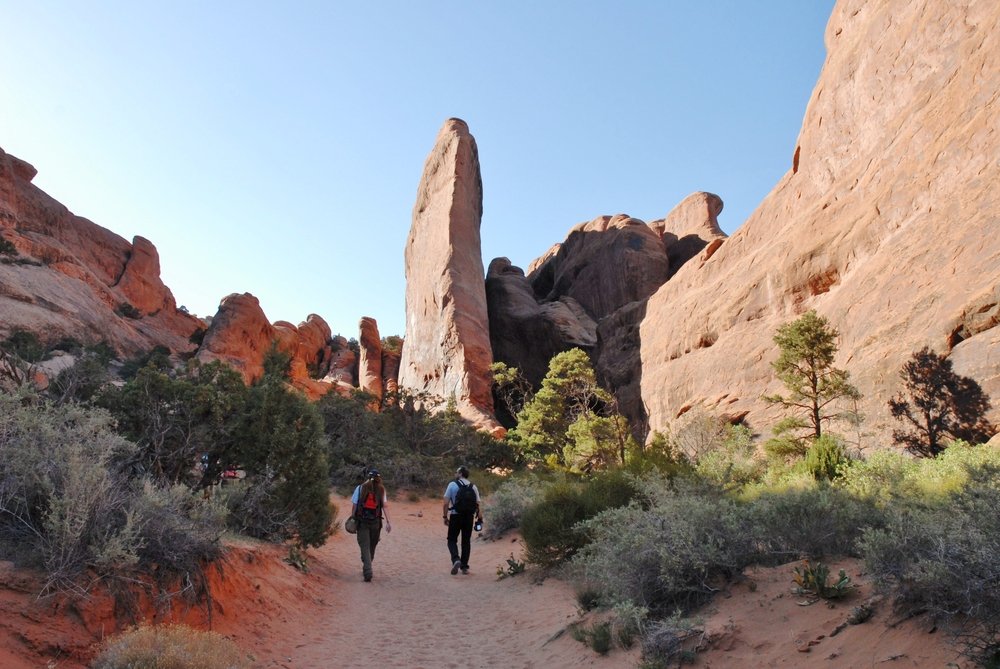
Trek through Devils Garden on one of Arches’ best hikes.
Take your time breaking down your campsite as you prepare for another day of adventure in this desert playground!
Don’t forget to top off on water here, as refill spots can be few and far between in Arches National Park.
No trip to Arches is complete without a hike on the Devils Garden Trail. Within only 2 miles of hiking, you will pass by a dozen natural sandstone arches, including Landscape Arch.
Landscape Arch is the longest sandstone arch in the national park, stretching nearly 300 feet across.
It looks impossibly thin at points — its thinnest section is only 6 feet across — which is wild when you consider its size!
This is a good hike to do earlier in the day before temperatures become too hot (hence the name Devil’s Garden!).
With detours to grab a closer look at some of the arches, the total distance on this hike becomes about 5 miles — so it’s not for the faint of heart.
Be prepared to tackle this hike and bring lots of water, preferably in a Camelbak for easy access.
To amp up the difficulty, you can tack on the Double O Arch, also accessible off the Devils Garden Trail.
However, this is on the hard side of moderate difficulty, so be sure to be prepared with proper footwear and water.
Note that this is not for the faint of heart as there is quite a bit of drop in some sections of the hike, as well as some sections where you need to scramble and do some wayfinding.
Whatever hiking adventure you choose, return to the parking area to find some shade and a cool drink of water!
Take a scenic drive to the beautiful Fiery Furnace Viewpoint.
On the main road headed toward the park entrance, there is a parking area for the Fiery Furnace Viewpoint.
From here, you can get an epic view into the thick fins, hoodoos, and arches of this area.
To hike in Fiery Furnace, you must obtain a permit from the visitor center or join in on a ranger-led hike (I recommend this latter option).
You can book a ranger-led hike on recreation.gov: note that you need to book at least 4 days in advance, and it’s suggested to book several weeks ahead if possible as these are all small groups of no more than 25 people.
Note that since there are no maintained trails through Fiery Furnace, it’s easy to become disoriented and lost — another reason a ranger-led hike is a fabulous idea.
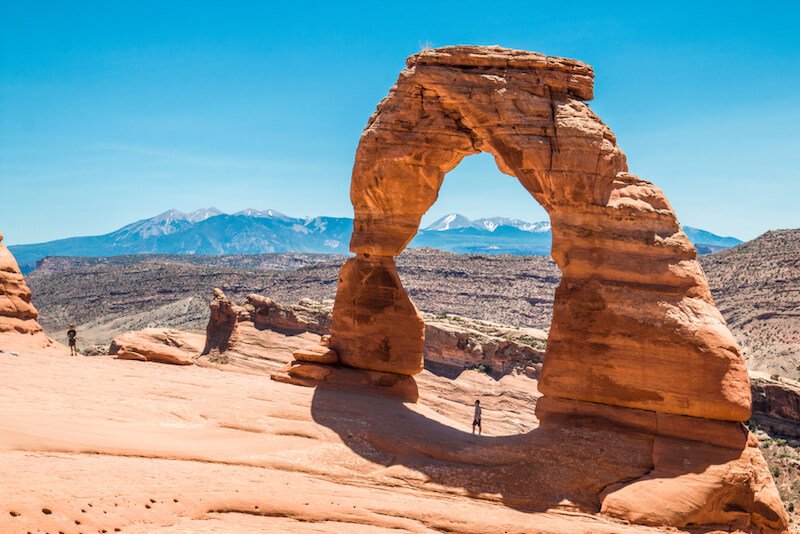
Visit Delicate Arch for sunset.
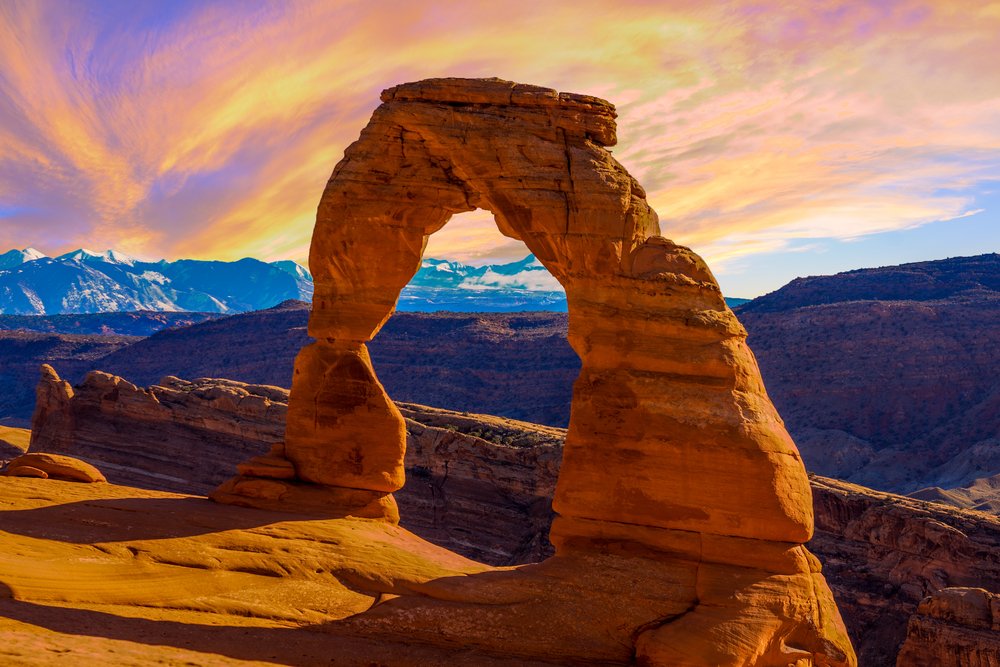
We saved the most iconic arch in Arches National Park for last! You will probably recognize Delicate Arch from the many social media snaps of it, and even from Utah’s license plate!
To reach the trailhead, continue on the main road toward the park entrance until you reach the turn for Wolfe Ranch / Delicate Arch Viewpoint Road on the left.
Continue down the side road and park at the Wolfe Ranch Parking Area — this is where you’ll start your hike to Delicate Arch.
The hike to Delicate Arch is a little challenging and requires hikers to follow the cairns marking the trail to avoid getting lost.
However, there are usually a fair number of hikers here, so it’s hard to get too lost.
Take your time and be observant. At 3 miles round trip, this hike is well worth the close-up view of the arch!
Say goodbye – for now – to Arches at the pristine Panorama Point.
Take one last good look at Arches National Park from Panorama Point.
This is the perfect place to reminisce and plan your next Utah adventure — trust me, there will be another one!
Take one last good look at Arches National Park from Panorama Point.
This is the perfect place to reminisce and plan your next Utah adventure — trust me, there will be another one!
Have More Time in Arches National Park?
This is already a fairly ambitious Arches National Park itinerary, but if you’re a fast hiker who doesn’t spend a lot of time soaking up views or photographing, you may want to tack on a few additional hikes in the park where it makes sense.
You may also want to keep these in your back pocket in case the crowds of Arches start to get to you: these are lesser-visited and a bit off the tourist path, though they are by no means a secret.
Here are a few additional arches in the park worth the hike!
Tower Arch: A moderate 2.7-mile roundtrip hike in a more secluded section of the park — this is great if you’re tiring of the crowds on the more on-the-beaten-path part of Arches and want to make a detour to shake off the crowds.
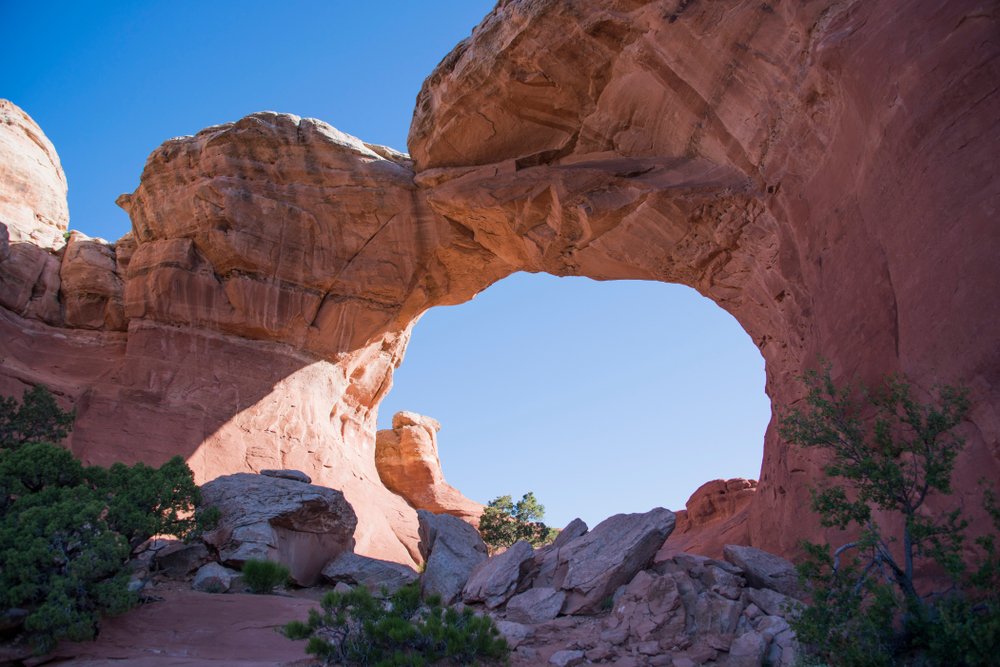
Pine Tree Arch & Tunnel Arch: These can easily be added onto a hike to Landscape Arch while hiking the Devils Garden section of the park. These are less-visited than some of the other arches in the section, but the Devils Garden area is still rather popular, so don’t expect total solitude.
Additionally, you can add some more fun activities in Moab, like this sunset cruise on the Colorado River, a half-day rafting tour, or a 4WD tour in Hell’s Revenge.
Where to Go Before or After Arches National Park

Arches National Park is often visited in conjunction with other incredible Utah bucket list destinations.
If you base yourself in Moab, you’ll likely also want to visit Canyonlands National Park (where you’ll find Mesa Arch — contrary to popular belief, this arch is not in Arches!).
You’ll also want to spend at least a half-day exploring Dead Horse Point State Park, where the Colorado River bends beautifully in a way similar to Horsehoe Bend in Arizona.
People often spend a few days in Salt Lake City before making their way to Arches, but you can also do this in reverse.
Other stops people often make include Zion National Park, Bryce Canyon National Park, and Capitol Reef National Park.
I’ve included all of these on my one-week Utah Mighty 5 road trip itinerary, so if you are planning a longer stay, be sure to read that post!
I also have a post that combines all the best Utah attractions with some stops in Arizona like the Grand Canyon as well as Nevada in this Southwest USA itinerary.
Emily is a freelance travel and outdoor recreation writer from Big Sky, Montana. Her adventurous spirit has led her to the high peaks of the Sierras and the largest wilderness areas in the lower 48. When she’s not writing, Emily can be found backpacking, road tripping to outdoor destinations, climbing, or rowing whitewater.