

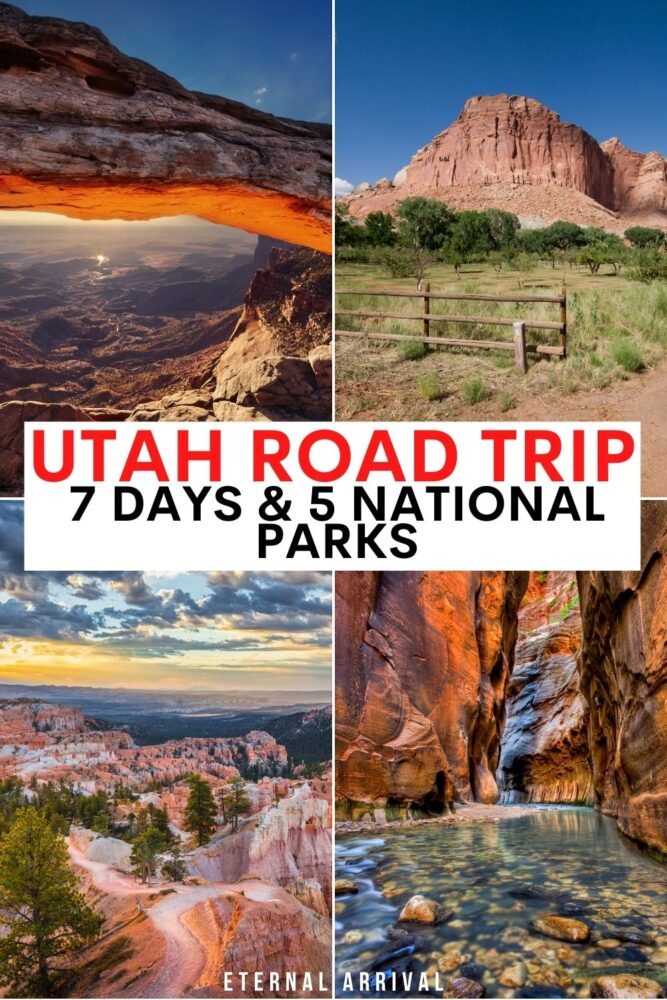
The Perfect 7-Day Mighty 5 Utah Road Trip Itinerary
Anybody who loves the outdoors needs to visit the incredible state of Utah!
Utah has so many options including phenomenal national parks (five of them!), hot springs, ski resorts, and more!
Pack your bags and your camera because this 7-day Utah itinerary has all of Utah’s unique destinations laid out in the perfect order.
| Planning your Utah road trip at the last minute? Here’s my quick tips: Where to Stay on a Utah Road Trip: – In Salt Lake City: Kimpton Hotel Monaco – Near Arches NP: Moab Red Stone Inn or Moab Springs Ranch for hotels, Under Canvas Moab for luxury glamping – Near Bryce Canyon NP: Stone Canyon Inn or Bryce Canyon Log Cabins – Near Zion NP: Cable Mountain Lodge or Springhill Suites Best Activities: Want to fully enjoy your Utah road trip? Booking some activities will help you create a more relaxing itinerary rather than planning every minute of it yourself. For example, you can book a horseback excursion on a canyon trail ride or an ATV tour in Bryce Canyon or a Moab Sound and Light Show tour in the Arches National Park area. Where to Rent a Car: I always user Discover Cars to find the best price on my rental; compare car rentals and prices from here. Alternately, you can rent an RV or campervan via RVShare and save on accommodations. |

I’ve ensured you hit all the top attractions and snag some of those drool-worthy Instagram pictures you see plaguing your feed.
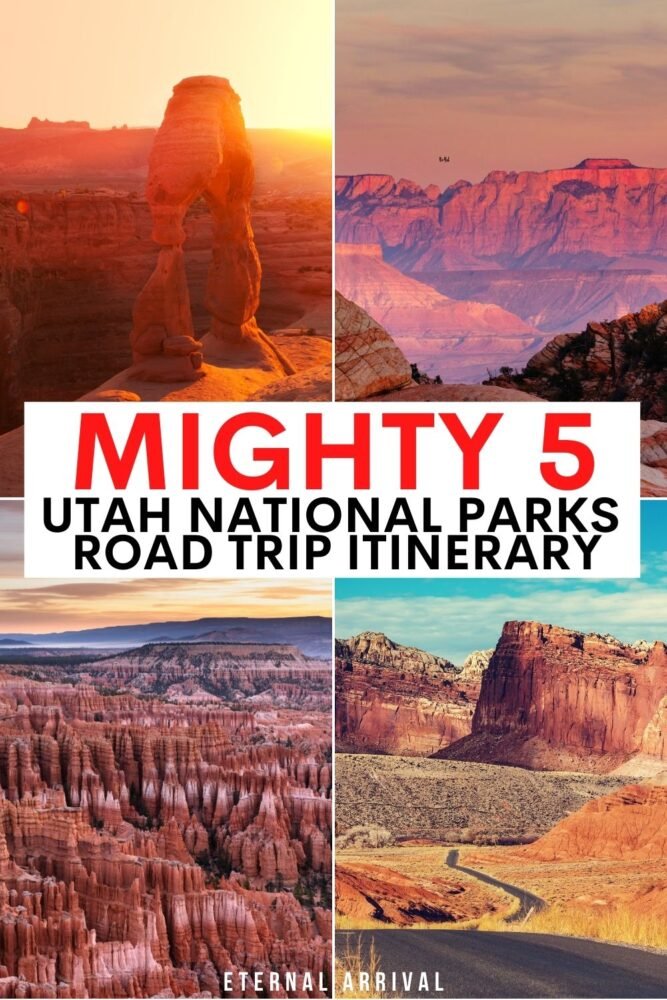
Plus, I’ve a few off-the-beaten-path gems you can also add onto your Utah itinerary while road tripping Utah’s Mighty 5 (which refers to its five amazing national parks)!
When to Plan Your Mighty 5 Utah Road Trip
Utah is incredible any time of the year. With tepid summers and gorgeous snow-covered winters, there is never a season that doesn’t reveal jaw-dropping landscapes.
But since you’ll be cruising the highways and spending enormous amounts of time in the outdoors if you’re doing a Mighty 5 road trip, I suggest the months of April-May and September-October.
Late September and early October is a great time if you want to see some fall foliage in places like Zion!). If I had to pick the best month to visit Utah, I’d pick October — fewer crowds, better weather, and gorgeous foliage!
Going in the shoulder season will allow some crowds to dissipate at the popular sites and puts you ahead of snow closures. These months are considered the off season for crowds, and the weather has never failed me during these months.
Tips for Planning Your Utah National Parks Road Trip Itinerary
Prep for the parks. This Utah road trip means you will need to pay for entrance to at least 4 separate national parks, 5 if you also visit the interior of Capitol Reef and don’t just pass through. Each park can easily charge a $30 admission fee, so if you’re planning to enter more than two parks, an America the Beautiful pass will save you money! Buy it online at REI.
Time it wisely. Spring and fall, in my opinion, are the best times to visit Utah! Skip summer unless you’re willing to handle the heat (and school vacation crowds), and winter unless you’re a confident winter driver as many parts of Utah experience snow.
Cell service is spotty. Don’t always count on having cell phone service while driving in Utah! There are many long stretches of highway with very little service. Be prepared by having your maps downloaded offline.
Places on the map are not always as direct or close as they look. There are many routes that, at first glance, appear to be doable… but when you plug it into your maps app, you find they’re rather far apart! I’ve omitted a few notable places from this itinerary for that reason, such as Monument Valley, which is hard to squeeze into a 7-day Utah itinerary.
The Mighty 5: Your Perfect 7 Day Utah Road Trip Itinerary
Day 1: Salt Lake City
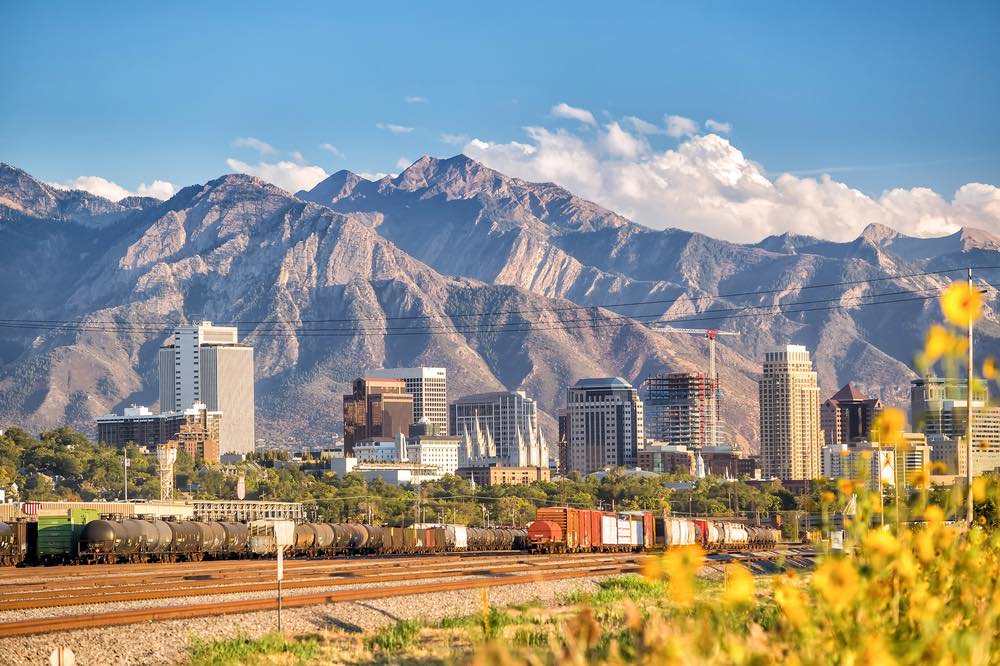
Salt Lake City International Airport is a hub for flights and car rentals as well as the perfect starting and ending point for exploring Utah.
I suggest booking your arrival and departure tickets from here, as it creates the perfect loop for your 7 day Utah road trip.
Another option would be to fly into Las Vegas, in which case, your route itinerary would look like the following: Las Vegas – Zion – Bryce Canyon – Capitol Reef – Moab – back to Vegas or SLC.
You could also add on a few days at the Grand Canyon and Grand Staircase-Escalante National Monument as well Page, AZ easily with this kind of itinerary.
If that sounds more like the itinerary you want to follow, check out my 10-day Southwest road trip post, which does a roundtrip from Las Vegas to Moab and back, visiting three states and touching all Mighty 5, the Grand Canyon, and Page’s landmarks like Antelope Canyon and Horseshoe Bend.
However, for the purposes of this 7 day itinerary, let’s assume you’re flying into SLC, as it’s the easiest for routing purposes, plus SLC is a great airport hub!
Not sure where to get the best deal on your rental? I’ve rented cars dozens of times through various search engines and have settled on Discover Cars as the best site to rent with in the USA – it searches dozens of rental companies to find the cheapest price for your rental! Compare car rentals for your trip here!
Salt Lake City is in the heart of Utah, nestled among the Wasatch and Oquirrh Mountain Range it is surrounded with fantastic opportunities for fun.
Here’s how you should spend your day in SLC! If you have two days, read our two-day Salt Lake City itinerary.
Check-in to the Kimpton Hotel Monaco Salt Lake City
This luxury hotel is such a delight for the eyes!
Swirling colorful carpet draws you into the warm space of the lobby while modern vintage furniture gives the Kimpton Hotel Monaco an inviting atmosphere.
The rooms are adorned in old-world style with flashes of flair from the 1950s.
Hotel Monaco is perfectly situated in downtown SLC, making exploring the city extremely accessible.
Grab a coffee and start your day
Begin your morning by making the 3 block walk to Campos Coffee.
Snag a seat in their stylish cafe and order up a delicious cappuccino with a side of Cran-Apple Toast.
Campos coffee offers an inviting, wide-open atmosphere adorned with a steampunk theme. Enjoy a quiet morning here as the city will quickly wake up.
Wander around downtown SLC
Salt Lake City is known for its outdoor squares and parks. Once you’ve properly caffeinated, head to one of the year-round farmer’s markets for food, fun, and Utah flair.
There are several downtown areas that offer farmers’ markets at different times a year. A couple of options include Liberty Park, Sugar House, and Downtown Farmers Markets.
Most of these markets only take place on Fridays and Saturdays but if you’re lucky enough to catch one, they’re worth the visit.
Fresh fruits and vegetables line the streets along with homemade gifts and local artists displaying their talents. It’s easy to spend a few hours wandering the streets.
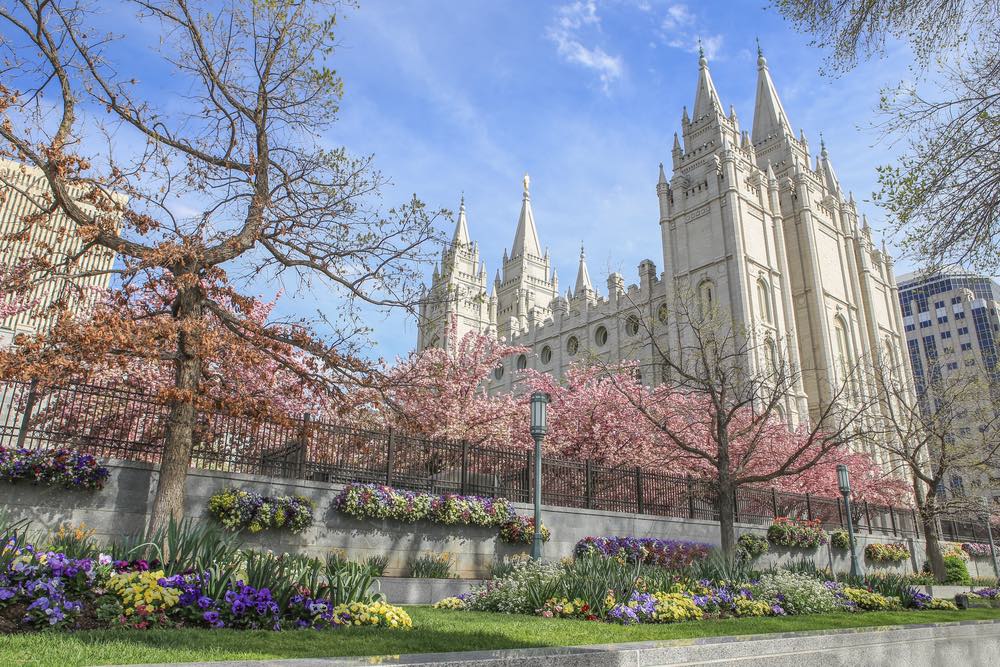
While you’re on foot, consider seeking out some of Salt Lake’s most known and gorgeously constructed monuments such as the Mormon Temple, the State Capitol, and Temple Square. There’s a ton of historical sightseeing in downtown SLC, so be sure to pack your most comfortable shoes.
Hit the hiking trails
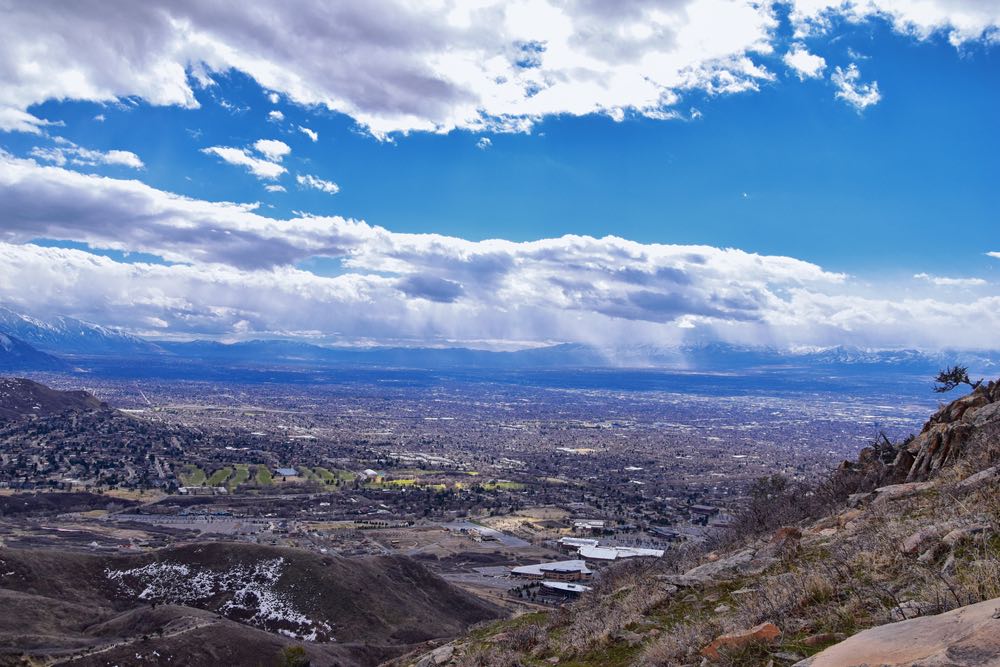
Salt Lake City is filled with tons of outdoor options as well!
One of the most fun and accessible hiking trails is The Living Room. Lying just 10 minutes from downtown, this 2.2-mile out-and-back hike leads to incredible views of Downtown and the surrounding landscape.
Sit above the horizon on “chairs” made from surrounding rock and enjoy the afternoon high above the city.
If you desire some trails that require a bit more of a time commitment consider looking into Mount Timpanogos Trail or summit Grandeur Point. Both of the trails lead to exquisite views.
If you’re visiting in the fall, the colors of the changing leaves along both trails are breathtaking!
I also have a full guide to the best hikes near Salt Lake City here in case you want to extend your trip a bit and do a day hike or two!
Grab a delicious dinner in the city
Head back to the city and clean up for dinner.
Salt Lake is filled with phenomenal restaurants that’ll please any palate. A few of my favorites are Settebello for pizza or Red Iguana for Mexican.
Settebello offers insanely delicious Neapolitan style pizza wood-fired to perfection with a fluffy, buttery crust. Their bruschetta is simple and delicious, piled high with fresh tomatoes on divinely toasted bread.
If a cuisine south of the border sounds more enticing, Red Iguana is the hot spot for you. Dubbed as Utah’s “killer Mexican food,” they have all the specialties including chimichangas and indulgent Mexican desserts that go down well with a custom-made margarita!
Day 2: Moab
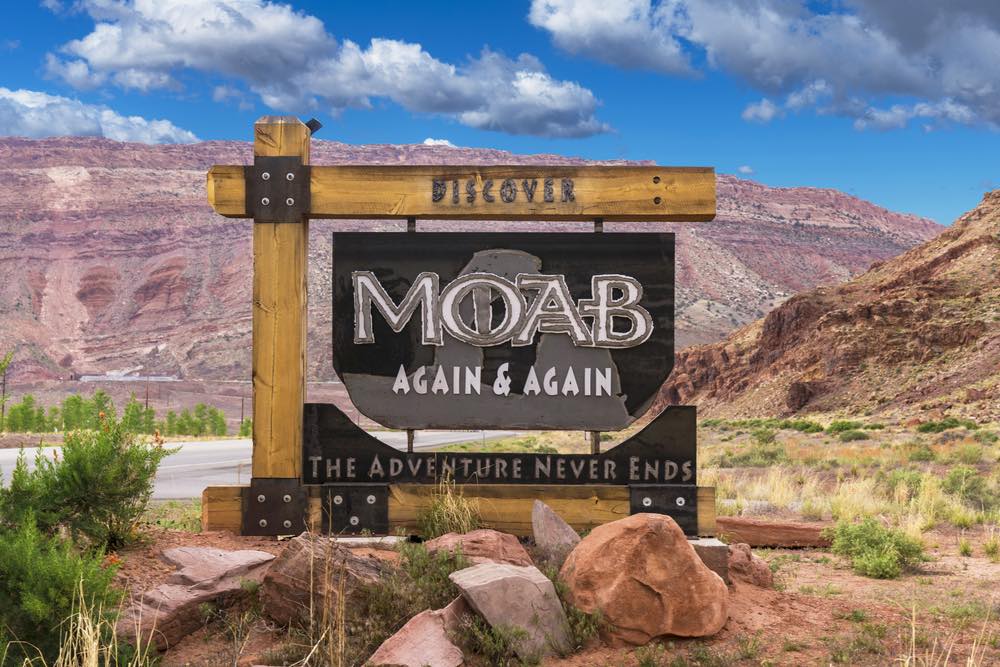
Day two of this Utah road trip is all about hiking and soaking up some of Utah’s most iconic scenery in Moab!
3.5 hours south of Salt Lake via an incredibly scenic drive lies 3 parks that are so breathtakingly beautiful, it’ll take two days to explore.
Dead Horse Point State Park, Canyonlands National Park, and Arches National Park all lie within miles of each other but the landscapes of each are so totally different.
Here’s how you should spend your first day in beautiful Moab.
Start the day with a delicious breakfast
As you roll into the quaint city of Moab, consider stopping for breakfast at the Love Muffin Cafe to fuel your hiking day.
They have all the breakfast classics including breakfast burritos, quiches and scones set in a brightly colored, eclectic cafe.
I’ve also heard rave reviews of Moab Cafe. Although I’ve never personally visited, it sounds like it’s worth checking out!
Head to Dead Horse Point State Park

Dead Horse Point State Park is the perfect introduction to the beauty of Moab.
It’s a sprawling 5,000-acre park set high among the desert landscape with towering cliffs and unrivaled views of the Canyonlands in the distance.
There are several pull-outs along the drive to the parking lot that are all worth the extra stops.
But to truly experience the spectacular sights, hike the Dead Horse Rim Loop Trail. This trail is a 5-mile loop that canvasses the rim of the canyon.
The most prominent view from the trail is hands down the overlook at the point of the Colorado River — it’s stunning!
Dead Horse Point also has a trail system for mountain bikers as well. If you’ve come prepared to bike, the park Intrepid Trail is a 16-mile single-track trail on dirt roads that offers the same unrivaled views with a bit more adrenaline.
Head towards Canyonlands National Park
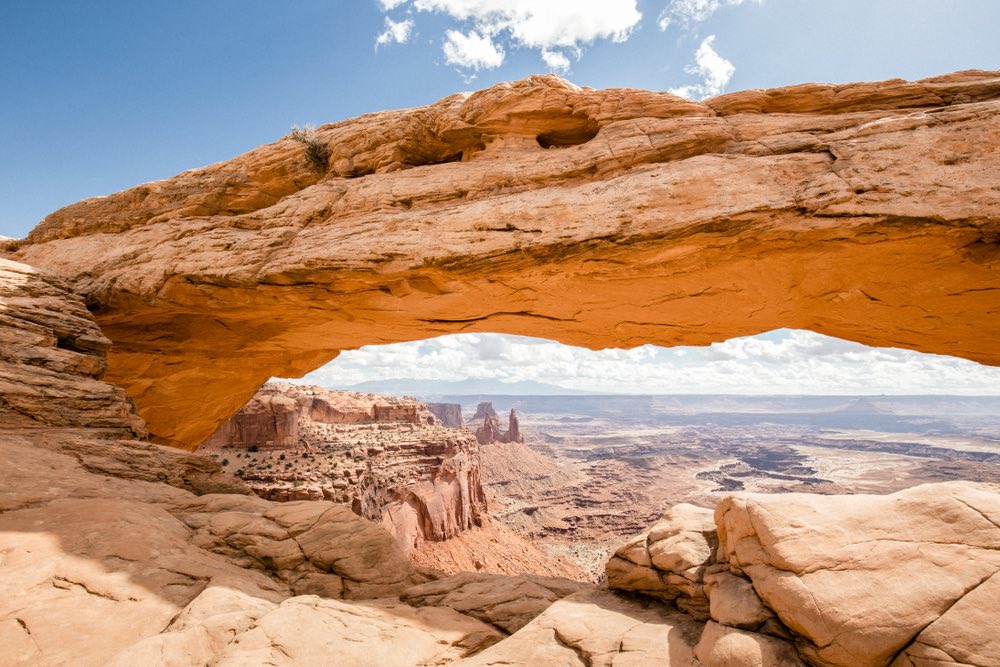
Rest your feet and make the short 12-minute drive over to Canyonlands National Park to the park entrance at the Island in the Sky Visitor Center.
Canyonlands is a massive park that has 3 different districts. For the sake of time, I recommend visiting the nearest and most accessible district called the Island In The Sky.
Here, you’ll find a comprehensive visitors center with rangers who are more than willing to help you plan your afternoon.
The Island In The Sky is the only paved district in Canyonlands National Park with easy access to well-marked trails; the Needles is beautiful but more remote and not quite suited for such a quick trip to Utah, and the Maze and the Rivers (consisting of the Colorado River and the Green River) are even more remote.
On your drive into the park stop at the Grand View Point Overlook. The overlook totally lives up to its name as it reveals jaw-dropping views into Monument Basin as you ascend via a scenic drive. You can also take the trail, which is an easy 1.8-mile hike.
Another iconic sight is Mesa Arch, a short and easy 0.7-mile trail that leads you to an arch that’s perched perfectly on the edge of Canyonlands Cliffs.
After a few dramatic photos of Mesa Arch, head over to Upheaval Dome, the last trek of the day. Upheaval Dome is attractive because of its odd geology and wild folklore that surrounds its creation.
An easy 2-mile wide trail takes you along the rim of the Dome and gives you a panoramic view of just how weird and wonderful the geology truly is.
Grab a drink to toast your hikes
After an entire day of hiking, you deserve a beer!
Back in the city of Moab is Moab Brewery. The perfect place to end your first day in the spectacular Utah desert. Moab Brewery is always fun, always lively, and always has plenty of beer!
The atmosphere is a fun mix of outdoorsman bar vibes. Kayaks hang from the ceiling and pool tables fill the corners.
You’ll find a massive selection of microbrewed beers including ambers, lagers, Hefeweizens and IPAs.
They’re also a full-service restaurant, so grab dinner and hang around for a bit.
Check into your Moab accommodations
There are several different options when it comes to accommodations in Moab. These include hotels, Airbnb, glamping, and camping.
If you’re wanting more of the comforts of home, there are plenty of commercial hotels located in the heart of Moab.
For something more unique look into the Moab Red Stone Inn or Moab Springs Ranch. Both offer a more low-key, secluded fee.
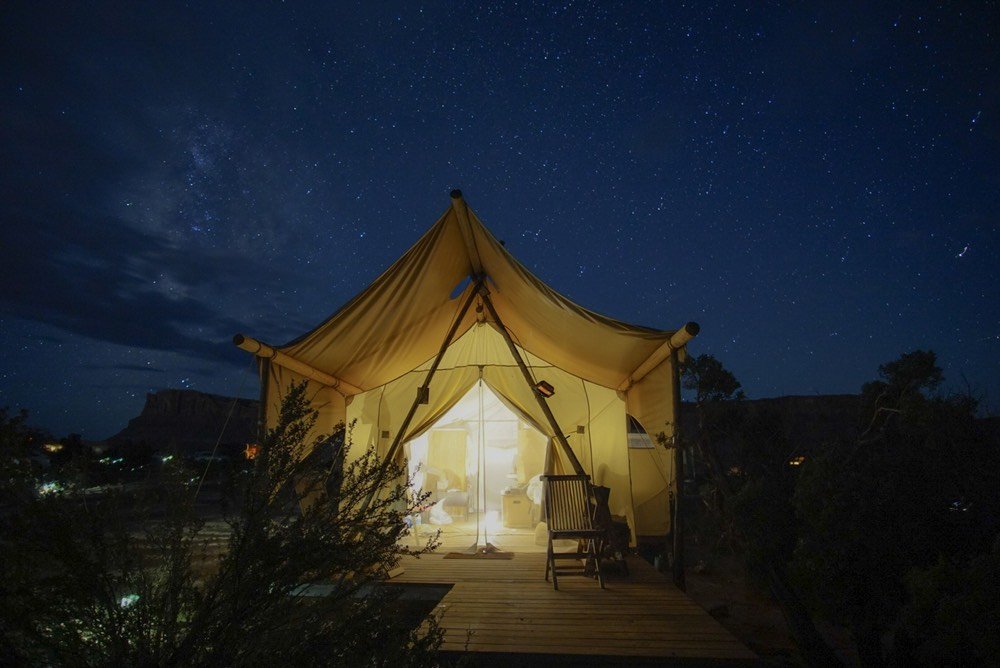
As for glamping, Under Canvas Moab knocks it out of the park in terms of comfort, style, and entertainment, and is frequently cited as one of the best glamping lodges in the entire United States.
If you’re wanting to go all in and camp under the stars, there are plenty of campgrounds dispersed in and around the city.
To find these, I recommend checking out my entire write-up on Utah’s incredible dispersed campsites or by using some well-known campground finder apps including The Dyrt, iOverlander, or rec.gov website.
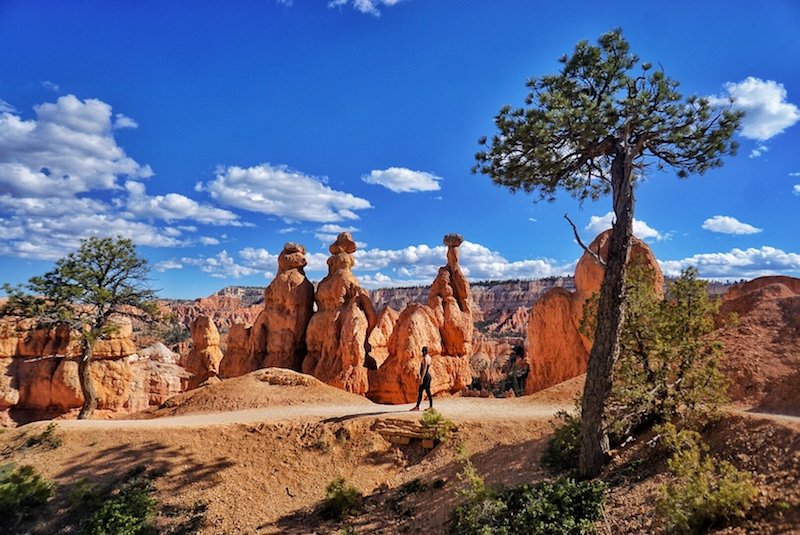
Day 3: Arches National Park
Wake up early while the city of Moab is still sleeping and get a head start on Arches National Park.
Arches National Park is one of Utah’s top attractions and draws over 1.5 million visitors a year. Because of its popularity, it’s important to beat the crowds if you want to experience Arches in all its glory.
Start with a sunrise hike to Delicate Arch
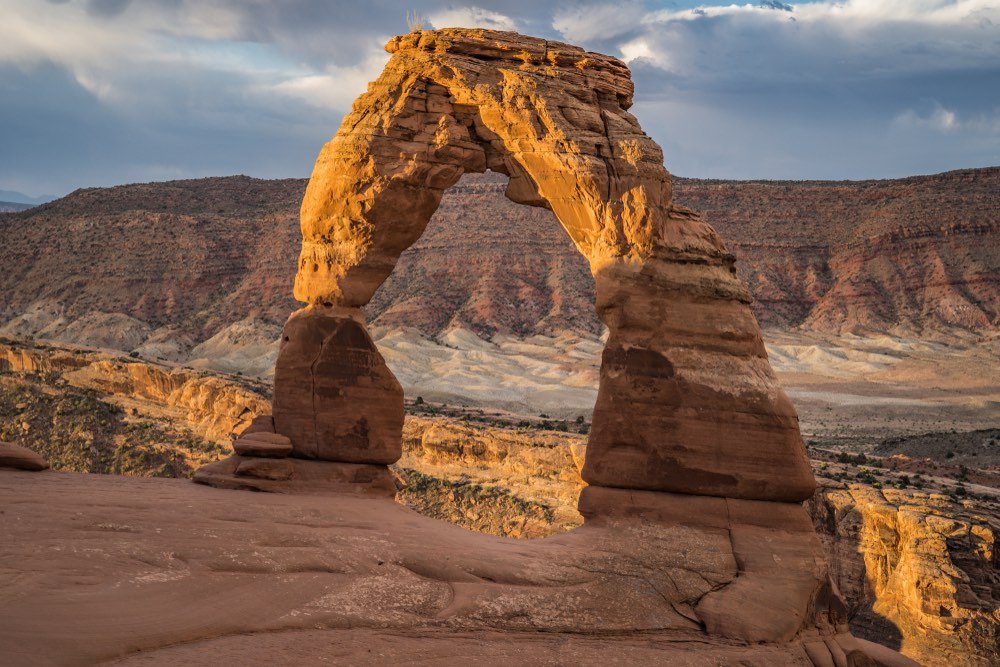
The iconic Delicate Arch should be your first destination and you should plan to hike it before the sun rises.
To make this possible, check the local times of the sunrise and plan to head out about an hour and half before this.
You’ll need a headlamp or flashlight for the first part of the 1.5-mile hike to Delicate Arch, as it will still be dark outside.
If you timed it correctly, you’ll reach Delicate Arch just as the sun begins to beam on its east side.
It’s an amazing experience to see the surrounding landscape wake up and to watch Delicate Arch glow under the newly risen sun.
Wander the Devils Garden
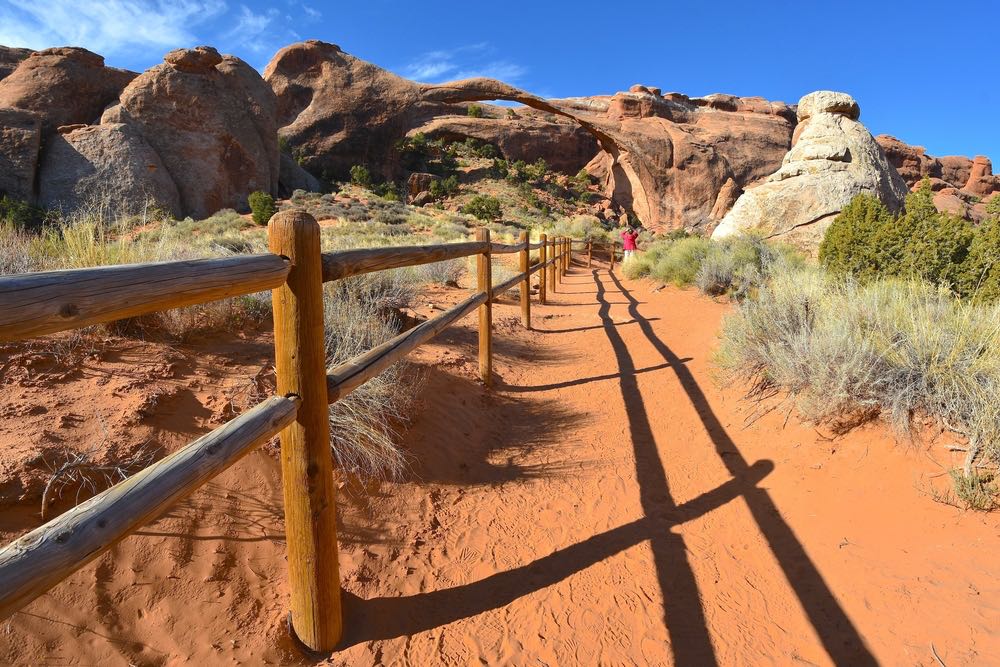
After you’ve captured photos of Utah’s most iconic arch, continue driving on Arches Entrance Road until you reach the Devils Garden Trailhead.
This 7-mile trail can easily be broken up into something more manageable (2-3 miles) while still offering insane views of the otherworldly landscape.
Massive boulders, tunnels, and arches are the highlight of this trail, as well as its tranquility.
Devils Garden is much less crowded than the surrounding trails and offers a great opportunity to bask in the uniqueness of Utah in peace.
On the way back, be sure to stop in Fiery Furnace which has some of the best views and reddest rocks in Arches.
Snap some final photos of Arches
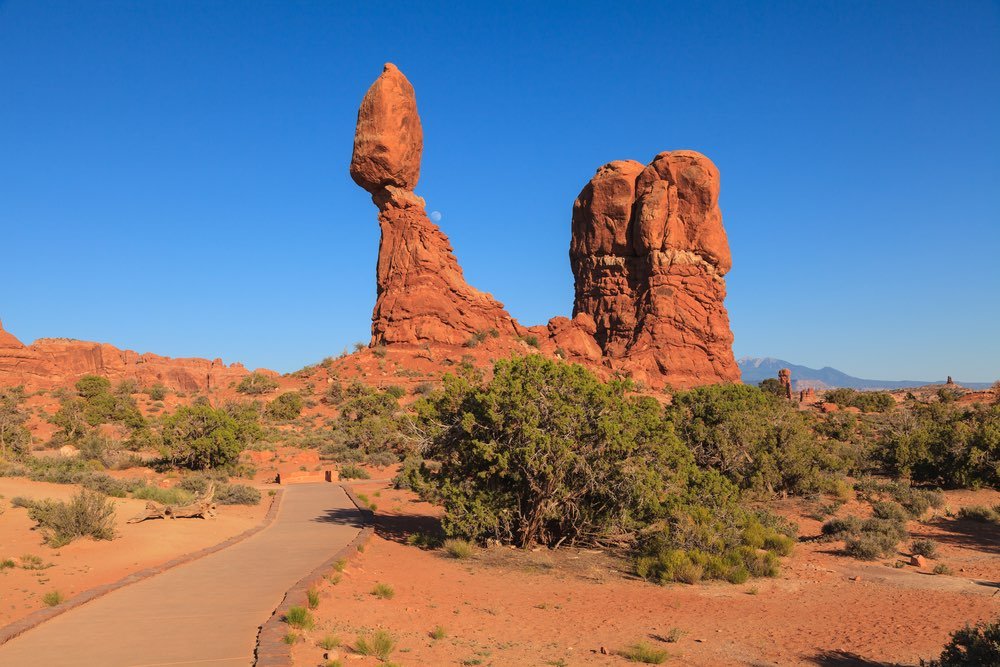
As you meander your way back to the entrance, take this chance to capture some stunning photos at the multiple pull-outs spread throughout the park.
Balanced Rock, the Windows, Double Arch, and Petrified Dunes Lookout are just a few spots worth a quick stop.
You also should make sure to visit the longest arch in the entire park, Landscape Arch, which is accessible via an easy 1.9-mile out-and-back trail.
The day should still be early enough to capture the stunning lighting and natural beauty of the surrounding rock formations.
Grab lunch and gas before hitting the road
Stop off in Moab for a bite to eat and gas up the car before you hit the road again to head towards your next destination.
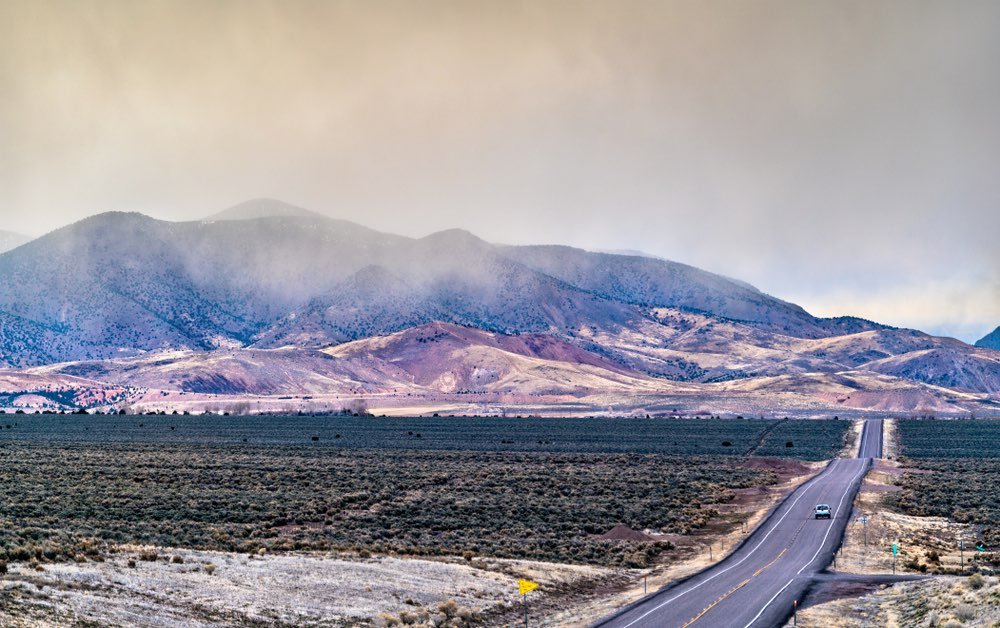
The afternoon will be spent driving to Bryce Canyon National Park. The 4-hour drive from Arches National Park to Bryce Canyon National Park is absolutely stunning.
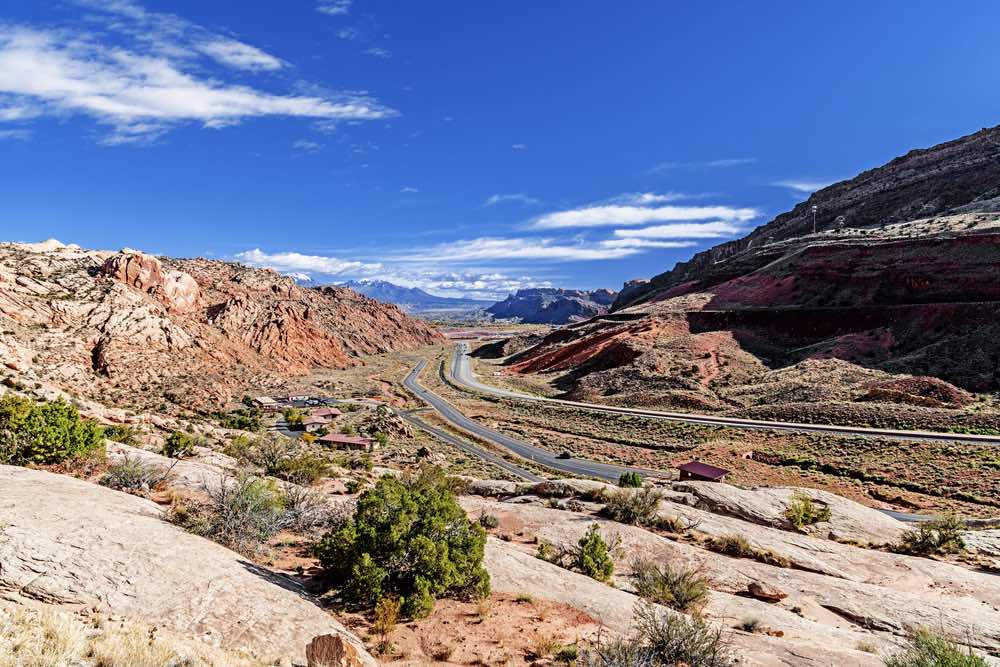
You’ll leave Arches and head West on highway 70. As you leave the desert landscape of Moab you’ll be transported into the mountainous scenery as you head south through Highway 24.
If you don’t want to visit Capitol Reef National Park, you can shave an hour or two off your drive time by skipping Highway 24, instead going a more direct route to Bryce via Highway 72 and Fishlake National Forest. However, for the purposes of this post, we’ll go the scenic route so you can visit Capitol Reef!
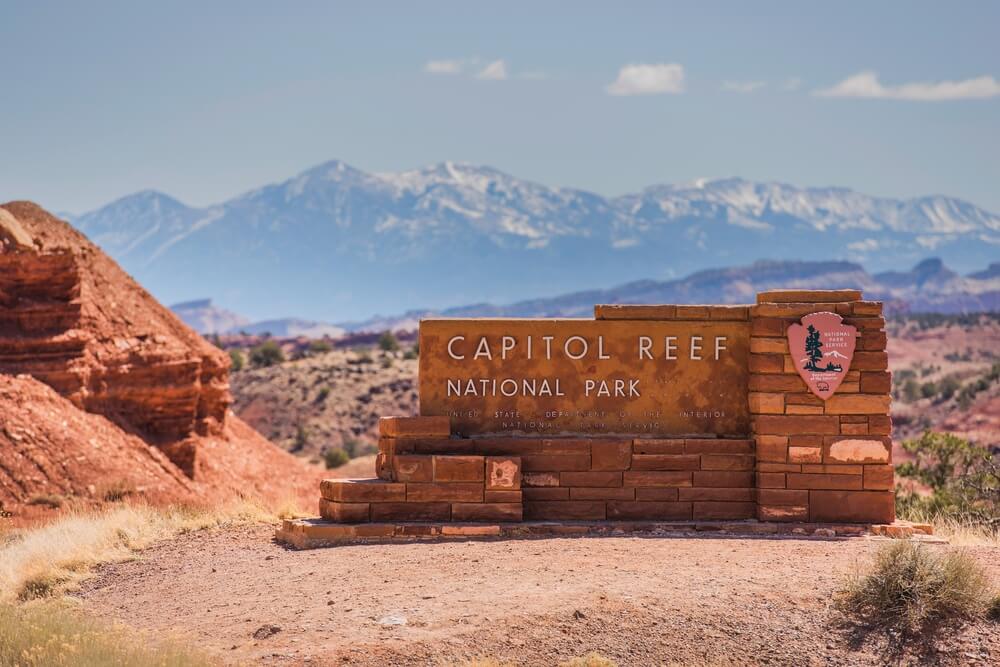
Stop quickly in Capitol Reef National Park
With only 7 days in Utah, it’s hard to tackle all of the Mighty 5 and do them proper justice.
This Utah itinerary focuses more heavily on the Southern Utah national parks, but that doesn’t mean we can’t pop into Capitol Reef on the way to Bryce from Moab!
We won’t have time to take on some of the best hikes in Capitol Reef, but we can definitely see a few of the most beautiful landmarks there that are easy to access by car.
As you near Torrey, be sure to stop off at Factory Butte, a stunning and off-the-beaten-path land formation that looks like it could be something out of Mars. It’s right off Highway 24 so you can’t miss it.
For a quick but scenic spin through the park, stick to the parts of the park near Torrey that are accessible via Highway 24, all centered around the Visitor Center.
This includes the Fruita Schoolhouse, the Petroglyphs, Hickman Natural Bridge, and the gorgeous views at Panorama Point.
If you have a national park pass, as you should, then you can also visit a few places within the park within an easy drive. That would include Fruita Barn, the Gifford Homestead, and if you have time for a hike, the Cassidy Arch Trailis a phenomenal 3.1-mile out-and-back with one of the best views in all of Capitol Reef, rated as moderate.
Arrive in Bryce Canyon National Park
As you turn south and head towards Bryce, the topography changes one final time into a mix of bright red cliffs, canyons, and hoodoos.
The first sighting of a hoodoo along a scenic drive is a great indication that Bryce Canyon is just around the corner!
The city of Bryce is a small, quiet town that lies minutes outside the National Park. Although limited on hotels and restaurants, it’s easy to find a place to have dinner and a warm place to sleep.
You can also stay in nearby Escalante, which is halfway between Capitol Reef and Bryce Canyon and is home to Yonder Escalante, a great accommodation choice with cute cabins and Airstreams available for rent.
Grab dinner and hit the sheets
Hell’s Backbone Grill & Farm, Big Fish Family Restaurant and Stone Hearth Grille are a few restaurants that cater to weary travelers looking for a hearty meal.
As far as hotels, check out the Stone Canyon Inn or Bryce Canyon Log Cabins in nearby Tropic.
Each resort is immaculately maintained and offers stunning views of Bryce Canyon in a private setting.
Of course, Bryce Canyon is also brimming with campgrounds. There are two campgrounds inside the park, North Campground and Sunset Campground, as well as options for backcountry camping.
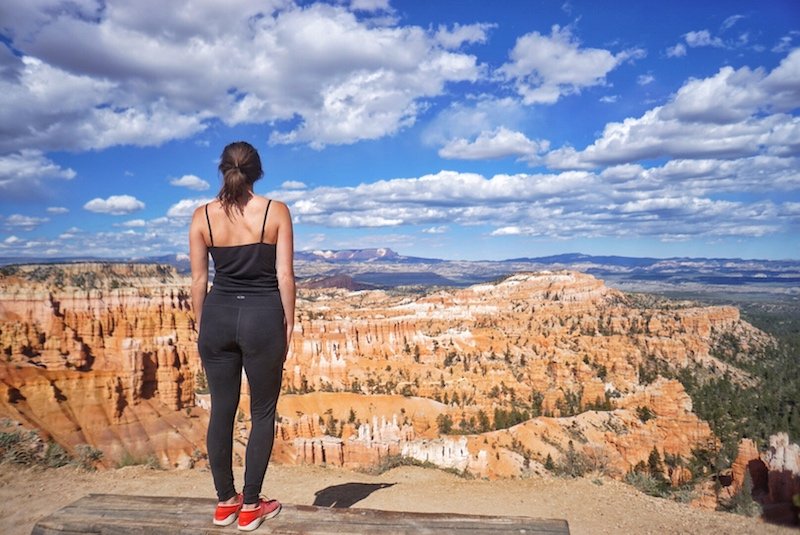
Day 4: Bryce Canyon
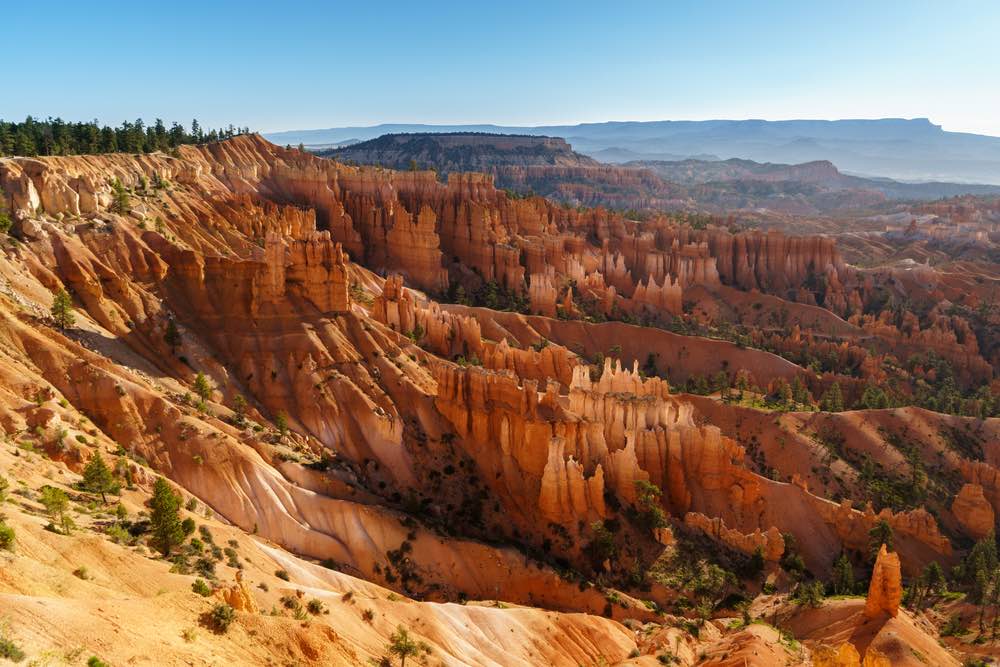
Bryce Canyon is purely about the landscape!
With the largest concentration of hoodoos and brightly colored cliffs, Bryce Canyon is a geologic wonder that resembles Mars.
Hikers will adore the plethora of beauty that is easily accessible via the trails in the park!
While the classic Bryce Canyon Rim Trail would be amazing to do, at 11 miles roundtrip, it’s not doable for this itinerary, so save it for a return trip. We’ve listed a few shorter day hikes that are better suited for one day in Bryce instead.
Do a hoodoo hike
There are several different ways to enjoy one day in Bryce in an adventurous and active way!
Hike the Navajo Loop Trail or Queens Garden Loop inside the core section of the park to experience the topography from within the canyon.
Navajo Loop is a personal favorite and you’ll enjoy absolutely stunning views from everywhere on this canyon trail!
… Or hop on a horse or ATV!
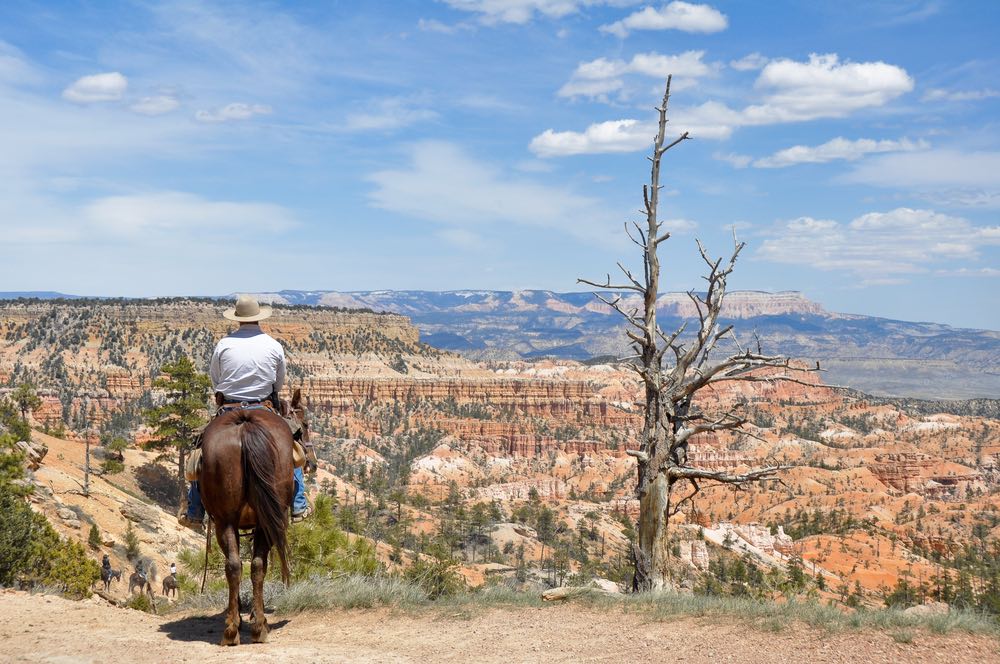
If your feet are exhausted from the previous days’ hikes, no worries — there’s still plenty of ways to experience Bryce Canyon without needing to hike.
Hop on a horse for a horseback excursion on a canyon trail ride or pump up your adrenaline with an ATV tour!
Either is a great way to stay active and see the best that Utah’s Mighty 5 have to offer without overexerting yourself.
Get the best sunset view in Utah

As the sun begins to set, head to Sunset Point to watch the most phenomenal sunset cover the canyon.
It’s probably the best place to catch the sunset in all of Utah, with its hoodoos, red rocks, and wide-open skies.
As the skies begin to darken, catch the glory of the stars, as Bryce is part of the world-renowned International Dark Skies club.
Of course, if you’re too tired for sunrise — or you just want to double up on the beauty of Bryce — another option is to do an early wakeup call the following morning at Sunrise Point, which offers a great vista from a viewpoint better oriented for the rising sun.
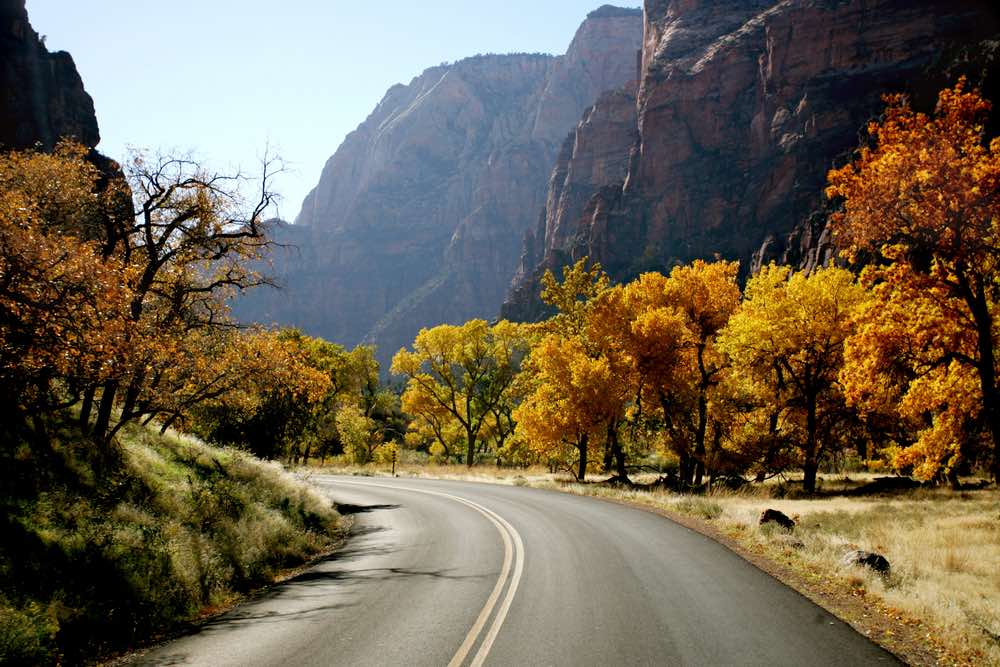
Day 5: Springdale and Zion
Wake up early and start the 2 hour drive to Springdale, Utah.
What makes the Beehive State so unique is the opportunity to experience dramatic landscape changes over the miles and the drive from Bryce to Springdale is a prime example of this.
Start at the East Entrance of Zion
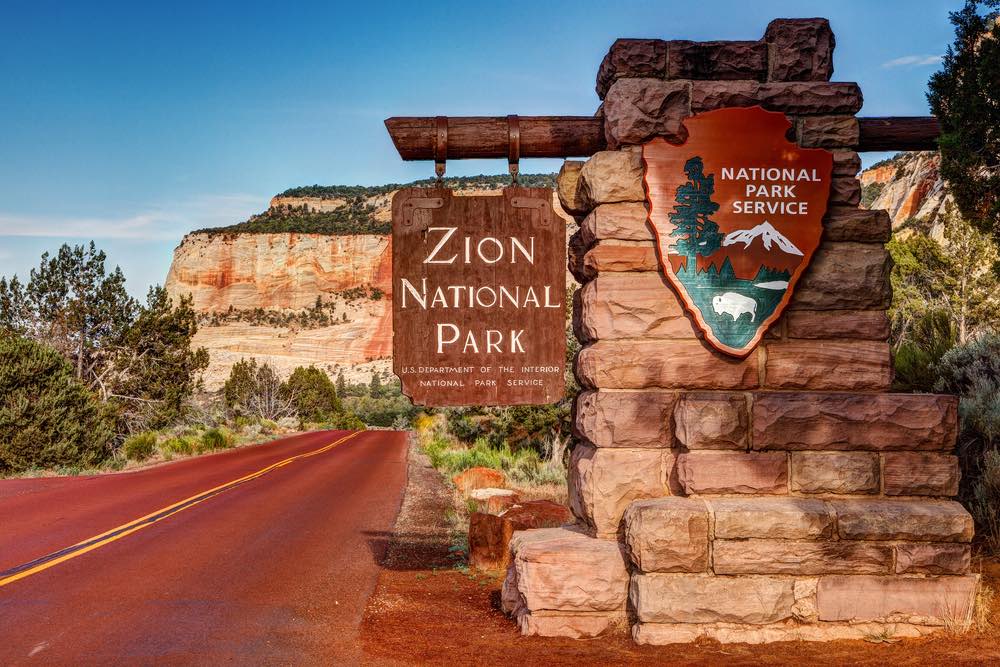
Head south down highway 89. From here, you’ll hit the East Entrance of Zion National Park first.
I recommend coming in from this direction because it allows you to drive through the entire length of Zion before hitting the main headquarters of the Park.
There are no words to describe the beauty of Zion. Sky-high mountains loom over deep purple slot canyons, multi-layered rock formations weave among the cliff sides, and wild animals can be seen crossing the street.
The beauty will captivate you all the way to the visitors center where you’ll catch a park shuttle to the epic water hike of The Narrows.
Hike to the Narrows
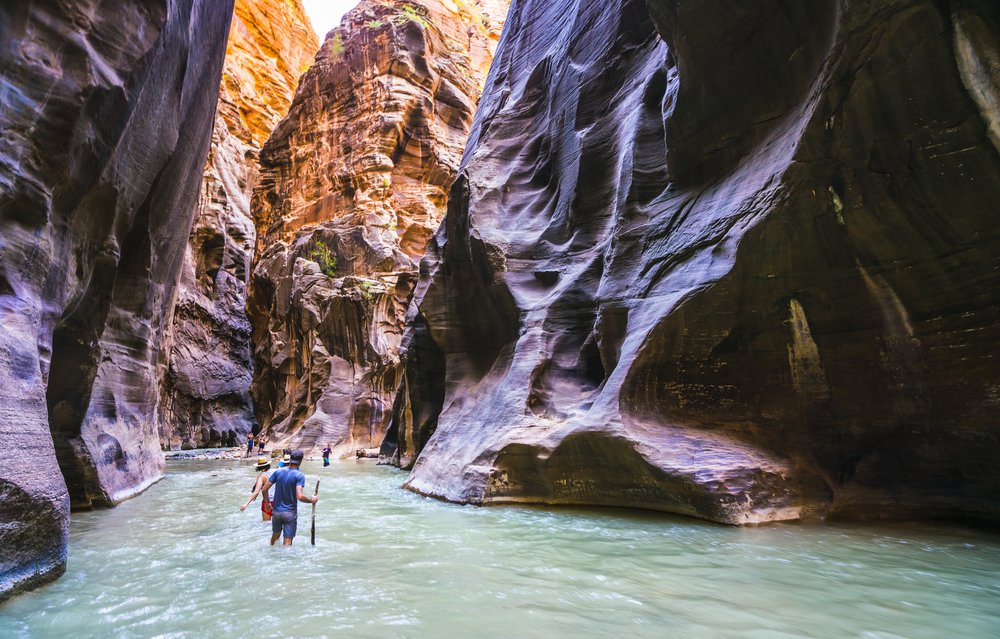
The Narrows is by far the top trail in Zion for discovering the interior slot canyons, and it’s a must-see on the bucket lists of hikers everywhere.
Some visitors rent waders and gear from the nearby Zion Outfitters but I don’t see this step as absolutely necessary. If you’re wanting to save money, it’s perfectly acceptable to hike without being outfitted.
Waterproof hiking shoes, however, are absolutely needed, or you’ll be regretting it. Trust me.
Jump on the shuttle and head to the last stop, Temple of Sinawava. From here, make the 1-mile paved hike into The Narrows.
The beauty of this hike is you can make it as long, or as short as you desire. The entire trail will be water wading while you explore between two towering canyon walls that tend to change color as the sun orbits over.
Get in as much, or as little, hiking in as you like and head back to the visitors center to claim a campsite.
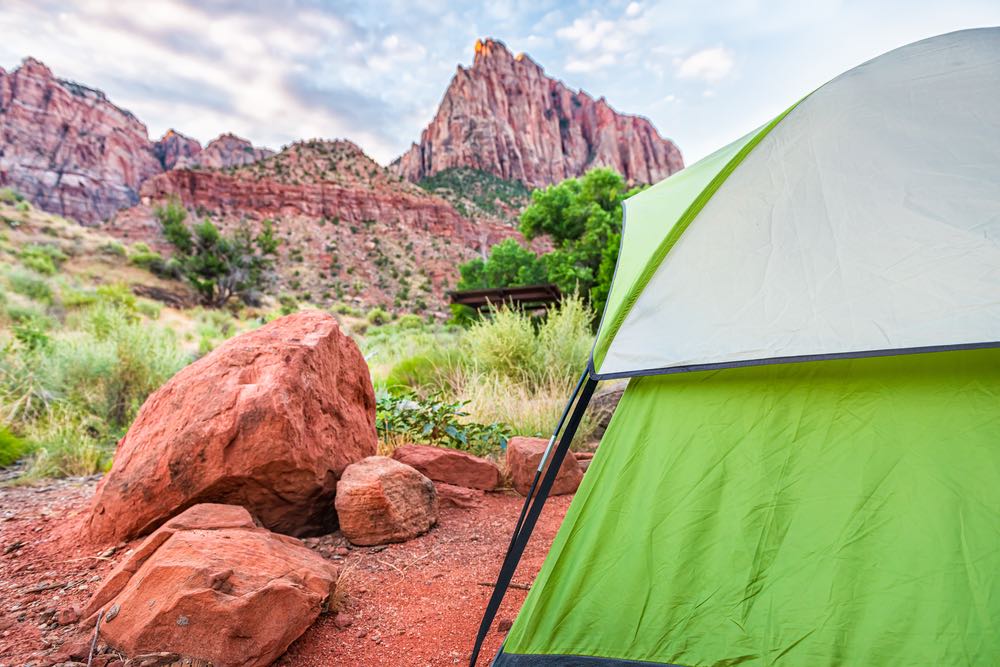
Grab a campsite or check into a hotel
The Watchman Campground is the only public campground in the park and fills up quickly.
This is a gorgeous, shaded campground sitting at the foot of the Mountains with a paved walking path along the Colorado River and within walking distance to the bustling city of Springdale.
If you can’t (or don’t want to) snag one of the limited campsites in Zion, there are plenty of wonderful hotels in Springdale.
I recommend Cable Mountain Lodge or Springhill Suites, with their stunning floor-to-ceiling windowed lobby with incredible Zion views. Another classic is the Zion Lodge which must be booked months and months in advance.
Head to the city and grab a bite to eat at The Spotted Dog (American), Zion Pizza and Noodle (pizza), or the Whiptail Grill (Mexican).
Shop around the many unique, handcrafted stores and head back to camp to enjoy a night under the stars or to your hotel for some creature comforts in a beautiful setting.
Day 6: Zion National Park
Grab a delicious cup of coffee before hitting the trail
Wake up early and hit Deep Creek Coffee for a pre-hike meal and hand-crafted coffee. You’ll need the energy for this hike!
Today’s trail, Angels Landing, is a strenuous uphill hike to the tops of Zion so you’ll need to properly fuel your body.
If you’re feeling extra energized this morning, rent a bike from Zion Cycles and skip the shuttle!
You can bike to the trailhead of Angels Landing as well as the rest of the park. Although a big undertaking, it’s a great alternative to beating the crowds.
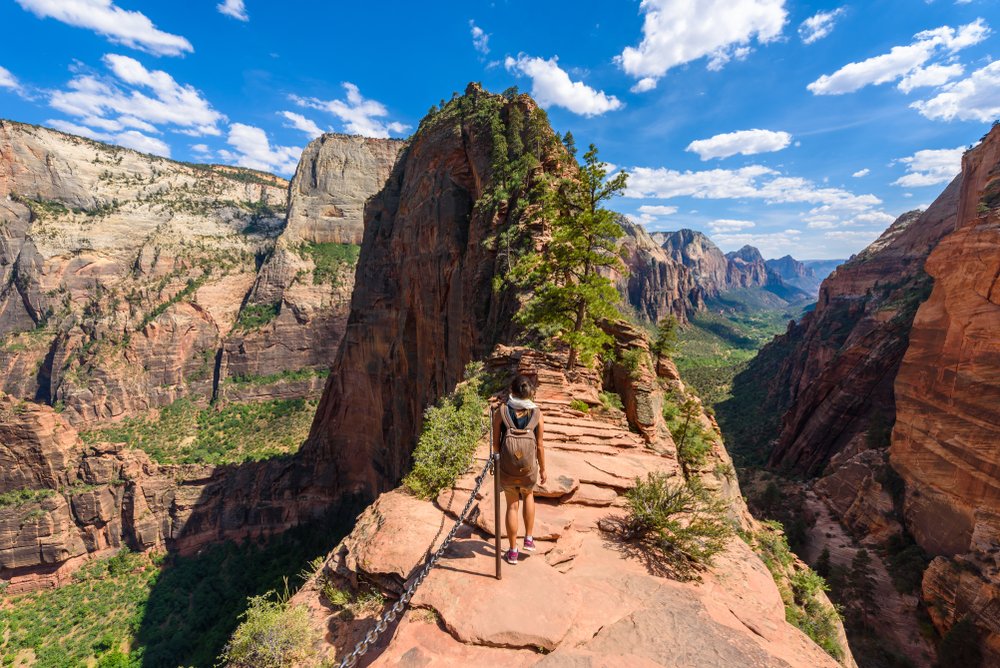
Angels Landing is arguably THE top hike in Zion and for a good reason. This 5-mile trail climbs up and over the canyons of Zion and gives you a birds-eye view of the true beauty of the park.
Summiting Angels Landing is an exhilarating experience! As you ascend, you’ll be assisted by chains that are hanging off the sheer cliffside offering a heart-pounding experience.
Once at the top you’re greeted by the most epic view on earth. Catch your breath and enjoy the beauty before you.
Want a different view? Head up to Observation Point. While normally this is a harder hike than Angel’s Landing, the East Rim to East Mesa approach is closed due to the danger of rockfall.
The easier route via East Mesa is still accessible though, and is only rated as moderate. It involves a 6.7-mile out-and-back trail with only 700 feet of elevation gain (the hard Observation Point trail involves well over 2,000 feet of elevation gain!).
For this trailhead, I suggest you park at the intersection of Beaver and Fir Roads if you don’t have a high-clearance vehicle.
Celebrate your summit with a drink
Descend Angels Landing and head back to town for a celebratory beer at Zion Brewery.
Located creekside to the Colorado River, Zion Brewery has the perfect patio to enjoy the afternoon while you recharge and reminisce.
Once you’ve had a beer… or three, cool off at the riverbank or tackle a shorter Zion hike around sunset for even more epic views.
Hit Zion Canyon Overlook Trail for sunset
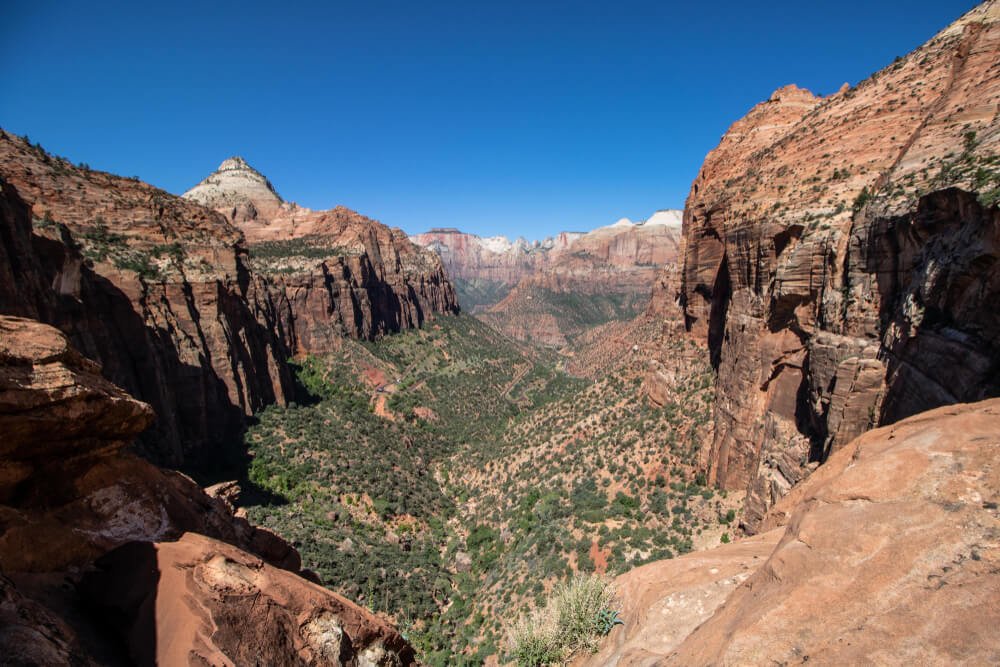
For a great view worthy of the final full day of your Utah itinerary, head to Zion Canyon Overlook Trail for sunset.
It’s a super short trail, less than 1 mile out-and-back and rated as easy, though there is about 400 feet of elevation gain. It’s absolutely worth it!
Parking is limited so you may have to circle around for a spot. Give yourself some extra time to find parking if you’re going at sunset as it is a popular sunset spot.
Day 7: Back to Salt Lake City
The last leg of your journey will be spent making the 4.5-hour drive back to Salt Lake City.
Don’t let the longer drive intimidate you, there are plenty of stops you can make along the way to break up the drive.
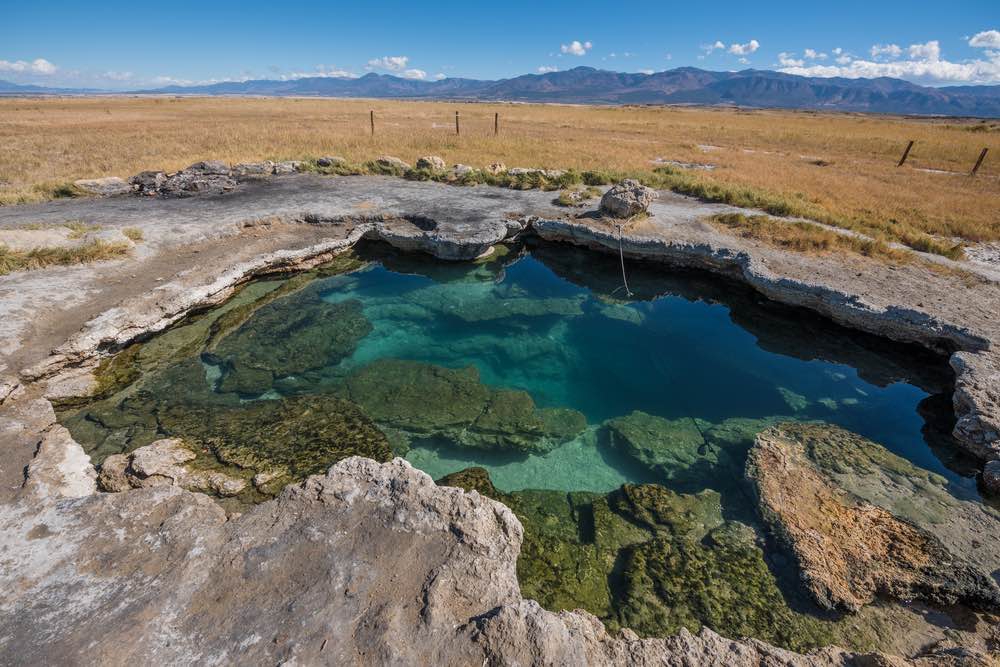
A few options I recommend are visiting the ghost town of Grafton, stretching your legs at Cedar Breaks National Monument or soaking in the natural hot springs along the way.
As you head north to Salt Lake City, you’ll conveniently pass two opportunities to soak in Utah’s many natural hot springs.
Mystic Hot Springs and Meadow Hot Springs are both located off Highway 15 and welcome tourists to enjoy the soothing heated waters. It’s the perfect ending to your 7-day road trip across Utah.
I hope this 7 day Utah itinerary inspires you to get out and enjoy this beautiful and truly unique state!
Read Next
I have so many posts to help you plan an epic trip through the Southwest, from general packing guides to quotes to inspire your trip to detailed itineraries just like this one for neighboring states!
Here are my suggestions for where to go next.
What to Pack for a Road Trip: The Ultimate Road Trip Packing List
Road Trip Quotes: The Best Road Trip Quotes & Instagram Captions
Arizona Road Trip: The Perfect 7 Day Arizona Road Trip Itinerary
Southwest USA Road Trip (Nevada, Arizona, & Utah): The Ultimate Southwest Road Trip Itinerary for 10-14 Days
Idaho Road Trip: The Best Idaho Road Trip Itinerary
Montana Road Trip: The Perfect 10 Day Montana Road Trip Itinerary
Sabra is an adventure-hungry outdoor enthusiast originally from Dallas, Texas. She has been to 33 states, 3 countries, and has traveled America while living out of the back of her truck. Besides writing, Sabra can be found powerlifting, running her online personal training business, and enjoying time with friends and family.
We followed this itinerary last week on our trip to the “Mighty Five” and everything you said was spot on. Your restaurant and hotel suggestions were perfect as well as advice on “must do” hikes and trails and how much time was needed to get from place to place. Thank you for doing the research and posting your adventures. We had an incredible trip!
Awesome Michele, I’m so happy to hear you felt that way!