7 Epic Things to Do in Arches National Park in Winter

Among the five iconic national parks in Utah, often referred to as the Mighty Five, Arches National Park may be the most recognizable.

From Delicate Arch’s feature on the Utah state license plate to influencer snaps of natural arches across social media, most people need no convincing to visit Arches National Park once they know what it is.

In the summertime, the park is bustling with visitors, sweaty and eager to see all the top attractions in the park, and the roads can be clogged up with people trying to fit in all the hotspots on their Arches itinerary.

⌛ Planning your wintery Arches trip in a hurry? Here are my quick picks.

❄️ Best Arches Tours & Experiences
1. Half Day 4×4 Tour of Arches National Park
2. Full Day 4×4 Tour of Arches & Canyonlands National Park
3. Arches 4×4 Tour & Hiking Experience

🛏️ Best Arches NP Area Hotels
1. Red Cliffs Lodge (comfortable lodge at mid-range prices)
2. Under Canvas Moab (gorgeous glamping with wood stoves for heat)
3. Element Moab (budget-friendly, spacious rooms)

Arriving in Utah by plane and driving to Arches?
→  Book your rental car here!
A family in winter clothing hiking in Arches National Park in winter at the Windows Arch area on a cloudy day

On the other hand, winter is a much more serene season in Arches.

In addition to its quieter crowds, its natural beauty is emphasized when the occasional dusting of fresh snowfall creates a stark white contrast to the naturally-red canyon walls and natural arches.

Although daily visitors tend to drop correspondingly with the lowering temperatures, there’s still a ton to do in Arches National Park in winter!

Things to Do in Arches National Park in Winter

Take a scenic drive through the park.

View from afar of the beautiful Turret Arch (which looks like a castle made of natural rock arch) against a backdrop of snow-covered tall mountains, with some light snow on the ground as well.

Embark on a picturesque journey through Arches National Park by car, meandering through its striking red rock formations.

Luckily for those who want to avoid the winter cold as much as possible, many of the park’s iconic attractions can be admired right from the comfort of your car.

For those colder winter days, taking the scenic drive of Arches in winter outlined below offers a cozy way to explore.

Crank up the car heater and enjoy a warm Thermos of hot chocolate!

Start your journey from the park’s main entrance, with a brief pit stop at the visitor center to get oriented, before you make your way through the main scenic route.

If you can allocate about 5 hours, you’ll have ample time to navigate all the paved routes within the park, allotting a leisurely 10-15 minutes at each viewpoint.

As you cruise through the captivating landscape of Arches National Park, make sure to take detours to The Windows Section, Wolfe Ranch, and the Delicate Arch Viewpoint.

These spots are undoubtedly among the park’s prime attractions accessible by car.

Hike to the scenic Delicate Arch.

A view of a single orange sandstone arch against a backdrop of snow-covered mountains and a blue sky.

If you were to have to make the difficult decision of just one winter hike in your visit to Arches National Park, the Delicate Arch Trail should be at the top of your list!

The 3-mile roundtrip journey brings you up close and personal with the larger-than-life.

It takes approximately 2-3 hours, varying with conditions — owing to the trail’s terrain icy patches are common.

It’s wise to pack some crampons for icy terrains, though refrain from using them on exposed sandstone since that can damage the landscape.

What makes this the premier winter hike in the park? Isn’t it obvious?

It’s all about the awe-inspiring backdrop of the snow-clad La Sal Mountains behind Delicate Arch, an icon of the park: a truly unparalleled panorama.

Take a hike to Landscape Arch.

the landscape of the devils garden area of arches national park, with a view of landscape arch with snow and a tree and a blue sky in the background. this is the largest arch in the world

In winter and summer alike, Devil’s Garden stands out as a favorite hiking spot in Arches National Park.

In winter, it’s a good choice due to its relatively smooth trails and a series of magnificent arches.

Two primary trails beckon: one leading to Landscape Arch and another to Double O Arch (detailed below).

Landscape Arch, a marvel within the Devil’s Garden, boasts the title of North America’s longest arch, spanning an impressive 306 feet!

Although a section of the arch fell in the 1990s, it still stands as a complete arch — at its thinnest, it measures a mere 6 feet across.

The 2-mile roundtrip to the Landscape Arch serves as a fantastic midpoint for those who don’t want too much of a challenge.

Make the longer trek out to Double O Arch.

The famous Double O Arch in winter, two arches one on top of the other in the winter snow with a sunburst coming through the top arch.

For those seeking an added dash of challenge, extending the hike to Double O Arch is a must, but be careful in snowy conditions.

The trail’s terrain is uneven, and certain stretches have narrow pathways flanked by steep drop-offs.

In snowy and icy conditions, this hike should be reserved for the adept winter hiker!

Spanning just over 4 miles roundtrip, the journey to Double O Arch is demanding but promises unmatched rewards, even with winter’s added challenges.

Enjoy some winter photography.

A view of a hiker as seen through a large circular arch, entering a winter wonderland of red rock and snow.

If you are lucky enough to visit Arches National Park soon after a fresh snowfall, you simply must explore the park with a camera in hand!

The fresh powdery snow lining the red rock features and magnificent natural arches is something that very few people are lucky enough to see in person.

Although Arches National Park does typically receive a half-foot of snow each year, it melts quickly once met by sunshine.

Some of the best places to explore for winter landscape photography are The Windows Section and Devils Garden.

Both of these areas offer maintained hiking trails and opportunities to photograph snowy arches.

Take a 4×4 tour of Arches (and maybe Canyonlands!)

A sunrise view of a snow-covered Mesa Arch illuminating the canyon below, lots of detail covered in snow, on a cloudy day.

If you’d like to take a break from winter hiking in Arches National Park, another great way to see the epic Utah winter landscape is by 4×4 tour!

You can take a half-day 4×4 tour leaving from Moab, which will tour Arches off-road.

On this half-day tour, you’ll get to see several spots that regular visitors by car just can’t get to, including Tower Arch, Eye of the Whale Arch, the Marching Men, and more.

Book this half-day 4×4 tour!

Alternately, you can opt for a full-day 4×4 tour that encompasses both Arches and Canyonlands, ticking two Utah National Parks off your bucket list with one off-roading adventure.

In addition to seeing Arches, you’ll also get to explore the massive Canyonlands park.

This full-day Arches and Canyonlands tour covers the Island in the Sky part of the park, one of the more accessible parts of the park.

It also includes driving along Shafer Trail, seeing Tower Arch, and getting to check out ancient fossilized dinosaur tracks!

Book this full-day 4×4 tour of Canyonlands and Arches!

Marvel at Dead Horse Point State Park

A landscape resembling the Grand Canyon with lots of layered rock carved away by the bend of a river, all the layers of rock are covered in a light snow, alternating orange and white colors.

While this guide covers traveling to Arches National Park in winter, one of the best things of basing your winter itinerary in Moab is just how close it is to several incredible national parks and state parks.

Head outside the park for a half-day trip to Dead Horse Point State Park, which is one of the most beautiful places to visit in Utah.

It’s even more spectacular in the winter if you’ve been lucky enough to get a bit of snow!

Where to Stay Near Arches

Glamping tent lit up from within with starry sky behind it

Winter Glamping: Moab Under Canvas

I finally got to stay at Moab Under Canvas on my last trip to Moab and it did not disappoint!

The tents were laid out so thoughtfully and I loved the amenities like the in-tent bathrooms, including hot showers!

There was also a wood stove in the tent which would have made it great for chilly nights, too (I visited in the summer, but it looks well-appointed for winter visitors, too!)

Book your stay at Under Canvas Moab here!

Mid-Range Comfort: Red Cliffs Lodge

Located right on the Colorado River, this gem is a bit outside of Downtown Moab and Main Street but it’s worth the small sacrifice of convenience for a location this spectacular. 

There’s an on-site pool, hot tub, fitness area, and restaurant, and there are also activities available such as wine tasting and horseback riding that the property can organize.

Check prices and availability here!

Budget Stay: Element Moab

Lots of hotels in Moab can be on the pricy side, but this comfortable, large hotel is one of the better-priced options in the region.

The rooms are huge and spacious, especially for the price you pay!

Check rates and availability here!

Winter Weather in Arches National Park

Snowy view of Arches National Park in the winter, looking through one arch and seeing a larger complex of arches through the "window", red rock covered in snow.

Arches National Park in winter is generally pleasant and not too cold, with periodic (though not guaranteed!) snow.

While Arches isn’t extremely cold in the winter, it is at a relatively high elevation.

The lowest elevation part of the park is 4,085 feet at the Visitor Center; the highest elevation is at 5,653 feet.

Due to that, Arches experiences more snowfall than lower-elevation parks at a similar latitude.

The table below shows average temperatures in Arches National Park during the winter:

MonthHigh TemperatureLow Temperature
December41° F20 °F
January40° F18° F
February49° F25 °F

Arches Winter Road Conditions

Arches national park in the winter with landscape and building that is no longer in use

Arches Scenic Road

The Arches Scenic Road is the main paved road through the park.

From this main road, visitors can access the most popular attractions in the park, such as Balanced Rock, Devils Garden, Double Arch, and more! As the main access route in the park, the Arches Scenic Road remains open year-round.

Closures can occur on the Arches Scenic Road for snow removal operations. Call or visit the Arches Visitor Center for a current road conditions report.

Be sure your vehicle is suited to travel the potentially icy roads following winter weather.

Salt Valley Road

In warm season’s dry conditions, the Salt Valley Road, which connects Arches National Park’s main paved road to the Klondike Bluffs and Tower Arch Trailhead, is a two-wheel-drive road fit for most vehicles.

Although come wet or snowy conditions often seen in the off-season, the road can become impassable even with four-wheel-drive capabilities.

This road is not well-marked and is entirely unpaved.

The 10-mile stretch connecting the Devils Garden area of Arches National Park to Highway 191 outside of the park makes a great alternative entrance or scenic detour during promising weather.

The road also offers a faster and more direct exit from the park toward the amenities of town.

The Perfect 7-Day Mighty 5 Utah Road Trip Itinerary

Anybody who loves the outdoors needs to visit the incredible state of Utah!

Utah has so many options including phenomenal national parks (five of them!), hot springs, ski resorts, and more!

Pack your bags and your camera because this 7-day Utah itinerary has all of Utah’s unique destinations laid out in the perfect order.

I’ve ensured you hit all the top attractions and snag some of those drool-worthy Instagram pictures you see plaguing your feed, as well as suggesting a few off-the-beaten-path gems, while road tripping the Mighty 5 in Utah!

PLANNING FOR UTAH AT A GLANCE: 

When to Go: With mellow summers and stunning snow-covered winters, Utah is beautiful all year round but since you'll be spending a tremendous amount of time in the outdoors, I suggest going in the months of April-May and September-October. But if I had to pick just one month to go, I'd choose October — the crowds are fewer, the weather is appealing, and fall foliage is in full swing. 

Where to Stay: For this itinerary, you'll have sleepovers in Salt Lake City, Moab, Bryce Canyon National Park, and Springdale or Zion.

For the first overnight stay in Salt Lake City, I recommend staying at Kimpton Hotel Monaco for a luxurious stay in downtown SLC.

Moab has several accommodations but for something exclusive, I suggest staying at either Moab Red Stone Inn or Moab Springs Ranch. And if you prefer glamping, Under Canvas Moab is unmatched when it comes to comfort and style.

And for a sleepover near Bryce Canyon National Park, Stone Canyon Inn or Bryce Canyon Log Cabins in nearby Tropic is what I recommend or you can even opt for camping within the park itself at any of its 2 campgrounds.

And as for your last days on your Utah road trip in Springdale, you can either choose to camp inside Zion but if you can't find a campsite or just don't want to, then you can stay at either Cable Mountain Lodge or Springhill Suites in Springdale. Both of these places offer incredible Zion views.

How to Get Around: You're definitely going to need a car while road tripping Utah. If you don't know where to rent one from, you can compare car rentals and prices from here. Alternately, you can rent an RV or campervan via RVShare and save on accommodations. 

Best Activities: Want to fully enjoy your Utah road trip without the hustles of planning? Booking some activities will help you with that. You can book a horseback excursion on a canyon trail ride, an ATV tour, a Bryce Canyon National Park guided Tour, or a Moab Sound and Light Show tour.

3 Things Not to Forget to Pack:  A sturdy pair of hiking boots will serve you well -- I love my Ahnu boots. A dual purpose phone mount and charger will come in very handy and you'll be happy to have a roadside emergency kit should your car break down while road tripping.

Road trip pro tip: Purchase an annual pass (AKA the America the Beautiful Pass) to save money on the entrance fees for the multiple locations in this itinerary run by the NPS!

When to Plan Your Mighty 5 Utah Road Trip

Empty road going through Zion National Park with mountains on either side and orange autumn trees alongside the road

Utah is incredible any time of the year. With tepid summers and gorgeous snow-covered winters, there is never a season that doesn’t reveal jaw-dropping landscapes.

But since you’ll be cruising the highways and spending enormous amounts of time in the outdoors if you’re doing a Mighty 5 road trip, I suggest the months of April-May and September-October.

Late September and early October is a great time if you want to see some fall foliage in places like Zion!). If I had to pick the best month to visit Utah, I’d pick October — fewer crowds, better weather, and gorgeous foliage!

Going in the shoulder season will allow some crowds to dissipate at the popular sites and puts you ahead of snow closures. These months are considered the off season for crowds, and the weather has never failed me during these months.

Tips for Planning Your Utah National Parks Road Trip Itinerary

green tent outside of the landscape of zion national park a beautiful red rock landscape in utah

Prep for the parks. This Utah road trip means you will need to pay for entrance to at least 4 separate national parks, 5 if you also visit the interior of Capitol Reef and don’t just pass through. Each park can easily charge a $30 admission fee, so if you’re planning to enter more than two parks, an America the Beautiful pass will save you money! Buy it online at REI.

Time it wisely. Spring and fall, in my opinion, are the best times to visit Utah! Skip summer unless you’re willing to handle the heat (and school vacation crowds), and winter unless you’re a confident winter driver as many parts of Utah experience snow.

Cell service is spotty. Don’t always count on having cell phone service while driving in Utah! There are many long stretches of highway with very little service. Be prepared by having your maps downloaded offline.

Places on the map are not always as direct or close as they look. There are many routes that, at first glance, appear to be doable… but when you plug it into your maps app, you find they’re rather far apart! I’ve omitted a few notable places from this itinerary for that reason, such as Monument Valley, which is hard to squeeze into a 7-day Utah itinerary.

Utah Road Trip FAQs

Allison visiting Mesa Arch in Canyonlands national park sitting in the middle of Mesa Arch

How many days do you need to visit the Utah National Parks?

There are five incredible national parks in Utah (hence their collective nickname, the Mighty 5!). One week in Utah is enough time to catch a glimpse of each of the five national parks, but to see them in full, you could easily spend a month in Utah’s national parks and not see it all!

What are the best national parks to visit in Utah?

All of them, but this itinerary focuses the most time on Arches National Park, Bryce Canyon National Park, and Zion National Park, with briefer part-day trips to Canyonlands National Park and Capitol Reef National Park.

How do I plan a road trip to Utah?

The first step is to determine your itinerary: where are you flying or driving into, and how many days do you have from there?

Below, I’ll offer a few different routing ideas for driving around Utah, but generally, this itinerary assumes you’ll fly into Salt Lake City and then have seven days to explore Utah by car. 

If you have longer, you can absolutely spend more time at each site, but 7 days is the bare minimum to complete a Mighty 5 road trip!

The Mighty 5: Your Perfect 7 Day Utah Road Trip Itinerary

Day 1: Salt Lake City

A view of the skyline of Salt Lake City with enormous mountains towering over the city.

Salt Lake City International Airport is a hub for flights and car rentals as well as the perfect starting and ending point for exploring Utah.

I suggest booking your arrival and departure tickets from here, as it creates the perfect loop for your 7 day Utah road trip. 

Another option would be to fly into Las Vegas, in which case, your route itinerary would look like the following: Las Vegas – Zion – Bryce Canyon – Capitol Reef – Moab – back to Vegas or SLC. 

You could also add on a few days at the Grand Canyon and Grand Staircase-Escalante National Monument as well Page, AZ easily with this kind of itinerary. 

If that sounds more like the itinerary you want to follow, check out my Southwest road trip post, which does a roundtrip from Las Vegas to Moab and back, touching all Mighty 5, the Grand Canyon, and Page’s landmarks like Antelope Canyon and Horseshoe Bend.

However, for the purposes of this 7 day itinerary, let’s assume you’re flying into SLC, as it’s the easiest for routing purposes, plus SLC is a great airport hub!

Not sure where to get the best deal on your rental? I’ve rented cars dozens of times through various search engines and have settled on Discover Cars as the best site to rent with in the USA – it searches dozens of rental companies to find the cheapest price for your rental! Compare car rentals for your trip here!

Salt Lake City is in the heart of Utah, nestled among the Wasatch and Oquirrh Mountain Range it is surrounded with fantastic opportunities for fun.

Here’s how you should spend your day in SLC! If you have two days, read our two-day Salt Lake City itinerary.

Check-in to the Kimpton Hotel Monaco Salt Lake City

This luxury hotel is such a delight for the eyes!

Swirling colorful carpet draws you into the warm space of the lobby while modern vintage furniture gives the Kimpton Hotel Monaco an inviting atmosphere.

The rooms are adorned in old-world style with flashes of flair from the 1950s.

Hotel Monaco is perfectly situated in downtown SLC, making exploring the city extremely accessible.

Book your stay online here!

Grab a coffee and start your day

Begin your morning by making the 3 block walk to Campos Coffee.

Snag a seat in their stylish cafe and order up a delicious cappuccino with a side of Cran-Apple Toast.

Campos coffee offers an inviting, wide-open atmosphere adorned with a steampunk theme. Enjoy a quiet morning here as the city will quickly wake up.

Wander around downtown SLC

Giant Mormon church with cherry blossoms blooming in the spring and other spring flowers

Salt Lake City is known for its outdoor squares and parks. Once you’ve properly caffeinated, head to one of the year-round farmer’s markets for food, fun, and Utah flair.

There are several downtown areas that offer farmers’ markets at different times a year. A couple of options include Liberty ParkSugar House, and Downtown Farmers Markets.

Most of these markets only take place on Fridays and Saturdays but if you’re lucky enough to catch one, they’re worth the visit.

Fresh fruits and vegetables line the streets along with homemade gifts and local artists displaying their talents. It’s easy to spend a few hours wandering the streets.

While you’re on foot, consider seeking out some of Salt Lake’s most known and gorgeously constructed monuments such as the Mormon Temple, the State Capitol, and Temple Square. There’s a ton of historical sightseeing in downtown SLC, so be sure to pack your most comfortable shoes.

Hit the hiking trails

View of Salt Lake City in the far distance from the trail to the Living Room on a partly cloudy day.

Salt Lake City is filled with tons of outdoor options as well!

One of the most fun and accessible hiking trails is The Living Room. Lying just 10 minutes from downtown, this 2.2-mile out-and-back hike leads to incredible views of Downtown and the surrounding landscape.

Sit above the horizon on “chairs” made from surrounding rock and enjoy the afternoon high above the city.

If you desire some trails that require a bit more of a time commitment consider looking into Mount Timpanogos Trail or summit Grandeur Point. Both of the trails lead to exquisite views.

If you’re visiting in the fall, the colors of the changing leaves along both trails are breathtaking!

I also have a full guide to the best hikes near Salt Lake City here in case you want to extend your trip a bit and do a day hike or two!

Grab a delicious dinner in the city

Head back to the city and clean up for dinner.

Salt Lake is filled with phenomenal restaurants that’ll please any palate. A few of my favorites are Settebello for pizza or Red Iguana for Mexican.

Settebello offers insanely delicious Neapolitan style pizza wood-fired to perfection with a fluffy, buttery crust. Their bruschetta is simple and delicious, piled high with fresh tomatoes on divinely toasted bread. 

If a cuisine south of the border sounds more enticing, Red Iguana is the hot spot for you. Dubbed as Utah’s “killer Mexican food,” they have all the specialties including chimichangas and indulgent Mexican desserts that go down well with a custom-made margarita!

Day 2: Moab

Sign for the town of Moab which reads "Moab Again & Again The Adventure Never Ends" with a desert landscape in a background.

Day two of this Utah road trip is all about hiking and soaking up some of Utah’s most iconic scenery in Moab!

3.5 hours south of Salt Lake via an incredibly scenic drive lies 3 parks that are so breathtakingly beautiful, it’ll take two days to explore.

Dead Horse Point State ParkCanyonlands National Park, and Arches National Park all lie within miles of each other but the landscapes of each are so totally different.

Here’s how you should spend your first day in beautiful Moab.

Start the day with a delicious breakfast

As you roll into the quaint city of Moab, consider stopping for breakfast at the Love Muffin Cafe to fuel your hiking day.

They have all the breakfast classics including breakfast burritos, quiches and scones set in a brightly colored, eclectic cafe.

I’ve also heard rave reviews of Moab Cafe. Although I’ve never personally visited, it sounds like it’s worth checking out!

Head to Dead Horse Point State Park

An overlook in Dead Horse Point State Park where you can see a bend in the Colorado River that has hollowed out a canyon, with red rocks in layers on the sides of the canyon.

Dead Horse Point State Park is the perfect introduction to the beauty of Moab.

It’s a sprawling 5,000-acre park set high among the desert landscape with towering cliffs and unrivaled views of the Canyonlands in the distance.

There are several pull-outs along the drive to the parking lot that are all worth the extra stops.

But to truly experience the spectacular sights, hike the Dead Horse Rim Loop Trail. This trail is a 5-mile loop that canvasses the rim of the canyon.

The most prominent view from the trail is hands down the overlook at the point of the Colorado River — it’s stunning!

Dead Horse Point also has a trail system for mountain bikers as well. If you’ve come prepared to bike, the park Intrepid Trail is a 16-mile single-track trail on dirt roads that offers the same unrivaled views with a bit more adrenaline.

Head towards Canyonlands National Park

A view of Canyonlands National Park as seen through the empty space of a rock arch, Mesa Arch, looking out onto the landscape.

Rest your feet and make the short 12-minute drive over to Canyonlands National Park to the park entrance at the Island in the Sky Visitor Center.

Canyonlands is a massive park that has 3 different districts. For the sake of time, I recommend visiting the nearest and most accessible district called the Island In The Sky.

Here, you’ll find a comprehensive visitors center with rangers who are more than willing to help you plan your afternoon. 

The Island In The Sky is the only paved district in Canyonlands National Park with easy access to well-marked trails; the Needles is beautiful but more remote and not quite suited for such a quick trip to Utah, and the Maze and the Rivers (consisting of the Colorado River and the Green River) are even more remote.

On your drive into the park stop at the Grand View Point Overlook. The overlook totally lives up to its name as it reveals jaw-dropping views into Monument Basin as you ascend via a scenic drive. You can also take the trail, which is an easy 1.8-mile hike.

Another iconic sight is Mesa Arch, a short and easy 0.7-mile trail that leads you to an arch that’s perched perfectly on the edge of Canyonlands Cliffs.

After a few dramatic photos of Mesa Arch, head over to Upheaval Dome, the last trek of the day. Upheaval Dome is attractive because of its odd geology and wild folklore that surrounds its creation.

An easy 2-mile wide trail takes you along the rim of the Dome and gives you a panoramic view of just how weird and wonderful the geology truly is.

Grab a drink to toast your hikes

After an entire day of hiking, you deserve a beer!

Back in the city of Moab is Moab Brewery. The perfect place to end your first day in the spectacular Utah desert. Moab Brewery is always fun, always lively, and always has plenty of beer!

The atmosphere is a fun mix of outdoorsman bar vibes. Kayaks hang from the ceiling and pool tables fill the corners.

You’ll find a massive selection of microbrewed beers including ambers, lagers, Hefeweizens and IPAs.

They’re also a full-service restaurant, so grab dinner and hang around for a bit.

Check into your Moab accommodations

A lit up canvas glamping tent with a dark night sky with lots of visible stars.

There are several different options when it comes to accommodations in Moab. These include hotels, Airbnb, glamping, and camping.

If you’re wanting more of the comforts of home, there are plenty of commercial hotels located in the heart of Moab.

For something more unique look into the Moab Red Stone Inn or Moab Springs Ranch. Both offer a more low-key, secluded fee.

As for glamping, Under Canvas Moab knocks it out of the park in terms of comfort, style, and entertainment, and is frequently cited as one of the best glamping lodges in the entire United States.

Book your stay at Under Canvas Moab here!

If you’re wanting to go all in and camp under the stars, there are plenty of campgrounds dispersed in and around the city.

To find these, I recommend checking out my entire write-up on Utah’s incredible dispersed campsites or by using some well-known campground finder apps including The Dyrt, iOverlander, or  rec.gov website.

Day 3: Arches National Park

Wake up early while the city of Moab is still sleeping and get a head start on Arches National Park.

Arches National Park is one of Utah’s top attractions and draws over 1.5 million visitors a year. Because of its popularity, it’s important to beat the crowds if you want to experience Arches in all its glory.

Start with a sunrise hike to Delicate Arch

A view of the famous Delicate Arch, a Utah road trip must, taken at sunrise with the light falling on the left side of the arch.

The iconic Delicate Arch should be your first destination and you should plan to hike it before the sun rises.

To make this possible, check the local times of the sunrise and plan to head out about an hour and half before this.

You’ll need a headlamp or flashlight for the first part of the 1.5-mile hike to Delicate Arch, as it will still be dark outside.

If you timed it correctly, you’ll reach Delicate Arch just as the sun begins to beam on its east side.

It’s an amazing experience to see the surrounding landscape wake up and to watch Delicate Arch glow under the newly risen sun.

Wander the Devils Garden

A nearly empty trail in Devils Garden in Arches National Park with red sand on the trail and views of the red rocks and arches around it.

After you’ve captured photos of Utah’s most iconic arch, continue driving on Arches Entrance Road until you reach the Devils Garden Trailhead.

This 7-mile trail can easily be broken up into something more manageable (2-3 miles) while still offering insane views of the otherworldly landscape.

Massive boulders, tunnels, and arches are the highlight of this trail, as well as its tranquility.

Devils Garden is much less crowded than the surrounding trails and offers a great opportunity to bask in the uniqueness of Utah in peace.

On the way back, be sure to stop in Fiery Furnace which has some of the best views and reddest rocks in Arches.

Snap some final photos of Arches

A trail leading up to a red rock formation which features a rock "balancing" on top of another rock, with the moon rising in the background.

As you meander your way back to the entrance, take this chance to capture some stunning photos at the multiple pull-outs spread throughout the park.

Balanced Rock, the Windows, Double Arch, and Petrified Dunes Lookout are just a few spots worth a quick stop.

You also should make sure to visit the longest arch in the entire park, Landscape Arch, which is accessible via an easy 1.9-mile out-and-back trail.

The day should still be early enough to capture the stunning lighting and natural beauty of the surrounding rock formations.

Grab lunch and gas before hitting the road

Highway 70 going through Moab with red rocks and desert landscape around it.

Stop off in Moab for a bite to eat and gas up the car before you hit the road again to head towards your next destination.

The afternoon will be spent driving to Bryce Canyon National Park. The 4-hour drive from Arches National Park to Bryce Canyon National Park is absolutely stunning.

You’ll leave Arches and head West on highway 70. As you leave the desert landscape of Moab you’ll be transported into the mountainous scenery as you head south through Highway 24.

If you don’t want to visit Capitol Reef National Park, you can shave an hour or two off your drive time by skipping Highway 24, instead going a more direct route to Bryce via Highway 72 and Fishlake National Forest. However, for the purposes of this post, we’ll go the scenic route so you can visit Capitol Reef!

Stop quickly in Capitol Reef National Park

the sign to enter capitol reef national park

With only 7 days in Utah, it’s hard to tackle all of the Mighty 5 and do them proper justice. 

This Utah itinerary focuses more heavily on the Southern Utah national parks, but that doesn’t mean we can’t pop into Capitol Reef on the way to Bryce from Moab!

We won’t have time to take on some of the best hikes in Capitol Reef, but we can definitely see a few of the most beautiful landmarks there that are easy to access by car.

As you near Torrey, be sure to stop off at Factory Butte, a stunning and off-the-beaten-path land formation that looks like it could be something out of Mars. It’s right off Highway 24 so you can’t miss it.

For a quick but scenic spin through the park, stick to the parts of the park near Torrey that are accessible via Highway 24, all centered around the Visitor Center. 

This includes the Fruita Schoolhouse, the Petroglyphs, Hickman Natural Bridge, and the gorgeous views at Panorama Point.

If you have a national park pass, as you should, then you can also visit a few places within the park within an easy drive. That would include Fruita Barn, the Gifford Homestead, and if you have time for a hike, the Cassidy Arch Trailis a phenomenal 3.1-mile out-and-back with one of the best views in all of Capitol Reef, rated as moderate.

Arrive in Bryce Canyon National Park

allison looking over the edge of bryce canyon and its orange hoodoos

As you turn south and head towards Bryce, the topography changes one final time into a mix of bright red cliffs, canyons, and hoodoos.

The first sighting of a hoodoo along a scenic drive is a great indication that Bryce Canyon is just around the corner!

The city of Bryce is a small, quiet town that lies minutes outside the National Park. Although limited on hotels and restaurants, it’s easy to find a place to have dinner and a warm place to sleep.

You can also stay in nearby Escalante, which is halfway between Capitol Reef and Bryce Canyon and is home to Yonder Escalante, a great accommodation choice with cute cabins and Airstreams available for rent.

Grab dinner and hit the sheets

Hell’s Backbone Grill & Farm, Big Fish Family Restaurant and Stone Hearth Grille are a few restaurants that cater to weary travelers looking for a hearty meal.

As far as hotels, check out the Stone Canyon Inn or Bryce Canyon Log Cabins in nearby Tropic.

Each resort is immaculately maintained and offers stunning views of Bryce Canyon in a private setting.

Of course, Bryce Canyon is also brimming with campgrounds. There are two campgrounds inside the park, North Campground and Sunset Campground, as well as options for backcountry camping.

Day 4: Bryce Canyon

A brilliant view over the hoodoos in Bryce Canyon. Hoodoos are vertical finger-like rock formations formed by erosion over time.

Bryce Canyon is purely about the landscape!

With the largest concentration of hoodoos and brightly colored cliffs, Bryce Canyon is a geologic wonder that resembles Mars. 

Hikers will adore the plethora of beauty that is easily accessible via the trails in the park! 

While the classic Bryce Canyon Rim Trail would be amazing to do, at 11 miles roundtrip, it’s not doable for this itinerary, so save it for a return trip. We’ve listed a few shorter day hikes that are better suited for one day in Bryce instead.

Do a hoodoo hike

the hoodoos of bryce canyon

There are several different ways to enjoy one day in Bryce in an adventurous and active way!

Hike the Navajo Loop Trail or Queens Garden Loop inside the core section of the park to experience the topography from within the canyon.

Navajo Loop is a personal favorite and you’ll enjoy absolutely stunning views from everywhere on this canyon trail!

… Or hop on a horse or ATV!

Man on a brown horse wearing a cowboy hat and looking over the canyon views.

If your feet are exhausted from the previous days’ hikes, no worries — there’s still plenty of ways to experience Bryce Canyon without needing to hike.

Hop on a horse for a horseback excursion on a canyon trail ride or pump up your adrenaline with an ATV tour!

Either is a great way to stay active and see the best that Utah’s Mighty 5 have to offer without overexerting yourself.

Book your horseback excursion on a canyon trail ride now!

Get the best sunset view in Utah

Sun setting over a canyon full of red and white hoodoo landforms.

As the sun begins to set, head to Sunset Point to watch the most phenomenal sunset cover the canyon.

It’s probably the best place to catch the sunset in all of Utah, with its hoodoos, red rocks, and wide-open skies.

As the skies begin to darken, catch the glory of the stars, as Bryce is part of the world-renowned International Dark Skies club.

Of course, if you’re too tired for sunrise — or you just want to double up on the beauty of Bryce — another option is to do an early wakeup call the following morning at Sunrise Point, which offers a great vista from a viewpoint better oriented for the rising sun.

Day 5: Springdale and Zion

Wake up early and start the 2 hour drive to Springdale, Utah.

What makes the Beehive State so unique is the opportunity to experience dramatic landscape changes over the miles and the drive from Bryce to Springdale is a prime example of this.

Start at the East Entrance of Zion

A sign which reads "Zion National Park, National Park Service" on the road leading to the national park with mountains in the background.

Head south down highway 89. From here, you’ll hit the East Entrance of Zion National Park first.

I recommend coming in from this direction because it allows you to drive through the entire length of Zion before hitting the main headquarters of the Park.

There are no words to describe the beauty of Zion. Sky-high mountains loom over deep purple slot canyons, multi-layered rock formations weave among the cliff sides, and wild animals can be seen crossing the street.

The beauty will captivate you all the way to the visitors center where you’ll catch a park shuttle to the epic water hike of The Narrows.

Hike to the Narrows

People hiking in knee-deep water in hiking sticks in a slot canyon with purplish rocks and pale green water.

The Narrows is by far the top trail in Zion for discovering the interior slot canyons, and it’s a must-see on the bucket lists of hikers everywhere.

Some visitors rent waders and gear from the nearby Zion Outfitters but I don’t see this step as absolutely necessary. If you’re wanting to save money, it’s perfectly acceptable to hike without being outfitted.

Waterproof hiking shoes, however, are absolutely needed, or you’ll be regretting it. Trust me.

Jump on the shuttle and head to the last stop, Temple of Sinawava. From here, make the 1-mile paved hike into The Narrows.

The beauty of this hike is you can make it as long, or as short as you desire. The entire trail will be water wading while you explore between two towering canyon walls that tend to change color as the sun orbits over.

Get in as much, or as little, hiking in as you like and head back to the visitors center to claim a campsite.

Grab a campsite or check into a hotel

Lime green camping tent contrasting against the red and orange rock landscapes of Zion with Watchman mountain in the distance.

The Watchman Campground is the only public campground in the park and fills up quickly.

This is a gorgeous, shaded campground sitting at the foot of the Mountains with a paved walking path along the Colorado River and within walking distance to the bustling city of Springdale.

If you can’t (or don’t want to) snag one of the limited campsites in Zion, there are plenty of wonderful hotels in Springdale.

I recommend Cable Mountain Lodge or Springhill Suites, with their stunning floor-to-ceiling windowed lobby with incredible Zion views. Another classic is the Zion Lodge which must be booked months and months in advance.

Head to the city and grab a bite to eat at The Spotted Dog (American), Zion Pizza and Noodle (pizza), or the Whiptail Grill (Mexican).

Shop around the many unique, handcrafted stores and head back to camp to enjoy a night under the stars or to your hotel for some creature comforts in a beautiful setting.

Day 6: Zion National Park

Grab a delicious cup of coffee before hitting the trail

Woman hiking Angels Landing, a ridge hike with a chain assist, with views of the valley in Zion National Park on all sides.

Wake up early and hit Deep Creek Coffee for a pre-hike meal and hand-crafted coffee. You’ll need the energy for this hike!

Today’s trail, Angels Landing, is a strenuous uphill hike to the tops of Zion so you’ll need to properly fuel your body.

If you’re feeling extra energized this morning, rent a bike from Zion Cycles and skip the shuttle!

You can bike to the trailhead of Angels Landing as well as the rest of the park. Although a big undertaking, it’s a great alternative to beating the crowds.

 Angels Landing is arguably THE top hike in Zion and for a good reason. This 5-mile trail climbs up and over the canyons of Zion and gives you a birds-eye view of the true beauty of the park.

Summiting Angels Landing is an exhilarating experience! As you ascend, you’ll be assisted by chains that are hanging off the sheer cliffside offering a heart-pounding experience.

Once at the top you’re greeted by the most epic view on earth. Catch your breath and enjoy the beauty before you.

Want a different view? Head up to Observation Point. While normally this is a harder hike than Angel’s Landing, the East Rim to East Mesa approach is closed due to the danger of rockfall.

 The easier route via East Mesa is still accessible though, and is only rated as moderate. It involves a 6.7-mile out-and-back trail with only 700 feet of elevation gain (the hard Observation Point trail involves well over 2,000 feet of elevation gain!). 

For this trailhead, I suggest you park at the intersection of Beaver and Fir Roads if you don’t have a high-clearance vehicle.

 Celebrate your summit with a drink

Descend Angels Landing and head back to town for a celebratory beer at Zion Brewery.

Located creekside to the Colorado River, Zion Brewery has the perfect patio to enjoy the afternoon while you recharge and reminisce.

Once you’ve had a beer… or three, cool off at the riverbank or tackle a shorter Zion hike around sunset for even more epic views.

Hit Zion Canyon Overlook Trail for sunset

For a great view worthy of the final full day of your Utah itinerary, head to Zion Canyon Overlook Trail for sunset.

It’s a super short trail, less than 1 mile out-and-back and rated as easy, though there is about 400 feet of elevation gain. It’s absolutely worth it!

Parking is limited so you may have to circle around for a spot. Give yourself some extra time to find parking if you’re going at sunset as it is a popular sunset spot.

Day 7: Back to Salt Lake City

Brilliant turquoise hot spring in the middle of nowhere in Utah.

The last leg of your journey will be spent making the 4.5-hour drive back to Salt Lake City.

Don’t let the longer drive intimidate you, there are plenty of stops you can make along the way to break up the drive.

A few options I recommend are visiting the ghost town of Grafton, stretching your legs at Cedar Breaks National Monument or soaking in the natural hot springs along the way.

As you head north to Salt Lake City, you’ll conveniently pass two opportunities to soak in Utah’s many natural hot springs.

Mystic Hot Springs and Meadow Hot Springs are both located off Highway 15 and welcome tourists to enjoy the soothing heated waters. It’s the perfect ending to your 7-day road trip across Utah.

I hope this 7 day Utah itinerary inspires you to get out and enjoy this beautiful and truly unique state!

What to Pack for an Utah Road Trip

I have a complete USA road trip packing list that you can go through before your trip to know everything to take but below is a rundown.

Travel guides

This Utah road trip itinerary is packed with so much useful information but Travel guides are useful resources to have for deeper insights as they dedicate more time and resources to research. So, to fully arm yourself with knowledge and tips before doing the mighty 5 Utah Road Trip, I recommend combining my personal experience with this highly-rated Fodor’s Utah travel guide.

Phone Mount & Car Charger

Though cell network is not the best while road tripping Utah, you’ll still need your phone whether it’s to check maps or take photos, so it’s essential to have a car charger. And for navigating, a phone mount is gold! It takes away the pressure of having to check your phone while driving (which you shouldn’t do btw) or even asking your front-seat passenger all the time. I honestly can’t imagine going on a road trip without this dual-purpose phone mount and charger!

Snacks

Road trips just go better with snacks and let’s not forget how quickly hanger can kick in especially if you don’t want to keep stopping just to get something to eat. Pack a few snacks — and not just the sweet ones but a mix of sweets and salty ones too.

Rehydration packets

Rehydration packets are life savers when it comes to road trips! From long hikes, fatigue, uncoordinated meal times, scorching sun, there are so many incidences that can cause dehydration.

I always carry some rehydration packets for every road trip I go on and they’ve been great at keeping me hydrated. There are quite many on the market but I recommend these ones.

Bug spray and after-bite care

Nothing takes away the fun of enjoying a scenic hike like bug bites. I know it and I’ve been there — nowadays I never leave home without this lemon eucalyptus-based mosquito repellent, it’s a natural and DEET-free solution that works well on even the most stubborn mosquitos!

Unfortunately, it is sometimes inevitable to avoid bug bites regardless of how committed you were to applying and re-applying bug spray every couple of hours. In that case, this After Bite itch eraser will instantly soothe any bug bites.

Sunscreen

Most people don’t know this but the windshield doesn’t protect you against all UV rays. While they protect against UVB rays (which cause sunburn), most do not block UVA rays, which cause aging and skin cancer and that’s why it’s important to wear sunscreen even when driving.

On top of that, you’ll need it on hikes, beach days, or every time you go under the sun. You could probably get away with a cheaper sunscreen but since my face is kind of sensitive to chemical sunscreens, I need something gentle and I found that in this sunscreen.

And unlike the myth that some skin tones and races don’t need sunscreen, I am here to tell you that you need it as sun cancer doesn’t discriminate based on skin tone. So whether you’re white, pale like me, Black, Latina, or Asian, you need sunscreen!

If you’re hiking, don’t forget about your scalp either — I often end up with a burned scalp and it’s no fun, often leading to headaches. Buy a special sunscreen for hair and scalp to avoid this!

Rain jacket

Do you hate hiking in soaked clothes? Me too! You could have the perfect Utah road trip itinerary but that won’t stop it from raining but that also doesn’t mean you should just waste your day and wait for it to end while hiding in your hotel room!

Get yourself the Marmot PreCip rain jacket (there’s a women’s version and a men’s version). I’ve used mine for years doing all sorts of activities, from biking to hiking and traveling.

And the best part about this jacket is that it keeps me dry when it rains without making me uncomfortably hot like other rain jackets due to the zippered arm-pits which provide ventilation.

External batteries

The Anker external battery pack is a travel must. While you can charge your phone while driving, you may want to charge other devices — a camera, a drone, portable speakers, an e-reader — as well.

Or if you notice your battery is running low while you’re out hiking or sightseeing, you can just start charging right away without having to return to your car. It holds several charges on a single battery pack and will last days at a time.

Read Next

I have so many posts to help you plan an epic trip through the Southwest, from general packing guides to quotes to inspire your trip to detailed itineraries just like this one for neighboring states!

Here are my suggestions for where to go next.

What to Pack for a Road Trip: The Ultimate Road Trip Packing List
Road Trip Quotes: The Best Road Trip Quotes & Instagram Captions
Arizona Road Trip: The Perfect 7 Day Arizona Road Trip Itinerary
Southwest USA Road Trip (Nevada, Arizona, & Utah): The Ultimate Southwest Road Trip Itinerary for 10-14 Days
Idaho Road Trip: The Best Idaho Road Trip Itinerary
Montana Road Trip: The Perfect 10 Day Montana Road Trip Itinerary

One Day in Canyonlands: Expert Itinerary for A Quick One-Day Visit

beautiful canyons in Canyonlands National Park with a golden light from the setting sun reflecting on the canyon walls


When you’re planning a trip to Canyonlands for a day, every moment counts!

This sprawling National Park is Utah’s largest of the Mighty 5 with several distinct districts, so note for even the most ambitious of travelers that just one day in Canyonlands is not enough to see it all.

To best use your time, you’ll have to focus on just one area of Canyonlands — and tackle it with a well-planned, one-day itinerary.

I have been living in the Moab area for more than a year now and have spent countless days and nights exploring the wonders of the area and I still can’t believe how absolutely spectacular it is!

In fact, Canyonlands is so spectacular that I often find myself lost for words, and even the most mesmerizing pictures still don’t do the stunning landscape justice.

Long story short, it’s one of those places that you have to see with your own eyes, but even once you’re here you might have a hard time believing that you’re not dreaming!

If you’re ready to start planning your perfect day in Canyonlands, let’s get right to it!

The author, Nicole Westcott, sitting atop a great viewpoint in Canyonlands national park

For starters, Canyonlands is the largest national park in Utah… which is saying a lot, considering the fact that there are five of them!

At a whopping 528 square miles, the massive Canyonlands park is divided into four districts; Island in the Sky, The Needles, The Maze, and The Rivers that divide them.

Soaring an incredible 1,000 feet above the other districts, the Island in the Sky district is not only the most scenic, but it also just so happens to be the most accessible.

The author, Nicole Westcott, at sunrise in Canyonlands national park

A 45-minute scenic drive from the popular town of Moab, the region’s tourism hub with plenty of accommodations, takes you right to its entrance and from there, you can get on with exploring its trails.

As you soak in the natural beauty up here, you can look down upon breathtaking views of the other three districts.

However, in my time here, I’ve noticed a few common misconceptions when it comes to Canyonlands National Park, any one of which can seriously put a damper on your plans.

But have no fear! After reading this itinerary, you’ll have all the info you need to make sure you show up to the park with confidence….and, most importantly, lunch!

Key Things to Know About Spending a Day in Canyonlands

There is nowhere in the park to get food.

The author, Nicole Westscott, holding a cup of noodles ramen in a cup, with a snowy trail in front of her

I highly recommend you come prepared with something(s) to eat.

A burrito from local favorite restaurant, Gilberto’s, makes a great portable lunch, but if you’ve got trusty favorite trail foods, go ahead and pack those.

The most important thing is to bring enough to keep yourself fueled up for your day in Canyonlands.

The last thing you want is to reach the top of a scenic overlook… only to find that you’re too hungry to enjoy it and there’s a 45 minute drive back to town!

Don’t forget to fill up the gas tank.

Sensing a trend here? The best part of Canyonlands is getting away from it all into nature, but that does mean you’ll be, you know, away from it all!

The park’s lack of  amenities means it’s super important to come prepared with everything you need.

Fill up the gas tank before you start your day because the scenic drive can turn into a scenic nightmare when there isn’t a gas station in sight. 

The weather can be extreme.

The author, Nicole Westcott, sitting in a snowy landscape while wearing winter clothes like a hat, boots, gloves

I know, right? Deserts are famously hot, you don’t need me to tell you that.

But hang in here with me for a second;  what many people don’t realize is that deserts can also get extremely cold.

Winter is a great time to beat the crowds (especially at the more-crowded Arches National Park).

That said, if you’re going to be spending your day outside at Canyonlands, be sure to prepare for temperatures in the teens and even snow storms that can close the park entirely. 

There are four districts of Canyonlands National Park.

I know I’m repeating myself here, but this is a big one!

I can’t tell you the number of times I’ve run into someone who was scrambling to make a last-minute plan for the day because they accidentally drove to the wrong district.

So when you are plugging “Canyonlands” into your GPS, go ahead and double-check that destination to make sure you get to the right spot!

For this Canyonlands itinerary, plug in “Island in the Sky Visitor Center” to orient yourself.

All right, enough of the logistics – let’s get on to your Canyonlands adventure!

Your One Day in Canyonlands Itinerary

Start your day with a sunrise hike to Mesa Arch.

Photo of people gathering around the Mesa Arch area at sunrise to take photos in a wintry landscape

When in Canyonlands, this is an absolute must-see stop!

Wake up early, grab breakfast to go and take that coffee in a travel mug, because you’re in for an unforgettable sight. 

Sure, Mesa Arch has great views at any time of day but watching the epic sunrise through the arch is a memory worth fighting (yourself out of bed) for. 

Plus, it’s only a 15-minute walk to the arch! Talk about a great reward to effort ratio. 

The incredible view here makes  it an extremely popular spot, yes even at sunrise, so get there early to score a spot in the tiny parking lot.

Make that short hike, then sit back with a coffee in hand and let the sunrise blow your mind. 

Who sleeps in on vacation anyways?

Walk to Grand View Point.

The author, Nicole Westcott, walking on a trail alone in the winter, towards a viewpoint in Canyonlands national park

The name speaks for itself and people are listening!

Another fan favorite, Grand View offers breathtaking views in every direction, with just a short 1.8-mile roundtrip hike.

Walking high along the cliff of a mesa, you can look down through geologic time to admire endless canyon layers, the river that has slowly carved its way through it, and if you’re really lucky, the mystical effect of a cloud inversion. 

This trail doubles as a viewpoint, so don’t be alarmed if you arrive at the trailhead and see a conga line of cars following you in. 

Most people are just coming for a picture, and a majority of the others won’t hike all the way to the point… even though it’s not that far. 

In other words, if you want to beat the crowds, just keep walking.

There are plenty of places to find solitude on this trail so if a certain section feels too congested, just find another.

With each view better than the last, this is a trail that rewards persistence!

Alternatively, hike to White Rim Overlook.

Feeling like checking out a hidden gem, or just not willing to take a chance with crowds? 

Some may say that the White Rim Overlook trail (a 1.8-mile roundtrip hike) isn’t as grand, but I think it’s pretty darn close.

And that’s a small price to pay to have a place as magical as Canyonlands to yourself. 

Eat lunch with a view.

The author, Nicole Westcott, walking with a beautiful view behind her

Time to bust out the bagged lunch!

The White Rim Overlook has an absolutely ridiculous (in the best sense of the word) picnic area that can take any bagged lunch and turn it into a gourmet dining experience. 

There’s just something indescribably special about eating a simple sandwich while soaking in a gorgeous canyon view…. And to think, you don’t have to pay extra for it! 

Just remember to clean up after yourself and keep an eye on the ravens. These birds show no mercy.

Leave your food unattended for a minute to run to the bathroom? Kiss that gourmet dining experience goodbye!

Swing by the Visitor Center.

A view of the landscape in Canyonlands on a one day trip to the park

I am a big believer in going to the visitor center when visiting a national park.

Somehow, though, I’m also the person who is guaranteed to be out on the trail before sunrise!

It’s a tricky balancing act, but in my experience, this is the best way to make the most of your stay, so I encourage you to do the same! 

Stop by to get your souvenirs and stick around for a bit to learn more about the park.

It’s one thing to see the amazing scenery, and something completely different to learn its geological history and really start to understand the amazing sights you’re seeing.

Even if all that hasn’t convinced you, you’ll at least want to stop by the Visitor Center to fill up on water.

It’s the only place in the park where you can, and the last thing you want is to find yourself on a hot trail with an empty canteen! 

Visit the mysterious crater of Upheaval Dome. 

Looking out at the wintry view of Upheaval dome for a spectacular view

Everyone loves a good mystery and Upheaval Dome is one for the ages. 

This, well,  mysterious crater has stumped geologists since it was first discovered and to this day, there’s not an explanation that is set in stone. 

Was it an ancient salt bubble? The impact of a giant meteorite? The world may never know! 

To see this curious wonder for yourself, take the Upheaval Dome trail to the first overlook (0.6 miles roundtrip) to get a look inside the crater. 

If your inner detective feels the need for further inspection, continue on to the second overlook (1.2 miles roundtrip) to investigate the canyon around it. 

Just be prepared to work up a sweat!

This uphill hike might be short, but it offers zero shade and the hot summer months mean that the workout packs quite a punch! 

Challenge yourself at Aztec Butte.

The author, Nicole Westcott, hiking in a mountainous area of the park in winter

This is one of my absolute favorite trails in the park. It’s got everything I want and none of the things I don’t.

Wide sweeping views, an archaeological site, a fun climb, not too long (just 1.4 miles roundtrip), and not a crowd in sight. 

Yep, you heard me. This bad boy is the place to go if you want to avoid crowds entirely. In fact, there are rarely ever more than a couple of cars in the parking lot.

Now, I know what you are thinking. If this hike is so great then why is no one here? There’s two big reasons. 

First off, it isn’t really advertised so it flies under the radar of most visitors. Let’s keep it that way and let this be our little secret, okay?. 

Number two is that it is a bit of a challenge. They say nothing worth having comes easy, and Aztec Butte is living proof.

Start by making the side trip to the granaries. This is a great way to admire the ancestral Puebloan structures while you are still feeling fresh, and it can help gauge your comfort level with rock scrambling. 

This side trail has just a few small sections where you may need to use your hands to help you climb over rocks.

The main trail up to Aztec Butte has a lot more of this so you definitely want to make sure you’re confident and warmed up t before you continue on.

The last section of the trail takes you right up the butte in a steep scramble that requires good traction and plenty of water. 

It’s quite the workout to make it to the top but once you do, you’re instantly rewarded with gorgeous views (and bragging rights!) from one of the highest hike-able points in Canyonlands National Park . 

Admire the Green River Overlook. 

The author, Nicole Westcott, looking over a stunning view

When a park sits atop a mesa that is more than a thousand feet taller than the surrounding landscape below it, you’re literally surrounded by striking views in all directions. 

But even with one jaw-dropping vista after another, there’s one particular location that’s permanently engraved in my memory.

The Green River Overlook is just that: an overlook with a view of the Green River cutting its way through the canyon more than a thousand feet below. 

Somehow, though, it is also so much more. It’s one of those rare places in the natural world where you can feel small in the best possible way. 

It’s a prime example of the power of water, and an opportunity to listen to nothing but the sound of wind blowing past your ears. Just a couple steps out of your car, and you’ll be surrounded by complete and utter wonder. 

After all, there’s a reason I keep getting drawn back again and again to Green River Overlook on my visits to Canyonlands. It just doesn’t get much better than this. 

Catch the sunset at Dead Horse Point State Park. 

The author, Nicole Westcott, watching the sunset at the neighboring park, dead horse point state park

Now, I know this is a guide for Canyonlands but I can’t wrap up without at least tipping you off to the park’s extraordinary next-door neighbor. 

A quick side trip to Dead Horse Point State Park pairs perfectly with a day trip to Island in the Sky because, well, they’re pretty close to each other, but far from just about everything else.

While there are plenty of ways to spend your time in the state park, it’s mostly known for its sunset point.

In fact, the park is literally named after it – Dead Horse Point. 

Even though you probably wouldn’t drive all the way from Moab just to visit it, it’s well worth the short side trip from Canyonlands.

You know what they say about two birds and one stone, right?

As an added bonus? Dead Horse Point is huge. No, seriously huge. 

Breathe a sigh of relief; this isn’t a spot you’ll have to worry about the usual nightmare of being crammed together at a viewpoint at sunset.

This isn’t the place where you’ll be lumped in with a bunch of noisy people, each trying to raise their cameras higher than the person in front of them. 

At Dead Horse Point, there are plenty of little places to escape the crowds and still get a spectacular view.

It’s like Mother Nature carved out the perfect natural amphitheater for you to lounge around and take in the type of sunset that only exists in this wide-open desert landscape!

One quick note about logistics: There’s a $20 fee per vehicle to enter Dead Horse Point State Park and your National Park Service pass (or your Canyonlands Day Pass, Interagency, Senior, South East Utah Group, etc.) won’t cover admission. But I promise you, it’s worth it!

The Perfect Weekend in Salt Lake City Itinerary: 2 Days in SLC

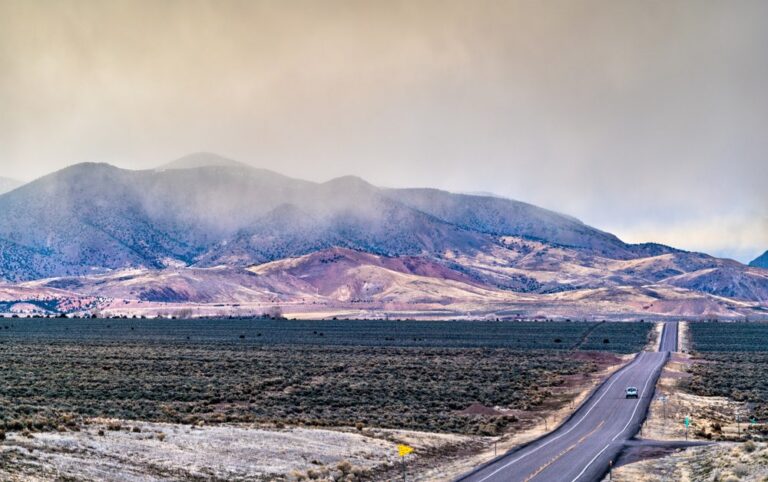
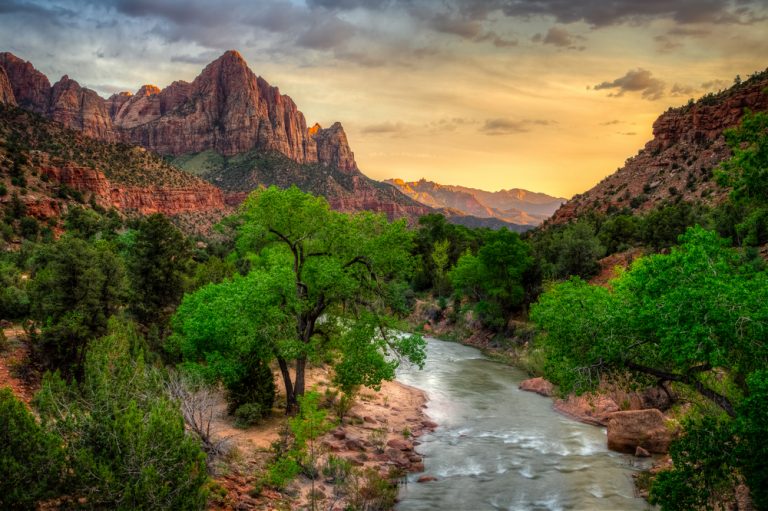
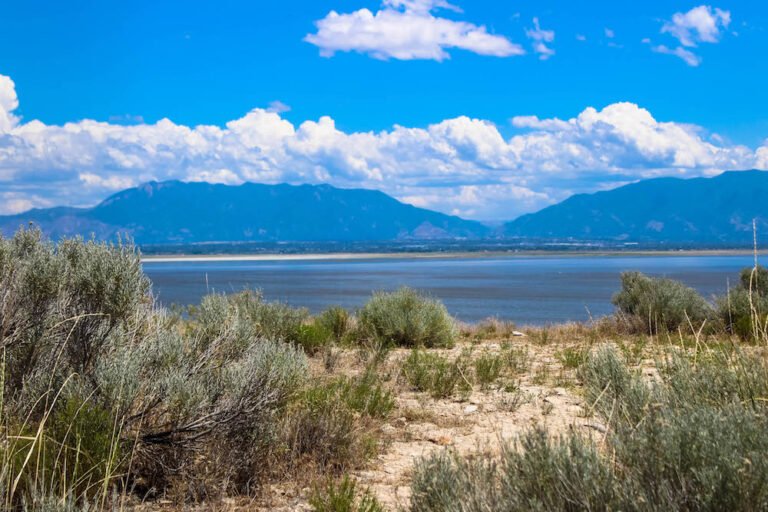
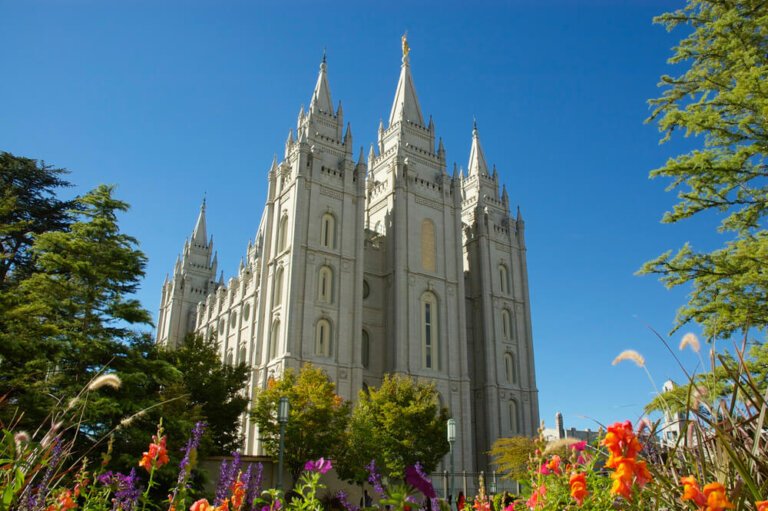
Salt Lake City may just be one of the most picturesque cities in America: a gorgeously constructed town in the Salt Lake Valley, set amongst the towering Wasatch Mountain Range and bordered by the blue waters of the Great Salt Lake. 

The city itself is a beautiful mixture of turn-of-the-century architecture and a modern landscape that offers indoor and outdoor activities year-round.

I’ve put together a 2 day Salt Lake City itinerary that highlights the best of what the city has to offer when you’re visiting SLC for just a weekend. 

SLC is a young and vibrant feeling city, with lots of student culture due to the presence of the University of Utah and Brigham Young University (BYU).

Whether you’re flying into SLC for a quick city getaway, are combining it with the ski resorts of Park City, or are making SLC just one stop on a long road trip including Utah’s 5 national parks, this itinerary is a great place to start.

Whether you’re seeking solitude in nature or looking to dive into the latest up-and-coming cocktail bar, this SLC itinerary covers it all — so let’s get started.

Where To Stay in Salt Lake City

Historic Luxury: The Grand America

interior of the grand america hotel with pink carpeting, an unmade bed, and spacious suite area
Photo Credit: Thomas Hawk via Flickr (CC BY-NC 2.0)

Located on 10 acres of immaculately kept gardens, The Grand America is a sight to see and experience! 

The building itself soars over downtown in grand opulence with its 24-story Old World-style architecture. This is no average run-of-the-mill hotel!

The lobby is decorated with hints of grandiosity, as ornate marble floors give way to classical French-style furnishings and beautiful works of art. 

The attention to detail bleeds into the guest suites, as floor-to-ceiling windows offer unrivaled views of Salt Lake City’s natural outdoor beauty! 

Complete with a spa, dining room, and luxury shops, The Grand America is an entire entertainment venue in itself! 

Check availability, reviews, and photos here!

Mid-Range Design Hotel: Kimpton Hotel Monaco

facade of a historic hotel building hotel monaco in downtown slc
Photo Credit: Jeremy Franklin via Flickr (CC BY-NC 2.0)

I love Kimpton hotels — their aesthetic is gorgeous, their locations are convenient (this one is just a few minutes from Temple Square!), and their amenities are extensive.

The Kimpton Hotel Monaco in Salt Lake City is no exception!

The hotel offers chic and spacious rooms (just look at those beds — swoon!). Plus, it has amenities like in-room massages and room service so you can really feel like you’re getting the royal treatment.

It also has wonderful shared spaces like a luxe cocktail bar and tasty on-site restaurant serving beautifully-plated delicious meals.

Check availability, reviews, and photos here!

What to Pack for Your Weekend in Salt Lake City

duffel bag sitting on a chair

Comfortable walking shoes: This SLC itinerary has you walking all about the city, so you’ll want a comfortable pair of shoes that can handle hitting the pavement for several hours!

I love my Birkenstocks and can wear them for days on end; another option might be a cute, lightweight white sneaker like this one.

Hiking shoes: If your walking shoes aren’t quite up to hiking par, you’ll want a pair of sneakers or hiking shoes that can handle the short hike up Ensign Peak on day two of this itinerary.

For a short hike like this one, I’d suggest some Nike running shoes which are lightweight and versatile enough to mix into your wardrobe.

Comfortable clothing (including clothes for a night out): Salt Lake City is located at 4,226 feet of altitude and has pretty drastically different seasons, so you’ll want to plan for what to pack depending on the time of year (more on that below).

You’ll want clothing comfortable for lots of sightseeing in the daytime temperatures, as well as clothing that’s appropriate for a hiking.

You’ll also want some nicer clothes for dining out at night or going out and exploring the SLC nightlife scene, and an outer layer for when it inevitably cools off at night!

Best Time to Visit Salt Lake City

snowy mountains behind skyline of salt lake city including the notable mormon temple building

Salt Lake City is located over 4,000 feet above sea level, so it’s prone to more shifts in temperature throughout the seasons!

The winter tends to be cold and snowy, with average temperatures between lows in the 20s and highs in the low 40s.

Spring and fall are more temperate, with average temperatures ranging from lows in the 40s and highs in the 70s.

Summer can get hot, especially in July and August, when average highs are around the 90s — but due to SLC’s elevation, you’ll still have lows around the 60s during the summer months.

It really depends on what you want to do during your weekend in Salt Lake City. If you’re visiting SLC as a hub before you go skiing in Park City, then winter of course would be ideal.

However, for general hiking and exploring, the months of May, June, September, and October probably offer the best combination of pleasant daytime weather and less rainfall (spring can be quite wet in SLC!)

Day 1 of Your SLC Itinerary

Salt Lake City - Temple Square at night with lights on and focus on church

Check into your hotel.

Start your two-day Salt Lake City adventure by checking into one of the most well-known hotels in the heart of downtown SLC, The Grand America

The hotel is in the perfect location for exploring the downtown area and its surrounding landscape, so let’s drop off your bags and get to exploring downtown SLC!

If The Grand is all booked up, Hotel Monaco is another great option which we discussed above.

The skyline of Salt Lake City in the afternoon light with autumn trees and green trees

Grab breakfast at Penny Ann’s.

Downtown Salt Lake is extremely easy to navigate, and most places are very easy to get to by foot or bicycle. The city also offers a bike-share program that simplifies transportation! 

Once you’ve dropped off your bags at the hotel, hop on one of the city bikes and set off biking to Penny Ann’s Cafe for breakfast! 

This classic American diner serves hearty plates of some of the best breakfast foods in Salt Lake. Deemed home of the “heavenly hot cakes,” everyone comes for a massive stack of their famous pancakes! 

My absolute favorite thing on the menu is their hot cake sandwich. Bacon and eggs are sandwiched between three of their famous hotcakes and drizzled with syrup. 

It’s a decadent breakfast meal that can only be experienced at Penny Ann’s. Top that off with their bottomless house coffee and you’re ready to explore the city!

A stack of many pancakes with blueberries, strawberries and bananas.

Wander around Temple Square.

Salt Lake City has a gorgeous downtown that is every sightseer’s dream! 

On my first day in a new city, I like to spend the afternoon getting to know the vibe of the city and seeing some of the most famous architecture that surrounds the city. 

Temple Square is number one on my list of where to start your Salt Lake City sightseeing because of its rich art, culture, and history. 

Temple Square is a beautiful complex of more than 10 acres of meticulously-groomed grounds that will take your breath away, including the main Mormon temple, Salt Lake Temple.

It’s owned by the Church of Jesus Christ of Latter-day Saints (aka the Mormon Church, who play a huge role in SLC history), but now, the name has changed to include other churches adjacent to the area of the Mormon Temple.

It’s easy to spend a solid hour walking the grounds or discovering the beauty inside. If you time it right, you can catch a free performance from the Tabernacle Choir or just spend time delving into the elaborate architecture of its interior. 

There’s also the Family History Library on one side of Temple Square, which is run by volunteers from the Mormon Church who will help you research your family history and genealogy.

If you happen to be visiting at Christmas time, you can catch the array of festive lights and nativity scenes displayed from around the world!

The giant Mormon Temple in Salt Lake City with flowers in the foreground

Wander the shops at City Creek Center.

After you’ve had your fill of architectural beauty, make the short walk over to City Creek Center for an amazing upscale shopping opportunity. 

City Creek Center is lined with over 100 stores and restaurants and caters to provide entertainment in its open-air atmosphere complete with a retractable roof for the days of inclement weather. 

Even if you’re not into shopping, it’s easy to enjoy City Creek Center for its foliage-lined walkways and babbling creek that runs the entire two blocks of the mall. 

It’s reminiscent of The Grand Canal Shoppes in Vegas with water shows and various art exhibits lining the pathways. There is always some sort of entertainment to compliment your spending spree!

Several jet fountains in the middle of a pedestrian walkway on a SLC itinerary

Grab a drink at Quench It.

All the walking and shopping calls for a unique Utah treat! Lying just a mile down N West Temple Street is Quench It soft drinks. 

You’re probably thinking soda? Really? But hang in here with me! Quench It isn’t just your regular soda drink. 

They serve what the locals call dirty soda and it’s a must-try! Dirty sodas have garnered a cult like following in Salt Lake and their shops offer a fun, colorful atmosphere for enjoying the bizarre drink. 

Dirty sodas are a combination of your favorite classic soft drink and spiked with a shot of flavorful Torani Syrup with a splash of coconut cream.

It’s a wildly delicious combination that’ll supply you with a good shot of sugar to amp up your afternoon!

Check out the local street art.

With sugar running through your veins, continue through downtown to snap some pictures in front of Salt Lake’s famous street art! 

Street murals have begun to take the city by storm and there are some incredible works of art hiding around street corners. 

My favorite way to spend the late afternoon is seeking out some of these works of art. Here’s a list of my favorites and their locations to help you navigate around the city!

The Magic School Bus: Where aremy fellow 90’s babies? So you remember watching The Magic School bus in science class? Well, this mural is über reminiscent of those days! 

Located at 800 S 15th E, this mural will bring back all the wonderful memories of Mrs. Frizzle and her magic adventures complete with a DJ dragon and floating candy!

The Book Wall Mural: Located at 222 South Main Street, this massive book mural has some of the world’s most famous books painted in gigantic form! 

You’ll find the spines of Harry Potter, Gone With the Wind, and The Scarlet Letter painted in meticulous detail. It’s a super fun place for a colorful photoshoot!

Rock Legends: I love rock music so the Rock Legends Mural is my favorite mural in downtown Salt Lake! Located at 162 400 W on the side of the famous Gateway shopping center, this colorful iconic mural is worth the visit. 

The faces of eight rock legends are painted in bright, colorful fashion. I can’t help but bust out an air guitar while I walk past the faces of Jim Morrison and Jimi Hendrix!

Grab a fancy dinner.

Head back to the hotel and clean up for a five-star dinner at Current Fish and Oyster

Current serves up the best seafood in downtown Salt Lake City! 

If you’re wondering about seafood in a landlocked state like Utah, don’t! Their menu is full of the freshest seafood flown in daily from around the world. 

Start off with their smoked clam dip as an appetizer and move on to their caramelized salmon for the main course. Not only are the dishes plated to appeal to the eyes, but the food itself will blow you away! 

Set in a vintage brick building, Current has kept the simplicity of its original construction with brick walls, concrete floors, and hundreds of Edison lights that warm up the space. 

Massive black booths and a sprawling bar add a trendy, welcoming feel that really sets the tone for enjoyment. 

I tend to hold out on cocktails here as their neighboring restaurant, Undercurrent steals the cocktail show! 

Plate of oysters in SLC

Grab drinks at Undercurrent or go see a show.

After dinner, spend the rest of the night one of two ways to see nightlife done SLC-Style

If you want to have a low-key night with a few drinks, walk across the street to their sister cocktail bar, Undercurrent.

Here you’ll find carefully crafted cocktails in a contemporary but comfortable setting. The entire interior has a nautical theme vibe that carries over into their drink selection. I love their Hanzo Steel cocktail or their Sea Legs cocktail! 

If you find yourself stumped on what to order, tell the bartender you want to Walk The Plank and they’ll decide the fate of your drink.

If you feel like listening to some rock and roll music, Salt Lake is home to a few music venues that are well-known in the industry! 

If you want to catch an intimate show, check out Kilby Court. Kilby Court is tucked away on a side street that was once a garage and offers an extremely private setting showcasing small acts. 

Although big names such as The Head and the Heart and The Shins have played at the venue, it caters to the more up-and-coming artists now. 

It’s a fantastic way to discover new music or to hang out in a friendly environment that offers entertainment in an intimate but inviting setting.

Man's hand serving an orange drink with crushed ice and mint

Day 2 of Your SLC Itinerary

Your second day in Salt Lake City is all about the great outdoors! 

Salt Lake offers unrivaled views of Wasatch Mountains, the Great Salt Lake, and miles and miles of the beautiful Utah landscapes! 

Hike up Ensign Peak.

Wake up early and start your day with a short hike up Ensign Peak! 

Ensign Peak lies in the foothills of Salt Lake and offers an entirely different view of the city. The trailhead starts off in a residential area just behind the Utah State Capitol building. 

The trail is an easy and enjoyable half-mile ascent that reveals the city from the perspective of 5,400 feet! 

If you time it right, it’s the perfect way to catch a Utah sunrise or to just enjoy watching the city wake up from above the horizon.

The view from the top of Ensign Peak in SLC looking over the State capitol building

Stop by the Utah State Capitol building.

Descend Ensign Peak and consider stopping at the State Capitol Building since you’ll be so close!

The grounds surrounding the building are beautiful and the Capitol itself is something to marvel at, so it’s absolutely worth some time on your weekend in Utah to dedicate to exploring the area.

Sitting on top of a hill, the ornate beauty and storied history of The Capitol building are captivating. 

You can hop inside for a free tour or guide yourself through the magnificent hallways and overlooks at your own pace!

state capitol building on a sunny day in slc with the words "STATE OF UTAH" written in front of the building

Grab a cup of coffee (and some breakfast) to fuel your day.

After an early morning, head straight to Salt Lake Roasting Co. for a fresh cup of coffee and homemade pastries! 

Salt Lake Roasting Co instantly became one of my favorite coffee shops in Utah because of their warm, inviting atmosphere. 

You’ll feel instantly welcomed into the quaint coffee shop beginning with the inviting blue and yellow bricked building that’s impossible to miss! 

The interior is a gigantic two-story roastery with a steampunk flair. All their coffee is fresh roasted daily and the pastries are made in-house by their pastry chef. 

If you’re in the mood for a more substantial breakfast, you’ll want to try out The Park Cafe.

 Located in the Liberty Wells area of Salt Lake next to Liberty Park (which you should totally check out!) it’s the perfect place to enjoy a comfort-food-style breakfast. 

Their breakfast omelets are to die for and their French toast tastes just like grandma’s! 

The Park Cafe has been a family-owned staple in Downtown Salt Lake since the 1980s which gives it that welcoming feel.

cup of coffee on a table at a cafe

Check out the Great Salt Lake and Antelope Island.

You can’t come to Salt Lake City and not experience the Great Salt Lake! 

I’ve found the best and most beautiful way to do this is to spend the afternoon exploring Antelope Island State Park. What makes this park so unique is its location and the hundreds of free-roaming buffalo! 

Antelope Island is a small peninsula jutting out in the middle of Great Salt Lake. My favorite way to explore is to take the hiking trails around the park. 

My favorite two trails are the Buffalo Point Trail and Frary Peak

Buffalo Point Trail is an easy 1-mile hike that has incredible views of Great Salt Lake and tons of wildlife. 

Frary Peak is a little more intense at 6 miles but because of its elevation gains, the views are incomparable! 

Another way to enjoy the afternoon is to take a dip in the Great Salt Lake at Bridger Bay Beach

This large sandy beach is located on the banks of Great Salt Lake and offers easy access into the water. 

The experience of swimming in the Great Salt Lake is unlike any other because you can effortlessly float due to the high salt content. It’s definitely a must-do Utah bucket list activity!

a buffalo on antelope island in great salt lake

Grab a local beer.

Head back into the city and grab an afternoon beer at Proper Brewing

I know Proper Brewing is the top brewery in Salt Lake because the locals could not stop talking about this place! It turns out, their suggestion was right! 

Proper Brewing takes pride in their microbrews and innovative beer combinations such as the beertini (just try it, as weird as it sounds!). 

The atmosphere is your quintessential brewpub with arcade games and pool tables for entertainment. 

Large bay windows look out to the city of Salt Lake and every soul in the joint seems to be having a lovely time! 

When I visit a brewery for the first time, I always pick up a flight so I can sample most of their menu. 

While I loved all the samples, their Belgium Dubbel really stood out to me. It’s a wonderful mix of low-key malty herbs and spice. 

To make an afternoon here, grab a burger from their onsite kitchen and enjoy the relaxing atmosphere with a beer in hand. 

tasting flight of different beers

Check out Gilgal Garden.

On your way back to the hotel, stop at Gilgal Garden. Gilgal Garden is a hidden gem in the middle of Salt Lake City and is most enjoyed after a beer…seriously! 

It’s a weird place and to enjoy it, you’ll need an open mind. Located at 749 East 500 South, Gilgal Garden sits in an unassuming lot in a residential neighborhood. It’s easily missed if you don’t know what you’re looking for. 

Gilgal is a sculpture garden created by Thomas Childs that consists of 12 sculptures and dozens of stone engravings depicting poems, scriptures, and texts. There’s some funky stuff there, like a Sphinx with the head of Joseph Smith, the famous founder of the Mormon church.

It’s a fun and free way to experience some of the culture that lies in the heart of Salt Lake City.

A statue of scattered parts of a body an interpretation from a biblical story

Stop by Red Butte Garden.

This is a great place to stop on your way to your next SLC hike, the Living Room. The trailhead is right nearby so it’s a quick and convenient stop.

In the Red Butte Garden, you’ll find the Natural History Museum of Utah (a great place to stop if you are traveling with kids) as well as several trails lined with beautiful flowers. 

This is where the Red Butte Garden Amphitheatre is as well, named for the park, where you can often find larger acts when they pass through SLC on tour. 

Another interesting place to visit while here is the Water Conservation Garden which creates a beautiful, rich-feeling environment that is truly sustainable and shows that drought-resistant plant life can be absolutely beautiful. 

red butte garden utah

Hike to the Living Room for sunset.

Hikers love the Living Room for its epic views over SLC which are particularly beautiful at sunset!

This 2.2-mile out-and-back hike leads to incredible views of Downtown and the surrounding landscape.

Sit above the horizon on “chairs” made from surrounding rock and enjoy the afternoon high above the city.

Landscape of salt lake city living room trail

Have a delicious dinner out.

 After your full day of enjoying the outdoors, head back to the hotel and clean up for dinner. I love exploring cities and trying different cuisines that are unique to the area. 

On my last trip to SLC, I found the most delicious Mediterranean food in Downtown called Spitz in the Sugar House neighborhood. As soon as you step foot into Spitz you’re having a good time! 

The ‘order in line’ restaurants creates a fun atmosphere with splashes of color through the entire interior and decks of cards stacked up on every table. 

I usually order one of their famous doners wraps. If you’ve never had a doner wrap before, you’re in for a pleasant surprise!

These massive wraps are stuffed with every type of Mediterranean meat and veggies curled up in a delicious tortilla-like wrap. I always order the Berliner Doner, a combination of feta, carrot slaw, cucumber, and tzatziki! 

Not only is each entree tasty, but it’s also served in a way that is every bit worthy of the ‘gram. They also have house specials such as their Street Cart fries and doquitos (fried lavash bread stuffed with feta and aioli, like a Mediterranean taquito).

You’ll never leave this place hungry and you’ll be dreaming about it long after you leave Salt Lake City!

Sate your sweet tooth.

You can’t leave Salt Lake without experiencing the decadence of their dessert scene! Like my main meal, I love exploring the latest and greatest dessert hangout throughout the city.

 I’m so glad I stumbled upon The Dodo, also in Sugar House. Without question, The Dodo serves up THE best pie in the world among other desserts! 

When I walked into The Dodo I could smell the sugary delights right away. They have 12 staple pies that can be ordered all year round, including peanut butter cream cheese, chocolate almond moose, and key lime. 

I ordered the Caramel Coconut Coffee Cake and to this day, I still think about it! 

They also serve up ales, cocktails, and wines to go along with dessert. The Dodo is a wonderful place to hang out and enjoy the beautiful Utah night on their warmly lit, comfortable patio.

a slice of key lime pie covered in lime zest

Finish the night under the stars.

Wrap up dinner and dessert and get ready for a night under the stars at South Physics Observatory

South Physics Observatory offers star parties that are open to the public on clear nights! Armed with professional astrologers, you can gaze up at the universe in their beautiful planetarium and learn all about the planets and galaxies!

They also open up for special celestial events such as meteor showers and comets. If you’re lucky enough to be visiting Salt Lake during a time like this you’re in for a once-in-a-lifetime experience! 

All their events take place outside, so come prepared, as Utah’s night can get a little chilly.

Utah night sky with lots of stars

More Time in SLC? Utah Day Trips Worth Taking

If you go a little further afield, there’s so much to see in the rest of Utah. (You can check out my 7-day Utah itinerary for some inspiration).

Just want to do a quick day trip? Just about 20 minutes from SLC, you can head to Big Cottonwood Canyon and Little Cottonwood Canyon in the Wasatch Range. This is a great place to visit in fall when the beautiful quaking aspens change colors! 

The Bonneville Salt Flats are another must-see just an hour and a half outside of SLC — there’s no place quite like it in the US!

Of course, in winter, there’s no place like Park City Mountain ski resort, home of the Sundance Film Festival and lots of great winter ski trails and activities!

For typical red rock landscapes, head to Moab for both Arches National Park and Canyonlands National Park, or head towards Las Vegas where you can see the beautiful Zion National Park.

How to Spend 1 to 5 Days in Moab: Itinerary Ideas for an Epic Trip!

Allison standing at the edge in Canyonlands national park

I’ve spent a lot of time in Utah over the years, road tripping through its national parks and exploring as much of the Southwest as I could.

Of all the places in Utah I’ve visited — which include five national parks and at least twice as many state parks — truly nothing beats the beauty of Moab.  

While I love road tripping Utah, if I had to pick one place to base myself to explore the best that Utah has to offer on a short trip, it would be Moab.

Moab is otherworldly, surrounded by beautiful red rock formations everywhere you look. But it’s also in the perfect location, close to both Arches National Park and Canyonlands National Park, as well as the Colorado River and Dead Horse Point State Park.

But Moab is more than just pretty views and a convenient location for ticking off a couple of national parks. It’s also an active mecca for everything from mountain biking to whitewater rafting to rock climbing to hiking. Every outdoorsy person should put Moab on their bucket list!

Honestly, it’s hard for any other place in the USA to come close for how much beauty Moab packs into such a small region.

How to Get to Moab, Utah

Sign for Moab town at the entrance to town

Typically, if you are heading to Moab, you will fly into Salt Lake City. There are many airports all over the U.S. that fly direct to SLC, making it a convenient choice.

From there, you can either drive to Moab (about 4 hour drive by car) or make a connecting flight to Canyonlands Airport (CNY). 

However, Canyonlands Airport is a small regional airport with limited flights. As a result, it can get rather expensive to fly into CNY. Another thing I’ll note is that renting a car at CNY typically is more expensive than renting at SLC.

If you don’t mind doing extra driving, you might want to fly into and rent a car from SLC. If time is really short and you don’t mind spending a little extra in order to maximize your Moab itinerary, then fly into CNY.

Insider Tip: If you are driving to Moab from SLC, Google Maps will have you go via Green River to I-70 and then turn off on Route 191. This is the fastest route! 

But there is an even more scenic drive if you continue east on I-70 and then turn off on Route 128. This is one of the prettiest roads in all of Utah! It will add about 1 hour of travel time, but it is so beautiful, as you track the Colorado River nearly the whole time. 

If you happen to be driving in around sunset, it’s even more majestic. Words don’t do it justice.

How This Moab Itinerary Works

Allison standing in Arches National Park in moab, Utah with the mountains behind her

This Moab itinerary is additive, meaning that the first day of the itinerary covers everything you’d want to see if you have only one day in Moab: the highlights, so to speak.

It is structured in a logical way that reduces backtracking and prioritizes the most important things, mindful of your limited time. 

It also makes sure you get out and do some light hiking, so that you’re not just doing a car-hopping, whistle-stop tour of overlooks without appreciating the nature. This is one of my pet peeves when traveling so I try to ensure that doesn’t happen in any of my itineraries.

If you have more time in Moab, you’ll find that the second day of this Moab itinerary contains the second most important things, and the third, fourth, and fifth days offer still more exciting things to do in Moab.

I would say that days 1 and 2 are the absolute core of a trip to Moab, covering Arches National Park, Dead Horse Point State Park, and a portion of Canyonlands National Park.

After that, I listed ideas for day 3, day 4, and day 5 based on my idea of importance and excitement. 

However, you could easily swap day 4 for 3, 5 for 4, etc. Stick to days 1 and 2 as the core of this Moab itinerary and feel flexible with the rest of it.

Where to Stay in Moab: Hotels & Glamping

Glamping at Moab Under Canvas with dark sky

There are lots of great places to stay in Moab for every type of traveler and budget!

GLAMPING | Moab Under Canvas

I finally got to stay at Moab Under Canvas on my last trip to Moab and it did not disappoint! The tents were laid out so thoughtfully and I loved the amenities like the in-tent bathrooms (including hot showers!).

There was also a wood stove in the tent which would have made it great for chilly nights, too. I stayed there in July and it was a little hot, though, so I would suggest it for the shoulder season.

>> Check availability and pricing on Booking.com | Hotels.com | Expedia

MID-RANGE | Red Cliffs Lodge

Located right on the Colorado River, this gem is a bit outside of Downtown Moab and Main Street but it’s worth the small sacrifice of convenience for a location this spectacular.

There’s an on-site pool, hot tub, fitness area, and restaurant, and there are also activities available such as wine tasting and horseback riding that the property can organize.

>> Check availability and pricing on Booking.com | Hotels.com | Expedia

BUDGET | Lazy Lizard Hostel

This was a godsend during my first trip to Moab, where we didn’t book anything in advance and then arrived in Moab, only to find the only remaining rooms were $300+ a night!

The setting was friendly, the amenities were basic but well-priced, and our private room was no-frills but comfortable. 

>> Check availability and pricing on Booking.com

Where to Stay in Moab: Vacation Rentals

Cabin Overlooking Moab

Image provided by the property

Cabin Overlooking Moab is a stylish cabin that can house 8 guests in 3 bedrooms. Best of all, it has one of the most impressive views in the entire Moab area. 

This cabin features 1,700 sq. feet of modern convenience, with all the things you’d need for an extended stay, but it’s still very much a cabin.

Best of all, it offers breathtaking views of the La Sal Mountains from one deck, the Moab rim from another, and Arches National Park from yet a third!

Book this VRBO cabin online here!

Wisteria Cottage at Cali Cochitta

A romantic, whimsical cottage surrounded by a tree and flowers, with a pastel green porch swing and a small dining table in front of the cottage in Moab.
Image provided by the property

The Wisteria Cottage at Cali Cochitta is a beautiful choice for couples and lovers of rustic cottage designs and colorful gardens.

The cottage is conveniently located 2 blocks from Main Street, and the inside comes equipped with a well-stocked kitchen, bathroom, and a beautifully designed bedroom with a king-size bed. Guests are also provided with a cruiser bike with which to explore the town, as well as secured bike storage.

The two main draws of this charming VRBO in Moab, however, are the garden area and hot tub. The garden is shared with other Cali Cochitta guests, so it makes for a beautiful place to chat with others outside.

On top of that, the hammocks are a great place to just sit back and unwind to the sounds of the stone water feature, another detail that adds to the dream-like ambient of the location.

Book this home in Moab!

Moab Travel Tips

Sitting on the edge of Dead Horse Point State Park at sunset in a black dress looking out onto the river

WHEN TO VISIT | Moab is indescribably hot in the summer! I visited Moab the last time in July and it was frankly pretty miserable. It was 110F the day we arrived! 

My previous trip to Moab was in May and the weather was gorgeous — warm but not overbearing. The best months are April-May and September-October. Note that it may snow in Arches in winter!

WHERE TO EAT | Downtown Moab has so many amazing places to eat, and if you’ve been on a larger Southwest road trip without much variety in your food, you can find a lot of variety in Moab! 

I had amazing Thai food at Thai Bella Moab (though some dishes were a bit too spicy, and I’m generally a person who can handle spice!) and Antica Forma has really nice Italian food. There are also a lot more options on Main Street.

Note that Moab can be very busy and crowded, so I always suggest making reservations or ordering take-out if picking last minute. On my last trip to Moab, waits for tables were like 1-2 hours!

If you’re on a budget, check out the take-out offerings at the Moab Food Truck Park — there are all sorts of delicious options.

GET AN EARLY START | While Arches currently does not run on a reservation system the way some national parks are, it is first-come, first-serve for space within the park. 

Once all 1,000 parking spots in the park are taken, it will shut down for a period of time — sometimes up to three hours. Avoid this by arriving early! My itinerary has you getting to Arches in time for sunrise on day 1, so you shouldn’t have this problem.

HIKING SAFETY | Always bring plenty of water when hiking in Moab. Stick to the trails and have an offline map downloaded on your phone in case you get disoriented. Bring filling snacks that aren’t too sugary to keep you fueled while hiking if it’s hot.

Your Customizable Multi-Day Moab Itinerary

Day One: Arches National Park + Colorado River Cruise

Windows section at Arches National Park with two arches next to each other

You can follow this guide or you can also download an audio guide to Arches National Park for less than $10. 

This one-day Arches mini-itinerary will walk you through the best spots quickly, but it may be more pleasant to have an audio guide if you’re an auditory learner!

Start with a sunrise hike to Delicate Arch.

Delicate Arch at sunrise with a sunburst and a small human figure at the base of the arch to give a sense of scale

For the first day of this Moab itinerary, I’m assuming you arrived the day before in Moab and are able to wake up bright and early for a sunrise hike.

I know I know. Waking up for sunrise is a pain. But at Arches National Park, which gets really crowded, it’s absolutely worth it — especially for the pay-off of seeing Delicate Arch at sunrise with minimal crowds. It’s the best hike in Arches for a reason.

Delicate Arch Trail is 1.5 miles each way (3 miles round trip), and note that the way there is uphill — 480 feet of uphill, to be precise — so you will get an early morning workout! Allow about 45 minutes to get there. 

To decide when to leave, I suggest looking at the sunrise time, then subtracting 45-60 minutes for the hike and however much time it’ll take you to drive to the trailhead. That should get you there around the right time!

Tip: You should bring a headlamp as it might still be dark when you begin your hike.

Explore the Devil’s Garden area.

Strange, towering red rock formations of the Devils Garden section of Arches National Park on a sunny day

Once you return to the Delicate Arch Trailhead and get back in your car, head to Devil’s Garden, about 15 minutes by car. 

You can do the entirety of the Devil’s Garden Trail if you are a serious hiker, or you can do just a small subsection of it. 

Here are a few trails to choose from in Devil’s Garden: pick whatever suits your current fitness level and desire!

The wide, narrow Landscape Arch in Arches National Park, with red rocks and green desert flora

EASY | Landscape Arch Trail: 1.9-mile out-and-back trail with little elevation gain. A good short hike for beginners.

MODERATE | Double O Arch Trail: 4.1-mile out-and-back trail with 670 feet of elevation gain and some scrambling and heights.

HARD | Devil’s Garden Trail: 8-mile loop with 1,085 feet of elevation gain. Some scrambling, primitive trails, and heights.

Snap photos at the Windows Section and Balanced Rock.

standing in the middle of an arch in utah

After you’ve done a fair bit of hiking, it’s time to take it easy, especially as the sun picks up in intensity. Luckily, the rest of this day in Arches is all easily accessible by car, with short walks rather than hikes.

Turn on The Windows Road about 15 minutes after leaving Devil’s Garden, and you’ll find a large parking lot. It may be difficult to find a spot here initially, so keep looking.

People tend to sightsee fairly quickly in this part of the park, since there are no long trails, so cars tend to cycle in and out at a decent clip. 

Once you find a parking spot, there are several gorgeous arches you can see in this section of the park. 

Those include Double Arch, North and South Window Arches, and Turret Arch, all of which are absolutely beautiful and worth seeing!

As you leave the Windows area, be sure to turn your head and spot Balanced Rock!

Make one final stop at the Park Avenue Viewpoint.

The red rock formations of the beautiful buttes and mesas and arches of Park Avenue in Arches

Finally, as you leave the park, make a stop at the Park Avenue Viewpoint, one of the best views in Arches National Park.

The viewpoint is beautiful, but you could also take the Park Avenue Trail for a short hike if you have enough time. It’s one mile to the Courthouse Towers Viewpoint one-way, two miles round trip, and the views from there are spectacular.

Relax and change at your hotel or glamp site.

Once you’ve tackled a full day at Arches, it’s time to head back to your hotel and get off your feet for a bit. 

Don’t get too comfortable, though — you’ve got to be out the door at 5 PM to get to your sunset cruise on time!

Take a sunset boat cruise on the Colorado River.

Sunset colors on the Colorado River near Moab

Time to finish your first day in Moab with a bang! A sunset boat cruise down the Colorado River is the stuff bucket lists are made of.

The cruise lasts 90 minutes, and then if you want, you can opt for a BBQ dinner add-on afterward so that you don’t have to figure out a dinner option after your cruise.

This tour starts at 5:30 PM, so be on time!

Book your sunset boat cruise here!

Day Two: Canyonlands National Park + Dead Horse Point State Park 

Allison standing at the edge in Canyonlands national park

Day two of this Moab itinerary is all about Canyonlands and its surrounding area. We will tackle one section of the park today, Island in the Sky. There are other districts of the park, but we won’t be visiting them today.

You can follow this guide for Canyonlands or you can also download the Canyonlands audioguide tour for under $10 if you want something to listen to while you drive!

A quick note on Canyonlands: The national park is divided into four districts: Island in the Sky, Needles, the Rivers and the Maze. I include Island in the Sky on Day 2 and Needles on Day 4. I don’t include the Maze (as it’s entirely backcountry and only suitable for experienced backpackers) or Rivers since it requires more planning.

Optional: Start the day with a scenic flight

Aerial view of the red rocks of canyonlands national park from a small plane above the park

For an incredible wake-up call, take the 9 AM scenic flight over both Arches and Canyonlands to get a birds-eye view of what you saw yesterday and what’s to come! 

It’s not cheap, but it is an otherworldly way to see the grandeur of the Moab region on an 80-minute flight — it’s certainly worthy of a spot on a Utah bucket list!

This is the only flight company allowed to fly over the national parks, so it’s a one-of-a-kind experience!

Book your scenic flight over Arches and Canyonlands here!

Check out Mesa Arch.

Allison sitting underneath Mesa Arch in Canyonlands national park on a sunny day

Whether or not you started the day with a flight, the first stop in Canyonlands is scenic Mesa Arch. 

If you didn’t opt for the flight, you could do another pre-dawn wake-up call to see the sunrise at Mesa Arch

At sunrise, there will be tons of photographers there, as the sun when it is rising lines up perfectly with the arch. With the right camera skills, you are able to get that classic framed “sunburst” you’ve probably seen on Instagram!

I didn’t visit Mesa Arch at sunrise (one sunrise is enough for me) but I still found it beautiful and worth the visit, with epic views and a gorgeous arch that rivals anything in Arches.

The Mesa Arch Trail is very short, just a 0.7-mile loop from the parking lot, making it an easy walk if you’re not in the mood for hiking.

Spend more time in the Island in the Sky District.

Sitting on the edge looking over Canyonlands national park

As you continue through Canyonlands, make your way to a few different stops along the Island in the Sky section of the park. 

Your final destination is Grand View Point, but there are a few spots along the way to stop at. I suggest stopping at Candlestick Tower Overlook, Buck Canyon Overlook, and Orange Cliffs Overlook before stopping at the Grand View Point.

There is an overlook there and you can also extend your sightseeing with a 1.8-mile return hike via the Grand View Point Trail.

If you want to hike in the Island in the Sky district, here are a few suggestions:

EASY | White Rim Overlook Trail1.8 miles out-and-back with 160 feet of elevation gain. Rocky terrain, so watch your footing, but the final viewpoint is otherworldly and worth every step.

MODERATE | Aztec Butte Trail: 1.7 miles out-and-back with 259 feet of elevation gain. However, it is moderate since there is slick rock and some scrambling necessary. 

HARD | Syncline Loop: 8.6 mile loop with 1,630 feet of elevation gain. Lots of scrambling and wayfinding, only for experienced hikers. Hiking the loop clockwise is recommended.

Watch the sunset at Dead Horse Point State Park.

Sitting at the edge of Dead Horse Canyon State Park looking out onto the Colorado RIver and red rocks and sunset colors

After a fun-filled day of hiking in Canyonlands, it’s time to rest your legs and watch the sun set over the beautiful Colorado River at Dead Horse Point State Park.

I consider Dead Horse Point State Park like a Grand Canyon in miniature. Personally, I find it more impressive than Horseshoe Bend in Arizona. It’s absolutely spectacular and sunset is when it’s the best.

If you arrive early at Dead Horse Point State Park you can opt for a hike. There is the Short Loop Trail (1 mile, easy), the Rim Loop Trail (5 miles, moderate), and the Big Horn Overlook Trail (3 miles, easy).

Note: There is a separate entry fee to Dead Horse Point that is a little pricy, about $20 per car, but it’s worth it in my opinion.

Grab a drink at Moab Brewery.

A beer tasting flight of four different color beers

After your long day hiking, you deserve a cold one!

This fun, lively microbrewery is a great spot to celebrate your hikes, scan through your snaps from the day, and enjoy a tasty beer.

They focus on ales and IPAs — the FMU Double IPA is especially delicious. 

The food, however, isn’t fantastic (though they do have good fries). I’d opt to eat at one of the restaurants I recommended above after you are finished with your beer!

Day Three: Rafting on the Colorado River

Start the morning with a half day rafting trip.

Three blue rafts sitting in the Colorado River in Moab near red rocks

Next up on this Moab itinerary, we’ve seen the Colorado River from a cruise and from afar, but now we’re going to see it up close and personal!

If you’re new to whitewater rafting, take it easy with a half-day Class I and II rapids tour. The tour lasts 4 hours as you traverse seven miles of river, and includes pick-up, drop off, a buffet-style lunch, and an expert guide.

Book your beginner rafting tour!

You could also pick a slightly more adventurous rafting tour, such as this Class I, II, and III rapids tour that includes Fisher Towers. 

Book your intermediate rafting tour here!

Hike Corona Arch.

The colors of the near night sky at Corona Arch

After you’ve rafted and had a tasty lunch, let’s go visit one of the coolest arches in Moab that isn’t part of a national park: Corona Arch!

The Corona and Bowtie Arch Trail is 2.4 miles long, out-and-back, with 482 feet of elevation gain. 

The trail starts on Potash Road near the Gold Bar camping sites. You start by crossing some train tracks and then make your way through the trail, which is well-marked. The scenery is nothing wildly special but when you arrive at Corona Arch: wow.

It’s rated as a moderate trail but I found it on the easy side, though there is some scrambling near the end of the trail as you approach Corona Arch, as well as a section with some cables and a ladder that helps you ascend the boulder.

Have a tasty dinner in town.

Once you’ve worked up an appetite again, it’s time to find somewhere to eat in Moab!

Grab a great dinner and then either head back to your hotel or onto our next activity.

Go stargazing.

Stargazing in Moab, Utah with the milky way visible as well as balanced rock silhouetted against the night sky in arches national park

I love stargazing and Moab is a fantastic place to do so! 

If you want to find one of the best places to see the stars, head back to Dead Horse Point State Park, which is an International Dark Sky Park!

Your pass should still be valid (they are good for two days), so you don’t have to pay the entry fee again. Just hold onto it from the day before. 

Dead Horse Point State Park holds occasional night sky programming, so check it out and see if anything is going on during your trip to Moab!

Canyonlands National Park is also a Dark Sky Park, and they even have night sky ranger programs!

While Arches isn’t technically a Dark Sky Park, the park is actively working on reducing light pollution and there are several great viewpoints in the park to do so. Panorama Point and The Windows are two great areas for stargazing!

Day Four: More Canyonlands National Park

Spend the day in the Needles District.

Red and white rock formations called 'the needles' in Canyonlands National Park

Tip: There is nowhere to eat in the Needles District, so have a hearty breakfast and pack a picnic lunch to enjoy later on one of your hikes!

Next up, we’re going to visit the Needles District, another part of Canyonlands National Park.

Here are some hikes you can choose from in Needles:

EASY | Slickrock Foot Trail: 2.4 miles with 137 feet of elevation gain. It’s on the moderate side of easy due to the uneven, rocky terrain, but it’s not a heart-pounder.

MODERATE | Lost Canyon Trail: 8.6 mile loop, 748 feet elevation gain, and some of the best views of all of the Needles District. Lots of up and down, so it’s a workout!

HARD | Druid Arch Trail: 10.8 miles and 1,614 feet of elevation gain. Added difficulty due to some sandy parts to hike through and some rock scrambling.

If you don’t feel like hiking, there’s still plenty to do in the Needles District! 

Check out the Roadside Ruin, which is an ancient granary from the Puebloan era. It’s just a short walk here. 

There are also some overlooks you can easily drive to, including Wooden Shoe Arch Overlook, and some very easy “hikes” that are really more like walks.

These mini-hikes clock in at around half a mile round trip. Pothole Point Trail and Cave Spring Trail are two of these short walks.

Take a sunset ATV ride on the Hell’s Revenge Trail.

The rocky formations of Hells Revenge in Moab, a perfect place for an ATV ride

After you’ve seen a good deal of the Needles District, it’s time for a sunset offroading adventure!

Be sure to time your day so that you can get back to Moab in time for your sunset ATV — around 6 to 6:30 PM in summer. Check the exact time on the GetYourGuide website as times may change throughout the year to reflect sunset time.

The famous Hell’s Revenge route takes you to a beautiful Colorado River overlook (a thousand feet above the river!) and includes a brief sojourn into Arches Natonal Park on a thrilling self-drive ATV ride. You’ll roar up petrified sand dunes and admire beautiful red rocks changing color as the sun sets on this 2.5-hour ATV adventure.

While this sounds every bit the adrenaline-pumping activity, it’s family-friendly — kids as young as 3 can be passengers in the ATV, and drivers need to be 18 or older with a valid license.

Book your sunset ATV ride here!

Day Five: Outdoor Adventure Your Way

Two women enjoying canyoneering in Moab

For your final day in Moab, let’s do some more outdoor activities — whatever you feel like trying, preferably something that you’ve never tried before!

Canyoneering is another popular activity in Moab, exploring beautiful slot canyons, rappelling down waterfalls (if the water level allows) or cliff edges, and getting to access all sorts of places you’d never be able to without this tour!

Book your canyoneering tour online here

And of course, another thing that Moab is famous is rock climbing. This is all set up with guides, so you can try rock climbing even if you’ve never learned the ropes (pardon the terrible pun).

I’ve just started getting into bouldering and rock climbing and I love it, but I’ve never tried it in Moab. It’s on my list for my next visit!

Book your rock climbing trip online here!

Moab Without a Car

Allison looking out of a car window in Moab

This itinerary assumes you have a rental car or your own car available to you. However, in case you don’t for whatever reason, note that there are no shuttles available in the Moab area national parks, and public transit is limited.

I don’t really recommend visiting Moab without a car, but if you had to, you could get around with tours. Here’s how I would do it.

Day One: Arches (4×4 tour of Arches) + Sunset Cruise

Day Two: Scenic Flight + Canyonlands (Island in the Sky 4×4 Tour)

Day Three: Rafting Tour 

Day Four: Canyonlands (Needles 4×4 Tour)

Day Five: Canyoneering or Rock Climbing

Where to Go Before or After Moab

Allison looking over the hoodoo fairy chimneys of Bryce Canyon National Park, another national park in Utah

You can continue your Utah road trip in any way you choose! 

Visit more of the Mighty 5, or head east to Colorado (Denver, Boulder, etc.), south to Arizona (Monument Valley, Page, Grand Canyon, etc.), or west to Zion National Park and Las Vegas.

Your Perfect Arches Itinerary: 2 Days in Arches National Park

The perfect desert adventure is waiting for you in Moab, Utah, at Arches National Park!

This outdoor playground is home to the highest density of natural sandstone arches in the world: we’re talking over 2,000 documented to date!

Full of breathtaking red rock features and scenic hiking trails, Arches National Park is sure to impress every US national park enthusiast. 

But there’s a lot to see here, spread across 50+ miles of roads, and it can get overwhelming to plan the perfect route to hit all of the bucket list musts in Arches National Park.

Don’t sweat (save that for when you hit the trails!) — we’ve broken down the top things to do in Arches National Park, day by day, into this easy two-day Arches itinerary!

Travel Tips for Arches National Park

Allison exploring Arches National Park on a sunny day

Go early. This is one of the most popular national parks in the Southwest, so don’t expect solitude. Usually, there is a line to enter the park starting as early as 9 AM. 

Try to get an early start on both days, since you only have two days in Arches. Aim for at least one day where you wake up early enough for a sunrise hike!

Be sure to have a car. Arches National Park does not have a bus or shuttle system, so you’ll need a car to access the trailheads and viewpoints in this itinerary. If you’re not driving to Arches from your home state, you’ll likely want to fly into Salt Lake City and rent a car there — flights to Canyonlands Regional Airport are expensive and rentals are limited there.

Not sure where to get the best deal on your rental? I’ve rented cars dozens of times through various search engines and have settled on Discover Cars as the best car rental search engine – it searches over 500 trusted rental companies to find the cheapest price for your rental! Compare prices for car rental from Salt Lake City here.

If you don’t have a car, plan tours. It is possible to do Arches National Park without a car, but you’ll want to book some tours of the National Park and some Moab activities in order to fill up your itinerary.

Slather on the sunscreen. Arches National Park is hot, hot, hot in the summer! Be sure to apply sunscreen at least 10 minutes before a hike, and reapply every two hours or so (or more if you’re sweating a lot). 

Don’t forget exposed skin on the back of your body, like the back of your next, behind the knees, lower calves, etc! This is where I typically end up burned when I’m not diligent.

Bring a lot of water. As mentioned in the previous point, Arches gets quite hot in the summer season and it can be quite easy to get dehydrated. 

In every road trip packing list, I make sure to impress upon how important it is to have a large supply of water in your car just in case of an emergency. 

Define your accessibility needs. Not all of the park is accessible to people with mobility limitations. The following places are wheelchair accessible: Park Avenue Viewpoint, Balanced Rock Viewpoint, Lower Delicate Arch Viewpoint, and Wolfe Ranch Cabin. 

There is an accessible campsite at Devils Garden (#4H) and the Visitors Center and the restrooms are accessible all throughout the park.

It’s best not to bring your pet. Arches National Park is not a particularly dog-friendly national park. Dogs are not permitted on hiking trails or at overlooks, nor in the backcountry, which basically eliminates all of this itinerary! 

Dogs are only permitted at the Devils Garden campsite, picnic areas, and along paved roads. If traveling with a pet, check out these other dog-friendly hikes in Moab.

Where to Stay when Visiting Arches National Park

Glamping tent lit up from within with starry sky behind it

We give some details on campsites below in the itinerary, but if you’re not planning to camp — or the campsites in Arches are all full — here is where we suggest you stay in Moab!

GLAMPING | Not into full-on roughing it and camping? Glamping is the perfect middle ground where you can experience comfort and ease while also being in nature. Under Canvas Moab knocks it out of the park in terms of comfort, style, and entertainment, and is frequently cited as one of the best glamping lodges in the entire United States.

Book your stay at Under Canvas Moab here!

BUNGALOWS | The charming Moab Springs Ranch has private bungalows that are the perfect place to stay in Moab if you want more privacy than the typical hotel. Each bungalow has its own little terrace, and each room has A/C, TV, a kitchenette and dining area, and a private bathroom. The property also has a restaurant, garden, and BBQ facilities on-site.

Book your stay at Moab Springs Ranch here!

INN | For a rustic stay that nonetheless has all the amenities you need, Red Stone Inn is a fantastic choice. Rooms all come with a kitchenette, AC, TV, and en-suite bathroom. In terms of shared amenities, there is a hot tub and free WiFi throughout the property.

Book your stay at Red Stone Inn here!

5 Things Not to Forget to Pack for Arches

man standing below delicate arch in utah wearing hiking boots

Sunscreen. I’m weaning myself off of chemical-based sunscreens, especially if I’m doing any water activities like rafting or swimming. I love SunBum SPF 50 with Vitamin E as it’s all-natural and moisturizing without feeling icky and sticky.

Hydration backpack. You’ll want to rehydrate a lot while hiking in Arches, especially if visiting in the summertime! I recommend bringing a hydration pack like this Camelbak which you can wear on your back and sip water from, totally hands-free. It has a zipper pocket so you can throw in other essentials — car keys, cell phone, granola bars, etc. and use it in place of a day pack.

Hiking boots. This Arches itinerary includes a number of hiking trails that are rather rocky and uneven, and having ankle support is really key in these instances if you don’t want to roll an ankle and ruin your trip. 

I love my pair of Ahnu hiking boots (for women) and for men, I suggest these similar Keen boots. Whatever boots you pick, be sure to break them in with a hike or two before heading to Arches.

Hiking socks. Don’t forget to pack hiking socks! Regular old cotton socks in hiking boots can lead to massive amounts of blisters — I’ve learned this lesson firsthand, unfortunately! Moisture-wicking hiking socks are cheap but can save your vacation. These DriTech socks are a great and inexpensive option, or you may want to invest in some merino wool quick-drying socks.

Headlamp. Because this Arches itinerary includes some sunset hikes and sunrise hikes, you’ll need a headlamp like this one. Trust me, as someone who hiked back from a sunset hike at Corona Arch in the dark without a headlamp, you’ll absolutely want one! A smartphone flashlight won’t cut it.

Day One of Your Arches National Park Itinerary

Start the day at the Arches National Park Visitor Center.

the rugged landscape of arches national park, starting at the visitor center

Time to get ready for a full day exploring the beautiful red rock landscapes of Arches. 

However, the rugged landscape that makes up the 119 square mile park is more fragile than you may think!

Luckily, the Arches National Park Visitor Center near the entrance station is well-equipped to provide information about park stewardship. 

They also offer important insider details on how to access and appreciate the park’s many famous attractions.

Also, they’ll let you know of any important closures. For example, on my last visit, unfortunately, the Devil’s Garden was temporarily closed.

The visitor center is also a great place to top off all your water bottles! Although there are fill stations sprinkled throughout the park, it’s important to carry plenty of water at all times.

Summertime temperatures often exceed 100ºF/38°C, so proper hydration while tackling this Arches itinerary is extra important — especially if you’re hiking a lot!

Begin your exploration at the Moab Fault Overlook.

view from the moab fault overlook viewpoint over the red rock landscape of this beautiful utah national park.

As you continue into the park from the visitor center, you will begin to gain elevation.

Look around at the sandstone features as you make the switchbacks above the park entrance.

To the left, you will see three pinnacles called the Three Penguins. Can you make out the penguin shapes?

The turnout for the Moab Fault Overlook will be one of the first viewpoints in the park on the right side of the road. 

Check out the impressive fault and read through the helpful interpretive signs to understand the tectonic plates and how they have impacted the beautiful Utah landscape.

Hike the scenic Park Avenue Trail.

red rock formations seen from a hike on this arches national park itinerary.

From the Moab Fault Overlook, continue on the main road to the Park Avenue Trail and Viewpoint

The views are epic right from the parking lot — this stop makes a great backdrop for a group photo, even if you’re not planning to do a hike!

Park visitors that are unable to hike long distances can enjoy an amazing lookout here. The first section of the hiking trail is paved to be wheelchair and stroller accessible.

For those who wish to continue past the paved section, the trail leads toward the astonishing Courthouse Towers in the distance. 

The 2-mile out-and-back trail takes hikers to the canyon floor for a close-up of the various towers and fins!

The trail connects with the main road at the 1-mile turnaround point, so it’s possible to arrange for a private shuttle.

If you want to arrange a shuttle, be sure to do it in advance, especially if you don’t want to hike back to the Park Avenue Trailhead or if you are trying to save time on this Arches itinerary to maximize your trip!

Gaze at the La Sal Mountains Viewpoint.

the famous 'three sisters' rock formation seen from the la sal mountains viewpoint in arches national park

After a nice walk through the sandstone monoliths, head back to the main road and stop at the La Sal Mountains Viewpoint.

There’s not much of a trail here, but it’s a nice place for scenic views with some interpretive posters to read through. 

You’ll also be able to spot the Three Sisters rock formation here, one of the most beautiful landmarks in Arches National Park!

The La Sal Mountains that you can see in the distance are about 20 miles south of Moab and are the second-highest mountain range in Utah.

They offer great recreation opportunities for locals and visitors with skiing in the wintertime! But in summer, boy, do they make one beautiful backdrop.

Visit Arches’ very own ‘Great Wall’.

large red sandstone 'wall' next to a road with a car on it driving in arches national park on a sunny partly cloudy day.

This feature isn’t quite the same as the great wall you may be thinking of on the other side of the globe. It is, however, really beautiful and impressive!

The Great Wall in Arches National Park is a towering row of naturally formed sandstone cliffs and towers.

Take in a drive-by view of this phenomenal feature or stop at the Petrified Dunes Viewpoint.

From the designated viewpoint, you can see the Great Wall in the distance and the petrified dunes with the La Sal Mountains in the background. It’s picture-perfect!

Hike to the viewpoint at Balanced Rock Trail.

hoodoo holding up a rock that looks like its balancing. mountains capped with snow in the distance at sunset.

This next tower is going to blow your mind! If you’re looking closely, you can even spot it as you drive to the trailhead…

Continue past the Great Wall on the main road until you see the well-marked parking area for the Balanced Rock Trail on the right.

Near the trailhead, there are bathrooms and a nice picnic area. Take some time to regroup, hydrate, and refuel with a well-deserved picnic lunch before you head out on a hike to Balanced Rock.

Feeling rejuvenated? Good!

Now, it’s time to get a closer view. The short and easy 0.3-mile scenic loop will take you around the base of the iconic feature.

This rock formation, known as a hoodoo (the likes of which you’ll see all over Utah, in particular, Bryce Canyon National Park) appears to be balancing a bolder that is 55 feet in diameter.

The total height of the structure is 128 feet!

Explore the Windows Section of Arches National Park.

a giant rock with an arch showing blue sky behind it in arches national park

Not far past the Balanced Rock Parking Area is a side road marked with signs leading to The Garden of Eden, Double Arch Trail, and The Windows Section.

The first hike takes off at the very end of the side road. Park in The Windows Section Parking Area and look for signs that lead to The Windows Trail. 

The Windows Trail is an easy 0.65-mile loop that takes hikers to the North Window and South Window (nicknamed ‘the Spectacles’ for its unique shape)

The hike finishes off with an up-close view of Turret Arch. You can take epic photos of Turret Arch through the North Window for a beautifully composed shot.

As another option, hikers can take Windows Primitive Loop Trail for an alternate view of the North and South Windows. 

Truth be told, all the trails are all scenic in this section of Arches National Park!

Hike the Double Arch Trail.

low angle shot looking up to the double arch off the trail in moab.

The second trail that you must hike on this side road is the Double Arch Trail.

The Double Arch Trailhead Parking area is just a short drive from the Windows Section, so it’s great to pair these two Arches activities back-to-back. 

Set aside ample time to explore this next arch and don’t forget your camera!

This easy 0.25-mile hike begins in a cool desert forest of juniper trees. Continue on the trail until you come to the unmistakable Double Arch! There’s nothing quite like it.

Set up camp at Devils Garden Campground, if camping.

the campsite at arches national park, devils garden, surrounded by trees and red rocks.

A fun-filled day in Arches National Park is best rewarded with an overnight at Devils Garden Campground. It’s also the only campground in Arches proper.

As the only campground in Arches, you’ll want to book it well in advance online at recreation.gov

Bookings open six months in advance ($20 site fee), and so you’ll want to book as far in advance as time allows if you are trying to camp within the park. 

There are only 50 sites in all of Arches National Park for camping, and it is full pretty much every day between March 1 and October 31, when it is by reservations only.

If Devils Garden is all booked up, you may want to check out the Slickrock campground outside of the park.

Not trying to camp? Refer back to the top of the post where we suggest places to stay in Moab, and skip forward to the sunset hike in the next section. After that hike, you’ll return to your hotel.

Located right inside the park, this campground makes a perfect starting point for your next day’s adventures. The sites in this campground are all well laid out providing some shade and red rock views.

It’s also a great place for stargazing in Arches!

Take in the sunset at Skyline Arch.

skyline arch seen with brilliant colors and red rocks.

Did you think you were done for the day? No way! Arches National Park is famous for its glowing golden hour!

Right from the campground, take the short and easy walk over to the Skyline Arch. The round trip walk will be less than 0.5 miles from the trailhead.

If you have extra time, you could also tack on the short 0.3-mile hike to Sand Dune Arch, located just a short walk from the Skyline Arch. 

However, if you have to pick one, Skyline is better at sunset.

If you brought your headlamp along, stick around for the star show. The uninterrupted night sky is sure to reveal some stellar views of the Milky Way.

That’s officially all for day one. Now, it’s time to rest up for an early start!

Day 2 of your Arches Itinerary

Catch sunrise on the Broken Arch Trail.

view of an arch that looks partly broken, with a small crack in the rock, seen at sunrise.

Rise and shine!

Grab your headlamp, camp stove, instant coffee, and a breakfast bar for the trail, because this is a sunrise you will not want to miss. Mornings are hard, I know, but this will be 100% worth it.

Right from the campground (or driving in from your hotel), hop on the Broken Arch Trail

The arch is located less than a mile from the trailhead, and it offers a perfect spot to sit and brew some morning coffee as you watch the sun come up over Arches National Park. 

This is one of those great short hikes with an epic reward, especially if you time it for sunrise.

From Broken Arch, you can complete the loop to pass by Sandstone Arch on your way back to the campground or go back the way you came. The distances are about the same.

Trek through Devils Garden on one of Arches’ best hikes.

two hikers walking down a trail in the devils garden section of arches national park.

Take your time breaking down your campsite as you prepare for another day of adventure in this desert playground! 

Don’t forget to top off on water here, as refill spots can be few and far between in Arches National Park.

No trip to Arches is complete without a hike on the Devils Garden Trail. Within only 2 miles of hiking, you will pass by a dozen natural sandstone arches, including Landscape Arch.

Landscape Arch is the longest sandstone arch in the national park, stretching nearly 300 feet across. 

It looks impossibly thin at points — its thinnest section is only 6 feet across — which is wild when you consider its size!

This is a good hike to do earlier in the day before temperatures become too hot (hence the name Devil’s Garden!).

With detours to grab a closer look at some of the arches, the total distance on this hike becomes about 5 miles — so it’s not for the faint of heart. 

Be prepared to tackle this hike and bring lots of water, preferably in a Camelbak for easy access.

To amp up the difficulty, you can tack on the Double O Arch, also accessible off the Devils Garden Trail. 

However, this is on the hard side of moderate difficulty, so be sure to be prepared with proper footwear and water. 

Note that this is not for the faint of heart as there is quite a bit of drop in some sections of the hike, as well as some sections where you need to scramble and do some wayfinding.

Whatever hiking adventure you choose, return to the parking area to find some shade and a cool drink of water!

Take a scenic drive to the beautiful Fiery Furnace Viewpoint.

lots of beautiful red rocks at the fiery furnace viewpoint in arches

On the main road headed toward the park entrance, there is a parking area for the Fiery Furnace Viewpoint. 

From here, you can get an epic view into the thick fins, hoodoos, and arches of this area.

To hike in Fiery Furnace, you must obtain a permit from the visitor center or join in on a ranger-led hike (I recommend this latter option). 

You can book a ranger-led hike on recreation.gov: note that you need to book at least 4 days in advance, and it’s suggested to book several weeks ahead if possible as these are all small groups of no more than 25 people.

Note that since there are no maintained trails through Fiery Furnace, it’s easy to become disoriented and lost — another reason a ranger-led hike is a fabulous idea.

Visit Delicate Arch for sunset.

sunset at the scenic and iconic delicate arch with sunset colors and mountains in the distance.

We saved the most iconic arch in Arches National Park for last! You will probably recognize Delicate Arch from the many social media snaps of it, and even from Utah’s license plate!

To reach the trailhead, continue on the main road toward the park entrance until you reach the turn for Wolfe Ranch / Delicate Arch Viewpoint Road on the left. 

Continue down the side road and park at the Wolfe Ranch Parking Area — this is where you’ll start your hike to Delicate Arch.

The hike to Delicate Arch is a little challenging and requires hikers to follow the cairns marking the trail to avoid getting lost. 

However, there are usually a fair number of hikers here, so it’s hard to get too lost.

Take your time and be observant. At 3 miles round trip, this hike is well worth the close-up view of the arch!

Say goodbye – for now – to Arches at the pristine Panorama Point.

one last look at arches national park before finishing up this itinerary

Take one last good look at Arches National Park from Panorama Point.

This is the perfect place to reminisce and plan your next Utah adventure — trust me, there will be another one!

Take one last good look at Arches National Park from Panorama Point.

This is the perfect place to reminisce and plan your next Utah adventure — trust me, there will be another one!

Have More Time in Arches National Park?

the red rocks of tower arch in a more remote park of arches national park, seen shortly after sunrise in the morning light

This is already a fairly ambitious Arches National Park itinerary, but if you’re a fast hiker who doesn’t spend a lot of time soaking up views or photographing, you may want to tack on a few additional hikes in the park where it makes sense.

You may also want to keep these in your back pocket in case the crowds of Arches start to get to you: these are lesser-visited and a bit off the tourist path, though they are by no means a secret.

Here are a few additional arches in the park worth the hike!

Tower Arch: A moderate 2.7-mile roundtrip hike in a more secluded section of the park — this is great if you’re tiring of the crowds on the more on-the-beaten-path part of Arches and want to make a detour to shake off the crowds.

Pine Tree Arch & Tunnel Arch: These can easily be added onto a hike to Landscape Arch while hiking the Devils Garden section of the park. These are less-visited than some of the other arches in the section, but the Devils Garden area is still rather popular, so don’t expect total solitude.

Additionally, you can add some more fun activities in Moab, like this sunset cruise on the Colorado River, a half-day rafting tour, or a 4WD tour in Hell’s Revenge.

Where to Go Before or After Arches National Park

Allison visiting Mesa Arch in Canyonlands national park sitting in the middle of Mesa Arch

Arches National Park is often visited in conjunction with other incredible Utah bucket list destinations.

If you base yourself in Moab, you’ll likely also want to visit Canyonlands National Park (where you’ll find Mesa Arch — contrary to popular belief, this arch is not in Arches!).

You’ll also want to spend at least a half-day exploring Dead Horse Point State Park, where the Colorado River bends beautifully in a way similar to Horsehoe Bend in Arizona.

People often spend a few days in Salt Lake City before making their way to Arches, but you can also do this in reverse.

Other stops people often make include Zion National Park, Bryce Canyon National Park, and Capitol Reef National Park. 

I’ve included all of these on my one-week Utah Mighty 5 road trip itinerary, so if you are planning a longer stay, be sure to read that post!

I also have a post that combines all the best Utah attractions with some stops in Arizona like the Grand Canyon as well as Nevada in this Southwest USA itinerary.

The Only Southwest Road Trip Itinerary You Need

Planning an epic road trip through America’s Southwest? You’ll be richly rewarded with insane Martian-esque landscapes, beautiful national parks, empty stretches of road, and stunning sunsets.

I’ve highlighted all the best on and off the beaten path adventures so you can create a Southwest road trip of your dreams.

This itinerary for the American Southwest starts and ends in Las Vegas, Nevada, taking you through six national parks and a handful of state parks and national monuments along the way.

Get ready for the USA road trip of a lifetime — this Southwest road trip is truly one for the bucket list.

How Long Do You Need For This Southwest Itinerary?

This Southwest itinerary should take you from 10 days to two weeks to complete.

However, if you were pressed for time, you could certainly condense it to a one-week road trip or hit a few highlights in just 5 days, though you would definitely need to cut out quite a few things.

As written, this road trip will take you through six national parks, three state parks, a handful of national monuments, and through hundreds if not thousands of miles of untamed landscapes. We saw one national park in Arizona and all five national parks in Utah.

If you were trying to condense this Southwest road trip into just five days, I’d make it go from Las Vegas to Zion to Bryce to Page to Sedona and back to Las Vegas via the Hoover Dam.

Extending this Southwest Road Trip

If you have even more time? There’s so much more to road tripping in the Southwest that you could tack on, or even go slightly beyond the Southwest itself.

You can also easily add on a little Western road trip from Vegas to see some of California’s famous parks (Joshua Tree and Death Valley come to mind) or swing up north after Moab to visit the famous Yellowstone National Park.

New Mexico with its beautiful White Sands National Park and Carlsbad Caverns National Park, plus its beautiful cities of Sante Fe, Taos, and Albuquerque, are also a great idea.

Personally, we swung north and east after Moab and went up to Denver and Boulder for a few days before heading back to Las Vegas to drop off our rental car.

However, considering the drive from Moab is about 8 hours, you may want to break it up with some time in Grand Junction or somewhere else in Colorado if you choose to continue eastwards. We just took the long driving day and took turns driving, but if you have only one driver, you may want to break up the journey.

Tips for Saving Money on this Southwest Itinerary

To save money, be sure to buy an Annual Pass for the national parks– you can easily purchase an America the Beautiful park pass online at REI.

For $80, you have unlimited entrances to all US national parks (and monuments, forests, seashores, etc — over 2,000 protected lands) for one vehicle for a year!

Seeing as national parks cost anywhere from $10-30 to enter, with most near the $30 side of the spectrum, you’ll definitely save money by buying an annual pass.

Another way to save money is to travel by campervan or RV, eliminating or reducing your accommodation costs.

There is free camping in BLM (Bureau of Land Management) land across most of the Southwest. I have a guide to free camping in Utah, which will cover most of this Southwest itinerary.

If you prefer the amenities of a maintained campground, you still won’t pay too much, as paid campgrounds are typically around $30 per night.

Finally, another big way to save money if you’re not going with a campervan is to book your car rental in and out of the same place — when I was researching, I found Las Vegas to have the best options, followed by Phoenix, which isn’t on this itinerary but would be an easy swap.

Not sure where to get the best deal on your rental? I’ve rented cars dozens of times through various search engines and have settled on Discover Cars as the best car rental search engine – it searches over 500 trusted rental companies to find the cheapest price for your rental! Compare prices for car rentals in Las Vegas here.

Southwest Road Trip Itinerary

Stop One: Las Vegas, Nevada

My Southwest road trip itinerary has you starting in Las Vegas for a variety of reasons: the first being that renting a car in Vegas is loads cheaper than renting in most other places along this American Southwest itinerary.

You can also rent an RV in Las Vegas and use that as your transportation and accommodation all in one!

The second reason being that flights to Las Vegas are often incredibly affordable — my flight from Vegas to San Francisco was only $32 on Southwest, which even includes a bag!

While in Vegas, check out the Seven Magic Mountains about 20 minutes outside of town – it’s a fabulous art installation by Swiss artist Ugo Rondinone, which will be dismantled at the end of 2018.

The Seven Magic Mountains installation, a temporary art exhibit 20 minutes outside of Vegas

If money permits, there’s no better way to get excited about the landscape you’re about to see than to take a helicopter tour from Las Vegas.

There’s a variety of helicopter tours you can take from Vegas, each offering a completely unique landscape. If budget allows, I strongly recommend taking a flight over the Grand Canyon.

You’ll get to see the Hoover Dam, Lake Mead, and an extinct volcano on your way to the Grand Canyon — the 7th natural wonder of the world!

You can opt for an aerial-only flight (which is more affordable) or a canyon landing tour that stops 3,500 feet below the Canyon Rim, right next to the beautiful Colorado River. Both are a great choice — it depends on how badly you’d like to land at the bottom of the canyon!

Book your flight to the Grand Canyon — aerial-only or canyon landing!

But if you’re on a tight budget in Vegas and still want to ride in a helicopter, there are several more affordable rides you can do, including a nighttime flight over the Las Vegas strip!

A short helicopter flight over the Las Vegas Strip just after sunset as the lights come down over the city is an incredible experience, and one I won’t soon forget. I was surprised at how breathtaking it was even after having my breath taken away seeing the Grand Canyon… but the Las Vegas Strip did not disappoint!

You can opt for a night flight with a romantic dinner or for the more budget-friendly helicopter over the Vegas Strip tour.

With prices for the latter just around $100 per person, it’s a great way to experience the high life (literally) without breaking the bank or needing to strike it rich at the slots before booking!

Book your helicopter tour over the Strip — budget or with luxury dinner option

Recommended photo spots: Anywhere and everywhere, really! A helicopter ride will give you stunning views; The Bellagio, the W, the Wynn, and pretty much anywhere on the Strip are also great places for photos.

Recommended accommodations: The W is the funkiest boutique hotel in all of Vegas — perfect for the ‘gram! The rooms are over the top and ridiculously outlandish, the staff is amazing with their personalized recommendations and greetings, and the calm of the pool there compared to at the SLS (which you can also visit if you stay at the W) was an awesome oasis in the middle of crazy Vegas. Can’t rate highly enough! Check prices, ratings, and availability at The W here.

Stop Two: Valley of Fire

About 45 minutes from Las Vegas is what I deem to be the most underrated spot on this entire Southwest road trip: the Valley of Fire State Park.

I literally have no idea why this isn’t a national park — it’s so massive and the vistas are so spectacular that it surely deserves the title.

That said, the fact that it’s only technically a state park will serve you well, as despite its proximity to Las Vegas there were very few people at the park.

While you could do this independently, I actually did a day trip to the Valley of Fire with Pink Jeep Tours and I can’t speak more highly of it — I definitely recommend it if your budget allows.

We absolutely maximized our time there and got to see all the best parts of the park with expert narration (and a wicked sense of humor!) along the way. It was pretty much a perfect day out.

Since we had so much driving along the way later on in the trip, it was nice to start off the trip at a slow pace and not have to handle the driving and planning ourselves for the Valley of Fire.

As it’s just 40 minutes outside of Vegas, it’s an easy and logical day trip if you’re wanting to spend a few nights luxuriating in Vegas before heading out on your Southwest road trip adventure of a lifetime.

I’d recommend the tour, as it’s what we did and loved it, but you can also DIY a day in the Valley of Fire if you have budget constraints.

Book your Pink Jeep Tour online here!

Recommended photo spots: Rainbow Vista trail, The Beehives, Elephant Rock, Balanced Rock, pretty much anywhere with an open road!

Recommended accommodations: Overnight somewhere in Vegas; we loved our stay at The W (find rates & availability here) but there are a ton of other budget-friendly options available in Vegas.

You can also camp inside the park, first come first serve, but get here early if you plan to do that as spots go fast!

Stop Three: Hoover Dam

After visiting the Valley of Fire, you’ll need to route back via Vegas on your way to the Hoover Dam. This is right on your way to Flagstaff and the Grand Canyon – no circuitous rerouting required – so you might as well see one of America’s biggest engineering marvels.

The Hoover Dam used to be the tallest dam in the world when it was first built, but it’s since been overtaken by a dam I’ve never heard of until researching this post, located in Tajikistan.

The most amazing fact (to me at least) about the Hoover Dam is that the concrete holding up is still not dry all the way through!

At its base, it’s a massive 660 feet thick — the equivalent of two back-to-back football fields!

Scientists say it’ll take 125 years for it to dry all the way through; at only 80 years since its construction, we’ve still got 30 to go.

The Hoover Dam from above on a helicopter tour – truly a sight to behold on a Southwest road trip

Recommended photo spots: The dam, obviously; the Pat Tillman memorial bridge

Recommended accommodations: No need to stay overnight – this is best done as a quick stop off on the way to Flagstaff and/or the Grand Canyon.

Stop 4: Flagstaff, Arizona (the Grand Canyon & Sedona)

Flagstaff is a perfect base for further road trips in the Southwest USA.

That said, Flagstaff on its own has plenty to write home about — don’t miss Sunset Crater Volcano National Monument, with its beautiful landscape and exciting lava trails.

But perhaps the best thing about Flagstaff is its proximity to some of Arizona’s greatest attractions.

30 minutes through a winding national forest, you’ll find Sedona — one of Arizona’s most scenic places, and a must on any Southwest US road trip itinerary.

If you have time, it’s worth giving at least a full day for exploring Sedona, or even following my 2 day itinerary to exploring Sedona’s best sights.

For the purpose of this post, I’m suggesting Sedona as a day trip from Flagstaff, but you could easily spend more time in Sedona if you wish.

Check out the stunning red rocks arching into the sky, and be sure not to miss the opportunity to go for a hike or to visit the Church of the Holy Cross — a stunning chapel quite literally built into the side of a mountain.

I didn’t have time in Sedona to go on the original Pink Jeep Tour (the same company as I went with on my Valley of Fire tour) but if I did, I absolutely could have gone on this off-roading 2-hour scenic rim tour.

Book your 2-hour offroad tour of Sedona!

Sedona is great for a day trip, but the main attraction when visiting Flagstaff is the South Rim of the Grand Canyon, which is a mere 90 minutes away.

I picked the South Rim for this itinerary because it works better with the itinerary, but you could also add on the North Rim between Page and Bryce Canyon. (Here’s how to pick between the two).

No amount of preparation can truly ready you for the grandeur of what it’s like to stand at the edge of this canyon in person.

I even flew over the Grand Canyon in a helicopter a few days prior to seeing it from the edge.

While the helicopter ride was an absolutely amazing experience, truly nothing beats standing at its edge and seeing its vastness from ground level. If you can see it both ways, do! But don’t underestimate the power of seeing it from ground level with your own eyes. It’s breathtaking.

The easiest way to see the Grand Canyon is to drive there from Flagstaff, about 90 minutes each way, which is what we did.

However, I didn’t realize at the time that there was a really cool historic scenic train that runs right from Flagstaff to the Grand Canyon! If you’re into train history and old, nostalgic train rides, this may be a really cool experience for you to have. You can book it online here.

Recommended Accommodation: When I was in Flagstaff, I stayed at the Hilton Doubletree in town. With free (warm!) cookies upon check-in, large rooms, and an in-house restaurant, it’s a comfortable and affordable crash pad between adventures and it’s much cheaper than staying in either the Grand Canyon or Sedona. Check prices, rates, & availability here.

Stop 5: Page, Arizona (Horseshoe Bend, Antelope Canyon, & Lake Powell)

Page, Arizona has some of the most spectacular sights in all of the American Southwest, all in a tiny little town.

For one, Horseshoe Bend, one of the most iconic photography spots in the entire Southwest US, is located a mere 3 miles down the main highway.

But the main draw to Page is the stunning Antelope Canyon. Broken into two parts, Upper and Lower, we opted for the Lower — having heard that it has more vibrant colors, as opposed to Upper which is famous for its sunbeams much-loved by photographers.

Upper is more popular (and thus more expensive and more crowded) than Lower, plus it requires advance reservations.

Chronic underplanners as we are, we opted for Lower, as we were able to book next-day tickets quite easily.

The information online is a bit out of date; there are now two tour companies operating tours to Lower Antelope Canyon.

Ken’s Tours charges $20 as far as I know, Dixie Ellis’ $25; plus the $8 tribal lands fee. We went with Dixie Ellis’ Lower Antelope Canyon Tours as the line was shorter and highly recommend the experience.

Be aware that this is an incredibly popular tour on everyone’s Southwest itinerary no matter what tour company you go with, and you will be waiting in line quite a bit – not to mention the waiting you’ll have to do in order to snap photos without people in them. However, it’s entirely worth the experience in my opinion!

Horseshoe Bend is a bit less crowded than Antelope Canyon, mainly because it’s more spacious. We actually went three times in the span of 24 hours seeking the perfect shot.

Sunrise is fantastic because so few people are there, although the sun rises on the opposite side of the bend so if you’re looking for sunbursts, you’re better off at sunset. Midday, you’ll see a wild array of colors that you can’t quite see during sunrise/sunset, so it’s worth a separate trip just for that as it’s not so far away from Page

At sunset
At sunrise

While sunset is the most crowded at Horseshoe Bend, it’s also the most magical. As a bonus, if you scrabble up the rocks a bit, you can quite easily get epic photos with no one else in the shot!

A clever way to escape the Horseshoe Bend hoards? Fly over it by helicopter (which seems to be a running theme of this post — sadly, I didn’t have the chance to do this, though. Next time!) You’ll also get to see Lake Powell — more on that in a second.

Finally, as if I haven’t written enough about Page to fill an entire blog post all on its own, you must check out Lake Powell.

This lake is simply stunning, with glassy blue water amidst a desert landscape. You can rent a paddleboard and check out the lake at your own speed, or go to one of the many viewpoints to see it from above.

Recommended photo spots: Horseshoe Bend, Lower/Upper Antelope, Lake Powell, Wahweap Overlook

Recommended accommodations: We stayed at Hampton Inn & Suites in Page – Lake Powell and highly recommend it. The rooms are large with plenty of space to work and relax in, with all the comfortable amenities you’d expect like a fitness room, a heated indoor pool, a Jacuzzi (perfect for sore legs after hiking all day!).

Breakfast was also delicious and included in the price of the room. It also couldn’t be any closer to Horseshoe Bend, just three miles and a quick five-minute drive down the road.

If you’re planning to visit Horseshoe Bend multiple times for the perfect photo like we did, it’s an awesome place to base yourself because as soon as you leave the parking lot you’re already on the road to Horseshoe Bend! Check rates, prices, & availability here.

Stop Six: Kanab, Utah

On the way from Page to Utah, you can go two different ways. We actually did both as we did a huge circle from Page to Kanab and back all in one day when we couldn’t go to Antelope Canyon as planned, so I can report on each way!

The first way, via I-89, you’ll pass a view of Lake Powell at Wahweap Overlook before making your way to the Visitor Center of Grand Staircase-Escalante National Park.

Stop off at the visitor center in Big Water, Utah and maybe you’ll be lucky enough to meet a man who discovered a brand new species of dinosaur! He is really lovely and fun to talk to, so definitely stop by if you can.

On the way to Kanab, you can stop off to do the Toadstools hike — a short one-hour roundtrip hike that ends in a truly Martian landscape. Quite off the beaten path of most people’s typical Southwest road trip itineraries, and well worth the stop!

“Toadstools” are formed when rain makes boulders fall from cliffs and land atop softer rocks, creating mushroom-looking rock structures. They look manmade but they’re entirely natural!

After passing Kanab, quickly grab lunch somewhere before making your way to the Coral Pink Sand Dunes State Park.

This little-visited park has sand dunes that look as if they’re straight out of the Sahara — all against the backdrop of some legendary Utah mountains.

This park is so close to Zion that I don’t know why it’s more popular, but you definitely should have it on your Southwest itinerary — all the better for you to snap some epic photos without the crowds!

With the clouds, it looked more orange than pink, but on a sunny day, I’m sure the sands are more true to their name.

If you go the other way from Page via the longer but more scenic route (I-89A), you can go over a beautiful mountain pass filled with lush evergreen trees and stop at the Vermillion Cliffs viewpoint and LeFevre Overlook.

There, you can see four plateaus that make up the “Staircase” of Grand Staircase-Escalante in a variety of hues — including chocolate brown, vermillion, and purple (two of the plateaus was unfortunately covered by some clouds when we were there!)

While you’re in Kanab, you’re so close to Zion, but I urge you to skip it — for now — in lieu of visiting it on your way back to Las Vegas!

Finally, Kanab is also a good stopping point if you are testing your luck for permits for the Wave in Arizona, as the Grand Staircase-Escalante National Monument Visitor Center visitor center here is where you would need to get your permit.

Your chances are low, but it’s worth a try!

Recommended photo spots: Lefevre Point, Vermillion Cliffs overlook, Toadstools, Coral Pink Sand Dunes State Park

Recommended accommodations: We didn’t stay in Kanab during this trip because we went back to Page in a giant circle (which we don’t recommend — it was only our poor planning that had us doing so!), but Canyons Boutique Hotel would have been a great choice if we did.

With a 8.9 rating on Booking, spacious rooms, nice décor, and a central location, it’s the best choice in town. Check prices, reviews, and availability here.

Stop Seven: Bryce Canyon National Park, Utah

Bryce Canyon is truly one of the most memorable stops on any Southwest US road trip itinerary. For one, it has its distinctive hoodoos which you’ll be hard-pressed to find anywhere else in the world in such number and scale.

Hoodoos (also called “fairy chimneys”) form when the water from melting snow seeps into the cracks of the rock and freezes overnight. Bit by bit, the cracks expand until large chunks of rock fall away, leaving pillars in their place.

Hoodoos form all over the world, but there are thousands of them at Bryce Canyon, partly because the elevation is so high (around 8,000 feet!) that the melt-freeze cycle happens at least 200 nights per year

We just drove to a few different viewpoints in the park — Natural Bridge, Sunset Point and Inspiration Point — and then did the Navajo Loop Trail, which filled about a half-day in the park.

If you’re looking for a creative yet structured way to spend some time in Bryce Canyon National Park, you can do an ATV ride, a horseback ride through Red Canyon, or join a hiking tour.

Recommended photo spots: Queen’s Garden Trail, Navajo Loop, Inspiration Point, Natural Bridge, and Sunset/Sunrise Points.

Recommended accommodations: Bryce Canyon doesn’t have the most exciting options for accommodations.

We didn’t stay overnight here, as we just visited for a day, but if we had, something simple but comfortable like a Best Western is probably your best bet. Check prices, ratings, and availability. 

Stop Eight: Capitol Reef National Park

On your way to Moab from Bryce, you can take a scenic route passing through Capitol Reef via Highway 12, which I highly recommend.

The least visited of Utah’s staggering five national parks, it’s not quite as epic as Zion or Bryce but it has its own charms. It’s worth a quick stop as you pass through, at the very least.

Recommended photo spots: The cute barns and old schoolhouse on the main road, the Scenic Drive, Panorama Point, Cassidy Arch, Temple of the Moon and Sun, Chimney Rock.

Recommended accommodations: The best — and in my mind, only! — place to stay in Capitol Reef is in the Capitol Reef Resort. They have covered wagons and tipis for a themed stay, as well as standard rooms and cottages for a more traditional hotel experience. Book a stay at the Capitol Reef Resort here.

Extra Stop: On your way between Capitol Reef and Moab, you’ll have the opportunity to stop off at Goblin Valley State Park!

Frankly, we were exhausted and gave it a pass this trip, but it’s definitely on the list for my next Southwest itinerary!

Stop Nine: Moab, Utah (Canyonlands, Dead Horse Point, and Arches)

Ah, Arches National Park. With its famous Delicate Arch which is featured on the Utah license plate, this is one of the most famous national parks in the US, and a must on any Southwest road trip itinerary.

In addition to the Delicate Arch hike, you should also be sure to see the North & South Window arches, the Double Arch, and the Turret Arch.

If you want to dedicate two days to Arches, follow this detailed Arches itinerary which will explain exactly what to do with your time there!

The Devil’s Garden trail was closed when we visited, but you should definitely check it out if possible — it’s supposed to be a stunner.

Also near Moab is the Canyonlands National Park, which I actually preferred to Arches (blasphemy, I know – but I hate crowds). It was super immense, with really colorful rocks and huge canyons, and far fewer people.

There are two entrances to Canyonlands, both of which are quite far from each other.

One is Islands in the Sky, and this is the one that’s closer to Moab (and also Dead Horse Point State Park, another must-see on your Southwest road trip).

The other section, Needles, is rather far away, and suitable if you’re staying longer in Moab.

We didn’t get a chance to visit Needles on this trip, but we weren’t disappointed with the taste of Canyonlands we got at Islands in the Sky — not at all.

Other spots you can’t miss in the Moab area include Dead Horse Point State Park, a place much more beautiful than the name suggests!

It’s right on the way from Canyonlands – Island in the Sky, so it’s a good idea to go there for sunset after visiting Canyonlands in the late afternoon.

Here, the Colorado River winds and rips its way through a valley, like a combination of the Grand Canyon and Horseshoe Bend all in one.

It’s absolutely stunning at sunset, although sunrise is supposed to be even better. I never woke up early enough to see for myself.

Finally, the Corona Arch is a great sunset spot that’s a bit of a hidden gem compared to the crowds you’ll find around Dead Horse Point and Arches.

Make sure you arrive there with about an hour to spare, as the hike is one hour on a not super well-marked path, and make sure you leave before it gets too dark!

We missed the sunset by at least a half-hour and ended up walking back in the dark because we didn’t give ourselves enough time for this hike (#travelbloggerfail) but we at least made it in time for some super pretty cloud action!

Bring a headlamp if you do this hike, trust me — it’s not fun navigating back in the dark with just your cell-phone as a light source.

There are some other great things you can do in Moab if you have the time — as if having two national parks and a state park in your backyard isn’t enough choice!

For an adventure rush, go rafting on either class I and II rapids or III and IV rapids on the Colorado River or hit the ominously-named Hell’s Revenge ATV trail which crisscrosses a rugged terrain in ATVs until you hit the Colorado River.

Book a rafting tour (class I & II), a tougher white water rafting tour (class III & IV) or an ATV tour!

Not into heart-stopping adventure? There are also more leisurely ways to relax in Moab, such as taking a 3-hour jet boat cruise to Dead Horse Point State Park along a peaceful stretch of the Colorado River, checking out side canyons and marveling at the canyon walls which reach 2,200 feet above your head.

Alternately, if you need some R&R after several long days of driving and adventuring, there are tons of great spas in Moab catering to soothing tired and aching muscles! Sorrel River Ranch and Spa Moab are two great choices.

Recommended photo spots: Mesa Arch (sunrise is supposed to be fantastic as the sun will rise directly through the arch!) in Canyonlands NP as well as the scenic drive pulling over at the various viewpoints, Delicate Arch and the other arches (North & South Window, Double, Turret) in Arches NP.

Outside of these national parks, be sure to also visit Dead Horse Point State Park (please don’t miss this!!), and Corona Arch. Be sure to give yourself enough time in Moab, it’s stunning! At least 3 days is a good start.

Recommended accommodations: Moab is a bit expensive compared to other places on the Southwest itinerary. If you are looking for a decent but budget-friendly place, book well in advance as the best-priced places book up quickly.

For people on a budget, I’d suggest the Aarchway Inn is just a tiny bit outside of Moab and has gorgeous settings with that classic Utah red rock all around, a lovely swimming pool, and well-appointed rooms. Check out rates, reviews, and availability here.

If you want a world-class stay, try glamping! Under Canvas Moab knocks it out of the park in terms of comfort, style, and entertainment, and is frequently cited as one of the best glamping lodges in the entire United States.

Book your stay at Under Canvas Moab here!

Stop Ten: Zion National Park

I recommended skipping Zion initially and saving it for the end because it’s probably one of the most epic national parks in all of the United States, and you’ll want a cool place to stop on the long drive between Moab and Las Vegas.

It’s a great way to end your Southwest road trip with something memorable, and it’s a great stopover on the way between Moab and Vegas.

If you’re at all into hiking, the Angels Landing hike is truly a can’t-miss experience.

Climbing up 1,500 feet over a grueling two hour hike (the last half mile of which is up rocks, which you have to use chain handrails to ascend) is not easy — but no epic view really is.

I feel compelled to leave an important safety note about this photo.

Angles are deceiving – there was a larger chunk of the rock edge beneath me which is obfuscated a bit by the high camera angle of this shot. I scooted around while maintaining at least 3 points of contact at all times to be safe. I never stood close to the edge, only scooted on hands and knees.

Still, I posed for this photo 3 years ago — after seeing so many articles in the last few years about selfie deaths, I wouldn’t pose the same way now, but I’d choose to leave a few feet more room between myself and the first edge.

Please be careful when posing on Angels Landing and never do anything you don’t feel comfortable with, especially in pursuit of a good picture! You will likely be exhausted from the hike in the heat, so you won’t have the best balance or judgment. Be cautious and respect your body’s limits. Always be on the safe side.

If you have more time, be sure to check out The Narrows, a hike that can take up to a full day wading through water through a beautiful slot canyon. You can also opt to do a shorter hike and turn around before the endpoint.

We didn’t have time for this, as we were flying out of Vegas later that evening, but it’s on my bucket list for my return to Zion. There are some other shorter hikes in Zion that are also fantastic if you’re too afraid of heights to take on Angels Landing.

Recommended photo spots: the top of Angel’s Landing OR Observation Point (higher and harder hike), Emerald Pools, Watchman, the Narrows

Recommended accommodations: We stayed about 45 minutes outside of the East Ranger Station at Zion Backcountry Yurt, with insane views of the Milky Way surrounding us. Book way in advance on Airbnb (you can find it here).  

It’s also common to stay by the West Ranger Station, close to Springdale, but expect to pay a pretty penny for the privilege. The best combination of proximity, value, and high-quality amenities is at Driftwood Lodge about a mile outside the center of Springdale. Check prices, reviews, and availability here.

After Zion, head back to Vegas, return your rental, and marvel at all your photos from the trip of a lifetime!

IMPORTANT NOTE: Don’t forget to travel with travel insurance, especially on a trip involving lots of driving and hiking! You want to be covered in case of an accident or medical emergency. I use and highly recommend World Nomads for their easy purchasing, extensive coverage, and low prices. Get your free quote here.

What to Pack for a Southwest Road Trip

Not sure how to handle packing for a long road trip? I have a full guide to how to pack for a road trip, but I’ll briefly go over the essentials here!

Essentials

Car documents and license: This should be rather obvious, but you’ll need your license, car documentation, and insurance papers (both car insurance and travel insurance) ready for any road trip you take.

Travel insurance: If your road trip includes going to another state or country where you are not insured locally, you may need travel insurance in order to cover you in case of an incident. I use and recommend World Nomads.

Roadside emergency kit: If traveling with your own car, you should already have one of these kits, including (but not limited to) a reflective triangle, rain poncho and emergency blanket, safety vest and whistle, etc. If renting a car, ask if they provide one and if not, bring your own roadside emergency kit that also includes a first aid kit.

Spare tire & tire changing kit: Having a spare tire isn’t much good if you don’t have a jack or kit to change out the tire. Make sure your tire changing kit is complete (or buy your tire changing kit before you head out), and make sure you know how to use it!

Flashlight or headlamp: In case you get somewhere poorly lit after dark, have an emergency in the night, or just go on a sunset hike and need to light your way back, a flashlight or headlamp is key (and make sure to bring some extra batteries, too!) I suggest a rechargeable headlamp like this — it’s a great travel must-have that I find myself using more often than I’d expect.

Car charger and phone mount: Navigating, picking tunes, taking photos: your phone battery goes fast on a road trip, so don’t forget a car charger. I like this dual purpose phone mount and charger! Don’t forget any and all USB cords you might need to for your charging needs!

A road trip playlist: I’d argue this is as essential as anything else on this list! Make sure you download it before you go so that you’re not dependent on data, as a few stretches of this Southwest road trip do go through service deserts.

Hygiene and Safety

Alcohol wipes: Be sure to bring some Lysol or alcohol wipes. These are hard to find currently in the current context, so I’d suggest buying alcohol prep pads, as these seem to be the safest source of 70% isopropyl alcohol wipes. Be a decent person and only buy one box. Do not hoard anything — these alcohol wipes are needed by many people with chronic health conditions such as diabetics. One box will more than suit your needs.

NOTE: Use alcohol wipes or prep pads ONLY on high-touch surfaces as needed and not excessively — soap and water should be your primary line of cleaning and defense. Only use these when not otherwise possible, such as when at a gas station or using a touchpad at an ATM or grocery store.

Hand sanitizer: Sources of hand sanitizer and soap cannot always be guaranteed, and there may be times where it is difficult or less safe to go to a public restroom. It’s better to try to source hand sanitizer in a store from a trusted brand, but in the absence of that being possible, this brand available online looks to be safe, FDA-approved, and with a high-enough level of ethyl alcohol to be safe.

Spare liquid soap: Liquid or bar soap should be chosen over hand sanitizer whenever you have access to water. It’s safer and easier to get ahold of proper soap. Some gas stations, park bathrooms, etc. may not be well-attended, so bring some spare liquid soap with a locking top or a bar of soap in a Ziploc baggie just in case. Be sure to wash your hands for 30-40 seconds, including every part.

Face mask: When in places where distancing is not possible, you will need to wear a face mask to keep yourself and fellow humans safe. I suggest KN94s as opposed to cloth masks when possible, as these offer you (and your fellow humans) the most protection. They’re the Korean equivalent of the N95, and they work quite well. Unfortunately, the N95 is still in short supply and should be reserved for health care workers, unless you’re lucky enough to already have your own personal supply of N95s from a previous need.

Extra water: Be sure to have a few gallons of extra water in your car for emergencies — especially since this road trip through the Southwest covers a lot of harsh desert climates. Whether it’s replacing the water to cool down your engine or emergency drinking water if you’re stranded, it’s a cheap and simple thing to add to your road trip packing list with no downside.

Extras

Snacks: I fully believe the adage “It doesn’t matter how old you get, buying snacks for a road trip should always look like an unsupervised 9-year-old was given $100.” Pro tip: mix salty and sweet — too much of one or the other is a no go. I like having things like KIND bars, trail mix, chips when I need something salty, RXBar protein bars, etc. for my trip

Toilet paper or Kleenex: Good for poorly stocked roadside bathrooms or other emergency needs.

Basic medicines: Any prescription medicine you need, plus motion sickness tablets, ibuprofen/paracetamol, and Pepto-Bismol tablets for upset stomachs.

Rehydration packets: I always pack some rehydration packets with me on my travels as I’m prone to getting dehydrated and getting headaches, and they’re a lifesaver. I recommend these ones.

Travel towel: Great for a quick dip, toweling off after a rain storm, having a spare towel in case of a poorly stocked hotel or Airbnb, a microfiber travel towel is a road trip must pack.

Bug spray: So necessary in the summer months! I love this lemon eucalyptus-based mosquito repellent. If I get any bites, I use this After Bite itch eraser, which instantly soothes mosquito bites.

Sunscreen: Did you know you should always wear sunscreen while driving? The windshield doesn’t protect you against all UV rays — while they protect against UVB rays (which cause sunburn), most do not block UVA rays, which cause aging and skin cancer. This is the sunscreen I use on my face daily, and I use a cheaper basic sunscreen for my skin. No matter your skin tone or race, you need sunscreen!

Lip balm with SPF: I love this key lime-flavored Sun Bum chapstick!

Sunglasses: Bring your favorite sunglasses plus a cheap spare pair as backup — driving without sunglasses = absolute misery.

Travel pillow: If you have someone to divvy up driving duty with, this is a comfortable must-have for kicking back and enjoying your time off! I like this cozy memory-foam travel pillow, because it comes with an eye mask if you want to take a quick nap!

Battery pack: The Anker external battery pack is a travel must. While you can charge your phone while driving, you may want to charge other devices — a camera, someone else’s phone, portable speakers, an e-reader — as well.

Insulated travel mug: A Contigo travel mug is leakproof and pretty much indestructible — and they’re inexpensive to boot. This one is vacuum-insulated and fits standard cupholders easily, great for early morning coffee to power up your road trip. It’ll also be a good thing to bring along on any sunrise hike to keep you warm!

Refillable water bottle: Get a refillable water bottle and either refill it from your extra-large water containers mentioned above or fill up in sinks and fountains along the way. This one is insulated, stainless steel, and convenient to drink from

Day pack: This Osprey day pack is a perfect size. Plus, it’s designed by a company that specializes in ergonomic solutions for backpackers and multi-day trekkers, so you know it’ll be comfortable.

Camera: For years, I’ve relied on my Sony A6000 to take nearly-professional quality images, and the photos you see in this post were almost exclusively taken on this camera! I truly believe this camera is the perfect middle-ground above a smartphone yet below the 5-figure kits that most photographers use. Don’t forget extra memory cards – I only use 64GB Sandisk memory cards.

Toiletries

Wet wipes: These biodegradable wet wipes are easy on the environment and your skin, with aloe vera and Vitamin E.

Vaseline: For fixing flyaway hairs to helping chapped or burned lips to soothing hands or chub-rubbed thighs (ladies, if you know, you know)… I always make sure I travel with Vaseline!

Haircare: Whatever you need to travel with. I just bring a brush and hair ties and shampoo, but your hair needs may be different than mine!

Other basic toiletries: Body wash, shampoo, conditioner, razor, shaving cream, deodorant, toothbrush and toothpaste, face wash, any sort of face cleansing or anti-acne products, moisturizer, body lotion, makeup, etc.

Clothing

Hiking Clothes: Depending on the time of year you do this Southwest road trip, you’ll want to bring either shorts or leggings, long-sleeve or short-sleeve hiking clothes.

Jeans and Ts: Good for non-hiking days and just basic walking-around-town days.

Comfortable hiking shoes: Absolutely necessary for tougher hikes and strongly recommended for even shorter hikes like Angel’s Landing. While tennis shoes may work, hiking shoes are safer.

Sandals: Great for being able to kick them on and off in the car and suitable for shorter walks to observation points, overlooks, etc. I use Birkenstocks.

Rain jacket: It does rain even in the desert! I love the Marmot PreCip rain jacket (there’s a women’s version and a men’s version) and I actually used mine twice on my Southwest road trip.

Dress up clothes: In case you want to have a few nice meals out, you’ll want to bring some nicer clothes as well.

The 15 Best Moab Airbnbs Near Arches National Park

Moab is one of the best places to base yourself when visiting Utah’s national parks.

Whether you’re road tripping the Southwest or sticking to a Utah road trip, no matter what, Moab simply must be on your Utah itinerary.

Its charming small town vibes combined with its proximity to two out of Utah’s Mighty 5 make it a perfect place to call your home base for a few days while traveling Utah.

Frankly, hotels in Moab are absurdly expensive for the quality, even by American standards! These Moab Airbnbs are a better option for a great place to stay that won’t break the bank.

Even better, each of these Airbnbs in Moab has its own unique character, making the place you stay a beloved part of your trip as well, more than just a roof over your head.

Here is a curated list of the best Airbnbs in Moab — which one would you choose?

Best Rental Home in Moab for Being Close to It All: Casa Moab

Two gray and wooden houses connected by a roof and twin staircases leading up the upper level, with gravel on the ground in front of the houses, at this popular Airbnb in Moab.
Image provided by the property.

If you’re looking for a resort near all the main happenings in Moab that also allows for a good night’s sleep, Casa Moab offers the best of both worlds — it’s located on a peaceful, unassuming street that’s only a stone’s throw from the bustle of Main Street!

Locations of interest in the vicinity include Slickrock Cinemas, the Moab Brewery, and Chile Pepper bike shop, as well as plenty of restaurants and shops for all your basic needs.

Casita #4 (there are 5 on the grounds, but #4 has the best decor in my opinion!) is located on the ground floor of Casa Moab, and it comes equipped with a state-of-the-art kitchen, smart TV with WiFi and cable, a spacious living area, and a cozy, luxurious bedroom.

However, the outdoor facilities are where Casa Moab really shines – between the outdoor sauna, large private deck, and fire pit table, Casa Moab makes for a great place to gather all your family and friends for an afternoon of fun and a delicious outdoor meal.

If, on the other hand, you’d prefer to have a peaceful evening to yourself, Casita #3 has you covered there, too – you can take full advantage of the elegant bathroom and its walk-in shower, and use all the hot water you want!

Book this Moab home here!

Best Home in Moab for Quirky Design: Moab Digs

Wooden two-story house with orange door and two porch swings in front with a sign on the Moab airbnb which reads "Moab Digs"
Image provided by the owner

Moab Digs has everything one would ever need – its open floor design combines its kitchen, living room, and dining room into one cohesive unit, and the bedroom comes with a king-size bed and plenty of natural light.

What sets Moab Digs apart from other apartments, however, is its unique, industrial aesthetic. The interior is dominated by shades of gray, with the occasional wooden texture, as well as warm shades of red and blue on some of the furniture and paintings – this combination of colors creates the perfect balance of sleek and simple and gives the apartment a very homey ambient.

On top of having a living room balcony, Moab Digs also has 2 patios. In keeping with the unique look of the interior, the wooden design of the patios is beautifully accented by the surrounding greenery and decorative details.

One of the patios comes equipped with a barbecue grill and is more than spacious enough for larger gatherings, and the other is elevated, providing a great view of the neighborhood.

This stylish apartment is well worth the price of admission, but those who are looking to stay for 3 nights or more get a 30% discount! And frankly, we suggest at least 3 nights in Moab to see everything you want to see, anyway!

Book this Moab Airbnb here!

Best Moab Home for a Romantic Getaway: Wisteria Cottage at Cali Cochitta

A romantic, whimsical cottage surrounded by a tree and flowers, with a pastel green porch swing and a small dining table in front of the cottage in Moab.
Image provided by the owner

The Wisteria Cottage at Cali Cochitta is a beautiful choice for couples and lovers of rustic cottage designs and colorful gardens.

The cottage is conveniently located 2 blocks from Main St, and the inside comes equipped with a well-stocked kitchen, bathroom, and a beautifully designed bedroom with a king-size bed. Guests are also provided with a cruiser bike with which to explore the town, as well as secured bike storage.

The two main draws of the Airbnb in Moab, however, are the garden area and hot tub. The green-and-pink scenery is very easy on the eyes, and thanks to the trees and vines, there is ample shade to keep you cool even on the hottest of summer days.

On top of that, the hammocks are a great place to just sit back and unwind to the sounds of the stone water feature, another detail that adds to the dream-like ambient of the location.

The garden is shared with other Cali Cochitta guests, so it makes for a beautiful place to chat with others outside.

If you’re in the market for a Moab Airbnb with an amazing view, a hot tub in pristine condition, and a beautiful interior, you’d be hard-pressed to find a better option than Wisteria Cottage, especially at this price point.

Book this home in Moab!

Best Moab Home for Couples on a Budget: Bogie’s Bungalow

Wooden house with aluminum wall paneling up to halfway up the wall, showing an open layout kitchen with two stools for eating at the bar.
Image provided by the property

Located in downtown Moab, Bogie’s Comfort Bungalow is an ideal getaway for a party of one or two looking for privacy on a budget.

The combination of the old-school wooden design, relaxing color scheme, and exposure to natural light gives the bungalow a distinct identity and a cozy atmosphere.

What’s more, this Moab Airbnb is a great pick if you have a furry or feathered friend you wouldn’t want to leave at home, as pets are permitted on the premises, for a small fee – you’ll even receive a complimentary gift bag with food and other accouterments your pet might need!

On top of the rooms being spotless, the hosts are very environmentally conscious, and all the cleaning supplies used by their staff are organic.

The exterior of the cabin is every bit as impressive as the interior – the cabin comes with a private patio and a personal entrance. 

Additionally, you’ll have access to a communal hot tub and barbecue grill – although you do get the cabin all to yourself, it is one of four bungalows owned by 3 Dogs & a Moose Cottages, so the areas are shared by all the guests.

Book this budget Moab home on Booking!

Best Airbnb for Outdoor Lovers: Red Rock Base Camp Teardrop Trailer

A silver teardrop trailer with an awning over it, with two orange camping chairs, next to a solar panel in a beautiful red rock landscape typical of Moab.
Image provided by Airbnb

For those who want to connect with nature but are looking to avoid some of the inconveniences of conventional outdoor camping, Red Rock trailers provide you with everything you could wish for, and more.

For the great price of $90 a night and up, you get a cozy, furnished trailer, as well as a fully-equipped outdoor kitchen, to really take in the beauty of your campsite as you prepare your morning coffee!

What’s more, the trailer is delivered to your campsite of choice (first-come-first-serve BLM site or otherwise), sparing you the hassle of having to arrange for transportation yourself.

The delivery fee varies depending on how far you are from town, but it’s free if you’re within a 10-mile radius of Moab.  You can even bring your pet along with you, for only $35!

The trailers themselves come equipped with a cooler and 40 gallons of water, with the option of having your tanks refilled.

If you’re worried about the cold desert nights, don’t be – the combination of good insulation and propane heating is bound to keep you warm, whatever the temperature, and while the trailers themselves do not have showers, you can expect to find some at your campsite or in town.

Book this cool Airbnb in Moab here!

Best Moab Airbnb for Large Groups: Scalatore

Unique Moab Airbnb concept: a bed with a wall at the headboard showing rock paintings, with rock climbing gear and notches in the wall to try out rock climbing on.
Image provided by Airbnb

Scalatore is a condominium located on the top floor of La Dolce Vita Villas, and it’s a rare example of a rental in a popular tourist area that’s every bit as memorable as the local landmarks, if not more.

This unique condo, aptly named after the Italian word for “climber”, has nearly 17-feet-tall ceilings and rock climbing walls in the master bedroom, making the interior an amazing place to practice and muster up some courage for the real thing.

Adding to the atmosphere of the bedroom is the ‘headboard’ of the bed – a custom-made, rocky-desert-themed art piece that gets you into the canyoneering spirit first thing in the morning.  

If you still haven’t had enough of the high altitudes come night time, the second bedroom has 3 elevated bunk beds that turn the simple act of getting in and out of bed into an adventure – there’s even the option of sliding out of bed down a fireman pole (kids will love this, just be sure to supervise!)  

Casting the unique concept aside, though, the living and kitchen areas are very cozy and well-furnished, and the second bathroom is a welcome addition, especially if you’re taking full advantage of the space and visiting with a large group.

Additionally, Scalatore is located on Main Street, meaning this Moab Airbnb is incredibly close to every downtown locale you could possibly want to visit!

Book this unique Moab Airbnb!

Best Moab Home for Design Lovers: Moab Flats #3

Black leather sofa, rug, coffee table, two paintings on the wall in a modern style, and a little white vintage radio on a mid-century modern drawer.
Image provided by the property

The best rentals are ones that look and feel like a proper home, and this suite really delivers in that department – every single detail feels like it belongs, from the stylish furniture to the red-and-orange-heavy art and décor.

The outdoor area is a great place to unwind after a long day of walking around – you can cook a meal on the barbecue grill, spend an evening chatting around the fire pit, or relax as you stargaze from the comfort of the community hot tub.

In terms of location, the condo is in the very center of Moab, so you’ll have quick and easy access to quite a few stores and restaurants, and the fact that there’s a block separating you from Main Street means that you’ll still be able to get a fair bit of peace and quiet.

The Moab area is well-known for its bike trails, so cyclists will appreciate the access to bike storage and a repair station at Moab Flats.

Book this home in Moab here!

Best Home in Moab for Peace and Quiet: Sunny Acres Cabin

Interior of a rustic A-frame cabin with light wood ceilings, glass doors opening up into the Moab landscape.
Photo provided by the owner

This charming cabin is the perfect retreat for couples who want to keep it simple and spend most of their time exploring the beautiful Moab area away from the crowds of Main Street.

It’s worth noting that the lack of internet and TV means that this is somewhat of an off-grid location, so this is a great pick if you’re trying to take a short break from looking at screens.

This is not to say, however, that the cabin is not well-furnished – despite its size, it manages to cover all the essentials, between the kitchenette, small bathroom, and sofa-bed. 

This is a very welcoming Airbnb in Moab – the combination of a predominantly wooden interior, cozy furniture, and abundance of natural light never fail to make guests feel at home, and you can get a great view of the mountains from the patio.

Adding to the hominess is the fact that you can bring your dogs, and the exterior of the property makes for a great place for your pet to run around and play!

The cabin is very well-connected, and options for exploration in the area are plentiful – Moab’s downtown area is just a short drive from the property, as are Arches National Park and Dead Horse Point State Park, two beautiful spots that offer some unforgettable sights.

Book this Moab home here!

Best Pet-Friendly Moab Home: Pioneer Cabin 2

Image provided by the property

Pioneer Cabin 2 represents the authentic log cabin providing endless outdoor entertainment! The house features and lower decks, picnic tables, a gas grill, and fire pit. In addition, the home sits at 7,600 feet in elevation on the La Sal Mountain Range with views of 6 mountain peaks. The best part? Canyonlands and Arches national parks are just short drives away!

A cozy home featuring a well-appointed interior and all the necessary home comforts, perfect for families looking for a comfortable home base within a short drive from outdoor adventures.

Built with an open floor plan, authentic log walls, and rustic decor, the house offers ample seating, a fully equipped kitchen, and amenities such as a dishwasher, a washer & dryer, ceiling fans, complimentary toiletries, books & games, parking, and more.

The property is 32 miles from Balanced Rock and 36 miles from Delicate Arch.

Book this home near Arches National Park here!

Best Home in Moab for Tiny House Lovers: Kokopelli West Studio

A brilliant coral pink orange house with four yellow chairs in front and a slanted tin roof, next to other colorful houses (green and yellow).
Image provided by the property

Kokopelli West #6 is ideal for a small group who would like to mingle with fellow Moab enthusiasts.

The property is made up of several tiny houses with a shared patio, where the members of this beautiful tight-knit community can get together and relax in the shade.

The interior of West #6 has everything you need – a studio with bedding and a view of the entire communal area, a well-stocked kitchenette, additional bunk beds, and plenty of windows to keep the place naturally bright.

The indoor space is very well-utilized, and you’ll have more than enough room for everyone even if you come with a party of 4.

Outdoor amenities included in your say are plentiful – aside from enjoying the great you can take a dip in either the pool or hot tub, cook up a delicious barbecue lunch, or just sit back admire the view of the mountains from the patio with your fellow guests.

Also worth noting is the property’s location – Arches National Park and Dead Horse Point State Park are a 10 and 40-minute drive away, respectively, and you’ll be within walking distance of the nearest stores and restaurants.

Book this tiny house Moab home here!

Best Moab Home for Families on a Budget: Purple Sage Flats

Bed with colorful yellow and gray bedspread with the words "MOAB" in block letters written above it with an exposed brick wall painted white to one side.
Image provided by the owner

Purple Sage Flats is a lovely Airbnb in the heart of Moab that’s sure to woo you with its elegance and coziness.

Everything about the interior, from the earthy color scheme of the furniture to the spaciousness and homey atmosphere of each individual room, makes it really easy to relax in this apartment.

Outside, you’ll be able to enjoy the communal hot tub or whip up some barbecue and relax by the fire pit. This communal area is very easy on the eyes, due in no small part to the beautiful murals!

The key to a great vacation at a popular tourist town is finding a rental with a great location, and Purple Stage Flats’ location is about as convenient as it could be.

The apartment itself is located on a peaceful street, yet is only a short walk from Main Street, giving it great connectivity to just about every spot of interest in the Moab area.

Another thing that’s great about Purple Sage is that it has a total of 8 available rooms, which makes it a perfect place for a wedding, or just about any gathering involving a large group of people.

Book this home in Moab here!

Best Cabin for Friends on a Budget: St Dane’s Pinyon Pine Cabin

Image provide by the property

Anyone who’s traveling on a budget or has a soft spot for comfy accommodation will appreciate this charming, affordable cabin.

This beautiful propert can easily sleep 4 people and still leave plenty of room for mobility.

The 420 sq ft cabin which provides panoramic views of the Moab Rim, Spanish Valley and The La Sal Mountains with access to the surrounding National & State Parks, La Sal Mountain loop road and Ken’s Lake Recreation Area.

The cabin comes complete with a kitchenette, a small living area, and a sleeper sofa. Sleeping a total of 4 adults. The bathroom provides a tub with a shower and the cabin comes completely stocked with linens, towels & toiletries at guest check-in.

The Pinyon Pine Adobe Cabin has its own private entrance and parking, with additional parking for adventure equipment on the property. This cabin welcomes dogs with an extra nightly fee.

Book this home in Moab here!

Best Home for Friends Trips: Cabin Overlooking Moab

Image provided by the property

Cabin Overlooking Moab is a stylish cabin that can house 8 guests and has one of the most impressive views in the entire Moab area. 

The property is located off the Sand flats road on the Wilson Mesa at 7300 feet elevation, it’s near the trailheads of Porcupine trail, Kokopelli trail, Slick Rock, and Finns N Things. Besides, the cabin is close to Moab’s Famous off-roading and mountain biking locations, which include Arches National Park, Canyonlands, Warner Lake, La Sal mountain range, and Castle Valley.

This cabin features 1700 sq. feet of modern convenience but still a cabin with breathtaking views of the La Sal Mountains from one deck, the Moab rim from another, and Arches National Park from yet a third. The house is only13 miles from Moab and the Colorado River.

Book this home in Moab here!

Best Moab Tent for Glamping: OK RV Glamping Tent

Large canvas glamping tent with two queen size cots inside with storage places.
Image provided by the property

This cozy little tent in OK RV Park is a great place to book if you want to connect with nature without having to relinquish access to too many commodities.

The tent itself is little more than a place to spend the night after a long day of exploring Moab, and this is reflected in its minimal furnishings – two beds for 2 and some rudimentary seating.

The outdoor area is more in line with what you would expect a rental in this area to have, namely a private patio and a fire pit.

What makes OK RV Park stand out, however, is the community of campers – you can keep to yourself and enjoy your own little corner of the camp, or you can go to the shared patio by the park’s office and get to know some of your fellow outdoorsmen.

Another selling point of the camp is how close it is to the national parks – you can drive to Canyonlands in about half an hour and to Arches in about 15 to 20 minutes.

Book this Airbnb in Moab here!

Other Moab and Utah Resources

Sign for the town of Moab that reads "Discover Moab again & again, the adventure never ends." with red rock landscape in background.

Want more content to help you plan the perfect trip to Moab? Here’s some further reading that might help:

Pin This Guide to the Best Moab Airbnbs!

Winter in Zion National Park: What to Know Before You Go

Many outdoor enthusiasts argue that winter in Zion is the best time to visit this beloved national park in southwest Utah!

Home to Angels Landing and the famous Emerald Pools, Zion National Park is often ranked as one of the most visited national parks in the United States.

However, in the winter, Zion’s tall canyon walls become accented in powdery white snow, and the crowds of summer become a distant memory. 

Although the shift in seasons may change the scenery, there are still many fun activities in Zion National Park in the winter! However, there are a few things you should know about visiting Zion in winter, first.

Zion Winter Road Closures

Curve in the road going through a snow covered section of Zion National Park in the winter on a sunny day

Zion Scenic Drive

During peak visitation in the summertime and between December 24th – January 2nd, the Zion Scenic Drive can not be accessed by personal vehicle.

All visitors wishing to explore the Zion Scenic Drive by vehicle must use the park’s shuttle bus system.

The wintertime buses generally run between 8 am and 5 pm and can be used to access trailheads for hikes like Emerald Pools and the West Rim.

When the shuttle bus is not operating in Zion National Park, visitors can use their personal vehicles to access the trailheads and attractions along the Zion Scenic Drive.

The park service recommends arriving at trailheads early in the day because trailheads do fill up. Once a trailhead is full, there will be no more parking allowed, so it is a good idea to have a secondary plan in place.

Zion Mount-Carmel Highway

For visitors traveling from Springdale, UT to the eastern side of the park near Mt Carmel Junction, the Zion Mount-Carmel Highway is the shortest route. This drive does pass under the famous Zion Mount-Carmel Tunnel, which is just over 1 mile long!

Passenger vehicles can pass through the tunnel at any time, but oversized vehicles do have a few prerequisites and restrictions.

All vehicles 11’4” tall or taller or 7’10” wide or wider, including attachments and accessories, will require a tunnel permit. Tunnel permits can be obtained at the entrance stations and cost $15 in addition to park entrance fees.

The final obligation of oversized vehicles using the tunnel is that the vehicles must use the tunnel during operating hours, which are between 8:00 am and 4:30 pm in the winter.

Semi-trucks, vehicles over 13’1”, and single vehicles over 40’ long are prohibited. For more information on prohibited tunnel vehicles or using the tunnel, contact Zion National Park at (435) 772-3256.

Kolob Canyons Road

Wintertime conditions such as impassable snow and icy roads can cause frequent temporary closures on Kolob Canyons Road. The road is maintained throughout the wintertime and is open to private vehicles year-round.

Kolob Terrace Road and Lava Point Road

The Kolob Terrace Road is open year-round. However, 4-wheel drive and tire chains may be required to pass safely through the winter driving conditions.

West Rim Road

The West Rim Road closes during the winter season.

Zion Winter Hours of Operation and Facilities

Snow on the valley floor of Zion National Park, next to a small river, with snow-covered trees and red cliff rock faces showing a winter Zion landscape

Although Zion National Park is always open to the public, some of the facilities do undergo reduced hours of operation come wintertime.

If you are visiting Zion National Park in the winter, you will want to be aware of these facility hours and seasonal closures:

Zion Canyon Visitor Center: 8:00 am – 4:00 pm

Zion Canyon Wilderness Desk: 8:00 am – 10:00 am and 3:00 pm – 4:30 pm

Park Store: 8:00 am – 5:00 pm

Kolob Canyons Visitor Center: 8:00 am – 4:30 pm

Zion Human History Museum: closed

Zion Nature Center: closed

It is always a good idea to begin a national park trip with a stop at the visitor center. This is a great way to make sure you have the most up to date information, and it allows you to review your itinerary with professional park staff. They may even have some insider tips to share with you!

Winter Camping in Zion National Park

Snow-covered mountain near the Watchman Campground, with a partly cloudy sky in the background. Red rock showing behind the snow.

Many who come to Zion National Park choose to camp during their visits. During the summer months, there are three different campgrounds: Watchman Campground, South Campground, and Lava Point Campground.

However, Lava Point and South close in the fall leaving Watchman Campground as the only front country year-round camping option in Zion National Park in winter.

Although there are many other lodging accommodations and campgrounds in the town of Springdale, UT, winter visitors with their hearts set on camping at Watchman Campground should plan to arrive early for first come, first serve camping beginning in December.

The campground capacity does reduce for the winter season in Zion!

Winter Safety in Zion National Park

Icy Trails

With limited daylight and cold nighttime temperatures in the wintertime, one of the greatest cold season hazard in Zion Canyon becomes icy trails and icy chains.

Many of the most popular trails, including Angels Landing, remain open year-round. It’s not uncommon to have clear dry trails.

However, ice may be lingering in the shady sections of high elevation trails, which can be especially dangerous on trails like Angels Landing which have sheer-face drops and require the use of chains for leverage!

To combat icy trails, many hikers choose to carry along Yaktrax or spikes. These handy accessories will help you keep your footing on slick surfaces.

Hypothermia

A woman in a lavender top and leggings hiking the ridge of Angel's Landing covered in a light snow, looking over a snow-covered valley in Zion in winter.

When your body temperature falls to dangerously cool levels, you begin to experience hypothermia.

Although Zion National Park is well-known for its mild wintertime temperatures, wet clothes combined with lower temps found in the narrow canyons can create a high-risk.

To avoid hypothermia, the park service recommends wearing non-cotton clothing and eating high-energy foods before chill takes effect.

Thermal layers and leggings will keep you a lot warmer than cotton, and be sure to also bring a waterproof jacket in case of rain, sleet, or snow.

Rockfall

Rock formations covered in snow, surrounded by fog on a wintry day in Zion national park

Rockfall is a year-round hazard in Zion National Park. When recreating within the steep canyon, be aware and alert.

If a rockfall occurs, the park service advises visitors to safely move out of the way. If it is not possible to move out of the way of falling rock, seek shelter behind a large and stable rock feature and place your backpack over your head.

Although rockfall can occur at any time, the risk can become increased due to water freezing behind the cliff walls. When the water freezes, it can cause the cracks behind rocks to expand occasionally lodging the rocks out of place.

Rain is also a big risk for causing rockslides, so even if it’s not freezing or snowing, you do have to be aware when visiting Zion in the winter!

Things to Do in Zion in Winter

Snowshoe to Observation Point

Kolob Canyon walls covered in a light snow which shows from underneath the red rock, a stormy sky with dark clouds above.

If you are fortunate enough to visit Zion National Park after a fresh snowfall, you may be able to cross country ski or snowshoe on some of the park trails! The higher elevation areas in Zion can hold snow from late October until March.

Kolob Canyons’ high  elevation makes it a great place to have fun in the snow all winter long. However, if you are looking for a snowshoe adventure in the main part of Zion National Park, you must check out the trail to Observation Point!

Beginning from the Weeping Rock Trail, hike up the switchbacks and out of the deep canyon. You may not need snowshoes at the beginning part of the hike, but the East Rim is known for holding deep snow. Check current conditions with a ranger before departing!

The trail to Observation Point is much wider than the trail to Angels Landing, but it has quite a bit more elevation gain. From Observation Point, you will be 700 feet higher than the summit at Angels Landing! This 8-mile round trip hike includes a look at Echo Canyon as well as one of the most iconic views in all of Zion National Park.

Take a Scenic Drive Through Zion Canyon

Snow-covered canyon walls with a sunny sky with some clouds, a plowed road that is empty winding through Zion in winter.

Parts of the Zion Scenic Drive are closed to private vehicles during the summer season. Once the crowds disperse, the shuttle bus shuts down, and visitors are allowed to travel through this section of Zion National Park in their own vehicles.

Traveling this scenic route in your personal vehicle allows for the opportunity to stop as needed and take in the gorgeous canyon views. This 57-mile scenic drive is well worth the trip with chances to see wildlife and the ability to stop frequently for photographs. The drive takes about 1.5 hours depended on the number of detours you choose to explore!

Most travelers begin the drive near St. George, UT, and continue through Zion National Park toward Mt Carmel Junction.

Try for Wildlife Viewing

Two goats or sheep with horns looking at the camera, perched on some snow on a red rock landscape in Zion National Park in winter.

There is no better season than winter to spot some of Zion National Park’s wild turkeys roaming the canyon.

Although some of the park wildlife hibernates during the wintertime, it is still possible to spot mule deer, bighorn sheep, and even eagle along the Virgin River!

Binoculars and a keen eye may be necessary to spot some of these well-camouflaged residents. Roaming the park after a fresh snowfall may make it easier to spot deer and bighorn sheep.

Practice Your Wintertime Photography

View of Zion's red rock cliff landscape juxtaposed with bits of white snow in the higher elevation crevices of the canyon on a blue sky winter day in Zion National Park

Zion National Park’s beautiful landscape becomes something even more picturesque once the snow begins to fall. The tall cliffs become dusted with powdery white snow and the wall’s red colors begin to pop.

Visitors hoping to capture Zion’s winter landscape can travel the Zion Scenic Drive while using turnouts and designated parking areas to find the perfect angle. Since many of the trails stay open year-round, photographers can also hike to scenic vistas like Angels Landing and Observation Point.

Pin This Guide to Visiting Zion in Winter!