What to Wear in Winter in Europe: Packing List

I remember my first time spending the winter in Europe. The year was 2009, and my semester living in Prague was coming to a close. The Christmas markets were in full swing, the snow coating the houses of the Old Town was straight out of a fairy-tale — and I was freezing my ass off, mostly because my California-addled brain had never learned to dress properly for the winter.

If it weren’t for the many cups of piping hot cups of svařák (Czech mulled wine) I was drinking at inappropriately early hours, I likely never would have survived.

Fast forward nearly a decade and several winter trips to Europe later, and I’ve finally mastered the art of packing for Europe in winter without wanting to die.

It’s a combination of not giving a crap if you look like a fat, fluffy dumpling and layering with actual winter-specific layers rather than what I was doing… which was piling some summery clothes on top of a pair of leggings and cute pea coat and wondering why I was still cold. California, guys. Growing up there does things to you.

After all that trial and error, here’s my full winter inn Europe packing list, detailing exactly what I recommend you wear for winter in Europe.

What to Pack for Europe in Winter

What to Pack Everything In

If you’re visiting Europe in winter, my number one recommendation is to travel with a backpack rather than a suitcase. While it is definitely possible to travel with a suitcase, and there are times when it is more convenient – I can also assure you that there will be times when you regret it hard, such as when you’re trying to lug your bag across snowy cobblestones and cursing your life. Take it from an idiot who brought a rolling suitcase to Finland in November.

I prefer to travel light with a backpack that fits carry-on restrictions because I hate paying for baggage fees and waiting at the airport. Even traveling Europe in winter, I’ve found that having a 44L backpack is perfectly fine, and there’s no need for a massive backpacker-style backpack unless you truly love clothes and want a jillion options. I’ve used and sworn by Tortuga Backpacks for the last three years – this is the one I’m carrying now. I’ve traveled around Europe in winter for the last few years and never truly needed a larger bag.

One thing that makes packing for winter in Europe so much easier is using packing cubes – having an organized system, especially with all the layers you need for winter travel – makes your life a lot easier, especially if you are traveling to more than one city or country. This packing list for Europe in winter includes a few of the things that I swear by all year round, not just winter, for helping me organize my clothes and belongings when I travel.
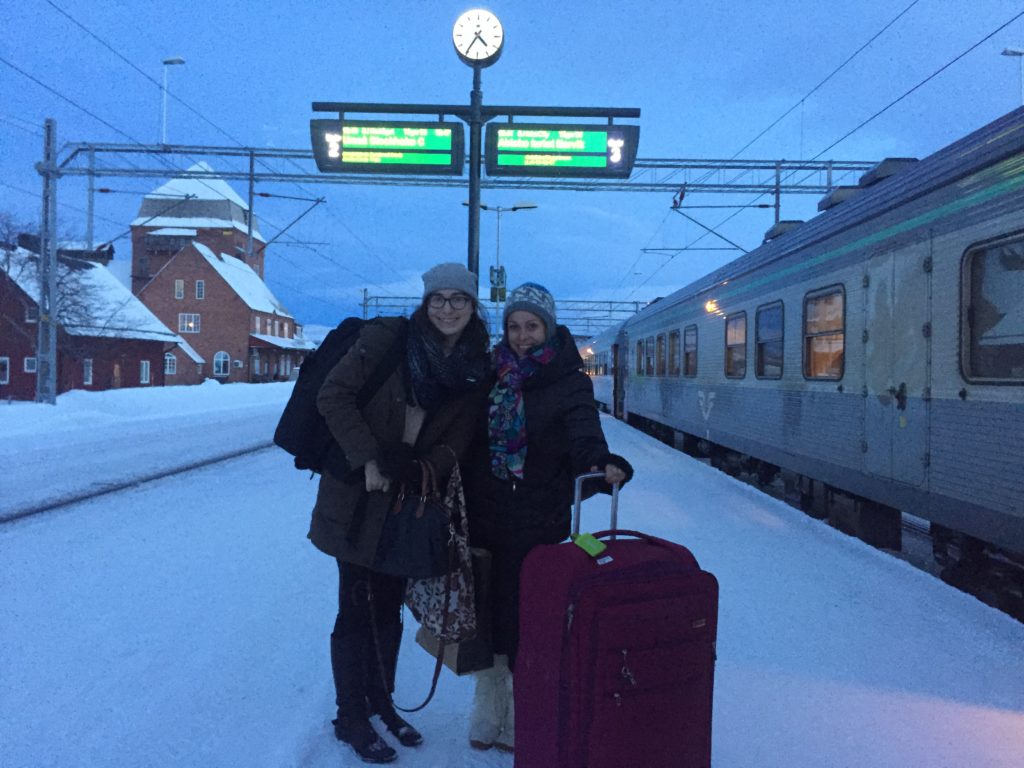
Abisko train station
How I packed vs. how my friend packed for winter in Europe. Trust  me – leave the rolling suitcase behind. She ended it dragging it more than rolling it!

Travel backpack (carry on size or check-in size)

While rolling suitcases can be great for in summer and fall weather, they aren’t a great idea for winter travel. For one, there will likely be snow or ice on the ground – meaning that you will have to drag, not roll, your suitcase… which kind of defeats the purpose of having a rolling suitcase.

Trust me, you’re way better off with a travel backpack that you can easily carry across snow, cobblestones, and other various obstacles that are the hallmarks of traveling Europe in winter. I am a light packer, so the Tortuga Backpack is the main backpack I need. I’ve spent two 5 month trips through Europe with it, including winter months, plus I take it on all my short term travels.

Why do I recommend Tortuga so much? Here’s why: this bag is 45L and has got three main compartments: one for a laptop and other flat objects, one giant rectangular compartment perfect for packing cubes stuffed with clothing, and one smaller compartment with pockets for passports, pens, odds and ends, etc. that I stash all my extras in – plus one small outer zipper pocket for anything you want quick access to.

It also has a water bottle holder on the outside as well as buckles so that you can strap something like a yoga mat to the outside. Plus, it’s quite comfortable to wear, with a padded hip belt and comfort-molding shoulder straps complete with a chest strap so that you can distribute weight perfectly across your body in the event that you need to wear your backpack for longer than usual. Check out more specs and details here.

Does it pass European budget airline requirements? I’ve never once had to check it in on a budget airline flight, and I’ve taken probably 50+ Ryanair and Wizzair flights at this point. I just buy priority boarding so that I have a guaranteed spot on board for my bag (plus a second personal item bag), which adds about $5 onto my total flight cost instead of the $20-40 or so that a heavy checked suitcase or backpack would. This adds up massively over time – with a bigger bag, I would have paid $1,000+ extra in baggage fees over the past few years. That’s massive savings.

Need a bigger backpack? Despite these long term trips, I haven’t personally used a bigger backpack (mostly because I have the back of a 90 year old woman). That said, I’ve heard great things about the Osprey system. If I ever were to upgrade my backpack capacity, that’s what I would choose. But I’m cheap and hate paying baggage fees, even at the expense of having less clothing options, which is why I prefer Tortuga. When flying budget airlines, I never check the bag, but I just purchase priority boarding for a few dollars (usually around $5) so I can have this bag on board with me, plus another personal item.

Packing cubes

Packing cubes will save your travel sanity. These easily zippable bags are wonderful when it comes time to pack and organize your clothing.  It keeps everything contained when you open your backpack, so if luggage clothing explosions drive you half as crazy as they drive me, investing in packing cubes will save you some serious therapy costs down the line.

I use these packing cubes and love them more than a logical person should love a simple zippable bag. Especially when packing for Europe in winter, when you have tons of accessories and layers to organize, this becomes extra essential.

Laundry bag

If you are traveling Europe in winter, your clothing will take a beating. Wet, dirty, covered in snow – basically, prepare to change your clothes at least once a day. I love having a laundry bag with me in addition to my packing cubes so I can keep dirty stuff separate and ready to go on laundry day.

You don’t need anything fancy – any bag will do – but I like having a cute one like this one from Kikkerland though, because I’m impractical and easily won over by a cute design. In a pinch, some plastic grocery bags will do as well.

Hanging toiletry bag

Packing for Europe in winter means you’ll need a few special toiletries (hint: bring ALL the moisturizer). After struggling to find a good way to organize my toiletries, I stumbled across this  hanging toiletry bag and purchased it on a whim to give it a try… and I promptly became a product evangelist.

It’s perfect for organizing your travel toiletries like shampoo, moisturizer, make-up, hairbrushes, tweezers, etc. It has a lot of organizers and seperators so you can really maximize your organization without taking up much excess space. It fits quite a bit – it’s like the Mary Poppins bag you always needed but never knew existed. It’s wonderful for girly girl travelers like myself who have a hard time leaving make-up behind when they travel.

It comes in a large size – I do just fine with the regular size, but those with lots of toiletries and odds and ends to organize will probably want to size up.

Cute travel daypack

I always use a daypack rather than a purse when I travel because it’s so much more comfortable, especially because I often carry lots of camera equipment with me. That said, I don’t want to look like an American bum (though I often do anyway) so I splurged on this adorable PacSafe Citysafe backpack

This bag is so amazing that I basically wrote a love letter to it here. My favorite feature about this travel backpack is that it has tons of awesome security features (locking zippers, slash-proof mesh on the inside of the bag, RFID blockers, etc.) but it looks adorable and not at all horrendous.

I use it pretty much every single day whether I am traveling or not. It’s one of the crucial things I bring with me on every trip, and it’s key when packing for a trip to Europe in winter because it’s the perfect size for squeezing in layer upon layer of cozy winter clothing.

5 Most Essential Things to Pack for Europe in Winter

When it comes to what to pack for winter in Europe, it’s best to bring all your essentials from home and try to minimize what you need to buy abroad. Most of the time, you won’t save any money by shopping in Europe. Prices tend to be a little higher than in, say, North America because 20% VAT is often rolled into the prices.

Also, depending on where you travel, in many countries the currency is currently quite strong compared to the US/Canada/Aussie dollar, so you won’t be at an advantage when it comes to shopping. For that reason, I recommend planning your winter in Europe packing list beforehand, and buying all your winter travel necessities before arriving in Europe.
A good, waterproof parka

While Europe’s weather can vary dramatically in the winter, it’s best to prepare for the worst and risk being overdressed than the alternative. I am a huge fan of The North Face because they guarantee all their products for life and will fix or replace literally anything you send to them — which I’ve tested by sending in a much used-and-abused down jacket that was returned looking like new.

Their jackets aren’t exactly budget-friendly, but they’re a great investment if you’re looking for a winter coat that will last a lifetime. This is the parka I own and I’ll use it for life (unless North Face cuts me off for how badly I abuse my clothing). If you don’t have a lot of money to spend on a new jacket but still want to ensure warmth in the winter, try buying a down jacket liner like this one and layer it between your warmest coat and winter layers.

Thermal layers

A good winter parka goes a long way, but unless you’re matching that down jacket with proper layers underneath, you won’t be maximizing your potential warmth. Everyone raves about wool’s warmth-retaining properties but I can’t tolerate it – it makes me so itchy that I want to tear off all my skin. If you can stand wool, something like these merino wool leggings paired with a cashmere sweater layer will serve you very well. Personally, I constantly wear these 32 Degrees thermal layers during European winters — I have about 5 tops that I rotate during the winter between laundry days. On bottom, I wear these fleece-lined leggings. I bring about 2-3 pairs of fleece-lined leggings on a winter trip since I can wear them several times before they start to feel gross. You’ll definitely want at least 2 pairs so you can change them out if they get wet from snow or bad weather. With thermal layers and a parka, you’re nearly set for any kind of weather in Europe.

Waterproof boots and warm socks

I’ve never really felt like snow boots are entirely necessary unless you really are planning on spending a lot of time in deep snow, like if you’re staying in a cabin in the woods or spending a significant amount of time in Lapland or ski resorts around Europe.

When it comes to packing for winter in Europe, if your trip is mostly in the cities, you just need two things in your boots: they need to be waterproof and have good traction. I first bought a pair of Blondo waterproof leather boots in 2008…  making this my longest-term relationship ever, eek, and one of my favorite travel shoes ever.

Despite many years of abuse and New York winters, I only had to get them resoled once in the last nearly 10 years. I’ve worn these in every European winter and they’ve always held up great – even in the Arctic Circle of Sweden.

If you plan on doing a lot of hiking in the snow, you may want a proper snow boot. The Elsa snow boot by KEEN is waterproof, insulated, and looks super cozy, and comes highly recommended as one of my friend’s favorite hiking boot brands.

Finally, no matter how insulated your boots are, you need proper socks to match –  sad, thin cotton socks won’t do the trick. I bought these excellent Smartwool socks after hesitating because of the price, but I’m glad I did. Although I generally hate wool, the skin on my feet is thick enough that I don’t mind wearing wool socks at all and can get all the lovely warm wool benefits without the itchiness. You don’t need that many pairs – two or three will do – because wool is really odor-absorbent and dry really fast, you can stretch out a few pairs whereas you’d need a fresh pair of cotton socks for each day.

Reusable water bottle

 The tap water in Europe is drinkable almost everywhere so make sure you bring a reusable water bottle. I’ve been to nearly every country in Europe and it’s super rare that I can’t drink the water, even in the Balkans. The only major city I can think of where I wasn’t able to drink the tap water was Kiev, Ukraine.

If you don’t already have one, try one from Klean Kanteen. If you drink a lot of hot beverages like tea or coffee, I recommend bringing a Thermos that will keep your drinks (and hands!) warm during the cold.

Moisturizer with SPF

If there’s one thing you don’t forget to pack for Europe in winter, let it be this. The cold in Europe is brutal on your skin, especially when combined with super-drying heating systems. Make sure you fight back with a heavy duty moisturizer. For the daytime, I use Aveeno moisturizer as I have sensitive skin but also want SPF protection.

Remember you need to use SPF even – if not especially – only cloudy days as UV rays are always lurking, even in the winter, ready to prematurely age your skin. (I’m super melanin-challenged, so perhaps I’m a bit paranoid). I don’t want to wear SPF at night, so I have a thick Olay night cream that I use while I sleep to put some moisture back into my dry skin.

Finally, travel insurance

Yes, I know this isn’t something that you physically pack for Europe – but it is just as essential to consider during the packing process.

Personally, I think it’s extra important to have travel insurance in winter. European winter weather is hard to predict, so it is best to be prepared and protected in case of trip cancellation/delays, lost luggage, illnesses, or accidents. I recommend buying travel insurance as far in advance as you can, as I’ve found it’s always cheaper that way than booking shortly before departure.

I have been a paying customer of World Nomads for years and use them to cover me when I travel. The contract is very clear as to what it covers, the prices are affordable, the excess/deductible is very low, and if you find yourself extending your trip it’s very easy to modify your insurance on the go.

What to Wear in Europe in Winter (Quick Checklist)

In a word (well, three): Layer, layer, layer!

I went into more detail above, but basically, here’s how I dress for winter in Europe. I start with a base layer – for me, that’s my fleece-lined leggings and thermal top, but many people prefer wool base layers. On top of my thermal layers, I usually wear just a simple acrylic sweater and jeans.

To seal in all the warmth, I add wool socks, waterproof leather boots, a scarf, a hat that covers my ears, gloves, and of course – my ridiculously warm parka. That will usually keep me warm enough for just about any winter situation in Europe.
Here’s a quick packing list plus a few product recommendations for what to wear for winter in Europe:

2-3 thermal tops

I use these 32 Degrees thermal layers  – I recommend having a few to swap between as they tend to get kind of sweaty during the day.

3 warm sweaters to layer on top

I love H&M for their non-itchy acrylic sweaters, but wool/wool blends also work great

2 pairs fleece-lined leggings

I am obsessed with my favorite fleece leggings – they are insanely warm!

2 pairs jeans

I wear these as an extra layer over my leggings. You can skip the leggings if it’s not that cold.

1 heavy jacket

Above, I recommended my North Face parka. While that’s my favorite, any warm jacket will do. What to look for: down or synthetic down lining, hood, waterproof, and windproof.

2 bras

 Or however many you want, you do you.

7+ pairs of underwear

This depends on how long your trip is, but I prefer to have a week’s worth of underwear and do laundry on the road.

Bathing suit

 If you plan to go to any thermal baths or saunas or the like while in Europe. If not, skip.

Flip flops

For walking around in your hotel/hostel when you don’t want to put on your boots.

1 or 2 knit hats

Since I’m addicted to fleece in the winter, this fleece-lined knit hats is a favorite

1 pair of gloves

I recommend a pair of touchscreen-friendly gloves so you don’t have to constantly take off your gloves to use your phone.

1 super-warm infinity scarf

I love infinity scarves like this one that you can wrap super close to your face and not have to worry about the wind with.

What to Pack for Backpacking Europe in Winter

There are a few special things you should bring if you are staying in a hostel or dorm in Europe in winter, which you can find below.
1 pair flip flops

I mentioned it above, but it goes double if you staying in a hostel!

1 travel towel

Most hostels in Europe don’t provide towels to guests and charge you to rent one. This can add up quickly if you are staying in multiple cities throughout Europe, so I recommend just bringing your own. Make sure you get the largest size or risk flashing everyone!

1 eye mask

I lived in hostels for the better part of a year and I swear by this contoured eye mask- it completely blocks out light, without putting annoying pressure on your eyes.

Some earplugs or good noise-canceling headphones

I love Hearos — they’re the gold standard for ear plugs. Alternately, if you listen to music to help you sleep, noise-canceling headphones can work wonders at drowning out inconsiderate roommates

Travel-sized toiletries

Most hostels don’t provide shampoo, body wash, etc. so make sure you bring your own. Instead of buying travel-sized toiletries, I recommend buying reusable GoToobs so you can pack your favorites from home.

Combination locks

I always check reviews of hostels to ensure that they have lockers available, as the risk of theft from fellow travelers is not something to take lightly. It’s really easy to just travel with a combination lock in case your hostel doesn’t offer their own locks so you can keep your valuables safe at all times.

Toiletries to Pack for Europe in Winter

Even though it is generally pretty easy for me to find all of my preferred brands in Europe, I do recommend bringing them from home if you can. For one, it’ll likely be cheaper. For another, it’s good to continue using the same products as back home as I find that travel and cold weather really stresses my skin and it’s nice to have continuity in the products that I use.

Here is a basic list of toiletries I typically pack:
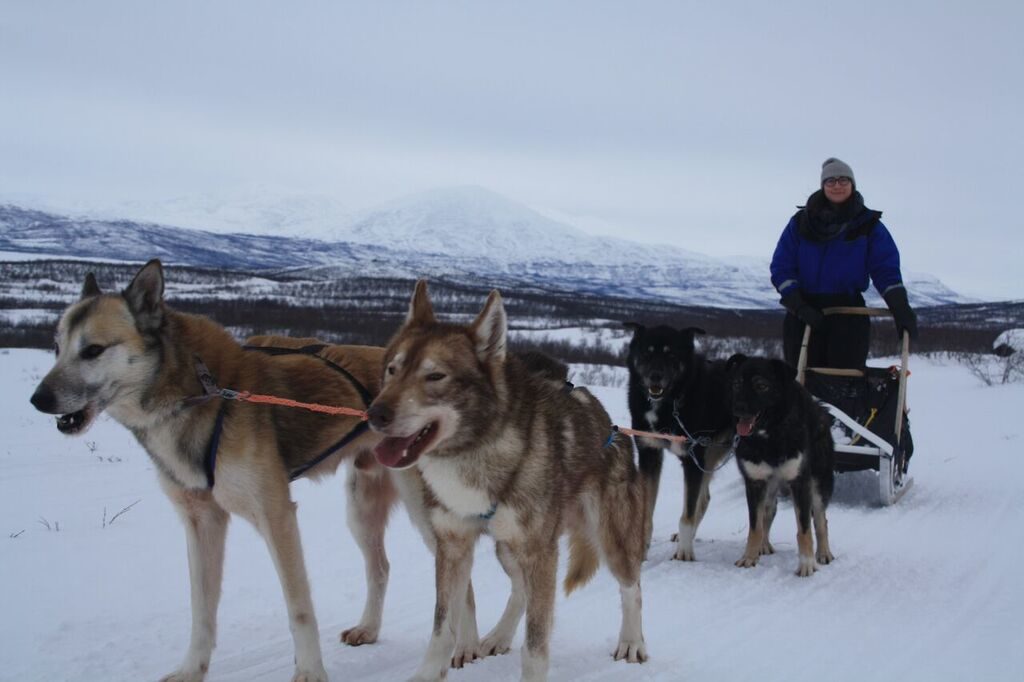
When not seeing the Northern lights, dogsledding is a fun way to pass the time
Don’t forget the moisturizer!

ALL THE MOISTURIZER

 Again, winter in Europe will destroy your skin. Even if you think you have oily skin, you will want moisturizer – the cold plus the overzealous heating in many cities means dryness, dryness, dryness. For daytime, I use Aveeno with SPF on my sensitive skin and Olay night cream for replenishing moisture overnight.

Kleenex packets

 I seem to always get a cold when doing winter travel so it’s nice to have these on hand

LUSH solid shampoo

Great at reducing your liquid load when you travel and makes my hair feel amazing – just trust me. Buy online or in store from LUSH and you’ll save serious money over Amazon. As a bonus, it’s totally packaging free, so you reduce your plastic waste.

Menstrual cup or your favorite tampon/pad brand, if applicable

If you have a specific brand allegiance, you may not find it. I switched to a Diva Cup for travel and now I never have to think about stocking up on tampons, which is awesome.

Deodorant

I am not a huge fan of European deodorant. The options have gotten slightly better in the last decade, but I love Secret Clinical Strength and stash up on it every time I’m home… but then again, I am sweatier than most people are. Even in winter.

Basic medicine

You will be able to find all this in Europe, but trust me — you want to have the basics on hand in case you need them on the road.

I carry Pepto-Bismol for standard stomach troubles, Imodium as a nuclear option (i.e. riding the bus when I am sick), some sort of painkiller like ibuprofen for headaches and minor pains, and some sort of motion sickness tablets.

Cold medicine

If you’re prone to getting sick in the winter. be sure to buy some cough or cold medicine – especially if you are traveling to Scandinavia or Germany. I’ve found out firsthand that they are really stingy with some of the ingredients over the counter in Northern Europe. You’ll want to have some as backup if you are used to being able to take cold medicine, as that is not necessarily the case in, say, Germany.

Electronics to Pack for Europe in Winter

The most important thing to remember about traveling in winter is that batteries drain extra quickly. You will want to bring extra batteries for everything — especially your camera — and a portable battery charger for your phone and other electronics. Trust me on this!

If you are serious about your photography, I recommend bringing a tripod as well. Since there are fewer daylight hours in Europe in winter, you’ll likely want to do a bit of night photography (especially if you are visiting around Christmas-time and are around a lot of photogenic Christmas markets!). I travel with a cheap tripod and find it works well enough for most situations.

sweden in winter

Where it not for my tripod, I wouldn’t have been able to capture this!

Laptop, if necessary

I bring my 13″ MacBook Air everywhere but other people may prefer a tablet or an inexpensive netbook. I work on the road so a user-friendly, lightweight laptop is a must.

Kindle Paperwhite

In general, I’ve found that it’s not too hard to find English-langage bookstores in Europe (or at least an English-langauge section), but still – I love having a Kindle so that I can buy any book there is just via WiFi.

Travel camera

For all my photos when I travel, I use a Sony A6000 because it’s lightweight for a professional caliber camera, inexpensive, and a HUGE step up from a smartphone. I’m hoping to upgrade to the Sony A7 III soon, but it’s outrageously expensive so I am struggling with making the plunge. But a few of my friends have this camera and their photos are nothing short of magical!

Travel tripod

There are a few reasons why you might need a tripod for traveling in Europe in winter – if you are going somewhere where you may see the Northern lights or want to do night photography, such as lit-up Christmas decorations. I use a simple, cheap 50″ Amazon tripod and it works just fine and fits in my carry-on sized bag. If you plan to just take daytime photos, there’s no need for a travel tripod.

Portable charger

Your camera and phone lose battery like crazy when in the cold, so be sure you don’t forget a portable charger when you travel in winter.  Anker is a reliable brand and what I personally use. I make sure I buy something that can hold multiple charges, so that if I forget to charge it one night it won’t be a big deal.

Adaptor, if necessary

 The UK, Ireland, and Malta use a different plug than the rest of continental Europe, and Switzerland’s plug is slightly different than the standard European plug. So do a bit of research about where you are going before you get there. I recommend buying it in advance because while adaptors are easy to find everywhere, it can be annoying to try to find one on your first day.

Headphones

I use simple iPhone headphones typically but you may want noise-canceling headphones if you are noise-sensitive.

***

While this sounds like a lot of things on your winter in Europe packing list – and it is – I am typically able to fit it all in a carry-on sized bag by choosing thinner but warmer materials, wearing my heaviest stuff on the plane, and picking my daypack and backpack for travel carefully!

Is there anything I’ve forgotten to pack for Europe in winter? Is there anything else you’re wondering if you should bring? Let me know in the comments!

Chisinau to Kiev by Train: Well, That Was a Trip

Despite being separated by a mere 500 kilometers of distance between the two points, taking the Soviet-era sleeper train from Chisinau to Kiev took a whopping 18 hours.  And would I recommend it? Yes, yes, and yes again.

Taking an ancient, glacially-paced train — a train older than either of the two countries it was going between — was probably one of my highlights of visiting Chisinau.

Though to be fair, that’s because the majority of my time in Chisinau was spent navigating the hospital system attempting to get a rabies vaccination after a cat bite incident in Odessa… but that’s a story for another day, and it’s most certainly not Chisinau’s fault that I didn’t get around to doing most of the best things to do in Chisinau.

Nor is it Chisinau’s fault that I didn’t take out my proper camera and took only crappy cell phone shots the entire 3 days I was there… but I digress again.

Sadly, this is the ‘best’ photo I have of Chisinau

Not a ton of travelers opt for this train due to time and budget concerns and a lack of information out there, so I’ve broken down the information that was missing on the internet here  to help people who plan to make this journey between Chisinau and Kiev by train in the future.

Bus vs. Train? Breaking Down Getting from Chisinau to Kiev

Upon arrival at my hostel in Chisinau, I was given a map with the arrival and departure times of buses. Traveling by bus from Chisinau to Kiev is by far the more popular option. But after a memorable #Experience in Romania and the marshrutka from hell from Ganja to Sheki in Azerbaijan, I’m a bit allergic to bus travel.

So when given the option between a 10 hour overnight marshrutka to Kiev and a sleeper train of indeterminate length and roughly twice the price… I opted for the train in a heartbeat, not even thinking about the price.

The train station in Chisinau is a happening place

The train journey is not the popular choice because it is both a longer journey (in my case, nearly by twice the time) and it’s more expensive. I paid 650 lei for my bed in an open sleeper car, whereas a bus ticket will cost around 300 lei. A bus takes approximately 10 hours between the two cities, and my train took 18 hours.

I’ll Take the 21:19 Train to Moscow

Attempting to purchase a train ticket between Chisinau and Kiev is a little intimidating because the people at the train station ticket counter don’t speak English. Knowing a tiny bit of Russian will help. I speak Russian with the complexity of an early toddler and through that and some gesturing I was able to get a ticket for the train to Kiev.

If you don’t speak Russian, I recommend asking your hotel or hostel receptionist to write down what you want in Russian or Romanian. Barring that, you could always use Google Translate if you have a SIM card or the language file already downloaded on your phone to use offline (guide how to do that here). This is highly useful for traveling through Russian-speaking parts of the former USSR. This tip also came in handy in Taiwan when I had to translate Chinese as the camera can automatically ‘translate’ things, making you feel like you’re from the future.

The departure times between Chisinau and Moscow as of July 2018.

However, in my bumbling Russian, I was able to get what I wanted across. There were three departures on the day that I booked my ticket, all heading towards Moscow and making stops in Kiev along the way. Despite the ongoing war in Donbass between Russian and Ukrainian forces, trains are traveling between the two countries as scheduled.

The woman at the ticket counter told me my train was due to arrive the next day at around 15:00. I’m not sure when the other two trains would arrive in Kiev. Theoretically, according to an out of date blog post, the morning train would arrive somewhere around 2 in the morning, whereas the 23:00 train arrives past noon the next day.

Comparing those times to my experience, I’d say those times are off, though. Unless it follows a very different route or I accidentally took a train with countless local stops and the other train is an express train, I have a hard time buying that. I’ll leave that gap for other intrepid travelers to fill in – if you find out, comment below and I’ll update this post accordingly.

When at the train station, be sure to check out the Monument to the Victims of Stalinist Repression in front

All Aboard the Slowest Train of Your Life

From start to finish, it took a whopping 18 hours to span 500 kilometers, including a perplexing 9 hours to traverse Moldova… which, given the size of this tiny landlocked country, practically defies physics.

On Soviet train, Moldova leaves you!

The train departed at 21:19 exactly on schedule and chugged along through Moldova making countless stops, finally reaching the border with Ukraine around 6 AM. Luckily, unlike the night train to Istanbul, all the passport-checking takes place on board the train.

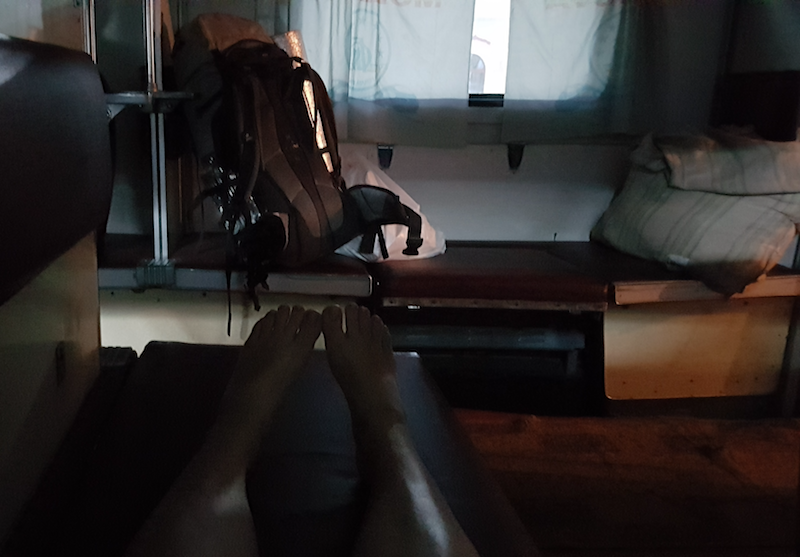
The train itself is spartan but functional, as befits a Soviet-era train. The train has bunk beds, where the bottom level has a luggage compartment underneath it that can be lifted up. The top bunks can be folded away and typically are, as it’s rare for the train to hit capacity (no need to buy tickets in advance save for the fact that the ticket line moves quite slowly). There are also bed/seat combinations on the side, so that each “section” can fit 6 people.

You’re given two sheets, a mattress pad that is actually quite comfortable, a pillow and pillowcase, and a towel if you’d like to wash your face or something on the train. There is hot water available and you can borrow glasses to drink tea or coffee out of (I assume you have to bring it yourself — my nice seat mate kindly shared his coffee with me in the morning, because people are angels). There was a restaurant car on my train in theory, but I didn’t check it out personally. The bathroom was actually one of the cleanest I’ve seen on a train, though of course, it’s strictly a BYO TP and hand sanitizer kind of affair.

One of the few photos I took on the train.

I wish I had taken better pictures but I am a shitty wannabe train blogger. I blame the combination of boarding a pitch black train, drugging myself in order to sleep, and then having a series of weird encounters with border officials and random people as soon as I woke up.

I arrived in Kiev around 3:10 PM the following day, pretty much exactly on schedule – if not a few minutes early.

Crossing Between Moldova and Ukraine

I exited Moldova with only a slight hitch. My border stamp, which I got at the Palanca border crossing commonly used between buses between Odessa and Chisinau, was so faded it almost looked as if it weren’t there.

I heard a flurry of a language I couldn’t understand with the words “Tiraspol” being bandied about — evidently, they thought that given the lack of entry stamp, I had entered via Transnistria. Eventually, they were able to detect the tiny hint of a Moldovan entry stamp (side note: I really hate it when this happens) and I was given my exit stamp.

After a quick and awkward pause for customs entering Ukraine (in which I thought I was being asked to get off the train because, again, toddler-level Russian, and began to change out of my sleeping shorts in front of a border guard), they quickly checked my baggage and ascertained that I hadn’t brought in too much alcohol in from Moldova.

I then waited for the Ukrainian passport control to come and stamp me in. The guards made some awkward comments on my appearance (oh, the joys of traveling while female) and then proceeded to ask me if I was sure if I didn’t need a visa to enter Ukraine (despite the fact that my entry stamp into Odessa a few days back was staring them right in the face).

This is the happy face of someone who didn’t take a bus.

All in all, it was a less pleasant experience than the super-smooth Palanca border crossing from Odessa, which had free Wi-Fi as well as the only land border Duty Free shop I’ve ever seen, but it was nothing crazy.

Just be aware that they don’t see a ton of people who are not Moldovan, Ukrainian, or Russian nationals doing this route so you may have to answer questions about visas that should seem obvious.

Welcome to Ukraine

Not long (I think – I was still blinking off the effects of my sleeping pills) after crossing the border into Ukraine, we pulled into a small city and instantly a flurry of activity began. People began boarding the train, selling kielbasa, soda, and SIM cards — ah, the trifecta of life’s necessities.

But here’s where the story takes an interesting turn.

I met a mysterious man in all yellow who addressed me in Russian. I repeat: all yellow, shirt, jeans, and all. Upon finding out I was foreign, his demeanor changed into something extremely exuberant. When I answered that I was American, he grew even more animated, and began shuffling through his briefcase through a series of tattily-laminated documents translated into several languages, the text of which read quite a bit like a standard spam e-mail and had a bunch of American-sounding names in it that, of course, meant nothing to me.

He began reading out the text of this spam-like document to me in English at full volume for the entire train to hear, flourishing his hands and shouting “your excellency,” trying to shake my hand with a suspicious forcefulness (which held what looked like a deck of laminated Tarot cards but were probably cards of Orthodox saints).

I was confused and still slightly drugged so I began yelling what I thought was “no, goodbye” in Russian over and over again… before realizing that I was babbling in Bulgarian. Whoops.

My seatmate — a young Russian backpacker about my age — looked on, bemused but looking prepared to intervene if necessary. When the man left, he cracked a smile.

“Welcome to Ukraine.”

A Comprehensive Cuba Packing List: What to Bring to Cuba

Packing for a trip to Cuba can be a bit of a challenge.

For one, you have to be more thorough in deciding what to bring to Cuba than in other countries.

Unlike other countries where you can simply pop into a CVS/Target/DM and grab what you need, it is a bit more difficult to buy certain items in Cuba due to sanctions and economic conditions.

For this reason, I really recommend you follow this Cuba packing list and consider your needs carefully. Cuba is one of those rare countries where it is better to overpack than underpack.

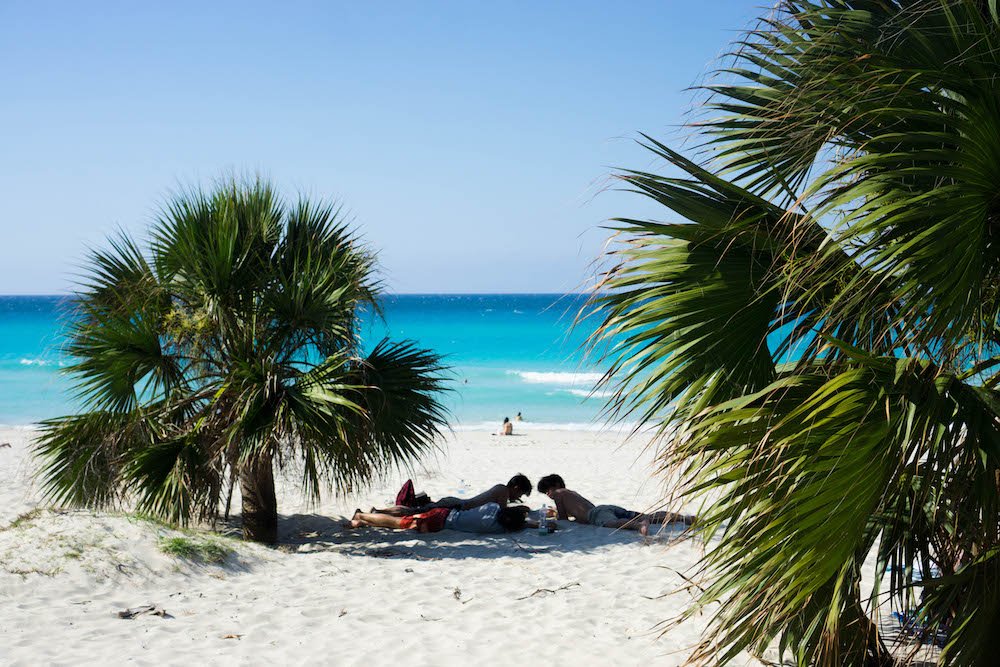
In terms of clothing, Cuba is easier to pack for. Cuba has a subtropical climate, with a yearly average temperature of 26°C/ 79°F, and tolerable humidity levels.

From November to April, it is generally quite sunny, whereas in May through October it can be quite stormy and even have hurricanes.

I visited Cuba for the first time in February and thought it was the perfect time to go – we had maybe one or two rainy days in two weeks, and the weather was hot but never intolerable.

With the Atlantic experiencing more severe hurricanes each year and Cuba being squarely in the crossfires, I probably personally wouldn’t visit Cuba in hurricane/rainy season, but if you do travel during the off-season you will get great deals so it’s up to you.

One thing that is often mentioning when discussing what to pack for Cuba is gifts or supplies for Cuban locals.

I wasn’t sure what the proper etiquette with respect to this was when I visited Cuba and opted not to bring in things as I wasn’t sure what people actually needed and I didn’t want to offend anyone by assuming they didn’t have basic necessities or by acting like a savior.

I later asked my friend, Dr. Kiona, who is an experienced Cuba traveler who also runs educational tours in Cuba, about this.

She says “It’s better not to come in with a savior attitude but to keep in mind there is an embargo so offering to bring something like you’re going to someone’s house is appropriate.”

She recommended asking your casa particular (a Cuban guesthouse) host if there is anything in particular that their community needs or is having trouble getting in local stores.

In the past, supplies that Cubans have asked for have included vitamins, tampons, condoms, deodorant, school supplies, toothbrushes and toothpaste, towels, and shampoo.

So basically, feel free to offer to bring something, but if you feel uncomfortable asking or don’t have travel plans locked down in advance, it’s in no way mandatory to bring things for your hosts except a friendly, laid-back attitude.

Remember that when you stay in casa particulares you are a guest in someone’s home, so behave like one.

What to Pack for Cuba

What to Pack Everything In

I’ve been traveling for a while and my packing gear is always the same – a backpack organized with packing cubes as well as a daypack with all my electronics and smaller items.

That said, if you prefer a suitcase, you could certainly swap out a backpack for a suitcase. You do you!

Generally, as I was traveling in a group of 3-4 travelers, we ended up organizing taxis between cities as the tourist bus was almost always sold out.

Since you too likely will be traveling between cities by car or organized bus rather than public transport, it doesn’t really matter if you bring a backpack or suitcase, I just happen to prefer backpacks.

Whether you bring a suitcase or backpack, packing cubes are a life-saver for either, especially if you are visiting multiple places in Cuba and plan to be traveling every few days.

You don’t need anything fancy (even Ziploc bags will do in a pinch) but separating your clothes into packing cubes will make your Cuba packing process much more streamlined and organized.

Travel Backpack (carry on size or check-in size): I am a light packer, so my Tortuga Setout Backpack is perfect for my travel needs, since I try to avoid checking my bag as much as possible.

Why do I recommend Tortuga so much? Here’s why: this bag is 45L and has got three main compartments: one for a laptop and other flat objects, one giant rectangular compartment perfect for packing cubes stuffed with clothing, and one smaller compartment with pockets for passports, pens, odds and ends, etc. that I stash all my extras in – plus one small outer zipper pocket for anything you want quick access to. It also has a water bottle holder on the outside as well as buckles so that you can strap something like a yoga mat to the outside. Plus, it’s quite comfortable to wear, with a padded hip belt and comfort-molding shoulder straps complete with a chest strap so that you can distribute weight perfectly across your body in the event that you need to wear your backpack for longer than usual. Check out more specs and details here.

However, if you want a bigger backpack, I’ve heard good things about the Osprey system and that’s the brand I would go with if I were to upgrade my packing capacity to something larger. Of course, you could always just bring a suitcase as well. I don’t travel with a suitcase anymore but I prefer hard-sided luggage if made to choose!

Packing Cubes: Whereas I’m a bit apathetic on whether you need a suitcase or backpack for your Cuba packing needs, I do feel strongly about packing cubes! No need to be picky with your packing cubes — anything rectangular and zippable will do. I use these packing cubes and love them. But really, anything works!

Laundry bag: In addition to packing cubes, I also like to bring a laundry bag to separate out my dirty clothing from my clean. While you could certainly just reuse a plastic bag for this purpose, I do like having a cute one like this travel-themed one from Kikkerland though, because I’m impractical. This makes it easy if you need to ask your casa owner if they can provide laundry services.

Hanging Toiletry Bag: I tend to pack a lot of toiletries with me and I use a hanging toiletry bag to pack them in an organized way that takes up minimal space. It has the perfect number of separators, organizers, and pockets without taking up any excess space. It’s kind of a magical Mary Poppins bag – you’d be amazed at how many travel-sized toiletries you can fit in there before you run out of room.

Backpack with locking zippers : While Cuba is safe, it’s not completely free from petty crime. While wearing a shoulder bag is generally more secure than a backpack because you can keep it closer to your body tucked underneath your car, I find that shoulder bags just are not comfortable if you carry a lot of stuff with you during the day. I swear by PacSafe for the combination of functionality and aesthetics, and I love their PacSafe Citysafe backpack. It’s actually cute, but it also has excellent security features like locking zippers, an interlocking clasp, and slash-proof mesh embedded in the fabric. If you’re curious to learn more, I have a full review here – not sponsored, just irrationally obsessed.

Essential Things to Pack for Cuba

Honestly, so many things on this list are essentials for Cuba because it is so hard to ensure you’ll get exactly what you need in Cuba if you forget it.

However, I tried to pick the things that I thought were the most essential, that would have the worst impact on your trip if you forgot it.

Since it can be hard to access certain toiletries in Cuba, those feature highly on the list.

Euros, if you’re American: While 1 CUC (the tourist currency) is equal to 1 USD, you won’t want to bring USDs with you to Cuba as you will get hit with a 10% conversion fee. Unfortunately I had to absorb this when I was traveling to Cuba as I was in Costa Rica before flying to Cuba and it ended up being cheaper to convert my USDs than to accept the horrible rate that the Costa Rican bank was giving me to convert their currency into euros. However, if you are in the U.S. before your trip, convert some USD to Euros. This is important: you’ll want to convert ALL THE CASH you’ll need into euros beforehand. American debit cards do not work in Cuba, full stop. Estimate all the cash you’ll need, an then add a 30% buffer on top of that. Luckily, I was traveling with two Irish girls so I was able to borrow money from one of them and reimburse them when we got to Mexico, but most Americans won’t be so lucky! If you are from anywhere else but the U.S., you have less to worry about in terms of money because your ATM card should work fine (just notify your bank you are traveling).

Travel insurance: It is mandatory to purchase travel insurance while traveling in Cuba, and you will likely be asked to show proof of insurance when entering the country. I actually don’t recall if I was or not — but I was sure that I had my policy information pulled up and saved as a PDF on my phone, and I’d actually recommend printing it just to be safe. I used World Nomads when I was in Cuba and highly recommend them to other travelers. You can get a free quote here.

Lonely Planet Cuba (2017 edition): I don’t always travel with a guidebook, as I generally just do internet research on the ground. However, with internet access being both expensive and not always accessible in Cuba, a guidebook here is truly indispensable. I would say that we used our guidebook literally every single day while in Cuba. It was also good fun to read at night before bed since we weren’t able to get our usual internet fix. Make sure you buy the most recent version as the information gets dated quickly. The most recent version is the 2017 Lonely Planet but I’m sure there will be a 2019 or 2020 version soon.

Kindle loaded with e-books: Since you won’t have WiFi often in Cuba, you’ll find yourself with a lot of free time that you have no idea how to use up, if you’re an internet-addicted millennial like myself.  While in Cuba, my Kindle Paperwhite was my best friend. Buy several books before you go so that you won’t run out of things to read and get bored! It’s not easy to pick up new English-language books in Cuba.

Spanish-English phrasebook or download Google Translate offline: I speak fluent Spanish and it’s lucky I do as it was pretty much indispensable in Cuba. English language knowledge is not that widespread even in people who work in tourism. I would recommend having a Spanish-English phrasebook in paper form or downloading Google translate offline. Here’s how you do it. On that note, it’s also helpful to download the maps of Cuban cities on your phone beforehand, as you won’t have WiFi when you touch down in Cuba. Especially if you travel to parts of Cuba outside of Havana, like Santiago de Cuba, you should have basic Spanish knowledge.

Contact lenses and solution, if necessary: It is not common to find contacts or contact lens solution in Cuba so I recommend bringing more than you need for your stay. I’d also bring glasses as back-up.

All your toiletries and cosmetics: It is really unpredictable what international brands you will be able to find in Cuba so I just say assume you won’t be able to find anything you need and bring all you need from home. While you  can find things like sunscreen, shampoo, etc. if you are in any way particular about what you like to use I’d bring it from home as due to the embargo it is not always easy to find your first choice, especially outside of Havana and Varadero, the two most touristic places in the country.

Sunscreen: While you can find sunscreen in Cuba, it is overpriced and not always easy to find outside of beach locations. The sun is no joke in Cuba so I highly recommend packing sunscreen before you go. I also like having this solid sunscreen stick from Neutrogena which is great if you are maxed out on your liquid toiletries and are trying to travel light, but also need SPF 70 like a ghost like I do.

Mosquito repellent: As a subtropical country, Cuba has lots of pesky mosquitos, especially in the rainy season. With the prevalence of mosquito-borne illnesses like Zika and dengue, I am really vigilant about applying and re-applying mosquito repellent, especially after coming out of the water or  I usually carry a bottle and also some repellent wipes with me if I need to reapply on the go. I also highly recommend bringing some After Bite mosquito bite treatment since it’s inevitable some of those buggers will get you at one point and this will take some of the sting out of the itch.

Water bottle with built-in filter: Cuba’s tap water is generally not considered to be drinkable, so if you are concerned about plastic consumption – I recommend purchasing a Lifestraw water bottle with a filtration system inside of it that gets rid of 99.9% of nasty bacteria and viruses. Another option is the Steripen, which uses UV light to purify water while traveling. The bonus of a Steripen is that you can also use it in juices or smoothies that you aren’t sure are made with safe water.

Bandana or face mask: I once got extremely ill from diesel fumes while traveling in a colectivo from Santa Maria to Varadero. I wish I had a face mask, Japanese-subway-style, to wear when traveling in Cuban cars because the fumes are really strong. A bandana would have come in handy as well.

Basic medicine: While Cuba’s health care system is quite functional (just ask my friend who fell and tore a ligament in her ankle on the beach and had to visit a Cuban hospital), it is still better to bring your own medicine from home. There are some international pharmacies (12 of them in Havana and another 30 or so scattered around the island) but trust me, the last thing you want to do if you get sick in Cuba is try to track down one of the few farmacías and discuss your bowel movements with a pharmacist. Here’s what’s in my arsenal for every trip and what I brought to Cuba:  Pepto-Bismol tablets for standard stomach troubles, Imodium as a nuclear option for diarrhea, some sort of painkiller like ibuprofen for headaches and minor pains, and some sort of motion sickness tablets. Of course, if you have any specific medical needs, you will want to bring that as well, especially anything that may require a prescription.

What to Wear in Cuba (For Women)

This part of my Cuba packing list is specific to women, so men, feel free to skip this part.

One thing I have to say here when it comes to deciding what to wear in Cuba: catcalling in Cuba is incredibly common and rather annoying.

Wear clothes you feel comfortable in, but be aware that if you look nice (and in my experience, even if you don’t) men will most likely make sure you know it. Over and over again.

While I did feel safe in Cuba, I did also often feel annoyed by the male attention.

Still, I didn’t let this impact how I dressed, but I do recommend you wear clothes you feel comfortable in and to be prepared for catcalling and comments to occur pretty much daily.

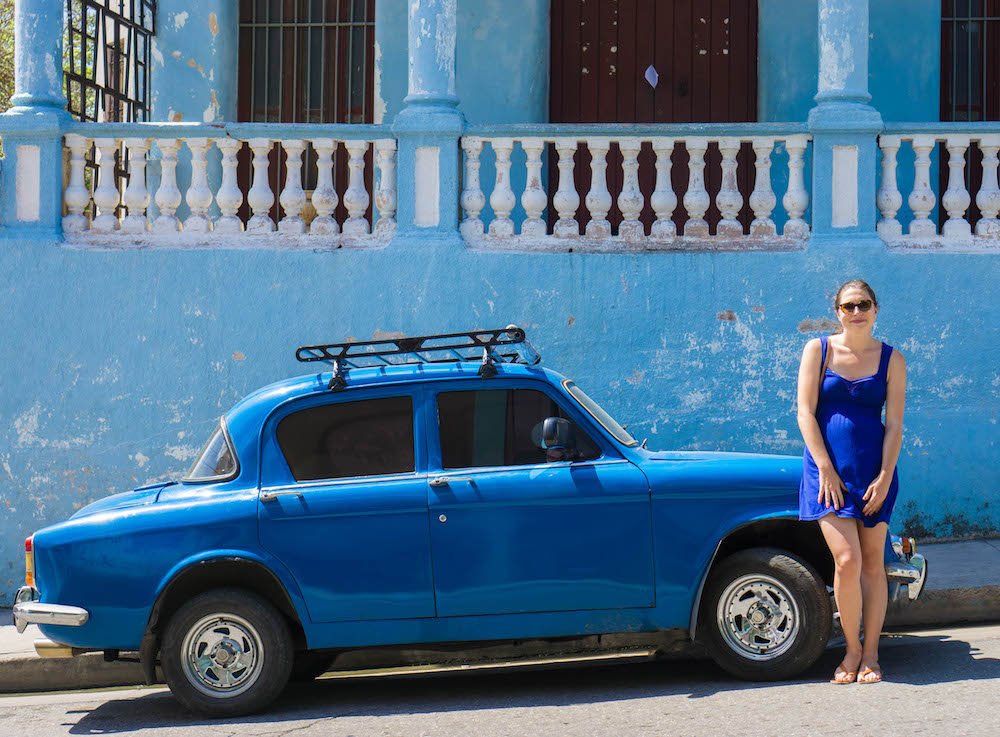
3-5 lightweight summer dresses: Dresses are great for Cuban weather, plus they pack up small, so bring as many as you can get away with. If you plan to hit some salsa spots, bring something you enjoy dancing in.

5+ tees & tanks: You will sweat a lot, so opt for black, navy, and other dark colors. Yes, they attract heat, but they also avoid the telltale yellow pit stains that seem to be my constant vibe whenever I attempt to wear white.

1 pair jeans: While during the day I felt too hot in jeans, I did occasionally wear my pair of jeans at night or when I was

2-3 pairs shorts: I usually have at least one pair of cuffed denim shorts and one pair of linen or silk-ish material for shorts.

2-3 skirts: I suggest bringing one black skirt and one printed skirt for flexibility. I especially love having midi or maxi length skirts, which feel great and coincidentally look nice photos. As a bonus, the extra fabric around your legs traps some cool air, making you feel less hot, and I liked the additional coverage it gave me

1 pair sneakers: Cuban streets are generally quite dusty so I found that I liked having a pair of lightweight closed-toe shoes that were comfortable to wear for long stretches. I usually wear a pair of black Nikes as I find they look cute even worn with my dresses and I’m all about having options.

1-2 pairs sandals: I suggest bringing one pair of rubber flip flops like these Havaianas and another pair of more stylish or dressy sandals. I’m obsessed with my Birkenstocks and will never go back.

1 pair heels, optional: I don’t like to dance but I know many travelers plan for a night out in Cuba dancing the night away. If you enjoy dancing in heels (and salsa does look best danced in heels) then I’d bring a comfortable pair with you. If you don’t plan to go dancing, then leave these at home – I did.

1 rain jacket: Even if you don’t plan on traveling in the rainy season, sometimes the weather has other plans. I love my Marmot rain jacket.

1 cardigan: Just in case you get cold at night or want a little extra coverage, a cardigan is good to have. You likely won’t need it in Cuba but it’s good for the plane.

1-2 bras: I personally brought 1 regular bra and 1 sports bra and switched between the two.

7+ pairs of underwear: You can easily arrange laundry with the owner of your casa particular but if you want to avoid laundry, just bring enough underwear for the duration of your trip.

Bathing suit: Cuba’s beaches are legendary, from Varadero to Holguin. Unless you’re planning strictly a city trip to Havana, you are likely going to want to take a dip in that beautiful Caribbean, especially if you’re staying in the resorts in Varadero! Bring your favorite bathing suit (I recommend bringing two, so that they have time to dry overnight).

What to Wear in Cuba (For Men)

Full disclosure, I am not a dude. But if I was, this is what I would bring, I guess.

  • 5-7 T-shirts
  • 1 pair jeans
  • 2-3 pairs shorts
  • 7+ pairs underwear
  • flip flops
  • comfortable walking sandals
  • sneakers
  • rain jacket
  • swim trunks

What to Pack for a Hostel in Cuba

Cuba really doesn’t have many hostels, although I did stay at one in Havana.

They function just like a casa particular only that there are dorms instead of regular rooms.

Still, some of these things may be useful if you stay at casa particulares, like I did during my time in Cuba.

1 pair flip flops: While the hostel I stayed at in Cuba was very clean, I still recommend wearing flip flops in any sort of communal bathroom.

1 travel towelMy hostel provided a towel, but I like having my own anyway.

1 eye mask: Great for when you want to sleep but your roommates don’t.

Some earplugs or good noise-canceling headphones: Cuba is a LOUD country, even – especially – in the mornings. I remember my street in Trinidad being one of the loudest I could imagine starting from around 6 in the morning. I love Hearos — they’re the gold standard for ear plugs.

What Toiletries to Pack for Cuba

Basically, anything you use on a daily/weekly basis you will need to bring with you. I went into a little more detail above in the “essentials section,” but here are a few more ideas.

Hand sanitizer: Just in case a public restroom or restaurant bathroom doesn’t have hand sanitizer,  I prefer carrying my own in case of emergencies.

Kleenex packets: Like above — public restrooms may be lacking in the toilet paper department, so having some Kleenex in a portable sleeve is always a good move. I don’t just do this for Cuba but for all my trips.

LUSH solid shampoo: Life-changing. Just trust me.

Sunscreen: Cuba is sunny AF and sunscreen can be hard to find. My skin is really sensitive on my face, so I use this fancy Japanese sunscreen to prevent acne, and a general sunscreen for my body. Remember to use reef-safe sunscreen if traveling to beach destinations like Cayo Largo!

Travel medications: I listed them above, but just to reiterate — stomach medicine, motion sickness pills, and some sort of painkiller are my standards.

Electronics to Pack for Cuba

There are really no special considerations when it comes to packing for Cuba, except that you should leave your drone at home as there are absolutely no drones allowed into the country. Also, you may not want to bring your laptop if you are just visiting Cuba, as you likely won’t have enough WiFi access to justify the weight.

Laptop, if necessary: I bring my Macbook Air everywhere but other people may prefer a tablet or an inexpensive netbook. I work on the road so a user-friendly, lightweight laptop is a must.

Kindle Paperwhite: Books are heavy and often hard to find exactly what you want on the road. I love the Kindle Paperwhite because the screen is glare-free, making it easy to read at the beach or in direct sunlight.

Travel camera: I use a Sony A6000 because it’s lightweight for a professional caliber camera, inexpensive, and a HUGE step up from a smartphone. You may want to replace this or add a GoPro too, especially good for adventure activities like kitesurfing and diving (just check to see if you also need an underwater house for your GoPro if you dive, as many of the newer models are only good to 10m — not nearly enough for divers)

Portable charger: I like to carry a portable charger even in Cuba just in case I forget to charge my phone fully. You’ll use up a lot less batttery in Cuba than other places you travel to because of the lack of WiFi, but still, it can come in handy at times!

Adaptor, if necessary: Cuba uses the same plugs as America and Canada, so if you’re coming from Europe or the UK, you will need an adaptor.

***

Well, nearly 3,000 words later, I think I’ve finally exhausted all the things you need to bring for Cuba. While this sounds like a lot, I was able to fit it all into a 44L backpack (carry-on size) and daypack because I chose lightweight fabrics and packed carefully.

Is there anything I’ve forgotten? Is there anything else you’re wondering if you should bring to Cuba? Let me know in the comments!

New York Packing List (Winter Edition): What to Wear in New York in Winter

My first trip ever to New York City was in the winter. I had just finished my college applications and was going to New York with my dad to check out New York University (which I’d later end up attending) and Columbia University (which, LOL that I ever thought I could get in).

There are a few things I remember from that trip: staying in the world’s tiniest hotel room that my dad confided still cost a whopping $300 a night, being awed at the Columbia campus, and oh yea, the bitter f#(*ing cold. 

Growing up in California, I had no idea what to wear in New York in winter. I became obsessed with pea coats I saw on style blogs (because I was convinced that upon moving to NYC, I’d somehow become a fashion maven, even though nothing style-related ever came to me even remotely naturally back in California) and bought one to prepare for my trip.

Two years later, I’d relegate my Gossip Girl-esque pea coats to a garbage bag in the back of my closet and give them to Goodwill, having finally accepted that the only appropriate answer to “what should I wear in New York in winter?” is: everything (and then add a layer).

Jokes aside, packing for New York in winter isn’t hard at all if you’re used to cold weather. If you come from a place where snow is both mesmerizing and terrifying, like I did growing up in California, you might need a little help.

After nine years of surviving brutal New York winters, I’ve prepared this New York packing list (winter edition) to help you get through the most ‘magical time of the year’ in the Big Apple.

Clothing That Should Be On Your New York Winter Packing List

There’s no need to buy an entirely new wardrobe to pack for a winter trip to New York, especially if you come from a place that already has harsh winters. This list may seem silly for people who live in, say, the Midwest or Canada. I’ve written this from the perspective of a Californian who was super taken aback by how cold New York winters could be.

I’ve outlined a few of my favorite NYC winter product necessities below, in case you are in need of cold weather clothing recommendations. If you already have all the cold weather gear you need, feel free to skip below, where you’ll find a more general New York packing list for winter.

Best Outerwear for New York in Winter

I told you my peacoat anecdote that started off this article for a reason: leave your cute jackets at home unless you check the weather right beforehand and are convinced you’ll be warm enough. Winter in New York varies greatly — I’ve seen December temperatures as high as 60°F / 16°C, and I’ve biked to work through polar vortexes in January as low as 2°F / -17°C. Climate change means that winter in New York – already capricious to being with – is volatile. So my biggest tip is to pack for the worst but hope for the best.

Realistically, a more average temperature range to help you with packing for New York in the winter months is around 32°F / 0°C, perhaps a few degrees warmer or colder.

I have two jackets that I recommend for New York winters: one thicker parka-style down jacket and one thin down jacket for layering.

My life in New York improved dramatically when I finally indulged in a proper winter jacket. I’m obsessed with this North Face parka and, while it’s pricy, it will last you a lifetime. North Face quite literally has a lifetime guarantee, which I tested when my zipper came unstitched after two years of heavy use, wearing it every day including when I was biking to work in the winter. North Face promptly fixed it up and sent it back as good as new.

I also use a small down jacket from UNIQLO – the Ultralight Down. (You can buy a knock-off version here). For me, it’s good for temperatures around  40°F / 5 °C and up. I also layer it underneath my North Face down parka on extremely cold winter days, or if I want to get away with wearing a cute coat that isn’t exactly winter-approved, like my leather jacket, I’ll wear it as a layer between my sweater and my cute jacket.

Best Shoes for New York Winters

Some people are really into snow boots and wear them all winter. Personally, I don’t really find snow boots necessary for New York. Yes, we get a few major snow storms in the winter, but they are few and far between. I find that having a proper pair of leather boots that are waterproof and have decent traction is perfectly fine for navigating New York sidewalks in the winter. I’ve occasionally used my Hunter rain boots on snowy winter days and while they are not the warmest, when they’re paired with some decent wool socks they do the trick as well.

I first bought a pair of Blondo waterproof leather boots in 2008… which means I’m celebrating my 10-year anniversary with them this year. (Is this my longest relationship?) I’ve only had to get them resoled once, which set me back about $60, but for a pair of shoes that I’m completely obsessed with and wear all the time, it was 100% worth it. It’s no wonder it made the cut for my favorite travel shoes.

It’s been literally a decade since I bought these boots, so I’m sure the original version I bought is no longer available, but these look exactly like the ones I have.  Even all these years later, they still make my list of favorite travel shoes!

Be sure to pair your winter boots with proper wool socks. No matter how insulated your shoe is, it won’t do much good if you are wearing thin, crappy cotton socks (another thing that took me several years to learn… why do I suck at winter so badly? Oh yeah, California). I invested in these Smartwool socks after much hemming and hawing about the price and I’m so glad I did. You don’t need that many pairs because you can actually re-wear them a few times before they get smelly because wool is so odor-absorbent and magical.

Accessories for New York in Winter

This is really what makes or breaks whatever you decide to wear in New York. As long as you have a hat, gloves, and scarf, you can almost get away with wearing whatever you want. (And with the right jacket, you kind of can).

In terms of a hat, I recommend wearing a tightly-knit hat that fits firmly on your head, covering your ears completely. Bonus points if it is lined with fleece! I lose my hats constantly so I go through several each winter, but I do recommend a beanie-style knit hat kind of like this one.

When it comes to gloves, you’re going to want something that is touchscreen compatible and warm, but you don’t need something waterproof or crazy high-tech. I recommend a simple pair of gloves like these ones. You’ll have your hands in your pockets most of the time anyway!

For scarves, I recommend the biggest, most wrappable scarf you can find. If you can tolerate wool (I can’t, except for socks, because of my ultra-sensitive skin), then get the wooliest monstrosity you can find. I tend to go for something huge, chunky, and made of acrylic which is easier on my skin. I prefer an infinity style knit scarf for winter that I can wear super tight around my neck to keep in as much warmth as possible.

Now, I’m going to let you in on my #1 secret weapon when it comes to what to wear in New York in winter… fleece lined leggings. These leggings are magic when it comes to surviving the New York winter. Again, if you can tolerate wool, you’ll probably be even warmer with something like these merino wool leggings. But since I can’t, I substitute fleece-lined leggings like these ones. On a cold day, I typically wear them underneath a pair of jeans and I am toasty warm all day long. I prefer the ones without feet because they sag less during the day.

I think that’s pretty much it in terms of accessories. If you get cold really easily, you may want to throw in some thermal tops to wear as a base layer as well. 32 Degrees (my preference) and UNIQLO make good ones.

Clothes to Wear in New York in Winter

If you’ve followed my advice up to this point — parka, fleece-lined leggings, all the winter accessories — you can actually get away with wearing pretty much whatever you want with them. I tend to choose a lot of sweater dresses because I am lazy when I travel and don’t like to pack a lot of different things that I have to mix and match. But you can also just wear jeans and sweaters on your trip so long as you have the appropriate winter accessories, shoes, and outerwear.

One big misconception about New York is that we wear all black all the time. While certainly you won’t look out of place in all black, New Yorkers also integrate a lot of color into their wardrobes, especially with their accessories, so don’t be afraid to wear whatever colors you normally would back home.

Here’s my basic New York packing list, winter edition (enough for 1 week):

What Else Should Be On Your Winter in New York Packing List?

Once you’ve figured out what to wear in New York in winter, I’ve got a few more things you should add to your NYC packing list. Some are NYC-specific but most are related to how you’d normally travel, anyway. New York has basically everything you need, so don’t be worried if you forget anything. There is a pharmacy on virtually every city block that will have everything you need. Just pop into a Duane Reade, Walgreen’s, CVS, Rite Aid… and you’ll be well-sorted (though you’ll pay a bit for the convenience).

Toiletries

  • Lip balm: Your lips will get more chapped in New York than you ever thought possible… going from the windy cold streets to the super-heated interiors will do a number on your lips. Be sure to bring a good quality lip balm with you – I love this Aquaphor.
  • High-quality moisturizer: For the same reason as above – New York winters will do a number on your skin. I use Shiseido moisturizer on my face most of the winter.
  • Sunscreen: Don’t discount the need for sunscreen even in the winter! New York is quite sunny in the winter (and cloudy days actually require SPF, too!) despite the cold so make sure you protect your skin. I use this fancy Japanese Biore sunscreen for my face as my skin is quite sensitive and acne-prone and this is really gentle on my skin
  • Hand sanitizer: New York is a dirty city – the subway in particular is a germ war zone. I recommend traveling with hand sanitizer for when you can’t get to a bathroom quickly and touch something questionable (which is basically any surface in the city). I carry a mini bottle of Purell like this one.
  • Kleenex
  • Everyday make-up
  • Basics like shampoo, body wash, etc.
  • Deodorant (please)
  • Prescription medicine, if you need it

Electronics

  • High-powered portable battery pack: Your phone battery will get run down very quickly on a cold winter day in New York, so be sure to pack a portable battery charger like an Anker battery pack (this is what I swear by as a blogger who needs fully charged electronics at all times!)
  • Camera: I personally use a Sony A6000 mirrorless camera, which is the perfect travel camera for producing professional-quality photos without taking up much space or weighing too much. I have several lenses for it but most people will be fine with the kit lens. Be sure to pack several extra batteries as well, for the same reason as above (winter weather = zapped electronics)
  • Adaptor, if visiting internationally: If you are visiting from Europe or somewhere that uses different outlets than U.S. plugs, you’ll want an international adaptor for sure.
  • Phone and charger
  • Laptop or tablet and charger
  • Kindle, if you use one
  • Noise-canceling headphones, if you have them: For the subway, trust me.

Random

  • Reusable water bottle: New York tap water is excellent quality. Save money and the environment with a reusable metal water bottle. Pretty much any café or restaurant will be happy to refill yours (I’ve never been turned down).
  • Reusable bags: The plastic bag ban is currently being battled in New York City, but please step ahead of the curve and bring your own reusable tote bags anyway.
  • Whatever else you’d normally pack for a week away from home!

Want to check this post for future reference? Pin it!

Not sure what to wear in New York in winter? This NYC packing list for winter will be your winter New York guide! What to pack for NYC in winter | New York winter | NYC packing list for winter | What to bring for winter in NYC

Sweden Packing List: What to Wear in Sweden in Winter (From Stockholm to Lapland)

stockholm-sweden-winter

If the idea of visiting Northern countries like Sweden in the winter seems overwhelming and you have no idea what to pack for Sweden in winter… don’t worry, it’s actually a lot less daunting than you think. I found that I actually didn’t need much that I didn’t already have when I did my research and wrote down my Sweden packing list.

Even though my trip took me north of the Arctic Circle, I actually didn’t need to overthink what to pack for Swedish Lapland since it was actually colder in New York City than Sweden during my trip!

While I got a bit lucky with the weather, I am also willing to bet that a trip to Sweden in the winter is not quite as cold as you think. let’s look at the numbers, here: the coldest month of the year is January, and even in January, the average temperature is 10°F or -12°C — not that different than a cold winter day in NYC or Boston (and positively balmy compared to where my sister lives in Minneapolis). Canadians could even tan in that weather! Your typical low temperature in Lapland would be closer to 1°F / -17°C, which is also not that bad compared to a lot of the United States or Canada in the winter.

That said, you will need to pack plenty of warm clothes and layers, as the weather is quite unpredictable and you could end up experiencing temperatures as low as -20°C / -5° F or even -40° C/°F if you get really, really unlucky. Pack for the worst; hope for the best.

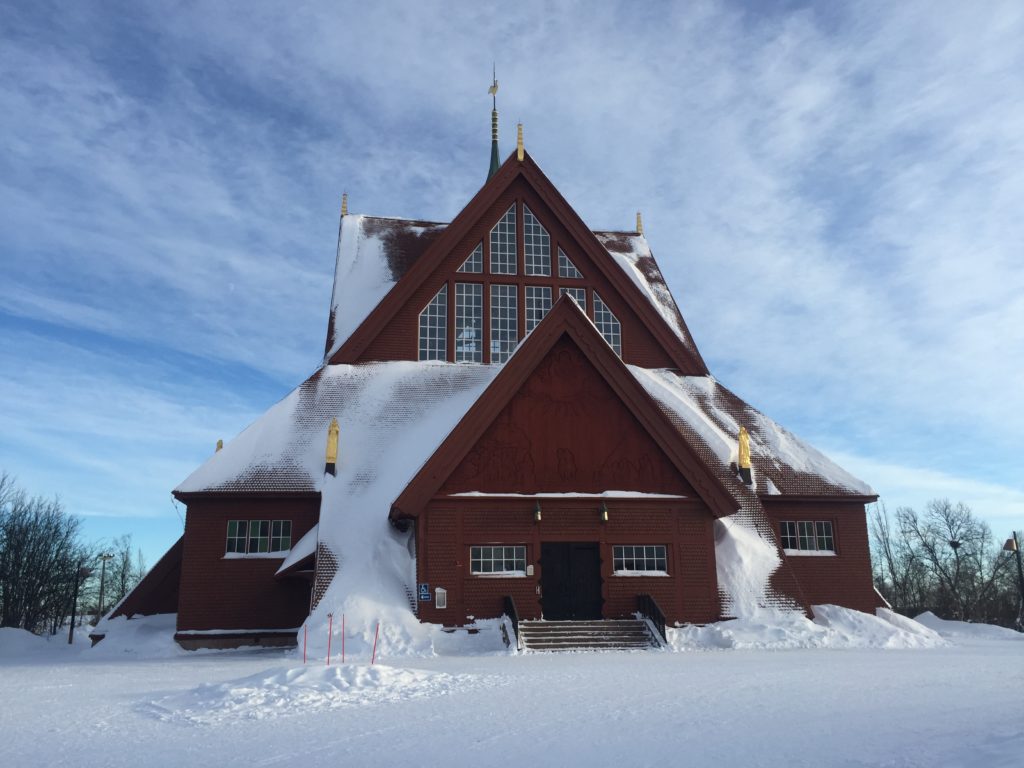
Kiruna church
Kiruna church in winter. Worth the subsequent snow drift maneuvering.

Sweden Packing Guide

What to Pack Everything In

Having seen my friend struggle with a giant suitcase throughout Arctic Sweden… I strongly recommend that you bring a well-designed travel backpack instead of a suitcase. Sure, it’s possible to travel with a suitcase… but you will likely regret it when you end up trying to drag your bag through freshly laid snow, getting all your clothes wet in the process. Take it from an idiot who brought a rolling suitcase to Finland in November 🙂

Although I often travel long-term for weeks or even months at a time, I have learned to travel light with a backpack that’s around 45L (more on this in a bit). I use packing cubes, because having an organized system – especially with all the layers you need for winter travel – is essential to make packing for Sweden a breeze. This winter packing list includes a few of the things that I swear by all year round, not just winter, for helping me organize my clothes and belongings when I travel.

Abisko train station
How I packed vs. how my friend packed for Abisko. Trust  me – leave the rolling suitcase behind.

    • Travel Backpack (carry on size or check-in size): While rolling suitcases can be great for short weekend trips, they are decidedly a bad idea for Sweden in winter. There will likely be snow and ice on the ground, and you will have to drag, not roll, your suitcase, which kind of defeats the purpose of having a rolling suitcase. Not fun. You’re way better off with a backpack that you can easily carry. I am a light packer, so my Tortuga Setout Backpack is my true love — this is the updated version of the exact backpack I brought with me to Sweden’s Arctic north, which I also spent two 5 month trips through Europe with it. The newer version is just as toughly constructed but even more organized – I’m a huge fan!
      • Why do I recommend Tortuga so much? Here’s why: this bag is 45L and has got three main compartments: one for a laptop and other flat objects, one giant rectangular compartment perfect for packing cubes stuffed with clothing, and one smaller compartment with pockets for passports, pens, odds and ends, etc. that I stash all my extras in – plus one small outer zipper pocket for anything you want quick access to. It also has a water bottle holder on the outside as well as buckles so that you can strap something like a yoga mat to the outside. Plus, it’s quite comfortable to wear, with a padded hip belt and comfort-molding shoulder straps complete with a chest strap so that you can distribute weight perfectly across your body in the event that you need to wear your backpack for longer than usual. Check out more specs and details here.
      • Does it pass budget airline requirements? I’ve never once had to check it in on a budget airline flight, and I’ve taken probably 50+ Ryanair, Norwegian, and Wizzair flights at this point. I just buy priority boarding so that I have a guaranteed spot on board for my bag (plus a second personal item bag), which adds about $5 onto my total flight cost instead of the $20-40 or so that a heavy checked suitcase or backpack would. This adds up massively over time – with a bigger bag, I would have paid $1,000+ extra in baggage fees over the past few years. That’s massive savings.
      • Despite traveling for two years, I haven’t personally used a bigger backpack, but I’ve heard excellent things about the Osprey system. If I ever were to upgrade my backpack capacity, that’s what I would choose. But I’m cheap and hate paying baggage fees, even at the expense of having less clothing options, so your mileage may vary.
    • Packing Cubes: If you haven’t used packing cubes before, get ready for a travel revolution. These super helpful zippable bags are a miracle when it comes to organizing your clothing, keeping everything from bursting out every time you dare open your backpack. Any packing cube will do. I personally use these packing cubes and love them to the ends of the earth. As a substitute, some gallon size plastic Ziploc bags do the same job of keeping clothing separated and contained. But given how bulky winter travel clothing can be, you’ll likely just rip them and have to throw out the bags, so I recommend actual packing cubes instead.
    • Laundry bag: If you are traveling Sweden in winter, you will get your clothing wet, dirty, and covered in snow constantly, and you’ll have to change your clothes a decent amount. A laundry bag will come in handy at keeping dirty stuff separated from the clean. Like packing cubes, you don’t need anything fancy at all. I do like having a cute one like this one from Kikkerland though, because I’m impractical and like cute stuff.
    • Hanging Toiletry Bag: Packing for Sweden in winter has special toiletry concerns (hint: bring ALL the moisturizer) and I recommend using something like this  hanging toiletry bag to organize your various shampoos, moisturizers, make-up, etc. This bag conveniently fits perfectly in the outer pocket of my Tortuga backpack. It has a good number of separators, organizers, and pockets without taking up any excess space.  It’s the Mary Poppins bag you always needed but never knew existed – a miracle for girly girl travelers like myself who want to bring their entire vanity with them when they travel (but don’t want to pay check-in fees).
    • Cute travel daypack : I prefer using a daypack to a purse when I travel and I always bring the same backpack with me on literally every single trip. I am completely obsessed with the PacSafe Citysafe backpack which is a security bag that is actually cute and not horrendous to look at. I use it every day, whether I’m bringing my laptop to a café or packing all my camera equipment for a busy day out. The best part is that it is slashproof and has locking zippers that make it virtually impossible for a pickpocket to get into your bag without you noticing! Sweden is super safe so this isn’t really a major concern but I’m obsessed with this backpack (and paid for it out of pocket – nothing here on this list is sponsored, for the record) so I had to plug it anyway.

Most Essential Things to Pack for Sweden in Winter

Keep in mind: Sweden is freaking expensive (though it is one of the more affordable of the Scandinavian/Nordic countries). Therefore, it’s extra important that you pack appropriately, because anything you need to buy in Sweden will be extra expensive.

If you plan to travel elsewhere in Europe this winter, check out this Europe in winter packing list to get you started!

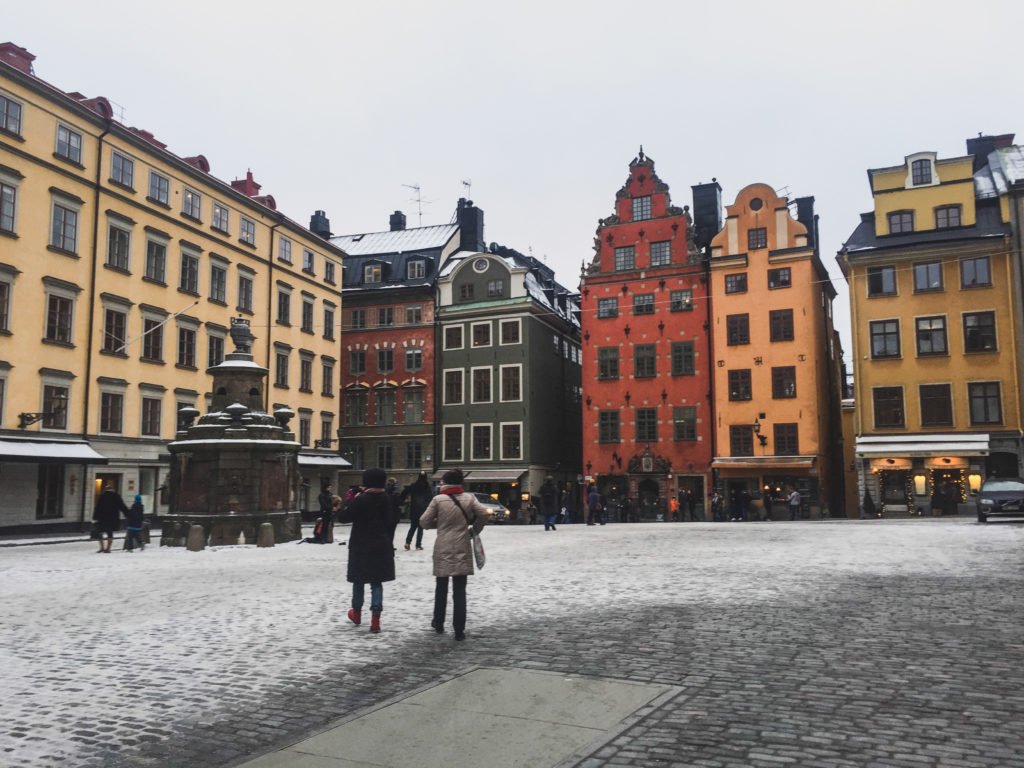
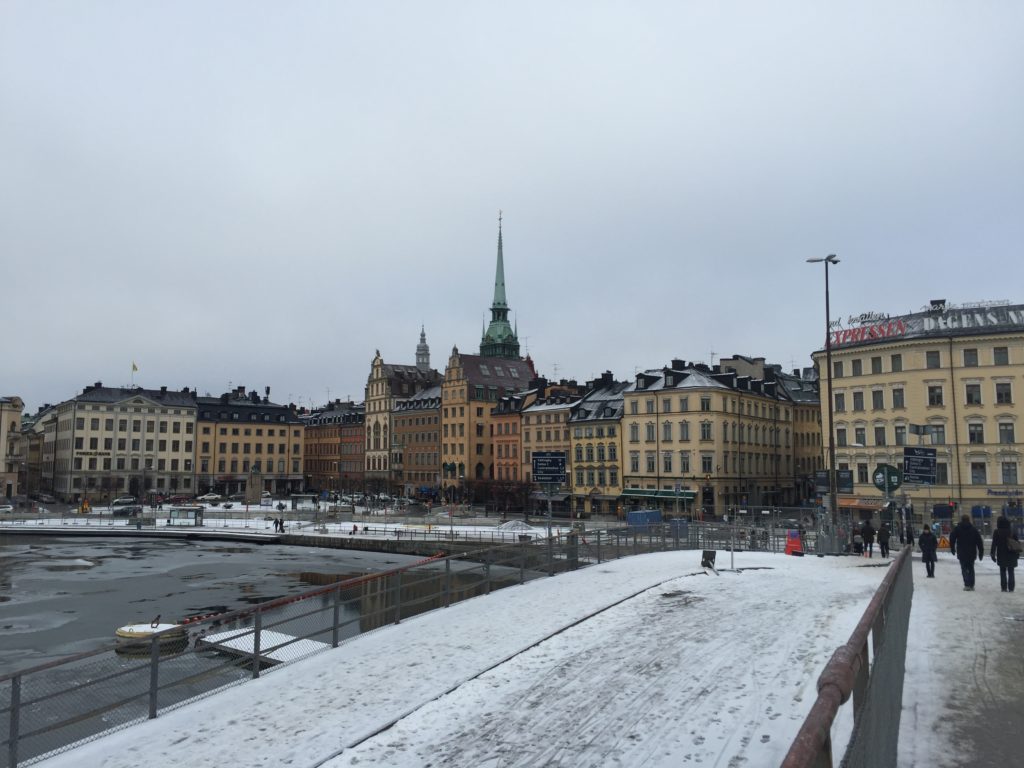
Gamla Stan in winter
Long parkas, hats, scarves, and boots – the winter uniform in Sweden!

    • A good, waterproof parka: While I said that Sweden in winter isn’t that cold – it still is pretty freaking cold. Pack for it appropriately. I love winterwear from The North Face because they guarantee all their products for life and will fix or replace literally anything you send to them. Their down jackets aren’t cheap, but they’re a great investment if you’re looking for a winter coat that will last a lifetime. This is the parka I own and I’ll use it for life. If you’re not looking to spend a lot of money on a new winter jacket, you can also buy a down jacket liner like this one and layer it between your winter coat and your other winter layers.
    • Thermal layers: While a good winter jacket will give you a lot of warmth, you’re fighting a losing battle unless you have warm layers underneath. I can’t wear wool or I get insanely, tear-off-all-my-skin itchy, but if you can tolerate wool then something like these merino wool leggings paired with a cashmere sweater layer will serve you very well. since I can’t wear wool, I am obsessed with these 32 Degrees thermal layers and wear them all winter long (I have about 5 that I rotate out). On bottom, I wear these fleece-lined leggings. With that plus a parka, you can wear basically anything over it.
    • Waterproof boots and warm socks: You don’t necessarily need proper snow boots if they are waterproof and have good traction. I first bought a pair of Blondo waterproof leather boots in 2008… which means I’m celebrating my 10-year anniversary with them this year. (Is this my longest relationship?) I’ve only had to get them resoled once, which set me back about $60, but for a pair of travel-friendly shoes that I’m completely obsessed with and wear all the time, it was 100% worth it. These are what I wore to Sweden and they held up great. However, if you plan on doing a lot of hiking in the snow, you may want a proper snow boot. The Elsa snow boot by KEEN is waterproof, insulated, and looks super cozy. Finally, no matter how insulated your shoe is, it won’t do much good if you are wearing thin, crappy cotton socks. I invested in these Smartwool socks after much hemming and hawing about the price and I’m so glad I did. You don’t need that many pairs because you can actually re-wear them a few times before they get smelly because wool is so odor-absorbent and magical. And even though I generally can’t tolerate wool because of itchiness, I don’t mind them on my feet.
    • Camera plus tripod: It’s highly likely that one of the reasons why you are going to Sweden in the winter is to see the magical Northern lights. In that case, you’ll want to ensure you have a camera that is capable of manual settings. Most importantly, you need to be able to set the aperture, ISO, and shutter speed. I use a Sony A6000 and it works great. To properly photograph the Northern lights, a travel tripod is absolutely essential: you need the camera to be still for at least 5 seconds to get a decent photograph, and there’s no way you can eliminate camera shake for that long without a tripod. Personally, I use a simple, cheap 50″ Amazon tripod and it works just fine and fits in my carry-on sized bag.
    • Reusable water bottle: The tap water in Sweden is drinkable everywhere so make sure you bring a reusable water bottle. If you don’t already have one, try one from Klean Kanteen.
    • Moisturizer with SPF: The cold will destroy your skin. Be sure to bring a heavy-duty moisturizer to prevent dry skin. I use Aveeno moisturizer as I have sensitive skin. Make sure your moisturizer has SPF as the snow + sun combination can lead to surprise sunburns!
    • Finally, travel insurance. Yes, I know this isn’t something that you pack But it is just stupid to leave home without it. I think it’s extra important to have travel insurance in winter as the weather is unpredictable and you will be protected and reimbursed in case of trip cancellation in addition to illnesses or accidents. I recommend buying travel insurance as far in advance as you can, as it’s always cheaper that way. I always use World Nomads when I travel. The contract is very clear as to what it covers, the prices are affordable, the excess/deductible is very low, and if you find yourself extending your trip it’s very easy to modify your insurance on the go.

What to Wear in Sweden in Winter

Layer, layer, layer!

Start with your base layers. Many people swear by wool, but I use a combination of a synthetic thermal top plus fleece-lined leggings. On top of my thermals, my next layer is just a simple sweater and jeans. I finish it off with wool socks, waterproof boots, a scarf, hat, gloves, and of course – a nice toasty jacket. That’s usually warm enough for me!

dogsledding in Abisko
If you’re cold, just add some puppies.

Here’s a quick packing list + product recommendations for what to wear for winter in Sweden:

    • 2-3 thermal tops: I swear by these 32 Degrees thermal layers and recommend getting 2 or 3 as they’re so warm they  can get kind of sweaty.
    • 3 warm sweaters to layer on top: Wool blends work great (and thermal layers make a nice barrier if you find wool itchy like I do). I love H&M for warm, acrylic winter sweaters.
    • 2 pairs fleece lined leggings: These are my favorite fleece leggings – so so so warm!
    • 2 pairs jeans: Wear these over your leggings.
    • 1 heavy jacket: I recommended the North Face parka above, but any warm jacket will work. Look for something that is lined with down, has a hood, and is waterproof and windproof.
    • 2 bras: Regular or sports bra – it doesn’t matter under all the layers.
    • 7+ pairs of underwear: However much you think you’ll need for your trip, so you don’t have to do laundry at your hotel, which would inevitably be super expensive in Sweden.
    • Bathing suit: Many hotels, guesthouses, and even hostels in Northern Sweden have their own saunas. Don’t forget your bathing suit or you’ll feel left out!
    • Sandals/flip flops: For the sauna or walking around in your hotel if you don’t want to put on your proper boots
    • 1 or 2 knit hats: I love fleece-lined knit hats like this one for extra warmth.
    • 2 pairs gloves: I recommend having two pairs, one lightweight pair of touchscreen-friendly gloves and one more heavy pair of waterproof gloves for things like dog-sledding and playing in the snow.
    • 1 super-warm infinity scarf: I love the scarves that you can wrap super close to your face, like this one. Never underestimate the power of a scarf for keeping you warm.

What to Pack if You Choose a Hostel/Dorm

There are a few special things you should bring if you are staying in a hostel or dorm in Sweden, which you can find below.

Stockholm in winter

    • 1 pair flip flops: I mentioned it above, but it goes double if you staying in a hostel!
    • 1 travel towelMost hostels in Sweden don’t provide towels and will charge a surcharge to give you one to borrow. Not worth it. Bring your own to avoid rental fees. This one is ultra-small and doesn’t take up much room in my bag.
    • 1 set of bedding (optional): Many hostels in Sweden require you to bring your own bedding or pay for renting it, which is annoying. If you want to save money and you have room in your bag, bring a twin-size sheet, duvet cover, and pillowcase. Otherwise, just suck it up and pay the rental cost (which is what I did).
    • 1 eye mask: I swear by this contoured eye mask as it doesn’t put uncomfortable pressure on your eyes but completely blacks out any light.
    • Some earplugs or good noise-canceling headphones: I love Hearos — they’re the gold standard for ear plugs. I’ve also been eyeing these noise-canceling headphones but haven’t made the plunge.
    • Travel-sized toiletries: Most hostels don’t provide shampoo, body wash, etc. so make sure you have these.
    • Combination locks: In Sweden, you’re probably at the greatest risk of theft from your fellow travelers. Prevent crimes of opportunity with simple measures like having a combination lock and keeping your valuables locked away. I always check hostels on Hostelworld to ensure they have lockers available because I travel with so many valuable electronic that it’d be idiotic to leave them unlocked.

What Toiletries to Pack for Sweden in Winter

Again, remember all your toiletries before heading to Sweden as you’ll pay a lot more once you arrive! Here’s what I recommend you bring.

When not seeing the Northern lights, dogsledding is a fun way to pass the time
Don’t forget the moisturizer!

    • ALL THE MOISTURIZER: Again, Swedish winter will chap the hell out of your skin. Make sure you use moisturizer to help with dry skin. I use Aveeno on my sensitive skin. Remember SPF for daytime!
    • Kleenex packets: I always seem to get a cold when I travel to cold climates so having Kleenex on hand is useful.
    • LUSH solid shampoo: Life-changing. Just trust me. Buy online or in store from LUSH and you’ll save serious money over Amazon.
    • Face wipesGreat for nights when you’re too lazy to take your make-up off properly or for a quick refresh.
    • Menstrual cup or your favorite tampon/pad brand, if applicable: If you have a specific brand allegiance, you may not find it in Sweden. I switched to a Diva Cup for travel and have never looked back. I highly recommend it.
    • Deodorant: I can’t rant enough about how much European deodorant sucks. I love Secret Clinical Strength and stash up on it every time I’m home… but then again, I am sweatier than most people are.
    • Basic medicine: You will be able to find all this in Europe, but trust me — you want to have the basics on hand in case you need them on the road. I carry Pepto-Bismol for standard stomach troubles, Imodium as a nuclear option (i.e. riding the bus when I am sick), some sort of painkiller like ibuprofen for headaches and minor pains, and some sort of motion sickness tablets.
    • Cold medicine: If you’re prone to getting sick, be sure to buy some cough or cold medicine before traveling to Sweden. They are really stingy with some of the ingredients over the counter in Northern Europe. That usually covers the bases for me — anything else I need I grab on the road.

Electronics to Pack for Sweden in Winter

The most important thing to remember about traveling in winter is that batteries drain extra quickly. You will want to bring extra batteries for everything and a portable battery charger. Trust me on this!

You’ll also want to bring a camera with the ability to change the shutter speed/aperture/ISO settings so you can properly capture the Northern lights. Cell phone cameras usually do a good job but they won’t be sufficient for photographing the Northern lights. Don’t forget a tripod!

Also, be sure to save some Swedish sayings and phrases to your phone before you go — a little Swedish will make a very positive first impression!

sweden in winter
Where it not for my tripod, I wouldn’t have been able to capture this!

  • Laptop, if necessary: I bring my Macbook Air everywhere but other people may prefer a tablet or an inexpensive netbook. I work on the road so a user-friendly, lightweight laptop is a must.
  • Kindle Paperwhite: Sweden is usually pretty good about having English-language books available but I still love having my Kindle as I can buy basically any book in the world as long as I have WiFi.
  • Travel camera: I use a Sony A6000 because it’s lightweight for a professional caliber camera, inexpensive, and a HUGE step up from a smartphone. If you are doing adventure activities like ice climbing or dogsledding, I highly recommend also bringing a GoPro. Whatever you bring, be sure to buy extra batteries, charge them up, and bring them alone.
  • Portable charger: Your electronics lose battery so much faster in the cold. Bring a portable charger with the ability to store enough power to complete 4 or 5 charges – it’ll save yourself so many headaches! Anker is a reliable brand and what I personally use.
  • Adaptor, if necessary: Sweden uses the standard European adaptor, so bring one if you need it.

***

While this sounds like a lot, I was able to fit it everything on my Sweden packing list into my 44L backpack and my daypack by wearing my heaviest clothing on the plane and using my packing cubes to fit my clothes in neatly.

Is there anything I’ve forgotten to pack for Sweden in winter? Is there anything else you’re wondering if you should bring? Let me know in the comments!

Bali Packing List: What to Pack for Bali (In Rainy or Dry Season)

Packing for a trip to Bali is pretty easy, but having spent 6 weeks traveling on this gorgeous island, once in rainy season and once in dry season, I’ve got a few opinions on what you need to bring to Bali. The biggest variable when it comes to deciding what should be on your Bali packing list is the time of year. Being a tropical country, Bali doesn’t have a summer or winter, but rather a wet and dry season.

From May to September, it is dry season, and you can expect gorgeous sunny skies and humid weather. My first trip to Bali was during dry season and it was some of the most perfect weather I’ve ever experienced in my life: humid without that feeling that you’re steaming in your own skin the way I felt in Bangkok and Singapore, just a bit breezy, and barely a speck of rain. If you have the ability to travel to Bali any time of year, the dry season is definitely the best.

Most of the year, though, is the rainy season, from October to April roughly. Despite the name, the rainy season is actually still a pretty pleasant time of year to travel to Bali, so you shouldn’t let that discourage you. In fact, my most recent monthlong trip to Bali was entirely in the rainy season. While there were a few all-day downpours, they were few in number. Generally, I found that mornings were generally really sunny, and there would be an epic rain or thunderstorm around 4 PM, usually clearing up by around 6 PM for a killer sunset.

So, by all means, definitely consider traveling to Bali during the rainy season, but I’d allow yourself more time and flexibility in your schedule to account for the rain. And be sure to pack properly for the weather.

Here’s everything you need to know about what to pack for Bali:

What to Pack Everything In

This is the most important part, in my opinion. If you are traveling through a few different parts of Bali you will likely prefer a well-designed travel backpack to a rolling suitcase, especially if you are planning any onward travel to places like the Gili Islands (highly recommended) or other islands of Indonesia. Sidewalks aren’t common in Bali and if you have to move from one place to another, a suitcase can be annoying.

However, keep in mind that there really isn’t much in the way of public transportation in Bali – everyone gets around in cabs or Ubers, or rents their own scooter for a portion of the trip. So, that said, if all you have is a rolling suitcase and you don’t see using a backpack in the future, disregard my backpack recommendation and just bring your suitcase — you’ll be okay.

  • Travel Backpack (carry on size or check-in size): I always use my Tortuga Backpack (I have the Setout version) for carry-on travel, even when I travel long-term.
  • Packing Cubes: While you can go either with a backpack or rolling suitcase when packing for Bali, I do have strong opinions about packing cubes being 100% necessary. It helps you organize your clothing and makes opening your backpack or suitcase a little less terrifying. Pretty much any set of packing cubes will work: you just need ones with a rectangular shape and a zipper. I personally use these packing cubes and love them. If you must, some gallon size plastic Ziploc bags will have the same effect, but they will eventually rip and need to be thrown out and thus aren’t very eco-friendly.
  • Laundry bag: I’ve never been anywhere where it’s easier to do laundry than Bali. Seriously — laundry is about $1 per kilo. It’s incredible. Laundromats are also everywhere, so if you think you’ll want to wash your clothes during your Bali trip, I’d bring a laundry bag like this one from Kikkerland to make laundry day even easier.
  • Hanging Toiletry Bag: I carry a lot of cosmetics and toiletries when I travel and using a simple hanging toiletry bag is a huge help. This conveniently fits perfectly in the outer pocket of my Tortuga backpack so it’s kind of meant to be. It has the perfect number of separators, organizers, and pockets without taking up any excess space. It’s like Mary Poppins magic bag.
  • Backpack with locking zippers : While Bali is safe, it’s not completely free from petty crime. I actually had my ATM card skimmed (more on this later — be sure to travel with a backup debit card if at all possible). While wearing a shoulder bag is probably the most secure option, it’s just not comfortable if you carry a lot of stuff with you during the day like I do. If you plan on renting a scooter, you’ll definitely want a travel backpack. I swear by PacSafe products and love their PacSafe Citysafe backpack. It’s actually super, super cute and comfortable. It fits my 13″ Macbook laptop no problem with plenty of room for all my other electronics and daily needs. If you don’t want to carry another small backpack, I recommend either a cross-body bag or a small handbag that you can carry securely and keep your daily items in.

Essential Things to Pack for Bali

Bali is set up well for tourism and as a result it usually won’t be a catastrophe if something is missing from your Bali packing list. However, there are a few things that are difficult to get in Bali or with fewer options. These are the essentials that I want to highlight that you definitely shouldn’t forget when you are planning what to pack for Bali.

  • Travel insurance: OK, it’s not technically something you pack for Bali but it’s so important that it deserves the top place here. Bali is a safe country but it’s not without its risks. Namely, lots of people choose to use scooters while they are in Bali and lots of people also choose to drink while they ride scooters. Put two and two together and you’ll see why scooter accidents happen regularly in Bali. Virtually everyone I know who spent a significant chunk of time in Bali has crashed their scooter at one point. Don’t be stupid – travel with insurance. I use World Nomads every time I travel, including in Bali. I recommend their Standard plan if you aren’t planning to dive, but definitely make sure you choose the Explorer plan if you are going to be doing any SCUBA diving as the original plan doesn’t include diving coverage. Get your free quote here.
  • Mosquito repellent: As a tropical country, Bali has lots of pesky mosquitos, especially in the rainy season. Dengue fever is a possibility in Bali and from people who have suffered it, it sounds absolutely miserable.. I usually carry a bottle of mosquito repellent with me (sometimes it’s hard to get the strong stuff in Bali) and also some repellent wipes with me if I need to reapply on the go.
  • Water bottle with built-in filter: Bali tap water is not drinkable and needs to be filtered or boiled before drinking. Bali has huge problems with plastic pollution, which is destroying its beaches (and thus the tourism-dependent island’s image) so please do not rely on water bottles during your Bali trip and instead pack a sustainable water solution. I used to carry a Water to Go bottle with me and never got sick on my travels in Bali. However, my filter broke and the water bottle now leaks so I am in the market for a new water bottle with filter – I have my eye on the Lifestraw variety which has rave reviews. You could also use a Steripen which is another option I am considering.
  • Reusable tote bags: Like many countries in the developing world, there is plastic everywhere in Bali and it’s a huge problem for the island. Bring your own reusable tote so that you can signal to it and refuse plastic bags whenever possible. I keep one or two small ones in my larger bag and bring them with me daily, plus I use them as beach bags, separating shoes from clothes, etc.
  • Basic medicine: Most medicine is available in Bali but to be safe I always carry a mini medicine kit as the last thing you want to do when you are sick is drag yourself to the pharmacy and explain your ailments. I carry Pepto-Bismol for standard stomach troubles, Imodium as a nuclear option for diarrhea (i.e. you have to ride a bus for several hours), some sort of painkiller like ibuprofen for headaches and minor pains, and some sort of motion sickness tablets. Supplement with any prescription medicine you need. The Pepto-Bismol is especially important as Bali doesn’t have great stomach medicine options – when I got sick last time all I could find was activated charcoal which is okay but not quite as effective.
  • Some cash in USD/euros/pounds and a back-up debit card: Unfortunately, card skimming scams at ATMs are incredibly common in Bali. It happened to me on my last trip. Also, on my first trip to Bali, I accidentally left my debit card in an ATM. This is because Bali ATMs give you your money first, then you have to tell them the transaction is over, and then retrieve your card. If you’re not paying attention and are used to things being in a different order it’s very easy to leave your card behind. I highly recommend having a secondary debit card – it was super helpful for me to have. If you don’t have a back-up debit card then bring at least $100-200 in a common currency like USD, euros, or GBP in cash as a safety measure (which I recommend doing every time you travel, anyway). I don’t mean to scare you off Bali but nearly every one I know who has spent some time on the island has had their card skimmed or lost at one point so be prepared.

What to Wear in Bali

Admittedly, this is a list for female travelers — dudes, sorry, but I trust you know how to dress yourselves in summer, so just follow that.

Bali is used to tourism, and while Balinese society is a bit conservative, they are used to tourists wearing pretty much whatever. You shouldn’t feel uncomfortable in shorts, mini dresses, etc. though it’s better to be wearing proper clothes and wandering around in just a bikini in restaurants and other establishments (though obviously that certainly happens, too). Be sure to bring comfortable travel shoes – this list has some of my favorites.

The only time you really should be mindful of what you wear is when visiting a Balinese temple. Cover your upper body with at least a short-sleeve shirt, and if you have any leggings or pants it is more polite to wear those. You will also have to put on a sarong regardless of what you are wearing / how covered up you are (sarongs are thought to keep bad energy in, away from the temple). Most popular temples will provide free sarongs to borrow but I recommend having one of your own just in case (plus they are a super handy travel item).

  • 5 lightweight summer dresses: Or really, however many you can pack without being cramped or ridiculous.
  • 5+ tees & tanks: The more neutral, the better. I suggest black, gray, and a few bright colors. Avoid white – it’s not sweat-friendly.
  • 1 pair loose pants: Pants can sometimes be more comfortable than
  • 2 pairs shorts: I bring one pair of loose-fitting linen or silky shorts for those insanely hot days, and one pair of denim shorts.
  • 1-3 skirts: I suggest bringing one black skirt and one printed skirt for flexibility. Personally I love having at least one midi-length skirt and prefer having two. The extra fabric around your legs traps some cool air, making you feel less hot, and I liked the additional coverage it gave me, especially when on scooters.
     
  • 1 sarong: Necessary for temples and for life. I like this one.
  • 1 pair sneakers: If you plan on getting active during your time in Bali. I usually wear a pair of black Nikes as I find they look cute even with my dresses and I’m all about options.
  • 1 pair cute sandals: Having a cute and comfortable pair of sandals is key. I’m obsessed with my Birkenstocks and will never go back.
  • 1 pair flip flops: Great fot beaches and days when you don’t want to muck up your cute sandals.
  • 1 rain jacket: Even if you don’t plan on traveling in the rainy season, sometimes the weather has other plans. The rainy season in Bali is no joke and you will want a proper waterproof rain jacket. I love my Marmot rain jacket.  If you plan on renting a scooter I recommend also buying a proper waterproof poncho as they will keep you much drier than a rain jacket.
  • 1 cardigan: Usually not necessary given the weather in Bali but I like to have it for those occasions when you’re in an over-air conditioned room or bus.
  • 1-2 bras: I trust you’re all big girls and you know what you need when it comes to bras. I personally brought 1 regular bra and 2 sports bras and switched between the them.
  • Exercise clothing: If you want to do yoga, etc. you’ll want to bring
  • 7+ pairs of underwear: The more underwear you bring, the longer you can go between washes. I don’t recommend bringing stuff to do your laundry on the road – it’s a waste of time and money. There are plenty of laundromats catering to backpackers in Nicaragua, plus you’re supporting the local economy. If you really need to clean some clothes in a pinch, a bar of soap and hanging it somewhere
  • Bathing suit: You’ll definitely want it, whether you’re taking dips in the your epic Bali hotel pool, going to the beach, learning to surf (in which case I recommend bringing a rash guard too) or diving in Bali or the Gilis.

What to Pack for Bali Hostels

If you’re staying in hotels or a private pool villa in Bali, you can skip this part, but there are a few specialized things you might want to bring in case you are staying in a hostel.

  • 1 pair flip flops: Yes, it was on the above packing list, but really, don’t forget your flip flops if you plan to stay in a Bali hostel. Those bathroom floors are rank.
  • 1 travel towelMany hostels nowadays do not provide free towels when you check in. Bring your own to avoid rental fees – and also to double up as a beach towel for beach days. These pack up smaller than you’d think and are an essential for me when I travel in hostels.
  • 1 eye mask: I swear by this contoured eye mask as it doesn’t put uncomfortable pressure on your eyes but completely blacks out any light. Great for inconsiderate roommates and early nights in when you’re tired and want to sleep before everyone else.
  • Some earplugs or good noise-canceling headphones: I love Hearos — they’re the gold standard for ear plugs. I’ve also been eyeing these noise-canceling headphones but haven’t tried out a proper noise-canceling variety just yet.

What Toiletries to Pack for Bali

Bali’s pharmacies and beauty stores will have most of the things you want and need… but these are my essentials that I always pack from home.

  • Hand sanitizer: If you’re traveling off the beaten path, restrooms can be questionable, so having some hand sanitizer is always a good idea.
  • Kleenex packets: Like above — public restrooms may be lacking in the toilet paper department (especially if you encounter a squat toilet), so having some Kleenex in a portable sleeve is a nice choice.
  • LUSH solid shampoo: Life-changing. Just trust me. Buy online or in store from LUSH and you’ll save serious money over Amazon.
  • Sunscreen: Bali is sunny as hell even in the rainy season. And you’ll want to wear sunscreen, even on cloudy days, as damaging UV rays can permeate cloud cover and wreak havoc on your skin and age it prematurely. My skin is really sensitive on my face, so I use this fancy Japanese sunscreen to prevent facial acne, and I buy a more standard sunscreen for my body when I’m on the road.
  • Travel medications: I listed them above, but just to reiterate — stomach medicine, motion sickness pills, and some sort of painkiller are my standards.

What to Pack for Safety in Bali

Bali is a perfectly safe place, despite all the fear-mongering about the volcano that has happened in the media over the last year. Let me break it down for you: unless you are in the exclusion zone, which is a mere 12 kilometers — a tiny fraction of the island — you will not encounter any problems in Bali. And no hotels in the exclusion zone are operating, so it’s kind of a moot point. I stayed in Sanur which is kind of close to Mount Agung and I never felt unsafe. Amed is even closer but it is outside the exclusion zone and safe for tourists as well.

Again, I recommend having travel insurance (especially for peace of mind regarding trip cancellation) – World Nomads is what I use – and just using common sense.

  • Combination locks: In Bali, you’re probably at the greatest risk of theft from your fellow travelers. Prevent crimes of opportunity with simple measures like having a combination lock and keeping your valuables locked away. I always check hostels on Hostelworld to ensure they have lockers available because I travel with so many valuable electronics.
  • Daypack with locking zippers: Backpacks are easy targets — I wrote above about how much I love my PacSafe Citysafe backpack. After nearly being pickpocketing while wearing a different backpack in Vietnam, I now carry no other kind of daypack. Pickpocketing is less of a problem in Bali than in many other places in Southeast Asia but it’s still good to be aware.

Don’t bother with a money belt. Thieves know about them. You’re better off carrying your wallet deep in a slash-proof backpack (like the one mentioned above) or in your day bag, tightly zipped.

Also, like I said before, before you travel to Bali I recommend having a second checking account and two debit cards if it’s at all possible. Keep them in different spots in case you get pickpocketed. This way you won’t be screwed while you wait for your bank to send you another card!

Electronics to Pack for Bali

There are really no special considerations when it comes to packing electronics for Bali. Bring whatever you’re comfortable bringing. As a travel blogger, I bring my entire life with me on the road, which includes a laptop, camera, multiple lenses, smartphone, GoPro, and more. If I stay at hostels, I always make sure that I stay at hostels with lockers so that I can lock up my valuables. People who are more paranoid/responsible than I am may want to bring a portable safe for peace of mind. But I’ve never felt the need, personally.

  • Laptop, if necessary: I bring my Macbook Air everywhere since I need it for work, but other people may prefer a tablet or an inexpensive netbook. I work on the road so a user-friendly, lightweight laptop is a must.
  • Kindle Paperwhite: English-language bookstores are few and far between outside of expat-haven Granada. I love the Kindle Paperwhite because the screen is glare-free, making it easy to read at the beach or in direct sunlight.
  • Travel camera: I use a Sony A6000 because it’s lightweight for a professional caliber camera, inexpensive, and a HUGE step up from a smartphone. You may want to replace this or add a GoPro too, especially good for adventure activities like rafting and diving (just check to see if you also need an underwater house for your GoPro if you dive, as many of the newer models are only good to 10m — not nearly enough for divers)
  • Portable charger: As an electronics-addict, I’m always running out of juice. Bring a portable charger to save yourself many headaches! Anker is a reliable brand and what I personally use.
  • Adaptor, if necessary: Bali uses the same plugs as Europe (non-UK), so if you’re coming from the US, Australia, Canada, or the UK, or anywhere that uses non-EU plugs, you will need an adaptor.

***

Well, nearly 3,000 words later, I think I’ve finally exhausted all the things you need to pack for Bali. While this sounds like a lot, I was able to fit my entire Bali packing list into a 44L backpack (carry-on size) and daypack because I chose lightweight fabrics and packed carefully.

Is there anything I’ve forgotten? Is there anything else you’re wondering if you should bring? Let me know in the comments!

What to Expect When You Travel to Colombia

I last visited Colombia in 2012, much to the chagrin of my normally quite laidback parents. After all, Colombia has had a hard time shaking its global image as a country ripped apart by drug violence, and shows like Narcos haven’t done much to help its image.

Luckily, much of my previously held misconceptions of Colombia proved false. I found the capital city of Bogotá ultra-cool and modern, full of street art and delicious restaurants, whereas Cartagena was as picture perfect as the postcards promised.

At the same time, cracks in Colombia’s newly safe facade still showed. We drove past a pickup truck full of army men with machine guns one night; we saw police dogs checking virtually every person’s trunk before they would be permitted to park in a mall; parts of Bogotá felt a bit dodgy at night. While I had an excellent time and left Colombia in love with the friendliness of the people and beauty of the country, I still believe that you should be aware of the still-present effects of its troubled history before you visit.

While I only had a week to spend in Colombia, guest writer Robert Schrader of Leave Your Daily Hell has spent far more time exploring this beautiful South American country, so I’ve asked him to share his honest perspective on what you should consider when planning a trip to Colombia. Read it below!

***

When you think of travel in South America, you probably imagine a trek to Machu Picchu, a laze on the beaches of Rio de Janeiro, a bike ride through the Argentine wine country or stargazing in the deserts of Chile. But a trip to Colombia? Probably not, in spite of the fact that you can have all these experiences (and more) there.

Thanks to a violent past and inadequate PR in the present day, Colombia has struggled to achieve the notoriety among tourists the most of its South American neighbors enjoy, even if visitor numbers are steadily increasing. Below are some reasons you should visit Colombia—and some facts about the country that might make you think twice.

Colombia is South America’s Grab Bag

You can enjoy most experiences you find elsewhere in South America in Colombia. Hike to the largely unknown Ciudad Perdida instead of Peru’s world-famous lost city; or laze on the Caribbean beaches near Cartagena, which are every bit as beautiful as those you find along the Atlantic Ocean in Brazil.

Colombia is replete with amazing cities—not only Cartagena, but the national capital of Bogotá, the hipster capital of Medellín and the salsa capital of Cali. The country also has a huge variety of natural experiences, from the Eje Cafetero coffee region, to Tayrona National Park, to the desert peninsula of Guajira, to Caño Cristales, a “rainbow river” that looks every bit as stunning in person as it does in viral internet videos.

Yet It’s Not (Completely) Safe

You don’t have to binge-watch Narcos to get an idea of the drug violence that plagued Colombia in past decades. The country’s dramatic turnaround has been less publicized, however, which leads many would-be travelers to believe that a trip to Colombia will put your life in danger. I’m split about the issue of whether or not Colombia is safe for travelers.

On one hand, tourists don’t venture to the most dangerous parts of Colombia, which account for most of the country’s annual murder rate—26.5 per 100,000 people, if you’re curious, which makes Colombia the 15th deadliest country in the world. But while I experienced neither violence nor theft during my trips, several travelers I know personally have been robbed at gunpoint in Colombia.

It’s Close—if You’re American

One reason Colombia’s popularity has increased (if not fully surged) is because it’s so convenient for North and South American travelers. Geographical distance notwithstanding, airlines have been adding flights to airports throughout Colombia, which when combined with the extensive domestic network of national airline Avianca make Colombia easy to explore, particularly compared to some of its neighboring countries.

On the other hand, Colombia is extremely inconvenient to travelers from basically anywhere else in the world. Few nonstop flights to Europe exist, and like the rest of South America, Colombia sits outside the range of flights to Asia, at least when it comes to the aircraft that exist now. Unless you already plan to be on a trip through Latin America, Colombia’s allure might not be enough to justify 24+ hours of flights.

It Remains Offbeat, For Now Anyway

When I took my first trip to Colombia, back in 2012, it seemed like the country was poised to become the next big tourism thing. While more foreign tourists are visiting Colombia than ever before, people’s lingering doubts about its safety (and other common misconceptions) has made this more of a trickle than a flood. And that’s a very good thing, at least as a traveler.

To be extremely general, Colombia feels more authentic than most other places I’ve been on the South American continent, with locals who are less jaded by tourism, food that is more unfamiliar and sights that are on their way to becoming iconic, but a far cry from clichéd. Colombia won’t remain off the beaten path forever, however, which means that you should probably visit sooner rather than later.

The Bottom Line

Colombia is a magnificent (but sometimes problematic) destination. Although it offers a veritable grab bag of the travel experiences you can enjoy further afield in South America, legitimate security concerns linger. Additionally, while the fact that it remains off the beaten path is attractive, its lack of proximity to travelers who live outside of the Americas can make it a hassle to reach. The good news is that if you do decide to visit Colombia, it’ll be a trip you never forget.

Robert Schrader is a writer, photographer, and creator of Leave Your Daily Hell, one of the world’s most popular independent travel blogs. When he’s not on the road, he lives in Bangkok, where he’s currently attempting to master the Thai language and not get fat—street food and self-control aren’t good bedfellows! Read his blog or follow him on Instagram to keep up with his travels.

7 Things To Know Before Applying for an Azerbaijan E-visa

As an American with major passport privilege, I always get stressed out when it comes to applying for visas. I’m just not used to it, as my passport allows me to travel to well over 150 countries without a visa or with visa on arrival.

So when I jumped on booking a cheap flight to Baku, Azerbaijan in January, I was actually a little stressed about the visa process. My friend told me that she had had her visa rejected several times. In my head, applying for an e-visa to Azerbaijan was going to be some insane, herculean task.

I was pleasantly surprised to find that applying for an e-visa for Azerbaijan is super straightforward and simple, provided you follow their rules. I did, however, find a few things that I should inform others of, hence writing this post.

Things to Know Before Applying for an E-Visa to Azerbaijan

Not every nationality is permitted to apply for an e-visa to Azerbaijan. Check the official government’s list of countries who can apply for an e-visa here. Currently, 95 countries can apply for e-visas to Azerbaijan. I’m not going to give a full list here as these things are subejct to change, and the official website will always be the most up-to-date.

Please note that this reflects my personal experience as an American passport holder traveling in 2018. Your experience may vary for a variety of reasons; I’m just trying to share what I personally learned about the process. And honestly, I’m mostly writing this post to stick it to the cheating e-visa company who nearly scammed $40 out of me before I even stepped foot in Azerbaijan. However, once I started using the official website, applying for an e-visa to Azerbaijan was incredidbly easy and straightforward. Still, there are a few things you should know to smooth out the process.

1. There is a scam company charging nearly 3x the rate – go with the actual government site

Some scam company with better SEO than the actual Azeri government runs a website that charges $65 for an Azerbaijan e-visa, when it actually costs $20 for the e-visa plus a $4 processing fee. The fake site has a very official looking URL: https://evisa.com.az. In actuality, though, you need to use https://evisa.gov.az or you’ll be charged nearly three times as much.

If you just search “e-visa Azerbaijan” or some variant of that, unfortunately, the scam site pops up first (in fact, when I just tested it now, the official site isn’t even really a search result, but the URL is hidden on the page if you look carefully)

I nearly fell for it! My friend who I was going to Azerbaijan with had gotten her e-visa before me painlessly and paid only $24 USD with the official site. I, however, ended up on the scam site and was shocked when it asked me for $65 USD. I tried to search if there had been some sort of diplomatic spat that raised the price of our visas but could find nothing online… and then I ended up on the legitimate website and realized I had nearly gone through an agency masquerading as the official website.

This happens to a lot of people so please, be careful and check that the website ends in .gov.az and NOT .com.az!

This is the correct website.

2. You can only get a single-entry Azerbaijan e-visa, so don’t leave and plan to re-enter on the same e-visa

The website only gives you single-entry Azerbaijan e-visas, which become used and invalid after you leave the country. If you plan to leave Azerbaijan to visit, say, other countries in the Caucasus and need to return, you will need to apply for and pay for another e-visa after leaving Azerbaijan. Luckily, the e-visas are all issued within 3 business days (3 hours for urgent cases, for which you’ll pay $50), so you won’t have to spend that much time out of Azerbaijan.

However, your Azerbaijan e-visa is only good for 30 days out of every 3 months, and I don’t believe you can use a second e-visa to get around that restriction (please inform me otherwise if that’s not the case). So watch your days and make sure you don’t exceed 30 days, including arrival and departure days.

Visiting Nakhchivan (assuming you fly) means you stay in Azeri territory and does not count as leaving, so a single-entry visa is fine for visiting Nakhchivan. No special papers or visas are needed for Nakhchivan.

3. You can visit Armenia before or after Azerbaijan, but not Nagorno-Karabakh

It is not a problem to get an e-visa for Azerbaijan if you have visited Armenia. I personally visited Azerbaijan first, before Armenia. However, I can point to several friends who have visited Azerbaijan after visiting Armenia, and while some of them were asked a few questions, absolutely no one was denied entry.

That does not go for the territory of Nagorno-Karabakh, which in international eyes is Azerbaijani territory that Armenia illegally controls. I’m not going to get into the politics or my opinion of it, but do know that if you go to Nagorno-Karabakh and try to enter Azerbaijan, deportation is the best case scenario. People have been extradited from other countries, sent to Azerbaijan, and jailed for visiting the Nagorno-Karabakh region. I do not recommend lying on your Azerbaijan e-visa application if you’ve visited Nagorno-Karabakh.

4. They are very, VERY fussy about writing your name properly on the visa application form

If you want a laugh, check out the PDF advising you on how to fill out your form and count how many times they write “It is wrong!”

But seriously, your visa information will be compared against a database, and if entered incorrectly, it will be denied. My friend either forgot to put her middle name or put it in the wrong section and her visa was denied. However, luckily, if you need to make a change to your Azeri e-visa you can do so rather easily. It costs 5 USD to fix and it takes about 3 hours to make the change.

5. Be sure to print your e-visa

This should be obvious but you will need to print your electronic visa for Azerbaijan and present it alongside your passport when you arrive at the border. There are kiosks in the airport that some countries use for visa on arrival but if you have an e-visa you can bypass these kiosks and just go straight the passport control.

6. You need at least 6 month’s validity on your passport

This should be common knowledge by now, but ensure that by the time you enter Azerbaijan you will have in excess of six months validity left on your passport. This doesn’t just apply for Azerbaijan but for virtually every country, and many airlines will not even let you board the plane if you have less than six months remaining on your passport, even if the country itself would let you in. So play it safe and make sure you renew your passport if needed.

7. You must register if your stay is 10 days or longer or if you’re moving around the country

You thought you were done when you entered Azerbaijan with your printed e-visa in hand? HA. There’s one more byzantine hoop you may need to jump through (or rather, make your hotel jump through). If you are only staying in Baku and not leaving the residence address (your hotel, hostel, etc.) you entered on your application, you’re fine.

But if you plan to visit a second place in Azerbaijan, or if you are planning on staying more than 9 days, you will need to register. Luckily, you can have your hotel register you and it’s not a problem. They will need to see a printed copy of your e-visa (so keep it with you after you’ve been stamped into the country) and your passport and it will only take them about an hour to do the paperwork and less than 24 hours to get confirmation. Keep ahold of your confirmation e-mail in case any issues arise.

Registration is free and your hotel should not charge you for it.

Have you applied for an e-visa to Azerbaijan and have anything to add? Let me know in the comments!

Lake Batabat and Its Floating Island, the Gem of Nakhchivan

I had never seen a landscape change this dramatically this quickly before, from dusty red rocks straight out of the American Southwest to lush green rolling foothills and steep mountains tipped with snow within the span of a single hour.

I must have had my head hanging out of the taxi window nearly the whole drive, like some cartoon of an overexcited dog. By the end of the drive to Batabat, I wouldn’t have been surprised if I had my camera imprinted into my face.

The driving distance from Nakhchivan City to Lake Batabat is rather short, a mere 65 kilometers, yet it is one of the most beautiful and dramatic drives I’ve ever done. The red rock mountains, the green mountains with the last vestiges of the season’s snow, and the yellow smatterings of mustard fields everywhere will always be in my mind. All this, punctuated by the occasional passing by of an old school Lada – I was in heaven.

About Lake Batabat

Lake Batabat is the pride of Nakhchivan, and it’s not without good reason. Located high in the mountains of Shahbuz at an altitude of 2,500 meters above sea level, this lake was formed by receding glaciers over the course of many thousands of years, forming a tarn.

Today, Lake Batabat is a popular excursion for Nakhchivani families, and when I went in May the lake area was strewn with gorgeous mustard flowers and other wildflowers. Handfuls of local families were out in the fields, picking mustard flowers and setting up picnics.

The Floating, Moving Island of Batabat

One of the most unique things about Lake Batabat is that it has its very own floating island in the middle of it. This tiny island is made entirely from peat and grass, and it isn’t attached to the bottom of the lake in any way.

As a result, it drifts — though slowly — throughout the year, moving as if pulled by the sun. The lake almost looks like one big moat for one tiny island, and the interest the floating island adds is what makes Lake Batabat such a photogenic place. I especially love how the shape of the island seems to mirror the exact shape of the lake… Batabat is a magical place.

How to Get to Lake Batabat from Nakhchivan City

The driving distance from Lake Batabat from Nakhchivan City is only 65 kilometers. The excellent quality of the roads means that it takes little more than an hour – perhaps an hour and a half at most – to get there, despite ascending to 2,500 meters above sea level.

We went in a taxi, as we weren’t able to find any information about whether or not minibuses go out to Batabat. But judging by the fact that everyone we saw out at Batabat had come in their own car, I don’t think there is any public transportation to the lake.

We arranged a taxi with the front desk at our hotel (Hotel Tabriz). Our driver took us to the Ashabi-Kahf caves, Lake Batabat, the salt sanatorium at Duzdag, and Qarabaglar for 150 manat ($88 USD) for a full-day trip. Perhaps you could negotiate a better rate but we were content to pay that.

Where to Eat in Batabat

On our way to Batabat we saw countless families doing a picnic out in the mustard-covered fields surrounding Lake Batabat.

Some families even came prepared with elaborate barbecue setups (the Caucasus, like much of the Balkans and former USSR, seems to view grilled meat as a religion rather than a food group).

Lacking such a setup, we ate at Restoran Batabat at a gorgeous table in the forest.

Photo credit: Stephanie Craig

There was no physical menu, and given the fact that my Russian skills are abysmal, and they spoke no English and we spoke no Azeri, we had to place our orders by phone using our hotel concierge as translator slash waiter.

Still, it worked pretty seamlessly, and we tucked into the most delicious meal we’d have in all of Nakhchivan, including soups (always order soup in Azerbaijan; it’s always delicious), chicken kebab with fluffy home-cooked lavash bread, pickled vegetables, and fresh tomatoes and cucumbers. We topped it off with a pot of cay because the tea in Azerbaijan is always fantastic.

Photo credit: Stephanie Craig

For the meal, drinks, and tea, we paid 40 manat ($23 USD for two) which is a little higher than we were used to paying but still an excellent price for a delicious forest feast.

What Else to See in Nakhchivan

My full Nakhchivan post is on the way, but in the meantime, I highly recommend Alinja Castle, a former fortress built high in the mountains, 1800 steps up. You should also check out the Ashabi-Kahf caves if you are interested at all in religious history, as the caves were mentioned in the Qur’an.

The Soviet-era salt sanatorium at Duzdag is incredible and definitely worth an extended stay – we felt amazing after a mere 30 minutes in the salt mine and could have used another 30 or more. Qarabaglar was also worth a visit, as it’s the most impressive example of the Islamic mausoleums that are common in Azerbaijan and Nakhchivan in particular (you should also check out the Momina Khan mausoleum in town as well as the Noah mausoleum). Ordubad is also worth a side trip; the Juma Mosque and old icehouse building are gorgeous.

No matter where you go in Nakhchivan, I’m sure you’ll love it.

But dedicate at least a half day for Lake Batabat, and you’ll be in love.