11 Best Hikes in Glacier National Park

landscapes of glacier n ational park with the highline trail in sight

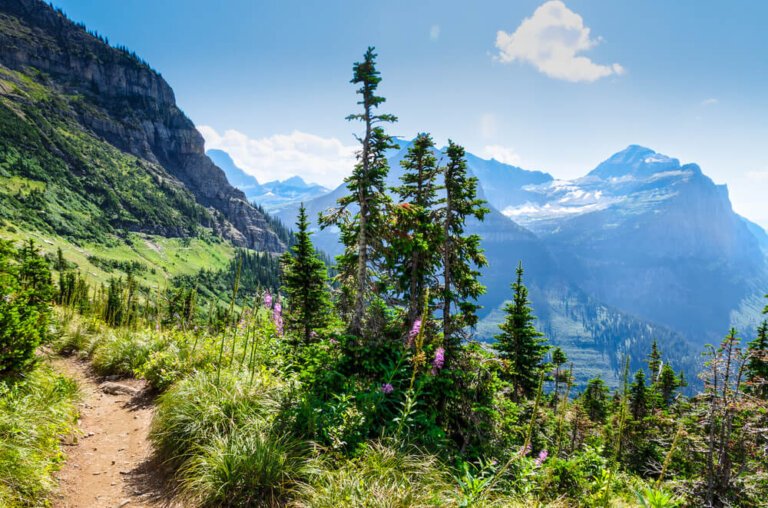
With over 734 miles of scenic hiking trails, Glacier National Park has a wealth of hiking to explore.

There’s a trail for every experience level and age group from a family-friendly boardwalk hike around the massive old-growth cedars near Lake McDonald to challenging mountain passes that offer rewarding views of the pristine landscape below.

Pack your backpack, grab your camera, and don’t forget the bear spray. These are the best day hikes in Glacier National Park you won’t want to miss!

Best Hikes in Glacier National Park

Grinnell Glacier

Brilliant turquoise blue water surrounded by white glacial ice, with green grass with red wildflowers on the edge, surrounded by tall mountain edges lightly covered in snow.

Mileage: 10 miles or 7 miles using the boat shuttle

Elevation Gain: 1,600 feet

The Many Glacier Valley in Glacier National Park is a true hiking paradise. One of the most commonly suggested hikes in this area is to see Grinnell Glacier.

There are at least 35 named glaciers in the park, and Grinnell is one of the most accessible… and seeing a glacier has got to be on the top of your list of things to do in Glacier National Park.

Now, let’s talk about how to get there…

From the Grinnell Glacier Trailhead, hike along the north shores of Swiftcurrent Lake and Lake Josephine. The mountain views from this section of the trail are beautiful!

The trail doesn’t begin to gain much elevation until you have passed the lakes. The last 3 miles are fairly steep, but at least there are plenty of wildflowers to occupy your attention as you climb. Seeing a glacier up close is worth the effort!

If you’re short on time or can’t manage a 10-mile hike, you can shave off 3 miles from the trek by using the park shuttle boats. Taking the shuttle boats costs a small fee and may require advanced registration. The boats can be used to shuttle across Swiftcurrent Lake and Lake Josephine.

Grinnell Glacier Alternative: Grinnell Lake Trail

Male hiker wearing blue jacket and blue backpack sitting after doing some Glacier National Park hiking, looking over the teal colored Grinnell Lake, surrounded by mountains dusted with some remaining snow.

Mileage: 7 miles

Elevation Gain: 1,600 feet

The trail to Grinnell Glacier can hold snow for much longer than the lake trail below.

If hiking through snowfields on a steep trail sounds uncomfortable, you can still enjoy a nice view of Grinnell Glacier from a lower elevation at Grinnell Lake.

Hikers can also use the boat shuttle to eliminate a few hiking miles.

St. Mary and Virginia Falls

Waterfall cascading over a cliff, with trees surrounded the edges of the cliff with a small sunburst poking through the trees.

Mileage: 3 miles

Elevation Gain: 450 feet

Hiking in Glacier National Park isn’t complete without a trip to St. Mary and Virginia Falls!

At the western end of St. Mary Lake, there is trailhead parking for the falls. You can also use the shuttle bus to get to this scenic waterfall trail.

Once you’re at the trailhead, hike downhill toward the St. Mary River. You will mostly be hiking through a historic burn area, which has beautiful wildflowers every spring.

Soon after you reach the river, you will come across St. Mary Falls. Take the bridge across St. Mary River to continue on your way toward Virginia Falls.

You can continue hiking on what is now the Continental Divide Trail for as long as you’d like, or flip around and head back to the trailhead.

Avalanche Lake

Green mountains with waterfalls cascading down the sides of it, towards the pool at the bottom that is Avalanche Lake, surrounded by pine trees and blue sky.

Mileage: 4.5 miles

Elevation Gain: 750 feet

Early in the springtime, many of the park roads are still closed for snow removal. Avalanche Lake is one of the first alpine lake trails to become accessible as the roads reopen!

From the Trail of Cedars Trailhead, follow signs to the Avalanche Lake Trail. The trail climbs steadily uphill while paralleling the icy blue waters of Avalanche Creek.

For a more secluded experience, continue 0.7 miles to the other end of the lake. It’s arguably a better view than the main beach!

Trail of Cedars

The brilliant turquoise Avalanche Creek, surrounded by mossy boulders and cedar trees on this easy Glacier National Park hike.

Mileage: 1 mile

Elevation Gain: 50 feet

The Trail of Cedars can be wandered before or after visiting Avalanche Lake.

The area includes boardwalks that weave through the impressive cedar trees.

There are plenty of interesting interpretive displays to read through and if you look carefully you may be able to spot the resident deer roaming around. This is a great place to wander with young or new hikers!

Redrock Falls

Small cascade over red rocks at Redrock Falls, a popular hike in Glacier National Park, surrounded by trees and blue sky.

Mileage: 4 miles

Elevation Gain: 285 feet

Head to the end of the road in the Many Glacier Valley to access this scenic waterfall. Park at the Swiftcurrent Trailhead and follow the Swiftcurrent Pass Trail.

You will come to the cascading waterfall after about 2 miles of hiking. Many small side trails wander around the falls offering different viewpoints.

If you were hoping to spot a moose during your trip to Glacier National Park, this is your best bet! Moose frequent the wetland area about 1.5 miles into the trail.

No luck? Take the short detour to Fishercap Lake and scan the shoreline. The best times to spot moose are in the mornings and evenings.

The first best part of this hike is the waterfall, but the second-best is that it ends close to the general store, which sells huckleberry ice cream!

Swiftcurrent Pass

View of glacial mountains which have eroded to leave a valley behind, covered in green grass and foliage, with small emerald greenish-blue lakes in the deep valley below it.

Mileage: 14 miles

Elevation Gain: 3,766 feet

Often considered the most challenging day hike in Glacier National Park, the trail to Swiftcurrent Pass is full of outstanding views, alpine meadows, emerald lakes, and wildlife. If you are rugged enough to take on this trail, you won’t be disappointed by the beauty it holds!

As you would if you were hiking to Redrock Falls, park at the Swiftcurrent Trailhead and follow the appropriately named trail. You will get to see Redrock Falls, Redrock Lake, and Bullhead Lake along the way. Both lakes offer great views and provide excellent habitat for moose!

Soon after Bullhead Lake, you will begin your ascent up toward the pass. Make your climb up the many switchbacks for an excellent view of the valley below. The trail is pretty narrow and steep in some spots, which doesn’t pair particularly well with a fear of heights.

Iceberg Lake

Blue glacial water topped with some unmelted glacial ice, surrounded by reddish-brown rocks lit up orange-red by the last of the afternoon light, on a popular hike in Glacier National Park

Mileage: 9.3 miles

Elevation Gain: 1,450 feet

Begin your trek to Iceberg Lake from the Iceberg Ptarmigan Trailhead, which is nearby the trailhead used to access Redrock Falls and Swiftcurrent Pass.

From the trailhead, follow signs to stay on the Iceberg Ptarmigan Trail. Soon after you reach Ptarmigan Fall, you will arrive at a junction. Here, you will veer left and follow the Iceberg Trail.

Your efforts will be rewarded with an epic view of the emerald blue lake and floating ice chunks. The lake is surrounded by 2,000’ tall cliffs that are frequented by mountain goats.

In addition to the goats and bighorn sheep you will probably see, keep an eye out for moose, bear, and deer. This trail is a wildlife photographer’s dream!

Highline Trail

A dirt path winding through the beautiful green mountains of Glacier National Park, with some purple wildflowers and views of the other glacial mountains in the park.

Mileage: 15 miles

Elevation Gain: 2,578 feet

Due to the long mileage and difficulty of this scenic hiking trail, it is often done as an overnight backpacking trip. Although challenging, seasoned hikers could make this particular trek in a single day.

For those wishing to embark on a multi-day adventure, the Highline Trailhead is the starting point for endless miles of exploring, including a popular route that traverses most of the park.

Park at the Logan Pass Parking Area or take the shuttle bus to access the trailhead. You’ll want to get on the trail early! Follow signs to Highline Trail and begin your steady climb up. This scenic trail will bring you along the garden wall followed by an opportunity to detour to the Grinnell Glacier Overlook. Adding the detour to Grinnell Glacier makes the total distance closer to 17 miles.

Continuing on, you will  eventually reach the Granite Park Chalet, which historically provided accommodations for visitors to Glacier National Park. Now, it is a National Historic Landmark and a comfortable backcountry camp for backpackers.

After taking in the view at the chalet, head back the way you came toward Logan Pass. Keep an eye out for wildlife, there are many reports of hikers encountering grizzly bear and mountain goats!

This trail is very exposed, and anyone with a sensitivity to heights is encouraged to seek other options.

Upper McDonald Creek Trail

Brilliant emerald-turquoise waters at Upper McDonald Creek, surrounded by rocks covered in green moss and trees.

Mileage: 5 miles

Elevation Gain: 278 feet

Hikers of all levels will love this scenic creek-side trail. Beginning from the Upper McDonald Creek Trailhead, which is only a short drive past Lake McDonald.

The trail starts by wandering through an old-growth forest. This section of trail is a common place to spot grazing mule deer. As you continue, you will encounter the glacial-blue Upper McDonald Creek.

This is an out and back trail, so continue as far as you feel comfortable before turning around and heading back toward the trailhead.

Florence Falls Trail

Mileage: 9 miles

Elevation Gain: 1,174 feet

This is just one of the many spectacular waterfalls in Glacier National Park. Begin this out and back hike at the Jackson Glacier Overlook, where there is a good amount of parking available.

Along the way, you’ll pass Deadwood Falls. This 10’ falls may be stout, but it’s quite loud as it spills into Reynolds Creek. The main event is further down the trail.

Florence Falls is a tower of cascading falls. Each cascade ranged in height from 30 to 50 feet! Bear frequent this trail in the springtime because of the abundance of cow parsnip that grows in the area.

Be bear-aware anytime you are hiking in Glacier National Park!

Pin This Guide to Glacier National Park Hikes

The 10 Best Grand Teton Day Hikes

Many people travel to Grand Teton National Park to get a glimpse of the iconic Teton Range, scout out some of the area’s diverse wildlife, and go on a scenic hike in the Tetons.

With over 200 miles of beautiful hiking trails in Grand Teton National Park, there’s no shortage of choices.

Every experience level and age group can find a trail they will enjoy from a family-friendly nature walk in Colter Bay to challenging mountain passes that offer rewarding views of the pristine landscape below.

Load up your backpack, grab your camera, and don’t forget to pack the bear spray. These are the best day hikes that Grand Teton National Park has to offer!

Best Day Hikes in Grand Teton National Park

Taggart and Brady Lakes

Still lake at Taggart Lake reflecting the Teton range above it, surrounded by trees, rocks, and foliage.

Distance: 6 miles

Elevation Gain: 585 feet

A trip to Grand Teton National Park is not complete without a hike to Taggart and Brady Lakes. These lakes are nearby each other and are both worth visiting.

Being such a scenic hike, this is a well-well-trafficked trail. With that said, there is limited parking at the Taggert Lake Trailhead, and arriving early is highly recommended so you can find a parking spot easily.

Take in the stunning views of Grand Teton, the tallest mountain in the Teton Range, from the parking area. When you are ready to get your blood flowing, depart from the trailhead and hit the trail. When you come to the first trail junction, veer right and follow the sign toward Taggart Lake Trail.

A little farther down the trail, you will come to yet another junction. The trail is very well marked. Just remember you are following the signs to Taggart and Brady Lakes! A map helps too!

Next, cross the sturdy footbridge over Taggart Creek. Look upstream to get a glimpse of the cascading waterfall. The trail begins to climb a bit starting here. Make your way through the forest of lodgepole pines and thick aspen groves.

After you’ve hiked about 1 mile, you will come to another trail junction. Heading left will take you to Taggart Lake. However, if you wish to visit both of the lakes keep right and check out Brady Lake first. Just a little way farther, and you will be rewarded with multiple scenic overlooks of Taggert Lake!

Once you come to the Valley Trail Junction, keep right and you will shortly arrive at the shores of Bradly Lake. When you are finished soaking up the Teton views, head back to the Valley Trail Junction and take the Valley Trail this time to get a closer look at Taggart Lake and complete the loop back to the trailhead.

String and Leigh Lake

Narrow footbridge crossing a section of String Lake surrounded by green trees at the start of this Grand Teton hike.

Distance: 4 miles

Elevation Gain: 50 feet

Begin your hike at the String Lake Picnic Area. At the trailhead, you will find stunning mountain views from the sandy beach at String Lake. This is a great spot to refuel with some lunch or cool off with a dip in the chilly lake.

The trail wraps around the shore of String Lake until you come to a junction that will lead toward Leigh Lake. Unlike String Lake, accessing the shore of Leigh lake can be a little trickier. Keep an eye out for a well-used trail down to the lakeshore.

From Leigh Lake, continue back the way you came and complete the loop around String Lake. For a much longer hike, you can choose to hike to Bear Lake from Leigh Lake. This would add an additional 4 miles to the hike.

Jenny Lake: Inspiration Point and Hidden Falls

Giant boulders in front of the view from Inspiration Point, showing lots of evergreen trees in front of a brilliant blue lake with some clouds on the horizon but an otherwise clear sky.

Distance: 2.5 miles

Elevation Gain: 330 feet

If you make a visit to hike in Grand Teton National Park, definitely plan for a stop at Jenny Lake! There is so much to do at Jenny Lake, it is well worth dedicating a half-day to.

Who doesn’t love a waterfall hike? The hike to Hidden Falls is one of the most beautiful in the park. This trail is short enough that it is considered a novice and great for families. Hop on the boat shuttle at the docking area. This will cut off about 5 miles from the hike and offer beautiful mountain views as you cross the lake. There is a small fee for taking the boat shuttle.

Once on the other side of the lake, begin your hike on the Cascade Canyon Trail. The trail climbs quite a bit before reaching Hidden Falls and the viewing area. Hidden Falls is a towering 100’ and is often regarded as the most scenic waterfall in Grand Teton National Park!

Continue on your way up to Inspiration Point. Since it is less than a half-mile from Hidden Falls, it’s worth the climb, but if your legs are exhausted, you can always choose to turn back to the boat dock. Inspiration Point offers a great view of Jenny Lake and the distant mountains.

Jenny Lake Loop

Hiking in Grand Teton National Park along the perimeter of Jenny Lake, a brilliant sapphire blue lake surrounded by rocks and pine trees.

Distance: 7.5 miles

Elevation Gain: 275 feet

This scenic loop around Jenny Lake offers countless photo opportunities and chances to gaze up at the stunning peaks known as the Cathedral Group in the Teton Range!

The loop begins at the Jenny Lake Trailhead and stays fairly close to the lake throughout the entire hike. This is a great long hike for those hoping to avoid super strenuous hills or elevation gain.

Along the way, you can choose to veer off to visit Hidden Falls and Inspiration Point, which are mentioned previously.

If you were hoping to experience solitude while hiking in Grand Teton National Park, this may not be the ideal trail for you. Although scenic and rewarding, this is a very popular trail. The road is nearby part of the trail too, and it can interrupt the quiet of nature at times.

Phelps Lake Overlook

View over the sapphire blue Phelps Lake surrounded by pine forest on a clear, cloudless day with mountains on the horizon.

Distance: 2 miles

Elevation Gain: 400 feet

The Phelps Lake overlook is a fairly easy hike that wanders through a pine forest and aspen groves before opening up to a scenic viewpoint. This hike begins at the Death Canyon Trailhead, which is located at the end of a rutted dirt road.

From the trailhead, you will enter the forest and follow the well-maintained trail for 1 mile. Phelps Lake sits at over 7,000’ in elevation and is a common place to spot moose and waterfowl.

Surprise and Amphitheater Lakes Trail

Still lake reflecting back the mountains and foliage above it, covered in some light snow that hasn't yet melted.

Distance: 10.2 miles

Elevation Gain: 2,900 feet

This hike is perfect for anyone looking for a low-mileage overnight backpacking trip or a challenging day hike! At just over 10 miles round trip, you can expect the first half of the trail to be an uphill slog. However, the dessert of this rugged incline is two pristine alpine lakes surrounded by beautiful rocky cliffs.

Begin the trek at the Lupine Meadow Trailhead and head toward Glacier Gulch. After many switchbacks, you will first reach Surprise Lake. A little farther down the trail awaits Amphitheater Lake.

Lake Solitude

Green and brown grass, with some pine trees sparsely populating the landscape, and a tiny blue lake at the foot of mountains on a remote Grand Teton hike.

Distance: 7.5 miles

Elevation Gain: 2,350 feet

Another hike that begins at Jenny Lake is the beautiful hike to Lake Solitude. Surrounded by mighty peaks, Lake Solitude is a great challenge for anyone looking to experience an alpine lake, possible wildlife sightings, and seasonal wildflowers.

The hike to Lake Solitude begins just like the hike to Inspiration Point, with a boat ride across Jenny Lake. This time, when you make it up to Inspiration Point, you will continue climbing on the trail instead of turning around.

The trail will level out a bit after Inspiration Point as you enter into Cascade Canyon. In the early summer, you will see a variety of colorful wildflowers. As you always should while hiking in Grand Teton National Park, be bear aware as you make your way deeper into the canyon.

The trail passes by a series of ponds before the scenery transformed into a pine forest. Keep trekking along until you finally arrive at the lake!

Lake Solitude sits just above 9,000’ in elevation and should only be tackled by experienced hikers that are prepared for a challenge.

Christian Pond Loop

A blue river or pond surrounded by yellowing grass with some low mountains behind it

Distance: 3.5 miles

Elevation Gain: 250 feet

This easy loop is well-known for wildlife and wildflowers!

Begin your hike to Christian Pond from the trailhead parking next to the horse corrals at the Jackson Lake Lodge. As you approach the pond, be on the lookout for moose and elk grazing as well as trumpeter swans gliding through the shallow water.

The trail leads to the shores of Emma Matilda Lake before looping back toward the trailhead. Take a little detour and hike along the lake’s edge. Another great spot for wildlife viewing! When you’ve taken in all in head back to the Christian Pond Loop and back to the trailhead.

Colter Bay Lakeshore Trail

A mostly still lake reflecting the mountains of the Teton Range beautifully in its glassy, slightly rippled surface.

Distance: 2 miles

Elevation Gain: 150’

The Lakeshore Trail in Colter Bay is a perfect walk for families or anyone new to hiking in a national park! The trail is made up of two scenic loops and can be shortened as necessary to meet your experience and comfort level.

From the Colter Bay Visitor Center, walk toward the marina and find the trailhead for the Lakeshore Trail. From the trail, hikers can easily access the rocky shore of Jackson Lake to take photos or scout for wildlife.

Pin This Guide to Grand Teton Hikes!

7 Best Hikes in Joshua Tree National Park

Joshua Tree National Park is one of Southern California’s iconic parks, known for its trails and hikes. Its dreamy terrain expands over 800,000 acres providing 114 hiking trails, running tracks, viewing trails, and much more.

The stunning views and rewarding hikes attract thousands of visitors to Joshua Tree each year.

If you are planning to visit the park, you can go for the best hikes in Joshua Tree for a good workout. It will be unjust to the magnificent setting if you won’t lace up your hiking boots once you are there.

While it is not easy to pick a favorite, here are seven best hikes in Joshua Tree that will make your trip worthwhile.

All About Joshua Tree

The Joshua Tree National Park gets its name from the Yucca brevifolia or Joshua tree. With about 800,000 acres of park, Joshua Tree provides dozens of experiences for people from around the world.

Apart from the park’s namesake trees, you will find other exotic flora, whimsical rocks, and dozens of trails waiting to be explored. The amazing hiking, biking, and horse riding trails make Joshua Tree one of America’s most attractive rock climbing places.

In spring, the place is laden with wildflowers so tourists can enjoy wildflower viewing and appreciate the exotic wilderness.

When the night comes, the desert sky clears out, revealing thousands of stars worth gazing at. The park is an ideal site for photography as every design looks like an artist sketched it.

It makes for a great fit for any type of trip whether that’s family, solo or as a couple. Use the awesome family travel hacks if you plan to go as a family to ensure you have everything prepared to make for an amazing trip.

7 Best Hikes in Joshua Tree

One of the best experiences of Joshua Tree is hiking along the magnificent trails of the park. If you are seeking a steep hike, you’ve got ten mountain peaks rising to the skies with an elevation of 5,000 ft.

Or, you can explore Joshua Tree’s five fan oases that display the most splendid sights.

Lace-up your shoes and bring your favorite travel backpack because we have listed down seven best hikes in Joshua Tree that are too tempting to resist.

Hidden Valley Trail

The Hidden Valley Trail lies in the heart of Joshua Tree Park, right after Park Blvd. While you hike around the 1-mile loop, you can experience a little piece of history in the Hidden Valley, which was once popular with castle thieves who would hide their loot there.

Natives strongly believe that the entrance of the Hidden Valley — the beginning of the trail — was created by Keys, who wanted to make a larger entrance for his castle.

The Hidden Valley Trail is an easy hike through giant rocks and boulders adorned by different trees and cacti varieties. You will also find picnic tables and BBQ grills along the trail to stop and have lunch. It is a great hike for people of all ages looking for an easy and fun hiking adventure.

Barker Dam Nature Trail

Barker Dam Nature Trail is another short 1.4 miles hike located east of the Hidden Valley. The trail is almost like a stroll through splendid scenery with giant rock formations. There is also a wide variety of flora along the trail as you enter into the open valley where you will find the dam.

The Barker Dam was built a long time back to collect water for livestock. There is also an old stone horse trough by the dam, and the water collected there attracts all kinds of birds.

When the dam is filled up, you are likely to find wildlife along the hike too. It’s a good hike when the dam is full, but make sure to look out for the bighorn sheep.

Ryan Mountain Trail

One of the most popular and best hikes in Joshua Tree is the Ryan Mountain Trail. It is a 3-mile hike to reach the summit of the mountain. While it’s a short trail, you will have to climb over a 1000 ft for 1.5 miles from the desert sands to the summit.

The hike is nowhere near a stroll. But, once you get to the top, it will be well worth the effort.  From the top, you can have a panoramic view of Joshua Tree Park and even enjoy a snack while watching the sunset.

Boy Scout Trail

A classic hike in Joshua Tree Park, Boy Scout Trail is a seven-mile trip that lets you discover the Wonderland of Rocks. If you hike deeper into the rocks, you will find the secret haven of dense willow trees.

With only 400 ft of elevation, the hike is a favorite of photographers and backpackers who are looking for some solitude and, of course, wildflowers.

About 3.5 miles in, your turn-around spot will be Willow Hole. It is a water source circled by lush green vegetation and desert wildlife. If you see some water there, you might want to stick around the area as you might encounter the bighorn sheep too.

Cholla Cactus Garden Loop

One of the shortest and best hikes in Joshua Tree, Cholla Cactus Garden Loop, is a hike through the Colorado Desert cactus garden. The view of thousands of natural cholla cactus makes the trail a must-see for every park visitor.

If you walk too close to the Cholla Cactus, it might jump onto your skin or clothes, which is why it is also known as Jumping Cactus.

The area is great for photography throughout the day. But, watch out for the cactus needles in the dark as they are a bit hard to get off.

Warren Peak Trail

If you are looking for a longer hiking experience, the six-mile Warren Peak Trail is the one for you. Although the last few miles are very steep, the trail is moderate for the most part.

The route is unique because you will find fewer Joshua trees and more pinyon, oak, and juniper trees along the way. You will also come across the Black Rock Spring, a source of water for the wildlife.

At the end of the trail, you will have a view of the western part of Joshua Tree. You will also be able to admire the Santa Rosa, San Jacinto, and San Bernardino Mountains.

Before hiking the Warren Peak Trail, you want to plan out a few things.

As the trail is exposed to the sun, you have to stay prepared with enough water and sunscreen. Some parts of the trail are more sandy, which might affect your pace. Therefore, pick your timings wisely.

Wall Street Mine Trail

All the history lovers out there will love the 2.8 mile Wall Street Mine Trail. It is one of the best hikes in Joshua Tree for learning the history of the park. In the 1900s, Bill Keys processed gold ore in the Wall Street Mine.

The miners carted the ore to the top of the hill, where they crushed it into the sand. They mixed the sand with water and mercury to wash away the useless gravel with water.

If you hike the trail, you can explore the ruins of the gold past. These include the preserved gold mine area and a gravestone. On your way to the mine, you’ll come across the ruins of Wonderland Ranch and an old windmill that pumped water from the mill.

Make sure you have at least two hours to fully explore all the colorful ancient history.

Know Before You Go

Before you go hiking in Joshua Tree, you should know a few things about the location and climate.

Since the park consists of two deserts, the temperature can soar up pretty quickly during summer, early fall, and late spring. The high temperature and dry air can make hiking extremely difficult for some people. So, try to apart yourself to the climate before going for longer or tougher hikes.

If you are visiting Joshua Tree in summer, you can also eliminate any potential risks by an early start, carrying plenty of water, and wearing enough sunscreen to stay protected.

We recommend that you visit the park in spring when the temperature is mild, and the flowers are blooming everywhere. Fall is also a good time to visit the park, but the air can be dry during this time, so stay prepared. In winters, the area gets cold enough to force you to put on layers of clothing.

Another thing to keep in mind is that there are no services in the park. So, you will have to carry everything you will need during the day, including water, food, sunscreen, and a first-aid kit. Since the area is pretty rocky, you also want to carry your best hiking boots for a tension-free adventure.

Conclusion

Joshua Tree is a great place for nature lovers seeking adventure, beauty, and some action in their hiking boots. The park provides its visitors with endless opportunities to explore the history of the region to its depths.

No matter which hike you pick from our list of best hikes in Joshua Tree, you will fall in love with the scenic views, unique flora, and impressive wildlife in the park.

Author Bio: Via Travelers is a modern travel blog providing the best tips, hacks, and itineraries to ensure you have an amazing adventure! Follow us on Instagram, Pinterest, Facebook, and Twitter.

Pin This Guide to Joshua Tree Hikes!

9 Best Hikes in Yellowstone for All Levels of Hikers

With over 900 miles of hiking trails, Yellowstone National Park has plenty of beautiful terrains to explore on foot.

There’s a trail for every experience level and age group from stroller-friendly boardwalk trails abound the colorful geysers near Old Faithful to challenging mountain summits that offer rewarding views of the pristine landscape below.

Pack your backpack, grab your camera, and don’t forget the bear spray. These are the 10 best hikes in Yellowstone National Park you won’t want to miss!

The Best Hikes in Yellowstone for All Levels

Fairy Falls

Distance: 2.5 miles (5 miles return)
Trail type: Out-and-back
Estimated time to complete: 3-5 hours
Difficulty: Moderate
Elevation gain: 250 feet

Who doesn’t love a scenic waterfall hike in Yellowstone? Fairy Falls is arguably the m ost beautiful waterfall in Yellowstone National Park, but lesser-known than Tower Falls, Upper Falls, and Lower Falls of the Yellowstone.

Fairy Falls is most commonly accessed from the Midway Geyser Basin near Grand Prismatic. To hike to Fairy Falls from the Midway Geyser Basin, park in the Fairy Falls Parking Area about 1 mile south of the geyser basin parking.

From the parking area, cross the bridge over the Firehole River and follow signs to Fairy Falls. After about a half-mile of hiking, you’ll be rewarded with a beautiful overlooking view of the Midway Geyser Basin including Grand Prismatic.

This is a perfect spot to stop for photos! The Yellowstone hike to Fairy Falls is about 2.5 miles each way, with under 250 ft of elevation gain. Once you arrive at the falls, you’ll be blown away by the water’s free fall from 200 ft above!

Before you head into the park, check with a park ranger or online for trail conditions. The Fairy Falls Trail is closed in the springtime for bear management.

Avalanche Peak

Distance: 2.1 miles (4.3 miles return)
Trail type: Out-and-back
Estimated time to complete: 3-4 hours
Difficulty: Difficult
Elevation gain: 2,100 feet

Extraordinary views of Yellowstone Lake, remote wilderness, and towering alpine peaks wait at the summit of Avalanche Peak.

At 10,574 ft high, Avalanche Peak is a challenging Yellowstone hike fit for experienced hikers with tolerance to steep terrain and high elevation.

One of Yellowstone National Park’s more physically demanding day hikes is also one of the most rewarding.

Roundtrip, this tough Yellowstone hike is about 4.3 miles. In the first 2.1 miles heading to the summit, the elevation gain is a whopping 2,100 ft!

The switchbacking trail that leads to the summit offers stunning views the entire way.

This trail is not recommended during September or October as grizzly bear activity heightens in the months leading up to their winter hibernation. Always hike in groups, make noise, carry bear spray, and be bear aware whenever hiking in bear country.

Winter is also not recommended due to high levels of snowfall.

Uncle Tom’s Trail

Note: Temporarily closed: check here for updates or check AllTrails trip reports for up-to-date information.

Distance: 0.6 miles (1.2 miles return)
Trail type: Out-and-back
Estimated time to complete: 30 minutes – 1 hour
Difficulty: Easy in length, but lots of stairs, so more like moderate for those with bad knees/mobility limitations
Elevation gain: 350 feet

The view from the observation deck at the base of the Lower Falls of the Yellowstone is a must-see for anyone visiting Yellowstone National Park.

Located in the Canyon Area at the South Rim, this heavily trafficked trail takes hikers from the top of the canyon down 328 steps to the base of the Lower Falls, which is a towering 308 ft high!

The hike down into the canyon is no problem with the well-crafted staircase, but keep in mind you’ll have to climb back out. There are many comfortable places to rest on the return hike, and it’s not a race to the finish.

The original trail, constructed by Uncle Tom Richardson in the 1800s, was not as you see it today. Before the well-constructed series of staircases and switchbacks, the trail was made primarily of rope ladders, which brought hikers down to the base of the falls.

Tower Fall Overlook

Note: At time of writing, this beloved Yellowstone hike is closed. Check AllTrails data for recent updates to see if it’s opened back up!

Distance: 0.9 miles (1.8 miles return)
Trail type: Out-and-back
Estimated time to complete: 1 hour
Difficulty: Easy/Moderate
Elevation gain: 250 feet

Check out the epic 132 ft drop of Tower Creek from the Tower Fall Observation Point! The waterfall is ominously framed by towering pinnacle rock formations, which give the creek its name.

Access to the observation point is very convenient! From the roadside parking area, head towards the trailhead, which is just past the general store.

There’s a popular overlook that’s a short walking distance from the parking area and another that involves covering a little more effort. The second viewpoint includes a 1-mile round trip walk down to the Yellowstone River towards the bottom of the falls.

Unfortunately, the trail ends short of the waterfall’s base due to a mudslide in 2004, but the riverside walk is enjoyable and scenic.

Reward your little hike with a treat from the general store!

Mammoth Hot Springs Trail

Distance: 3.5 miles
Trail type: Loop
Estimated time to complete: 2 hours
Difficulty: Moderate
Elevation gain: 560 feet

If you were hoping to see elk and hot springs, Mammoth is the place to be! Located nearby the North Entrance and Roosevelt Arch, Mammoth Hot Springs is a great place to get an up-close look at hot springs and even spot some wildlife!

Walk along the series of boardwalks through the variety of hydrothermal features.

Choose to stay on the Mammoth Terraces Trail to explore the Upper and Lower Terraces, which are filled with steamy multi-colored hot pots, or use this trail to access a web of remote backcountry hiking trails.

In total, there are about 1.3 miles of boardwalk available to explore around the Mammoth Hot Springs, plus the traditional trails.

There is parking at the Upper Terrace area, however, the parking area at the Lower Terrace is larger making finding a space much easier!

Mount Washburn

Note: This route may be closed — check AllTrails in advance to see if it’s changed

Distance: 3.1 miles one way (6.2 miles return) if coming from Dunraven Pass trailhead
Trail type: Out-and-back
Estimated time to complete: 3-6 hours
Difficulty: Strenuous
Elevation gain: 1,400 ft

If you’re looking to bag a peak in Yellowstone National Park, Mount Washburn is one of the most popular summits and day hiking destinations!

The summit has panoramic views of Yellowstone’s pristine landscape, but that’s not all. The peak also has an active fire lookout, which includes interesting interpretive exhibits.

There are two trails to the summit of Mount Washburn. The first option begins out of the Dunraven Pass Trailhead and is 6.8 miles roundtrip. The second option begins at the Chittenden Road Trailhead and is the shorter route option at 5.8 miles roundtrip.

Both trails offer beautiful scenery and access to the 10,243 ft summit of Mount Washburn. Whichever trail you choose to pursue, be sure to pack all the Yellowstone day hiking essentials including food, water, layers, a trail map, and bear spray.

Keep your eyes peeled as you hike, trail users often report seeing bighorn sheep close to the summit!

Lamar River Trail (Cache Creek Trail)

Distance: 3.5 miles each way, 7 miles return
Trail type: Out-and-back
Estimated time to complete: 3-5 hours
Difficulty: Moderate
Elevation gain: 700 ft

The Lamar Valley is famous for its wildlife sightings and pristine prairie landscape.

While driving through the valley, it’s not uncommon to spot giant herds of bison, wolves patrolling in the hills, or a grizzly bear lumbering around the willows near the river. When visiting Yellowstone National Park, make a visit to the Lamar Valley a high-priority!

Although a drive-by view of the Lamar Valley is nice, an in-depth excursion on foot is even better!

Take one of the best hikes in Yellowstone on the Lamar River Trail/ Cache Creek Trail to explore the area’s rolling landscape, wildflowers, and wildlife. Hikers commonly see herds of bison along the way. Don’t forget to monitor the trail ahead to see who’s footprints have been left in the mud!

Begin your hike into the Lamar Valley at the Lamar River Valley Trailhead and follow the trail toward Cache Creek. The roundtrip distance is around 7 miles with about 700 ft in elevation gain.

Pro tip: Stop often and scan the hillsides using a spotting scope or binoculars to find wildlife. It can be difficult to spot wolves and bear from a distance without one of these tools since they blend so well with the landscape!

West Thumb Geyser Basin Trail

Distance: 1 mile
Trail type: Loop
Estimated time to complete: 30 minutes
Difficulty: Easy
Elevation gain: 60 ft

Located on the West Thumb of Yellowstone Lake, the West Thumb Geyser Basin Trail is a great spot to stretch your legs and enjoy a picnic lunch.

The boardwalk trail here is a 1-mile loop that sees lots of use in the summertime. With the astonishing views, there’s no wonder why!

The West Thumb Geyser Basin Trail takes hikers along the shores of Yellowstone Lake for a closer look at the fascinating hydrothermal features. Stroll the boardwalk and take in the alpine views from this magnificent trail.

Old Faithful Geyser Loop Trail

Distance: 0.7 miles
Trail type: Loop
Estimated time to complete: 20 minutes
Difficulty: Easy
Elevation gain: 15 ft

Watching the timely eruption of Old Faithful is often high on Yellowstone National Park visitor’s bucket list. Many arrive at Old Faithful without realizing how much hiking there is to do in the area!

The Old Faithful Geyser Loop Trail is the perfect short Yellowstone hike to do if you have a little time to spare before the big event! At only 0.7 miles roundtrip, this trail is a nice boardwalk stroll for any experience level.

Pass by the colorful pools and bubbling pots as you make your way around the loop. Watch the time! You’ll want to be back to the Old Faithful Viewing Area with time to grab a seat for the eruption.

Old Faithful Pro Tip: If you’re not interested in watching Old Faithful from the bleachers near the visitor center with everyone else, make your way over to Observation Point in time for the event.

To get to Observation Point, find the trailhead at the end of the boardwalk near the Old Faithful Lodge and Old Faithful Lodge Cafeteria. Follow the trail about 0.75 miles to an obvious lookout area.

Remember to be mindful of the natural landscape when choosing a viewing spot. Stay on the maintained trail and avoid stepping on the fragile alpine vegetation.

***

I hope these tips helped you plan some fantastic Yellowstone hikes for your upcoming trip!

Pin These Best Hikes in Yellowstone!

5 Best Grand Canyon South Rim Hikes

The Grand Canyon is a hiker’s paradise with some of the most beautiful vistas in the entire United States.

While the hike down to the bottom of the canyon is best left to expert hikers, there are several easy to moderate Grand Canyon day hikes worth the effort!

The combination of utter exhaustion and triumphant accomplishment can bring a special sense of clarity and peace to a troubled mind. 

The Grand Canyon has provided that combination to many adventurers over the centuries.  The first humans to see the Canyon, the Ancestral Puebloans, are estimated to have looked over the edge some 12,000 years ago!

Today, the Grand Canyon has hundreds of miles of hiking trails to offer all fitness and adrenaline levels, and just one look at any vista is enough to tell you why this is a place you must visit at least once in your life.

No matter your challenge, physical or emotional, the grandest of all canyons has a gorge, a side canyon, a drainage gully, or ravine to draw you in and wrap around you, and bring you peace.

This post covers only hikes in the South Rim; I have a few North Rim hikes mentioned in this post comparing the South Rim to the North Rim.

Beginner Grand Canyon Hikes

There are two main “corridor” hiking trails along the South Rim: the South Kaibab and the Bright Angel trails.

Corridor trails are well marked and well-maintained, albeit heavily traveled. 

You won’t find solitude on these trails, but you will find solace. The Bright Angel Trail has the most options for a variety of skill levels. 

Not wanting to go beneath the rim? For those who are completely new to hiking, there is a 9-mile trail along the South Rim that provides spectacular views of the Grand Canyon along the full length of the trail. 

The Tunnels

Distance to First Tunnel: 0.5-mile roundtrip
Elevation Change: 300 feet
Estimated Time: About 30 minutes

Distance to Second Tunnel: 1.5-miles roundtrip
Elevation Change: Around 800 feet
Estimated Time: About 1 hour – 1.5 hours

A great first Grand Canyon hike below the Rim on the Bright Angel Trail takes you about a quarter of a mile down the trail to the first of two tunnels along the trail.  This is a very popular spot for families with young children and offers plenty of photo options of the Canyon and the hikers. 

Because of the popularity, the walk down may feel a bit like the line at an amusement park, but the thrill at the destination is much different. 

The chattering of hikers on the trail drops off dramatically as everyone stops at the tunnel to take in the scale of the Grand Canyon from below the edge. 

Even in just this short distance, you know you have walked into something extraordinary! 

Continuing down the trail approximately another half of a mile will bring you to the second tunnel which is equally as spectacular.

At this higher elevation, you can see junipers and pinyon thriving between great gaps in the rock.  The occasional shrubs and wildflowers scattered between the trail proper and the rock wall are a testament to nature and her ability to create life and beauty in the most unlikely of places.

Further down the trail, the multicolored cliffs are as inviting as they are imposing and the pull of the wonderful views can make it easy to forget that what goes down must come up.

Any Grand Canyon hiking trail below the Rim requires a significant effort to return to the top.  A safe estimate is twice as long to hike up as it took to hike down. 

The walk back to the surface from either tunnel is not terribly steep, however, any hike out of the Grand Canyon should be celebrated. 

The trail does steepen after the second tunnel, so don’t let the easy stroll down the trail trick you.

Unlike mountain hikes where you do the climb and then get an easy hike back down, in the Grand Canyon hiking down the trail is easy, but then you have to turn around and go back up.

As the park signage reminds hikers, “Down is optional, up is mandatory!”

1.5 Mile Resthouse

Distance: 3 mile roundtrip hike, as the name suggests!
Elevation Change: 1,300 feet elevation
Estimated Time: 2-3 hours

A great turnaround point, and a very popular Grand Canyon day hike for beginners, is another three-quarters of a mile down the trail to the 1.5 Mile Resthouse. 

This stop has composting toilets, seasonal water in the warm months, and an emergency telephone. The small “resthouse” structure has shade and plenty of space to enjoy a snack and a good rest before the climb back to the top. 

The view northward in front of you from this stop includes the full length of Garden Creek drainage gorge, which the trail runs along, and the formation called the “Battleship” directly west of the gorge.

In the Canyon proper, you can see the Bright Angel Canyon scoring the North Rim and providing a stage for the l, the only corridor trail on the North Rim.

Each peak in front of you has a name.  The two most prominent features in the view from 1.5 Mile Resthouse are the Cheops Pyramid to the west of the Bright Angel Canyon, and Zoroaster Temple to the right.

This is my favorite Grand Canyon hike for a beginner.  You get a good feel for the lure of the Canyon and the effort to return to the surface, without waking up sore the next morning. 

Intermediate Grand Canyon Hikes

3 Mile Resthouse

Distance: 6 miles roundtrip
Elevation Change: 2,240 feet
Estimated Time: 3-4 hours

For those with more hiking experience under their belt, there are two great Grand Canyon day hike points further down the trail. Another 1.5 miles down the trail is 3 Mile Resthouse. 

This resthouse, like 1.5 Mile Resthouse, also has composting toilets, seasonal water in the warm months, and an emergency telephone.

The shade structure is slightly larger than at 1.5 Mile Resthouse and I have spent many hours reading, writing, and sketching from this location.

If you’re lucky enough to reach the stop after hikers going down have made their way through, but before the hikers coming up reach the location, you can spend 2 to 3 hours here with very little company. 

Otherwise, this stop is an extraordinarily popular turnaround point and is a bustling location for Grand Canyon hikes!

The view of the Canyon from the 3 Mile Resthouse is not much different than 1.5 Mile Resthouse because the trail is still hugging the walls of the Garden Creek gorge and hasn’t yet turned to a more open view of the main Colorado River gorge. 

However, if you turn around and look back up at the Rim from where you started, the view is very different. 

The cliffs looming from where you came from are spectacular and humbling.  This is when you realize you are merely a guest here and you do not want to overstay your welcome. 

Take your photos, finish your journal entry or sketch, and after a good rest, start the return climb up the trail.  

This is a 6-mile round trip Grand Canyon hike and is the perfect combination of canyon immersion and a good workout.

Indian Gardens Campground

Distance: 9.6 miles roundtrip
Elevation Change: 3,000 feet
Estimated Time: 5-6 hours

Another great turnaround point for an intermediate to advanced hiker is the Indian Gardens Campground.  This oasis in the Canyon is 4.8 miles from the Rim, so a round trip hike is almost 10 miles in a single day. 

This hike takes an average of 2.5 to 3 hours to get to the campground so plan on 5 to 6 hours for the return trip.

For those with the time, this is a beautiful hike.  Indian Gardens is a stunning riparian area filled with cottonwood trees tucked in the crevices of the Canyon walls.

The small creek, Garden Creek, that created the drainage gorge the trail has been hugging, passes through the campground on its way to the Colorado River.

As with both rest houses, there are toilets and an emergency phone.  Indian Gardens also includes a ranger station, a mule corral, and year-round potable water.

The campground here contains 16 tent campsites, each with a table, two ammo boxes for food storage, and a shade structure. 

A backcountry permit is needed if you care to spend the night and be sure to plan ahead as this is a premium backpacking stop and the campsites fill up quickly. 

Despite the time commitment to reach this spot, the effort is well worth it.  This surprising water hole surrounded by the formidable multicolored cliffs is refreshing and energizing.

If planning to turn around here, be sure to leave early enough to reach the top before the sun sets. 

The Expert Grand Canyon Hike

Plateau Point

Distance: 12.2 miles roundtrip
Elevation Change: 3,200 feet
Estimated Time: 8-12 hours

This is the further point you’re recommended to do as a day hike in the Grand Canyon.

You can apply for a permit to hike to Indian Garden if you want to break up this into two portions, or if you want to attempt to hike to the river (which is not recommended as a day hike)

The trail from Indian Gardens to the Plateau Point is considerably less steep than in the upper 3 miles of the trail. 

Can You Hike to the Rim to River and Back in a Day?

In a word, no. The National Park Service adamantly discourages hikers from going to the Colorado River and back in a single day. 

The river is 9.3 miles from the trailhead so a round trip hike is almost 20 miles in a single day!

Of course, there are many visitors to the Canyon who take the risk, and each year, approximately 250 need to be rescued. 

NEVER try to swim in the Colorado River – the water is very cold and moves very fast.  The river water is not drinkable without some form of treatment so plan accordingly if you want to fill up at the River.  

There is an emergency phone and a primitive toilet, but no water at the River Resthouse.

***

Final Notes on South Rim Grand Canyon Hikes

Irrespective of your turnaround point, the hike down into the Canyon is the easy part.  Spend time on the trail taking in the panoramic views. 

Notice the changing colors of the rock as the sun and shadows move across the Canyon.  Allow your mind to quiet itself. 

Enjoy your turnaround point related and in high spirits.  Then start back up the trail with a singular focus.  The euphoria as you take that last step on to the rim surface is immensely satisfying and cathartic.

The physical and emotional effort to hike the Grand Canyon is an accomplishment at any distance and any fitness level. 

Every time I take a hike into the Canyon I shed a little more discontent, and bring home a little more comfort and joy!

Pin These South Rim Grand Canyon Hikes

7 Jaw-Dropping Hikes in Zion National Park

With canyons, red rock peaks, plateaus, and more than 10,000 years of archaeological history, Zion National Park is an ideal destination to hike your heart out, pitch a tent, or relax in luxury at one of the rural rustic lodges. 

Better yet, why not park at Kolob Canyon, at 8,726 feet in elevation, to watch the sunset over this 100+-year-old park founded in 1909 by President Taft.

Zion National Park lies close to the city of Springdale, near Kolob County, and covers over 229 miles of valley riverways, scenic dirt trails, red-rock cliffs, forged canyons, and rock formations, all of which can be seen on a quick weekend trip, but would be best navigated for a week or more to milk the most of each magnificent mountain landscape.

Averaging about 2,000 feet deep and boasting some of the world’s most beautiful scenic natural rock arches, Zion National Park lays exposed rock layers that uncover millions of years of geologic history.  Hiking Zion is the best way to see this history, and for some, the chance to escape the city and enjoy a rustic return to nature.

While there is no shortage of breathtaking trails and wildlife viewing, the following hikes, ranging from easy to moderate to strenuous, are some of the most popular, and they come highly suggested if you have as short as a weekend to visit Zion.  Are you ready?  Dive in!

5 Must-Have Things to Pack for Zion Hikes

Before we get started on these Zion hikes, let me just warn you that it pays to be prepared here. Hiking in Zion is strenuous and difficult at times, and many trails have very limited shade. At a bare minimum, you need water and ample sun protection.

Here are my recommendations for what to pack for Zion.

1) Proper Hiking Boots: Do not attempt to hike any strenuous hikes in Zion without proper hiking boots. Angels Landing, Observation Point, and the Narrows, plus a handful of other hikes not listed here, are all too difficult and potentially dangerous to do without proper footwear. If you’re doing only easier hikes like Lower Emerald Pools and the Grotto, you’ll be fine with sneakers.

For hiking the harder trails, I recommend these Ahnu boots for women and these Keen boots for men. Both are waterproof in case you want to tackle the Narrows, but they’re great for any of the Zion hikes.

Water Bottle with Filter: You will want way more water than you anticipate when you are hiking in Zion! You can either carry liters upon liters of water, which can be heavy, or you can pack a backup water bottle and use your water bottle with a filter to refill anywhere along the trail — streams, rivers, springs, anywhere! I use the Grayl for its ease of use and to reduce my plastic footprint.

Headlamp: If you’re planning to do any hikes in the afternoon or any hikes that have even the slightest chance of getting you back after dark, you’ll absolutely want to pack a headlamp like this one. It’s safer than a flashlight or using the torch on your phone since it still gives you both hands free, and it’s an absolute lifesaver (sometimes literally) if your sunset hike has you hiking down in the dark.

Sunscreen, hat, and sunglasses: You’ll absolutely want all the sun protection! This means a broad spectrum SPF 30-50 sunscreen (I recommend a mineral sunscreen like this CeraVe to avoid polluting nearby runoff water when you shower), a sun hat or baseball cap, and sunglasses. Also, don’t forget lip balm!

Trekking poles for the Narrows: If you’re doing a section of the Narrows, you’ll definitely want to bring a pair of collapsible trekking poles with you! I wouldn’t recommend bringing these on hikes like Angel’s Landing, where they’ll get in the way more than help, but other hikes welcome these trekking poles as well.

The 7 Best Hikes in Zion National Park

While not exhaustive of all the hikes in Zion, the below Zion hikes include a taste of the diversity of the majestic peaks of Southern Utah rocks and all that Zion National Park offers.

The Grotto Trail

If you only have a short weekend and are aiming to see as much of Zion National Park as possible, Grotto Trail clocks in at just 0.6 ½ miles, a quick easy 30-minute round trip. 

This fairly flat, sand-packed trail is a family-friendly hike that is fun for all ages.  Whether you are carrying a baby on your back or are allowing your little ones to run ahead, this wide-sand packed trail is good for families. With an elevation change of 35 feet, it parallels the Zion shuttle roadway, connecting you with the Zion Lodge, making this a safe and convenient trail to try with tykes.

Fortunately, with Zion National Park running a shuttle service from 9 AM to 4 PM daily, Grotto Trail is easily accessible by shuttle between the fifth and sixth shuttle stop.

At the beginning of the trail is a small picnic area and bathroom stop should you or the children want to take a short break before you gear up for the walk. 

The Grotto Trail lies in a valley star-studded with peaks on both sides of the trail. Famous for its red-rock canyons, you can view cliffs of up to 2,000 feet in elevation on either side of the trail, all the while walking by a dry river-bed, and most importantly Emerald Pools, while on this path.

The Grotto Trail is an easy, family-friendly, and quick hike if you are looking to wet your pallet with all of the scenic variations that Zion National Park offers.  After the hike, stop at Zion Lodge for some water, souvenir shopping, and food at the restaurant located inside the lodge.

Kayenta Trail & Upper Emerald Pools

If your children have some more energy, or you aren’t traveling with young ones in tow, hikers can extend their hike by making a loop from the picnic area down to Zion Lodge. 

After walking past the picnic area, cross the dry riverbed by taking Kayenta Trail, a winding zig-zagging trail that is located in a low-lying walking area at the base of Mount Moroni.

You’ll enjoy stunning views of the river and canyon, but keep in mind the trail is rather steep with a few drop offs on the side, so always keep your eyes on the track ahead of you and don’t get distracted. The last 500 feet or so are rather difficult, but the reward at the end — a stunning waterfall and the Upper Emerald Pools — are well worth it.

It’s a 3.1-mile out-and-back trail to the Upper Emerald Pools, and you can also make a loop via the Lower Emerald Pool trail below, which recently reopened after being shut down after mudslides.

Lower Emerald Pool Trail

This is a rather easy hike in Zion if you’re not particularly fit or if you’re traveling with youngsters or elders.

At only 1.2 miles in length round trip, it’s a perfect hourlong hike if you want an easy hike in Zion to balance out more difficult hikes, or if you’re traveling with less experienced or less mobile hikers. This path is paved all the way through, so it’s great if you’re traveling with someone in a stroller or wheelchair.

You’ll see waterfalls, pools, and beautiful scenery along this easy stroll. Do keep in mind though that the waterfalls are season-dependent so if you visit in the height of summer you will likely not see much more than a trickle!

Angel’s Landing

If you are looking for a hike that will give you a real workout, located near the Grotto Trailhead is Angels Landing, a 2.4 mile, one-way, exposed and strenuous hike that winds its way up a dirt and rock-studded trail.

Angels Landing starts in the valley of Zion National Park and scales up an elevation change of 1,500 feet, leading to the peak at 5,790 feet.  Expect about a 4-5 hour roundtrip hike.

If taking the Zion Canyon Shuttle, stop at the 6th stop at The Grotto Trailhead.  Located just near the stop is a bridge over the Virgin River where hikers can follow a paved trail to the West Rim trailhead.  

After walking for five minutes, hikers can find the trailhead at a split in the road, with the right side of the split beckoning towards Angels Landing. 

Expect for legs to burn and shake, as hikers will wind up a sand and rock trailhead with chain-links connected to metal posts along steep precipices overlooking drops into green-fern valleys.  As hikers wind up the final 500 feet of narrow switchback trails, be prepared for a slow crawl but well-worth the walk.  Do not despair!  Once hikers pass this last narrow climb, they can find the cliff’s edge, sit on top of it, and look over the 5,000 feet of canyon below.

After baring the sun and strain of muscles, hikers are rewarded with breathtaking views of green covered valleys, exposed red-rock, centuries of rock-eroded mountain faces, and a view of the river below.  Now is the time to whip out those peanut butter sandwiches, Clif bars, and cameras and enjoy the breathtaking perspectives of the 229-mile expanse that is Zion National Park.

Warning: Please bring at least 3 liters of water with you to keep you well-hydrated and fully aware while hiking.  Be very aware that this is a strenuous hike that is for those who have stamina and a healthy thirst for adventure — and not for those with a fear of heights!

Observation Point

While Angel’s Landing is an absolutely epic Zion hike, it’s also one of the park’s most popular — making it rather crowded at times, which can be a pain especially on the parts where you have to use chains to traverse the ridges and you have to pause a lot to allow for hikers to come down as well as you coming up.

If you want similar views of Zion as you’d get in Angel’s Landing, but on a less crowded and more strenuous hike, head to Observation Point. This hike is at a higher elevation than Angel’s Landing, but it gives you those sweeping views in the same direction.

Start at Weeping Rock, which is available on the Zion Shuttle Stop #7. The hike is 8 miles return, and it involves a strenuous elevation gain of 2,100 feet — so expect the hike to take at least a solid 5-6 hours or more, depending on your skill level.

The Narrows

The Narrows is a great hike for both easy, moderate, and strenuous hiking, depending on how far you take this Zion hike.

Located at the base of the Zion Canyon valley, this 9.4-mile total long hike can take as short as 30 minutes or as long as eight hours, depending on how deep hikers desire to explore these hollowed-out caverns. 

The trail is located at bus stop number 9, Temple of Sinawava, the last shuttle stop on the Zion Canyon Shuttle route.  The last shuttle of the day leaves at 8:15 PM, so be sure to return in time.

Once hikers arrive, they can expect to walk a third of a mile along a sand trail before reaching a gorge and dry riverbed.  If needing wheelchair access, the one-mile Riverside Walk from the Temple of Sinawava is available to those seeking an accessible way to see the beautiful Narrows.

If continuing past the first mile, hikers can expect to wind through ankle to calf high water flowing downstream.  The rest of the nearly eight miles of this hike includes wading through gentle downstream water, and one can expect to marvel at the blasted-out stone created by years of changing ecologic and geologic activity.

A sign and placard posted by the Zion National Park ranger service, and near the shuttle stop, is posted to help hikers plan the time of day when to hike.  Hikers can use these signs to determine when the tide of the stream is lowest in order to gauge how far and deep hikers would like to walk into the narrow 20-30 feet wide caverns.

Suitable for all ages, the Narrows winds along the canyon floor of Zion National Park and is generally open during all seasons.  During heavy rain, the caverns can flood, and therefore it may be closed for day-use.  Hike at your own discretion, and do pay attention to the Park Service announcements and tide placards located at various places in the park. 

So long as hikers are mindful of their safety, the Narrows via Riverside Walk will reward hikers with a delightful reprieve from Utah’s heat.  The hike also serves as a fascinating archaeological exploration, as hikers are literally hiking along thousands of years old riverbeds.

If going in the summer, the gorge and riverbed tend to fill with crowds (and sometimes algae), so be mindful of when you go, bring sturdy hiking or water shoes for those slippery rocks below the surface, and make sure to bring plenty of water and a filtered water bottle (I use a Grayl), that is, if you choose to fill your canteen from the riverbed.

Note: There are two ways to hike the narrows, ‘top down’ or ‘bottom up’. The hike listed is the latter. If hiking ‘top down’, you need a wilderness permit (secure yours online here) and to arrange a private shuttle to its starting point 1.5 hours outside the park.

If you just want to hike a stretch of the Narrows, or do the ‘bottom up’ trail, there is no need for permits.

The Watchman

Sunset over Zion National Park with a river and Watchman Mountain

The Watchman Trail is an easier, 3.3-mile roundtrip starting at the Zion Visitor Center.  With short drop-offs along the trail, this hike ends at a viewpoint of the Towers of the Virgin, as well as lower Zion Canyon and the town of Springdale.

With an elevation change of 368 feet, this two-hour roundtrip hike is often overlooked by visitors who are gung-ho on visiting the larger-than-life views of Angel’s Landing or the archaeological variety of the Narrows.

The Watchman Trail, located a half-mile from the South Entrance to Zion National Park, is host to desert flora and fauna, ponderosa pine, prickly pear cacti, and small shrubbery. 

This easy Zion day hike has very few areas of shade, so hikers will want to bring a liter of water for every mile hiked. 

The trail itself provides breathtaking views of the Watchman Spire, Watchman Overlook, and Bridge Mountain. With little elevation gain, this hike is perfect for a quick detour and a short introduction to the vastness that is Zion National Park.

Where to Stay When Hiking in Zion National Park

Hiking in Zion on a budget? Airbnb has cute and affordable glamping options, like Base Camp 37°

With more than ten hiking trails, over 124,000 acres of protected wilderness, and 1,000 different types of plants, Zion National Park boasts more than 90 miles of hiking.  

For those with a quick weekend getaway and an itch for the great outdoors, there is plenty of camping or even lodging. 

For those on a mid-range budget, opt to stay at Zion Canyon Lodge or in nearby Cable Mountain Lodge, located in Zion’s closest neighboring city, Springdale, a five-minute walk from Zion Canyon Visitor Center — perfect for catching the Zion shuttle and hiking without needing to worry about parking.

Traveling on a budget? You’ll likely want to head to Hipcamp for the best options, and you’ll want to stay a bit outside of Springdale for the best prices. My top choice would be the glamping tents at Zion Family Ranch Campground, which starts from $59/night, located a couple of minutes off Highway 89, this is the perfect stopover between Zion and Bryce Canyon National Parks.

Find this property on Hipcamp. First time booking with Hipcamp? I have a bonus for you! Get $10 off your first stay using my code: ALLISONG61751E or booking through my link.

Want to travel in luxury? Springdale has a number of ultra-luxurious properties, but my top two choices would have to be the stunning Springhill Suites (just look at that wall of windows and view! Absolutely incredible!) or the super-luxe Zion Ponderosa Ranch Resort to reward yourself after a day out hiking in Zion.

Pin These Hikes in Zion!

A Local’s Guide to the Best 13 New Zealand South Island Hikes

Why is everyone raving about the outdoor adventure scene in New Zealand?

For starters, this smallish country in a faraway corner of the planet is a beacon of unspoiled nature drawing globetrotters in. Home of bungee, tandem paragliding, and all-things-extreme, you don’t need to be an adrenaline-head to live a proper Kiwi adventure – enter New Zealand’s hiking scene! 

Hiking in New Zealand is an absolute joy. There are about a billion hikes -really… THAT many? Yup. It’s possible to spend days at the time heading from hut to hut, connecting with nature without dangerous predators — which you’ll totally appreciate if you are coming from Australia! 

You’d see parents hiking with small kids, retirees that are way much fitter than you, and the occasional backpacker carrying a guitar to liven up the night.

Truth is, trekking in Aotearoa – New Zealand in Te Reo Maori language – is a wonderful experience you can adapt to your schedule, skill, and level of fitness. 

For this guide to the top 13 New Zealand South Island hikes, I’ve curated a roundup of the most important and famous trails to take on.

You’ll also find a few off-the-beaten-path ones, and a stack of info gathered during the 6 years I’ve been living in this stunning country.

But before we get crackin’, lemme walk you through the basics of planning your trip…

How to Arrive in New Zealand

Kia ora, and welcome to Aotearoa! New Zealand is located in Oceania, in the South Pacific Ocean, 1800 kilometers east of Australia.

There are only 2 ways to get into the country: by plane or on a cruise ship from Sydney. If cruising’s not your jam, then you’ll have to fly in. 

There are 6 international airports, 3 in the North Island and 3 in the South Island. Auckland is where most international arrivals land.

For the sake of this guide to the South Island hikes and treks, let’s say that if you landed in Auckland first, then you could head to any airport from there. Christchurch and Queenstown airports are the main ones in the South Island.

Getting Around New Zealand 

Honestly, there’s not a whole lot of public transport to get around the country.

Most travelers either rent or buy a vehicle, book a hop-on hop-off tour, hitchhike, or join a rideshare Facebook group.

My bestie and I hitchhiked 512 kilometers this last summer along the South Island and can tell you it’s easy, safe, and fun!

If you love train rides, get on the Kiwi Rail. This scenic train has 2 routes on the South Island. Sadly, there’s only 1 route open for bookings at the moment, the TranzAlpine Great Journey. This half-day ride crosses Arthur’s Pass connecting Christchurch with Greymouth.

Of course, you can also fly… but it can be expensive. Plus, short flights are terrible for the environment. 

Planning Your Kiwi Adventure

Up until not long ago, you could pretty much walk into the country with little to no requirements.

Under the current situation, and while borders are still closed, it’s hard to guess what the future beholds once borders open again.

So for the sake of this roundup to the top hikes in New Zealand’s South Island, let’s focus on understanding how to organize a trip to Kiwiland. A few hints:

  •  If you are going to focus on hiking New Zealand South Island, you need to learn a bit about the 10 Great Walks – more on this below. 
  • You’ll also need to research requirements for renting a car under an international driver’s license and map out your itinerary to fit your hiking goals. 
  • I’d suggest creating a Google Map with your points and hikes of interest. Add estimated driving times connecting each. New Zealand has a reputation for winding roads, so you must allow some extra time.
  • When a walk piques your interest, find out if it’s a one-way or a loop. In many cases, one-way trails end up like… 400 km away from the starting point somehow, and you need to arrange a way back to your car.
  • You can freedom camp in many places. Ideally, if your car is not self-contained, you’d need to stay either at a Department of Conservation spot or a private campsite.

Currency in New Zealand

The country’s currency is the New Zealand Dollar (NZD). It fluctuates, but 1 dollar is about 1.50 USD.

The great thing is you can pay with your card pretty much everywhere, even if it’s only a few cents. You’d need cash for campsites and local markets, but that’s pretty much it.

New Zealand is one of the safest countries in the world, so the chances of getting robbed are low!

What to Pack for a Hiking Trip to New Zealand?

You’ll use most of your gear, especially if you are planning for overnight or multi-day hikes. A great backpacking backpack and sturdy hiking boots are of the absolute essence. Keep in mind though, that you may not need a tent if you’ll be staying in huts instead of campsites. 

Weather in New Zealand can change fast, so plan accordingly and bring layers of clothing. All in all, I’d leave the fancy outfits at home, and pack just the outdoorsy stuff. 

I’d suggest keeping your hiking and camping checklist handy. Go through it and focus on the gear that meets your hiking New Zealand South Island needs without overloading your backpack.

It can be challenging if you are not driving as you’d need to carry with you all the general travel essentials for your trip, plus your hiking gear. In this case, you may want to plan to leave stuff at your hostel and come back once you’re done hiking. Or you can stick to day hikes, or read up about freedom camping in New Zealand.

Best Time of the Year to Visit

Sync your trip with the hiking season! Spring and summer are the ‘official hiking’ months, when you’ll find all trails open and ready for you. Crowd-escapists!

Swing by around October – November. You’ll enjoy fairly good weather without stepping into everyone’s steps. 

Also, know that the whole country goes on holiday for 2 weeks after Christmas, as it’s the summer holiday and most companies shut down. So, between the 23rd of December to approximately the 9th of January, you’ll come across local holiday-makers everywhere!

New Zealand is also a great place for winter and alpine hiking, but be mindful of your skills and don’t take chances. Many trails are not recommended between June and September.

Still, even at the peak of the season, you need to check weather conditions before you hit the trails. Some trails close due to river floodings, wind conditions, and landslides. So, to avoid disappointment, stay flexible, and don’t get hung up on that one you missed!

What are New Zealand’s Great Walks?

The Great Walks are 10 ‘premium’ hikes scattered across the country. 

There are 3 hikes on the North Island and 7 hikes on the South Island. 

These New Zealand hikes are particularly stunning, correctly marked, and designed to cater to hikers of all levels. They can be done by sections during day hikes or be completed in full in about 3 to 6 days. 

You’ll find loops and one-ways. Alpine landscapes and estuary crossings. Wild deers, sandflies, and cheeky wekas trying to steal your food. 

It’s of the essence to organize these hikes with time and in detail as bookings are required, and spots fill fast!

In this roundup of South Island New Zealand hikes, you’ll find quick summaries of each of the Great Walks located here. You’ll also get the hang of other day hikes, plus overnight and multi-day trails that are just as beautiful and fun.

For the sake of geography, this roundup goes from north to south. Be my guest!

Bonus Tip: Check out this Google Map I created with all these South Island hikes marked!

The Best New Zealand South Island Hikes

1. Abel Tasman Coast Track

Welcome to THE MOST popular Great Walk in New Zealand!

Perched along the coastline of the Abel Tasman National Park, this hilly trail has sun, golden beaches, low-tide estuary crossings, and some serious summer vibes.

Type of walk: Great Walk, one-way.

Landscape: Hills, coastline, beaches.

Length and duration: 60 km – about 3 to 5 days in full.

Difficulty: The hike itself is easy but hilly. Prepare to go up and down, over and over.

Elevation gain: Nearly 200 m at its highest point. The hike starts at sea level. 

Time of the year: Year-round.

What else: 

  • Abel gets crowded over summer, but the great thing is you can go for a swim and maybe get lucky and see dolphins — cute!
  • There are many campsites and huts along the way, but you need to book about 2 months ahead (this is one of the most popular South Island hikes, after all!)
  • You can also kayak, do a day hike, or tour the Tasman Sea on a water taxi.

2. Queen Charlotte Track

You’ll find the Queen Charlotte Track on the top east of the South Island, just a quick water taxi ride from Picton.

This 70-km trail is a great alternative to the Abel Tasman as it presents similar scenery of beaches, emerald and blue waters, and stellar nights.

Type of walk: Multi-day. It may become an official Great Walk soon.

Landscape: Rolling hills, lush native forests, and beaches.

Length and duration: With 70 km, it’s one of the longest single-track hikes in the country, and takes between 3 to 5 days.

Difficulty: Easy tramping trail, but with more sustained elevation gain than Abel Tasman.

Elevation gain: Nearly 500 m from sea level.

Time of the year: Year-round. I hiked it mid-September and experienced rain showers on most days.

What else: 

  • If you’d rather not carry your backpack, you can book water taxis that take your heavy pack from spot to spot.
  • There are no DoC (Department of Conservation) huts. Only campsites with facilities and cooking shelters. However, there’s also private accommodation available.
  • If you want to experience a fancy hike, this may be it! There are a lot of luxury villas and eco-resorts along the trail for a spot of ‘glamping.’
  • This is an ideal hike to get into multi-day solo hiking.

3. Heaphy Track

Picky hikers keen to traverse a wide variety of landscapes, this is for you! 

At this point, we are still located on the top of New Zealand’s South Island. You’ve seen Queen Charlotte on the east, Abel Tasman on the center, and now the Heaphy Track on the west. This Great Walk is tucked in Golden Bay, a region that’s beyond stunning. Wide gold-sand beaches, silver waters reflecting the sun’s sparks, and pretty much nothing else to do other than enjoying the fresh salty seaside air.

The Heaphy Track receives 4 times fewer visitors per year than Abel Tasman. However, this also means it’s a bit more difficult to plan your itinerary.

This is due to the hike’s ending point that’s 400 km away from its beginning, and there are limited transport options.

Type of walk: Great Walk, one way.

Landscape: Changing views ranging from beech and rimu forest to tussock grasslands and beaches.

Length and duration: 78.4 km, spread throughout 4 to 6 days.

Difficulty: Moderate. It can be tiring as it’s quite long and has a fair share of elevation gain.

Elevation gain:  About 800 m if starting from Brown Hut, the northernmost point. If starting from the south, at Kōhaihai Shelter (sea level) then it’s a 915 m altitude gain. 

Time of the year: Year-round.

What else: 

  • You’d need to arrange transport beforehand. You can book a car relocation service for NZD 395. Alternatively, arrange a car key swap with fellow hikers, book a shuttle bus from the nearest towns for NZD 170 return, or take a flight (not recommended if possible — go green!)
  • It’s also possible to bike the Heaphy Track between May and November.

4. Paparoa Track

Meet New Zealand’s newest Great Walk!

The Paparoa Track opened in 2019, after many years without adding any new trails to this ‘exclusive’ group of hikes.

The Paparoa Track showcases the magic of the Paparoa National Park, which is the most similar thing to Jurassic Park you could encounter in your life. Dark green rivers, steep cliffs, and moss-covered trees seemingly hanging from huge rocks.

The Paparoa Track can be hiked in any direction, but it’s mainly designed to be walked from south to north. However, if you’d like to take your tramping itinerary to the next level, you could connect the hike with the Heaphy Track.

Note that the tracks are not connected per se. I’m suggesting this as an itinerary because you could do the Heaphy from north to south and then head to Punakaiki and hike the Paparoa Track from north to south. Bear with me, this will make sense if you check it on the map!

Type of walk: Great walk. One way.

Landscape: Karst limestone cliffs, river bridge crossings, alpine forest, gold-mining historic sites, and panoramic views of the South Island.

Length and duration: 55 km, 3 days.

Difficulty: Moderate.

Elevation gain:  If starting from the Smoke-Ho car park, you’d go from 400 m elevation to 1190. Hikers beginning from the track’s north end would start at sea level.

Time of the year: Year-round.

What else: 

  • First Great Walk specifically designed for both bikers and walkers.
  • You must arrange transport or hire a shuttle service as the car parks at both ends of the trail are for day use only.

5. Welcome Flat Hut Track – via Copland Track

The Welcome Flat Hut Track is quite popular amongst folks already settled in the country, or living the camper life.

Located on the West Coast, the glacier region is sometimes neglected by travelers heading toward Queenstown and Fiordland. I don’t blame them, QT is my fave!

But there’s a lot to explore around the West Coast too, so I wanted to share this hike, even though it’s a bit off-the-beaten-path. 

Welcome Flat is part of the Copland Track, a multi-day trip that’s suited for advanced hikers.

The best part? Once you reach the end of this section you’ll encounter… natural hot springs! Simply awesome. The hike itself it’s quite beautiful as you walk near the Copland River and get to enjoy snow-capped mountain views in the background. 

Type of walk: Overnight hike. One way.

Landscape: River, valleys, mountains, hot springs — yay!

Length and duration: 18 km, one way. Done as an overnight hike in 6 to 7 hours.

Difficulty: More of a tramping trail, so it’s a bit more challenging. You start by crossing a river on foot and then walk on tree roots and rocks.

Elevation gain:  440 m

Time of the year: Autumn and summer.

What else: 

  • Know that it rains heavily on the West Coast, which means the track is sometimes closed due to flooding, even during the hiking season.
  • If attempting the track over winter, beware of icy conditions. It gets slippery, trust me!
  • Even though this is not a great walk, you still need to book a hut spot.

6. Roys Peak

Roys Peak is one of New Zealand’s busiest hikes, and it’s known as the most ‘Instagrammable’ hike in the South Island.

You can indeed expect crowds and a full car park, but there are ways around it. The hike is beautiful and a treat for those keen to get more into hiking.

You gain altitude really fast, but you’ll hike on a walking path, so it’s very safe. Beware that getting down is harder than going up — you may end up with sore knees and black toenails!

Type of walk: Day hike. One way.

Landscape: Mountains and lake views.

Length and duration: 16 km return, usually done in 5 to 6 hours.

Difficulty: It depends on your level of fitness. It’s an easy walking track but it’s quite steep and, in the end, you sort of walk on a ridge. It’s not dangerous, but you must be okay with going up, up, up!

Elevation gain:  You’ll gain exactly 1,228 m from the departing point.

Time of the year: Year-round. You’ll need snow gear to go up over winter.

What else: 

  • Access to this hike is very easy as it’s located only 6 km from Wanaka.
  • Make a fresh start over night time and aim to summit at sunrise. It’s not only an amazing experience, but you’ll also beat the crowds. I did it just at the beginning of winter and got to enjoy the clearest night sky and impressive views. I couldn’t see Lake Wanaka as it was covered by an inversion layer, but still…magic! 

7. Mueller Hut

Want to head on a challenging but absolutely breathtaking track? Then welcome to Mueller Hut! Mueller Hut is located ‘just’ in front of Mt. Cook, the country’s highest peak. I must say this is, personally, my absolute favorite place in the whole country.

When you reach the Aoraki/Mt Cook National Park you’ll encounter a wee village with some hotels, a hostel, and camping sites. The Hooker Valley is overlooking the mountain range and provides dramatic alpine views.

I’ve chosen Mueller Hut for this roundup of the top hikes in New Zealand’s South Island, but there are many short – and still superb – trails in the area. On your way from the beginning of the Mueller Hut Track, you’ll find a half-way stop, Sealy Tarns, which can easily be made as a day hike.  

Type of walk: Overnight. One way.

Landscape: This is a proper alpine adventure as you’ll be facing Aoraki/Mt Cook, New Zealand’s highest peak.

Length and duration: 5 km. It takes about 4/5 hours to hike up and roughly the same to go down.

Difficulty: Advanced.

Elevation gain:  1,052 m

Time of the year: Don’t recommend it at the peak of winter. We did it early September and it was a total alpine adventure, with snow up to our knees. 

What else: 

  • Sealey Tarns is a great stop for day hikers. You’ll get there after tackling a 2,200-steps stair going up the mountain. If you decide to keep heading to Mueller Hut you’ll walk mostly on rocks.
  • Do not attempt to do this hike over winter if not with an expert guide. 
  • You need to book from November to April. However, you always need to register at the I-site.
  • Note that, even over summer, weather conditions can change. So don’t push it! We were about to hike up again this summer but we didn’t because of strong winds.

8. Routeburn Track

The Routeburn Track is New Zealand’s second most popular Great Walk. The track starts at the Routeburn Shelter, only 24 km from the cute little town of Glenorchy, and ends on The Divide Shelter, on route SH94 to Milford Sound, 85 km from Te Anau.

Side note! Te Anau is the perfect base for eager hikers as it’s just a few km away from the Kepler Track, and about a 1.5 hrs drive from the end of the Routeburn Track.

There’s another track that I’ve listed below, the Greenstone and Caples, that can be connected with the Routeburn Track if you just can’t stop hiking in New Zealand!

Type of walk: Great Walk. One Way.

Landscape: Subalpine, valleys, wetlands, native forests, and lakes.

Length and duration: 33 km, usually done in 2 to 4 days.

Difficulty: Moderate.

Elevation gain:  820 m

Time of the year: Hiking season -October to April.

What else: 

  • This is one of the most expensive Great Walks if you visit over the hiking season. Keep in mind bookings are compulsory between October and April.
  • Some sections of the hike had to be shut down because of massive floods from last summer, so it’s essential to check-in at the nearest information center. 
  • Arrange or book transportation beforehand. My friend and I hitchhiked from The Divide to Te Anau, but we were waiting for nearly 30 minutes -we got there after 5 pm.

9. Greenstone and Caples

The Greenstone and Caples track is a fabulous alternative for hikers keen to head on a trail similar to the Routeburn Track, without the hassles and costs of a packed Great Walk.

This is a beautiful hike in the South Island where you’d be walking on valleys and wetlands before climbing up to McKellar Saddle to relish on its subalpine landscape.

There’s a trick though! This hike is actually 2 hikes that connect to create a loop. You can tackle both and end at the starting point, the Greenstone Car Park. Alternatively, you can do the Caples, a section of the Greenstone, and then connect with the Routeburn for the last 2 hours of the trail -you’ll finish at The Divide. 

Type of walk: Can be hiked as a loop or a one way.

Landscape: Native forest, valley, wetlands, subalpine tussock grassland.

Length and duration: 38.5 km, 3 to 4 days.

Difficulty: Moderate. Long hiking days.

Elevation gain:  With McKellar Saddle at the highest point (947 m), if starting from the Greenstone Car Park (477 m altitude), you’d gain nearly 500 m.

Time of the year: The track is open all year, but hiking over winter is not recommended.

What else: 

  • You can drive and do the whole loop, or you can arrange transportation from Queenstown or Glenorchy.
  • We hitchhiked from Queenstown. Even though this is totally doable, the local road that connects Glenorchy with the beginning of the track barely sees any cars go by.

10. Kepler Track

Get ready to sweat bullets and enjoy amazing views in equal doses on one of the nicest South Island walks! The first day of the Kepler Track is pretty much nothing but going up, but it’s 100% worth it.

A detail that sets the Kepler apart is that it starts almost in town, only a few km away from Te Anau, and it’s a loop. This means that you don’t have to plan for transport — extra kudos for the Kepler! 

That said, it’s a stunning trail because it portrays a variety of landscapes as you walk by the Te Anau Lake, then enter native beech forest, and finally start walking on the mountain ridge as you get to the track’s highest point.

Type of walk: Great walk, loop.

Landscape: Native beech forest, mountains, lakes, and all the ferns in the world.

Length and duration: 60 km, 3 to 4 days.

Difficulty: Moderate. I found it a bit more difficult as you walk on a ridge to reach Mt Luxmore Summit. 

Elevation gain: Luxmore Saddle is the highest point at 1400 m. The lowest point is 178 m, so you’d climb almost 1200 m.

Time of the year: Hiking season (spring/summer)

What else: 

  • Don’t attempt to hike it over winter if you are not an expert. 
  • As with all Great Walks, you need to book in advance!
  • I personally find that even though this is a Great Walk, it’s a bit more challenging as on day 1 you’ll be pretty much climbing all day.

11. Milford Track

Nestled in the grand Fiordland National Park, this is a remote land of fiords, constant rains, mist, waterfalls, and deep, dark waters.

Out of all Great Walks, the Milford Track is, in a way, the most structured. It’s not possible to camp, and hut booking needs to be made well in advance — like, as soon as they open! 

It’s also the most expensive of all Great Walks, with a hut stay for non-residents coming at NZD 70 — but note that this can change! Up until this year, the cost of the hut for foreigners was NZD 130.

Type of walk: Great walk. One way.

Landscape: Valleys, rainforest, waterfalls, and glow worms!

Length and duration: 53.5 km, 4 days.

Difficulty: Moderate.

Elevation gain:  Highest point 1154 m. Lowest point 0 m. But as the hike can be done only in one direction, your initial elevation will be 250 m.

Time of the year: Hiking season.

What else: 

  • A major flood destroyed some sections of the trail last summer. Keep an eye on booking changes and trail openings.
  • Getting in and out of the trail is a bit of an adventure on its own! You’ll need to catch a boat from Te Anau Downs to get started and then can hop on a bus or take a short boat trip back to the Milford Sound Village.
  • The Milford Track can only be hiked in one direction!

12. Rakiura Track

Finally, here’s the southernmost hike on our roundup of the top hikes in New Zealand’s South Island!

What gives the Rakiura Track a special place in my heart is how far south it is. Quite isolated and the least visited Great Walk -except for the Milford Track that has quite limited spots- this wee corner of the world is wild and lush. 

It may not have the world-class beaches of the Abel Tasman or the alpine landscapes of the Kepler. But it’s still stunning, short-ish, and a great hike for beginners.

Type of walk: Great Walk, loop.

Landscape: Coastline, inlet crossing, beaches, rivers.

Length and duration: 32 km, 2, or 3 days.

Difficulty: Easy -but muddy!

Elevation gain:  200 m

Time of the year: Year-round.

What else: 

  • This Great Walk is cheap as chips! However, you need to make it to the cute and gorgeous Stewart Island first by taking a ferry from Bluff to Oban.
  • A visit to Stewart Island itself is a joy. The island is small, friendly, has a really cute town, and you can visit Ulva Island — a predator-free bird sanctuary — as a day trip. 

13. Te Araroa Trail

Well… this is something a bit different, but it felt right to finish this roundup with New Zealand’s very own thru-hike.

The Te Araroa Trail is a 3000-km long route that begins in Cape Reinga, at the top of the North Island, and ends in Bluff, just before crossing to Stewart Island. 

About 1,000 hikers take on the challenge every year, but many locals have become savvy section hikers. The trail goes through some famous hikes, like the Queen Charlotte Track, so pay attention to the signs as you may set foot on the Te Araroa without even knowing!

As a New Zealand resident, I love it when we are hiking and, just by chance, we find out we are doing – even if only a few km – the Te Araroa!

Type of walk: Thru-hike

Landscape: Coastline, mountains, towns, cities… everything!

Length and duration: 3000, from 4 to 5 months.

Difficulty: Moderate/difficult.

Elevation gain: 1925 m is the highest point of this cross-country trail network. 

Time of the year: Spring/summer.

What else: 

Final Thoughts on the Top Hikes in New Zealand’s South Island Roundup

It’s been such a joy to share all this information with you, my dear fellow hiking friends! As said before, plan with care and detail, and be aware of seasonality and weather conditions.

Make sure to be eco-aware, always follow the best ‘No Trace’ practices, and follow the trails’ instructions. Hiking in New Zealand is an experience of a lifetime for both experts and beginners, so find the trail that suits you best!

Author Bio

Martina Grossi is a content creator and SEO specialist based in Christchurch, New Zealand. Originally from Argentina, 7 years ago she packed a suitcase and set on her first big trip.

After spending a year backpacking Europe and living in Denmark, she moved to New Zealand, fell in love with the country, and became a happy hiker, yogi, and travel blogger.

You can always find her sneaking into the kitchen to eat from the pan, passionately planning her own and everyone else’s adventures, and drinking mate.

Pin This Guide to New Zealand South Island Hikes!

9 Utterly Incredible Day Hikes in Banff

Western Canada, specifically locales in and around Banff and Lake Louise, Alberta, offers blue lakes, rugged terrain, and dramatic mountain vistas worthy of the best hikes.

Much of the terrain is found Banff National Park, Canada’s first National Park and a UNESCO World Heritage Site which welcomes over 3 million visitors each year.

While Banff is a skiing mecca in the winter, in the summer, hiking in the mountains is the thing to do.

The Park encompasses just over 2,500 square miles of Alberta’s Rocky Mountains and sits adjacent to the Trans-Canada Highway, a primary East-West artery connecting the towns of Banff and Lake Louise. 

Just an hour and a half’s drive west of Calgary, Alberta, Banff National Park should be included on any itinerary of must-visit hiking destinations, and it’s one of the main reasons to love Canada and all the incredible nature it has to offer.

Banff and Lake Louise proper are typically what com to mind when thinking of outdoor excursions in the National Park because the towns are central to the best day hikes and trailheads and each offer wide ranges of accommodations, restaurants, and amenities to make a Canadian Rockies adventure complete.

With this scenery at your fingertips, obviously, going for a hike is one of the things in do in Banff!

There are countless hikes you can do in the Banff area, but these are the best day hikes in Banff for all difficulty levels, from easy to experienced.

9 Best Hikes in Banff National Park

Lake Louise Lakeshore Trail

Even if you don’t recognize the name Lake Louise you have probably come across pictures of its pristine turquoise water, red canoes, and mountain backdrop before.

It is undoubtably the most popular spot around Banff National Park, the primary image of Banff on Instagram.

Tackling the 2.9 mile out-and-back trail is an easy trek with minimal elevation gain. 

It is heavily trafficked but paved for a majority of the way before transitioning to a packed dirt path making it stroller accessible and family-friendly.

It offers stunning views of Mt. Collier and Mt. Victoria North Peak on your way out and of the picturesque Fairmont Chateau hotel on the return.

Lake Louise Lakeshore trail is partially shaded in a dense forest and follows the water’s edge which makes for cool temperatures even on hotter days.

While there is parking at the hotel, visitors often find the lots at capacity so plan on going quite early or in the late afternoon, particularly in summer months.

Lake Louise Lakeshore trail is also well suited to transition into a longer hike by combining with other nearby spurs like Devils Thumb, Beehive Circuit, or The Teahouses trails.

Each begin and end at the Fairmont Chateau and follow the initial path along the Lake Louise’s shore.

The Teahouses Trail

The Teahouses trail is a 12.3-mile loop with substantial elevation gain at 3,530 feet affording arguably the best views of the Fairmont Chateau and Lake Louise in the distance.

Glacier scenes, waterfalls, alpine lakes and, of course, a visit to two historic backcountry teahouses are all experienced on the moderately steep loop.

The small log cabins which now act as privately-owned cafes, were originally built in the early 1900s to service the Canadian Pacific Railway.

Today, both the Lake Agnes and Plain of Six Glaciers Teahouses serve hot and cold beverages (coffee and tea are go-tos) as well as sandwiches and assorted sweets.

There are some tradeoffs as Lake Agnes Teahouse has a slightly larger menu and is better suited for families, but Plain of Six Glaciers is more remote with fewer crowds. 

It might be hard work to make it to the spots but certainly worth the trip, once you grab a quick rest and a well-deserved treat before the return hike. Make sure to take cash for the transaction if Plain of Six is your destination.

Beehive Circuit Trails

Another convenient variation to the Lake Louise Lakeshore trails are the Beehive Circuits.

Little Beehive (5.6 miles out and back) and Big Beehive (6.4 miles loop) take you from the shore of Lake Louise to nearby unique “beehive” rock formations.

The routes can be combined to form an 8-mile loop by following some portions of each path.

No matter the final combination, you are rewarded with stellar views of Lake Louise and the Fairmont Chateau, where your hike began. 

When paired together, the trails cover slightly less elevation than the Teahouses but in less distance. In total, the circuit covers around 3,000 feet so prepare for a steeper ascent.

Any variation which follows Big Beehive also takes you near Agnes Lake Teahouse where a full lunch or brief refreshment is up for grabs.

Devils Thumb

One last variation to check out from Lake Louise Lakeshore trail is Devils Thumb.

Do note this is a very technical hike and requires significant skill to do, so it’s not a hike to do unless you are a skilled hiker.

Ask at the Visitor Center for more information about the hike to see if it’s the right one for you.

This route, which also starts from the Fairmont Chateau, is an alpine lake hike covering 7.4 miles and nearly 2,900 feet.

The trail is quite similar to Big Beehive, in fact you will be able to catch glimpses of the same incredible rock formations and pass the Lake Agnes Teahouse too, but Devils Thumb takes you a bit higher and deeper into the backcountry.

Devils Thumb is a perfect option for those hoping to tag some rock climbing onto their hike.

Giant Steps via Paradise Creek

In close proximity to the Lake Louise grouped trails, but beginning from a separate trailhead, is Giant Steps. Giant Steps is a 12.8-mile hike with difficult rating.

Hikers are rewarded by reaching the trail’s namesake waterfalls, a cascading series of alternating water features and pools.

The trail and falls are spectacular anytime May through October, particularly during the spring melt when water levels are at their highest and most intense before slowing toward the end of summer and fall. 

Depending on your schedule and transportation, and because parking at the Fairmont Chateau and Lake Louise can be a challenge, it may be helpful to checkout Parks Canada and Roam Transit websites for shuttle schedules before heading toward the hotel.

The shuttles are convenient, well-timed, and cost-effective. If you choose to stay in Banff, there are also several great hikes that begin closer to town and you won’t have to guess at crowds, timing, or parking availability.

Sulphur Mountain (near Banff town)

One such hike takes you up Sulphur Mountain, a steep, but moderate 6.3 mile out and back trail rising 2,400 feet and accessible right from downtown Banff.

It’s a tough one, but it’s one of the most scenic hiking trails in Canada!

It offers panoramic views including those of town, the Banff Upper Hot Springs, Sulphur Mountain, and the Banff Gondola.

Plan to stop for lunch at the Gondola top at one of three restaurants – Sky Bistro, Northern Lights, or Peak Patio. 

The trail includes several switchbacks and areas for scrambling, thus can be quite technical at places. Check the gondola schedule if you wish to cut the trail in half by downloading by machine power!

Spray Loop Trail and Bow Falls

Also easily accessible right from downtown Banff is the Spray Loop Trail.

The 7.6-mile path follows Spray Creek south from town and Bow Falls, with passing views of the Banff Gondola, Sulphur Mountain. Bow Falls viewpoint is located just near the trailhead and makes a perfect pair to the hike.

Elevation stays fairly steady creating a good route for trail running and several river access points lead from trail to water’s edge, although you stay fairly removed from the water throughout the hike.

The trail is very shaded and wonderful for warm days with no cloud cover. Spray Loop is prime for river and falls views but does not afford many of the mountain vistas found on other Banff National Park routes.

Cory Pass Loop

If you are on the hunt for more advanced terrain, including difficult rock-climbing routes, look no further than Cory Pass Loop.  

The trail circumnavigates Mount Edith with views of neighboring Mount Norquay. It is similarly close to downtown Banff, about 10 minutes’ drive, and easily accessible from the Trans-Canada Highway but the terrain is only suggested for experienced travelers.

The trail covers an elevation gain of over 3,800 feet in just over 8 miles and is steep and exposed at times. Most who have hit this trail before will tell you taking the loop counterclockwise is best because the alternative sets you up for quite a steep descent. In fact, this is one route for which you don’t want to forget your trekking poles.

Cory Pass rewards hikers with stellar views of Mt. Cory and the valley below. Pay close attention to weather patterns before heading out. Rain can make the slopes muddy difficult to navigate, especially on steep sections.

Eiffel Lake and Tower of Babel routes

Last but not least, Eiffel Lake and Tower of Babel routes should top off your list of Banff area hikes before departing the National Park.

Access is partway between Lake Louise and Banff but closer to the Lake Louise side and the turnoff to Moraine Lake Road is just before reaching the final drive to the Fairmont Chateau.

Eiffel Lake is a 7.3-mile-high-alpine trail beginning at the base of Moraine Lake. A moderate elevation gain of 1,870 feet ends at a quiet backcountry lake and serves as an easy resting point before the return hike. Plan for around 3 hours in and back.

The trail is narrow, making passing other hikers inconvenient at times. This can be avoided if you choose an early morning start or late afternoon return. The trail opens up after a series of switchbacks and is a decent mix of tree cover and open space.

Tower of Babel Route begins at the same trailhead but shoots off in the opposite direction from Moraine Lake covering much more technical terrain. In fact, the route should be reserved for advanced climbers. 

Novice hikers will prefer the tower views from Eiffel Lake route as the terrain consists of rock scramble with little path options. The route covers 1.8 miles, not so short when you’re primarily scrambling, and it is ideal for rock climbing and bouldering.

These trials and routes are just a small portion of the vast adventure opportunities available in Banff National Park but fully representative of the beauty of Alberta and its surrounding terrain.

Pin These Best Banff Hikes for Later!

6 Incredible Hikes in Idaho Worth the Trip

If you are considering where to tackle some of best outdoor adventures in the Mountain West, Idaho shouldn’t be counted out.

The Gem State is a hotbed of easily accessible, rewarding, year-round hiking. Check out some of these top options for Idaho hikes!

Best Idaho Hikes

Pioneer Cabin Trail (Ketchum)

Pioneer Cabin Trail is a popular Idaho day hike about 10 minutes outside Ketchum. There are several overnight camping sites on the approaching Corral Creek Road but Pioneer’s proximity to town makes launching from Ketchum or the Wood River Valley easy. 

Hikers are rewarded with stunning views of the Pioneer Mountains and Sun Valley’s Trail Creek in the distance. Grabbing a picture in front of the cabin, with its painted roof reading “The higher you get, the higher you get” is a right of passage. Plan for a 6-7 hour outing.

The cabin was originally built in 1938 by the Sun Valley Company to make backcountry ski training more accessible for the ski school.  Many of its earliest visitors served in the famed 10th Mountain Division during WWII. After falling into disrepair, local volunteers worked on a substantial refurbishment project between 2016-2018.

The main trail section is a 3.6-mile out and back path covering 2,809 feet in elevation gain and best accessed late May through September. Additional trails connect to Pioneer’s main route making longer loops convenient to add on and creating multiple paths to reach the cabin. Each of the trailheads meet at a central parking area at the end of Corral Creek.

Much of the trail, including 23 switchbacks, is below a forested tree line but the upper portion opens up into a large alpine meadow making for great views when wildflowers are in bloom early summer. Waiting until higher elevation snow is fully melted makes for an easier hike.

Warm Springs (Ketchum)

Warm Springs Trail is located in Ketchum within the Sun Valley ski area boundary. Beginning at the Warm Springs base area and rising 3,479 feet to the summit of Bald Mountain, the Warm Springs Trail follows ski slopes and crosses maintenance tracks for a round trip of 7.8-miles up Bald Mountain and back.

While the resort gondola and some chair lifts do run in summer months, there is something rewarding about climbing the mountain under your own power. You are able to descend on the gondola if you don’t feel like the return journey though.

Before reaching the summit where you can grab well-deserved lunch at the Roundhouse Lodge, the trail wraps to the west side of the mountain for views of Bassett Gulch.  

The mix of open ski slopes and tree trails makes for a fun variation in trail type and more demanding sections intermixed with relatively intermediate ones. If you prefer to stay in the sun, you can opt for a steeper but shorter hike directly up the middle of the Limelight ski run. Pack sunscreen if you do. The valley is aptly named!

Louie Lake Trail (McCall)

Louie Lake Trail outside McCall is another of the state’s top hikes and particularly convenient if you’re coming in from Washington or Oregon.

 At only 813 feet in elevation gain, the moderately rated 2.6-mile trail has the most “reward to effort” ratio and ends at an alpine lake with dramatic views of the surrounding mountains.

Grabbing a quick swim in the lake during warmer days is well worth the hike in.  Much of the trail shares an access road with motor vehicles so make sure to watch for bikes and off-road vehicles. You can also opt for a longer 7-mile loop to catch nearby Boulder Lake and Twin Peaks Ridge without adding much more elevation. Total time for the main trail is about 1 hour but plan for 4.5-5 hours if you try the Boulder Loop.

Louie Lake Trail is best experienced in summer and early fall when the seasons’ colors begin to change. It is best to wait a few days after heavier rains as some of the water elements may be unpassable after swells or snowmelt.  Access is a bit tricky because the parking lot is unmarked.

 However, once on the trail there are plenty of helpful directional markers to reach the lake.  While the main trail and longer loop are great options for most hiking abilities there are a few creek crossings that are not maintained and shaded portions that may be icy during colder months making for some precarious spots.

Mineral Ridge National Recreation Trail (Coeur d’Alene)

Another of the state’s best hikes can be found on the Panhandle at Mineral Ridge 11 miles east of Coeur d’Alene. Unlike other trailheads which are difficult to locate or navigate, access to Mineral Ridge is well labeled and includes a large parking lot, two picnic areas, drinking water and restrooms.

The 3.3-mile loop is well maintained by the Bureau of Land Management and sits on a bald eagle migration path.  Chances of catching a glimpse of the birds are best during winter months from November to February. 

Mineral Ridge is a great option for families with small children and hikers of all abilities, not only because of the trailhead amenities, but because multiple benches along the path offer a quick place to sit and rest.

It takes about 1 hour and, while there are a few switchbacks, they are neither steep nor lengthy. Hikers are rewarded with views of Coeur d’Alene and Wolf Lodge Bay. It’s worth timing your hike to align with the sunset as the view is spectacular.

Hulls Gulch Reserve (Boise)

If you want to stay close to the big city and catch skyline views from a different vantage point, Hulls Gulch Reserve near Boise is your best bet. The Reserve covers over 292 acres on the Northend and is well managed by the City of Boise Parks and Recreation Department. The Reserve was established in the 1990s to spare recreation area near the city from development and to offer ecological restoration for native trees, grasses, and shrubs. This foresight proved valuable as Boise now experiences one of the top population growth rates in the region. Access to Hulls Gulch Trail, the most popular in the reserve, is off North 8th Street behind Camel’s Back Hill. The well-traveled path is a moderately difficult and follows Hulls Creek for 3.1 miles to a scenic waterfall. Out and back is 6.3 miles of moderate hiking with a total of 1,131 feet in elevation gain. The easy pitch is ideal for trail runners but you’ll want to start early or head out later on in the evening as the path is in direct sun. Plan for about 2.5 hours.  

Sawtooth Lake Trail (Stanley)

Sawtooth Lake Trail is a 10-mile, in and out path, and one of the more difficult of Idaho’s best hikes.

The Stanley area is a mecca for hikes, camping, climbing, and especially fishing but due to its remote location, most who visit the Sawtooth Lake Trail are camping in the area for multiple days.

The trail is listed as accessible year-round but requires more technical skill, not to mention appropriate gear, during full snow cover. Even in summer, the higher altitude shaded sections will have snow patches and avalanches have been reported in some years.

The first 3 miles are relatively mellow and wooded with a few tree gaps for surrounding views.  The final 3 miles are the most advanced section. Total elevation gain is 1,873 feet and hikers are rewarded with views of Alpine Lake and McGowan Peak. Hike time without snow is about 4-5 hours.

Insider Tip: Don’t miss Stanley Bakery on your way to the trailhead. It’s a great option for breakfast or a paper bag lunch for your excursion.

Pin These Best Hikes in Idaho for Later!