8 Best Hikes Near Salt Lake City

Salt Lake City is the capital of the state of Utah, located in the western half of the United States.

The city was built upon an ancient lake bed in a desert ecosystem and sits at just over 4,000 feet in elevation.

The city experiences the extremes of the seasons: stifling heat in the summer months and snowy, chilly winters. 

Salt Lake City sits in the heart of Salt Lake Valley, surrounded almost 360° by the Oquirrh and Wasatch Mountains, the western edge of the mighty Rocky Mountain Range. 

One of the most unique aspects of Salt Lake City is the proximity to trails and canyons in the Wasatch mountains.

That means that even if you have just a weekend in SLC, you have plenty of time to get in a fantastic hike!

One minute you can be walking downtown amidst the skyscrapers and traffic, and then 15 minutes later you’re surrounded by nature, with nothing but birdsong breaking the silence.

No matter what your skill level, ability, or time frame is, you can guarantee there is a perfect hike for you close by.                                                                                                      

Want to hike to a waterfall? Along a riverbank? Reach some Insta-worthy viewpoints? You’ll have no problem finding a hike in Salt Lake City that ticks all of your boxes. 

While there are literally dozens of trails to discover in and around Salt Lake City, I’ve narrowed the list down to the 8 most popular among locals and visitors.

All of these hikes are heavily-trafficked and well established.

Grab your hiking boots and trekking poles… it’s time for an adventure!

Easy Hikes In & Around Salt Lake City

Ensign Peak
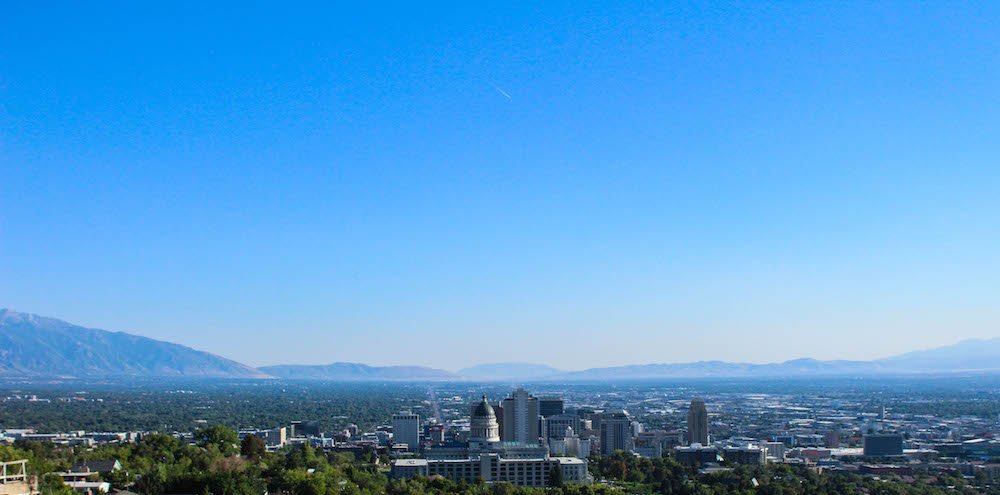
Highlights: sweeping and unobstructed views of the entire Salt Lake Valley, short, urban

Length: 0.8 miles

Elevation gain: 374 feet

Located directly behind the state capitol building lies the famous Ensign Peak, a local urban hike that is one of the most popular trails around Salt Lake City.

History tells us that on July 26, 1847, just 2 days after the Mormon Pioneers entered the Salt Lake Valley for the first time, their leader, Brigham Young, led a group of men to the top of Ensign Peak. From their vantage point, the men laid out plans for their future city, Salt Lake City.

The Ensign Peak trail is about 1 mile round trip, but has an extremely steep incline the entire way to the summit. Most of the trail is unshaded, but since the trail itself is so short, it shouldn’t be a big problem for most people to hike it at any time of day and year.

When you arrive at the trailhead, follow the paved path until it forks. Stay to the right and you’ll find yourself on the steep, dirt trail. The trail will wind its way up to the summit, which you can see for most of the hike. Once you summit, you’ll find a tall monument that was erected when the first settlers summited the peak. 

The Ensign Peak trail is popular with people of all ages and skill levels. When you hike it, you’ll be sure to find little kids running around, senior citizens with their hiking poles making their way up, and all sorts of family and youth groups. 

The best time to hike to Ensign Peak is right before sunset, where you can watch the sun dip below the Great Salt Lake to the west.

Donut Falls
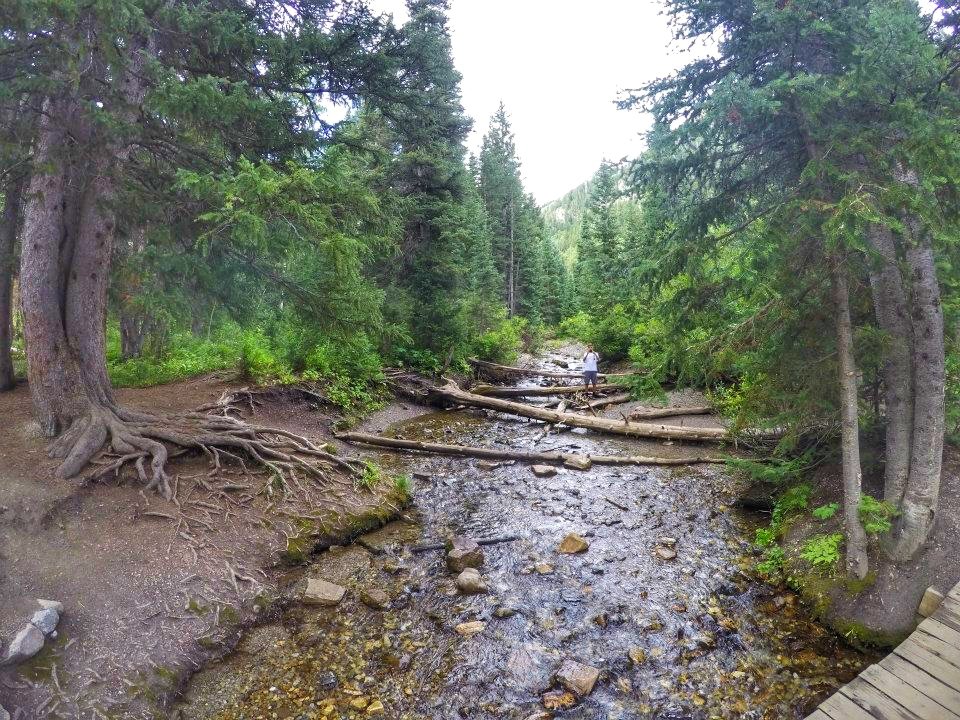
Highlights: river, shaded, fun waterfall at the end of the trail

Length: 3 miles

Elevation gain: 531 feet

Who doesn’t love a good donut? And how about one that you can hike to and will last longer than an edible one? Donut Falls just might be the perfect hike for you. 

Donut Falls is a 3 mile out-and-back trail located in Big Cottonwood Canyon, just a brief drive from downtown Salt Lake City. While there is a parking lot directly at the trailhead, it becomes full pretty quickly. The Donut Falls trail is extremely popular, especially during the hot summer months.

For an unforgettable experience, wear good-fitting shoes that can get wet. Some of the trail is wet from the river and can be slick. Trekking poles for stability would also be advisable.

At the end of the shaded trail, hikers are rewarded with a beautiful waterfall cascading through a rock formation, creating the “donut” shape. If you’re wearing waterproof shoes with good grips, take care and scramble up and into the cavern for a truly unique experience.  

Cecret Lake
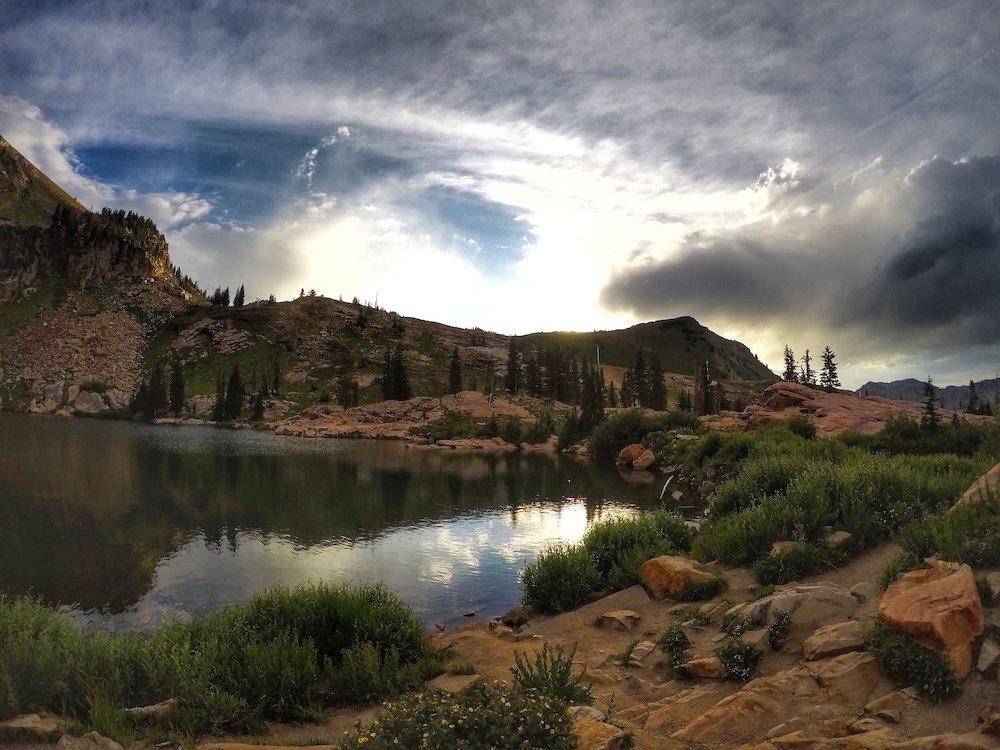
Highlights: abundant wildflowers, picturesque mountain lake

Length: 1.7 miles

Elevation gain: 459 feet

Cecret Lake (pronounced like “secret”) is a beautiful alpine lake located in Little Cottonwood Canyon, and is a wonderful family-friendly hike. 

One of the best reasons Cecret Lake is such a popular trail to hike is the abundance of wildflowers in the area. The trail itself is a popular spot for photographers, so it’s nothing out of the ordinary to be on a hike and pass a few photo shoots. 

The hike to Cecret Lake is only open for a few months during the later summer and fall. Since the hike is at such a high elevation, it’s common for snow to block the trail until July. This is not a hike that can be done during the snowy winter months.

Once you reach Cecret Lake, look but don’t touch. The water is part of a protected watershed for the Salt Lake Valley, so it needs to stay as uncontaminated as possible.

Hike around the lake and take in the sweeping views of the snow-capped mountains, vibrant wildflowers and some of the bluest sky you can find.

Moderate Hikes In & Around Salt Lake City

The Living Room Lookout
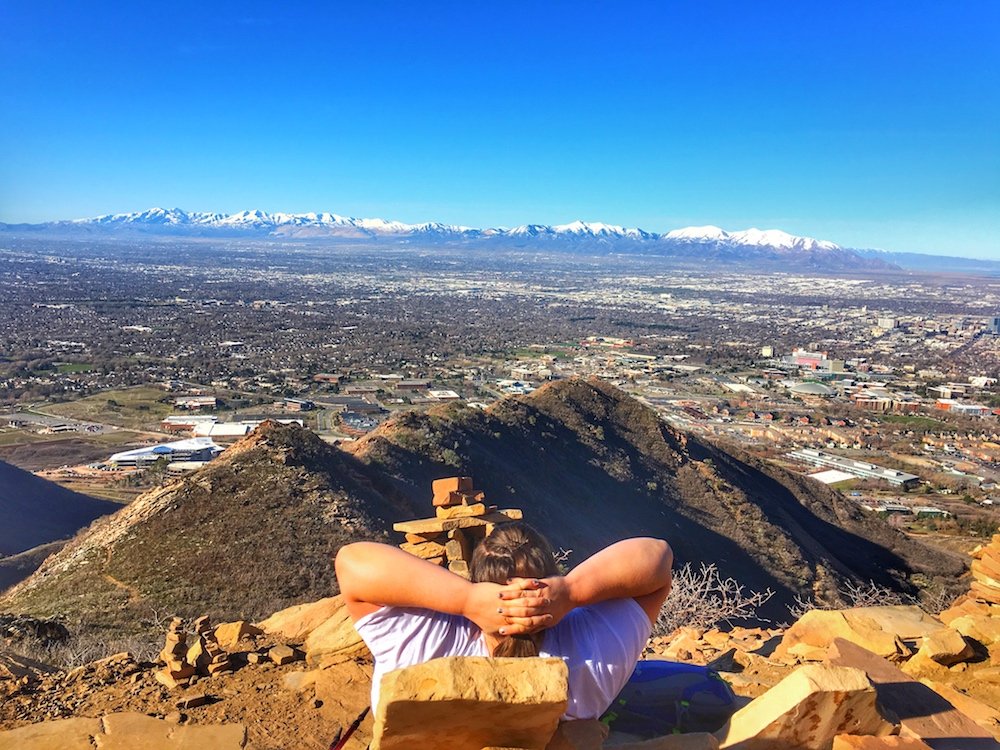
Highlights: epic views, rock furniture at the summit (explained below)

Length: 2.3 miles

Elevation gain: 980 feet

Depending on your level of skill and adventure, you could technically classify the Living Room Lookout hike as either easy or moderate. If you take a wrong turn and wind up scaling the face of the mountain, it could even be classified as difficult.

The trailhead for the Living Room Lookout hike is located on the University of Utah property, just southwest of the Utah Museum of Natural History. 

The trail leads up a pretty narrow path and actually follows a wash at some points. There are quite a few offshoots, but stay to the right and you’ll keep on the correct path. There is just under 1,000 feet elevation gain over a 2.3 mile steep round trip.

There is minimal to no shade, so plan accordingly. Bring plenty of water and consider the time of day that you’re hiking. The trail faces west, so early morning before the sun peaks in the sky is going to be the most ideal time.

The big draw for hiking up to the Living Room Lookout is the setup at the top. The rocks have been arranged to look like couches and lounge chairs, facing the valley lookout, creating an epic backdrop for photos. 

Even if you can’t make it to the top, you’re going to have an unbelievable view at every turn along the trail.

Dooly Knob Trail (Antelope Island)
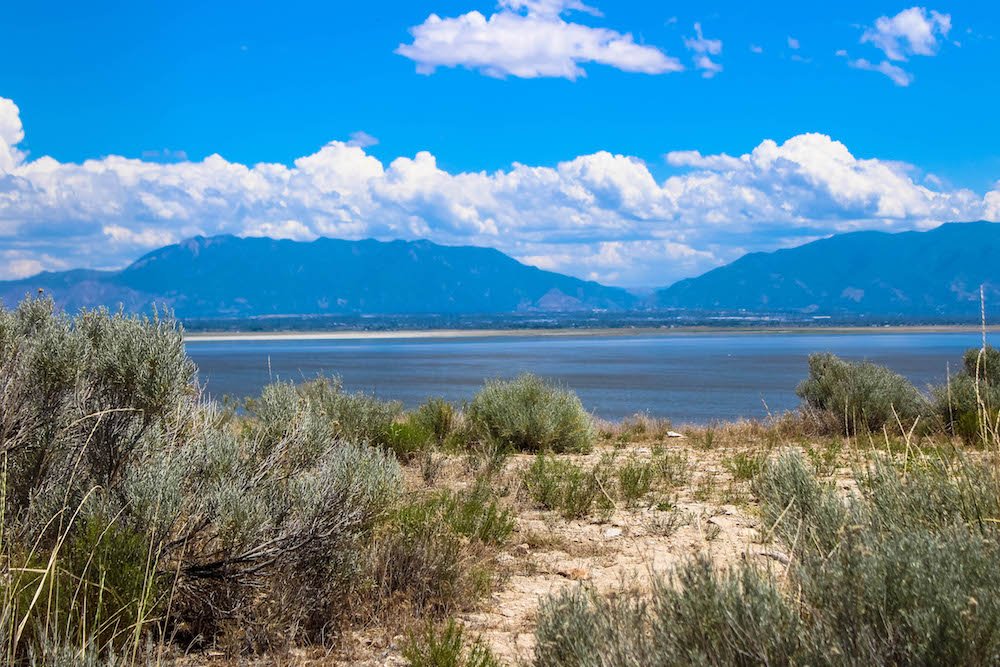
Highlight: wildlife, island views

Length: 2.4 miles

Elevation gain: 705 feet

There’s just something special about hiking on an island, when the views constantly remind you how epic your location is.

Antelope Island is located in the Great Salt Lake, and offers multiple hikes for adventures of all skill levels. The Dooly Knob trail just happens to be the most popular.

The hike to Dooly Knob is best done in the cooler months. Antelope Island is known for having biting bugs during the spring and early summer months. If you want to hike during that time, keep in mind any exposed skin.

The first part of the trail is a little brutal for some inexperienced hikers. For 0.75 miles at the beginning, you’ll be hiking almost straight up at a steep incline. As you stop and catch your breath, take a look around and enjoy the views of the beach, the mountains, and the urban city skyline.

As you make your way to the summit, keep your eyes peeled for wildlife. Antelope Island is known for having antelope, coyote, a herd of buffalo, and a variety of smaller wildlife. 

Fifth Water Hot Springs Trail
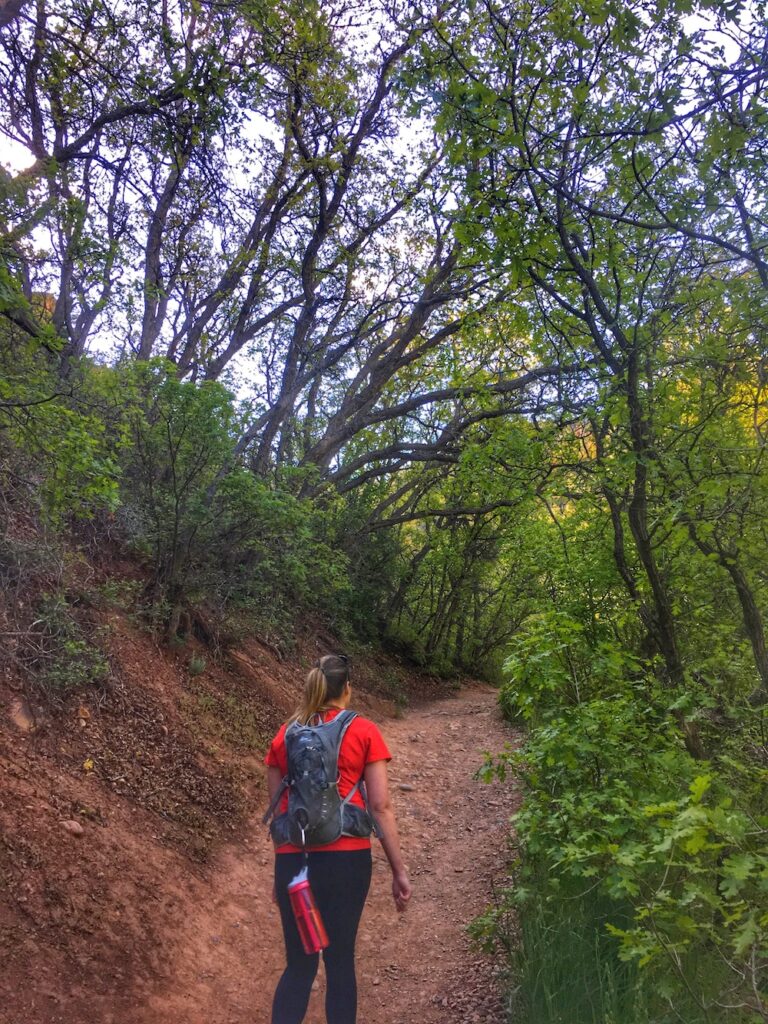
Highlights: river, vegetation, hot springs, waterfall

Length: 4.5 miles

Elevation gain: 636 feet

The Fifth Water Hot Springs Trail is a beautifully shaded pathway in Diamond Fork Canyon, about an hour south of downtown Salt Lake City.

The path follows along a river, leading to milky blue hot spring pools. So when you hike this trail, make sure you have a swimsuit with you, or at least something that you don’t mind getting wet. 

From the trailhead, follow the trail southeast along the east bank of Sixth Water Creek. Do not cross the footbridge. After a mile, you will come to another foot bridge, which you should cross. This is the junction of Sixth Water Creek (from the left) and Fifth Water Creek (from the right). 

Stay to the right and continue your hike along the heavily-trafficked creek trail. After about a mile, you’ll begin to notice that the water turns a milky blue color. Your nose hairs will start to curl as well, because the smell of sulfur will only increase the closer you get to the hot springs.

Once you reach the hot springs, relax and soak it all in (see what I did there?). Scramble up to the top of the nearby waterfall. Set up a hammock. Take all the pictures. Truly enjoy your time before you make the hike back to the trailhead.

Difficult Hikes In & Around Salt Lake City

Mount Timpanogos via Timpooneke
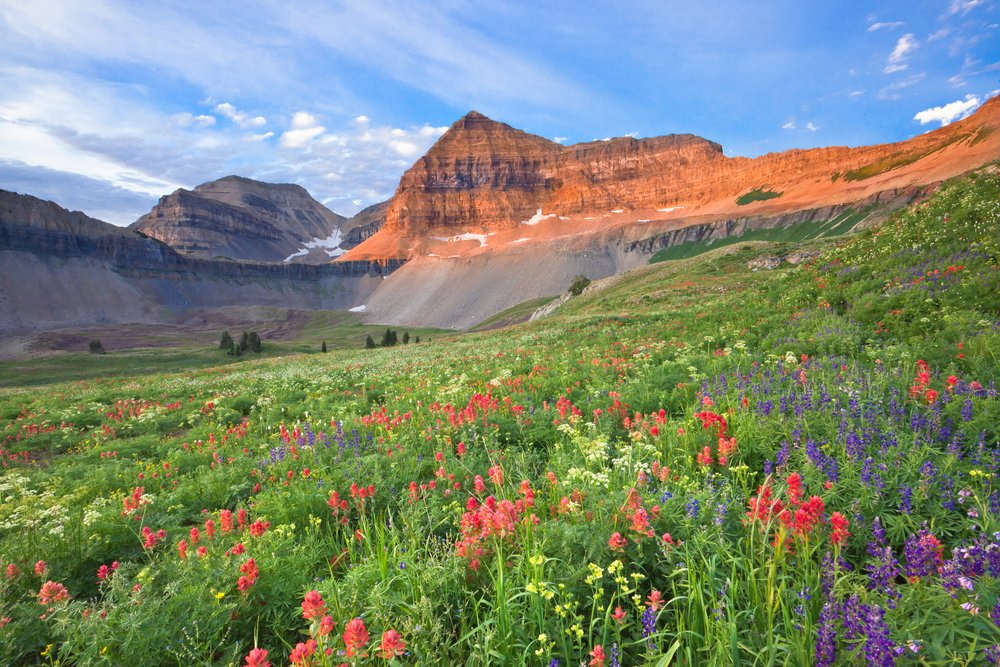
Highlights: stunning view of the Wasatch mountain range, abundant wildflowers, wild animal sightings almost a guarantee, clout

Length: 12.8 miles

Elevation gain: 4,425 feet

Summiting Mount Timpanogos is one of the most popular hikes in the entire state of Utah. While there are two options for you to take to the summit, the Timpooneke trail is the more desirable of the two routes. The trailhead is located about 50 miles southeast of downtown Salt Lake City.

The hike up Mount Timpanogos is extremely arduous and many of the switchbacks can be strenuous. You’ll want to make sure that you’re in decent shape before attempting the hike. Some locals even choose to run this trail, but I wouldn’t recommend it unless you’re an experienced trail runner at high elevations.

If you choose to do this hike during the day, keep in mind that it gets extremely hot. Bring plenty of water. Even if you do this hike in the middle of the summer, keep in mind that there is a great chance of ice/snow once you reach the saddle. 

One of the best things about hiking up Mount Timpanogos is reaching the summit for the sunrise. Depending on your ability, you’ll want to begin your hike around midnight to ensure you reach the summit by the 6am sunrise.

Although you might work up a sweat on the way up, you’ll need to bring warm clothing. If you reach the summit before sunrise and have to wait for it, it’ll get cold, especially since you’ve worked up a sweat getting there. We arrived about an hour before the sunrise and huddled together, taking in the views.

Mount Olympus
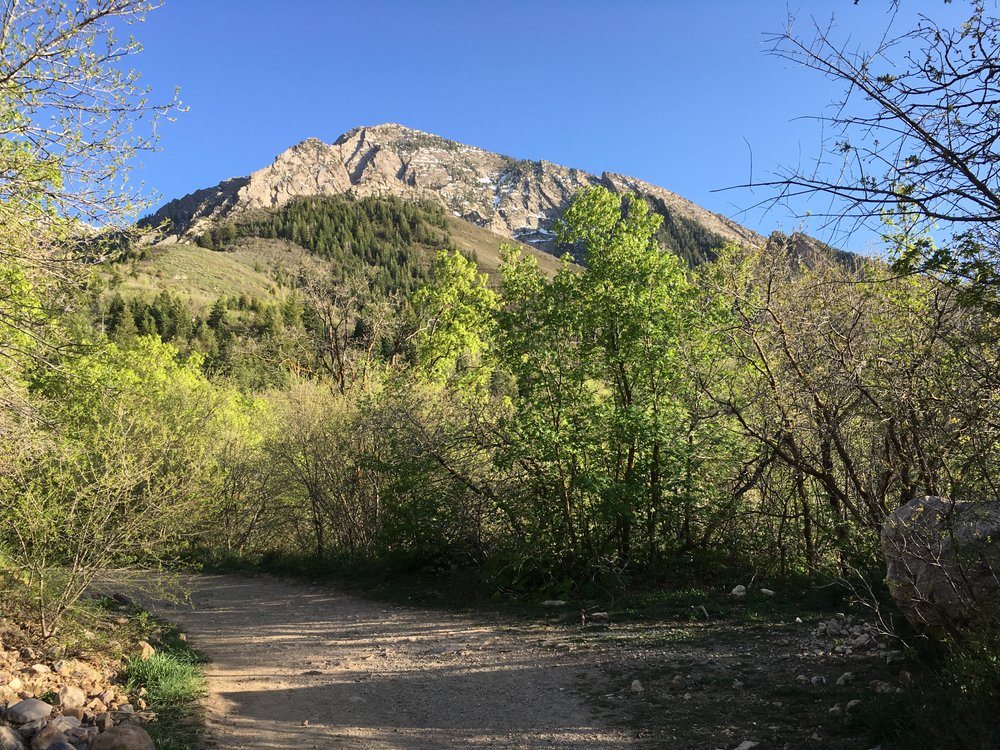
Highlights: city views, wildflowers, clout

Length: 8 miles

Elevation gain: 4,192 feet

Zeus was the king of the gods and reigned from Mount Olympus, ruling the world and imposing his will on mortals. While you won’t find Zeus atop this particular Mount Olympus, you can still feel as powerful as he did, knowing that you have summited one of the hardest hikes in the state of Utah.

Before you begin the hike, keep in mind that the trail isn’t very well-marked. I recommend downloading an offline map to keep you on the correct path, especially since cellular reception can be hit-or-miss.

The hike up to Mount Olympus is unforgiving and exposed most of the trail. Bring plenty of water and opt to hike early in the morning. Take your time and ask for directions if you need it.

Looking at the length to elevation gain ratio, you should be able to tell right away that this hike is quite steep. Trekking poles or a walking stick are highly recommended to assist with your ascent. Because the trail ascends so quickly, you’ll be amazed at how abruptly you’ll find yourself in alpine terrain, leaving behind the hustle and bustle of the city below.

The last section of the hike is almost like a mountaineering scramble, so take care to stretch well before you begin. You’ll also want to take plenty of time after the hike to cool off and stretch out your muscles, particularly your calves. If you skip this step, there’s a great chance you’ll have dead legs for a few days.

Hiking to the top of Mount Olympus is not for the faint of heart. Prepare yourself mentally for the scramble to the summit and take your time. Once you reach the top, your reward will be simply stunning. And you’ll have bragging rights for life!

About the Author
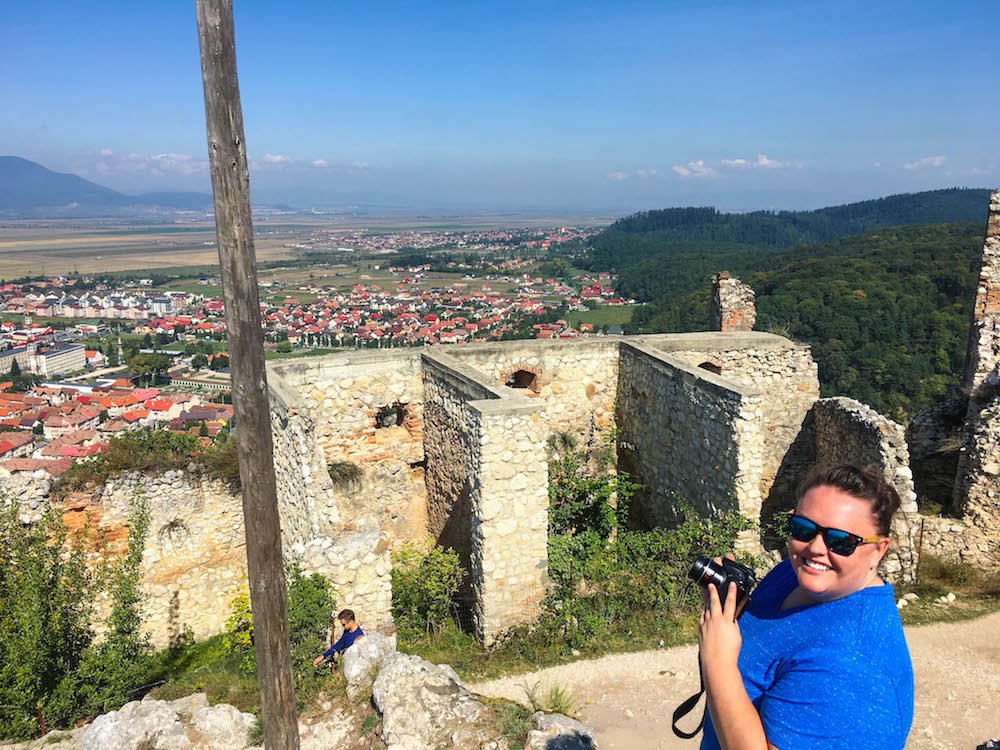
Rachelle is the writer and creator behind the website Adventure is Never Far Away. After moving to Utah in 2009, Rachelle was finally bitten by the travel bug and started to travel around the world and in her own backyard. She has been determined to prove that adventures can be found anywhere. You don’t have to go far to find an adventure!

You can find her blog at Adventure is Never Far Away, and you can follow along with her adventures on Instagram, Pinterest, and Facebook.

Pin These Salt Lake City Hikes!

7 Best Day Hikes Near Los Angeles: Hiking Trails You Can’t Miss!

Los Angeles is a mecca for many things: the entertainment business and celebrity sightings, all the green juice and avocado toast your heart could fancy, and miles of sandy beaches, just to name a few.

Sunny nearly year-round, in LA you can head west and hit the beach or head inland and get your fill of mountains all in one day.

It’s just one of the many things to love about La La Land (the traffic being on the list of things not to love, but hey, there are many other reasons why LA is worth visiting!).

You won’t be lacking for great hikes in LA, which offers everything from breathtaking views of Malibu to trails through film shoots from bygone days.

All of these LA hiking trails can be used as a jumping-off point to explore other trails in the area, and range from well-known to lesser-known. Either way, you’ll get to soak up the LA sunshine one way or another.

And the best thing? LA is so dog-friendly, so many of these hikes can be done with your favorite four-legged friend.

Los Liones Trail to Parker Mesa Overlook, Malibu

Distance: 7.3 miles

Time Required: 4 hours

Difficulty: Moderate

Parking: Free, available on Los Liones Drive

Directions: At the end of the cul-de-sac of Los Liones Drive, follow the Los Liones Trail. At the overlook, make a left at the East Topanga Fire Road junction, continue to Parker Mesa Overlook

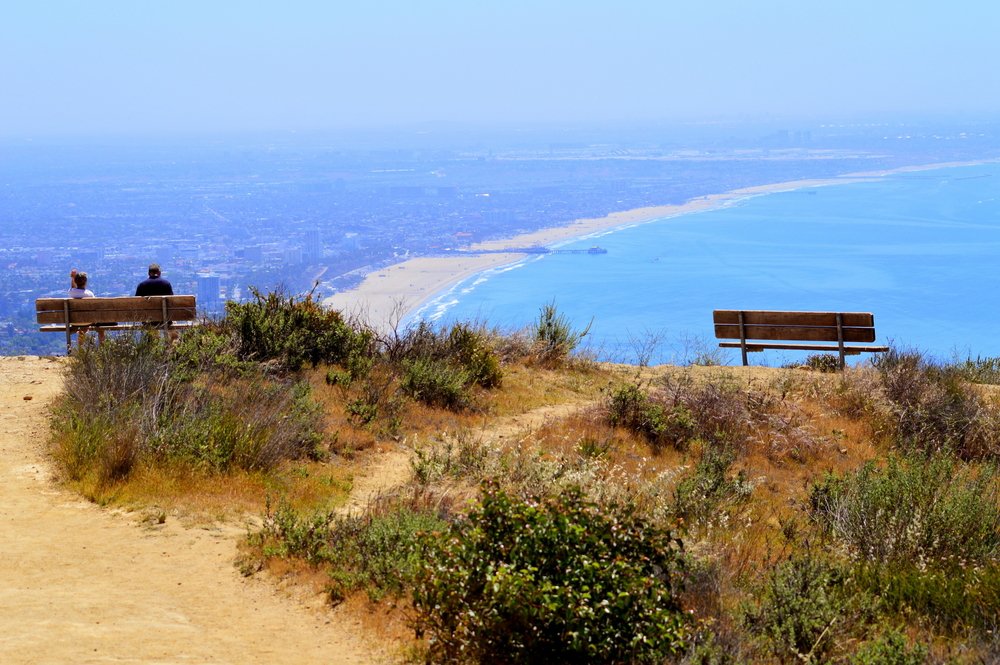
With sweeping ocean views and the Malibu breeze against your face, this is a classic LA hike for those looking to admire the Pacific coastline.

The trail goes through some of the best scenery of the Santa Monica Mountains: you’ll wind your way through vegetation in the canyon and then into the chaparral.

As you climb the trail upward, you’ll be rewarded with views of the Santa Monica Bay and Pacific Palisades. On a clear day, you can see out to Catalina Island.

Once you’re on the trail to Parker Mesa Overlook, the path will be mostly unshaded and goes up at a steady incline, so pack your hat and sunglasses and lots of water. The LA sunshine is great, but you know what they say about too much of a good thing! At the end of the hike, you’ll get more endless views of the Pacific.

Plan B: This trail is only moderately difficult, but it does take time – especially if you’re going to stop to soak in the views. If you want to take it easy or are pressed for time, skip the hike to Parker Mesa and just do the Los Liones Trail, which is a 2.6-mile loop.

This is also a great place to watch the sunset in LA as it sinks into the Pacific! Be sure to bring a headlamp if doing a sunset hike to make the hike back safe.

Insider Tip: Malibu may be synonymous in many people’s heads with the rich and the famous, but did you know it’s also home to one of the US’s best RV parks?

Bronson Caves to the Hollywood Sign, Griffith Park

Distance: 6.6 miles

Time Required: 4 hours

Difficulty: Moderate

Parking: Free, two parking areas on Canyon Drive

Directions: Turn right off Canyon Drive to follow Bronson Caves Access Road to Brush Canyon Trail and continue left on Mulholland Trail. Make a left onto Mt. Lee Drive Viewpoint for a view of the sign (which will add 0.5 miles onto the trail), or make a right to climb to the back of the sign

The start of this hike is more a walk to the Bronson Caves, famously known as the Bat Cave in the 1960’s Batman TV series. From there, you’ll catch a glimpse of the Hollywood sign, your destination for this quintessential Los Angeles hike.

As you continue onward, you will climb upward through brush canyon, but from Mulholland Trail onward, the trail levels off more. Once you get to the back of the Hollywood sign, the closest you can get is from behind the gate. There is a little hill behind the sign as well, which has panoramic views all the way to downtown.

This LA hiking trail is quite popular with locals and out-of-towners, or locals bringing out-of-towners, but it’s hard to resist getting such an epic dose of LA, what with the iconic Hollywood sign before you and the LA skyline beyond.

Bridge to Nowhere, Angeles National Forest, Azusa

Distance: 10 miles

Time Required: 7 hours

Difficulty: Difficult

Parking: $5, available at the end of East Fork Road. If the lot is full, park on the street. This hike can be crowded, especially on the weekends, and the trailhead can be especially crowded with picnicking groups.

Other: You’ll need a wilderness permit to access the trail. You can self-register for one at the trailhead or get one at any ranger center or visitor center in Angeles National Forest.

Directions: Start at Coyote Flat and down to the Heaton Flats Campground. Stay on the main trail; do not go on the Heaton Flats Trail. Follow the trail to the East Fork Trail. The trail is not always well-marked, so stick to the eastern right side of the valley and the remnants of the old road and spot returning hikers to stay oriented.

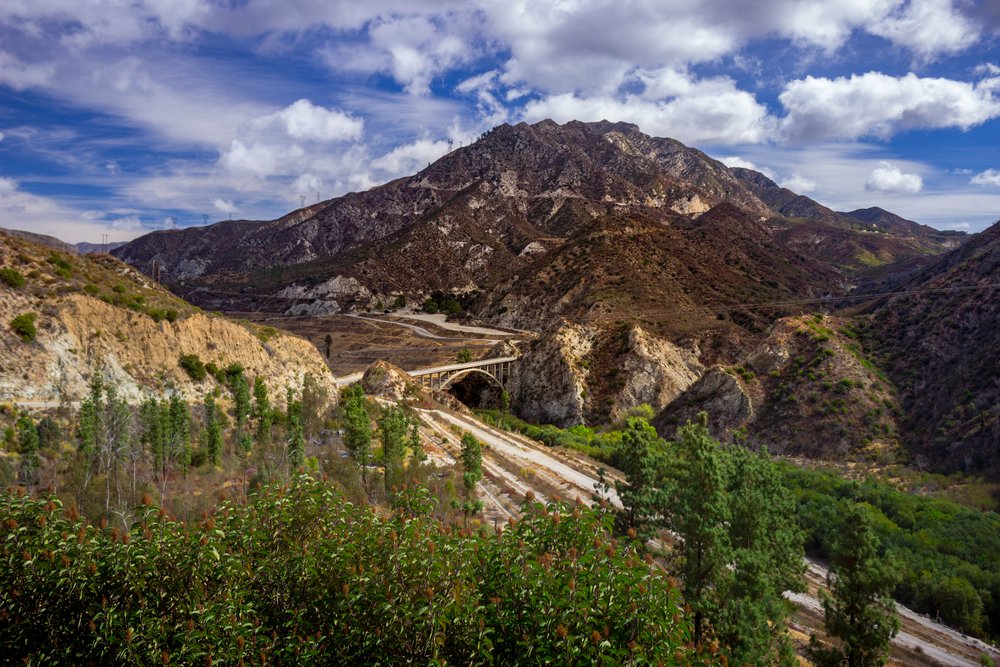
Further inland in the Los Angeles metro area are the San Gabriel Mountains, the mountainous backdrop to LA’s beaches and city sprawl.

The Bridge to Nowhere was originally supposed to be just a bridge, constructed in the 1930s over the East Fork of the San Gabriel River. A massive flood washed out the road leading to the bridge and construction was ultimately abandoned.

Nowadays, it makes for quite the hiking destination and on the weekends, bungee jumpers go to the bridge for a bit of thrill-seeking ($120 if you’re interested). Full of river crossings (some waist-deep) and swimming opportunities, this challenging hike to reach the bridge isn’t for the faint of heart.

Note: Bring water shoes for river crossings and a change of socks. If you are going in the winter and there have been heavy rains, the river may be flooded and there is also the potential for flash flooding, which are particularly dangerous. Postponing your hike is the best bet.

Portuguese Canyon Trail, Portuguese Bend Reserve, Palos Verdes

Distance: 5 miles

Time: 2 hours

Difficulty: Moderate

Parking: Street parking available on Crenshaw Blvd., check the signs for parking restrictions.

Directions:  At the end of Crenshaw Blvd, the park entrance is at Burma Road and make a left onto Eagle’s Nest Trail

About 30 minutes south of downtown, Palos Verdes is a hidden coastal gem of LA.

Often overlooked and slightly out of the usual way for most LA destinations, Palos Verdes refers to both the peninsula and a cluster of neighborhoods.

Along with some pretty amazing scenic drives, there are some great LA hiking trails with views of the bluffs and coves. This particular trail is inverse, meaning it goes downhill towards the ocean and you’ll get most of your workout as you make the trek back up.

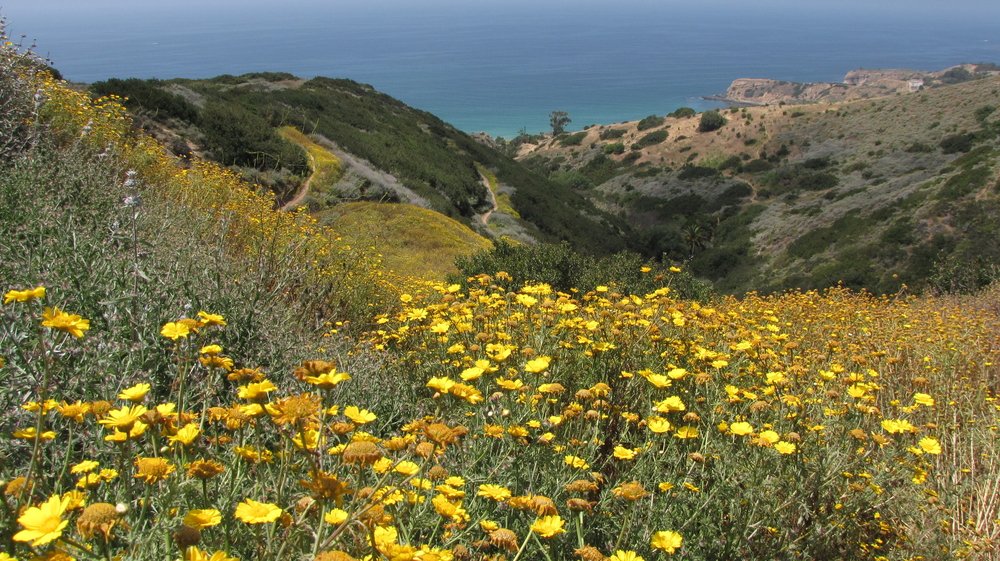
In the spring, the hills are covered in a blanket of bright yellow flowers. Plenty of side trails mean you can take detours along the way if you want to log in a few more steps or explore other paths.

City View and Walnut Forest Trail, Ernest E. Debs Regional Park, Arroyo Seco

Distance: 2.5 miles

Time Required: 1 hour

Difficulty: Easy

Parking: Free parking in the lot by Audubon Center, enter on Griffin Ave.

Directions: From the parking lot, follow onto the Scrub Jay Trail. Take a right to connect to City View Trail. Make a left on Summit Ridge Trail, make a left on Walnut Forest Trail. Make a right to connect back to Scrub Jay and back down.

Just a short drive from downtown, Ernest E. Debs Regional Park sits on what used to be ranch land in the Arroyo Seco neighborhood.

Most Angelenos have driven by this park going to and from downtown LA without realizing this park is full of hiking trails and views!

This loop is ideal for a quick hike or late afternoon walk if you’re looking for some views of downtown LA, but be prepared for some uphill climbs.

Bird watchers, from seasoned to amateur, love this park for the variety of birdsong you can hear as you’re hiking. If you’re looking for a longer LA hike, feel free to hop onto any of the trails crisscrossing the park. Not only will you get views of different cities within LA from different sides of the park, but there are areas throughout the park that are great for a picnic.

The Audubon Center is currently closed because of Covid-19; otherwise, it’s worth checking out, especially if you’re going with kids.

Ferndell Trail to West Observatory Trail, Griffith Observatory

Distance: 2.5 miles

Time Required: 1 hour

Difficulty: Easy

Parking: Free street parking on Fern Dell Drive.

Directions: Trailhead at Fern Dell Drive

This small gem of a LA hike is right on the border of the famous Griffith Park and Observatory.

While most trails in LA are dry – the city is located in a desert, after all – the short and relatively easy trail through Ferndell doesn’t fit the mold. Even when other parts of Griffith Park are dry and dusty, especially during a drought or the scorching summer months, Ferndell stays lush and cool.

Enjoy the many varieties of both native and non-native fern, which form a shaded canopy for some respite from the sun. Along with its diverse plants, Ferndell also has many insects, birds, reptiles, and mammals to spy. Once you get to the West Observatory Trail, the hike will start to go uphill. This trail is great for a short hike, or as an oasis-like starting point to jump onto Griffith’s more challenging hikes.

Note: Fern Dell Museum, which is located at the start of the hike, is temporarily closed because of Covid-19.

Pin These LA Hikes for Later!

7 Best New Mexico Hikes Near Sante Fe & Albuquerque

Note: This is a guest post by Stacey Wittig

So many hike-worthy trails exist in the national parks and national forests between Santa Fe and Albuquerque that it’s difficult to choose.

When you find yourself in such a situation, it’s always smart to tap the locals’ knowledge for their faves. Not only are the following seven some of the most popular hikes near Albuquerque and Santa Fe, New Mexico, but they’ll also deliver views or experiences that you won’t find in other places across the globe.

You’ll meet locals along the way, and they’re sure to tell you that a helpful rule of thumb is to do lower elevation hikes in the winter and higher ones in the summer. In the summer, hike early in the morning to avoid the heat of the day.

With that in mind, here are the top 7 “must-do” day hikes between Albuquerque and Santa Fe, New Mexico:

Easy Hikes in New Mexico

Main Loop Trail, Bandelier National Monument

Adventurous hikers, campers, and archaeology-buffs all love Bandelier National Monument. The 1¼-mile/ 2-kilometer Main Loop Trail takes approximately one hour to complete.

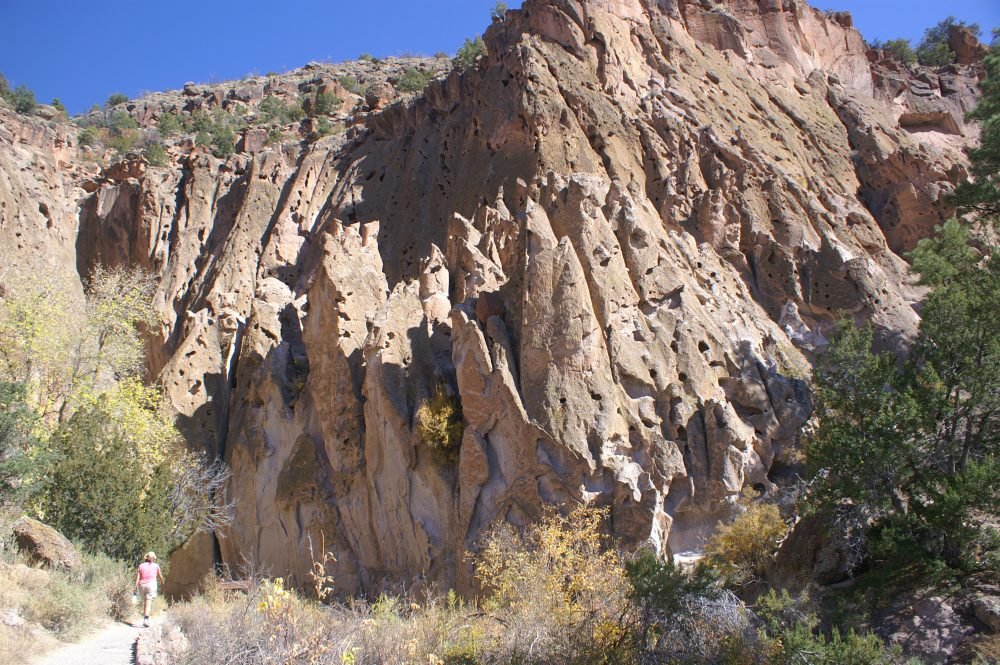
The first part of this easy trail is paved and level, but soon you leave the valley floor and head up to the ruins along the cliff face.

Ancestors of today’s Pueblo people fashioned their homes from the volcanic tuff, which makes up the cliffs. You’ll use hand-hewn log ladders to reach the homes just like the original inhabitants did.

But be careful not to touch—oils from your hands will impact the petroglyphs and other features made from the soft rock. Also, please don’t sit on the walls!

Insider Tip: Bring binoculars for viewing the petroglyphs. Rock art is nearly invisible in some particular lights, but binos will help you see glyphs otherwise overlooked. If you’re up for exploring more archaeological sites, at the far end of Bandelier National Monument you find the Tsankawi Village Trail that takes you to unexcavated ruins.

Paseo del Bosque Trail, Albuquerque

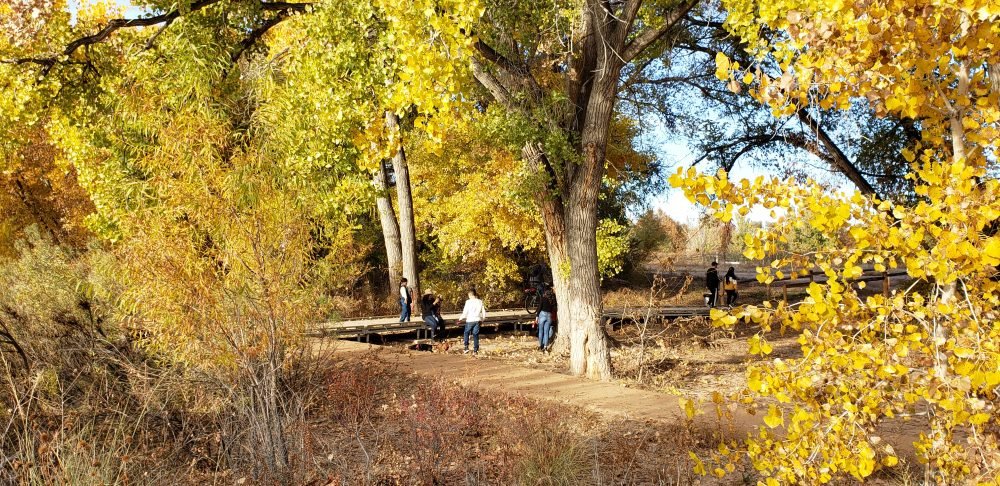
Known as “The Bosque” by locals, this 16-mile/25.8-kilometer trail has seven access points as it follows the Rio Grande through the city of Albuquerque.

No matter where you join the path, your journey will be uninterrupted by roadways. You can walk as much or as little of the open space trail that passes through Rio Grande Valley State Park.

This easy trail is perfect for acclimating to the altitude if you’ve just arrived, and you can spend as much time as you wish to walk. The trail is paved and used by bicyclers, hikers, runners, and families with strollers, so be sure to “share the trail.” Get off paved paths to explore dirt trails that follow the acequias, or irrigation ditches established in the 1700s.

Insider Tip: ‘Bosque’ means ‘forest,’ and so you’ll be under shady cottonwood trees much of the time, but in this high and dry climate, bring sunscreen and plenty of water. After your hike, be sure to check out Albuquerque’s foodie scene for après-hike refreshments!

Moderate Hikes in New Mexico

Slot Canyon Trail, Kasha-Katuwe Tent Rocks National Monument

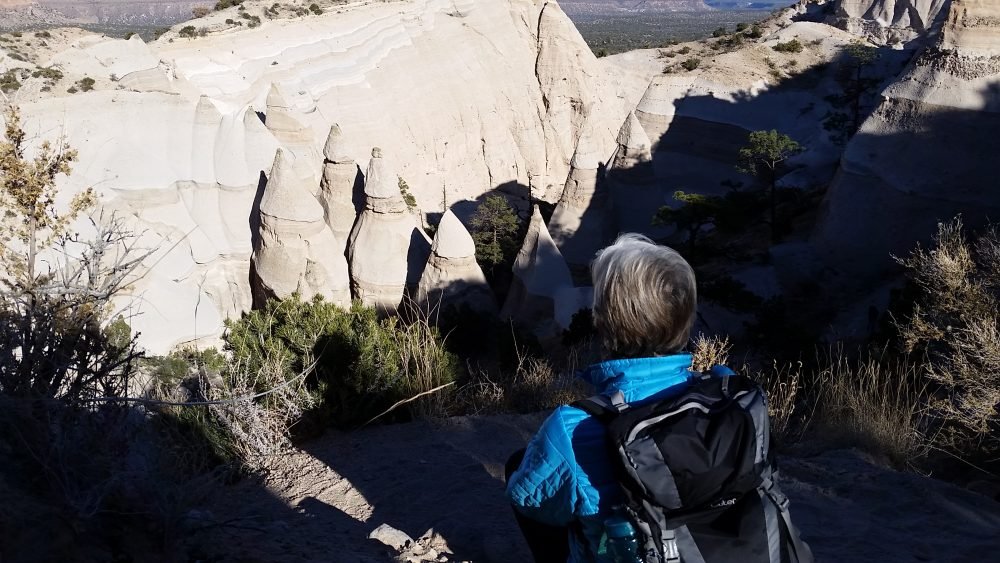
Walk among rock hoodoos that look like tipi tents! Amid the unusual rock formations, you’ll likely imagine yourself in another world.

The Slot Canyon Trail is a 3-mile/4.8-kilometer roundtrip hike into a narrow canyon shaped by geologic processes seldom seen on this lovely planet. Switchbacks around the bisque-colored cone-shapes make the steep—630-foot/192-m— climb bearable.

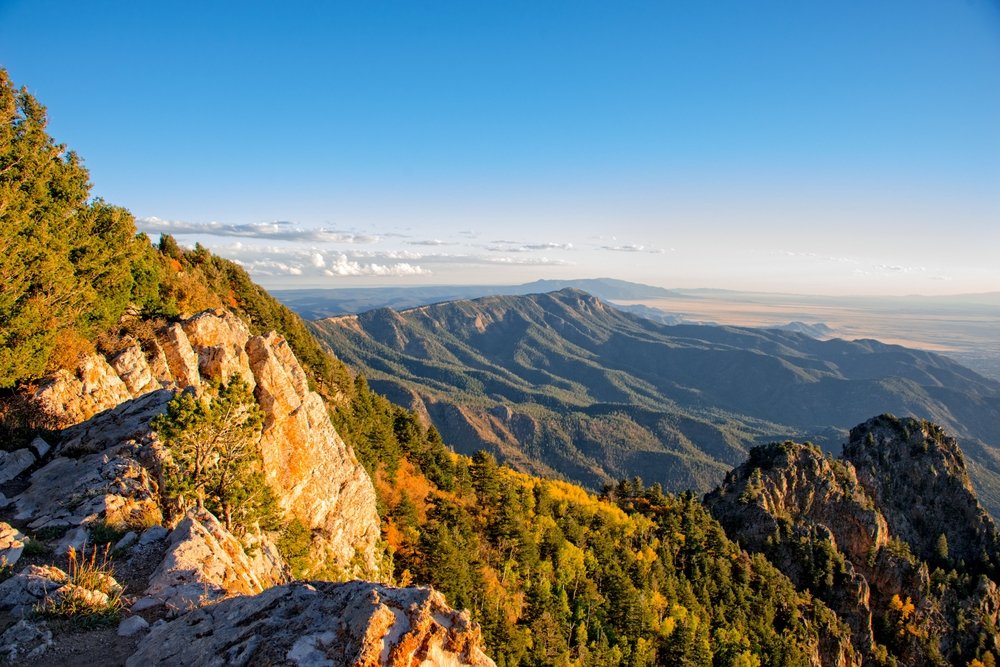
Vistas of the Sangre de Cristo Mountains towards Santa Fe and the Sandia Mountains outside Albuquerque at the mesa top are oh-so-worth the hairpin ascent!

At Kasha-Katuwe Tent Rocks National Monument, you’ll learn about the geologic processes that shape this natural landscape on educational displays. Spoiler alert:  boulder caps on top of the tapering formations—some up to 90-feet/ 27-m tall—protect the softer rock below from erosion. Allow one to two hours for hiking and exploring this moderately rated hike.

A sacred site for the people of Pueblo de Cochiti, the monument is sometimes closed for cultural observances. Check www.blm.gov/visit/kktr for closures before you go. The fee area does not allow dogs, except service dogs, of course.

Tip: Bring plenty of water and arrive early during busy summer months to get a parking spot, necessary for park entry.

Bandelier offers over 70 miles/ 112.7 km of trails, check with park rangers for permits and possible closures for longer routes that require overnight stays. Warning:  it is a felony offense to remove or damage pottery pieces, obsidian flakes or anything else from government lands.

Piedra Lisa Trail, Cibola National Forest

On this well-defined trail, you won’t get lost, but there is a steady uphill elevation gain of 1229 feet / 374.6 meters.

We recommend that you start at the Piedra Lisa Trailhead and turn around at the top of Rincon Ridge—a sign for the Rincon Spur Trail marks the turnaround point.

That makes this a scenic 4.2-mile/ 6.8-kilometer out-and-back hike to granite formations and forested canyons.

Spectacular views overlooking Juan Tabo Canyon are the reward on this narrow, rocky trail that is moderate with some challenging sections. Expect to spend 2-3 hours. Find directions to the trailhead here.

Tip: Arrive early to get a parking spot (no fee.)

Tree Spring Trail, Cibola National Forest

This moderate hike is one of the shortest routes by foot to the top of the Sandias from the backside, and so as you can imagine, it is sometimes busy.

You’ll hike up 2 miles / 3.2 kilometers to the intersection of South Crest Trail for an elevation gain of 1039 feet /316.7 meters.

Turn around and go back the way you came for a 4-mile/ 6.4-km roundtrip hike. Trees shade about 80% of the popular trail. Find a map and directions to the Tree Spring Trailhead here. The fee area allows dogs on leashes.

Insider Tip: Hiking poles are recommended, and cellphone coverage is not guaranteed.

Bonus Tip: While you are in the Southwest, make sure to check out the unique Native culture found in this region.

Advanced New Mexico Hikes

La Luz Trail, Cibola National Forest

La Luz Trail is one of the most acclaimed hiking trails in the Sandia Mountains. The 15-mile / 24.1-kilometer out-and-back trail goes from Juan Tabo picnic area to near the Sandia Peak Tram Upper Terminal. 

With an elevation gain of 3,200 feet / 975.4 meters, the mountain trail is challenging but, as its popularity attests, rewarding.

If you don’t have the six or more hours to hike the whole way, there are several places where you can turnaround. Or once near the top take a right at the fork to go to the Sandia Peak Tramway.

Many opt to take the Sandia Peak Tramway back down the mountain for a 7.5-mile /12.1-kilometer one-way, uphill hike. Locals recommend taking two cars and parking one at the bottom of the tram (fee area) before continuing to La Luz Trailhead at Juan Tabo picnic area.
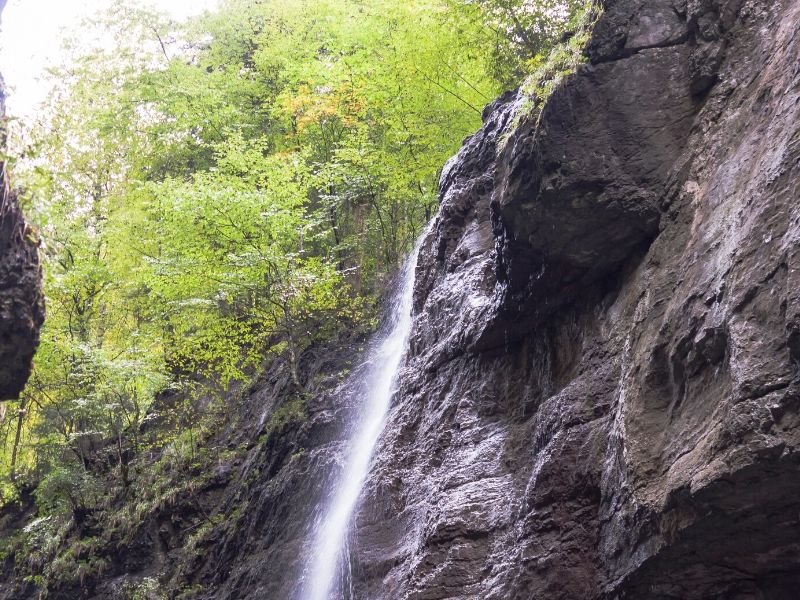
Then when you exit the tram after your downward ride, you won’t have to hike the 2.6 miles / 4.2 kilometers back to the trailhead. Note: this all-season trail can be hot in summer on the lower sections, and icy and snow-covered in winter on the upper part.  Get directions to La Luz trailhead here.

Pro Tip: In the mountains, the weather can change fast. Bring plenty of water, snacks, and extra clothing.

Sandia Crest Trail, Cibola National Forest

Sandia Crest Trail—considered the ‘backside of the Sandias’—follows the entire length of the Sandia Mountains from Canyon Estates in the south to Placitas in the north. 

Only very hardy walkers would attempt to do the whole 26.5 miles / 42.7 kilometers in one day. However, the trail is divided into the North Crest (10.6 miles / 17.1 km) and the South Crest (16 miles/ 25.8 km).

Both are rated difficult, and each has a roughly 4100-foot/ 1249.7-meter elevation gain. In the summer, you’ll see wildflowers galore during either of the all-day hikes.

From the parking lot (fee area) at the top of Sandia Crest, it is possible to have a beautiful hike going either north or south on the trail. Check out the Cibola National Forest website for details on getting there.

Be sure to pack water, snacks, and extra clothing for changing weather conditions.

New Mexico Hiking Safety Tips

In the dry Southwest USA, it matters not how much water you carry in your backpack, but more importantly, it’s all about the water you have in your body.

Two hours before your hike, drink plenty of water and then continue drinking water during and after your trek. Forest Service safety guidelines recommend bringing two or three liters of water on any hike. Moreover, you must remember to drink the water that you bring.

The American Hiking Association recommends that you bring the following ten items on every hike:

Hiking Essentials

  1. Appropriate footwear: hiking boots or trail shoes
  2. Map and compass to back up your GPS
  3. Extra water
  4. Extra food in case you end up spending an unexpected night in the woods
  5. Rain gear including extra clothing and a hat
  6. Safety items including light, fire and a whistle
  7. First aid kit
  8. Knife or multi-purpose tool
  9. Sunglasses and sunscreen
  10. Daypack for all your essential items

Get the whole scoop here.

Check out the weather before hiking the canyons and mountain trails, as flash floods in canyons can be deadly, and weather conditions change fast in the mountains.  Temperatures near the peaks can drop quickly during brief rain or snow showers. If you encounter deep snow on the trail, turn around and go back.

Before you begin your hike, tell a trusted person where you will hike and when you plan to return. If an unfortunate event arises, which leaves you detained by injury or other problems, your friend can alert the authorities.

Hiking with Dogs

Here are some canine trail etiquette guidelines:

  • Hikers with dogs should yield to hikers without dogs.
  • Greet other walkers, so your pooch understands that they are not adversaries.
  • Bring a plastic bag or two to clean up after your pet.
  • Pack dog snacks, extra water, and a water dish for your four-legged hiking companion.

About the author, UNSTOPPABLE Stacey Wittig

I’m called “UNSTOPPABLE Stacey” because I don’t let age, gender, or family stop me from traveling. You see, my hubby prefers not to travel, so I typically go solo. I’ve lived in the USA Southwest for over 25 years and authored hiking books including New Mexico’s Bandelier Walking Tour: A Self-guided Pictorial Sightseeing Tour.

I blog at UNSTOPPABLE Stacey Travel, and you can find me on Facebook, Twitter, and Instagram.

Pin These New Mexico Hikes For Your Bucket List!

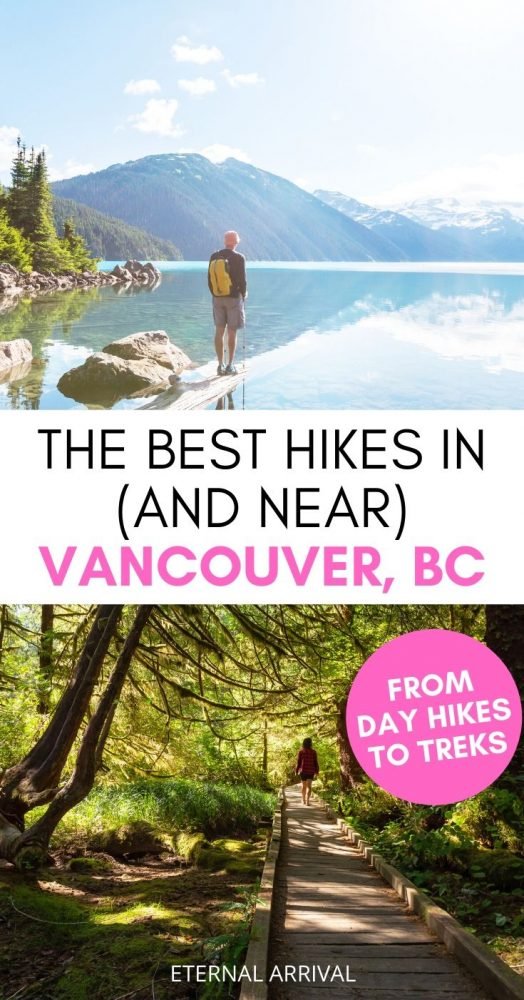
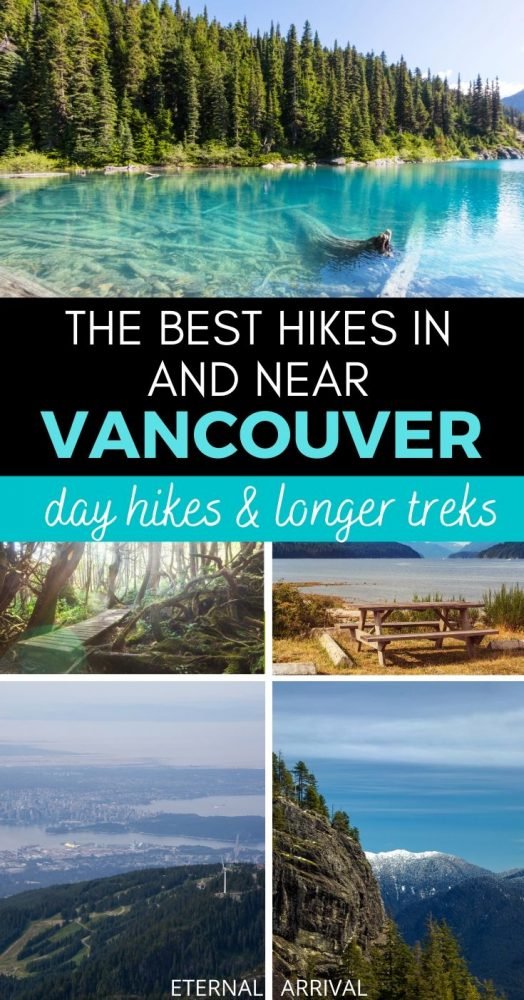
8 Epic Hikes In & Near Vancouver: From Day Hikes to Longer Treks

The city of Vancouver is located in the Lower Mainland region of British Columbia in Canada.

The city’s mild climate and location surrounded by ocean, mountains, rivers, and lakes make the area a popular destination for outdoor activities with fantastic hiking trails near Vancouver.

Downtown Vancouver is in close proximity to the North Shore Mountain range and the Garibaldi Mountains with some excellent mountain scenery and spectacular lakes to explore.

The largest island off the west coast of North America, Vancouver Island, has fantastic coastal hiking trails through spectacular old-growth forest and long stretches of trails right on the beach with the opportunity to see marine animals such as whales, orcas, dolphins and more!

When staying in downtown Vancouver in the center of the city you are close to several amazing forest and mountain trail hikes near Vancouver that can be reached by the local public transport system such as the Grouse Mountain, Lynn Headwater Park, Quarry Rock, and the Baden Powell trail.

A short drive from the city, also within reach by public transport there are several challenging backcountry wilderness mountain trails such as hiking to Garibaldi Lake and The Stawamus Chief.

The Best Day Hikes in Vancouver

Grouse Mountain

Grouse Mountain located about 15 minutes by public transport from Downtown Vancouver. It is a beautiful mountain close to the city center rising 1250 meters (4100 feet) above the city.

The mountain is a popular location for outdoor activities inside the city with fantastic ski runs and facilities for snow sports in winter and home to the challenging Grouse Grind hiking trail and several other exhibitions and entertainment on the mountain in summer.

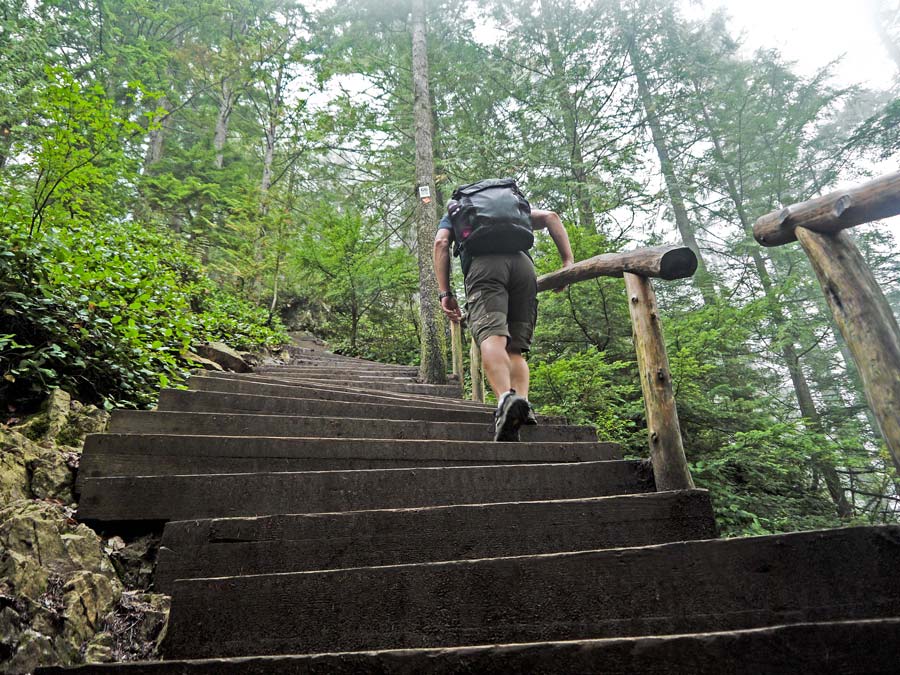
The Grouse Grind trail has quite a reputation when it comes to hiking in Vancouver, as it’s known as one of the toughest challenges the city can throw at you! It is a steep hiking trail up Grouse Mountain with about 3000 stairs climbing 853 m (2800 feet) vertical over a distance of 2.9 km (1.8 mi).

It is a one-way trail; you can only go up the mountain hiking the Grouse Grind and have to go down using the Skyride Gondola for $15 CAD for the ride down the mountain.

The other option is to hike down with a steep trail with some technical parts called the BCMC trail. The Grouse Grind only takes about one and a half to two hours on average to reach the top, but it is a steep hike. Grouse Mountain is easily reached by a shuttle from Canada Place in Downtown Vancouver, making it one of the easiest to get to hikes in Vancouver.

Lynn Headwater Park

The beautiful Lynn Headwaters is a massive regional park located in the city of Vancouver with 74 km of hiking trails for all skill levels to explore.

The trails in the park vary from easy flat routes to more difficult backcountry trails including more uphill and even some scrambling. It is amazing to find such beautiful forests located inside the city, making it possible to actually go hiking in Vancouver and not just near it!

The Lynn Headwater Park is easy to navigate to by public transport from Downtown Vancouver: a quick ride with the sea bus, and from there, bus #228 goes all the way to Lynn Valley Center.

The Lynn Loop is an easy, fairly flat 5.2 km trail passing through a forest filled with Cedar and Hemlock trees and next to the running water of Lynn Creek. The route is well-marked and the trail is wide and easy to follow.

The Headwater trail is a longer trail at 14km: not too steep, but a bit more challenging.

For a harder climb, attempt the Lynn Peak trail, a steep climb with an elevation change of 720m over 4km. This trail is often compared to the Grouse Grind and takes about 4 hours to complete with epic views of Vancouver and Mount Seymore rewarding you at the end of a tough Vancouver hike!

Baden Powell Trail

The Baden Powell trail is a challenging 48 km trail connecting Deep Cove with Horseshoe Bay on Vancouver’s North Shore.

There are a lot of steep climbs with a total ascent of 4860 m over the route. To hike the complete trail, you need a full day, as there is nowhere to camp on the route.

The trail does however have several parts that can be reached easily, so you can hike different parts of this trail, so you don’t have to do the whole stretch in one go if that’s too intimidating.

The four sections of the trail commonly hiked are: Deep Cove to Lynn Valley, Lynn Valley to Grouse Mountain, Grouse Mountain to Cypress Mountain and Cypress Mountain to Horseshoe Bay. 

The trail from Lynn Valley to Deep Cove goes from Lynn Valley park, starting at the Lynn Canyon Suspension Bridge, a beautiful 50m high suspension bridge, a popular free alternative to see the well-known (and expensive) Capilano suspension bridge. This part of the Baden Powell trail passes several beautiful landscapes, including views of Deep Cove, the Seymour River, and Lynn Creek. 

The Quarry Rock trail in Deep Cove is an easy 3.8 km hike with beautiful views. Quarry Rock is a large rocky outcrop with amazing views close to the ocean in Deep Cove. The trail overlaps with the Baden Powell trail.

Epic Hikes Near Vancouver & On Vancouver Island

Garibaldi National Park, Whistler

Garibaldi National Park is a wilderness park between Whistler and Vancouver on the coastal mainland. The park gets its name from the glacier-ringed Mount Garibaldi located inside its borders.

This spectacular park is amazing for hiking near Vancouver, with more than 90 km of excellent trails clearly marked, leading you to some of the most beautiful glacial lakes and viewpoints in British Columbia.  

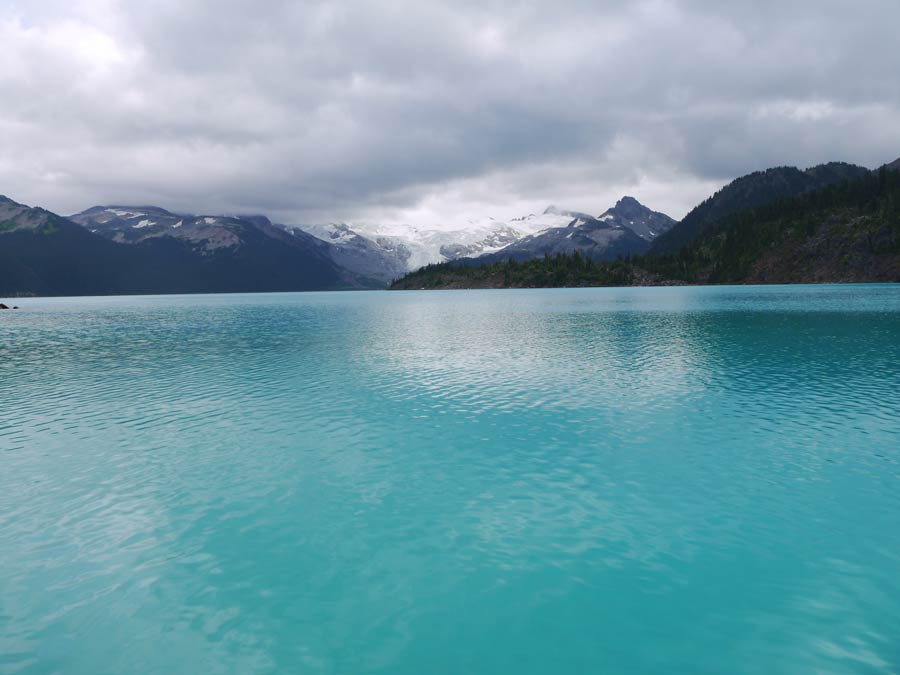
The trail winding to the amazing Garibaldi Lake at an elevation of 1450 m is a bucket list hike to do in the park! The hiking trail is an 18 km out and back route and takes on average 6 hours to hike. This perfect turquoise glacial lake hedged by beautiful mountain peaks makes for unreal views.

The lake is a great place for a swim during this strenuous walk. It is possible to extend the route by hiking to either Panorama Ridge or the Black Tusk peak.

Both these hikes are long day hikes and are often done as backpacking trips camping either at Garibaldi Lake or Taylor Meadows. The park is located close enough to Vancouver allowing for long day hikes from Vancouver, granted you get an early start.

The trailhead leading to Garibaldi Lake, Black Tusk and Panorama Ridge is in the Rubblehead parking area, located 35 km from Whistler and 70 km from Vancouver. The park can be reached from Vancouver by public transport with the Parkbus. 

The Stawamus Chief

The Stawamus Chief hike outside the village Squamish near Vancouver is named after the massive granite rock ‘The Chief’ you climb during this amazing hike. This huge rock is very famous for rock climbing.

The Chief has three peaks that you can summit during this hike. It is a challenging hike with a total elevation gain of more than 900 meters. The three peaks are separate, so you go down after climbing one peak before you start to go up the next.

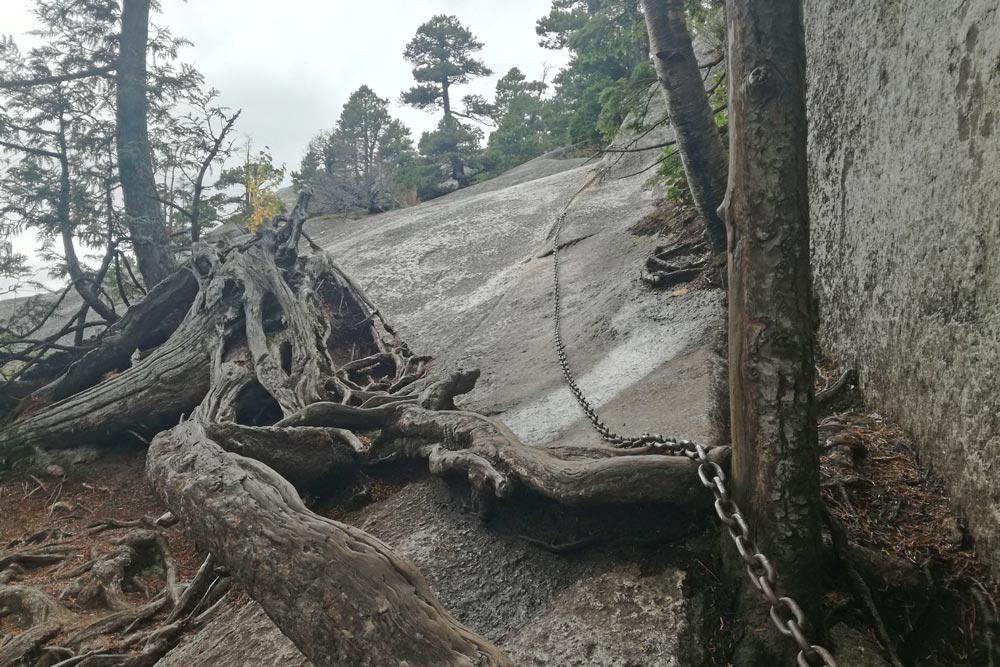
The total distance of the hike to all three peaks is about 8 km and takes most people 4 or 5 hours to complete. Getting to the top of each peak is challenging and hikers make use of chains and ladders to scramble to the top of the granite rock in some sections.

The views of Howe Sound and Garibaldi Provincial Park are incredible from the top of the peaks of the Chief. The hike follows the same path up and down. It is possible to only climb the first peak or only peak one and two, which will take a lot less time.

The granite rock gets very slippery when it is wet and it can be dangerous, so this hike is better to do in summer in dry weather. The Chief is right next to Highway 99: only about 55 km from Vancouver and less than 5 km south of Squamish. There are daily buses from Vancouver to Squamish, making it easy to get to from Vancouver.

The Juan de Fuca Trail, Vancouver Island 

The Juan de Fuca marine trail is a beautiful coastal hiking trail over beaches and forest along the coast of Juan de Fuca provincial park on Vancouver Island.

This challenging hike on Vancouver Island is a backpacking trail and you have to carry all the food, gear, and supplies you need for the duration of the hike.

The total distance of the Juan de Fuca hiking trail is 49 km through dense forest with plenty of hills to conquer. The hiking route starts from China Beach, close to the town Sooke in the south, to Botanical Beach located close to Port Renfrew in the north.

The trail takes an average of 4 days to complete. There are campsites to stay along the way, and no pre-booking is necessary, you can leave the camp fee in a deposit box on site.

Plenty of marine animals can be seen when hiking on the beach; keep in mind to always keep an eye out for bears on the route and feel free to explore the intertidal pools. Bear Beach has beautiful pools filled with barnacles, mussels, anemones, and other interesting animals.

There are several trailheads on the Juan de Fuca trail with car parking making it easy to do day hikes or to hike only a part of the trail. Parkinson Creek, Sombrio Beach, and China Beach are all quick to reach from trailheads, each with car parking.

Doing Vancouver island day hikes along the trail and spending some time on these beaches is great. Sombrio is a very nice beach to come for the weekend. The beach has a beautiful hidden waterfall in the forest and is one of the most popular beaches for surfing on Vancouver Island.

Transport to the Juan de Fuca Trail can be arranged with the West Coast Trail Express from Victoria. To get to Victoria from Downtown Vancouver takes about 3 hours by car and ferry. The ferry trip is beautiful, passing islands (and seeing marine life with a bit of luck!)

To get to Victoria by public transport use the SkyTrain’s Canada Line and bus service to get to the Tsawwassen Ferry Terminal, take a ferry to the Swartz Bay terminal on Vancouver Island, and take bus #70 to downtown Victoria.

The West Coast Trail, Vancouver Island 

Famous for being one of the toughest and most beautiful multi-day wilderness hikes in the world, the West Coast Trail hiking route on the west coast of Vancouver Island is an experience pursued by numerous adventurers every year.

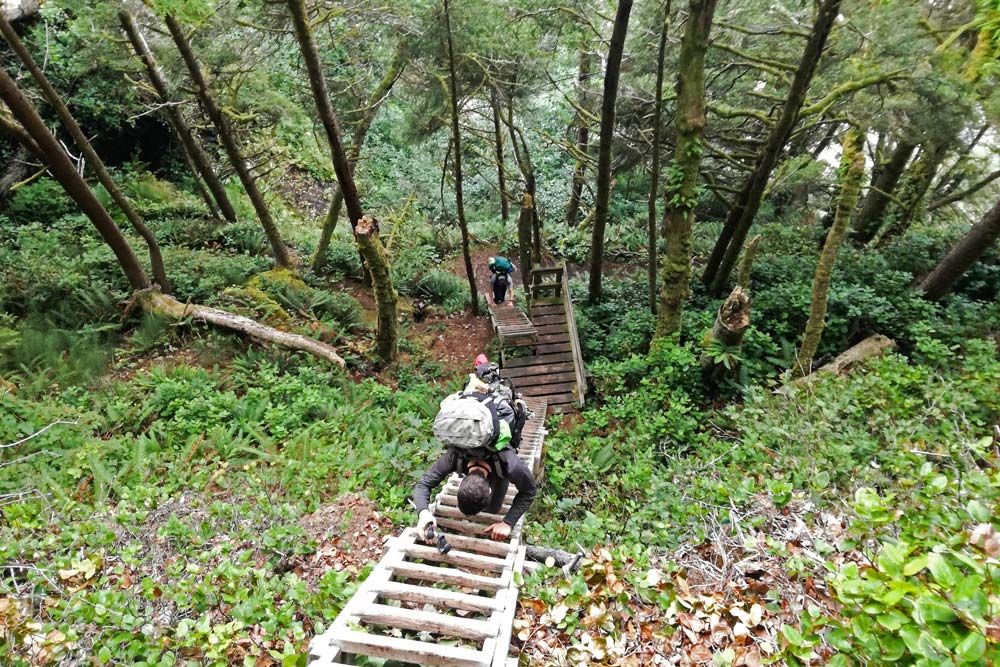
The fauna and flora on this trail is unreal. This 75 km multi-day hike challenges hikers with tough terrain; hours of walking on the sand, pools of mud, and about 70 ladders to climb — with all your gear to boot. It is a 5 to 7 day hike, which requires carrying your tent, supplies, food, and gear for the whole route.

A key difference between this and the Juan de Fuca hike is that you have to complete the entire trail. There are not other trailheads to start or exit on the way.

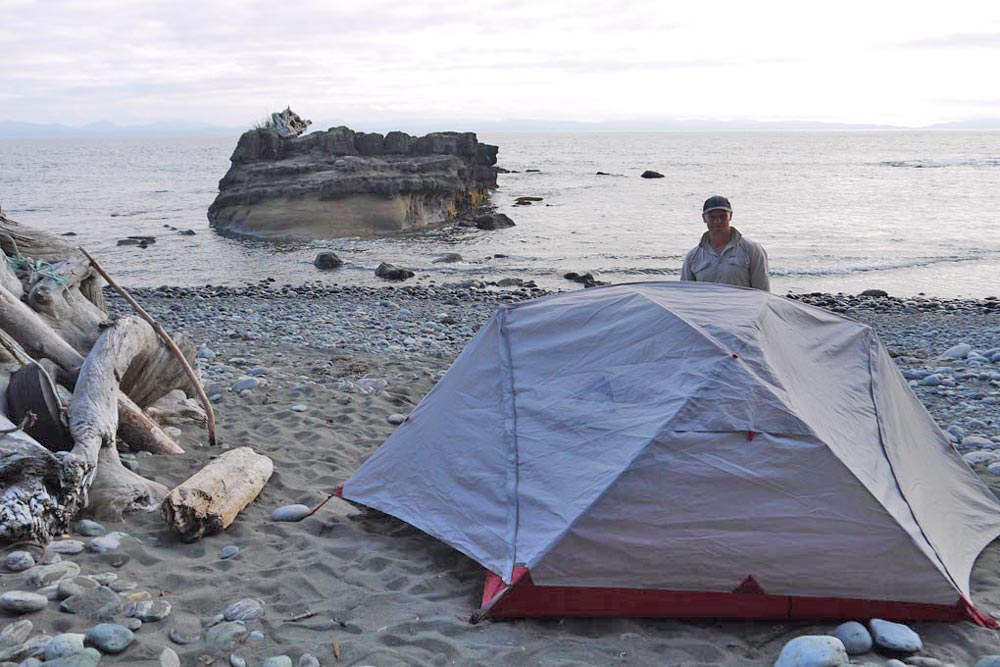
Part of what makes this trail so special is that the majority of the hike is on miles of extensive, white sandy beaches, and you can pitch your tent on the beach every night!

When not hiking on the sand, the trail goes through spectacular indigenous forest; however, this is where it can get very muddy and tough when it rains.

The wildlife you can see on the West Coast trail is incredible, from terrestrial animals like deer, bears, and wolves in the forest to marine animals like orcas, whales, and dolphins while hiking on the beach.

Only 30 people are allowed to start hiking the West Coast trail per day, so booking this trail early is important. Transport to the West Coast Trail can be arranged from Victoria with the West Coast Trail Express.

The Trans Canada Trail

Also known as The Great Trail, the 24,000 kilometers (15,000 miles) route is the longest recreational trail in the world and stretches over the massive country of Canada connecting the Pacific, Atlantic, and Arctic Oceans.

The complete trail has only been hiked by a few people, taking more than two years of committed full-day daily hiking to complete. The trail is made up of about 400 different sections, and it is said most Canadians live so close to the trail that they can get there within about 30 minutes.

The West Vancouver part of the Trans Canada Trail starts in Horseshoe Bay, along the Seaview Walk, and then splits into an upper and lower trail.

The upper trail across the Upper Forested Lands is good for hiking. Where the Great Trail passes through Vancouver’s Burnaby Mountain Conservation, it connects many different walking routes in the area. In Vancouver, more than 42 km of trails are part of the Great Trail and 24 km of these trails are next to the ocean, either on shoreline pathways or on the seawall. 
About the Author

Campbell from South Africa and Alya from Russia have been traveling the world together searching for the best hikes and dives on the planet since the day they met in the Philippines in 2014. A lot has happened on the way, starting their successful travel blog Stingy Nomads, getting married, and they are still traveling!

Pin this Post on Hiking in & Around Vancouver!

The 10 Most Breathtaking Hikes in Germany

Blessed with some truly magnificent natural beauty, there are over 200,000 kilometers of well-maintained hiking trails in Germany.

Literally a paradise for outdoor enthusiasts, nature-buffs, and health freaks, it’s so easy to get off the beaten path and explore the rural landscapes on your own.

Whether it’s Sächsische Schweiz, Allgäu Alps, or the picturesque Baltic Coast, there is something for everyone in Germany!

From glistening mountain lakes to the enchanted Black Forest and its cool treetop walkway, Baumwipfelpfad Schwarzwald, to the otherworldly peaks reaching for the sky to the jaw-dropping views of the glaciers, here are some of the best hiking trails in Germany.

Grab your trekking shoes, a bottle of water and some grain bars, jump in your rental car, and head out to some of these truly inspiring hiking destinations.

The Best Hikes in Germany

Rheinsteig Trail

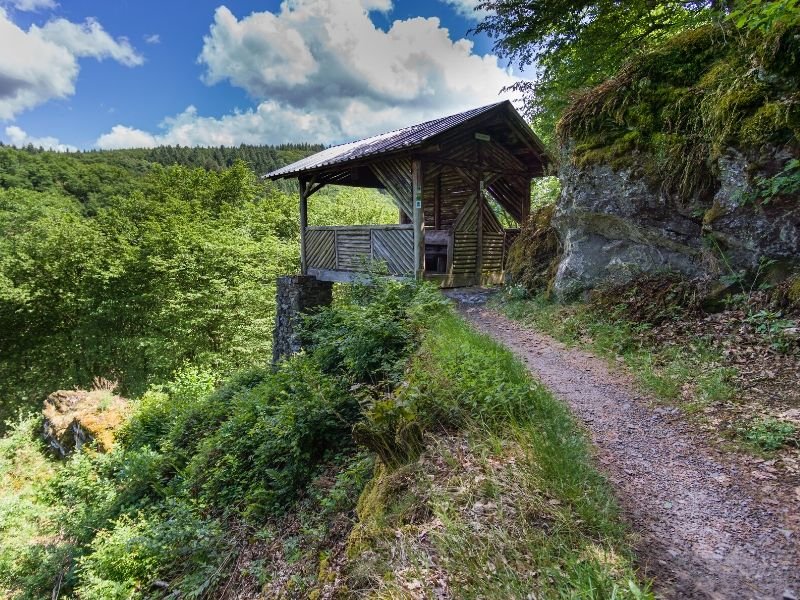
This 320-km long hike along the bank of the Rhine River allows to test yourself and enjoy difficult gradients and spectacular views of countless castles in Germany, stately homes, cliffs, and vineyards.

The trail is well-marked with plentiful signs along the way that make it easy to follow the paths without using navigation devices. As Germany’s oldest hiking trail, which runs from Wiesbaden to Bonn, Rheinsteig is definitely worth taking.

If you plan on hiking along Rheinsteig Trail, consider starting at Wiesbaden-Biebrich train station, and then follow the path leading to the trail itself through the castle grounds. While going the full distance can be somewhat strenuous, most hikers opt for taking a particular section or two.

Depending on your route you will be able to see Kloster Eberbach, Schloss Johannisberg, Lahneck Castle, and Eibingen Abbey. The trail is open year-round and you’ll need decent walking shoes and supplies to last the length of your hike.

Eifelsteig Trail

The Eifelsteig is the long-distance hiking trail that takes you through the unspoiled scenery of the Eifel. The trail connects the historic cities of  Aachen in North Rhine-Westphalia and Trier in Rhineland Palatinate.

While hiking this route, outdoor enthusiasts will appreciate the changing landscape of rolling fields, rivers, moorland, and volcanic crater lakes. The total length of the route is about 313 kilometers (194 miles) and is divided into 15 daily sections, each between 14 and 28 kilometers.

For hikers looking for specific types of accommodation, there are hotels, bed and breakfast, campsites, youth hostels, and holiday flats along the route. You may also take advantage of additional services, ranging from advice about hiking, packed lunches, to baggage transfer to your next place of stay.

If you’re looking for some in-depth exploration, you may want to go on day hikes or multiple day hikes in combination with the Eifelsteig. The trail is quite challenging but the old pilgrimage sites and abbeys, along with hilltop-perched medieval castles of Manderscheid make this hike  unforgettable.

Painter’s Way Trail

The Malerweg trail (Painter’s Way in German) is a part of the Elbe Sandstone Mountains, the mountain range located in Saxony (southeastern Germany) and North Bohemia (Czech Republic).

This impressive 112 km (69.5 miles) trail is also known as Saxon Switzerland and Bohemian Switzerland in both Germany and the Czech Republic respectively.

The trail got its name from many romantic artists and poets who loved to spend their time here, roaming around in the search for inspiration. The area became particularly popular as a prime hiking destination in the late 18th century thanks to the painters from Dresden Academy of Fine Arts, Anton Graff and Adrian Zingg.

The hike is broken into 8 daily walks of about 17 km (10.5 miles) each. This allows you can take a day hike or go on an aspiring week-long journey across table-top mountains and narrow gorges. Different stages offer various levels of difficulty, but generally, the Malerweg trail suits all levels of fitness.

The Bastei Bridge is definitely the most popular section is the second stage. Built-in 1824, the scenic bridge wonderfully crosses the rock and overlooks the Elbe River.

If you want to get to Saxon Switzerland from Germany, the nearest city is Dresden.

Alternatively, you can travel from Berlin (in winter or summer, it’s always beautiful). The entire trip takes around 3 hours by car.

If you’re coming from the Czech side it will take about 2 hours from Prague, the Czech capital.

The national park is extremely well-connected to other Western European countries and cities by buses, trains, or planes.

If you’re traveling from Dresden’s Hauptbahnhof (main central station), arrive at Pirna/Liebethal or Stadt Wehlen to start on the second stage.

Ahrsteig Trail

Crossing the Ahr Valley, also known as Germany’s “Red Wine Dorado,” the Ahrsteig Trail takes you to a number of peaceful meadows, narrow rocky paths, isolated high plateaus, and lively wine villages. take your time to soak up the panoramic views of the Ahr Valley, with sights that stretch as far as Cologne.

The 84-km trail follows the Ahr river, and you can hike the entire length of this trail by spotting the Ahrsteig trail logo on the tree trunks along the route and rest on the trail’s comfortable seats along the way.

Hikers should know that there are two ways to walk the Ahrsteig trail. First, you can take the red route, which begins at the source of the Ahr in Blankenheim, and finishes just before Altenahr.

The second way is to take the blue A route that follows the river to the wine-producing area of Walporzheim and onwards to the spa town of Bad Neuenahr and on to Sinzig. Both routes are interconnected, so you can choose the one that best suits your needs.

Before undertaking a multi-stage hike it pays to be in reasonable shape. Particularly, you need to be at a reasonable level of fitness to cover the first 11 kilometers from Blankenheim in the Eifel mountains to Freilinger Lake, a popular nature reserve and recreation area.

Hochuferweg from Sassnitz to Lohme

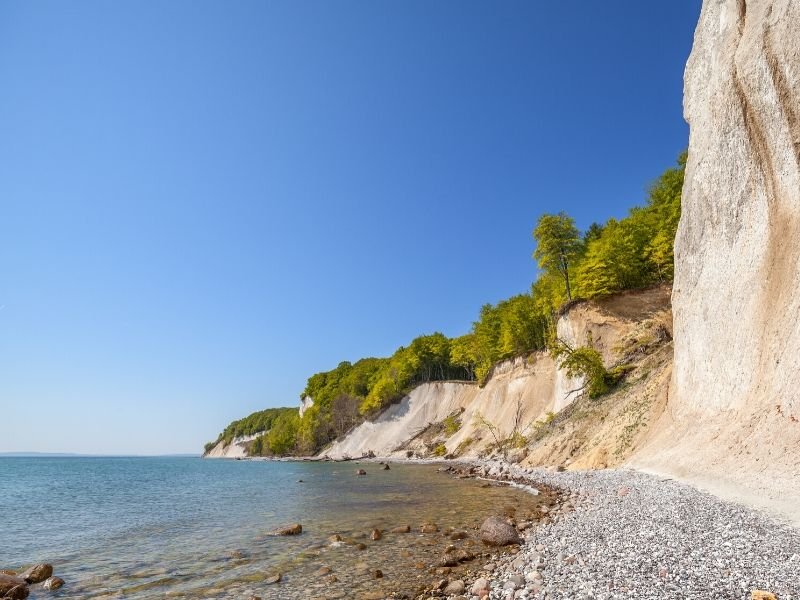
The third most beautiful hiking trail in Germany in 2012 according to Wandermagazin (a German hiking magazine), the raised coastal path from Sassnitz to Lohme combines the raw charm of the chalk cliffs with unparalleled views of the Baltic Sea.
Situated on Germany’s largest island by area, Jasmund National Park is an amazing place for anyone willing to enjoy the combination of forests, meadows, marshes, and Rügen’s chalk coast.

The 13.5-kilometer long trail takes you from the car park in Wedding/Sassnitz along the steep coast of the Baltic Sea. The path to the Königsstuhl (King’s Throne) passes the Wissower Klinken that once inspired the romantic artist Caspar David Friedrich to draw his famous “Chalk Cliffs on Rügen”.

From the lookout point, Ernst-Moritz-Arndt-Sicht, the raised coastal path takes hikers through the Ancient Beech Forests that are among the last untouched forests in Europe. These forests are on the UNESCO list as well.

Once the Königsstuhl has been reached, the picturesque chalk cliffs can be appreciated from the Victoria viewpoint. Then head on to the Königsstuhl National Park Centre (German: Nationalpark-Zentrum Königsstuhl) and learn everything about the development of Rügen’s chalk coastline and more than 1400 species that inhabit it.

Should the hike take longer than expected, you can hop on a bus from the National Park Centre back to Sassnitz or continue hiking along the path to Lohme. A bus also leaves to Sassnitz from there.

Lahnwanderweg Trail

The 290-km long trail takes you high above the Lahn River all the way from Netphen to Lahnstein. Lahnwanderweg trail covers a series of viewpoints with spectacular views of the Lahn valley and Westerwald forest.

While some prefer the enchanted landscape at the source and in the upper Lahn valley, others the larger expanse of the floodplain landscapes in the middle Lahn valley and the wild and romantic lower Lahn valley, where the river meanders deeply between towering rocks. At your own walking pace, there are many opportunities to let your mind wander.

The entire path is divided into 19 stages allowing hikers enough time to enjoy and discover the villages, towns, castles, and palaces. It is usually possible to create a magnificent walking experience.

A total of about 6,000 vertical meters and small side valleys contribute to the historical timber-framed buildings, to historical ruins, delightful scenery. If you want, you can even scramble through a few easy and well secured via ferrata passages.

To start this trail you may want to come to Koblenz and then a local train to Bad Ems or Diez.

Circular Path Around the Eibsee

Eibsee is a beautiful mountain lake in Bavaria not far from Dinkelsbühl Germany around 100 km southwest of Munich.

With crystal clear water that turns turquoise on nice summer days, the lake is close to the border with Austria and hikers can reach it either from Grainau or Garmisch-Partenkirchen by car or bus.

The 7-km long loop trail around Eibsee invites you to enjoy the fresh air and picturesque nature and it normally takes about 2 hours to complete at moderate speed — it’s just is perfect for everyone!

With few gentle hills around, it’s possible to hike off-the-beaten-path and walk along the lake. In case you want to skip the regular trail, you’ll need decent trekking shoes and hiking experience.

Alternatively, there is an opportunity to go swimming, rent a boat/SUP, and explore the lake’s small islands. The trail is open year-round.

To start your hiking adventure, you may go either counterclockwise or clockwise around the lake. If you start from the parking and don’t want to do the whole walk, consider going to the right and follow the path in the North direction.

On your way, you will pass the Hotel Eibsee and the actual path which leads around the lake will start. The bulk of the islands can be found on this side of the lake.

This is a great place to visit while you’re near the Black Forest Germany region.

Partnachklamm Gorge

After the snow melts, Garmisch-Partenkirchen, Germany’s tourist ski town, turns into a hiker’s paradise.

Located some 100 kilometers south of Munich in Reintal Valley, Garmisch-Partenkirchen is only a stone’s throw away  from Zugspitze, Germany’s tallest mountain. All these things make Partnachklamm trail a truly unique place and will impress even the most seasoned hikers.

The Eckbauer, a 1238-meter-high peak at the southern edge of Partenkirchen, is a good starting point for a hike. It is the smallest of the Wetterstein mountain chain, as the area’s predominant section of the Bavarian Alps is known, and lined with easy and moderate trails.

Beyond Forsthaus Graseck hotel begins a dramatic gorge, the Partnachklamm, formed by a mountain stream with a number of paths running through tunnels in the rock drilled alongside. A journey through the tunnel makes you feel like a kid again. At the end of the Partnachklamm, for those who don’t feel like walking, there are horse and buggies back to the chairlift, or Eckbauerbahn.

WesterwaldSteig Trail

Heading through low mountain ranges, a 239-km long WesterwaldSteig trail offers mind-boggling views as it extends across Rhineland-Palatinate, Hesse and North Rhine-Westphalia. The trail is designed for folks looking for picturesque rock landscapes, idyllic lakes, and pretty half-timbered villages.

To start your adventure, head to Hesse Herborn in the Dill Valley. From here, the path leads you to the Fuchskaute, the highest point in the Westerwald. If you’re really want to get some spa treatment consider visiting the town of Bad Marienberg on the way.

As you explore the area around you definitely should wander through the deep Holzbachschlucht Gorge and learn more about the time when the volcanic rock basalt was mined here. A number of monasteries are also located along your way to the Rhine. Pay them a visit if you’re interested in history.

Pretty much any section of WesterwaldSteig can easily be reached by train.  Of course, you can opt for doing one or a few of the sections if you don’t want to hike the entire trail. In this case, find a village that has train connections and start your hike from there. In general, the region is well connected by bus and train.

At the end of each of 16 stages, there are usually some hotels. However, it’s always wise to plan and book where you want to sleep in advance as there is not always a large choice.

About the Author

Ivan Tannenberg is an independent traveler, history junkie, and a techno-geek. Having traveling the world out of a backpack for a year-and-a-half non-stop he is now based in Vietnam aiming to explore new incredible destinations and cities. Go and check his travel blog for more of his journeys around the world. Follow him on Facebook, Instagram and Pinterest.

Pin This Germany Hikes Post for Later Inspiration!

8 Incredible Hikes in (and Near) Austin, Texas

Many people visit Austin for the food and music scene.

After all, the city is home to Franklin’s Barbeque, South by Southwest (SXSW), and putting a positive spin on being “weird”.

Nightlife is one of Austin’s biggest draws for visitors. The nightlife scene in Austin includes a thriving gay scene and is one of the most LGBTQ-friendly cities in Texas!

One thing people may not take into account though when thinking about Austin is just how many outdoor activities there are to do, especially hiking trails.

In fact, going for a hike is one of the things you must do in Texas! Austin is located along the Colorado River and sits at the tip of Texas Hill Country.

Since the city sits at four major ecological intersections, it gives adventurers a different experience for each hike they take.

Here are some of the best easy day hikes near Austin!

Best Hikes Near Austin

Mount Bonnell

The perfect hike to get us started on the list of awesome Austin hiking destinations is Mount Bonnell. At 775 feet, it is the highest spot in the city.

Don’t let this height intimidate you though, because the hike is relatively easy — only a third of a mile long. The workout for this one comes from the 200-foot elevation gain! 

Given that it looks down on the city, this is a perfect view for sunset, though you won’t be alone to enjoy it. If you are an early bird, the sunrise is far less crowded.

Ann and Roy Butler Hike-and-Bike Trail at Lady Bird Lake

The fourteen and a half-mile trail is perfect for someone looking for unique scenery along their trail run or long, leisurely walk.

Instead of running through just nature, this trail runs through downtown, neighborhoods, and cultural attractions such as Congress Bridge: yes, that famous bridge where you can see bats fly out at sunset!

Another unique feature is the boardwalk, created in 2008 to bridge the gap between several of the trails and make it easier for hikers and runners to enjoy.

St. Edwards Park

This one is one of the lesser-known hikes near Austin, but it definitely worth your time, especially if you are a sucker for waterfalls and nature.

Of the three Austin hikes we have covered so far, this one is the most difficult. Part of the reason for this is that the trail is a bit rocky and hilly.

You have the option of taking the three and a half mile hike or connecting to either the Forest Ridge or Bull Creek trail for a longer route. Choosing one of the longer routes means exciting views that don’t require quite as steep hike as Mount Bonnell!

Interestingly enough, the north side of the park is a part of the city of Austin, while the south side is owned by Balcones Canyonland Preserve system. When going into the Preserve area, it is important to note that dogs must be on their leash.

Shoal Creek Trail

This three and three quarter mile trail consists of many different types of terrain, including concrete, dirt, and gravel. This is in part thanks to the fact that it is the oldest of the hiking trails in Austin, dating back to the 1960s.

Like the Ann and Roy Butler trail, this one is also in the heart of downtown Austin; unlike the previous trail, Shoal Creek is typically less crowded.

This might be in part because instead of giving you city scenery, you feel like you are out in the woods. There is a great deal of shade here, so this one is a good option for warmer sunny days (and are a lot of those in Austin!).

This peaceful Austin hike winds along with a creek, taking you through two parks and even through a canyon towards the northern end of the hike, giving a peaceful backdrop to guide your workout. Despite not having city views, this is one of the Austin hiking trails you don’t want to miss!

Barton Creek Greenbelt

This Austin hike is for everyone! Located in South Austin, there are twelve miles of trails to check out.

If, like me, you are an outdoor enthusiast, there are many other ways you can expand your time along this trek. Other activities you can participate in include hiking, biking, rock-climbing, bouldering, swimming, or even just resting in a hammock.

To get started, the best place to park is Zilker Park. While you have to pay for parking and it does get busy, it starts you off on your first mile and a quarter with fairly flat terrain.

For some of the route, you need to be considerate because it does go through residential neighborhoods. One of the more popular stops includes Gus Fern where, after a good rain, people go for a good, free swim in deeper waters.

The Loop 360 access point is one of the most popular ones throughout the loop because mountain bikers and rock climbers come for the more interesting terrain and the climbing wall Seismic. Something to keep in mind though is it can get rather noisy from the highway located nearby, so it’s not the most relaxing part of the trail.

If you’re looking for an extra challenge on your Austin hike, be sure to check out the Hill of Life! It is a three hundred-foot vertical uphill with some spectacular views and takes about thirty minutes to go up, if you’re going at a decent pace.

McKinney Falls State Park

McKinney Park is one of my favorite places. This state park is located 14 miles from downtown, so it’s a perfect hike near Austin if you are looking for a short drive to get away from the city scenery.

There are six different hiking trails along the state park and they range from half a mile to a little over three miles. You can access information about each hike here.

I do want to note, though, that there are some pretty interesting things to see here, including the remains of Thomas McKinney’s horse trainer’s cabin and a picnic table that was donated by the Smith family, who gave the land to the state to build the state park that it is today. They also have done guided events in the past, though I am not sure if they are currently (especially due to present health concerns!).

Unlike previous Austin hikes I’ve listed, which are all free, this one cost $6 to get into if you’re over thirteen. If you are bringing kids along that aren’t yet teenagers, it is free for them. I recommend going in the spring to this trail because the wildflowers are in abundance along the trails, not to mention the cooler weather!

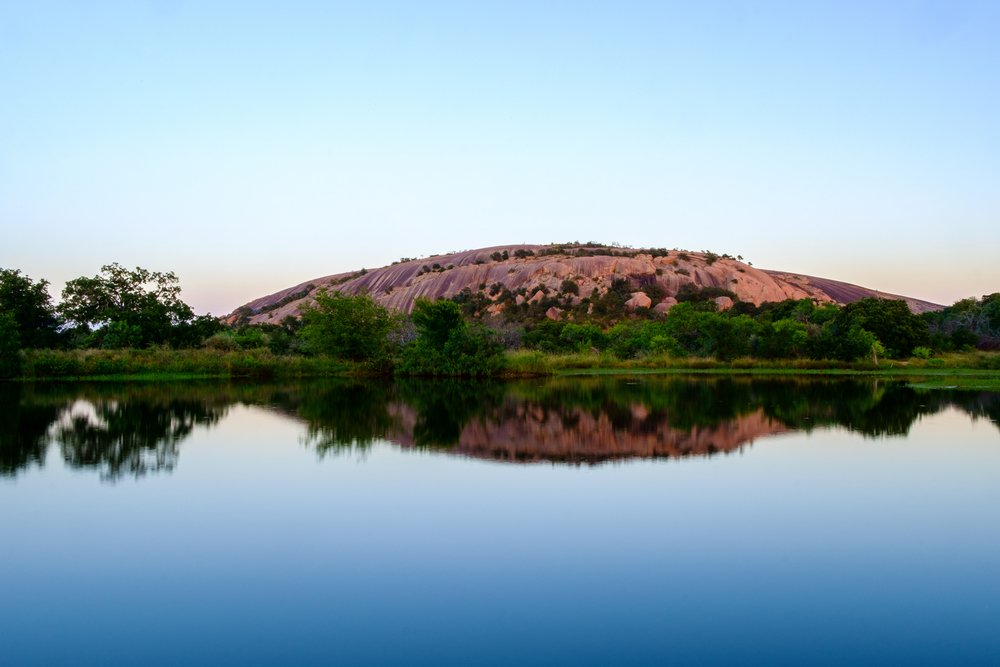
Enchanted Rock State Natural Area

This hiking trail is located the furthest away from Austin, in the town of Fredricksburg, which is about an hour and a half east.

This is also the only one that I would recommend taking advantage of their camping option.

The reason for this is that the natural area is on the list for International Dark Sky Places, meaning there is no light from other areas obscuring your view of the night sky and it is breath-taking, to say the least. They even have ranger-led star parties!

If you’re a stargazing enthusiast, this should definitely be on your Texas bucket list.

There are eight trails to choose from, which range from just over one-tenth of a mile to four miles, with the latter giving you amazing views. The summit of the large rock is 1,823 feet high, and it will definitely get your heart pumping due to the steep incline!

When heading down, you truly get the best view by taking the west side, where the Enchanted Rock meets the Little Rock.

Naturally, in the summer, many people come earlier in the day to shelter themselves from the heat and sun’s rays, since this trail doesn’t offer much shade. I personally think this trail near Austin would be best in fall or spring!

Hamilton Pool Preserve

This one was saved for last on purpose! It is very well-known and with good reason.

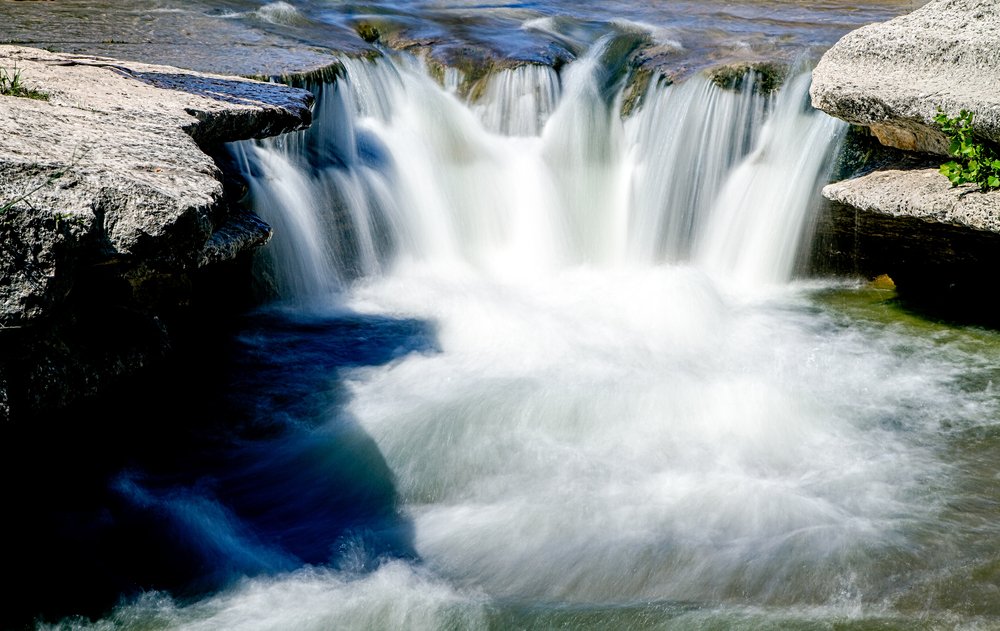
The location, located thirty minutes outside of Austin, is best known for its beautiful 50-foot waterfall and natural pool area, which is actually a collapsed grotto! Unlike with many of the other trails, this grotto’s water stays consistent all year round.

The trail is not a long one to reach the pools — only about half a mile — but it can be rocky and steep at times so come prepared. Wear proper shoes and not flip flop type sandals.

If you’re looking for more than just spending several hours at a pool, be sure to check out the trail that will take you to the Pedernales River. While you’re hiking, you can search for several birds that are hard to spot in other parts of the state, including the Golden Cheek Warblers and Cliff Swallows.

The cost to get into Hamilton Pools is twofold. First, you have to pay $12 online per car (each car can hold up to eight people). Then you have to pay $8 per person between 13 and 62, $3 for seniors, and it’s free for children under 13.

It is also recommended you book several months in advance, especially in the summer! Part of the reason for this is that you are given a time slot: either 9 AM to 12:30 PM or 2 PM to 5:30 PM. Within that time slot, only 25 people can come in. This is nice because the pool doesn’t get overcrowded (especially important these days!).

Which Austin hike sounds best to you?

Given Austin’s proximity to so many different types of nature, this list of hikes in and near Austin could go on; however, this is a great start and a way to find beauty in the everyday while you spend time in, and around, the Austin area.

Be sure to let us know how you enjoyed the hike and give some tips to your fellow Austinite hikers!

10 Jaw-Dropping California Hikes You Can’t Miss

Growing up in California, it’s easy to take how beautiful the state is for granted. But the longer I’ve been living away from home (11 years now, more than a third of my life), the more I’ve come to appreciate just how beautiful and diverse the state is.

With a land mass just about the size of Spain, California is home to a stunning variety of landscapes: from arid deserts to lush pine forests. It’s grand on a scale that can’t be believed, home to both the tallest tree in the world (Hyperion in Sequoia National Park) and the tallest mountain in the contiguous United States (Mount Whitney in the Sierra Nevadas). It’s no surprise that California hikes are some of the most beautiful in the world as a result.

While I’d like to think I’m a California expert, sadly, it’s far from the case. More than a decade away from my home state has made California seem almost foreign and exotic when I go home. Though I know a lot about the Bay Area and Lake Tahoe, having grown up just outside San Francisco, so much of the state is still a mystery to me outside my one tiny area of awareness.

To help fill in the gaps, I got some travel bloggers to help me fill in my knowledge gaps of the top hikes in California that intrepid explorers simply can’t miss on their trip to the Golden State.

Southern California Hikes

Lost Palms Oasis, Joshua Tree National Park

By Michael of Time Travel Turtle

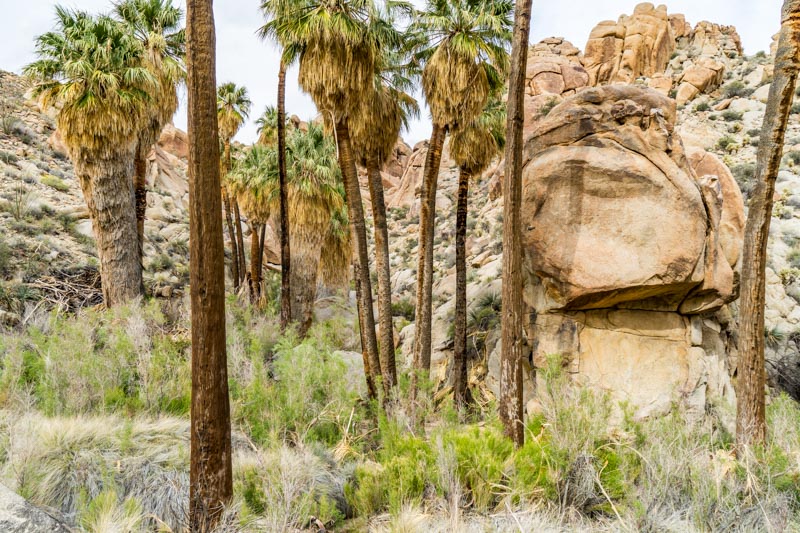
Most people, for obvious reasons, think of Joshua trees when they hear the name of Joshua Tree National Park. But in the south of the park, as the Mojave Desert turns into the Colorado Desert, the flora changes. In this part of the park, it’s all about the palms.

The best place to see the palms that grow in Joshua Tree National Park is at the Lost Palms Oasis. The hike to get there is a fantastic walk that is about 6 kilometers (3.5 miles) in each direction through some stunning desert landscapes with cacti, rock formations, and colorful flowers.

Even though it’s very dry here, palm trees are able to grow because of cracks in the ground that allow water to come up from subterranean reserves. It means you won’t see many of the palms until you get to the final destination – a large ravine where the tall trees are clumped together along the bed.

The hike begins from near the Cottonwood Spring Visitor Centre in the south of Joshua Tree National Park. There is a car park at the trailhead. It’s not one of the busiest hikes, which means the path isn’t too crowded. However, you will probably never be too far away from other hikers, which makes it nice and safe.

The return hike will probably take around 3 hours at a decent pace with a break at the oasis and is moderately difficult – there are some rough patches when you’ll need to scramble up and down rocky hills. It can be hot at any time of the year but especially in the summer. You should always carry sunscreen and lots of water. You may even want to reconsider hiking it on very hot summer days.


Willow Hole, Joshua Tree National Park

By Taryn of Happiest Outdoors

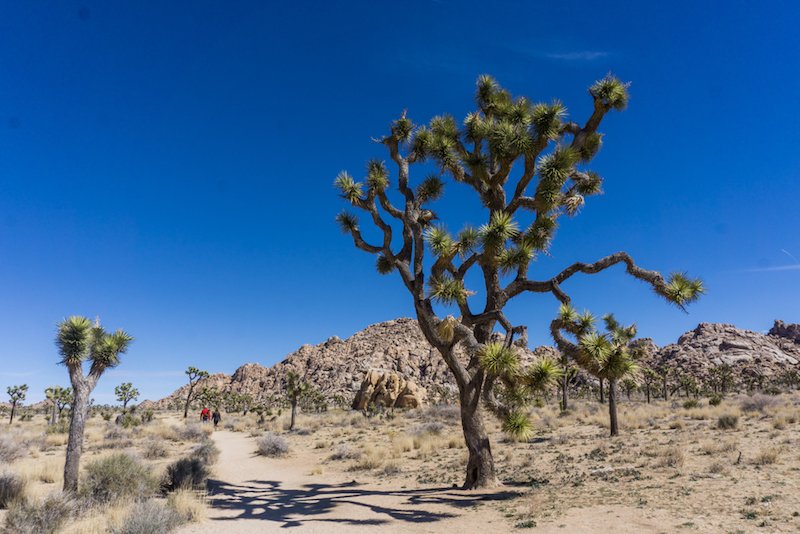
There are plenty of popular short hikes and nature trails in Joshua Tree National Park. But if you want to get off the beaten path, you have to hike to the Willow Hole. It’s an oasis in the middle of a remote part of the park. Most of Joshua Tree is open desert dotted with cactus, Joshua trees, and the odd rock outcropping.

But the Willow Hole is nestled in the middle of the Wonderland of Rocks, a huge labyrinth of strangely shaped rocks, boulders, and canyons. This watering hole attracts lots of wildlife so you might to be lucky enough to spot a coyote, jackrabbit or even the resident herd of bighorn sheep. I was thrilled to see a fox on my hike.

This moderate hike is about 7 miles round trip and will take most people 4-5 hours to complete. Be sure to bring plenty of water, a hat, and sunscreen as it can get really hot out there. Start your hike at the southern trailhead of the Boy Scout Trail on Park Boulevard. The beginning of the hike is on a sandy trail through Joshua trees and cacti. After a few miles, you’ll reach the Wonderland of Rocks and leave the desert.

For the rest of the hike, you wind through the rocks following dry streambeds called washes. There are a few signs to keep you on track, but pay attention to make sure you stay in the main wash as it can be easy to get off course. After a mile of meandering through the rock formations, you’ll arrive at the treed oasis of the Willow Hole. Take a break in the shade and stay quiet to see if you can spot some animals. When you’re ready, turn around and retrace your steps to the car.

Torrey Pines State Reserve, San Diego

best hikes in California

By Mimi of The Atlas Heart

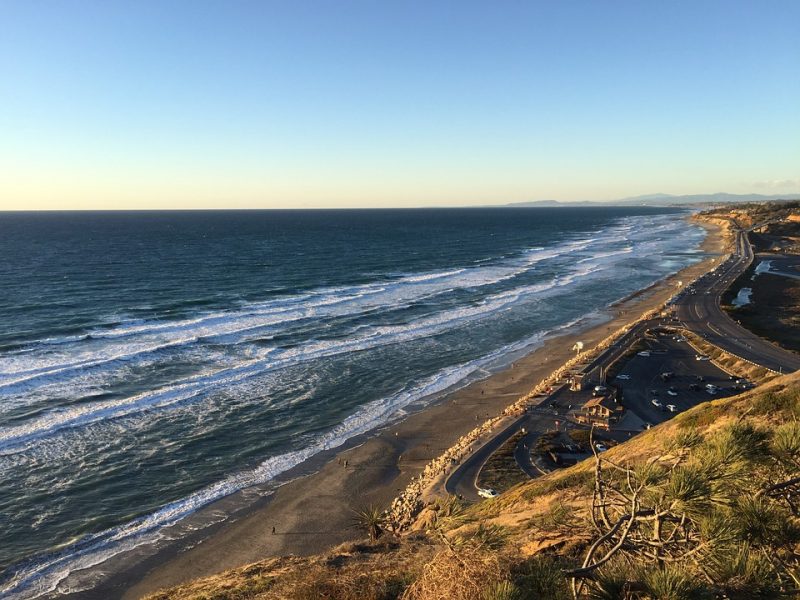
Torrey Pines State Natural Reserve is one of the many spots where you can enjoy beautiful coastal hikes in San Diego. The park is located in north county and offers two easy and relaxing hikes with plenty of coastal breezes, and a little shade from the nearby eucalyptus trees (although I’d still recommend bringing a hat, sunscreen, and water for the desert environment). 

One aspect I love about the Torrey Pines hike is that although you still have desert fauna around you while you’re hiking, it’s not as dusty and hot as other hikes around San Diego – probably because of the proximity to the ocean. 

The park offers two hikes – the Razor Point Trail and the Yucca Point Trail – and you could easily complete both in a day. Between the views of the golden-tinged cliffs and the turquoise color of the breaking waves, they both make you sigh and remember just how pretty San Diego is. 

The Razor Point Trail is 1.3 miles and the Yucca Point Trail is 1.25 miles, and neither one of them have more than a 200-foot change in elevation. They each take about one hour to complete. Both offer great views of the coast, but if you actually want to go down to the beach, the Yucca Point Trail is the one to do. 

Torrey Pines Reserve is located between La Jolla and Del Mar, north of downtown San Diego. If you’re driving, you can use I-5 to take the Carmel Valley Road exit.

Keep in mind that the fee for parking in the South Beach entrance can be anywhere from $10-$20, depending on if it’s a weekend or not (hint: go during the week when possible). Try and avoid the times of 10 AM – 1 PM when the reserve is most crowded. 

If you don’t want to pay for parking, it’s free to simply walk into the reserve. Take the 101 bus or park along the beach. Alternatively, the North Beach entrance only costs $3-$6 for parking. 

Potato Chip Rock, Mount Woodson

By Patrick of German Backpacker

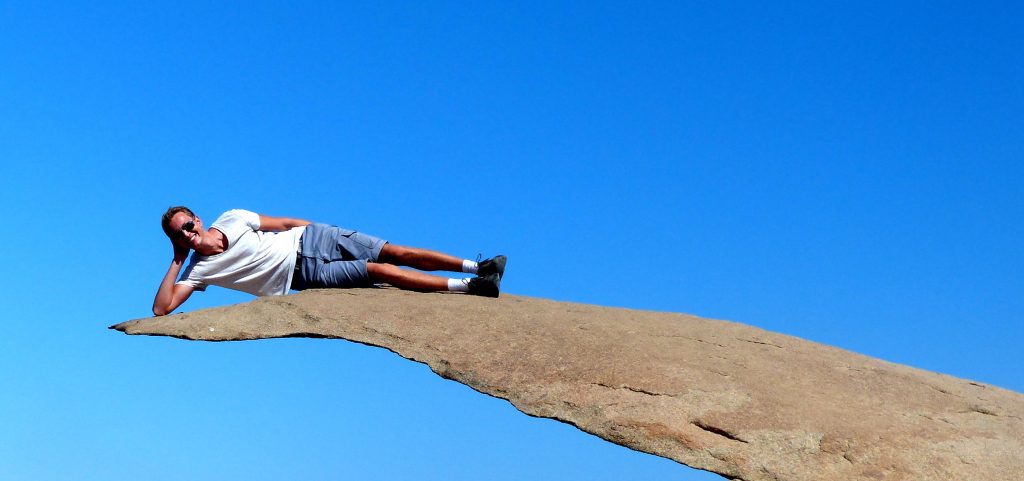
You might have seen the iconic picture of people standing on the thin “Potato Chip Rock“ somewhere on Instagram before. This fun picture opportunity is close to Poway at the Mt. Woodson summit, and therefore, it’s a nice day trip in southern California.

Make sure to start your day early, since the hike can get quite exhausting due to the heat and the elevation gain – there’s absolutely no shade on this trail. Another reason for an early start is to beat the queue to actually take a picture on the rock, which can get long especially on weekends. But it’s worth it!

The actual summit of the mountain isn’t very exciting and full of antennas blocking the view, so keep going a little bit further until you reach the famous rock. The whole trail takes about 4 miles one-way until you get there. Be careful when you actually climb on the rock – it’s not very high up in the air, but it’s still a little bit scary to climb over to the edge. I enjoyed the hike a lot and it’s a nice city escape for a day, just make sure to bring a lot of water and to get there as soon as possible in the morning.

Griffith Observatory, Los Angeles

By Sofie of Wonderful Wanderings

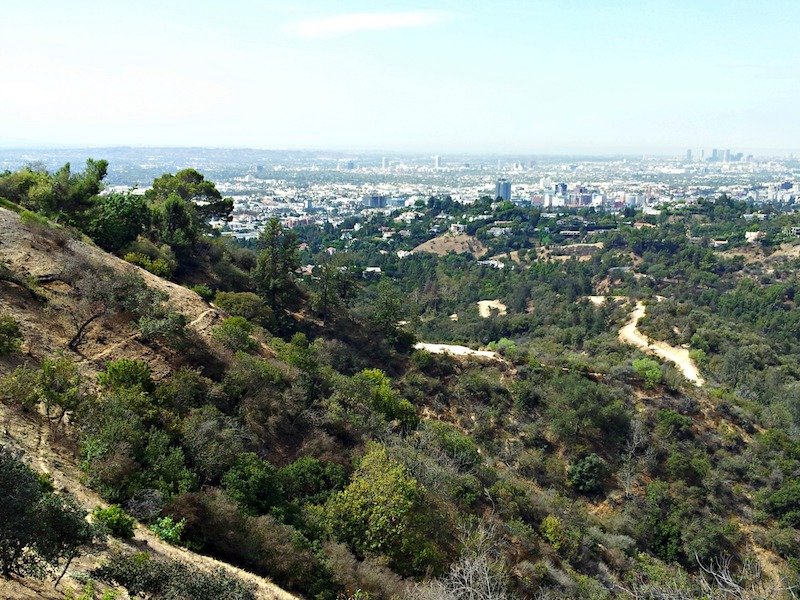
The Griffith Observatory in Los Angeles is a fun place to learn about our universe, but what makes it even better is the great views it offers and the fact that you can hike there! There are two trails at Griffith Park leading up to the observatory: the West Griffith Observatory Trail and the East Griffith Observatory Trail.

My friend and I drove up to the starting point of the West Trail and hiked the short 1 mile from there up to the observatory. Yes, the path goes uphill quite a bit, but it’s broad and flat so all-in-all it’s an easy hike.Just make sure to put on some sunscreen before you start if it’s a sunny day, because there’s no shade and it can get really hot over there.

The West Trail starts at the Greek Theatre, the East Trail at Ferndell Drive. There’s public parking by the start of both trails and if you want, you can take one trail up and the other one down, which results in a 2.1-mile hike. If you park by the start of the West Trail, make sure to use the free parking lot (watch out, it closes at sunset!) by the part of Ferndell Drive that has no street parking. If you go further up, there’s paid street parking. If you start your hike at the Greek Theatre, you can park there for free but only when there’s no event going on.

Mount Wilson, Pasadena

By Nancy of We Go With Kids

Located in Pasadena, California, Mount Wilson sits 5,710 feet above sea level and affords an amazing view of Downtown Los Angeles on a clear day. There are a number of trails you can take to the summit, but one of my favorites is to start at the Chantry Flat trailhead in Arcadia. Although the trailhead is quite popular and fills up quickly on the weekends, you will want to get an early start as the roundtrip journey of approximately 14 miles will take you a full 6-7 hours.

My favorite thing about the hike is the visually interesting things you see along the way. There’s a short one-mile detour to Sturtevant Falls, which I highly recommend, and numerous cabins and campgrounds along the way. And of course, when you reach the top, you’ll find Mount Wilson Observatory, where there is a handy water fountain that you can refill your bottles with. Although this is a hike that can be accomplished in one day, the availability of campgrounds makes this an easy introduction to backpacking, if you are so inclined.

The trail is popular among mountain bikers so it’s important to be on high alert. Although I personally love this hike, it is not one that I would recommend for new hikers or those that are not in physical shape. It is an arduous 6 miles to the top, a generous mile across the observatory grounds, and then another 6 or so miles back down. Instead of going back down the Chantry Flats trail, you can take the Observatory’s toll road to the Winter Creek trail which will lead you to about 1/2 mile from the Chantry Flats trailhead. My personal preference is always to avoid an out and back if possible, so I particularly like the availability of numerous options.

In general, the trail narrows at numerous points and is too steep to recommend for young children. Moreover, there is virtually no cell service (although there are pay phones at Mount Wilson Observatory), so you really are on your own once you embark.  If you don’t feel up to the complete hike, it is possible to drive up to the Observatory, so a one-way hike would be an option, if you are able to arrange transport ahead of time.

Northern California Hikes

Rodeo Beach, Marin Headlands

photo - Longest Bus Rides travel blog

By Jessica of Longest Bus Rides

Rodeo Beach lies in the Marin Headlands facing the vast Pacific Ocean. Arrive by car, bike, or bus just 20 minutes north of San Francisco. Take the first exit north after the Golden Gate Bridge. Both routes to the beach are really fun! The first route is flat and has a long 1-way tunnel through a hillside. Don’t go in if the stoplight is red!

The second route is hilly and phenomenal, especially at the golden hours just after sunrise and just before sunset. The whole world pulls off the road for photos of the Golden Gate Bridge from Hawk Hill. Be careful if you’re a photographer, as the area has become known for people getting their high-end cameras stolen at the sunrise hours.

The hiking is beautiful at all times of year, whether with a blue sky and turquoise waves crashing, or with the famous San Francisco fog rolling in. There’s a reason Instagram Meetups are held here! Your two hiking options both take you to cliff’s edges. The shorter, but less crowded option is accessed by first crossing the beach, then heading uphill.

Alternatively, head up the steep hill straight from the parking lot for a for a gorgeous view of the ocean and surfers below. Follow the cliffside trail high above the ocean. Or, keep inland and explore the old military bunkers used during World War II to triangulate the exact location of approaching enemy warships.

Hike for miles, stopping along the way for a picnic, if you like. Do an out-and-back hike, or a loop. Apart from the initial short steep uphill from the parking lot, the trail is flat. You can climb up steep hills to more bunkers for more views. This area is off leash dog friendly. Unlike other beaches, there aren’t many dogs, and all the owners are great about picking up after their dogs, so there’s no poop to step in.

Another hiking area in the Marin Headlands is Mt. Tamalpais, which has many trails, most of them with long steep sections.


Land’s End, San Francisco

By Jessica of Independent Travel Cats

Land’s End is a short coastal trail in San Francisco that offers great view fo the Golden Gate Bridge. Along the Land’s End hike you can see the ruins of Sutro baths, old shipwrecks, a war memorial, and small rocky beaches. I walked this trail a number of times when I lived in the SF Bay area and it was one of my favorite places to walk in the city.

Near the trailhead is a lookout point and a visitor center that you can visit before or after the hike. There is both parking available as well as a nearby bus stop near the trailhead.

The trail is less than 2 miles long and you can turn back whenever you wish. It is a relatively easy hike although there are steps and rough sections. The first section of the trail is ADA accessible. The trail is just a section of the California Coastal trail so you can keep going and make it into a much longer hike. You can keep going all the way to the Golden Gate Bridge but that is a much longer hike, about 4 miles. The Land’s End section of the trail also has small paths off of it at a few places where you can visit beaches, a war memorial, or even the Legion of Honor (a fine arts museum).

Popular places to visit nearby include Ocean Beach, the Camera Obscura, Golden Gate Park, Legion of Honor, the San Francisco Zoo, and Golden Gate Bridge.

Mount Whitney, Sierra Nevadas

By Jackie of Life of Doing

Hiking Mount Whitney is a once in a lifetime experience. It’s the highest mountain in California and the Sierra Nevadas at 14,505 feet/4,421 meters and over 7,100 feet/2,165 meters elevation gain. The strenuous day hike is 22 miles or 35 kilometers round trip and an out-and-back route. However, the hike is recommended over two days. Completion time varies based on altitude sickness, the number of breaks, weather, and training. Remember to stay hydrated, eat, and not overexert the body too hard.

Hikers will enjoy the various terrain along the route. Everyone starts at Whitney Portal which is a 15-minute drive from the main city, Lone Pine. Hikers go through waterfalls, forest areas, 99 switchbacks, potential snow, and jagged rocks. Along the Trail Crest, hikers may see the turquoise water from Guitar Lake in the distance. Reaching the summit is a huge milestone. Admire the surrounding mountainous views and take a photo with the Mount Whitney plaque.

Due to the trail’s popularity, all participants need to enter a lottery for a hiking date. Lottery occurs from February to mid-March, and hikers are notified of their date in April. Choosing a fall or winter date has a great chance of securing a date, albeit the weather will be unpredictable. Hikers must pick up their permit at the Visitor Center (at US-395 and CA-136) 1-2 days before the hike.

Visitors stay overnight in one of Lone Pine’s motels. The main street has a few restaurants, gas stations, a grocery store, and a Lone Pine Film History Museum. Camping is an option if hiking overnight. Reservations are required at the official Whitney Portal Campground. Reservations are not needed if camping along the trail at Outpost Camp (mile 4) or Trail Camp (mile 6). It’s an exhausting day, but we hope you enjoy this hike!

Half Dome, Yosemite National Park

By Jill of Jack and Jill Travel

Half Dome is the highlight of Yosemite National Park and hiking to the top of the formation should be on the bucket list of any hiker. There are various ways to do the hike, but the shortest one is still a 14-mile roundtrip hike with major elevation gain (4,800 feet from the Yosemite Valley trailhead). The last section of the hike involves pulling yourself up a steel cable on the flank of the granite dome. Wooden steps have been laid on to help with footing, but it’s still an upper body workout for sure.

Because of its popularity, a permit system has been implemented. You can get a permit to Half Dome by entering a lottery held in March, or rely on the 50 or so first-come-first-serve daily permits. You can only do the hike when the cables are up (early summer), and I recommend an early start to get the hardest part of the hike out of the way before the heat sets in.

Even though getting to the top of Half Dome is the goal of this hike, the getting there part is also part of the attraction. If you take Mist Trail, you’ll pass 2 of Yosemite’s famous waterfalls: Vernal Fall and Nevada Fall. There’s a reason this section of the hike is called Mist Trail. The trail takes you so close to these falls, there’s often a mist of water blowing in your face. So make sure you wear proper footwear and something quick-drying.

California is one of the most diverse and beautiful states in the US. These stunning California hikes are perfect for adventurers -- including Half Dome, Joshua Tree, and other gorgeous day hikes in California. Add these to your hiking bucket list!

Telica Volcano: Nicaragua’s Best Sunset Hike

Perhaps I should have been worried when they told me they had to cancel the Telica Volcano hike two days prior due to a “minor eruption.”

Or perhaps I should have hedged a bit when we set up our campsite just past this ominous sign.

View of a smoking volcanic crater with text that says "hazard zone by impact of volcanic rocks from this point"
Can’t see anything wrong with passing by this sign…

Perhaps I shouldn’t have been so excited about spending a night just a few minutes’ walk from Telica Volcano’s constantly-smoking crater on the Ring of Fire.

But then I wouldn’t have had done one of my favorite things I did in Nicaragua. And my goal was to say to anything that intrigued me.

… Even if it scared me. Even if it meant sleeping atop Telica Volcano – one of Nicaragua’s most active – for the night.

View of the smoking crater of Telica volcano with lots of gravel and greenery nearby

My Experience HIking Telica

I woke up in pain the day before my Telica volcano hike. My body (and ego) were both pretty bruised from volcano boarding down Léon’s other volcano, Cerro Negro, the day prior.

I had a headache all night, making it hard to sleep, squeezing out maybe just a few hours. Before I finally fell asleep, I was prepared to wake up early the next morning, call off the hike, and beg for a refund.

But as a surprise act of mercy from the travel guides, I woke up with a clear head and actual energy for a change, as if I had sleepwalked and drank a pot of coffee in the middle of the night. Trust me… this never happens.

So I grabbed my hiking gear and walked to the Quetzaltrekkers office, where a delicious and hearty breakfast of eggs, potatoes, veggies, and toast awaited. It was the closest thing to a proper Western breakfast that I’ve had since in Nicaragua, and I would need it.

We loaded up our backpacks with tents, 8 liters of water, and other camping gear, and that’s when I had my first “oh shit” moment.

I have a terrible back and shoulders, just part of life being a secret 80-year-old. I felt the pack dig painfully into my shoulders right away. As we wove an intricate and seemingly random series of turns through the streets of León towards the bus station, I rued each and every step.

After getting off the bus in San Jacinto 30 minutes later, we were greeted with the smell of sulfuric pits, where geothermal activity made mud gurgle in the sun, like water left to boil on the stove too long. We walked through the dried husks of abandoned corn fields, occasionally stepping over a low point of a barbed wire fence. I was glad I splurged on a guided tour — the trails were not clearly marked for tourists and could have potentially resulted in a lot of backtracking with a heavy pack in the hot sun.

After about 45 minutes of walking through the hot sun on flat terrain, straps digging firmly into my shoulders, my shoulders ached, my enthusiasm flagged, and I was wondering how the hell I was going to do this.

Luckily when I shared my concern with one of my guides, he saw that I wasn’t distributing the pack’s weight properly. He helped me jerry-rig a solution, tying the waist belt tighter to sit on my hips and creating a chest strap out of a spare T-shirt (the backpack I borrowed for the trek didn’t have one). As with everything I do, it was the pinnacle of fashion.

I felt like a whole new person — I had no idea how much having my hip belt fitted properly could make a difference (I’m still a hiking newb, y’all). I marched on with renewed enthusiasm until we reached the base of Telica Volcano.

telica volcano from afar

Luckily, Telica is not that tall – just over 1,000 meters (3,481 feet for my fellow metric-shunning Americans out there).

This meant we could do the major part of the ascent in just over an hour, though the climb was admittedly rather steep. Luckily, portions of the hike were quite well-shaded, and there are three designated resting places on the hike – one about 10 minutes in, one about 30 minutes in, and another basically at the top.

I blew past the first resting spot and didn’t want to break momentum; nearing the halfway point, I started to walk more slowly, focusing on my breathing. With the sun on my face, pack on my shoulders, and eyes fixed on the trail, I felt like I was truly meditating for the first time in my life: focused almost entirely on that present moment, the sensations in my body as I simultaneously pushed it and listened to it.

The last thirty minutes were a little harder, but I kept pushing through it, relishing the moments of shade and picking up my pace in the sunny patches.

We stopped at a local cooperative on the top of the volcano for lunch, and holy shit, gallo pinto had never tasted so good. It was a simple meal – rice and beans, scrambled eggs, tortillas, and hot sauce, but I greedily ate every bite of my enormous portion.

We set up our camps and afterward made our way to the crater, where I took some spooky shots, then walked over to the sunset viewpoint for the most epic sunset of my life.

Only in Nicaragua can you buy a beer for a buck fifty on top of a volcano

After the sunset, we tried to peek into the crater to see the magma below, but it wasn’t visible that night – the sulfur cloud was too thick. We had a delicious meal of pasta with vegetables and fire-roasted marshmallows for dessert.

Twilight slipped into the darkest night sky I’ve seen since the Sahara, and countless stars sparkled overhead. Without wifi or artificial light to distract me, exhausted by the climb, I slipped into sleep in my tent by 9 that night.

I awoke at 3 in the morning with the sudden remembrance that I was atop a highly active volcano in a highly seismically active region. Try going back to sleep after that thought.

I somehow managed – thank you, long hike and carb OD- and was awoken at 5 in the morning to make the short trek to the sunrise spot. Using our head torches, we walked and walked until we reached the spot. We waited and waited… and then this happened.

Imagine watching the sky turn from pitch black to yellow-blue, illuminating the peaks of five volcanos all lined up in a row like highly dangerous dominoes…. and then turning around to see this crater smoking peacefully a couple hundred meters away.

After some oatmeal and a small struggle with my tent, we packed up our bags, mercifully lighter after having eaten and drunk the majority of their contents, and set back off to civilization. Behind us, Telica Volcano continued to smoke and gurgle, active yet peaceful. For now.

Tips for Hiking Telica Volcano

Unless you’re a very inexperienced hiker, Telica Volcano shouldn’t present any particularly crazy challenge.

  • I was very grateful that I brought proper hiking boots (I love my Ahnus), though it definitely would have been possible to do the hike in running shoes if that’s all you have with you.
  • I highly recommend going with a tour guide, as the path is not very well-marked and our guide was taking on a strange path through corn fields and over fences. I would have struggled to find the right path, but I did meet other hikers who had done the hike independently up to the top, so it is possible. I went with Quetzaltrekkers and would recommend them to others happily.
  • If you go without a guide, be sure to talk with locals to make sure there hasn’t been any recent activity. The volcano is still very much active, but there are monitoring stations on the volcano so it is possible to get up-to-date information.
  • Ensure you have enough water for the hike – I’d recommend having 4 liters or so.
  • Be sure to pack in and out all your garbage and leave no trace

Durmitor National Park: The Gem of the Balkans

Months later, I still feel like I don’t have adequate words to describe Durmitor National Park.

Which is odd, because normally words come to my overcaffeinated fingers a bit too easily – see my exhausting list of 40 unique things to do in Montenegro if you have any doubts.

But Durmitor National Park, nestled high in the mountains in the northeast corner of Montenegro, defies even my verbosity.

The landscape of Durmitor National Park looks alternately like New Zealand, Scotland, Iceland, and the Alps.

Limestone crags cut by melting glaciers millions of years ago left an otherworldly landscape in this tiny corner of this tiny country, unbeknownst to much of the world.

Pristine glacial lakes are the few remnants of this prehistoric time: every other surface is covered with craggy rocks and lush grass.

It’s no wonder this is one of the most beautiful national parks in Europe.

Read more