The Only Packing List for 2 Weeks in Europe You Need

All I packed for 6 months in Europe - Find out how here!

I’m sold on the virtues of packing light for a European getaway, having had lots of practice.

I spent five years living and traveling around Europe, typically doing getaways for a week or two at a time.

I’ve also done a five-month Europe backpacking trip which spanned three distinct seasons — in just a carry-on!

I started off in Southern France, Spain, and Morocco in the summer, made my way through the Balkans in the fall, and ended in snowy Denmark.

And yes, I did that all in a carry-on backpack (I’ll recommend exactly which one below!) and I’ve since adapted that original Europe packing list for shorter trips.
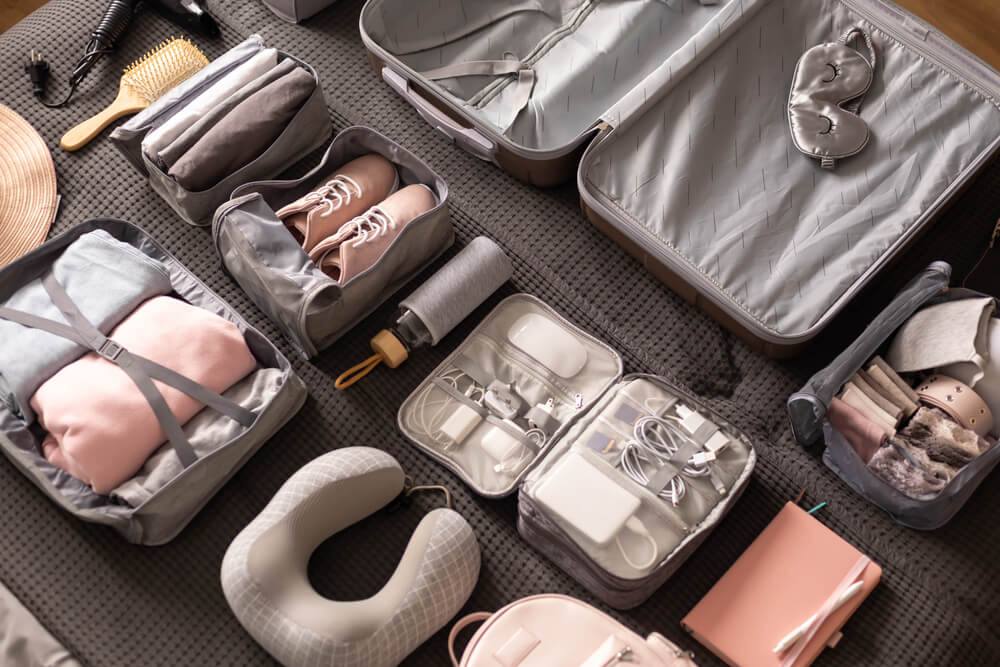
Organization of storage carrying necessary things in comfortable case with konmari method lying on bed. Empty open suitcase with neatly packing clothes, accessories, technique for travel trip vacation
As much as I wish I could say this is what my packing looks like… it does not.

So if you’re wondering what to pack for two weeks in Europe, I’ve got you covered — no matter the time of year.

While this packing list is designed for traveling for two weeks in Europe, it can also cover everything from a months-long backpacking adventure to a shorter jaunt through Europe.

This packing list for 2 weeks in Europe is your guide to packing light, no matter the season or even the trip length.

Just do laundry every one or two weeks, as you would at home, and you’re golden!

Kiruna Church Sweden - the jumping off place to see the Northern lights
This 2 weeks in Europe packing list works for all seasons — even winter in the Arctic!

I’ve created two separate clothing packing lists for Europe, one for spring/summer/fall and the other for winter.

Spring and fall aren’t too harsh in Europe, so you can mostly bring the same things as you’d bring for summer, just with a few more layers.

Winter in Europe, however, can be downright brutal, so I’m coming at you with some tips that helped me out even when I was north of the Arctic Circle (and nope, I’m not joking!).

That said, if that’s what you’re planning, you may find my winter in Norway or Lapland packing lists more helpful.

Allison posing at the top of Fjellheisen in Tromso
My typical Norway winter outfit — which fits in a carry-on, minus the coat!

Don’t worry even if you’re packing for Europe the first time – this list is comprehensive.

Not only is it comprehensive, it’s travel-tested and regularly updated so that it only has products I have actually used (and still use).

This list is an evolving effort from the last last seven years of traveling the world and running this blog — not just ones I’ve heard about or taken from other packing lists.

Packing List for 2 Weeks in Europe

Backpack and Related Gear
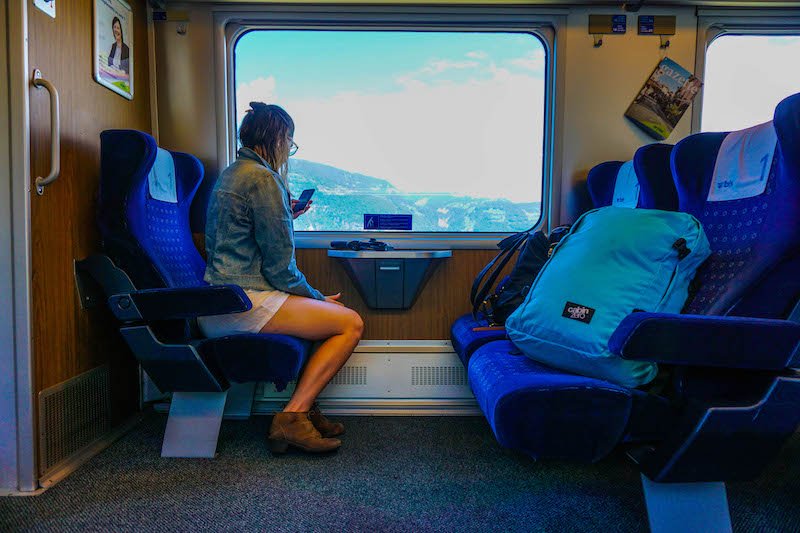
allison on a train with her backpack
I started off with a CabinZero backpack and a PacSafe, but quickly replaced the CabinZero bag with a Tortuga — more on that below!

When I total it up, I’ve spent at least two years of my life backpacking across Europe, which is kind of insane to think about.

As a result, these products have been tested time and time again, and I’ve eliminated anything that I’ve given up on the road (which is a lot).

For the record, I’ve paid for every single item on this list out of pocket – not one thing on this packing list here is sponsored (and even if it were, you could expect my honest opinions, anyway).
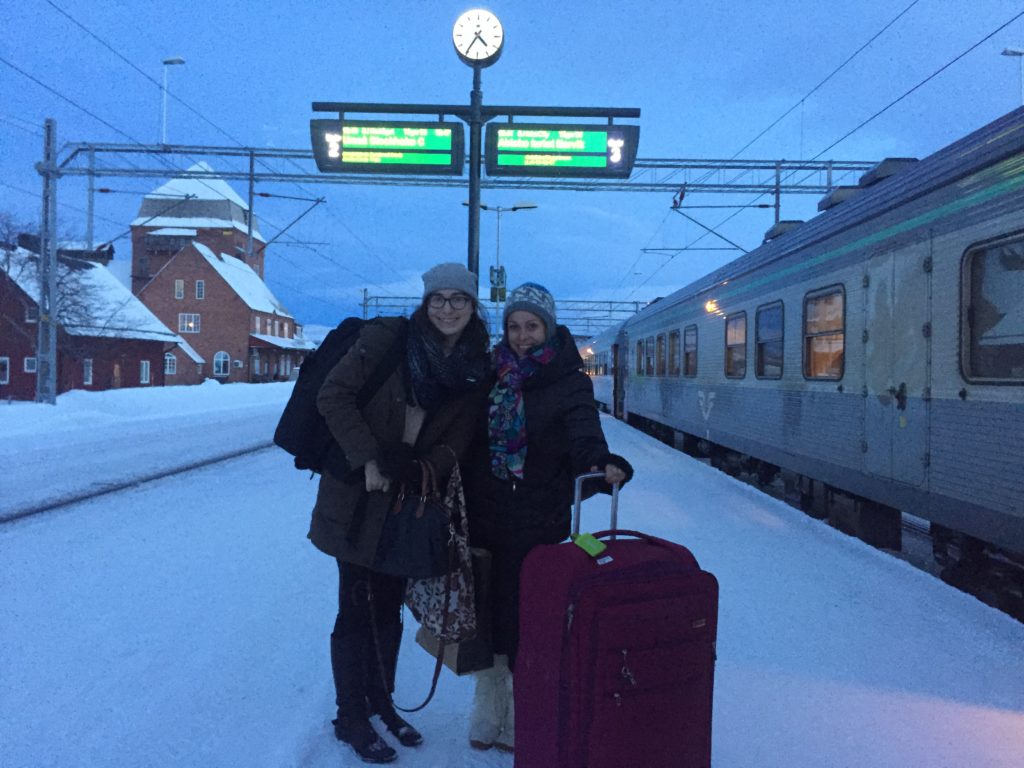
Abisko train station
Me and my Tortuga back in February 2016, before I ever started this blog!

The only exception is that when I asked to become a Tortuga affiliate (because I loved their product so much), they sent me the newest version of their bag to test out.

I had previously purchased their original version with my own money and loved it, and tested this one to be sure it was still as good as their old offering, so that I could be sure I’d still recommend it to my readers.

It definitely passed the test and from 2016 until today, Tortuga has been my go-to travel backpack when I’m packing light and using a carry-on.

And my original Tortuga lives on: once I got my new one, the old one was gifted to my ex, who still uses it on his travels!

Travel Backpack
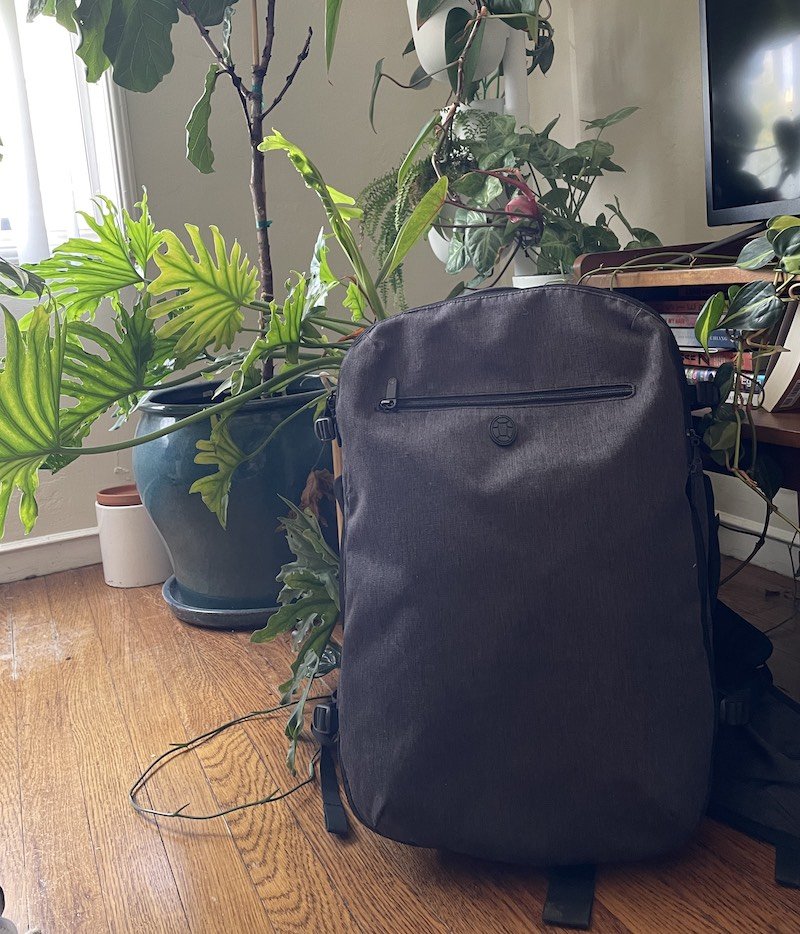
the tortuga backpack that i use on my travels and swear by
This backpack is now 4+ years old and still looks and feels as good as new!

While you certainly can travel with a suitcase, I prefer traveling around Europe with a carry-on bag — and a backpack in particular.

Between cobblestone streets and cute little guesthouses that have no elevators and only stairs, you’ll be grateful for having something that is easily carried on your back.

When it came time to begin my travels, I chose a 40L Tortuga backpack because they’re compact, carry-on friendly, and don’t scream “backpacker” as loudly as other bags.

Their philosophy is a bag that’s as easy as back as a suitcase, while being as comfortable and ergonomic as a hiking backpack.

I have an Osprey backpack for camping and backpacking, and while the Osprey is slightly more ergonomic, the Tortuga is infinitely easier to organize and pack for a trip to Europe.

I used their original version for a few years before Tortuga recently sent me me their newest version to test out, and I love it even more than the original.

The backpack is 40L and has an opening style like a suitcase, making it easy to access all your stuff.

It has three main compartments: one for a laptop and other flat objects like papers and books, one giant rectangular compartment perfect for packing cubes stuffed with clothing, and one smaller compartment with pockets for passports, pens, odds and ends, etc. that I stash all my extras in.

Plus, it’s quite comfortable to wear, with a padded hip belt and comfort-molding shoulder straps complete with a chest strap so that you can distribute weight across your body. 
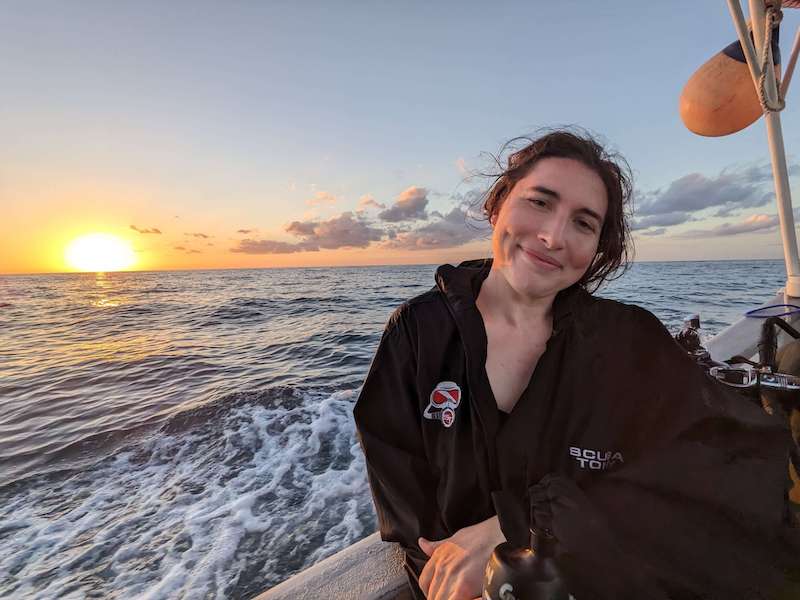
Allison smiling on a dive boat
The Tortuga fits so much that I even packed all my dive gear, including a 5mm wetsuit, BCD, and a regulator in it one trip!

Now, what many people ask: Does it pass budget airline requirements in Europe?

For me, yes. I’ve literally taken my Tortuga backpack as my carry-on luggage on 50+ budget airline flights at this point and never once been asked to check it in.

However, one of my travel tips is that when I fly on a low-budget airline, I pay for priority boarding. I do this not to board first, but so that I can also bring my CitySafe PacSafe as my personal item (more on that later).

This only adds a few dollars onto my budget airline ticket, whereas adding checked luggage usually more than doubles my ticket cost — and adds on a long wait at the airport to pick up my bag!

Toiletry Case

I absolutely love love love my eBags Pack-it-Flat Toiletry Bag which works kind of like magic – you won’t be able to believe how little space it takes up, yet how much it can fit.

It’s kind of like the Mary Poppins bag… just when you think nothing else can come out it, there’s more. It has a ton of separators that help keep my toiletries organized when I travel. 

Although it’s flat and compact, it fits virtually all my toiletries, which as a bit of a girly-girl I have a lot of!

An absolute must-have for your sanity when on a two week trip through Europe, a toiletry case will keep you organized and never have you searching for random odds and ends.

Remember, though: if you are traveling carry-on, you will still need to put your liquids in a clear quart-sized toiletry bag.

Packing Cubes

I keep everything sorted and tidy with my BAGAIL compression packing cubes.

These come with two sets of zippers, so that once you fill up your packing cube, you can compress the air out of it and fit more in it!

They’re one of my top packing tips for keeping things organized and sane on a longer trip!

Laundry Bag

Even if you’re only traveling for two weeks in Europe, I like having a separate bag for all my laundry day needs.

This travel-themed laundry bag from Kikkerland is beyond adorable!

Small Travel Backpack
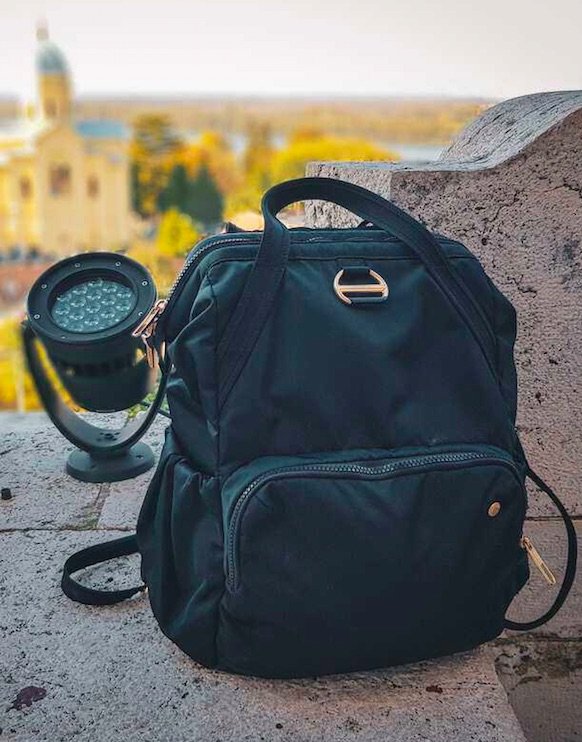
My Pacsafe backpack on display while traveling in europe

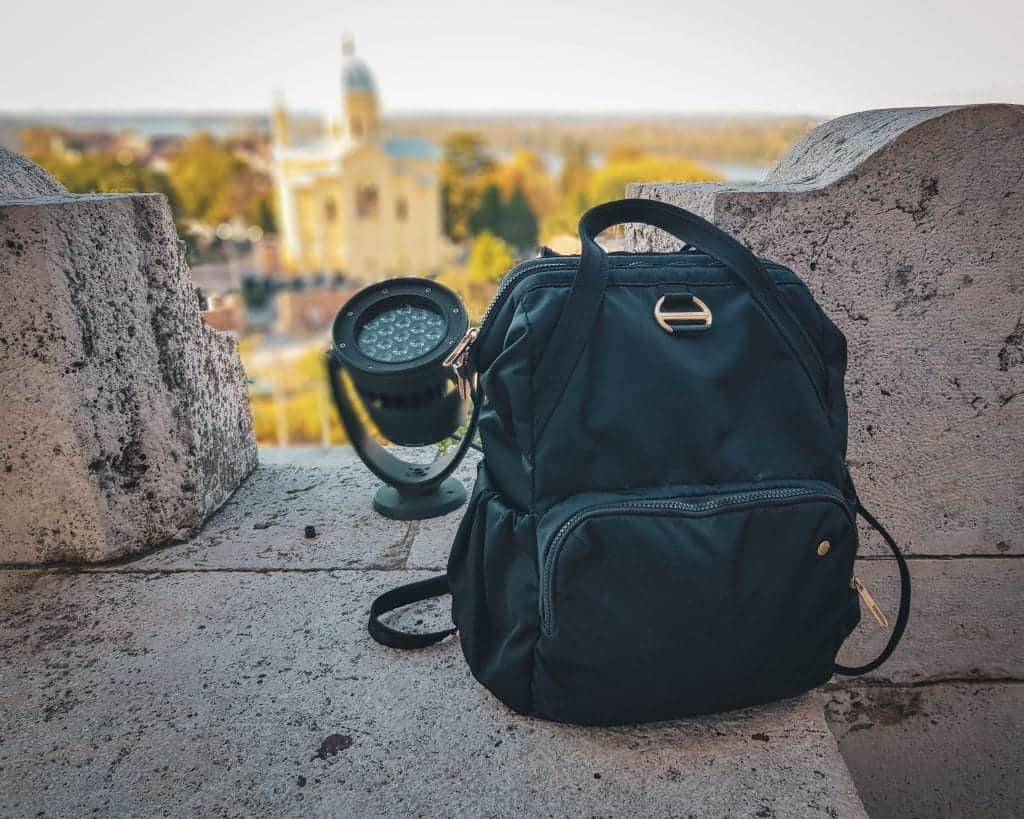
Finally, I use a smaller day pack for all my day-to-day needs. I’m absolutely obsessed with my Anti-Theft CitySafe backpack – it’s adorable, trendy, but also super secure.

It’s slash-proof and has zippers that interlock and fasten, adding multiple levels of security a thief would need to go through in order to successfully pickpocket you.

Unfortunately, petty theft is a big problem in Europe — especially when visiting large capital cities of European countries.

And I can’t stress enough how cute it is! Check it out here.

If you really don’t like backpacks, I would suggest a crossbody purse for more security, but frankly, I find these difficult to wear for a full travel day of sightseeing, as they put a lot of strain on just one shoulder.

Documents & Other Essentials
Person holding a passport in an airport

Passport | You’re going abroad, aren’t you? You’ll need your passport with you, obviously!

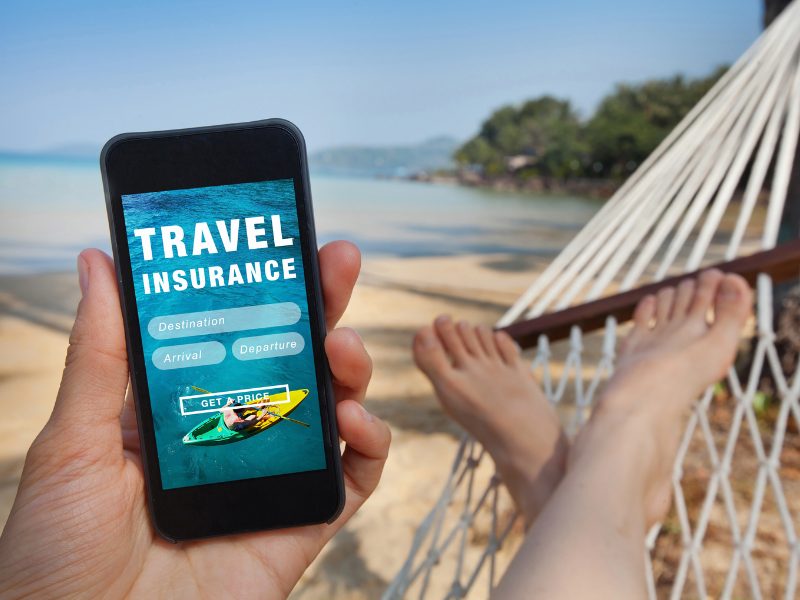
Travel Insurance | Especially in this day and age, it’s foolish to travel without travel insurance.

I use SafetyWing Nomad Insurance for all my travels outside the USA (unfortunately, as a US citizen, it doesn’t cover me in my home state).

With coverage starting at just around $12 per person per week, it’s a no-brainer for me, since it covers unexpected medical costs, trip delays, cancellations, lost luggage, etc.
Get a quote from SafetyWing for free here!

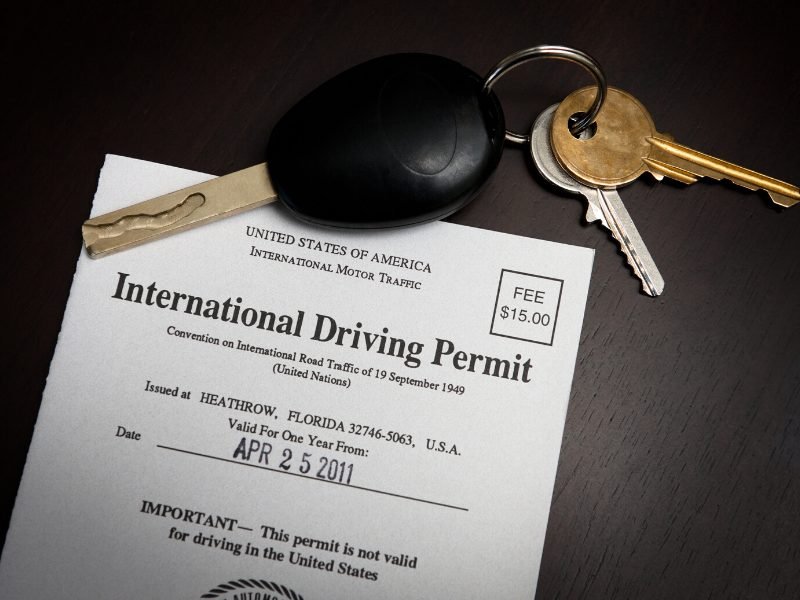
An international driving permit and car keys
Some countries need an IDP to drive! Check before renting a car.

Driver’s License & International Driving Permit | For many European countries, just your driver’s license won’t do — you may also need an International Driving Permit, which you can get ahead of time from AAA for about $20.

Personally, I’ve never been asked for one when renting a car (all over Italy, including Tuscany and Sicily, as well as Portugal, including Azores, Madeira, etc), but I have heard that you can be fined (quite a bit!) for driving without one if you are pulled over.

Guidebooks | While blogs are great, I also love having paper guidebooks for my travels. If you agree — bring some. I suggest paperback travel guides, as they’re simply not as practical to have on the Kindle.
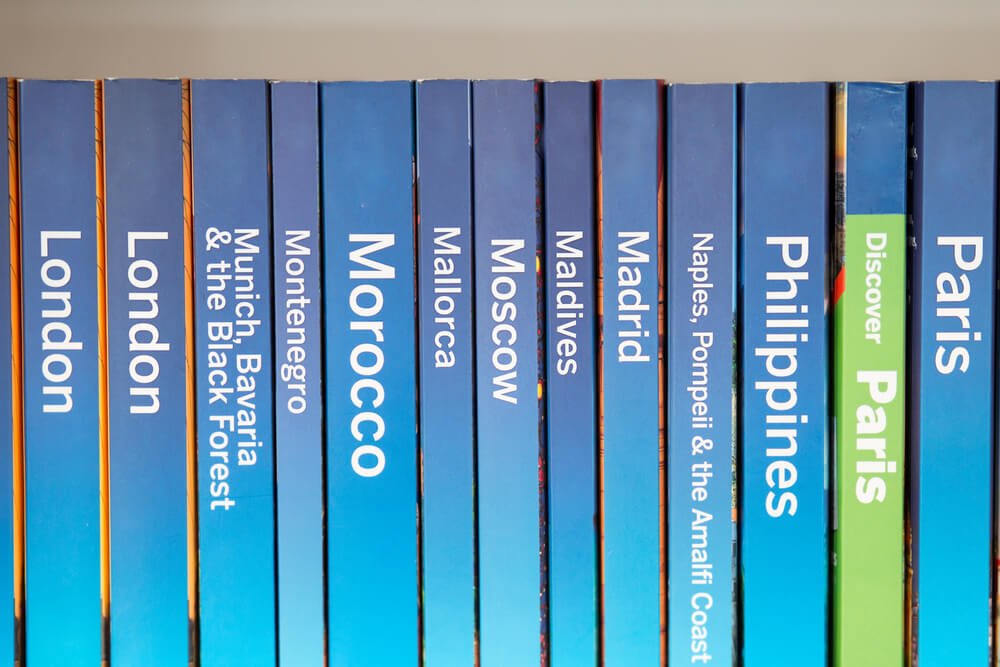
a selection of guidebooks to read

Credit Cards and Debit Cards | I suggest having a spread of credit cards and debit cards available to you.

More importantly is not always carrying them all at once when possible — and carrying them in two different places (e.g., one in your wallet and one deep in your backpack) when you do, such as when you’re switching locations.

Nothing puts a wrinkle in your plans more than suddenly losing access to your cards — especially ones that let you withdraw cash — so bring more than one and keep them in different places to avoid any issues.

Photocopies of Important Documents | Whether it’s a photocopy of your drivers license, passport page, etc., it’s nice to have photocopies for peace of mind.

Essential Clothing to Pack for Europe for Women & Femme People (Spring, Summer, Fall)

Bucharest in the fall, with some of my wardrobe staples!

Wondering what to pack for Europe for two weeks in the spring, summer, or fall?

Here are all the things you should cram in your travel backpack (with packing cubes, naturally — we’re not monsters, here) – for the people who love options yet hate checking luggage.

Note on semantics: I recognize the limits of the gender binary but in the context of this Europe travel packing list post, I’m focusing on the kind of clothing I enjoy wearing as a cis woman who dresses anywhere from slightly femme of center to more femme, depending on my mood.

Some things may apply to you; some may not. Take what helps and leave whatever doesn’t serve you — the way you dress is valid and wonderful!

Shirts

Allison wearing a striped shirt and cardigan on a boat

T-Shirts | Skip 100% cotton T-shirts! Instead, pick fabrics that also utilize materials like bamboo and hemp which wick moisture away from the body, allowing you to stay cool and sweat less.

I love this simple hemp/bamboo/cotton blend that comes in a variety of colors. I suggest about 3 T-shirts. If traveling in spring or fall, you may want to swap some long sleeve T-shirts into the mix as well.

Blouses | If you like to look a little dressier, throw in some shirts like this casual, gauzy white collared shirt or some long sleeve linen blouses that will make you look super European as you travel around!

allison at yellowstone

Tank tops (summer) | If traveling in summer, throw a few tank tops into the mix! I also suggest a hemp or bamboo blend like these simple, classic tanks.

Chambray Shirt | I love these because you can wear it either as a light jacket over a tank top for cooler summer evenings in the summer, or it can be a shirt of its own when buttoned up and paired with bottoms.

I also will sometimes wear these over a dress as well for a casual look! I love this cute tencel blend chambray shirt. Tencel is a soft, cozy fabric made from eucalyptus and wicks moisture away better than cotton.

Allison in front of Waikiki skyline and Diamond head on a whale watching tour
Allison wearing a cardigan on her travels

Cardigan or Hoodie | No matter what time of year you are traveling, you’ll likely be grateful to have one of these, at least for the plane. In summer, A/C on public transit and in museums, etc. can be blasting so don’t forget this. Bring either a cardigan or a cozy hoodie, whatever fits your style best.

Medium-weight Jacket (spring/fall) | If you’re visiting in the spring or fall, or visiting mountainous areas in the summer, you’ll want to bring a medium-weight jacket. Preferably, you should pick something water-repellant like this cute water-resistant black cotton jacket or a faux leather jacket which is also water-resistant in case there is rain.

Bottoms

Rocking my favorite midi skirt in Maine in the summer!

Shorts (summer only) | Everyone says that Europeans don’t wear shorts. I don’t really think that’s true, but when they do wear shorts, they tend to be dressier and well-fitting, like these high-waisted linen shorts.

I especially love these for the longer inseam — less thigh-chafing! Denim shorts aren’t as popular in Europe, but if you pick something trendy like these Paris-chic high-waisted denim shorts, you won’t be out of place.

Midi Skirts | I absolutely love midi skirts — they’re great for hot weather as they create their own breeze, but they also cover enough of your leg in spring/fall to keep you fairly warm.

They also pair well with tights and boots if you want to make them a little more cool-weather appropriate. I absolutely adore this polka dot midi skirt as well as these fun summery print skirts.

Lipstick is my forever travel mood!

Jeans (spring/fall only) | Unless you’ll be in the mountains, you probably won’t need jeans in Europe in summer.

I like to have a black pair of jeans and a pair of light-wash jeans (yes, I’m Team Mom Jeans over here) to be the most versatile.

Tights & Leggings (spring/fall) | If you want to mix and match some of your dresses with leggings to make them more versatile into the other seasons, I love adding leggings and boots. I have and love these black leggings!

Dresses / One Pieces

Allison enjoying the beach in Oahu's North Shore

Rompers | If you love the simplicity of a dress without worrying about your thighs chafing, rompers and jumpsuits can be a great choice.

I love this sophisticated short sleeve belted romper which comes in a variety of colors, or this long sleeve loose-fitting romper. For spring or fall, I like these full-length, long-sleeve jumpsuits.

Lightweight Summer Dresses (summer) | These can be any style you like! I suggest a mix of mini, midi, and maxi dresses so you can vary up your look.

If you get chafing / ‘chub rub’ when you wear dresses like I do, I suggest throwing in a few pairs of slip shorts like these which save my thighs from themselves every summer.

Sweater Dresses (spring/fall) | All the ease of just throwing on a dress (just add leggings) with the warmth and comfort of a sweater! I love slim fitting options as well as more boxy sweater dresses like this one.

Accessories

Allison wearing a sunhat, glasses, and swim cover up

Scarf | Great for when the A/C is blasting, you want to make a surprise church visit, or you just want some flair to change up your outfit. I suggest a large but lightweight scarf like this, great for spring, summer, and fall!

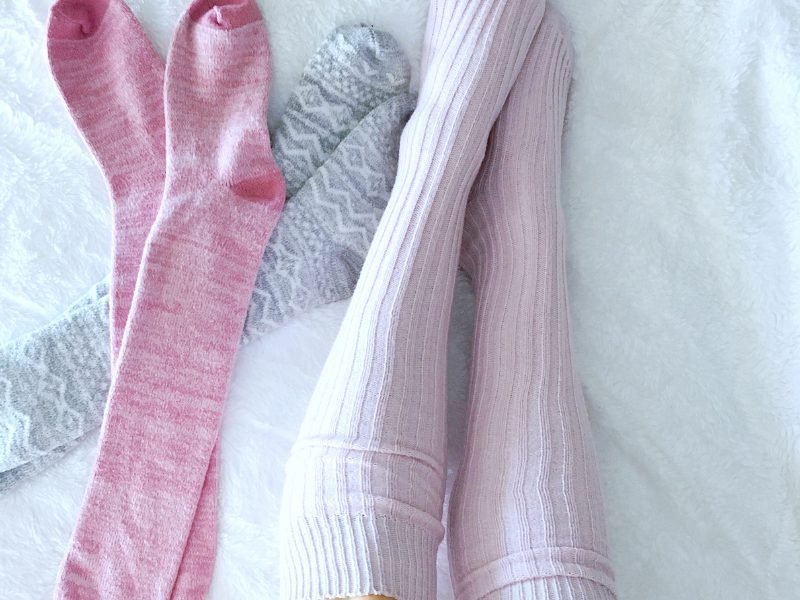
Socks | Depending on the kind of shoes you’re bringing and the time of year, you’ll want to either bring just a few pairs of socks or quite a few.

I suggest merino wool socks like these which are odor-resistant, so you can wear them multiple times on your trip without the smell.

Underwear & Bras | You can either bring 7-8 pairs of underwear and do your laundry once on the road, or bring enough for the full trip if you really don’t want to deal with laundry.

If you wear bras, I suggest bringing a few different bras, like a sports bra, a bralette, and a more standard strappy bra so that you have options.
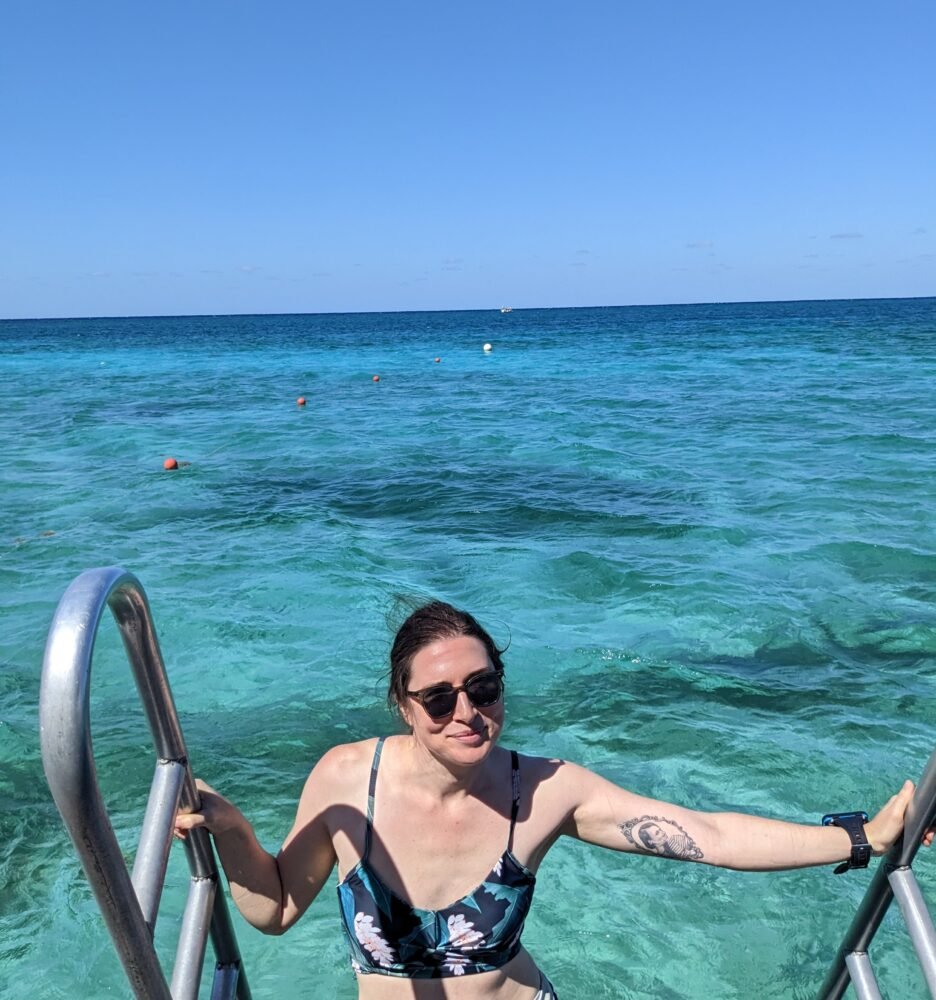
Allison wearing a swimsuit while emerging from the ocean

Swimsuits | I strongly recommend bringing at least two bathing suit options — there is nothing worse than having to put back on a still-wet swimsuit! I love these options for two-piece swimsuits and these cute color-block one-piece swimsuits.

Pajamas / Sleeping Clothes | I love having cute dedicated sleeping clothes. I make room for them even when packing for a short trip!

It’s one of those things that still makes me feel at home on the road. I love silky or satiny sleeping clothes like this adorable pajama set. That said, you could also just wear your leggings and T-shirts.

Footwear

Allison standing on a black sand beach in Tahiti with overalls and a rainbow shirt on

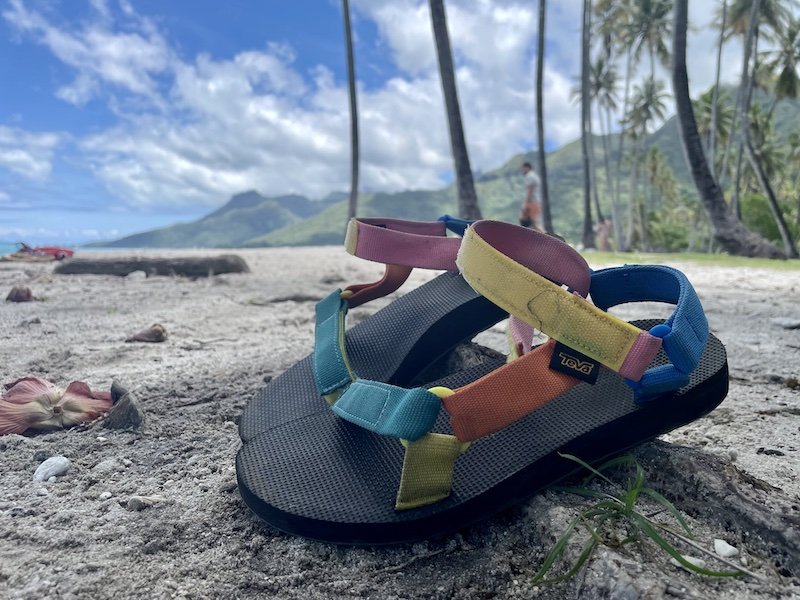
Water Shoes (summer) | Many European beaches are pebble beaches and not the most comfortable for your feet! I love Tevas because they look cute both in and out of the water and dry quickly.

They’re water-friendly, but don’t scream “I’m wearing water shoes out in public!”. I have these quirky pastel rainbow 90s Tevas and adore them. Leave the flip-flops at home — these are much better for beach days.

Sandals | Depending on the weather during your trip, a pair of sandals will go a long way. As a card-carrying Northern Californian hippie, I wear Birkenstocks until there is a frostbite risk, basically.

I love my Birkenstock Gizeh sandals and they’re one of the few pairs of shoes that can hold up to everything European travel throws at them.

Allison wearing her rain jacket and sneakers and a baseball cap

Versatile Sneakers | I love casual sneakers that are cute enough that you can pair them with anything, even dresses.

For summer, I love white sneakers like these ones, and in spring and fall I tend towards my black Nikes.

Flats | For going out at night and looking a little more put together, a pair of fold-up flats is nice to have and take up barely any room in either your suitcase or your day bag.

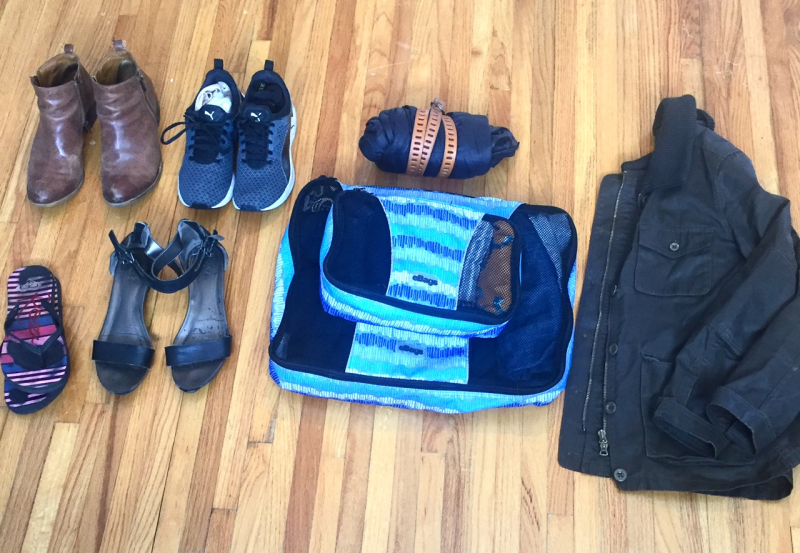
Ankle Boots (spring/fall) | A pair of comfortable ankle boots is a must for shoulder season travel. I love a good pair of Doc Marten Chelsea boots in either black or brown.
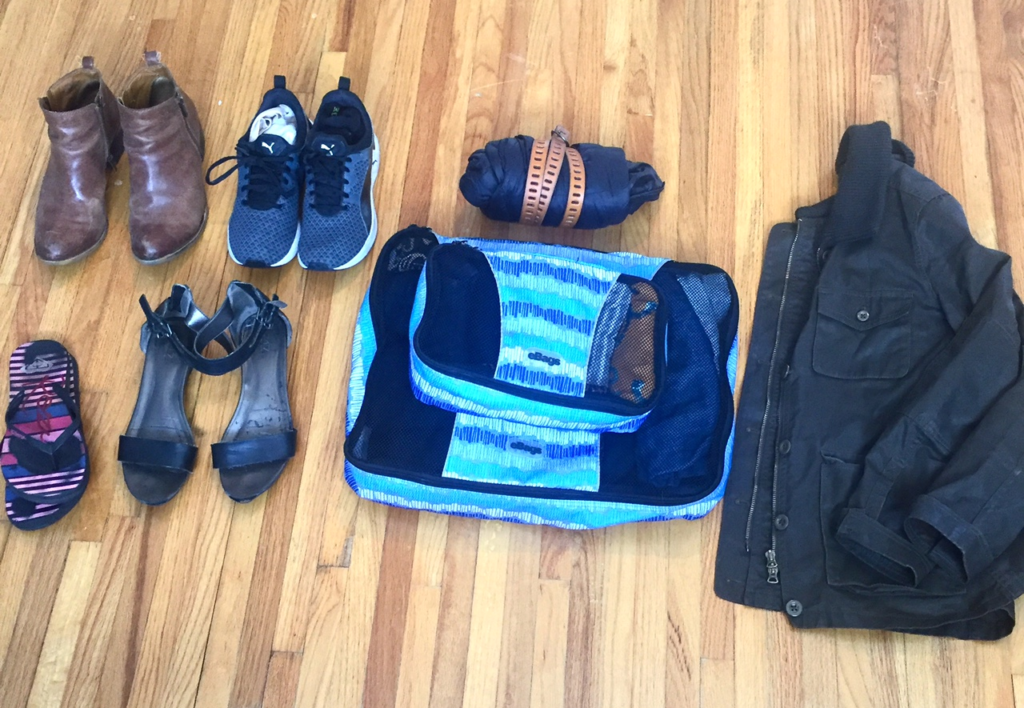
packing list for europe: All I packed for 6 months in Europe - Find out how here!
How I packed for my first 5-month Europe trip — yup, that’s all my clothing!

This sounds like a lot — well, it is!

But it all managed to fit into two packing cubes (I actually didn’t even need to use the third one, as I kept all my underwear, socks, and sleepwear in pockets that come with my backpack).

Depending on how much you pack and how attached you are to your clothes, it’s always an option to send some of your belongings or souvenirs you bought on the road…

This is especially true for those people who like to shop once you reach your destination and find yourself needing extra room!

Tip: You can use an international shipping service like Shiply to compare rates on different shipping services to send home items more affordably.

Essential Clothing to Pack for Europe For Women & Femme People (Winter)

Allison Green sitting in bed at a ice hotel
Warm enough for temperatures below freezing at the Ice Hotel in Tromso, Norway!

Packing for winter in a carry-on isn’t that hard — just think smart, wear your heaviest clothes on the plane, and think about layering as much as you can.

This will work for even super cold weather, but not for something extreme like a ski holiday, where you need more specific gear like waterproof pants, etc.

PSST – Planning a longer winter trip? Here’s my guide to packing for a long-term winter trip in Europe.

Winter Clothing Essentials for Europe

Jeans | Same as above, but you’ll want to add more jeans to your collection — at least 3-4 pairs is recommended. I opt for more black, gray, and dark denim in winter, personally.

Warm Leggings | I love fleece-lined leggings, but other people swear by merino wool leggings. It will depend on what your tolerance for wool is (mine is pretty low — I can wear wool socks, and that’s about it!)

Sweater Dresses | Like I recommended above — I’d opt for 3-4 of these if you like to wear dresses in winter.

Large, Warm Wrap Scarves | I suggest bringing at least two different big wrap scarves so you can swap them out since they will be a big part of the photos you take! I like these ones which come in a variety of styles.

Allison Green wearing a big wrappable scarf and a hat for Norway trip

Beanie | You’ll want a tight-fitting hat that covers your ears! Again, I suggest bringing at least two to add some variety to your photos, if you care about that kind of thing.

Touchscreen-Friendly Gloves | Nothing is more annoying than having to take your gloves on and off to use your phone while you are traveling, for accessing vouchers, getting directions, making payments, etc. Get some touchscreen-friendly gloves so that this isn’t a problem!

Thermal Tops | Bring a few thermal tops to wear underneath some long sleeve shirts or sweaters.

You can change these out more often so you can swear the same sweaters more often without them smelling.

Merino wool layers are even more odor-resistant, so if you don’t mind wool, it’s even better!

Sweaters | I recommend bringing at least 2-3 warm sweaters for your trip, and you can layer a thermal top underneath them if you need extra warmth.

Allison posing at the top of Fjellheisen in Tromso
My typical Norway winter outfit!

Waterproof Knee-High or Snow Boots | I love these boots from Blondo and have owned a similar style for 10+ years — they’ve stood up from everything, from slushy, salty New York City winter streets to the Arctic Circle! They’re great walking shoes and they’re also warm and comfortable.

Waterproof Ankle Boots | You’ll want something with traction as well as waterproof so that they are useable in case of snow or rain. I love these black waterproof Chelsea boots — they’re waterproof but don’t look like rain boots

Warm Wool Socks | Don’t underestimate the power of warm wool socks in the winter — they will keep you super toasty!

And even though I generally don’t like wool, I don’t mind them for socks, as the skin on my feet is a lot less sensitive there.

Underwear | Same as above — you’ll want 8-15 pairs depending on whether or not you plan to do laundry on your trip, as well as 2-4 bras depending on what you have planned for your Europe trip.

Parka | If it’s going to be really cold, I suggest this North Face parka which I’ve worn all over cold European cities in the winter as well as throughout many frigid New York winters! It’s a little pricy, but it will last you a lifetime (and comes with a lifetime repair or replace guarantee!)

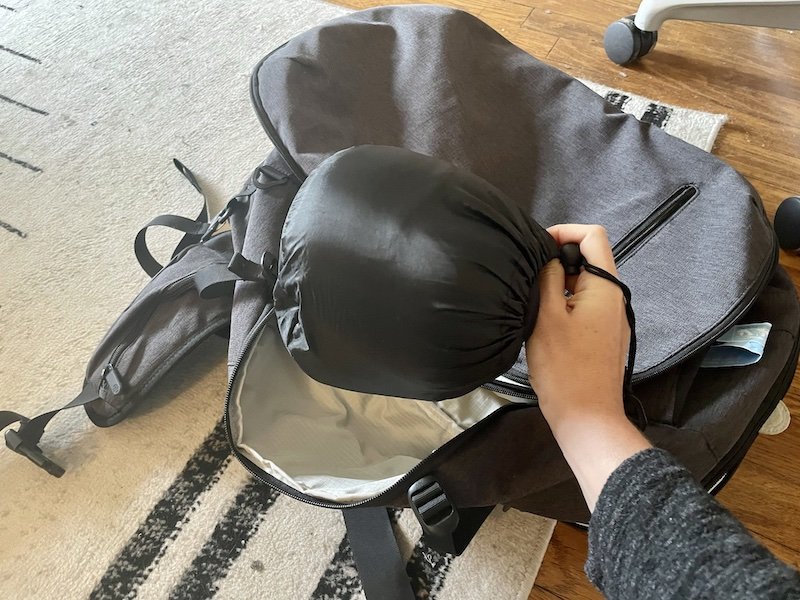
Light Down Jacket | Sometimes it’s not really that cold and a full-on parka is a bit overkill — on days like those, I’m grateful for have a small, packable down jacket that keeps me warm but doesn’t take up much extra space in my carry-on.

Toiletries & Hygiene Supplies
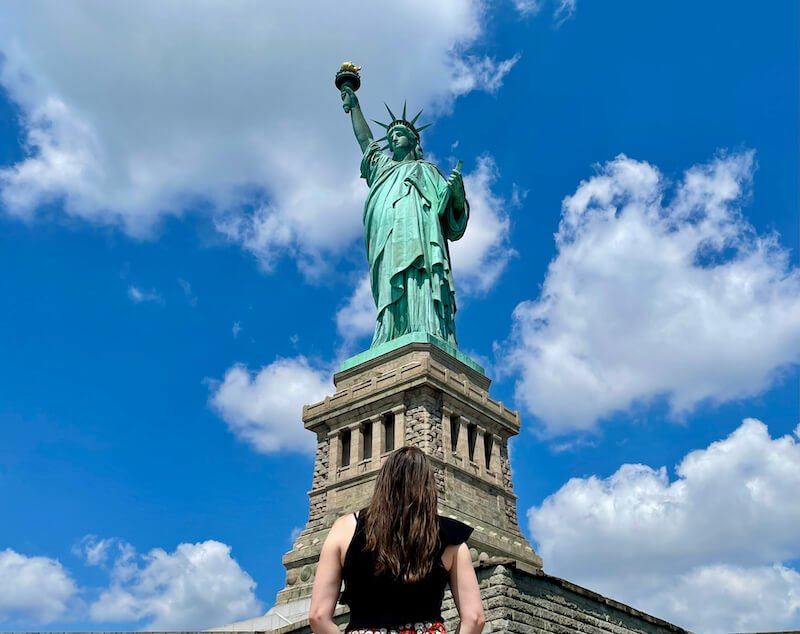
Allison in front of the statue of liberty

Period Supplies | If you’re a person who gets periods, you’ll want to be prepared! I barely menstruate any more due to my contraceptive implant, but when I did, I loved traveling with my Diva Cup.

It’s better for the Earth and better for your luggage — the Diva Cup is reusable, hygienic, and actually way more convenient than tampons or pads as they need to be changed less frequently.

They’re really comfortable once you get used to them and carry a lower risk of TSS or leaking. That said, periods are a personal matter and everyone has their preferences, so do what makes you comfortable!

Toiletry bottles | Rather than buying small travel-sized containers of shampoo, conditioner, etc. I take my favorites from home and put them in GoToobs.

These reusable, easy-squeeze bottles are great for filling with your need-to-have toiletries that are hard to source on the road.

Toothbrush | I like having a folding toothbrush for travel. Personally, I have those stupid clip-on toothbrush protectors — they always get lost or broken in my bag!

Solid Shampoo | It’s really nice to have solid shampoo when you’re on the road and you need to save some room in your quart-sized bag of liquid toiletries.

Dry Shampoo | I love having powdered dry shampoo to freshen up my hair between washes or on days when I feel particularly greasy or blah.

Hair Ties | For days when getting out dry shampoo is just too hard

Mini Hairbrush | I always rip out the brush part of those folding hairbrushes (I have thin hair that knots easily), so instead I stick to a small but sturdy mini hairbrush like this one.

Tweezers | Because god forbid I go more than a few days without plucking those random chin hairs that love to pop up overnight… and my eyebrows. I like a slanted tip one.

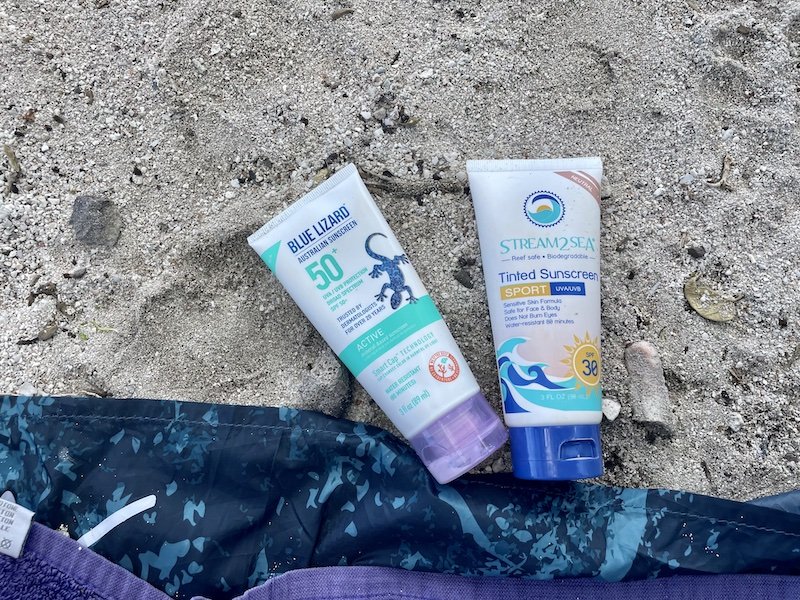
Solid Sunscreen | Who doesn’t love a good solid for liquid swap? Solid sunscreen is great to keep in your bag without worrying about sunscreen explosions.

I tend to bring this from home and keep it in my day bag, and I’ll buy liquid sunscreen if I’m having a beach day and really need to continually layer up.
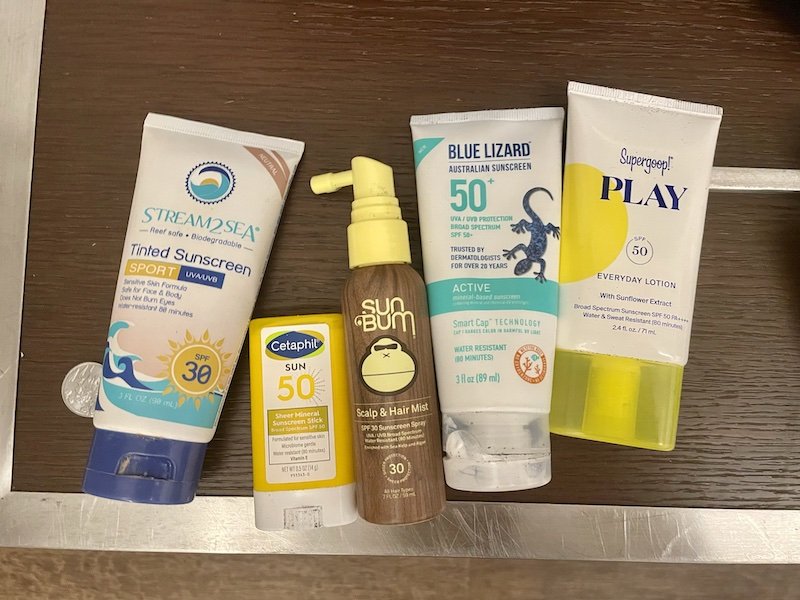
A selection of reef-safe sunscreens

Razor | It can be hard to find my favorite brand abroad sometimes, so I always bring my favorite razor brands with me, especially since I’m really prone to strawberry legs.

Anti-Friction Stick | I swear by having an anti-friction stickat the ready during summer travels, because if you got thick thighs like I do, this is a godsend against fighting the devil that is chub rub. Vaseline also works in a pinch!

Deodorant | As an American, I’m always horrified by the deodorant selections in Europe. Let’s just say that Fa is not acceptable. Bring some from home — I swear by Secret Clinical Strength because I sweat and stink like crazy when I sweat.

Make-up | This is such a personal category that I’m not going to go into too much detail here. You know what make-up you do and don’t like to wear! I personally bring some lightweight CC cream, concealer, mascara, a creme blush/highlighter duo, and several different lipsticks.

Other Toiletries | Again, another hyper-personal category. This includes things like face wash, moisturizer, body wash, shaving cream, etc. — everyone has their own preferences, so bring whatever you want from home.

Just make sure they are travel-sized (less than 100 milliliters/3.3 ounces). If not, put them in a GoToob in a size suitable for a two week trip to Europe.

Travel Medicines & First Aid
Travel Medicines for Nausea & Stomach Issues | For me, this includes 1 bottle Pepto Bismol tablets (because the last thing you want when you’re having an upset stomach is to try to find a pharmacy that speaks your language), 1 bottle Imodium (for real D-Day intestinal emergency days), and Pedialyte rehydration packs (theoretically it’s for babies with diarrhea; I use it for hangover emergencies, because I’m an adult).

Pain Medicines | For me, this is always bringing a bottle of Aleve. I can never find Aleve outside of the US and I find that it works better than other painkillers for me personally. 

I also bring Excedrin Migraine, and you should too if you’re prone to migraines like I am, since this another medicine I also think is difficult to find in Europe.

Motion Sickness | I always carry a bottle of Dramamine with me for bus trips, boat trips, plane trips, etc., and you should too if you’re prone to motion sickness like I am (why do I travel, again?)

Bandaids & Neosporin | If you are a clutz like I am, you will want to bring some Bandaids and either some alcohol wipes or some Neosporin.

Tiger Balm | Don’t know what this magical ointment is? Well, I don’t really know what’s in it either, only that it seems to work for just about everything. I fell in love with it traveling Southeast Asia, and now I use Tiger Balm for everything. It works for everything from headaches to hangovers to sore muscles to mosquito bites

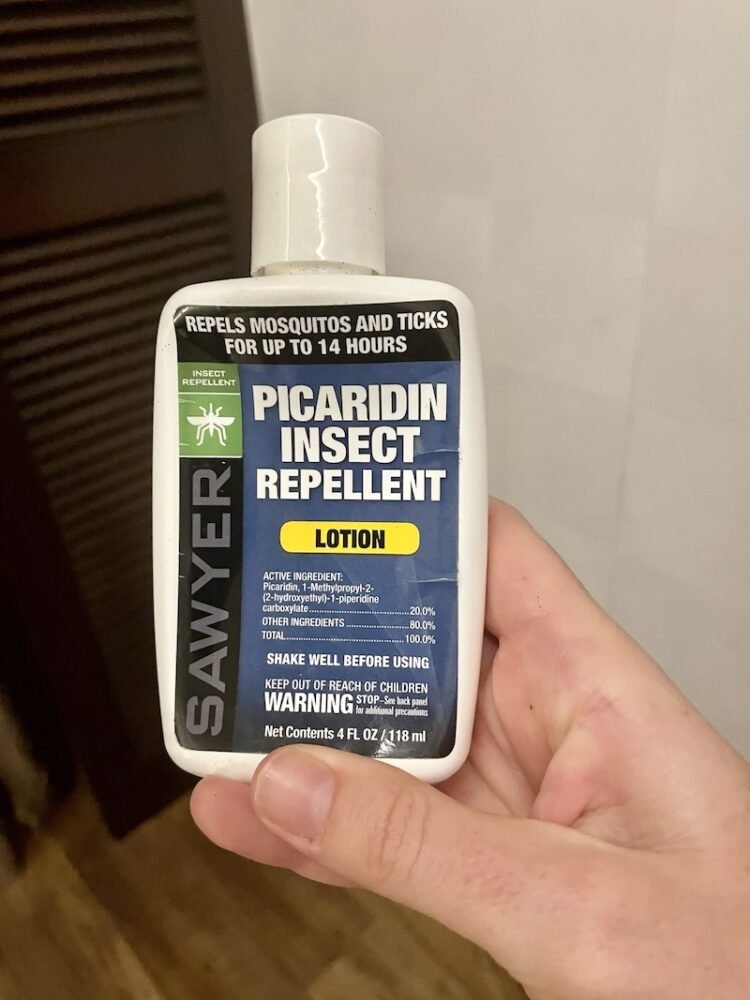
Bug Repellent | You can buy bug spray, but I always forget to bring it with me. I now pack mosquito repellent wipes in my day pack so I can apply around sunset, when the mosquitos get really active!

Random Odds & Ends That Make Life Less Terrible

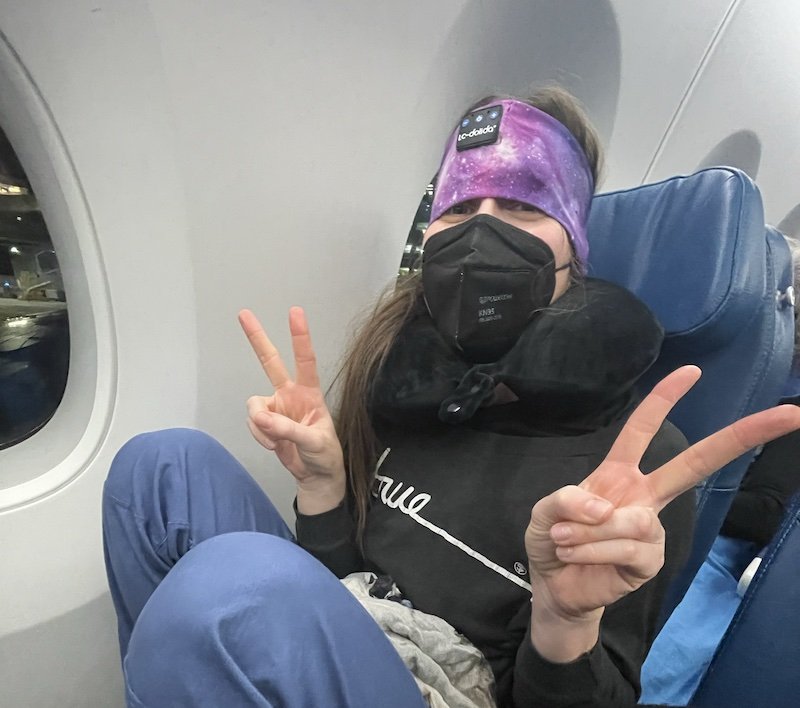
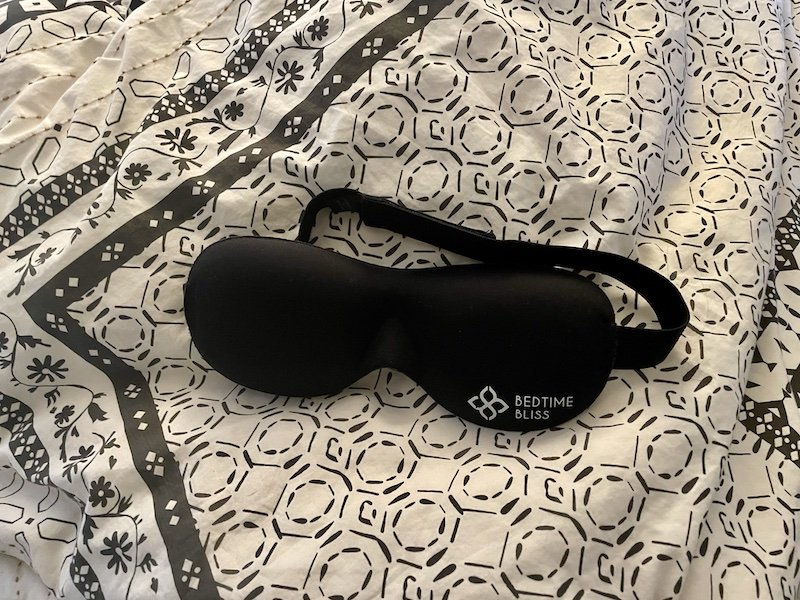
Sleep Mask | I need a lot of darkness to sleep, so I carry a contoured sleep mask with me for travel and hotel rooms that just don’t get dark enough.

Earplugs | After trying many different earplugs in my year or so living in hostels, I’ve found these to be the best in class, able to withstand even a 12 person dorm!

Journal | Moleskine notebooks are my favorite journals, like the hipster wannabe I am.

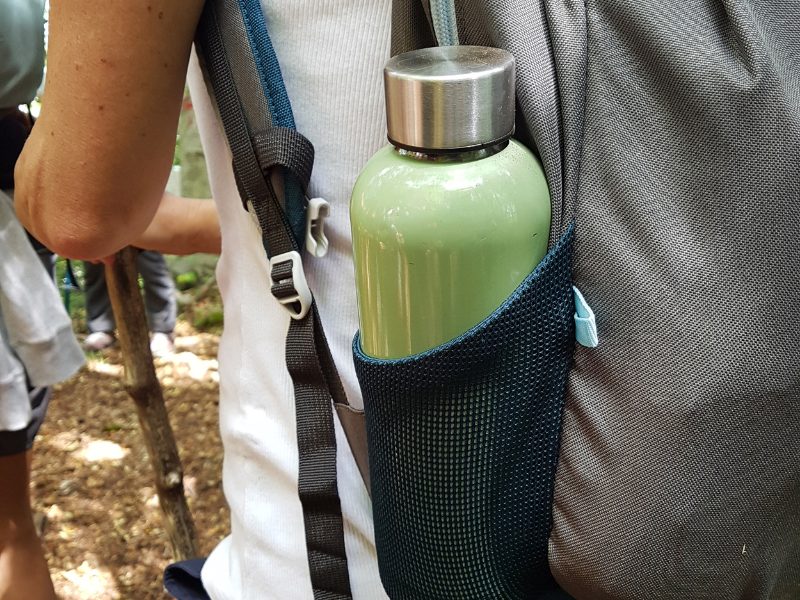
Water Bottle | Tap water is drinkable in virtually all parts of Europe, so bring a reusable water bottle. Many cities in Europe even have public fountains for public use, especially in places like Switzerland, Italy, and Spain. Make the planet suck less – use less plastic!

Reusable shopping bags | Not only good for shopping, they’re also great for separating nasty clothes from tolerable ones, or for shoving random things that won’t fit in your backpack or suitcase at the last minute when checkout is rapidly approaching. I find having 2-3 reusable shopping bags essential.

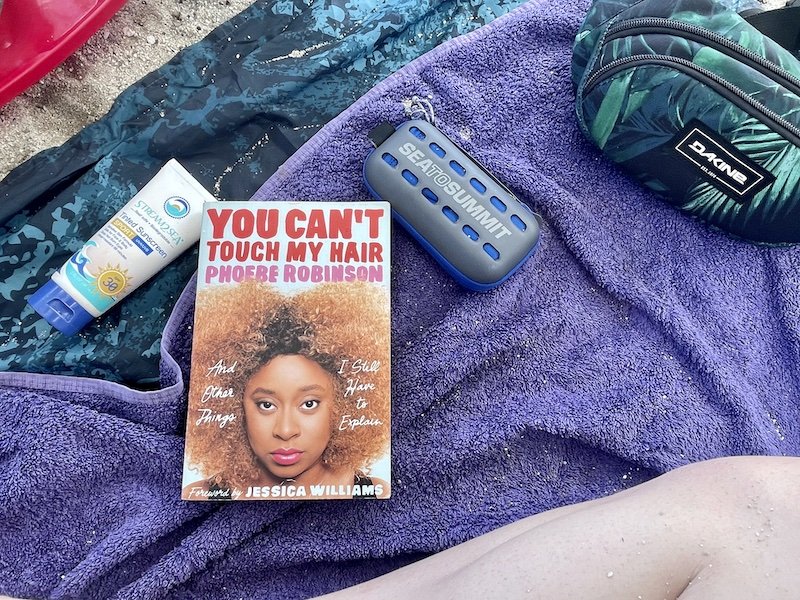
Travel Towel | I swear by having a large microfiber travel towel. They’re great for beach days since microfiber repels sand. It’s also useful for those random European hotels that give you something the size of a hand towel and swear it’s a bath towel.

Electronics & Camera Equipment
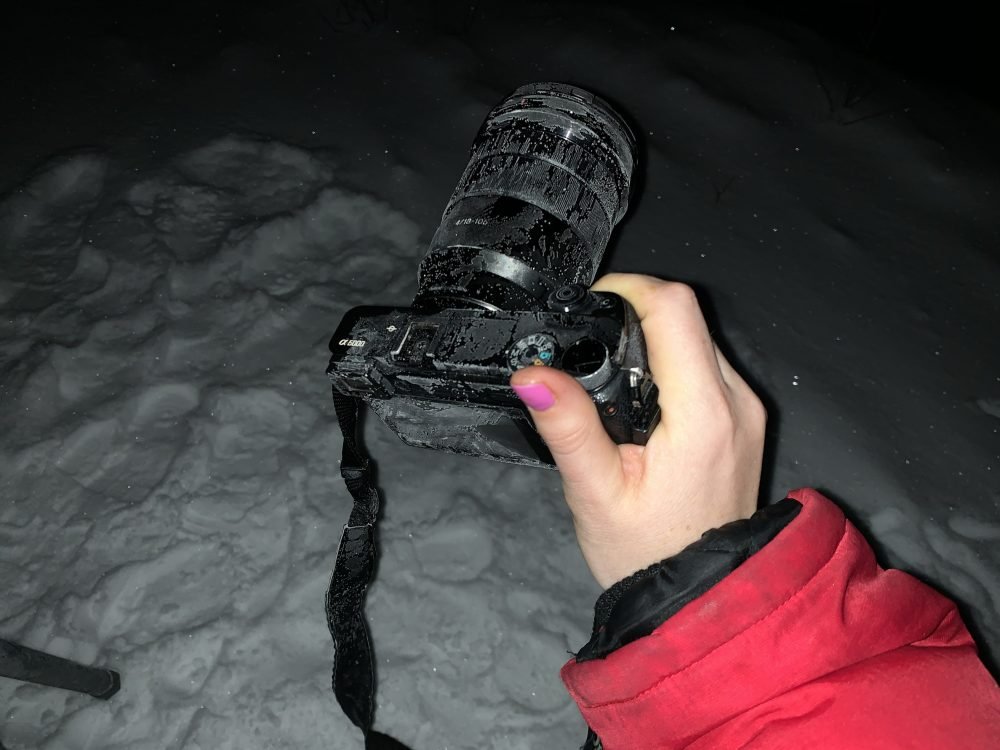
The cold can wear out your camera batteries… and frost over your camera! Bring extra batteries if traveling in winter.

Laptop | As a blogger, I bring my Macbook Air everywhere but other people may prefer a tablet other type of computer. However, this is only necessary if you want it — you may just enjoy the opportunity to leave it at home!

Smartphone | Who even leaves the house without one these days?

E-Reader | While I do love the romance of a paper book, I also am pragmatically obsessed with my Kindle Paperwhite. Depending on where you travel, English-language bookstores can be few and far between, but I can get books on my Kindle any time I have WiFi. I love the Kindle Paperwhite because the screen is glare-free, making it easy to read even in direct sunlight.

Travel Camera | I used to use the Sony A6000 (now discontinued), and now I use a Sony A7 full frame camera for my photos. This may be overkill if you don’t need to take photos professionally, especially now that smartphone cameras are so good!

Portable Charger | I’m always running out of battery, as I use my smartphone for everything when I travel. I rely on Anker portable chargers on every trip abroad.

Adapter | If you are coming from the US or Canada, you will need an adapter for your electronics.

Also, keep in mind that if you are visiting both the UK and continental Europe that they use different plugs (and even within, there are exceptions: for example, Malta uses UK plugs!). Bring a universal adapter that you can use on your Europe travels and beyond.

You likely won’t need a converter. Leave the hair-dryers at home, as most European hotels have them for you to use.

No items were sent to me for this Europe packing list for two weeks; all are products I’ve purchased independently or something as close to it as possible as I could find.

The sole exception is the Tortuga Setout Backpack – I bought the original version with my own money, and when I asked to become an affiliate of their program, they sent me the new one to try out and ensure that I still like it and can recommend it, as the one I carried was discontinued. 


Further reading: 
Want more ideas on what essentials to bring on your trip to Europe? Check out this guide to travel gear and resources.

What to Pack for New York in Fall: What to Wear & Bring [2023]

Let’s be honest about New York: no one lives there for its weather.

There are few things that New Yorkers can agree upon, but the fact that fall is the best season to be in New York is surely one of them.

New York’s winters are about three months too long, stretching on so that it feels like half a year.

Spring lasts about three weeks, only in bits and pieces, teasing you before plummeting back into winter temperatures or before giving itself over to a miserable, scorching summer.

Oh, summer. That time of year when the subways feel like saunas (only smellier and far more crowded), throngs of families finally able to travel on their school breaks flood the streets, and there’s a pervasive heavy humidity to the air that so that walking feels like wading through water.

But fall, fall is the promised land when it comes to New York seasons. The smothering humidity lessens to a crisp, fluttering breeze.

The leaves on the trees do their yearly magic to ripen to red slowly, before fluttering down onto the streets in a cascade of satisfyingly crunchy leaves.

Chafed thighs and underboob sweat are banished (until the following year). It’s the little things.

The best thing about visiting New York in fall is that you can actually make the most of it and see as much of the city as you set your heart to.

Sure, you may not have those endless summer days, where the sun doesn’t set until nearly nine at night, but you also aren’t constantly maneuvering through crowded, sweaty streets desperately seeking out your next hit of A/C.

Visiting New York in fall means that you can actually visit it the way it’s best experienced: slowly, deeply, and on foot.

What to Pack for New York in Fall: The Essentials

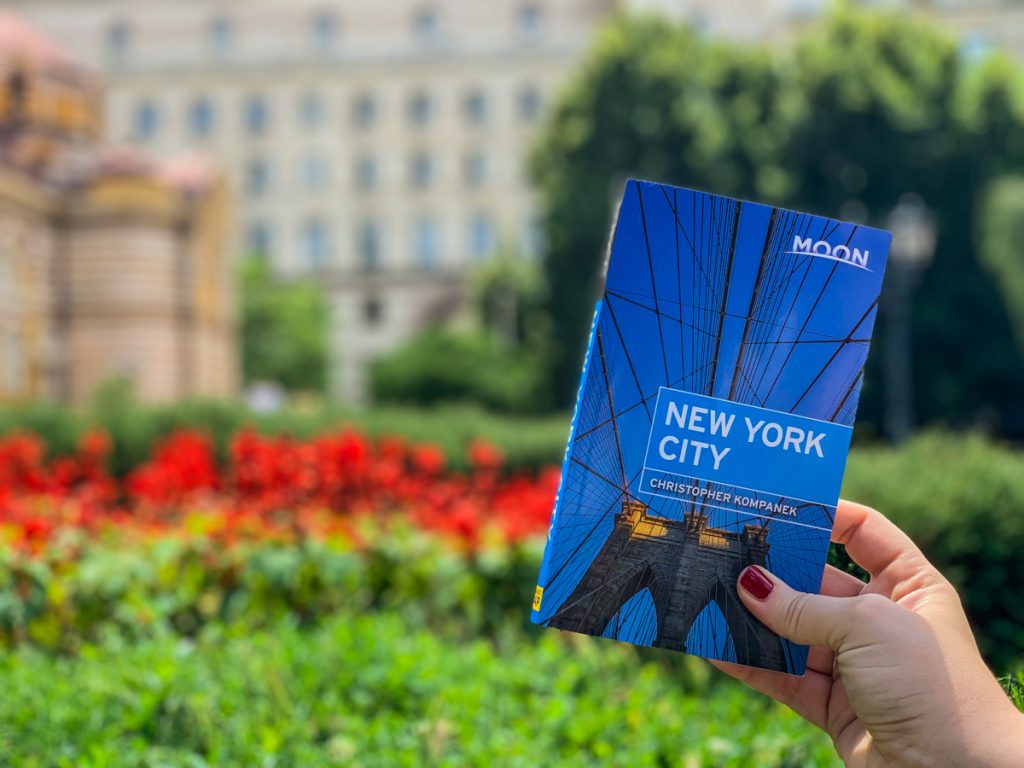
A high-quality guidebook like Moon New York City

Travel blogs are great for pre-travel research, but nothing beats the convenience of having a well-curated guidebook in your day bag or purse. While I rely on blogs for much of my travel planning, when I travel I still often grab a coffee and sit down with a guidebook to strategize and get some neighborhood tips without having to trawl through the internet.

Moon Travel Guides sent me a copy of their latest New York guidebook to review, and I’m impressed by the quality of the recommendations in the book. Moon New York City is written by a New York native and features some serious insider knowledge. And fall is the perfect season to travel with a guidebook in hand, leisurely following one of the suggested neighborhood walking tours or eating your way through the city.

As a former New Yorker, I love seeing tourists directed towards the city’s finest (and away from the endless tourist traps). I love when tourists get a chance to see the city through our eyes: through our local under-the-radar restaurants, hidden speakeasies, craft beer bars, and offbeat neighborhoods.

Many of my personal favorite places are featured in the guidebook, giving you an idea of what New York means to New Yorkers beyond just the tourist sites that, honestly, most New Yorkers ignore. Get the guidebook on Amazon or wherever books are sold.

Comfortable walking shoes

Since fall in New York gives you the best possible conditions to explore the city, I strongly recommend that you pack the most comfortable shoes possible, so that your travels aren’t interrupted by pinched toes or chafing blisters.

I’m originally from California, so anything below 70 degrees is ‘boot weather’ on my warped inner thermometer. I wear these Blondo waterproof leather boots nearly all fall and winter long for the last decade and they’ve held up beautifully that whole time, though I did get them re-soled about five years ago to keep them looking their best. They’re ultra-comfortable to walk in and great if there’s some rain in the forecast or if it’s on the chilly side.

If it’s on the warmer end of the fall months, I swear by my Birkenstocks; otherwise, I find a comfortable but stylish running shoe like my black Nikes are the way to go to keep myself pounding the pavement without getting tired.

Camera & charger

New York is an epic city with so many amazing angles to capture. Don’t be caught off guard and miss a photo-perfect moment.

My current photography set up is the Sony A6000 mirrorless camera with the 18-105mm f/4 lens, which lets me get everything from street scenes to super zoomed-in detail shots. The lens is definitely a bit on the bulky side, but the A6000 is so lightweight that it all balances out.

More and more, I find myself reaching for my iPhone X out of laziness when I’m photographing food or general street scenes. I generally find that it performs as well as my mirrorless camera in most daytime scenarios and can sometimes outperform it in low light conditions. However, in times when I want to zoom in on a particular composition, I love having my mirrorless camera + zoom lens combo. The zoom on camera phones is still pretty terrible, so if you want a diversity of shots, I recommend a versatile lens like the 18-105 I recommended above.

Of course, make sure you have some spare batteries as well as your camera battery charger to keep your camera juiced up and ready to capture the fall beauty of New York! Also, unless you’re coming from the Americas or certain parts of Asia, you may need a universal adaptor for American outlets, which use Type A and B sockets.

External battery pack

More and more, we rely on our smartphones for getting us around as we travel, whether it’s navigating unfamiliar streets on Google Maps, using it as our primary camera, uploading to Instagram Stories, hailing Ubers, or using it to present skip-the-line tickets bought on mobile apps. 

Make sure your smartphone can keep up with your jam-packed trip to New York and bring along an external battery pack. My personal favorite brand is Anker, which I have used for years and find to be the best combination of powerful, compact, and reliable.

Reusable water bottle

Cut down on plastic waste during your trip to New York and take advantage of the fact that New York City has some of the cleanest urban tap water in all of the entire United States.

Using a reusable water bottle, you’ll save a ton of money over buying bottled water, not to mention keep plastic waste to a minimum, and any coffee shop, restaurant, or bar will be happy to refill your water bottle for you (or you can fill it up at any water fountain which you’ll find throughout the city’s main sites and museums).

While we’re at it… be sure to bring some reusable tote bags as well to avoid creating plastic trash!

What to Wear in New York in the Fall: Clothing Packing List

Let me put in a quick note on what the weather is like in New York City in fall. If I had to put it in two words, it would be this: changing rapidly.

September average temperatures range from lows of 61° F to highs of 76 ° F. For you metric folks, that’s 16° to 24° Celsius.

Then by October, temperatures drop pretty significantly and range from lows of 50° F to highs of 64° F (in Celsius, 10° to 18°).

November is when fall in New York really starts to fade away and merge into winter. Don’t be surprised if you see a bit of snow in November!

The average low is around 42° F and the average high is around 55° F (for Celsius, 6° to 13°). Of course, much lower (and higher) temperatures are possible than this!

Those are just to give you some ideas of what to expect from New York fall weather, so that you can better adapt your New York in fall packing list.

As you can tell by the temperature averages, what you’d wear in New York in September is much different than what you’d wear in New York in November.

So, basically: adjust this generic list according to the temperatures you think you’ll experience but also what you’re used to.

A Californian like me will have a much different idea of “cold” than a Chicagoan or Londoner!

Also, please note that this is my packing list for women in New York — men, you’ll want to make adjustments where it doesn’t apply to you, keeping in mind the temperature ranges I listed above.

Now, without further ado, here’s what to wear in New York in September and onwards!

A warm, versatile jacket

As I hinted at above, my recommendation for what kind of jacket to wear in New York in fall depends on when exactly in fall you are visiting.

Fall in New York really has two distinct halves – the one that is the tail-end of summer, and the one that is the harbinger of winter.

So, if you’re deciding what to wear in New York in September, I’d recommend bringing a lighter jacket rather than a full winter coat.

This is the perfect time to wear your favorite leather jacket (or vegan leather jacket!) – bonus points if it’s black, so you’ll fit in with all the other New Yorkers. The crisp fall air is perfect for your leather jacket.

In addition to this, a simple black cardigan or a chambray shirt which can be worn unbuttoned is a great and lightweight addition to your New York fall capsule wardrobe.

I love these options because they are perfect to wear for the daytime before transitioning to your heavier jacket at night, and they don’t take up much space in your bag.

If you’re planning what to wear in New York in October or November, it gets a little trickier. The end of October is particularly finicky.

I’ve experienced everything from literal snowstorms to literal hurricanes in the final week of October!

Of course, both of those are freak occurrences and not likely to happen during your fall in New York, but just be aware that it’s not unusual to have extreme weather in the late fall in NYC. 

If you’re planning on visiting in October/November, it’s better to bring a warmer jacket as your primary jacket and a lightweight jacket as your backup in case of freakishly nice weather. I love the UNIQLO packable down jacket (here’s a similar version) as a stylish but lightweight alternative to heavier winter jackets, and I find that mine keeps me warm in temperatures as low as 40° F / 4° C. If necessary, you can layer the two, as the down jacket is quite light — I do this often!

A rain jacket and/or umbrella

New York isn’t particularly rainy in the fall – expect an average of 7 days of rainfall per month, about a quarter of the time. However, it’s always better to be over-prepared than under-prepared in my book!

I love my Marmot PreCip jacket and used it in New York all the time. It kept me dry even on long bike rides through the rain in the city! 

If you don’t want to bring a raincoat, I’d still throw an easy folding travel umbrella in your bag. Whenever it rains, you can easily grab an umbrella on the street in the touristy parts of New York – they proliferate as if out of thin air – but they’ll be overpriced and break within a few uses and just add to landfill.

A knit hat and scarf

I find that my ears and neck get cold first, before any other part of my body. I strongly recommend bringing a knit hat with you, as well as a lightweight scarf. They’re easy to pack and will bring versatility to the clothes that you bring. 

I find that if I just accessorize what I would wear on a summer day with some extras – a jacket, a hat, a scarf, some leggings – that’s the perfect recipe for a fall in New York outfit.

Comfortable leggings

I love leggings for travel. To me, leggings plus a dress plus boots equals the ultimate travel outfit. Not much to match, and it’s hard to beat the stretch and comfort of leggings. 

In the early fall, I recommend simple cotton/spandex leggings (I usually buy mine at H&M); by the time late fall rolls around, you’ll often find me in my favorite fleece-lined leggings, one of my favorite ways to stay warm when the temperature drops in New York.

Your favorite travel outfits

What I recommend you wear in New York in fall depends on what your personal taste is, and that isn’t really for me to dictate! You could be a jeans and sneakers kind of person, or you could be a dresses and leggings kinda girl (raises hand).

Generally, for one week of travel in the fall in NYC, I would bring the following: 1 pair jeans, 3 pairs leggings, 3 long-sleeve shirts, 2 short-sleeve shirts, 2 skirts, 3 dresses, 1 chambray button-up, 1 leather jacket, 1 ultra-light down jacket, and my favorite travel-friendly shoes. 

Pro packing tip: Pick neutral colors for your shirts and skirts and prints for your dresses so that you can easily mix and match your separates!

Underwear and other essentials

Of course, don’t forget to bring enough bras and underwear for your trip! I don’t recommend doing laundry in NYC if you can help it – it’s expensive and a pain in the ass – so bring enough to last you your trip unless you’ll be in New York for such a long time that it’s not feasible to do so.

For one week, I would bring 2 bras and 8 pairs of underwear, as well as 7 pairs of socks.

A travel daypack or purse

While in general, pickpocketing is not a major issue in New York the way it is in many European cities, that doesn’t mean it doesn’t happen – especially in crowded places like Times Square or a rush-hour subway car.

I lived in NYC for nine years and was never the victim of theft (well, okay, once someone stole the front wheel of my bicycle while I was at dinner, but that hardly counts). 

However, if you’re going to be spending a lot of your time in touristy places in New York, I do recommend investing in a bag with some security features.

Make sure it’s one that you like so you can use it in other cities around the world! I am obsessed with my PacSafe backpack and it’s been with me to nearly 30 countries since purchasing it. 

It has interlocking zippers, RFID blockers, and slash-proof construction and is basically theft-proof (I mean, I could barely get into my own bag when I first got it, so that tells you how a thief would do with it!).

It’s also actually cute and stylish, so you won’t look out of place in New York. Be sure to put it in front of you while on the subway – it’s polite, but it’s also the best way to prevent theft.

Of course, if you don’t like carrying a backpack, a purse also works. I recommend a cross-body bag you can wear in front of you so you can keep an eye on it. 

Odds & Ends to Pack for New York in the Fall

Your everyday toiletries

Shopping for odds and ends in New York is likely twice as expensive as it is back home, so I recommend stocking up on what you need beforehand and bringing it with you to New York rather than shopping once you arrive.

Here is what I would bring, but adjust it for your own needs: lip balm, everyday makeup, a moisturizer with SPF for day time, deodorant (please for the love of God), shampoo and conditioner, body wash, a razor, a hairbrush, and hair ties.

Hand sanitizer & Kleenex

How shall I put it nicely? The New York subway is likely where the superbacteria that will take us all out will form. 

I’ve seen all sorts of nastiness go down on a New York subway car, so try to avoid touching the railing if you can. And if you can’t, be sure to use hand sanitizer (squirt a little hand sanitizer into a Kleenex to clean the rail if you’re rightfully germophobic). 

Kleenex is also handy as finding a free restroom in New York is like finding a needle in a haystack and finding one stocked with TP is like winning the lottery. 

Headphones & earplugs

You’ll love having headphones on the New York subway, trust me! And I’d strongly recommend bringing earplugs as well. Even if you’re staying in a quiet neighborhood, New York can be one hell of a loud city, with sirens blaring, horns beeping, and the occasional drunk reveler bellowing show tunes from many floors below…

Complete New York in the Fall Packing List, in Bullet Form

Just want a quick and dirty New York in fall packing checklist? Here you are:

ESSENTIALS

CLOTHING (ASSUMING 1 WEEK OF TRAVEL)

  • 1 or 2 jackets, including 1 waterproof option
  • 2 or 3 pairs comfortable walking shoes (I recommend one pair of boots and one pair of sneakers, plus throw in a pair of sandals if visiting in early fall)
  • 1 pair of jeans
  • 3 pairs comfortable leggings
  • 3 long-sleeve shirts
  • 2 short-sleeve shirts
  • 2 skirts
  • 3 dresses
  • 1 chambray button-up or cardigan
  • 2 bras 
  • 8 pairs of underwear
  • 7 pairs of socks.
  • 1 scarf
  • 1 knit hat

TOILETRIES + ODDS & ENDS

  • Umbrella
  • Lip balm
  • Everyday makeup
  • Moisturizer with SPF for day time (and one without for nighttime)
  • Deodorant
  • Shampoo and conditioner
  • Body wash
  • Razor
  • Hairbrush + hair ties
  • Kleenex
  • Hand sanitizer
  • Headphones
  • Earplugs

What to Wear in Paris in Winter: Female Packing List + Tips!

Paris is a gorgeous city any time of year, but in the winter, it’s a bit extra delightful.

The tourists are as gone as they’ll ever be, scared off by the cold temperatures and or lulled into Germany or Austria instead for Christmas Market fever.

Yes, winter in Paris is cold, and the weather in Paris in December through February isn’t exactly enticing, but getting to see the City of Lights as close to empty as it gets is not a bad trade-off.

view of luxembourg garden covered in snow in paris in winter

In order to enjoy your time visiting Paris in winter, you’ll want to pack appropriately.

Whether you’re visiting Paris on a solo trip or you’re going with a partner, friends, or family, you’ll need to know how to dress and what to bring for a winter trip.

I’ve nailed down exactly what to wear in Paris in winter to keep you bundled up and warm, yet looking as chic and feeling as comfortable as possible.

Paris Weather in Winter

the sacre couer with snow in winter

First of all, before you decide what to wear in Paris in winter, you should probably figure out just how cold it’ll be.

Luckily, Paris’s winter weather is not that cold: throughout the winter, we’re talking average highs of 46-48° F (8-9 °C) and average lows of 37-39 °F (3-4 °C).

However, that of course doesn’t account for extremes which are possible. Climate change means more volatility; France shattered its heat wave record this last summer.

Snow is possible but not necessarily likely during your winter trip to Paris. It really can vary — some months there’ll be no snow at all, other months, it can pile up. In 2010, there were 14 snowstorms that December in Paris with temperatures as low as -10 °C / 14° F and even lower in the surrounding suburbs.

I tell you this wide range not to be unhelpful, but to remind you to prepare for the worst weather and hope for the best when deciding how to pack for Paris in winter.

When it comes to packing for winter in Europe, I think it’s always better to be a bit overprepared than underprepared.

Otherwise, you risk having to spend a day of your trip looking for all your winter needs and buying some things impulsively that aren’t quite right, rather than preemptively bringing or buying things you love.

There’s so much to do in Paris — from visiting the Louvre and Catacombs to taking a day trip to the Champagne region to exploring a more unusual side to Paris, that there’s really no point in spending the time shopping for appropriate clothes just because you didn’t pack right!

Where to Stay in Paris in Winter

If you’re visiting Paris in winter, I suggest opting for an awesome place (perhaps with an Eiffel Tower view?) that takes advantage of the fact that you’re visiting in the off-season!

Whether that’s a chic Airbnb in Paris or a luxury hotel with an unbeatable view, it’ll improve your trip to Paris in winter drastically.

EIFFEL TOWER VIEW | For a chic hotel with an Eiffel Tower view that won’t totally break the bank, the Jardins Eiffel is a fantastic choice for a dash of luxury at a reasonable price. the rooms are quaint and lovely with a real Parisian touch to them. Prices from $250/night and up. Check details on Booking.

MODERN BOUTIQUE | citizenM is one of my favorite hotel chains as they offer all sorts of great modern amenities, incredibly vibrant styling, and well-thought-out rooms at budget prices. They offer a smaller footprint per room but designed in a way that doesn’t seem tiny, and passing on that discount to you. Prices from $200/night and up. Check details and availability on Booking.

LUXURY APARTMENT | For a lovely apartment-style stay, you’ll need to be careful to pick an apartment rental that stays within Paris’s short-term rental laws. Résidence Charles Floquet is a condo-hotel that does just that, offering all the apartment amenities with the confidence of a hotel, ranging from 1-bedrooms with courtyard views to duplexes with Eiffel Tower views. Prices from $400/night and up. Check details and availability on Booking.

What to Wear in Paris in Winter: The Essentials

Here is my complete list of what to wear in Paris in December through February, with product recommendations to things I love, as well as a few Paris winter outfit ideas along the way.

A winter coat

What coat you should pack for Paris in winter depends on how warm you like to be. I personally run cold in general and come from a magical place (California) where winter barely exists: where people freak out and pull on the Uggs and fleece jackets as soon as temperatures drop below 50 °F (that’s 10 °C for you non-Americans out there)

I struggled with winter a lot when I first moved to New York. It was a rough wake-up call. After two years of trying to make cute woolen peacoats work for me in sub-freezing temperatures Gossip-Girl-style, I eventually packed in it, called it quits, and invested in a proper winter coat. My life changed overnight, even if I definitely lost quite a few fashion points.

This is the exact North Face parka that I bought. I love that it comes down to mid-thigh, which makes a world of difference over a jacket that ends at the hip. You really have no idea how much heat you lose in that area until you wear a jacket that covers it!

While North Face gear is pricy, it will last you a lifetime, as North Face products have a lifetime guarantee (hold onto your receipt though just in case).

I tested this guarantee when my zipper came unstitched after two years of heavy use, wearing it every day including when I was biking to work in the winter.

North Face promptly fixed it up and sent it back as good as new. This isn’t sponsored, for the record – I’ve paid out of pocket for my North Face gear and would happily buy it again.

However, I know for some people, the idea of wearing a puffy winter coat in Paris in winter makes them cringe. And I get it — I mean, I suffered through two winters of being ridiculously cold for the sake of fashion as well.

So what instead I would suggest, if you really want to look cute without sacrificing warmth, is to buy an ultra-thin down jacket like this one (make sure it has no hood) and layer it underneath a cute wool peacoat – I love this one in red. Make sure the coat has a high neck so the layer doesn’t peep through!

Best Shoes for Paris Winters

Since Paris doesn’t really snow that often in the winter, you can safely leave the snow boots behind. What I do suggest is something waterproof, as Paris is quite rainy all winter and it’ll also work in case it does snow while you’re in Paris as well.

For me, the winter boot I can’t live without are my Blondo waterproof leather boots. I bought this pair in 2008… which means I’m celebrating my 10-year anniversary with them this year, which is longer than most of my friendships and every relationship I’ve been in so far.

In 10 years of heavy use, I’ve only had to get them resoled once, which set me back about $60 in NYC. However, for a pair of shoes I wear nearly every day for 3-4 months per year, it was 100% worth it. 

The traction is excellent, the look is sleek and streamlined, and I’ve tested their waterproofness in many a filthy slush puddle and emerged with my feet unscathed. They stand the test and that’s why they’re the only shoes I think you need to wear in Paris in winter.

Since it’s been literally a decade since I bought these boots, the exact original version I bought is no longer available, but these look exactly like the ones I have and are the same Blondo brand.

If you want a shorter Chelsea-style ankle boot rather than a knee-high look, Blondo also makes a really cute version here that I’m eyeing for this winter.

One last note: Be sure to pair your winter boots with proper wool socks. No matter how insulated your shoe is, it won’t do much good if you are wearing thin, crappy cotton socks (another thing that took me several years to learn… why do I suck at winter so badly? Oh yeah, California).

I invested in these Smartwool socks after much hemming and hawing about the price and I’m so glad I did. You don’t need that many pairs because you can actually re-wear them a few times before they get smelly because Smartwool is odor-absorbent and basically kind of magical. I’d bring 3 pairs for a week-long trip and give them a day to breathe in between wears.

Winter Hat

Winter accessories are really what make or break whatever you decide to wear in Paris.

As long as you have a hat, gloves, and scarf, you can almost get away with wearing whatever you want as your base layer – as long as you have the right jacket and shoes like I recommended above as well.

In terms of a hat, I recommend wearing a tightly-knit hat that fits firmly on your head and covers your ears completely — bonus points if it is lined with fleece!

I lose my hats constantly since I’m a hot mess of an adult, so I go through several each winter. I recommend a beanie knit hat with fleece, kind of like this one.

I like colorful ones with a pompom on it, because it adds a bit of color and interest to your winter photos (where you can otherwise just look like an all-black blob).

On warmer days where your ears don’t need to be covered, you can always try to be chic Parisian-style with a beret (here’s how to wear a beret and not look like a potato).

Touchscreen-friendly gloves

For gloves, look for something that is both touchscreen compatible and warm. However, you really don’t need something waterproof or crazy high-tech. I recommend a simple pair of gloves like these ones.

You’ll have your hands in your coat pockets most of the time anyway, but it’ll be nice to have touchscreen-friendly gloves so you can use your smartphone without having to take them off.

Plus, if you’re traveling to Paris with teenagers, they’ll definitely want easy access to their phones!

Winter scarf

For scarves, I recommend the biggest, most wrappable scarf you can find. I tend to go for something huge, chunky, and made of acrylic.

I like acrylic because it’s gentler on my skin than wool, which tends to make me itchy with when it’s in direct contact with my skin (with socks being the exception, since the skin on my feet is much less sensitive than everywhere else).

However, other people may be fine with wool, in which case I’d definitely say go for a wool scarf as wool can really trap in heat and keep you ultra-toasty.

I prefer an infinity style knit scarf for winter that I can wear super tight around my neck to keep in as much warmth as possible. Every bit counts!

I suggest at least one but better yet two scarves if you can fit it. Since it’s an outer layer, it’ll show up in all your photos, so choose a pattern or print you love that goes well with your winter coat, which you’ll likely only have one of, and adds variety to your photos.

Winter Leggings

Now, I’m going to let you in on my #1 secret weapon when it comes to what to wear in Paris in winter. Three words: fleece lined leggings.

These leggings are magic when it comes to surviving just about any winter. If you can tolerate wool, you’ll probably be even warmer with something like these merino wool leggings.

But since I can’t, I substitute fleece-lined leggings like these ones. On a cold day, I typically wear them underneath a pair of jeans and I am toasty and warm all day long. I prefer the ones without feet because they sag less during the day, and then I can wear my own warm socks with them. I generally pack 2-3 for a one-week trip.

What to Wear in Paris in Winter: Complete Clothing Packing List

If you’ve followed my advice up to this point — warm jacket (preferably down or faux down), waterproof leather boots, wool or fleece-lined leggings, and all the winter accessories — you can pretty much get away with wearing whatever you want with them.

I tend to choose a lot of sweater dresses because I am lazy when I travel and don’t like to pack a lot of different things that I have to mix and match, when just one dress will do perfectly. But you can also just wear jeans and sweaters on your trip so long as you have the appropriate winter accessories, shoes, and outerwear.

Here’s my complete Paris in winter packing list (well, clothing at least).

This list is assuming you’ll be in France in winter for one week.

Feel free to add or subtract clothing items as it makes sense depending on the length of your trip as well as your personal taste and style.

It includes the above-mentioned outwear accessories so you don’t forget it!

  • Several pairs of fleece-lined leggings. 3 pairs should do you well for 1 week.
  • 1-2 base layer thermal tops if you run cold. You can skip these if you don’t get cold easily or you’re used to cold temperatures.
  • 1-2 sweater dresses, picking colors that pair well with your leggings
  • 1-2 pairs of jeans (slightly loose is better; too tight will be hard to layer), which you can wear over leggings if it’s especially cold.
  • 2-4 warm sweaters. I recommend wool if you can tolerate it. 100% cashmere sweaters tend to be everyone’s favorite, but I find even cashmere itchy personally. I wear synthetic or acrylic sweaters with a base layer underneath.
  • thick jacket like the North Face parka I recommended, or a cute pea coat or something similar.
  • thin down jacket to layer underneath a less warm coat. You can keep this rolled up in a day bag, that’s how small it is, and add and subtract it as a layer as needed.
  • 3-5 pairs of wool socks.
  • 1 pair waterproof leather boots or similar boot that can withstand snow and rain.
  • 1-2 knit hat.
  • 1 pair gloves, making sure you pick ones that you can use with your smartphone.
  • 1-2 ultra big, cozy warm scarves. I especially suggest infinity style wrap scarves which trap in heat.
  • 1 large-ish cross-body purse or even a cute backpack for daily use.

What Else Should Be On Your Paris in Winter Packing List?

So, you’ve determined what to wear in Paris in winter – the last thing to decide is what other extras to bring.

Here are my essentials: however, you know what you need, so feel free to adapt as you see fit.

Toiletries & Personal Items

  • Lip balm: I tend to get dry lips in winter from the cold air and overheated buildings. I love this Aquaphor as it doesn’t dry my lips out the way many balms do (which trick you into continuing to use them!).
  • High-quality moisturizer: For the same reason as above – the combination of winter weather plus heat will do a number on your skin.
  • Sunscreen: Don’t discount the need for sunscreen even in the winter! I like this fancy Japanese Biore sunscreen for my face as my skin is quite sensitive and acne-prone, and this is really gentle on my skin.
  • Hand sanitizer: Perfect to use after getting off the metro, before eating, or any place with less than sanitary conditions. You don’t want to get sick on your trip! I always find I get way sicker when I pick up illnesses abroad, so prevention is key. I carry a mini bottle of Purell like this one with me.
  • Kleenex
  • Everyday make-up
  • Shampoo & conditioner
  • Hair brush & other hair accessories
  • Body wash
  • Body lotion
  • Deodorant
  • Prescription medicine, if needed
  • Other medicines (ibuprofen, Pepto-Bismol, etc.)

Electronics

  • High-powered portable battery pack: Your phone battery will get run down very quickly on a cold winter day in Paris, so be sure to pack a portable battery charger like an Anker battery pack: this is what I swear by as a blogger who needs fully charged electronics at all times!
  • Camera: I personally use a Sony A6000 mirrorless camera, which is the perfect travel camera for producing professional-quality photos without taking up much space or weighing too much. I have several lenses for it but most people will be fine with the kit lens. Be sure to pack several extra batteries as well, for the same reason as above (winter weather = zapped electronics)
  • Adaptor, if visiting internationally: If you are visiting from continental Europe, North America, South America, most of Asia – basically, anywhere that doesn’t use UK plugs – you’ll want an international adaptor for sure. If bringing something that is reliant on heat, like a hair dryer or straightener, be sure to bring a voltage converter as well.
  • Smartphone and charger
  • Laptop or tablet and charger
  • Kindle, if you use one
  • Noise-canceling headphones, if you have them

Of Course, Don’t Forget Travel Insurance!

When planning any trip, especially a winter trip, be sure not to forget about travel insurance!

I use SafetyWing and its Nomad Insurance to insure all of my trips for its affordable rates and comprehensive coverage for all my travel needs.

Especially when traveling in winter in Europe, with its unpredictable weather and cold and flu season going strong, you’ll want to be covered!

SafetyWing’s Nomad Insurance provides both travel insurance (coverage for trip delays, cancellations, interruptions — the likelihood of which increases in winter) and travel medical insurance (coverage for things like accidents, illnesses including Covid, etc. — also more likely in winter!).

Coverage is really affordable — for me, it costs roughly $11 USD for a week of coverage outside of the U.S., with a policy max of $250,000 after a deductible of $250. Not bad!

Check SafetyWing for a quote here!

Taiwan Packing List: What to Wear in Taiwan (In All Seasons)

Taiwan is a beautiful lush country with so much to do and see!

With world-class cities like Taipei and Taichung thriving in winter and gorgeous beaches in Kenting in summer, what to pack for Taiwan will largely depend on the season.

Taiwan has four distinct seasons (here are my thoughts on the best time to visit), so if you are coming to Taiwan in winter from another destination in Southeast Asia, expect a bit of a shock to your system.

I visited Taiwan in January coming from Bali, and it was on the cool side in Taiwan but still rather pleasant.

Allison Green enjoying a day in Taiwan drinking a cup of coffee, wearing a beanie and a long-sleeve shirt

In January, I found that the average temperatures were around 50-65 °F or about 10-18 °C.

If you come from a cold climate, that may seem like a warm winter!

However, many people combine a trip to Taiwan with Southeast Asian destinations.

Taiwan in the winter is definitely cooler than destinations you might pair it with, like Indonesia, Singapore, or the Philippines!

I may have gotten lucky in my two weeks in Taiwan in winter, as it only rained one or two days of my trip.

However, apparently the week before I arrived, there was nearly a week straight of rain. So pack accordingly, prepared for the worst but hoping for the best!

One lucky day, I was even able to wear a maxi dress I bought in Bali – in the winter!

Meanwhile, Taiwan summers are hot and humid with the potential for plenty of thunderstorms, usually in the late afternoon.

You can expect temperatures around 80 °F during the day, about 27 °C, but heat waves can definitely hit!

That’ll send the mercury rising up to 95 °F /35 °C with a sea of humidity to boot.

Typhoons can also happen during the summer months, but this type of weather is unpredictable.

As I usually end up recommending for most destinations with four distinct seasons, spring and fall are the most pleasant times of year to visit Taiwan.

The mild winter means that fall and spring are even milder, but you’re less likely to have truly cold weather and rain in these months.

In April and May you may even be lucky enough to see the cherry blossoms, and September and October will bring lovely orange and red fall foliage, so there are reasons to visit for every season.

Your Ultimate Taiwan Packing List

What to Pack Everything In

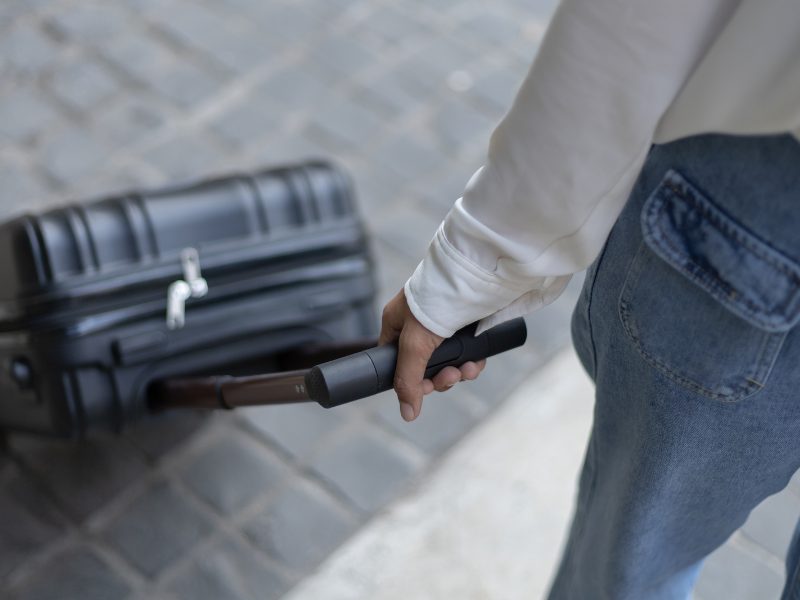
woman holding luggage on a street wearing a white shirt and jeans

I normally travel with a backpack, but I actually brought a big 2-wheel suitcase to Taiwan as I was staying in Bali for a month beforehand and wasn’t flying with budget airlines so I was actually able to bring a checked bag for not much extra.

However, I ended up really hating traveling with a suitcase.

Even though Taiwan has excellent public transportation infrastructure, it just got annoying to move with my suitcase all the time.

Especially when I took the train to Taichung it was quite bulky and annoying to have my suitcase with me.

the city of taichung with its scenic park

I considered traveling more around Taiwan during my 2 weeks there but I ended up sticking to just Taiwan and Taichung because I hated lugging around my suitcase so much!

Since that’s kind of ridiculous, I recommend instead just bringing a travel backpack that is comfortable, that you actually like traveling with.

Normally, I use the Tortuga Setout Backpack and found myself missing it dearly on this trip.

Or, pack light and bring a rolling suitcase that isn’t too heavy and has 4-wheel spinners (I was dragging around an old 2-wheeler; do not recommend!)

Here are the products I generally use to organize my packing, and what I wish I had brought to Taiwan instead of my god-awful giant rolling suitcase.

All I packed for 6 months in Europe - Find out how here!
Packing cubes are bae <3

Travel backpack (carry on size or check-in size): When I’m not being an idiot and seriously overpacking, I always use my Tortuga Backpack  so that I can avoid checking in my luggage.

I really regretted not having it with me in Taiwan and in the year since my Taiwan trip it’s all I’ve brought with me since.

Here’s why I love the Tortuga: it’s 45L but it’s separated into three smart compartments: a laptop area, a large rectangular area, and a smaller compartment with separators for passports, pens, etc.

The large rectangular area is the perfect thing to pile all your packing cubes stuffed with clothing into — its shape is perfect for packing in way more than you think.

Plus, it’s quite comfortable to wear, since it has a padded hip belt as well as comfort-molding shoulder straps and a chest strap, helping you distribute the weight.

Check out more specs and details here!

A rain cover for your backpack: Taiwan is prone to lots of rain so it’s great to be prepared.

I’ll be honest, I actually don’t have one of these because I am a horribly irresponsible person.

Every single time I see a person with a backpack proudly trudging through the rain with a rain cover on, clearly not frantically panicking about the state of their electronics the way that I am, I vow to get one.

Be like them, not like me.

This rain cover looks to have good reviews but again, terrible at adulting (1/10, barely remember to feed myself), so do your own research if you’re so inclined.

Packing cubes: Whether you pack for Taiwan with a suitcase or a backpack, I definitely recommend packing cubes.

Many people who visit Taiwan visit several cities during their trip via the excellent train system (seriously, guys, Taiwanese trains are next level perfect, especially the high speed trains!)

Since you’ll need to pack and repack your bag several times if you do this, packing cubes make a world of difference.

Plus, as it keeps your clothes rolled and packed neatly, it prevents wrinkles and makes sure you’re utilizing your space the best way possible. 

I use these packing cubes and love them, but any will do fine.

Laundry bag: In addition to packing cubes, I also like to bring a laundry bag to separate out my dirty clothing from my clean clothes.

Laundry in Taiwan is affordable and can be done at most hostels, hotels, or guesthouses, so you don’t really need to pack everything you need for a long trip unless you really want to.

While you could certainly just reuse a plastic bag for this purpose, I do like having a cute one like this travel-themed one from Kikkerland.

Hanging Toiletry Bag: I tend to pack a lot of toiletries with me because this is one area where I find it hard to claim my “light traveler” status.

Plus, after falling in love with Taiwanese beauty products, I definitely left Taiwan with more toiletries than I came with!

I use a hanging toiletry bag to pack my toiletries in an organized way that takes up minimal space.

It has the perfect number of separators, organizers, and pockets without taking up any excess space.

It’s kind of a magical Mary Poppins bag – you’d be amazed at how many travel-sized toiletries you can fit in it.

Unlike other bags, it zips up flat like a bulky manila envelope, so it is really easy to slide into your backpack or suitcase without being a weird bulky shape that makes bags annoyingly hard to close.

Backpack with locking zippers: Taiwan is one of the safest destinations in Asia in terms of petty crime, but that doesn’t mean that opportunist thieves don’t exist anywhere in the country.

On all my travels, I swear by PacSafe for the combination of functionality and cute aesthetics, and I love their CitySafe backpack which I use as my everyday bag, even when I’m not actively traveling. 

It’s actually cute in addition to having all the awesome security features that make you feel pretty much pickpocket-proof!

If you’re curious to learn more, I have a full review here – not sponsored, just irrationally obsessed.

Essential Things to Pack for Taiwan

neon lights in ximending - one of the best places in taipei to visit
Taiwan has fantastic shopping, but I still prefer to be prepared!

Taiwan, especially its cities like Taipei and Taichung, are ultra-modern and super easy to shop in.

Whether you need more clothes, some toiletries you forgot, or some accessories, you’ll find plenty of stores in Taiwan.

However, the language barrier in Taiwan can sometimes be a bit of an issue and a lot of signs and labels will be in Chinese, which is not always the easiest for shopping.

Therefore, I recommend packing carefully anyway (that’s why you’re reading this Taiwan packing list anyway, right?) so that you can buy things as desired rather than as needed.

Travel Insurance: Travel insurance is a must for any country, regardless of safety.

Taiwan is basically as safe as it gets, but still, there are random acts of nature everywhere — typhoons are a regular occurrence in the summer, and a 6.4 earthquake hit Taiwan just a few weeks after I left.

I use SafetyWing travel medical insurance travel medical insurance to cover me both in terms of trip delays or interruptions as well as illness, theft, or accident.

Lonely Planet Taiwan: While obviously, I do a lot of research on blogs, I also like to have a digital copy of a Lonely Planet loaded up on my Kindle.

It is more comprehensive than blog posts, which often give good information and firsthand experience, but sometimes don’t go beyond surface depth or top 10s. I like planning with a balance of both.

Kindle loaded with e-books: If you are traveling between cities in Taiwan by train or bus, you’ll find yourself with a lot of spare time.

For travel, my Kindle Paperwhite is my best friend.

Buy several books before you go so that you won’t run out of things to read and get bored!

It’s not always easy to find English-language bookstores when you travel, so I like having the option of using a Kindle.

Basic toiletries and cosmetics: While I love Taiwanese beauty products and definitely stocked up on quite a few things in Taiwan, there’s no denying that the brands they have in Taiwan are different to what we have in the US, Europe, etc. 

If you have a preferred product be sure to bring it. That said, if you’re a beauty fan, definitely pop into Watson’s or some similar beauty store in Taiwan and pick up some fun products.

I love Taiwanese sheet masks; they’re cheap and make an excellent souvenir!

Since Taiwan is so humid, I ended up preferring powdered foundation instead of liquid, because I was sweating so much.

Here are a few of the best drugstore powder foundations that might work for you!

Sunscreen: One major problem with buying sunscreen in Taiwan is that a lot of sunscreens have whitening agents – which is a problem in many Asian countries.

These whitening agents can be really harsh, especially on sensitive skin, so I recommend avoiding them.

I traveled Taiwan in winter but still liked having my solid sunscreen stick from Neutrogena because I always max out on my liquid toiletry allotment.

Mosquito repellent in summer: In winter, you won’t need mosquito repellent in most places in Taiwan but you definitely will in the summer or shoulder season months.

Typically, I bring a bottle of mosquito repellent spray, but I also like to keep a few of these super-handy mosquito repellent wipes with me if I need to reapply on the go.

I also highly recommend bringing some After Bite mosquito bite treatment since it’s inevitable some of those buggers will get you at one point in high mosquito season.

Water bottle with built-in filter: Tap water is safe to drink in most places in Taiwan but sometimes buildings have crappy old pipes and the taste or quality may not be as high as you are used to.

While it’s not going to make you sick the way, say, drinking Bali’s or Thailand’s tap water would, it still is better to drink it filtered if you have a sensitive stomach.

I typically use a Lifestraw water bottle with a filtration system inside of it that gets rid of 99.9% of nasty bacteria and viruses.

Another option is the Steripen, which uses UV light to sterilize tap water.

Basic medicine: While Taiwan will likely have most medicine you need, I still always stand by having a basic first aid and medicine kit for common travel woes.

This goes especially stomach medicine, as I find a lot of countries don’t have my preferred medicine (salicylate bismuth, aka Pepto Bismol) and instead have things that don’t work quite as well for me.

Here’s what’s in my arsenal for every trip and what I brought to Taiwan:  Pepto-Bismol tablets for standard stomach troubles, Imodium as a nuclear option, some sort of painkiller like ibuprofen for headaches and minor pains, and some sort of Dramamine or motion sickness pills.

Of course, if you have any specific medical needs, you will want to bring that as well, especially anything that may require a prescription.

What to Wear in Taiwan in Winter for Women

Allison Green jumping in the air with her hands up in a white and blue striped dress

This part of my Taiwan packing list is specific to women, so men, feel free to skip this part and go on to the next section, where I attempt to guess what you should bring.

Taiwan’s winter isn’t that harsh (see: above sundress I wore in the winter one day in Taichung!), but you should definitely pack differently for Taiwan in winter than in summer.

Use this post as a guideline but keep in mind the temperatures are about 50-65 °F, (10-18 °C) so you can also just bring what you’d be comfortable with wearing in those climates.

This packing list is assuming you’ll be in Taiwan for a week or more – if you’re only in Taiwan for a shorter trip, you can subtract from this list.

Light sweater, hat, skirt, and leggings – an easy Taipei in winter outfit!

2-3 long-sleeve dresses: I love dresses year-round, even winter, because I don’t have to match and they make me look a little more dressed up. Pair with leggings or bare-legged with a pair of boots on a warmer day.

5+ tees: I prefer darker colors as I’m able to hide the fact that I spilled soy sauce and xiao long bao juice all over my shirt.

2 pair jeans: Definitely a must for Taiwan – the weather is perfect for jeans.

1-2 pairs thin cotton leggings: Great for pairing with dresses or skirts to keep warm.

2-3 long-sleeve tees or thin sweaters:  Taiwan’s winter is perfect long-sleeve weather, so pack a few tees or thin sweaters (nothing too bulky)

2 skirts: I suggest bringing one black skirt and one printed skirt for flexibility. I typically wear mini-length skirts with leggings in winter.

1 pair sneakers: You’ll walk a ton in Taiwan, so be sure to bring some easy walking shoes. I love my black Nikes as I find they look cute even worn with my dresses and I’m all about having options. I also like white sneakers since they pair well with different outfits (here’s how to wear white sneakers and keep them clean!)

Moisture-wicking socks, preferably made of wool or something that is odor-absorbent like these ones from Smartwool

1 pairs sandals: Even though it’s winter it may still be warm enough for sandals.

Plus, many Taiwanese guesthouses and hotels ask that you remove your shoes when you enter, so having something that slips on easily is nice.

I love my Birkenstocks and will never go back

1 rain jacket: Even if it looks like it’ll be a nice day out, the rain in Taiwan often has other plans – namely, ruining yours.

I love my Marmot rain jacket and bring it with me on every trip because it packs up small and offers pretty much complete waterproofing.

1-2 cardigans: Great for layering if the weather is being especially finicky!

1-2 bras: I personally brought 1 regular bra and 1 sports bra and switched between the two, but the cleaner people amongst us may object to that and want to bring more. You do you.

1 hat: My ears get cold easily and Taipei can get windy!

7+ pairs of underwear: I like having about a week’s worth of underwear so I don’t always have to plan out my laundry days.

Bathing suit: If you plan on going to one of Taiwan’s hot springs, you may want to bring a bathing suit!

What to Wear in Taiwan in Summer (Ladies)

volcanic area in taiwan in summer
If you do any hiking in summer, you may want to bring a sweater – it can still get pretty cool in Yangmingshan and other higher altitude places

Generally, summer is quite warm in Taiwan, so you’ll want to wear lightweight, breathable clothing and leave anything synthetic or polyester at home.

Opt for cool, natural fabrics like cotton and my personal summer favorite, linen.

That said, Taiwan can go a bit crazy with air conditioning and you’ll want some layers if you go hiking in the mountains, so be sure to bring a cardigan or two to layer with even if the forecast looks hot!

3-5 lightweight summer dresses: Dresses are great for Taiwanese summer weather, plus they pack up small, so bring as many as you can get away with. Aim for something that hits around the knee (a few inches shorter is fine, but avoid tiny mini dresses) as Taiwan is a bit conservative with how they dress. I love maxis and midi dresses for this climate.

5+ tees & tanks: You will sweat a lot, so opt for black, navy, and other dark colors.

Yes, they attract heat, but they also avoid the telltale yellow pit stains that seem to be my constant vibe whenever I attempt to wear white.

1 pair jeans: It’ll probably be too hot to wear these during the day, but I like having them to wear at night occasionally, or when I know I’ll be somewhere heavily air conditioned.

1 pair thin cotton leggings: Great for making yourself less appetizing to mosquitos at night and also for cooler nights up north or in the mountains if you go hiking in one of Taiwan’s gorgeous national parks

1-2 long-sleeve tees or thermals: For hiking and unexpectedly high air conditioning

2-3 skirts: I suggest bringing one black skirt and one printed skirt for flexibility.

I especially love having midi or maxi length skirts, which feel great and coincidentally look nice in photos!

As a bonus, the extra fabric around your legs traps some cool air, making you feel less hot.

1 pair sneakers: Even in the summer I often like to wear breathable running shoes for walking around.

I love these black Nikes. Plus if you want to hike, and Taiwan has great hiking, you’ll want proper shoes for that.

Moisture-wicking socks, preferably made of wool or something that is odor-absorbent like these ones from Smartwool because your feet will sweat a lot in the summer.

1-2 pairs sandals: I suggest bringing one pair of rubber flip flops like these Havaianas and another pair of more stylish or dressy sandals.

I’m obsessed with my Birkenstocks.

These are great for when it’s just too hot to put on sneakers, and rubber flip flops are great for days when rain is in the forecast.

1 rain jacket: Even (especially) in summer rain is common and I need a jacket like my Marmot rain jacket which is pretty much completely waterproof and small when packed up.

Plus the underarms have zippers underneath which you can open, making the jacket more breathable, which is a must in humid summer weather.

1 cardigan: In case of overzealous air conditioning

1-2 bras:  Maybe more if you’ll be really active

7+ pairs of underwear

Bathing suit: Especially if going down south to Taiwan’s best beaches!

What to Wear in Taiwan (For Men)

I don’t know what to put as a photo here…. so look, here’s Taipei 101, I guess?!

Full disclosure, I am not a dude. But if I was, this is what I would bring, I guess.

Winter:

  • 2 pair jeans
  • 5 T-shirts
  • 5 long-sleeve tees or thin sweaters
  • 7+ pairs underwear
  • flip flops
  • sneakers
  • a few pairs of moisture-wicking socks
  • sturdy waterproof rain jacket
  • swim trunks
  • 1-2 cardigans
  • 1 non rain jacket (denim jacket, hoodie, etc)

Summer:

  • 1 pair jeans
  • 1 pairs thin, lightweight travel-friendy men’s pants
  • 2-3 pairs shorts (in summer)
  • 7+ pairs underwear
  • flip flops
  • comfortable walking sandals
  • sneakers
  • a few pairs of moisture-wicking socks
  • sturdy waterproof rain jacket
  • swim trunks
  • sweater for colder weather + too much AC

What to Pack for a Hostel in Taiwan

Sun moon lake scenery in Taiwan with blue lake, cloudy sky, and little islets in the water

If you’re backpacking through Taiwan, there are a few extra things that you should bring that you might not need if you were staying in hotels.

1 pair flip flops: For communal bathrooms, you’re definitely going to want a pair of flip flops to avoid funky foot issues!

1 travel towel: Some Taiwanese hostels will provide a towel, but it’s not always a given.

You can usually rent one for a small fee, but I find it handy to carry my own XL quick-dry travel towel

They fold up quite small, are great for beach days or hot spring dips, and are generally just a nice thing to have.

1 eye mask: Great for when you want to sleep but your roommates don’t!

Some earplugs or good noise-canceling headphones: I love Hearos — they’re the gold standard for ear plugs.

What Toiletries to Pack for Taiwan

While you can easily replace most toiletries in Taiwan, here’s quick list of what I recommend bringing in addition to your typical toiletries that you bring with you on every trip (body wash, shampoo, etc.)

 
Be grateful that I’m not including a photo of me wearing a Taiwanese sheet mask.

Hand sanitizer: Nice for when eating street food, taking public transit, etc. and you may not have a chance to wash your hands first

Kleenex packets: Just nice to have in case a restroom doesn’t have toilet paper – I always keep a Kleenex packet with me.

LUSH solid shampoo: Life-changing. Just trust me.

Sunscreen: Again, avoid the icky whitening agents and make sure you bring a sunscreen from home. You can find sunscreen without whiteners in Taiwan but it can be tricky sometimes.

Travel medications: I listed them above, but just to reiterate — stomach medicine, motion sickness pills, and some sort of painkiller are my standards.

Electronics to Pack for Taiwan

taichung city with greenery and skyscraper

Taiwan is one of the safest countries in the world!

You can relax and bring what you normally would on any trip and know that, generally, petty theft is extremely rare in Taiwan.

Laptop, if necessary: I bring my Macbook Air everywhere but other people may prefer a tablet or an inexpensive netbook.

Unlocked smartphone: Taiwan has affordable data plans and it’s easy to buy a SIM card upon arrival at the airport.

I love being able to use Uber, Google Maps, etc. and other things while I travel so a SIM card is a must for me.

Kindle Paperwhite: Books are heavy and often hard to find exactly what you want on the road.

I love the Kindle Paperwhite because the screen is glare-free, making it easy to read at the beach or in direct sunlight.

Travel camera: I use a Sony A6000 because it’s lightweight for a professional caliber camera, inexpensive, and a HUGE step up from a smartphone.

You may want to replace this or add a GoPro if you are doing adventurous activities on your Taiwan trip.

Portable charger: I like to carry a portable charger everywhere I travel and Taiwan is no exception!

Adaptor, if necessary: Taiwan uses the same plugs as the US, Canada, and many other North American countries, as well as some other Asian countries. If you’re coming from the UK, Europe, or Australia you will need an adaptor.

***

Well, nearly 4,000 words later, I think I’ve finally exhausted all the things you need to pack for Taiwan in any season!

Is there anything I’ve forgotten? Is there anything else you’re wondering if you should bring to Taiwan? Let me know in the comments!

What to Wear Under a Wetsuit: Female & Male Wetsuit Essentials

Allison in bikini in front of Moorea background

Wearing a wetsuit for underwater activities may seem like an open-and-shut case.

After all, a wetsuit is a one piece. Isn’t it one and done?

Not really. Most of the time, you’ll want to wear something underneath your wetsuit (going commando is for the brave, for many reasons).

But a few questions still remain, like exactly what goes beneath it… and how do you decide between so many options?

Don’t worry — I’m here to tell you what to wear underneath a wetsuit. But more importantly, I’ll also explain the use case of each item, like why would you pick a bathing suit in some instances and a neoprene dive vest in others?

Snorkeling in Tahiti at the Intercontinental
Another option: Swim leggings and a swim top!

Like for example, you’ll want to think about just how much insulation you’ll need from the cold.

The answer will vary greatly if you’re diving in the tropics vs. the frigid California coast’s colder waters!

Another is how how free your movement needs to be. Are you surfing or doing something active? Or are you doing a lazy drift dive?

This post will mostly be focused on what goes under your wetsuit for diving, as that is where my own personal experience lies.

However, you can surely adapt this to also be useful for surfing or other water activities where you might need to wear a wetsuit.

Why Wear Something Underneath a Wetsuit?

Allison and her partner all suited up and ready for diving in Moorea

Technically, you don’t need to wear anything under a neoprene wetsuit… but most people do.

Yes, you can go commando, but it’s typically not the best idea. Here are a few main reasons why!

Easy To Change

There are a few ways in which wearing something underneath your wetsuit can help with changing.

For one, it makes changing easy without flashing anyone.

Whenever I surface from a dive, one of the first things I do is unzip my wetsuit to get warm.

Having a bikini top, for example, underneath means I don’t have to worry about anyone getting an eyeful!

Then, I can put a UV-protective dive shirt over my swimsuit, or just allow myself to warm up in the sun if I have sunscreen on (reef-safe, of course).

But also, certain dive garments can make it easier to put on your wetsuit and take it off. This layer creates a barrier between your skin and the neoprene of the wetsuit.

Allison at the overwater bungalows of Manava Beach Resort
Admiring the overwater bungalows in Moorea between dives

Wetsuits can notoriously be a nightmare to get on and off — especially when wet.

Your skin has more friction than a dive skin, so if you are wearing a dive skin, the wetsuit can slip on and off more easily.

A dive skin can also add insulation and warmth if that’s something you need when you’re in the water.

Another benefit is that it can protect your skin from the rub and tug of the neoprene material — especially in areas where there are tighter spots, zippers, etc.

Not all divers like dive skins — I typically don’t use one, personally.

But if you find it a pain to take your wetsuit on and off and find yourself dreading that part of a dive trip, you may want to check out a dive skin next time!

Comfort

Woman taking off a wetsuit with one hand and holding her hair out the way with another hand. Wearing a shorty wetsuit.

Sometimes, it’s just more comfortable to have a layer between you and your wetsuit, especially if you have sensitive skin that is prone to getting irritated or chafing.

Tugging neoprene wetsuits repeatedly over your bare skin can lead to irritated skin or possibly even open sores if your skin is really sensitive (which puts you at risk for things like a marine infection, a highly serious condition)

Whether you pick a dive skin, swim leggings, compression gardments, or a rash guard, make sure it’s snug-fitting and made from a breathable material that does well underwater.

Make sure it’s not too warm: you don’t want to sweat underwater, because this can actually drop your body temperature and leave you feeling chilled!

Hygiene

a black and grey wetsuit with cressi logo
Benefits of having your own wetsuit: you know how hygienic it is!

Hygiene is another compelling reason to wear something underneath your wetsuit… especially if you are renting a wetsuit (people notoriously pee in rental wetsuits — sorry to be the bearer or bad news.

But even if you are using your own wetsuit, there are other hygiene considerations to factor in.

For one, we mentioned sweat above — let’s elaborate a bit. The warm environment that sweat creates can cause increasing chafing and skin irritation. Worse, that can sometimes lead to infections.

Additionally, using a layer like a dive skin between you and your wetsuit creates a barrier between you and your wetsuit, meaning that sand is less likely to rub against your skin.

This is especially important if you’re using your wetsuit for surfing, when you may take lots of tumbles into the sandy water!

UV Protection

If you’re a scuba diver who does multi-tank dives, you’re well-acquainted with the topside surface interval, typically spent on the boat.

Since you’ll likely want to remove at least the top of your wetsuit so you can warm up and get rid of those shivers, you’ll want some sort of UV protection against the sun during that time.

Rash guards that guard against ultraviolet rays are a great choice. You can just wear it beneath your wetsuit, or you can have a dry one ready to go in the boat to throw on once you surface from your first dive.

Yes, you can wear sunscreen, but you’ll need it to be reef-safe sunscreen. This can be a bit hard to slather on, and you won’t be protected immediately as the sunscreen needs some time to sink in.

Keeping Warm

Allison's Scuba gear all laid out on the floor as if about to pack for a dive trip
My own little SCUBA setup!

In general, neoprene wetsuits do a rather good job at keeping you warm — I mean, there’s a reason why they are the gold standard for what to wear underwater, right?

Quick segue to get geeky about the science behind it: basically, neoprene traps a thin layer of water, floating between your body and the wetsuit. Body heat warms the water in that thin layer, which then keeps you warm.

However… sometimes that’s not enough, especially if you are doing repetitive dives or drift dives where you don’t generate a lot of body heat. Additionally, in very cold water, you’ll definitely want more protection.

You could of course opt to buy a thicker wetsuit and not bother with all these layers.

However, unless you’ll use that thicker wetsuit many times over, this is a costly investment — and likely not worth it.

A 3mm wetsuit can typically cost around $200 for a decent one; meanwhile, most 5mm womens wetsuits cost around $400-500. Yikes.

In that case, thermal dive accessories may be the better choice. You can wear a thermal rash guard, which is thicker and specifically designed to help you retain your body heat.

For even more warmth, pick a neoprene thermal vest, as your core is the most important part of your body to keep warm to avoid underwater chill.

You can also wear a wetsuit hood, which fits snugly around your head and neck to keep you warm.

This isn’t the most comfortable or cute option, to be sure, but it’s essential in really cold environments, such is if you go diving in Monterey.

Hands and Feet Protection

You may also want protection for your hands and your feet, like wetsuit gloves and neoprene booties.

Booties can also protect you from chafing your heels on open-heel fins, or from cutting your feet if you are doing a shore dive entry.

Wetsuit gloves can also help you from cuts and stings in case you accidentally touch something you shouldn’t.

What to Wear Under a Wetsuit (For Women)

Bikini or One-Piece Swimsuit

Allison and her partner on a dive boat while traveling in Moorea
Enjoying a surface interval in our bathing suits!

In my experience, I’ve found that when it comes to wearing something beneath my wetsuit, a swimsuit is all I need under my wetsuit in about 90% of instances

Two-piece swimsuits are my pick over one-pieces.

I can warm up my back a lot more easy that way by warming up in the sun!

I’ve learned this the hard way by wearing a sun suit (swim suit with long sleeves) that felt great underwater, but made it very hard to warm up once topside!

That said, there’s a big caveat here: I can get away with just a bikini underneath simply because I tend to wear thicker wetsuits than most people do.

That’s because I am really, really prone to cold (as in, my core body temperature is around 96.5-7 F on a normal day… so, ya know, near hypothermic on the daily.)

I am the proud owner of a 5mm wetsuit that I will wear even in Caribbean and South Pacific waters with water temperatures around 80 F… while everyone around me dives in a 2mm shorty.

Rashguard and Swimsuit

Allison and her partner on the island of Moorea with view of water in the background
A long-sleeve swim suit or rash guard can work wonders!

Many women opt to wear a swimsuit and then pair that with a rashguard to keep them a bit warmer and prevent chafing or rubbing on their arms and back while diving.

However, for me, I find that wearing the rashguard once I’m topside can make me feel extra cold.

In that instance, I would bring two rashguards for a two-tank dive day, and swap out my wet rashguard for a dry one during my surface interval.

If you are simply snorkeling or kayaking and don’t plan to take off your wetsuit, that may not matter as much.

Full-Body Dive Skin

If you tend to struggle with your wetsuit, a dive skin is probably the best answer.

A dive skin is a full-body stretchy undersuit (typically made of spandex or Lycra). It’s basically a base layer, but for underwater activities.

This base layer is not meant to keep you warm like a wetsuit does. Rather, it helps prevent chafing when you swim, surf, or go scuba diving.

Plus, it helps your wetsuit slide on and off more easily — no off-balance tugging on wetsuit legs and arms while on a dive boat!

Neoprene Rash Vest and Swimsuit

Allison Green diving with a sea turtle in Tahiti
Kept warm by a neoprene vest!

Story time: let’s flash back to the time I thought my 3mm wetsuit would be good enough for Cozumel. HAH.

I quickly learned that while the water was warm and my wetsuit was tight-fitting and otherwise adequate, the drift dives I was doing meant that I got colder a lot more easily.

For one, I wasn’t generating body heat by kicking. Also, the water rushing past me took away from my core body temperature.

I desperately looked at 5mm wetsuits at a few different dive shops in Cozumel, but they were all about $500+. Yikes.

Plus, the rental that I tried on didn’t fit properly, and kept unzipping. It was deeply unpleasant.

Instead of spending $500 on a new wetsuit, I added a 3mm neoprene vest as a layer between my 3mm wetsuit, adding heat to my core. It worked a charm.

Since these can be rather cheap, I strongly recommend buying one on Amazon before your next dive trip or instance in which you may need a wetsuit with some extra warmth.

For extra warmth, grab one with a hood.

That way, you can buy a good-priced one from the start, rather than having to buy an overpriced one like I did out of sheer urgency.

Plus, it’s pretty small, so you can easily pack this extra layer without weighing down your bag.

What to Wear Under a Wetsuit (For Men)

Swim Trunks or Speedo

bathing suit section of a store with plain navy men's swim shorts with stripes on it

Just like women can wear bathing suits under their wetsuit for easy changing, men can too.

As a benefit, most men’s swimwear doesn’t include a top layer, so the upper body is generally not covered.

This is actually a good thing when you remove your wetsuit: not having a wet layer on your upper body gets your body warm faster.

That said, you’ll want to throw on a dive shirt or other additional layer and/or some sunscreen in order to avoid sunburn.

Rash Guard and Diving Shorts

man in black and white rashguard sitting on a light blue surfboard

Rash guards are also rather beneficial for men too.

Surfers will be well accustomed to this — it’s a part of their uniform, after all, alongside some board shorts!

That said, I wouldn’t recommend board shorts underneath your wetsuit — it’s too bulky. That’s. more for topside relaxing.

You’ll need something slim fitting — diving shorts would be ideal here, as they’ll fit seamlessly beneath a thick wetsuit.

If you don’t want to invest in neoprene shorts/diving shorts, you can always opt for from compression bicycle shorts.

Instead of a rash guard, you can also wear compression shirts, too. You can pick between short sleeves and long sleeves: short sleeves will be more comfortable, but long sleeves will give you more coverage if are using it for UV protection.

Full-Body Dive Skin

As mentioned above, a dive skin is full-body jumpsuit that isn’t so much made to keep the wearer warm but rather to make donning and doffing your wetsuit a lot more smooth.

This body suit is also helpful because it gives you UV protection once you’re above water and want to take off your wetsuit.

Neoprene Vest and Swim Trunks

A thermal vest is also a good option for men, too, especially in colder temperatures or when doing water sports that involve exiting and entering the water multiple times.

A neoprene vest is nice in that it keeps your armpits free, so you’re not sweating too much in your undergarments.

Deciding What to Wear Under Your Wetsuit

Activities

woman in a wetsuit paddleboarding on a lake with misty, cloudy weather

What you are doing is the biggest factor to deciding what you should wear beneath your wetsuit!

For example, if you are kayaking or paddle boarding, you’re going to want to have unrestricted arm movement.

In that case, a full dive skin may not be a good option if it restricts your arm movement. You may want to opt for a sleeveless dive vest instead.

If you are surfing, you’ll want something that doesn’t impede your ability to quickly jump on your surfboard, so you’ll want everything to fit comfortable.

Things should be not too tight to restrict movement, but not too loose that you are feeling anything bunch underneath your wetsuit.

If you’re going scuba diving, you’ll want to account for any additional buoyancy some of your garments may give you, such as a neoprene vest.

You may need to add extra weights to your weight belt or integrated weight system, for example.

Water Conditions

The temperature of the water is another huge factor.

But everyone experiences the water differently. What many people think is warm water for them will start to feel too cold for me!

Besides the water temperature itself, it’s important to also think about what the current is like.

Water with a stronger current will feel colder to you than no current.

Topside Weather

Allison and her partner in a red kayak with the island of Moorea behind them and brilliant blue waters
Calm waters for kayaking after a dive!

One of the reasons why you might be weighing what to wear underneath your wetsuit is because you’ll be switching between underwater activities to topside activities.

If it’s really warm and sunny when you surface, you’ll want to have something that you can remove easily so that you can warm up in the sun.

You’ll likely want to replace this with a dry rash guard or dive shirt.

Plans for Afterwards

If you’re on vacation, it’s not always convenient to go home, shower, and change after diving or doing other water activities.

In that case, you may want to plan what you’re wearing underneath your wetsuit with your plans for after in mind.

For example, you may want to wear a bathing suit underneath if you are planning to have some relaxing beach time after.

If you plan to go somewhere to eat, you’ll want to maybe wear a bathing suit with a restaurant-appropriate beach cover-up.

The Ultimate Road Trip Packing List: 50 Road Trip Necessities

Music blasting on the stereo, windows rolled down and hair mussed by the wind, singing with your road tripping besties: there’s nothing better than a road trip. It’s my favorite way to travel.

I’ve done road trips all over the world: from Brazil to the Faroe Islands, the American Southwest (Nevada, Arizona, and Utah) to Azerbaijan.

Nothing beats having your own set of wheels beneath you and everything you need in your car!

When planning a road trip, it’s crucial to consider not only what you want to wear and bring to your final destination, but all the little things that will make your road trip more comfortable along the way. That includes necessities, like an annual travel insurance policy and safety gear for hitting the road, as well as frivolities like road trip games and a killer Spotify road trip playlist

After all — on a road trip, the destination is the journey!

EXPERT TIP: Not sure where to get the best deal on your rental? I’ve rented cars dozens of times through various search engines and have settled on Discover Cars as the best car rental search engine – it searches over 500 trusted rental companies to find the cheapest price for your rental! Compare prices for car rental in your destination here.

Here are the things that I think are absolute road trip necessities, to help you plan and pack for hitting the open road.

Below is your ultimate road trip packing list for all occasions!

Note that this is a road trip packing list that assumes you’ll be staying in hotels along the way. If you’re also camping, you’ll need to add other items like a tent, sleeping bag, etc. — check out my car camping packing list which will tell you all the things you need to bring!

Road Trip Packing List: 50 Key Road Trip Necessities to Bring

Road Trip Essentials

These are the absolutely mission-critical items to have in terms of safety and physically being able to go on your road trip, and making sure you have the items on this list is one of my top travel tips for planning a long road trip.

They’re not that interesting, sure, but they are all the road trip essentials you need to remember, so be sure to scan this part of the road trip packing list carefully to make sure you haven’t omitted anything vitally important!

Car documents & driver’s license

This should be rather obvious, but you’ll need your driver’s license, car documentation, AAA card if you have a membership (or other similar roadside assistance program), and insurance papers ready for any road trip you take.

If you have an America the Beautiful National Parks pass, don’t forget that at home. If you don’t have one and you plan to visit 2 or more national parks during a USA road trip, I strongly suggest buying one. At just $79.99 for the year, it typically pays for itself after the third use and it covers 2,000 parklands in the U.S. National Parks system.

Make sure you double-check that you have all this information easily handy in case you need it on your trip.

If you are renting a car at your destination, make sure you get all the paperwork from the car rental office and ensure you’re sufficiently insured for the trip.

Travel insurance

If your road trip includes going to another state or country where you are not insured locally, you may need travel insurance in order to cover you in case of incident.

Double check with your health insurance plan and car insurance plan to ensure you’re within their coverage; if not, travel insurance will fill in the gaps.

Roadside emergency kit

You should already have an emergency kit in your car with things like a reflective triangle, rain poncho, emergency blanket, safety vest, safety whistle, etc. in case of an emergency.

But if you don’t, know is a good time to invest in a roadside emergency kit that also includes a first aid kit.

If you’re bringing your own car from home, you’ll want to make sure you have things like jumper cables, etc. in case you have a battery die on you on the road.

Car manual

Have your physical car manual handy or download an electronic version of it before you set out on your road trip — it’s essential in case any funky lights turn on and you’re not sure what they mean, or if you have trouble with some function.

Once on a road trip in Utah, I managed to lock the steering wheel of a rental car, and it was really counterintuitive to understanding how to unlock it. I almost got stuck out there for hours! Be sure to have access to a car manual, whether physical or electronic, before setting out on your road trip.

Spare tire & tire changing kit

Having a spare tire isn’t much good if you don’t have a jack or kit to change out the tire. Make sure your tire changing kit is complete (or buy your tire changing kit before you head out), and make sure you know how to use it!

Flashlight or headlamp

In case you get somewhere poorly lit after dark, have an emergency in the night, or just go on a sunset hike and need to light your way back, a flashlight or headlamp is key (and make sure to bring some extra batteries, too!)

I love a headlamp to keep my hands free when I’m hiking — a rechargeable one like this is a great travel must-have.

Any seasonal car gear

For the most part, this packing list is geared towards summer road trips, but if you happen to be planning a winter road trip, don’t neglect seasonal car necessities like an ice scraper, tire chains, etc.

Basic Road Trip Necessities

These are the little things that are easy to accidentally skim over and forget.

They aren’t as vitally important as the above, because they’re easy to replace on the road, but save time by packing these road trip necessities before you go!

Car cell phone charger

You will zap your cell phone battery FAST while on a road trip, so it’s essential to have a car charger.

I like this dual purpose phone mount and portable charger!

USB cords

Of course, it’s pretty hard to connect your phone and charge it and do all sorts of other necessary 21st-century things without USB cords.

Bring 1 or 2 more than you need, it’s always a good idea.

Handsfree phone holder

I recommended this 2-in-1 phone mount/charger above — if you don’t already have a phone mount, or you want one that chargers, this is clutch!

Coins & small bills

There are places in the world that still use only cash… shocking, I know.

When you are ready to hit the road, don’t get caught off guard without any cash for a park entrance fee, bathroom fee, road tolls, or little odds and ends along the way like buying tasty produce from a local roadside farm stand!

Paper map or offline map

Yes, paper maps still exist and not just as an Instagram prop… although they do make awesome Instagram props, too.

Or if you just want to use your phone, that’s OK too, but be sure to download all the offline maps using Google Maps or Maps.me

A killer road trip playlist!

OK, what good is a road trip without some awesome music? Be sure to have an epic playlist ready to go.

My friend Stephanie gathered all the best road trip songs — download some before you go in case you need some tunes when you don’t have any data or WiFi.

If you prefer podcasts, have your favorite shows downloaded and ready to go.

Road Trip Items for Hygiene & Travel Safety

In the current public health crisis, it’s important to bring plenty of sanitizing gear with you when you’re on a road trip!

There are lots of high touch-point surfaces you may not think of immediately, like a gas station nozzle, which can be high-risk on a road trip.

Here’s what I recommend you pack for a road trip in 2023 in the current hygiene context.

Alcohol wipes

It’s best to try to source alcohol wipes in a store from a brand you trust or from a verified brand seller on Amazon, such as from the Clorox store.

Use alcohol wipes on high-touch surfaces as needed and not excessively — soap and water should be your primary line of cleaning and defense.

I suggest you use these when not otherwise possible, such as when at a gas station or using a touchpad at an ATM or grocery store.

Hand sanitizer

Hand sanitizer as well is another great thing to have on hand when on the road, as sources of hand sanitizer cannot always be guaranteed and there may be times where it is difficult or less safe to go to a public restroom.

Again, it’s better to try to source hand sanitizer in a store from a trusted brand, but in the absence of that being possible, this brand available online looks to be safe, FDA-approved, and with a high-enough level of ethyl alcohol to be safe.

Spare liquid soap

Liquid or bar soap is still the gold standard for washing your hands and should be chosen over hand sanitizer whenever you have access to water.

Some gas stations, park bathrooms, etc. may not be well-attended, so bring some spare liquid soap with a locking top or a bar of soap in a Ziploc baggie just in case.

Be sure to wash your hands for 30-40 seconds, every part, in order to get the full sanitation benefits.

Face mask

When in places where distancing is not possible, you will need to wear a face mask to keep yourself and fellow humans safe.

Bring multiple cloth face masks and circulate them, allowing face masks ample time in the sun when possible (such as leaving them on your dashboard) or washing them in between uses in order to sanitize the masks.

Extra water

Not specifically hygiene-related, but worth putting in this section nonetheless.

Be sure to have a few gallons of extra water in your car for emergencies. Whether it’s replacing the water to cool down your engine or emergency drinking water if you’re stranded, it’s a cheap and simple thing to add to your road trip packing list with no downside.

Personal Comfort Road Trip Items

These are the little things when packing for a road trip that make your time much more comfortable on the road.

From snacks to sunscreen, travel towels to travel pillows, these are the little things that you probably already have at home that you should make sure not to forget on your long road trip.

Road trip snacks

There’s a funny quote about snacks for road trips… it goes like this: “It doesn’t matter how old you get, buying snacks for a road trip should always look like an unsupervised 9-year-old was given $100.”

I’m not sure who originally said it, but it’s true. Nothing ruins a road trip faster like hanger… so be sure to avoid it!

Have a good mix of snacks and not just sweet ones. I find that too many sweets on an empty stomach is a recipe for major headaches. Likewise, too many salty snacks and not enough water will also do you in!

I like having things like KIND bars, trail mix, granola bars, chips when I need something salty, RXBar protein bars, etc. for my trip.

Toilet paper / Kleenex

Don’t be caught off guard by a poorly stocked restroom! Bring your own toilet paper from home, or have a resealable pack of Kleenex with you.

Basic medicines

At a minimum, you should have motion sickness tablets, painkillers like ibuprofen/paracetamol, and something like Pepto-Bismol tablets for upset stomachs while you’re on the road.

Rehydration packets

Impromptu hikes, lack of schedule, random meal times, salty snacks, sunny days, hangovers from wine nights after driving duty is done: there are many reasons it’s easy to get dehydrated while road tripping.

I always pack some rehydration packets with me on my travels as I’m prone to getting dehydrated and getting headaches, and they’re a lifesaver. I recommend these ones.

Microfiber towel

I can’t express to you how much I love microfiber travel towels!

They pack up to nearly nothing and they’re super effective at soaking up moisture… plus they quick-dry so fast compared to standard home towels!

Whether you take a dip in a lake or river, are staying in a hotel or Airbnb that doesn’t provide enough towels, or need an impromptu picnic blanket or beach touch, a microfiber travel towel is a road trip must pack.

Bug spray

Nothing ruins a scenic sunset worse than being inundated by bug bites! For a natural DEET-free solution, try this lemon eucalyptus-based mosquito repellent.

After-bite care

Some bites are inevitable no matter how diligent you are with bug spray. Keep itchiness at bay with an After Bite itch eraser, which instantly soothes any bug bites.

Sunscreen

Did you know you should always wear sunscreen while driving? The windshield doesn’t protect you against all UV rays — while they protect against UVB rays (which cause sunburn), most do not block UVA rays, which cause aging and skin cancer.

Plus, you’ll want it for hikes, days out in the sun, beach days, and that sort of thing. This is the sunscreen I use on my face daily, and I use a cheaper basic sunscreen for my skin.

No matter what your skin tone or race, Black, white, or Asian, you need to wear sunscreen daily — and on a road trip it’s no different!

If you’re hiking, don’t forget about your scalp either — I often end up with a burned scalp and it’s no fun, often leading to headaches. Buy a special sunscreen for hair and scalp to avoid this!

Lip balm with SPF

Be sure to bring a hydrating lip balm that also has SPF on your road trip! Poor hydration and lots of sun can both cause dry, chapped lips which are no fun when traveling. I like the key lime Sun Bum chapstick best.

Sunglasses

There’s nothing worse than squinting through the windshield as the sun nearly blinds you while you drive! Seasoned roadtrippers know to bring your favorite sunglasses, plus a cheap spare pair as backup.

Travel pillow

You hopefully have someone to divide the driving duties with, so while you’re on a break from manning the road, you’ll want to have a comfortable way to kick back and enjoy your time off of driving duty.

This cozy memory-foam travel pillow also comes with an eye mask if you need to catch some Zs while another driver takes over!

Travel blanket

A cozy-soft travel blanket, whether it’s just a blanket you love from home that you don’t mind taking on the road or a specialty travel blanket, will make your time on the road that much more comfortable.

Also great for impromptu picnics, sunset hikes that get surprisingly chilly, and taking a nap while you’re off duty! Here are some of the best travel blankets.

Insulated travel mug

I use and swear by Contigo travel mugs — they’re leakproof and pretty much indestructible and they’re inexpensive to boot. This one is vacuum-insulated and fits standard cupholders easily.

Reusable water bottle

Don’t waste plastic or money constantly buying new water bottles at obscene prices!

Get a reusable water bottle and either refill it from your extra-large water containers mentioned above (safer given the current situation) or fill up in sinks and fountains along the way.

This one is insulated, stainless steel, and convenient to drink from. Another good choice would be a collapsible water bottle like this one which you can take with you when hiking.

It’s a great zero waste travel item.

Tote bags

In case you need to buy groceries or other things along the way, bring some reusable tote bags to decrease your plastic footprint.

Day pack

Day packs are essential when hiking or leaving the car for a bit to do some sightseeing and needing to bring essentials like bug spray, sunglasses, water, and sunscreen with you.

This Osprey day pack is the perfect size and it’s designed by a company that specializes in ergonomic solutions for backpackers, so you know it’ll be comfortable.

Wet wipes

As opposed to alcohol-based wipes which are primarily for sanitizing things, wet wipes are nice to have on hand for a quick freshening up before proper showers or face-washing.

These biodegradable wet wipes are easy on the environment and your skin, with aloe vera and Vitamin E.

Vaseline

Vaseline is a traveler’s miracle, perfect for everything from fixing flyaways to helping super-chapped lips or hands (common when hyper-sanitizing!) to preventing chub rub, a summer affliction for the thicker-thighed ladies out there like me.

I always make sure I travel with Vaseline and while you don’t walk as much on road trips as on other forms of travel, it’s still such an easy addition to your bag that I say bring it!

Haircare

For ladies with long hair, a brush and hair ties are a must, especially on hot days. I also tend to take advantage of the fact that I’m not flying and thus don’t have to adhere to liquid restrictions when I’m road tripping by bringing my favorite shampoos from home.

Your hair care needs will vary depending on your hair length and hair texture, so bring whatever you know you need for your personal hair care, including any heat styling tools you want, because space isn’t an issue when road tripping!

Toiletries

Whatever toiletries you need from home, bring it on the road with you because the great thing about a road trip is no checking luggage! Here’s a quick list of toiletries you likely want with you.

  • Shampoo & conditioner
  • Body wash
  • Razor & shaving cream
  • Deodorant
  • Toothpaste & toothbrush
  • Face wash
  • Any acne or anti-aging skin treatments
  • Moisturizer
  • Body lotion-
  • Makeup

Comfortable clothing

When road tripping, think loose, comfy clothing that’s easily breathable which transition from car to outside easily.

For women, I suggest the following at a minimum for car/outdoor comfort. Yoga pants or leggings with a comfortable waistband, tee shirts with a sports bra, hiking boots or sneakers depending on activity, some sandals or flipflops for quicker rest stops: these are some road trip clothing essentials.

You’ll also want to bring layers like a jacket for any needed warmth, depending on the temperatures of your destination.

You may want to also bring some packing cubes (I like these from Eagle Creek) for your clothes and a laundry bag for dirty clothing to add a little organization to your trip, especially if you’re stopping in different destinations each night.

Rain jacket

I included this separately from the comfortable clothes section because I wanted to highlight and underline how important a good rain jacket is. Rain is inevitable at times, so might as well dress for it!

I love the Marmot PreCip rain jacket (there’s a women’s version and a men’s version). I used mine for years biking in all sorts of rainy NYC weather and it always kept me dry without making me too hot and uncomfortable like some other rain jackets can, due to the zippered arm-pits which provide ventilation.

This is key if you plan to do anything outdoors like hiking or other active day trips while it’s raining.

Umbrella

In addition to a rain jacket, grab an umbrella from home and toss it in the car in case of rain!

Kids Equipment & Entertainment

If you’re hitting the road with kids in tow, you’ll want to be prepared for the inevitable “are we there yet?” with plenty of road trip games and entertainment for your little ones.

I’m childfree so I don’t know exactly how to handle this, but here are some tips for surviving long drives with kids!

You’ll also want to research what the best travel car seat is, as well as other kid necessities!

And if you’re traveling with a baby, you’ll want all the baby items from A-Z that you know you need!

Road Trip Electronics

These are the electrics odds and ends that you’ll most likely want with you on your road trip!

External batteries

The Anker external battery pack is a travel must. While you can charge your phone while driving, you may want to charge other devices — a camera, a drone, portable speakers, an e-reader — as well.

Or if you notice your battery is running low while you’re out hiking or sightseeing, you can just start charging right away without having to return to your car. It holds several charges on a single battery pack and will last days at a time.

Camera & extra batteries

For all my years of running this travel blog, I’ve relied on my Sony A6000 to take nearly-professional quality images. I don’t sell my photography, but I do love having wonderfully preserved memories, and this camera is the perfect middle-ground above a smartphone yet below the 5-figure kits that most photographers give.

Whatever camera you choose, be sure to have plenty of extra batteries and the battery charger as well — plus extra memory cards! I rely exclusively on 64GB Sandisk memory cards.

Laptop & charger

I bring my Macbook air and charger with me everywhere, but you may not need this set up if you don’t need to do any work while you travel.

Portable speaker

I love having a Bluetooth speaker with me on road trips. They’re great for when you find an isolated spot you want to chill with friends at (though of course, make sure to be a decent citizen and don’t blast your music when other people are around enjoying nature).

Kindle or inspiring audiobooks

I bring my waterproof Kindle e-reader with me everywhere, but I can’t read while people are driving or I get motion sickness badly! So I love listening to inspiring adventure books on Audible while I travel.

Portable WiFi device

If you need to work while on your road trip or want to have a WiFi device handy so kids can connect to their devices (and you can stay sane), a portable WiFi hotspot is a road trip essential.

I like this GlocalMe WiFi device which is compact and easy to set up. Note that it won’t work all the time, as there need to be cell towers around, but on the plus side, it doesn’t need to access a specific network so even if your phone does not have signal, it might!

Fun Road Trip Accessories

These aren’t strictly necessary, but these little items will make your road trip much more memorable and a whole lot more fun!

Instant camera

I love this Instax mini instant camera for printable memories on demand! It’s the modern version of a Polaroid and it’s a great way to preserve memories of your trip.

Because face it, how often do you develop digital photos?

Car cooler

There are two routes when picking a car cooler: one that’s powered by the electric unit in your car (like this one) or a standard ice cooler.

Either makes it possible to enjoy food that needs to be refrigerated on-the-go, ice-cold drinks, or keep essential things stored at fridge temperature.

Travel corkscrew or Swiss army knife

Because what good is end-of-the-driving-day wine or beer if you have trouble opening it?

This is the classic Swiss army knife by Victorinox, but if you just want a corkscrew/bottle opener, you can have a simpler set-up like this ‘waiter’s friend’ style corkscrew.

Just make sure that if you’re flying before starting your next road trip, you don’t want to pack it in your carry-on!

Picnic basket

Extra? Absolutely. But how cute and romantic is this picnic basket setup?

If you’re road tripping with a loved one and want to have romantic picnics, with the family and want to make special memories, or you just want some darn cute pictures of you and your friends enoying a road trip picnic, a picnic basket is an excellent choice.

Want something equally enjoyable but far more practical if you’re hiking? This picnic backpack is an excellent alternative.

Lumbar support

If you get back pain a lot — holler at my over 30 crowd — lumbar support for your car will be an absolute game changer!

Is it cute? No. But neither is being hunched over for days because you didn’t take care of your back, either.

Travel notebook & pen

This page-a-day travel journal is the perfect sidekick for remembering your travels and jotting down notes from the open road.

Tasty instant coffee

If you’re a coffee geek reading this, you probably want to throw something at me for the contradiction in terms that is “tasty instant coffee.”

But don’t stop reading! Joe Coffee, a NYC-based coffee shop, has delicious instant coffees which they dehydrate in small batches so that your cup tastes like a freshly-brewed one. Buy it online on Amazon here.

Better yet, they work in either cold or hot water so you can have an iced coffee or hot coffee fuss-free (most hotels you stay at should have an electric tea kettle).

Not sure how to make coffee on the road? Read my guide to the best travel coffee products — certified by a former barista!

Folding chairs

Plan to have some days where you just relax lakeside or riverside and enjoy the scenery, or even some beach days?

Folding camping chairs are cheap, easy to pack, and amp up your road trip experience to the next level.

Mad Libs & other games

Did anyone else play Mad Libs all the time as a kid on road trips and planes? To me, this is the ultimate childhood nostalgia game — and it’s really a load of fun!

Other fun road trip games include a deck of cards, Bananagrams, etc., though a lot of these are better suited for rest stops and hotel nights than the open road.

Quick Road Trip Checklist

Want the above list in bullet form? Find all your road trip essentials and necessities below!

Road Trip Essentials:

  • Car documents
  • Driver’s license
  • Travel insurance
  • Roadside emergency kit
  • Car manual
  • Spare tire & tire changing kit
  • Flashlight or headlamp
  • Any seasonal/winter car gear (scraper, chains, etc.)

** If car camping, check this car camping packing list and read my camping tips for beginners post.

Other Road Trip Necessities:

  • Car charger
  • Spare USB cords
  • Handsfree phone holder
  • Coins and small bills
  • Paper map / offline maps
  • An awesome road trip playlist (or Spotify, podcasts, etc.)

Road Trip Items for Hygiene:

  • Alcohol or bleach wipes
  • Hand sanitizer
  • Hand soap
  • Face masks
  • Large multi-gallon jugs of water in case of emergency

Personal Comfort Items:

  • Road trip snacks (granola bars, nuts, chips, etc.)
  • Toilet paper & Kleenex
  • Basic medicines
  • Rehydration packets
  • Microfiber towel
  • Bug spray
  • Afterbite care
  • Sunscreen
  • Lip balm with SPF
  • Sunglasses
  • Travel pillow
  • Travel blanket
  • Insulated travel mug
  • Reusable water bottle (metal or collapsible for hiking)
  • Tote bags
  • Day pack
  • Wet wipes for face
  • Vaseline
  • Haircare products
  • Comfortable clothing
  • Rain jacket
  • Umbrella
  • Kids entertainment

Toiletries:

  • Shampoo & conditioner
  • Body wash
  • Razor & shaving cream
  • Deodorant
  • Toothpaste & toothbrush
  • Face wash
  • Any acne or anti-aging skin treatments
  • Moisturizer
  • Body lotion-
  • Makeup

Essential Road Trip Electronics:

  • External battery packs
  • Camera & camera batteries
  • Laptop & charger
  • Portable speaker
  • Kindle and/or Audiobooks
  • Portable WiFi device

Fun Road Trip Extras:

  • Instant camera
  • Car cooler
  • Travel corkscrew or Swiss army knife
  • Picnic basket
  • Lumbar support
  • Travel notebook & pen
  • Instant coffee
  • Folding camp chairs
  • Mad Libs, board games, etc.

Dive Trip Packing List: Everything You Need to Bring for Diving

Allison's Scuba gear all laid out on the floor as if about to pack for a dive trip

From kaleidoscopic coral gardens to large pelagics to tiny nudibranchs, scuba divers know that diving is one of the most incredible ways to see the world.

Scuba diving is one of the most magical, immersive, and exciting activities you can do on your travels — but it does require a fair bit of planning.

After all, diving brings you into an underwater world you were never meant to inhabit, and you’ll need to make sure you’re well-equipped to handle that.

Whether that means relying on a dive shop for your bigger rentals or bringing your own gear, packing for a dive trip requires special preparation.

Whether you’re planning a liveaboard dive trip or plan to weave diving into your next vacation, here is a packing list specifically for scuba divers. 

Do You Need to Pack Your Own Dive Gear?

Allison's hand, wearing a wetsuit, wearing a dive computer on her left wrist with scuba gear in the background.
You can rent dive gear, but it won’t be things you’re used to, so there’s a learning curve!

Generally, no, you can always rent whatever dive gear you need. 

I’ve sorted this diving packing list into ‘need-to-haves’ and ‘nice-to-haves’ because I do believe it is really important to own your own core gear, if it’s within your means.

However, I also acknowledge that going diving quickly gets very expensive, and dive equipment is not cheap… plus, it takes up a lot of space.

I recognize not everyone has the funds or the storage facilities for full-on dive gear (I make it work in my tiny 500-square-foot apartment, but I also have tons of closet space).

That said, there’s something to be said about having your own dive gear that you know and trust. 

Don’t worry — you can still dive even if you don’t have a single piece of gear! I’ll tell you what I think are the most essential, though.

I’ve slowly been building up my dive equipment kit over the past year and I’m grateful that I now have a self-sufficient enough dive kit and that all I would need to do is rent tanks and a weight belt!

Allison's Scuba gear all laid out on the floor as if about to pack for a dive trip
My SCUBA gear (minus the fins!)

However, I still tend to dive with dive operators as my dive experience is only intermediate, with a little over 30 dives under my belt. 

Plus, I prefer the expert knowledge that comes with dive shops, because their dive masters can bring us to the best dive locations and know the conditions of each dive.

For me, the benefit of having my own gear is knowing it and trusting it so I can dive comfortably.

I know my own equipment is in good condition and is up-to-date on its servicing. Plus, I’m familiar with all the ins and outs of it, and don’t have to have a learning curve on each dive.

While a good dive operator will have well-serviced equipment, things are more in your own hands when you have your own gear.

What to Pack Dive Gear In

Depending on how you decide to pack for your dive trip this truly depends!

If you are bringing a lot of your own pieces of equipment, you will want a specialty suitcase designed with diving gear in mind.

I recommend the Cressi roller bag / backpack combo, which can easily fit a full scuba kit (and then some!).

It has lots of thoughtful touches like a side pocket for fins, water-resistant construction,

In addition to your checked bag with your gear, your carry-on luggage should carry anything sensitive or valuable (regulators should go in your carry-on!), as well as any personal items you want in flight.

I also suggest bringing a few items of clothing in your carry-on just in case your luggage gets delayed!

What to Wear on a Dive Boat

Bathing Suit

Allison and her partner on a dive boat while traveling in Moorea
Enjoying a surface interval in our bathing suits!

It’s useful to have a bathing suit layer underneath your wetsuit for a few reasons.

For one, it makes peeling off your wetsuit layer to warm up during a surface interval a lot easier.

I also prefer wearing a bathing suit to full garments like a rash guard, etc. because I find it easier to get a little sun on me to dry off and warm up.

That said, there are countless things you can wear under a wetsuit!

Getting your core dry and warm is the easiest way to warm up after a dive.

I get a lot less cold wearing a bikini than a one piece, since there’s less material on me that’s wet.

My bikini is no longer sold online, but here are a few I like: this black and white printed two-piece, this colorful high-waisted set, and this fun sporty colorblock two-piece set.

Flip Flops

For the most part, you won’t actually wear your shoes on the boat — many boats ask you to take off your shoes when you board.

Make it easy on yourself with some simple flipflops like Havaianas.

Sun Hat

Allison Green and her partner wearing scuba gear on a boat. Allison is wearing a Scubapro wetsuit and her partner is wearing an Aqualung wetsuit. They are both smiling at the camera and wearing hats with their hair back and scuba gear visible behind them.
You can mix and match bringing your own gear and renting, as we did in Tahiti!

Between getting to and from your dive site and being exposed to the sun during your surface interval, you’ll need some sun protection.

I prefer an adjustable baseball hat that won’t fly off even if your captain is driving the speedboat like a madman to get to the dive site!

Layers / Sun Protection

Besides keeping the sun out of your face, you’ll also want layers like a dive shirt or rash guard to keep you protected from the sun while you’re on the boat.

For the first dive, you can just wear a normal T-shirt, and to relax between surface intervals, you should bring something like a long-sleeve rashguard or dive shirt.

I like this colorful and fun dive shirt!

Cheap Sunglasses

You don’t want to bring your nice sunglasses on a dive boat, trust me!

It’s easy for them to get lost, especially when you’re packing up at the end of a long day of diving.

Bring a cheap pair of sunglasses specifically for the dive boat — I like these ones which are cute but inexpensive.

Hair Protection

If you have long hair, you’ll want to keep your hair protected. Salt water and mask straps can really do a number on your hair.

The easiest way to protect your hair is with a simple fabric headband which will keep strands of hair from getting in your mask (which hurts the seal as well as breaking your hair).

Another way to protect your hair is with a neoprene mask strap which will keep you from breaking the hair on the back of your head.

And if your hair does end up getting rather gnarly after dives anyway, the Sea 2 Stream leave-in conditioner works miracles (truly, miracles — my thin, easily broken hair can attest to that).

Need-to-Have Dive Gear

Mask

Blue lined mask with prescription lenses inside
My mask looks funky because I have prescription lenses inside so I don’t need to wear contacts when I dive – pretty cool, huh?

Anyone who goes scuba diving should have their own mask, point blank. If you buy one item — make it this.

Your mask is one of the most essential items for diving: after all, your sight is one of the most important things that keeps you safe underwater.

Having a reliable mask you know and love means no struggling with mask flooding, fogging, etc. and other stressful situations that can negatively impact a dive.

I use this TUSA mask and am extremely happy with it!

Keep in mind that your mask should fit well, and many masks can be too big depending on your face shape.

As a rough guide, you’ll want to fit about two fingers between your hairline and where the mask hits.

Snorkel

You’ll also want a snorkel for use on the surface to conserve your air (especially if you’re doing shore dives).

A snorkel is also a safety device: it’s a back-up breathing device in case you get tired during your dive and don’t have any more air in your tank when you surface.

I use a TUSA Hyperdry Snorkel which has a dry top chamber that covers the opening of your snorkel to reduce the amount of water that can get into your snorkel.

It also has an angled purge chamber for easier purging — I find I have to use less intense exhales to satisfactorily purge my snorkel.

Fins & Dive Boots (If Needed)

My snorkel, mask, and fin set on the beach with one of the best snorkeling areas in Moorea
My mask, fin, and snorkel set!

I have simple IST Proline fins that are no longer available online — they’re actually more designed for snorkeling than scuba diving, but I’ve enjoyed how lightweight they are.

I am planning to upgrade to a better set of fins in the future, such as these Tusa open-back fins combined with a 3mm neoprene bootie (like this one from Cressi) to keep my feet warmer.

I prefer open-back fins because they’re way easier to remove when you’re getting back on the boat, which is helpful because normally you’re quite tired at this point and don’t want any more struggle than you need

Split fins are another popular choice but I haven’t tried it yet!

Surface Marker Buoy (SMB) / Safety Sausage

It’s really important to have your own safety sausage / SMB attached to your BCD.

While it’s unlikely that you’d get separated from your divemaster if you’re being vigilant, having one can make your safe rescue a lot quicker.

If you’re diving with a DM, you likely don’t need one of the SMBs that inflate underwater, with words on it indicating that there are divers below.

I bought mine at my local dive shop here, but you can find a similar one here. It’s easy to inflate with just a few breaths at the surface.

If you’re shore diving with a buddy and think there’s a chance of boat traffic overhead, you’d want a DSMB.

Dive Computer

Allison holding her dive computer which shows it has been 7 days since her last dive and her last max depth was 55 feet
My beloved Shearwater Peregrine!

Okay, so a dive computer is absolutely an investment, but I do think it’s really important to have your own dive computer or dive watch.

It can be overwhelming to decide what dive computer to get if you’re a beginner, so I’ve demystified it in this (simplified) guide to the best entry-level dive computers.

For one, most dive computers have an app so that you can download all your dive profiles and easily log your dives.

This can come in handy later down the line, when PADI certifications or more advanced dive trips or dive sites require a certain number of logged dives.

Plus, being familiar with your dive computer is a safety matter.

You’ll want to know how it alerts you about rapid ascents, how it displays depth, how it alerts you about approaching your no decompression limit (NDL), and how it monitors safety stops.

I use a Shearwater Peregrine which I admit is a bit of a splurge (I wanted a backlit display for easy visibility especially on night dives).

My girlfriend uses this Aqualung i300 dive computer and is happy with it overall, and it’s a good $200 cheaper.

Dive Certification Cards

Don’t forget to bring your PADI or other certification card to your next dive trip!

Generally, a dive shop can look you up in the PADI database and find your certification, but it would be awful to not be able to dive in case they can’t find you for some reason.

Dive Insurance

I saved the last for the most important — dive insurance. Yes, not technically ‘gear’, but absolutely a need-to-have.

Many travel insurances don’t fully cover scuba diving accidents, and so you’ll want to read the fine print and ensure you’re covered in case of a diving accident.

The biggest thing to worry about is decompression illness (DCI or ‘the bends’), which requires treatment in a hyperbaric chamber… a treatment which can cost several thousand dollars.

DAN provides an annual dive insurance plan, which I buy and then I pair that with a travel medical insurance like Safetywing to ensure I’m covered in case of other illness, accidents, or trip interruptions.

Nice-to-Have Scuba Gear

Wetsuit

Allison's Cressi wetsuit folded up next to a snorkel
If you can bring your own wetsuit, I recommend it!

One of my biggest pieces of diving advice is to know what the water temperature is where you’re going and how you tend to feel in the water.

I can tell you from recent experience, it’s really unpleasant to arrive at your destination excited to dive… and emerge from your first dive chilled and worrying about how the rest of your trip is going to go.

I took my 2.5 mm Cressi wetsuit to Cozumel, where the water temperatures were consistently 79°/80° F (around 27° C).

Despite being more than comfortable in a 3mm on my dives in Tahiti and Moorea in water that was more like 77°-78°, I was pretty chilled in my 2.5mm.

That’s because Cozumel has a lot of drift diving where you don’t really build up your body temperature, because you’re still and just allowing the current to take you.

I ended up having to rent a 5mm for the rest of my dives, making my wetsuit pretty much moot to bring!

You can bring a 3mm dive vest to offset any chill you might be worried about — I’m planning that for my next trip.

I’ve also gone ahead and bought this Cressi 5mm wetsuit too and just got back from wearing it while diving in Roatan where it was perfect.

I’ve reviewed some other 5mm wetsuits in case you also run cold!

Generally, I love Cressi wetsuits for being high-quality yet affordable: a fraction of the price of brands like Aqualung and Scubapro but still really good!

If you know you’ll be diving in cooler or cold water, you’ll probably also want to bring a 7mm wetsuit and a dive hood like this one.

BCD

Allison's scubapro BCD with pink and purple detailing and a large S on the left shoulder
My ‘vintage’ ScubaPro BCD that I got for a steal!

I recently got my own BCD — it’s an older version of the ever-popular Scubapro BCDs that I got when a local dive shop closed for business.

That exact BCD is no longer available online (frankly, the colors make it look like it came from the 90s, but it works fantastically) — and the Scubapro BCDs I can find are all $500+.

If you’re looking for an entry level BCD, I’d suggest something like this Cressi BCD or a pricier Aqualung BCD.

Regulator & Spare O-Rings

Allison holding her own Aqualung regulator, including an octopus and pressure gauge
This is three parts: the regulator (and BCD hose), the pressure gauge, and the octopus.

I’m now the proud owner of my own regulator!

When I dove with ScubaTony in Cozumel, they had a great deal where you could buy used Aqualung regulators and buy back the rental fee you paid.

To have the same set up I have, you’d want a Aqualung Calypso regulator (comes with hose), Aqualung Calypso octopus, and a pressure gauge like this one (pick PSI or bar, whatever you’re most comfortable with — I use PSI).

Aqualung is practically synonymous with regulators and is the gold standard of most dive shops.

Since your regulator is literally your lifeline, it was a place where I wasn’t planning to skimp on spending.

You should also bring some spare O-Rings just in case one pops out (this happened to me once on a recent dive trip!)

Dive Knife

Generally not really necessary, some people like to have a dive knife handy in case you encounter fishing line or nets, or to help any marine life that may be in trouble for the same reason.

Dive knifes are more necessary if you dive in places with kelp forests like Monterey or in wrecks.

Dive Light

Dive instructor showing a plankton with her her dive light in Tahiti
Dive lights can also show fun things like jellyfish and plankton!

Whether you’re planning night dives or just like to peek into crevices to try to spot shy sea creatures like lobster, shrimp, and eels, a dive light or dive torch comes in handy!

If you’re night diving, keep in mind you’ll want both a primary light and a backup light.

You can get a cheaper dive light like this one or splurge on a higher-quality one.

Log Book

If you like a pen-and-paper logbook, they can be a fun way to keep track of your dives and write down any notes about problems you had or what you saw on a dive.

Those dive memories can go quick so it’s always nice to write things down in a log book (or in your phone) during a surface interval.

Frankly, if you use a modern dive computer that imports your dive data, this isn’t really necessary anymore, but some people like the analog vibe of log books.

Reef Hook (If Allowed/Needed)

On certain drift dives you may need a reef hook, which you attach to a rock (rather than living coral) to keep you in place with minimal damage to the reef.

They’re not allowed in many places or necessary in others, so check on the dives you are planning to do to see if it’s necessary.

Camera Equipment for Diving

Underwater Camera like GoPro and Underwater Housing 

Allison holding her GoPro 11 in the protective GoPro housing made for diving, holding the camera up against a white wall

Taking great videos of your dives is the best way to remember your diving trip! I recently upgraded my GoPro set-up and I see miles of difference.

I use a GoPro Hero 11 with the proprietary GoPro dive housing (I’m not taking any chances on a third party dive housing when my GoPro costs several hundred bucks!)

You’ll also need either a floating stick or a dive tray. The latter keeps your footage more stable, but it can be rather unwieldy.

My girlfriend uses this Movo dive tray (with mounted dive lights) and gets really great footage, but she’s dialed in her buoyancy control quite well.

If you’re just starting off diving or capturing underwater photography, you’ll probably just want a floatie stick so that you can focus on other aspects of your diving.

You’ll also want a lanyard for your floatie/dive tray to make sure it’s secure on your BCD.

Memory Cards

You’ll need a micro SD to go with your GoPro. I suggest getting one with a decent amount of memory, because the new GoPros have 4K which take up a lot of space.

I suggest having an extra one in case yours corrupts or you fill it with too many scuba memories and you don’t want to have to delete footage before you’re ready to.

Filters for GoPro

Allison holding her flip filters in her apartment
Flip filters are the best investment for your underwater photography!

The best addition to a GoPro is dive filters — I invested in these Backscatter flip filters and they are amazing!

You never have to worry about your footage getting locked into one (bad) filter — you can adjust the filters extremely easily while underwater by just flipping the filters on or off.

I bought the dual system, which has filters for both 20-40 feet depth and 40-80 foot depth.

It’s a little pricy, but for how it amazing it makes my footage — it’s absolutely worth it.

Extra Batteries

Having extra GoPro batteries is always nice, especially if you’re doing repetitive dives.

Having these GoPro batteries which come with a separate charging port so you don’t have to have your GoPro plugged into the wall to charge is really helpful, too.

Stuff for Surface Intervals

Quick Dry Microfiber Towel

Pineapple print microfiber towel with sunscreen products and sunhat and legs with rainbow sandals on a black sand beach
A microfiber beach towel is useful from beaches to dive boats!

The best way to warm up after a dive is to dry off. Yes, it may feel awful when you first peel off that wetsuit but you’ll be grateful for it in less than a minute!

I always bring a small microfiber towel — and next trip, I’m thinking of bringing two small ones because then each one will be dry on a two-tank dive.

Sun Protection Clothing

As mentioned above, you’ll want to bring something dry to cover up in during your surface interval / return trip after your second dive.

That can be a rash guard, a dive shirt, a swim cover up, or even just a plain T-shirt — as long as it protects you from the sun, it’s good to have!

Additional Clothing

If you want to change out of your swimsuit into fresh clothing when you get back from your dives, it’s nice to have a change of clothing in your bag.

Just make sure it stays dry!

If you’re staying at a nice resort like the Atlantis Bahamas, Kanuhura Maldives, etc., you’ll likely want some nicer clothes you can change into before you arrive at the resort.

Dry Bag

Yellow Sea to Summit dry bag all folded up, in a hand, on the beach with palm trees and blue water and green mountains in background
Dry bags will absolutely come in handy!

… and a dry bag will help with that! It’s handy for keeping things like your change of clothes, your wallet/money, your phone, etc. all stay safe from salt water.

Get a small one if you only want to keep your basics dry or get a larger one if you also want to keep clothes dry.

Sea to Summit is the most-trusted dry bag brand, so it’s what I’d go with.

Other Dive Travel Musts

Reef-Safe Sunscreen

A side by side comparison of two reef safe sunscreen companies on a beach towel on the beach in Moorea
Two actually reef-safe brands! I prefer the Sea 2 Stream.

It’s extremely important to use reef-safe sunscreen when you’re diving if you want the reefs to still be there in the future!

I love Sea 2 Stream for reef-safe sunscreen — they have a regular version and a tinted version in case the white zinc is not your favorite look.

The worst two sunscreen ingredient offenders are Oxybenzone and Octinoxate — avoid those at all costs!

Other ingredients to avoid are Benzophenone-1, Benzophenone-8, OD-PABA, 4-Methylbenzylidene camphor, 3-Benzylidene camphor, and Octocrylene.

Check the ingredients yourself because there is no regulation for what a company calls ‘reef-safe’, and unfortunately some brands that advertise themselves as reef safe are actually not.

Lip Balm

You’ll want to use a lip balm to soothe chapped lips, which can get exacerbated by salt water and the sun.

Make sure you don’t use anything with SPF because that goes against the whole point of reef-safe sunscreen! I like Aquaphor.

Motion Sickness Pills (Dramamine)

Allison Green diving with a sea turtle in Tahiti
Dramamine keeping me happy while diving!

If I’m on a surface interval that is just out at sea, it’s quite easy for me to get seasick.

I take less drowsy Dramamine one hour before I plan to leave for my first dive, and it keeps me feeling well for a two-tank dive, including the surface interval.

You can also take all-natural ginger Dramamine 30 minutes before your first dive. It’s not quite as effective, but if you are less prone to seasickness, it may be enough!

Ear Drops 

If you have any problems with equalizing or swimmers ear, divers swear by Diver Drops.

It’s not something I’ve needed to use yet, luckily, but if you are prone to ear problems you may want to give it a try.

Mask Defogger

Yup, you can do the ol’ spit and rinse, but having mask defogger at hand is always nice.

I always feel more comfortable having used it and knowing I’m going to enjoy my dive… nothing is worse than a foggy view while you’re trying to enjoy your dive!

Allergy / Sinus Medication

If you are prone to getting stuffy, I suggest bringing whatever allergy medicine you typically take at home. I take Zyrtec and I also use Flonase.

Note that you should be cautious with using decongestants like Sudafed, etc. as this can potentially cause problems.

DAN recommends exercising caution with it (and better off avoiding it entirely), and never using it to dive despite being sick.

General Travel Essentials

Allison Green wearing a sunhat and carrying a tan mesh beach bag with palm trees behind her
Of course, you’ll need to pack some stuff for when you’re not diving, too!
  • Clothing for Your Trip (for an example of a tropical packing list, check this Tahiti packing list)
  • Noise-Canceling Headphones
  • Insect Repellent (be sure to shower this off if you use any chemical based ones before you dive!)
  • Credit Cards & Debit Cards
  • Mobile Phone & Charger
  • Laptop & Charger, if bringing
  • Travel Adapter, if needed
  • Camera Gear 
  • External Battery Pack
  • Ear Plugs
  • Eye Mask
  • Mini First Aid Kit
  • Medicine (Birth Control, Prescription Medication, etc.)
  • Your Own Water Bottle

What to Wear in Norway in Winter: Your Norway Winter Packing List

Allison in an ice hotel in Tromso

If you’re planning a trip to Norway in the colder months, especially coming from a warmer climate, you’re probably a little nervous about what to wear in Norway in winter.

I’ve just returned from a winter trip to Norway and while I was a bit concerned about the cold, I found that with the right winter clothing and accessories, I was well prepared for the cold in Norway.

And despite packing for temperatures as low as -20 C (though it didn’t get that cold in my time there!), I was able to fit in all in my carry-on backpack due to careful planning and packing and proper layering.

In this post, I’ll explain what I wore in Norway in winter, linking to products either exactly the same as or really similar to what I used.

My typical Norway winter outfit!

Your Winter in Norway Packing List

8 Essentials to Pack for Norway in Winter

Crampons

One of the most important things to pack for Norway in winter is a sturdy pair of crampons. Crampons are basically small spikes or grips that you attach to your winter boot with a stretchy silicone attachment.

You don’t need a super intense-looking mountaineer type crampon, unless of course you’re going mountaineering (which I definitely can’t help you with, as the most activity I got in Norway was dog-sledding).

I used these simple Yaktrax which were really easy to take on and off — essential, as indoor places everywhere in Norway ask you to take off your crampons before entering.

They were also perfectly grippy for icy city streets and I didn’t have any slips while wearing them, walking around in the snow and ice for miles (and the day I went out without them on accident, I definitely noticed the difference!).

Moisturizer and lip balm

Winter in Norway will really dry out your skin, so you’ll definitely want to pack a pretty heavy-duty moisturizer as well as lip protector.

I remembered the former but forgot the latter and by day 2 I had sore, chapped lips and running to the nearest pharmacy to drop $10 on a basic chapstick…

Norway is expensive, and buying little things adds up. Be smarter than I am and bring it from home where you’ll spend less on something better!

I love this moisturizer from La Roche-Posay and highly recommend Aquaphor Lip Repair for keeping your lips moisturized!

Camera

It’s highly likely that one of the reasons why you are going to Norway in the winter is to see Tromso’s Northern lights!

In that case, you’ll want to ensure you have a camera that is capable of manual settings – a smartphone won’t do if you want proper photos.

Most importantly, you need to be able to set the aperture, ISO, and shutter speed. I use a Sony A6000 and it works great.

sweden in winter
Captured with my Sony A6000!

Travel tripod

To properly photograph the Northern lights, a travel tripod is absolutely essential.

You need the camera to be still for at least 3-5 seconds to get a decent photograph, and there’s no way you can eliminate camera shake for that long without a tripod.

In the past, I’ve used a simple, cheap 50″ Amazon tripod and it worked just fine.

Reusable water bottle

 The tap water in Norway is drinkable everywhere (and absoutely delicious).

Make sure you bring a reusable water bottle so you don’t spend a fortune on bottled water, which is expensive in Norway.

If you don’t already have one, try this one from Simple Modern.

Battery packs

Your electronics lose battery so much faster in the cold!

Bring a portable charger (I brought two) with the ability to store enough power to complete 4 or 5 charges – it’ll save yourself so many headaches!

Anker is a reliable brand and what I personally use (I have this one) — as a blogger who always needs my electronics charged, it hasn’t let me down!

Also remember to bring extra batteries for your camera, especially if photographing the Northern lights!

The cold can wear out your camera batteries… and frost over your camera! Bring a lens cloth to defog it as well.

Adaptor, if necessary

Norway uses the standard European outlet, so bring one if you need it, which you will if you’re coming from the UK, the Americas, or Asia.
Here’s a universal one if you don’t have one or are in the market for a new one.
Travel insurance

View while whale watching in Tromso Norway

Yes, I know this isn’t something that you pack, but in my opinion, it is just foolish to leave home without it… especially since the pandemic!

It’s extra important to have travel insurance in winter in the Arctic, as the weather is unpredictable, and you will be protected and reimbursed in case of trip cancellation in addition to illnesses or accidents.

When planning any trip, especially a winter trip, be sure not to forget about travel insurance!

I use SafetyWing and its Nomad Insurance to insure all of my trips for its affordable rates and comprehensive coverage for all my travel needs.

For a trip as expensive as traveling to Norway, it’s especially important for me to have coverage. Plus, it’s a Norwegian company!

It provides both travel insurance (coverage for trip delays, cancellations, interruptions — the likelihood of which increases in winter) and travel medical insurance (coverage for things like accidents, illnesses including Covid, etc. — also more likely in winter!).

When you throw in travel to the Arctic, things get even more unpredictable with the weather, and you’ll be especially glad for the peace of mind!

Coverage is really affordable — for me, it costs roughly $11 USD for a week of coverage outside of the U.S., with a policy max of $250,000 after a deductible of $250. Not bad!

Check SafetyWing for a quote here!

What to Wear in Norway in Winter

Allison Green sitting in bed at a ice hotel
Sitting on one of the beds at the Tromso Ice Domes, where the rooms are kept below freezing, wearing my base layers and warmest clothes!

Base layers

You can get away with wearing most of your normal winter clothing in Norway as long as you have proper base layers that help insulate you and keep you warm.

You want something moisture-wicking and antimicrobial, which will keep things from getting stinky or uncomfortable when you sweat (which you will if you’re walking around or being active, yes, even in the cold!).

I brought one pair of thermal leggings and one thermal top with me for one week and just aired them out overnight.

I didn’t find I had any issues with odor, but you could bring a second pair of each if you prefer to alternate daily.

For thermal leggings, I recommend these for women and these for men, both by Columbia, a trusted outdoors brand.

For a top thermal layer, I recommend this top for women and this top for men.

Many people swear by wool, but in general I can’t wear wool or I get insanely, tear-off-all-my-skin itchy (though wool socks are fine for me as the skin on my feet is thicker and less sensitive).

If you can tolerate wool then something like these merino wool leggings, paired with a cashmere sweater layer, will serve you very well.

Note: These are especially important if you stay in an ice hotel or Northern Lights hotel in Norway which often have thermal insulated sleeping bags, but you’ll want a warm layer in between you and your sleeping bag!

A warm winter jacket or parka

A trusty hooded, waterproof parka: the most essential thing to pack for Norway in winter!

For walking around in Norway in winter, you’ll want a nice and warm winter jacket (preferably a parka which goes to about mid-thigh) that is water-resistant and hooded, to keep you warm against the snow.

Winter in many parts of coastal Norway like Tromso actually isn’t that cold, with average temperatures around -4° C to 0° C (24° F to 32° F).

However, there is a lot of wind and precipitation, making it feel colder. You want a waterproofed jacket that will protect against snow and even worse, freezing rain.

For my most trip to Norway, I wore a jacket that I bought from Decathlon which I can’t find online but is virtually identical to this one but in a navy blue.

I loved having a faux fur lined hood to keep snow and rain out of my face and the weatherproof material was much-needed!

Down feathers add a nice layer of warmth that really helps insulate you (though if you want a vegan option, this jacket is similar).

On my past trip to the Arctic, in neighboring Abisko, Sweden where it’s actually a bit colder, I did really well with my North Face parka which I’ve owned for 10 years and absolutely love.

I forgot my North Face parka back in California and I had to replace my winter jacket in Europe, which is why I didn’t bring my North Face jacket with me on this trip.

If you’re buying a winter jacket for the first time and want something really durable, I think North Face makes some of the best winter clothing.

Best of all, their clothing comes with a lifetime fix or replace guarantee, so if you ever have any issues, you can send it in and they will fix it for you or replace it in the event it can’t be fixed.

Snow boots & wool socks

My snowboots came in handy everywhere on my trip!

Norway in winter is extremely snowy and you will regret it if you visit Norway in anything other than proper snow boots!

I wore a pair of snow boots by Quechua which I bought from Decathlon, which I can’t find online.

Here is a similar boot by Sorel, a trusted winter brand that’s beloved in Norway and beyond (here’s a women’s version and a men’s version). I recommend sizing about half a size up to account for thick winter socks.

But no matter how insulated your shoe is, it won’t do much good if you are wearing thin, crappy cotton socks.

I invested in these Smartwool socks after some hemming and hawing about the price and I’m so glad I did.

You don’t need that many pairs because you can actually re-wear them a few times before they get smelly because wool is naturally odor-absorbent and antimicrobial.

I was fine with two pairs of socks over a week, which I alternated daily.

And even though I generally can’t tolerate wool because of itchiness, I don’t mind them on my feet as the skin there is much thicker and less sensitive.

Scarf

For a scarf, the bigger and more wrappable, the better!

I brought two simple scarves, both from H&M, similar to this one to add a bit of variety to my photos since I’d be wearing the same jacket every day.

Winter hats

Tip: Bring a few colorful winter hats to add color to your photos!

When it comes to variety, the same advice goes with hats!

I actually brought three different colors because I could add some variety to photos without adding much heft to my backpack.

I picked bright colors like red and yellow so they’d stand out against the white snow.

I also picked ones with cute pom poms or details (since I knew I’d have some photos of me facing away from the camera), but you can also make your own yarn pom poms!

I like simple fleece-lined knit hats like this one which comes in a variety of colors (men’s version here).

Gloves

As for gloves, I recommend having two pairs!

You need one pair of one lightweight pair of touchscreen-friendly gloves and one more heavy pair of waterproof gloves for things like dog-sledding and playing in the snow.

However, if you’ll just be in the city and aren’t doing any winter activities in Tromso, this isn’t necessary.

Clothes

For the rest of your clothing, you can pretty much wear whatever you are used to wearing in winter.

If you have all the above accessories, you’ll be good with a layer of jeans and a sweater.

For me, for one week, I bought three sweaters and two pairs of jeans and it was perfectly fine with all my other winter clothing listed above!

Underwear

Pretty self-explanatory. I brought eight pairs for seven days and two bras.

But you probably know your underwear needs better than I do!

Bathing suit + flip flops (optional)

If staying at a hotel with a pool or sauna (you lucky duck), be sure to bring these!

Note that some saunas don’t actually allow you to wear swimwear, so do check on any posted signage before hand.

Toiletries for Norway in Winter

You’ll want to pack all your usual toiletries, which obviously vary depending on the person. Here’s what I brought:

  • Shampoo & conditioner
  • Body wash
  • Razor
  • Deodorant
  • Make-up
  • Dry shampoo
  • Moisturizer & lip balm

What to Pack Everything In

Having seen my friend struggle with a giant suitcase throughout Arctic Sweden… I strongly recommend that you bring a well-designed travel backpack instead of a suitcase.

Sure, it’s possible to travel with a suitcase… but you will likely regret it when you end up trying to drag your bag through freshly laid snow, getting all your clothes wet in the process.

Take it from an idiot who brought a rolling suitcase to Helsinki in November.

Abisko train station
I was definitely happier than my friend with my backpack than she was with her suitcase when traveling around Abisko in Swedish Lapland!

Travel Backpack (carry on size or check-in size)

While rolling suitcases can be great for short weekend trips, they are not the best for Norway in winter.

There will likely be snow and ice on the ground, and you will have to drag, not roll, your suitcase, which kind of defeats the purpose of having a rolling suitcase. Not fun.

You’re way better off with a backpack that you can easily carry. I am a light packer, so my Tortuga Setout Backpack is perfect for me.

This is the exact backpack I brought with me on my trip to Norway, and it had plenty of room for more than I brought.

This bag is a spacious 45L and has three main compartments.

There is one for a laptop and other flat objects, one giant rectangular compartment perfect for packing cubes, and one smaller compartment with pockets for passports, pens, odds and ends, etc.

There’s also one small outer zipper pocket for anything you want quick access to. It also has a water bottle holder on the outside and a strap for something like a jacket or yoga mat.

Plus, it’s quite comfortable to wear, with a padded hip belt and comfort-molding shoulder straps complete with a chest strap so that you can distribute the weight evenly across your body. 

Check out more specs and details of the Tortuga bag here!

Does it pass airline requirements? Technically, it’s a little larger, but I’ve never once had to check it in on a budget airline flight, and I’ve taken probably 50+ Ryanair, Norwegian, and Wizzair flights at this point.

Here’s what I do: if I’m flying on a stricter airline like Ryanair or Wizzair, I just buy priority boarding so that I have a guaranteed spot on board for my bag (plus a second personal item bag).

This adds about $5 onto my total flight cost instead of the $50 or so that a heavy checked suitcase or backpack would.

Despite traveling for two years, I haven’t personally used a bigger backpack, but I’ve heard excellent things about the Osprey system.

If I ever were to upgrade my backpack capacity, that’s what I would choose. But I’m cheap and hate paying baggage fees, even at the expense of having less clothing options, so your mileage may vary!

Tip: Wear your heaviest layers, like jackets and boots, on the plane to fit the rest in your carry-on!

Packing Cubes

 If you haven’t used packing cubes before, get ready for a travel revolution.

These super helpful zippable bags are a miracle when it comes to organizing your clothing, keeping everything from bursting out every time you dare open your backpack.

I personally use these eBags packing cubes and love them to the ends of the earth.

Laundry bag

If you are traveling Norway in winter, you will get your clothing wet, dirty, and covered in snow constantly.

This means you’ll have to change your clothes a decent amount. A laundry bag will come in handy at keeping dirty stuff separated from the clean.

Like packing cubes, you don’t need anything fancy at all. I do like having a cute one like this one from Kikkerland though, because I’m impractical and like cute stuff.

Hanging toiletry bag

Packing for Norway in winter has special toiletry concerns (hint: bring ALL the moisturizer) and I recommend using something like this hanging toiletry bag to organize your various shampoos, moisturizers, make-up, etc.

It has a good number of separators, organizers, and pockets without taking up any excess space. 

It’s the Mary Poppins bag you always needed but never knew existed – a miracle for travelers like myself who want to bring their entire bathroom with them when they travel (but don’t want to pay check-in fees).

Day bag

You’ll also want a smaller day bag or purse for carrying your day-to-day odds and ends, like your wallet, lip protector, phone, camera, etc.

I used a simple foldable backpack like this one which easily fits in another bag.

I packed it up folded away for the plane so I didn’t have to carry two bags, but then I used it during my day-to-day travels in Norway.

You may prefer to carry a purse or a larger backpack depending on your needs – this is just what worked for me!

Pin This Guide to What to Wear & Pack for Norway in Winter!

Wondering what to pack for Norway in winter? This Norway winter packing list will help you pack for Norway in winter. Including Norway winter outfit ideas, tips for how to pack for Norway, things to bring to Norway in winter, and tips for Norway jackets, boots, etc., this guide to packing for Norway in winter is your ultimate Norway winter travel companion!

Tahiti Packing List: What to Pack for Tahiti’s Islands (Bora Bora, Moorea + More)

Allison exploring Tahiti while staying at a resort, wearing a bikini, with infinity pool, palm tree, blue sky, and Moorea in distance, while walking barefoot on a bridge.

If you’re planning a tropical vacation to Tahiti and other French Polynesian islands like Moorea and Bora Bora, here’s a Tahiti packing list that will help!

Whether you plan to just relax and chill in an overwater bungalow on a Bora Bora or Moorea getaway, or have a more active trip filled with water activities like scuba diving and jet skiing all over Moorea and Tahiti, this guide will help!

I just got back from a 10-day trip to Moorea and Tahiti (a 5 day itinerary in Moorea, and a 5 day itinerary in Tahiti) and here’s what I packed — and a few things I wished I packed!

Notes on Packing for French Polynesia

The beautiful verdant green landscapes of Moorea with mountains and clouds

For biosecurity reasons, there are strict limits on bringing in fresh fruit and food items into French Polynesia. You can read about them here.

I wouldn’t bring a lot of food from home — just enough to consume on the plane — or you risk having to throw it out at the airport when you arrive.

Another thing to consider is whether you are traveling only between Tahiti and Moorea, which only requires ferries, or if you are also traveling to other islands, such as Bora Bora.

If you fly to other islands, be aware that inter-island flights via Air Tahiti have stricter weight limits.

The planes are a lot smaller than the jets that bring international travelers to Tahiti… you’re hopping between tiny islands in the South Pacific, after all!

Don’t get hit with tons of excess baggage charges. Pack lightly to save a headache!

You’ll also want to leave a little room in your suitcase for bringing back Tahiti souvenirs!

Travel Documents & Preparation

Passport

Person's hand holding a US passport with a plane in the background while sitting in an airport chair, unpainted nails, wearing jeans, looking out window at plane.

French Polynesia is part of France, so if you typically need a visa for France, you may need one for the islands of French Polynesia.

This helpful visa wizard on the French government website will let you know if you need a visa.

Generally, if you don’t need a visa to enter the Schengen European zone, you won’t need one for French Polynesia, but I suggest you double check.

Also, make sure your passport has at least six months of validity — I’ve had too many close friends and family members have travel plans derailed or delayed due to forgetting to check on this!

Also, if you’re a European citizen, you’ll get to enjoy a zippy, expedited passport control line that moves a lot faster than the non-EU citizen line!

Driver’s License

Remember to bring your driver’s license for self-guided adventures in Tahiti!

I strongly recommend renting a car while you are in Tahiti!

We didn’t have a car rental in Moorea and we regretted it, but we loved having a car in Tahiti.

The one exception would be if you plan to strictly have a resort stay where you don’t leave the resort and all your activities are planned by the resort… but where’s the fun in that?

If you plan on renting a car while exploring Tahiti or other larger islands, you’ll need to bring your driver’s license.

As long as your driver’s license is in English or French, you should be good to go.

If your driver’s license is in another language, you will want to have an international driver’s permit just in case.

Credit Card + Debit Card

Person with hand on their credit card, feeding it into a portable point of sale system, with a blurry background and receipt starting to be printed.

Be sure to bring at least one credit card (especially if renting a car) and a debit card for your trip to Tahiti.

And of course, be sure to notify your card companies that you’ll be traveling to avoid any hassle upon arrival!

You may also want to bring a backup debit card just in case you lose one.

You will need cash for a handful of things in French Polynesia, such as taking taxis, so to be without a debit card would be a real hassle.

PADI Card (If Diving)

Allison's hand holding her gold "Open Water Diver" card issued by PADI with plants and apartment background visible behind her.

If you’re a certified scuba diver, you’ll definitely want to bring your PADI card and log book.

Be sure to have dive insurance or travel insurance that covers diving as well. I used Safety Wing to cover me for my most recent trip.

They actually cover dive-related medical expenses so long as you’re certified, which is rare with travel insurance companies!

Travel Insurance

I used to always book my travel insurance through World Nomads but I’ve recently switched over to SafetyWing.

Not only is it dramatically cheaper while maintaining the same benefits, it also covers diving, so long as you are PADI certified (which you had to pay extra for with World Nomads).

Dive insurance can be expensive, so I thought it was great that SafetyWing includes dive coverage in their basic policy, the Nomad Insurance travel medical insurance coverage.

For my recent trip to French Polynesia, I paid just $18 for a 10-day trip — a great deal, especially considering the overall cost of my trip!

Their Nomad Insurance is both travel insurance (covering delays, interruptions, and cancellations) as well as travel medical insurance (covering illness including Covid-19, accidents, etc.), so you can rest easy on your trip.

Get a free quote for your travel insurance to French Polynesia here!

In-Flight Essentials

The interior of a plane with no one in it and the overhead bins clear

No matter what you’re coming from, a long flight to Tahiti is inescapable. These islands are smack-dab in the middle of the Pacific Ocean, after all!

Be sure to pack your bag properly with all the essentials for long haul international flights!

Typically, most airlines will allow you to carry both carry-on bags and personal items.

We flew French Bee and they allowed one carry-on and one personal item.

However, remember that carry-on items — especially roller bags — risk potentially being checked if it is a full flight.

Always make sure the most essential things that you can’t risk losing are on the plane with you in your personal item!

Comfortable Clothing

Allison giving two peace signs, wearing a mask, a headband, a mask, a T-shirt that says 'true" and blue pants
Sitting chaotically, as us neurodivergent queers do best

I always make sure I wear comfortable clothing I can shift and move around in on flights.

You’ll spend a lot of time in these clothes, so make them comfortable!

My new go-to plane pants are my Patagonia Caliza climbing pants — they’re surprisingly comfortable and moveable, while still looking put-together enough for flying.

I also wear a T-shirt with a long-sleeve shirt on top of it so I can control my layers since airplane temperatures swing wildly.

Compression Socks

Three pairs of socks in different colors, one being worn

I wore compression socks for the first time on my recent trip to Tahiti and I am a convert — I’ll never go back to not wearing them on long-haul flights!

My feet weren’t swollen after an 8-hour overnight flight, and I felt a lot more energized in general when I landed.

No need for anything fancy — I wore simple compression socks like these.

Travel Pillow

My scrunched up travel pillow next to backpack for scale

Most flights from the U.S. to French Polynesia are overnight, like ours that left from San Francisco shortly before midnight.

I brought this scrunchable memory foam travel pillow with me and I loved it!

It offered a lot more support than blow-up travel pillows, and it packs down smaller than a bead-filled travel pillow (which I have accidentally ripped open on a plane while trying to rip off the tag, sorry flight attendants…)

Contoured Eye Mask

A black sleep mask that says bedtime bliss on it on a bed duvet cover

I’m in love with contoured eye masks for sleeping on planes and in hotels where I’m not sure what the lighting situation is, since I need it to be very dark to sleep.

I love this contoured eye mask so much that when I looked it up to grab the link, Amazon reminded me that I’ve ordered it four times (because I keep misplacing it).

You may want to grab a spare because there’s nothing I hate more than losing an eye mask while I travel!

Pen

Vase full of colorful pens

This is something I always forget when I’m traveling internationally in the digital age, but you’ll often have to fill out customs and entry forms with pens.

Since the pandemic many airlines are not distributing pens alongside the cards, so having a pen comes in handy!

Noise Canceling Headphones

I used to always just use my iPhone earbuds until I realized how noise-sensitive and how much ambient-seeming noise actually truly frays my nervous system.

I’ve since invested in Bose noise-canceling headphones (the 700 version) and I’m obsessed.

Normally, noise-canceling headphones are rather bulky, but these have a really sleek and flat-laying profile which makes them far easier to pack and fit in your bag than other similar headphones.

I’ll never travel without them in the future!

Also, fellow noise-sensitive people, if you pair some Bose headphones with the ever-incredible (and dare I say, stylish?) Loops earplugs… it’s sensory heaven.

Beach & Water Essentials

Microfiber Beach Towel

Pineapple print microfiber towel with sunscreen products and sunhat and legs with rainbow sandals on a black sand beach

Beach time is one of the must-do things in Tahiti!

Unless you’re staying in a resort where you can count on unlimited beach towels to be provided for their hotel guests, it’s a good idea to bring a microfiber beach towel of your own.

Even then, I like having a microfiber beach towel with me that I can bring on dive boats, snorkeling trips, or even to lay underneath my beach towel.

Microfiber beach towels repel sand better than beach towels, which tend to soak up sand and track it everywhere.

I have this cute pineapple-covered striped microfiber beach towel and I love it!

Reef-safe Sunscreen

A side by side comparison of two reef safe sunscreen companies on a beach towel on the beach in Moorea

Protect your skin, and the beautiful reefs of French Polynesia, with reef-safe sunscreen free of coral-killing chemicals while on your tropical island vacation!

My girlfriend and I brought different brands of reef-safe sunscreens with us so it was fun to be able to compare.

She brought this tinted Stream 2 Sea sunscreen. While it was only SPF 30, it covered so well and stayed so well that I felt it was better than the SPF 50 I brought.

I brought this Blue Lizard SPF 50 sunscreen, but I didn’t feel like it soaked in as well, and I did end up slightly burned after wearing it.

Between the two, I’d pick Stream 2 Sea! There are also non-tinted versions available, but I personally liked the tint as it helped disguised the zinc-y-ness of the mineral sunscreen.

Aloe Vera

Aloe vera gel in green color in clear container with cut up aloe vera plant next to it

No matter how diligent you are with your sun protection, a sunburn is always a possibility on sun-soaked islands like you’ll find in the South Pacific.

I sometimes remember to bring a little aloe vera from home so that I’m not forced to buy a large, overpriced bottle… but I forgot this time.

Luckily, I got burned at the end of my trip, and not too badly, so I didn’t need to buy a huge bottle to bathe myself in.

I suggest these carry-on friendly, travel-size aloe vera bottles.

Beach Bag

Allison holding a tan mesh beach bag at a resort in Tahiti, packing list essential item!

I used a beach bag as my ‘personal item’ and stuffed it full of things I’d need for my trip.

I bought this tan mesh beach bag and really liked it! The holes are not too loose that anything would fall out of them.

There is also a secure pocket that I kept things like keys and my phone that I wanted quick access to.

Dry Bag

Yellow Sea to Summit dry bag all folded up, in a hand, on the beach with palm trees and blue water and green mountains in background
Dry bags will absolutely come in handy on your Tahiti packing list!

If you’re traveling on boats, etc. you’ll want to have a dry bag with you to keep your key electronics and documents safe!

Sneaky swells and waves can have you caught off guard and you don’t want to end up with your passport wet, or an expensive mirrorless/DSLR camera covered in salt water!

Sea to Summit is the gold standard for dry bags — you can get a set of them, or just get the size you need.

GoPro (with Dive Accessories, if Needed)

A GoPro shot of a diver underwater shown on the screen of the GoPro

A GoPro is an essential if you plan to dive or snorkel!

The new GoPro Hero 11 is the best they’ve put out yet — it has incredible image stabilization (very helpful when taking shaky snorkel/dive footage) and 5.3K video (basically, better than 4K).

Plus, the Hero 11’s image sensor is better than previous ones — you can zoom in, crop, change lenses, and adjust the aspect ratios, all things that were difficult or impossible to do on past GoPros.

Note that while the GoPro is waterproof, it’s only waterproof to 10 meters (and I’ve ruined a GoPro diving below that without a case… so yes, they do mean it).

If you plan to dive, you’ll need additional dive housing (and filters will also help you get the perfect color clarity). I suggest this dive housing set that includes four filters.

You’ll also want a GoPro grip that you can clip to your BCD, but that also can cinch around your wrist so that it won’t slip off while you are diving. I suggest this waterproof grip.

Snorkeling Gear

My snorkel, mask, and fin set on the beach with one of the best snorkeling areas in Moorea
My mask, fin, and snorkel set!

Personally, I like to have my own mask and snorkel set when it comes to traveling to island destinations where I can snorkel.

It came in handy when I wanted to snorkel from where I was staying in Moorea!

I use it for shore snorkeling as well as when I dive, so I can use my own equipment that is perfectly fitted to me so that I don’t have a learning curve with new equipment.

Also, some beaches – like Temae Beach in Moorea (one of Moorea’s best attractions) – have incredible snorkeling but don’t have infrastructure where you can rent snorkeling gear at the site, so you’ll absolutely want to bring your own from home!

I recently invested in nicer snorkeling gear, since I also use it for diving and I want it to last a lifetime.

I have a TUSA mask that is specifically for scuba diving and I also have a TUSA snorkel that is a game-changer for snorkeling!

It has a the Hyperdry Elite Top, which is a dry top that quickly closes the gasket when it is submerged underwater.

Basically, the water pressure of going underwater closes the valve so that the water doesn’t flood into the snorkel.

Then, all you have to do is blow fairly lightly on the angled purge chamber in order to clear the snorkel!

It’s pretty amazing — I was shocked at how little water would get into my snorkel when I’d dive down to get a better look at coral while snorkeling.

Allison wearing her favorite water-friendly, reef-friendly swim leggings and her trusty snorkel and mask set!

That said, if you don’t snorkel or dive frequently, a cheaper set may suit you just fine, like this set.

I also have these IST Proline Fins, which were absolutely necessary for both diving and snorkeling.

Much of the snorkeling in Tahiti and Moorea involves enough of a swim that you’ll want fins for safety/energy conservation reasons.

My fins are so good that I was able to snorkel for 2 hours without getting tired… much to the chagrin of the shoulders I later burned.

Scuba Gear, if Needed

Allison's hand, wearing a wetsuit, wearing a dive computer on her left wrist with scuba gear in the background.
A dive computer is great to have for logging your dives and monitoring for safe depths and ascents!

Personally, I only brought my own mask, snorkel, and fins on this last trip.

However, some people like to bring their own equipment such as wet suit, BCD, etc. and just rent oxygen tanks while there.

If you have scuba gear, like a dive computer (not sure what to get? Read my guide to the best entry-level dive computers here), etc., bring it!

After my last trip diving in Cozumel, I decided to get the full monty: BCD, regulator, wetsuit (3mm and 5mm), SMB…

Read my full dive gear packing list here if you want to bring more than the basics.

A Good Book

Purple beach towel with sunscreen, book called "You can't touch by hair" by Phoebe Robinson, fanny pack, and travel towel

If you like reading on the beach, I recommend bringing a good book from home!

You won’t have much luck finding English-language book titles here, so bring whatever you’ve been wanting to read from home.

If you tear through books, I suggest bringing a Kindle instead so you can reload new books as you go through them without having to worry about finding a bookstore.

Reusable Water Bottle

Green reusable water bottle in a sleeve of a backpack

Bring your own reusable water bottle from home and you won’t waste as many plastic water bottles!

The tap water on many islands in French Polynesia is totally drinkable without any added treatment. The water on Tahiti, Moorea, and Bora Bora are all drinkable, for example.

If you visit more remote islands, I suggest asking your host if it’s safe to drink, or you can use a water purifier bottle like this Lifestraw to be extra safe.

What to Wear in Tahiti (Women)

Tops (~5-7 light tops)

Allison eating food in a restaurant in a green tropical print top

I would suggest bringing a selection of shirts, such as a tank top, a short-sleeve shirt, a sleeveless blouse that is breathable, etc.

In general, opt for loose fitting light clothes made of breathable materials, like linen or hemp blends.

I tend to avoid 100% cotton clothing, as it takes forever to dry, as well as synthetic fabrics like polyester that don’t wick moisture and sweat well.

I brought mostly small, thin crop tops so I was able to bring a bunch of tops with me without taking up a lot of space.

Here are a few crop tops similar to ones I brought on my trip: one, two, three, four, and five.

I’d also suggest bringing one or two long sleeve shirts for the evening — spray with Permethrin spray if mosquitos tend to target you!

Bottoms (~3-4 options)

Allison wearing a rainbow shirt and overalls with background of mountains and foggy misty sky

I prefer shorts, so that’s what I went with. If you prefer skirts, go for that!

Here’s what I brought: a pair of distressed overall shorts similar to these which were my go-to, these fun rhinestone-fringe distressed black denim shorts, and a plain pair of Levi’s denim shorts.

I also had my Patagonia Caliza climbing pants which I wore when it was raining or cool out, or when I wanted to cover my legs from pesky mosquitos.

Rompers or Dresses (~3-4 options)

Allison wearing a short romper with monstera print with sunhat in front of bungalows

I rarely wear dresses because that chub rub life is so real.

Also, I have sensory processing issues due to my ADHD/ASD that make any chafing sensation pretty much unbearable.

Enter: the romper! I brought several which I have accumulated over the years that are no longer available online.

Here are a few similar ones: one, two, three, and four.

I did also bring one maxi dress similar to this one which I only wore at night and when I didn’t have to walk around too much.

Nicer Outfit(s) if Staying at Resorts

Sun dress in front of resort bungalows

While in general, Tahiti is a pretty casual type of trip, you may want some nicer outfits for places that have a dress code.

This will depend on where you are going. A laidback, independent beach vacation warrants a different packing list than fancy resorts on Bora Bora!

If you need something more elegant, a black jumpsuit like this one is still casual but better suited for dinners.

Otherwise, fun colorful maxi dresses are great for toeing the line between comfort and dressy.

Swim Cover-ups

White cover up fanning out as person is spinning crossing a suspension bridge

I brought this white sheer lace swim coverup and absolutely loved it!

It’s so elegant yet easy to wear, it doesn’t wrinkle, and it covers up beautifully.

I also love this fun monstera print cover-up from Moss Rose, and enjoyed having both to switch between.

Allison wearing a monstera print swim cover up and a bikini in front of bungalows

You should bring at least two because they’ll get damp from covering you up, plus they’re lightweight and it’s fun to switch them up.

Plus, they’re very lightweight and easy to throw extras in your bag, and they’ll liven up and add accessories to your swimwear photos!

Rain Jacket

Allison wearing her rain jacket and sneakers and a baseball cap

You’ll want to bring a light jacket that is waterproof, whether you are visiting Tahiti and its islands in the rainy season or the dry season.

Being a tropical island, heavy rains are always a possibility and you’ll want to be prepared!

We traveled in the wet season and were grateful for our rain gear: the Patagonia Torrentshell is a classic for a reason, and the underarm zippers for added breathability are perfect in hot climates.

Sun Hat

Allison wearing a sunhat and a white cover up while looking up at cave geology and tropical flora

Tropical weather means lots of sun exposure, and a sun hat should be the first layer of protection for your face against the sun, followed by facial sunscreen.

Bring a large sun hat with a wide brim to protect your face from harsh rays. I brought this packable SPF sun hat that can be crushed without losing its shape.

Baseball Cap

Allison and her partner in a red kayak with the island of Moorea behind them and brilliant blue waters

In addition to a wide-brimmed sun hat, I was glad to have a baseball cap for active outdoor time!

This was good for time on the boat where a sun hat would have easily blown away, as well as for activities like kayaking.

I brought this white one that was leftover from my Halloween costume, but they have all colors!

Multiple Swimsuits

Allison sipping a virgin pina colada while wearing sunglasses in a monstera-print bikini with a high waist with blurry pool in background

If you’re visiting tropical island paradises, what better excuse than to wear as many cute swimsuits as possible?

I wore this cute planty/floral one with a high waist as my #1 swimsuit and an older triangle bikini somewhat similar to this one.

Swimsuits are great to wear under wetsuits if you plan to dive, but you may also want to bring some rash guards or other types of sun protection.

Underwear, Bras, and Socks

Allison in bikini in front of Moorea background
Since you’ll wear your swimsuit so much, you may need to pack less than you think!

Bring enough underwear for the number of days you’ll be in Tahiti, and a little extra unless you want to do laundry while you’re there.

I only needed a few bras since I didn’t wear them with many of my outfits — I was in a swimsuit and cover up many of the days!

Same with socks — I only needed two pairs because I rarely wore my sneakers and mostly wore sandals.

Flip Flops

You’ll want some rubber flip flops like Havaianas for your beach days exploring beaches of the islands of Tahiti, Moorea, etc.

Water Shoes

Colorful sandals propped up with tropical background

I brought some water shoes like my colorful Tevas that are cute enough to wear outside of the beach but also will allow me to wade in any shallow water that’s a bit rocky.

My girlfriend had really cute black Chacos and I was very envious of her sandals — they were understated and practical.

Sneakers

If you plan to hike or do any other active land activities, you’ll want a pair of sneakers.

I have a simple pair of black Nikes that I always bring on trips.

What to Wear in Tahiti (Men)

View of overwater bungalows in Tahiti

I won’t go into as much detail here because well, I don’t wear men’s clothes and I didn’t travel with a male partner!

I would imagine you’d want to bring the following:

  • 5-7 casual, breathable shirts
  • 2-3 pairs of shorts
  • 1 pair of nice-ish pants for dinners out
  • 1 nice dress shirt
  • sandals/water shoes
  • nicer shoes
  • sneakers and socks
  • underwear for the trip’s duration

Toiletries, Medicines & Other Essential Items

Five different kinds of sunscreen, a totally normal amount for a 10-day trip…

While you can find many toiletries in Tahiti at supermarkets like Super U, it’s best to have your own so you don’t have to spend your precious vacation time looking for them!

I suggest using GoToobs — these little bottles are made of silicone and are easy to squeeze your favorite toiletries into.

Here is a quick bullet point list of toiletries you may or may not want to bring, depending on what you use and what you expect your hotel or guesthouse to have:

  • Shampoo
  • Conditioner
  • Body Wash
  • Dr. Bronner’s soap (for hand washing laundry, etc.)
  • Makeup/nail polish (I like pink nails for tropical climates!)
  • Moisturizer
  • Regular sunscreen (for not when in ocean water)
  • Deodorant
  • Toothpaste & Toothbrush
  • Razor & Shaving Cream

Insect Repellent

PIcaradin insect spray by Sawyer brand

Tropical climate means a higher chance of mosquitos! You’ll definitely want to bring mosquito repellant on your trip.

We used Picaridin with some success, but a few particularly ambitious mosquitos were able to get past it.

DEET is stronger, but it may bother more sensitive skin.

I suggest bringing some mosquito repellant wipes in your bag at all times!

Wipes are easier to keep in your bag without worrying about things getting uncapped/leaking… plus, you’ll always remember it when suddenly you find yourself being devoured!

After-Bite Care

Person treating their mosquito bite

You’ll inevitably end up with a few bites no matter what, so you might as well be prepared.

After-bite balms can be helpful, and there are other methods like this one that use the immediate application of heat to spike bloodflow to the area and reduce swelling and inflammation.

My girlfriend, who was a mosquito magnet on this trip, swears by the heat method and would only find relief by scalding herself with hot showers or placing hot spoons on her bites.

I’m getting her this anti-itch heat applicator for our next trip somewhere tropical so she’ll find relief a lot easier.

Dramamine or Anti-Motion Sickness Tablets

Boat ride heading towards islands
You’ll absolutely want Dramamine if you get motion sickness on boats!

I always bring Dramamine from home because often when I buy it abroad I can only find the super drowsy versions that knock me out.

If I bring it from home I can make sure I’m bringing something non-drowsy!

I take Dramamine about an hour before a boat ride that would normally make me nauseous and I’m so much better.

I take these ones because they are in pill/swallowable form. Note that the chewable forms of Dramamine have food dye in them, which are a migraine trigger for many.

Small First Aid Kit

Small red first aid kit with a white cross plus sign on it

Bring a small first aid kit from home with common medicines in it to supplement whatever isn’t in it.

I would suggest painkillers like ibuprofen or acetaminophen, stomach medication like Pepto Bismo in pill form as well as Imodium (anti-diarrheal), and any essential prescription medications from home.

I also use a premade first-aid kit that has things like bandaids, gauze, etc.

Umbrella

A rainy day in Tahiti wearing a rain jacket and hat

While most of the time, there will be light rain, there will occasionally be a downpour!

During those rare times, you’ll be happy for having a sturdy umbrella.

Electronics for Tahiti

Phone and Charger

Allison at the overwater bungalows
When phones take photos this good, you hardly need ‘real’ cameras!

These days I take more and more photos with my phone and leave my camera behind!

In fact, for this trip I just used my iPhone 11 and my girlfriend’s Google Pixel 5 and was super happy with how all of our photos turned out!

Laptop and Charger

Hands on a laptop keyboard with a cup of coffee behind it

If you need your laptop on your trip, be sure to bring it!

Don’t rely on having good Wi-Fi, though, especially outside of Tahiti and Papeete.

External Hard Drive

External hard drive plugged into a laptop

This is a good way to back up your phone’s camera or memory cards if you have a digital camera like a mirrorless or SLR camera.

Pro Tip: Throw a few favorite shows or movies on your hard drive too because the WiFi on the islands of Tahiti is not great.

A hard drive like this one will serve you well!

External Battery Charger

With all the photo taking you’ll be doing, you’ll likely run down your phone’s battery quickly!

Anker is perhaps the most reliable battery brand, so it’s what I personally use (I have this one) — it’s never let me down.

Adaptors

Tahiti is a French territory, so it uses the same outlets as you’ll find in France and most of continental Europe.

Grab a universal adaptor or two for all your charging needs if you have a different type of outlet back home.