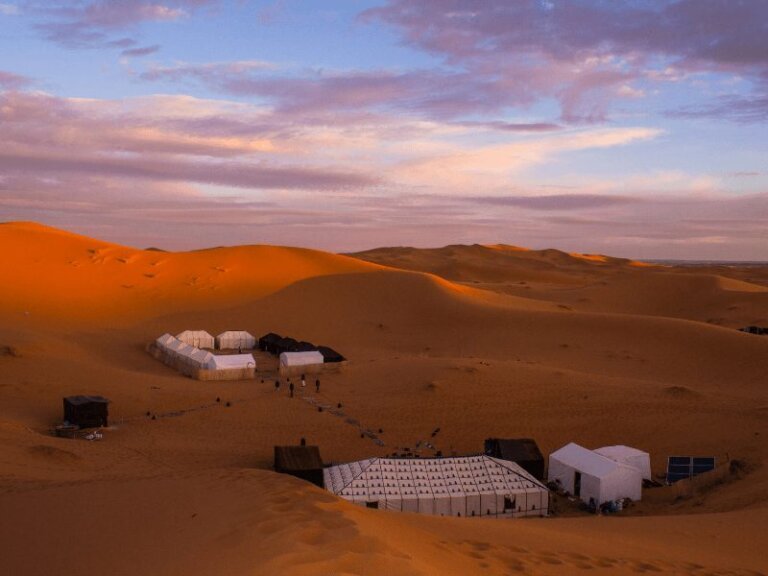
7 Wonderful Reasons to Visit Finnish Lakeland in Summer

Northern Europe is where I’m meant to be in the summer.

Calm streets not taken over with tourists like Western and Central Europe, sunny days with cool breezes, and sunlight that almost never ends? Consider me converted.

I spent a week exploring Finland in June over Midsummer and it was one of the best times to visit this country. For some reason, Finland only seems to see big tourism numbers in winter, when people come to experience the aurora, go reindeer or husky sledding, and see “Santa Claus.”

And while I definitely recommend all of the above — I loved my 2016 trip to Swedish Lapland, which I imagine is rather similar — I don’t think anyone should overlook Finland as a fantastic alternative summer destination in Europe.

In fact, I’d argue that Finnish Lakeland is one of the best places to spend summer in Europe. Need convincing? This post aims to do just that!

Note: I visited Finland this summer as a guest of Visit Lahti and Visit Tampere, but all opinions are my own!

Finnish Lakeland grows some of the best strawberries in the world

Perhaps this seems like an overstatement, or at least, a strange way to start a list of reasons to visit Finnish Lakeland.

But when I think about my time in Finland this summer, nothing comes to mind more vividly than eating nearly a kilo of fresh summer strawberries, sticky with juice to the point where they were nearly bursting before you even bit into them.

One of the best places to snack on strawberries in Finnish Lakeland is at Pihamaa Estate near Asikkala, a delicious strawberry farm you can visit and shop at. We left with red-stained sticky fingers, an impossibly large amount of strawberries, strawberry and raspberry flavored ciders and lemonades, and a smile we could barely wipe off our faces.

Cruising on one of Finland’s nearly 200,000 lakes is the perfect lazy day

A drone flight over a lake in Lahti region, courtesy of Megan Starr

Another memory that stands out for me from my time in Finnish Lakeland was our morning boat ride and picnic lunch organized by Lehmonkärki, the incredible resort where we spend two nights in Lakeland this summer.

We boated out to Päijänne National Park, parked the boat at small islets to wander through pine forests, marveled at the wildlife, and sat in the sun enjoying a fantastic picnic lunch prepared by the team at Lehmonkärki. The lunch was complete with Finnish donuts called munkki and, this being Finland (the world’s largest consumer of coffee), some freshly brewed coffee.

Oh, yea — Finnish Lakeland has an incredible coffee scene

You may think that in order to get a fantastic cup of coffee, you’d be better off in the capital rather than in smaller cities. But that’d be discounting just how deeply Finns love and value their coffee.

The coffee scene outside of Helsinki is quite vibrant, with local purveyors offering freshly roasted single origin beans. We experienced just this in Lahti, where we visited the roastery at Kahiwa and learned the story behind this enterprise.

The owner, Joonas, started importing beans from Kenya from his grandparents’ neighbors and slowly started branching out from just Kenyan beans to support other small, highly-quality local farms.

With the help of one other coffee sourer, he now imports and roasts beans from Kenya, Colombia, Rwanda, Nicaragua, Brazil, Peru, Guatemala, and Ethiopia.

Finnish Lakeland is embracing a vibrant craft beer culture

Too hopped up from your coffee? Luckily, Finns love a good drink as well, and craft beer has taken Finland by storm, with some 110 breweries operating in this small Nordic country.

We had the opportunity to visit several small breweries during our time in Finnish Lakeland, including Teerenpeli, Kanavan Panimo, Pyynikin, and Plevna Brewery, and we sampled beers from maybe a half-dozen more (… all for research’s sake, of course).

I was especially impressed by the way Finns have embraced creativity within the craft beer scene and used both local and exotic ingredients to conjure up unique and memorable brews, such as the cloudberry saison I adored from Pyynikin, the blueberry gose I loved at Kanavan Panimo, and the mango chile gose from CoolHead Brew which blew me away.

I especially loved doing a brewery tour at Pyynikin, located in Tampere just outside the city center. If you’re a beer geek and you only have time for one brewery, make it this one: it’s well worth it.

Finnish Lakeland’s cuisine is focused on local, delicious ingredients

Those in the know are aware that Nordic cuisine has been making a global resurgence. The last year that I was living in New York, I remember that Nordic cuisine was the new big cool thing, with a handful of new fine dining restaurants redefining what was once thought of as a rather simple and not especially creative cuisine.

Luckily, Finnish gastronomy has been part of this cool new wave of inventive Nordic cuisine, and the restaurant scene in Finnish Lakeland is no exception.

One of my first meals in Finnish Lakeland was also the most memorable — thinly shaved reindeer meat served on mashed potatoes with fresh thyme, homemade tart lingonberry compote, and roasted carrots. It was delicious Nordic food at its finest: high-quality and local ingredients prepared correctly and simply.

You can take part in the thriving sauna culture

There is perhaps no more uniting element amongst Finns than the love for sauna. I mean, this is a country with more saunas than cars.

There’s approximately one sauna for every 2.5 people living in Finland, meaning that nearly every family has their own home sauna. It’s not thought of as something for the elite or the rich — it’s thought of as a standard household amenity, perhaps the way the rest of Europe thinks of a washing machine or dishwasher.

But sauna culture goes beyond the home as well, with a wonderful public sauna scene that is easily accessible for both lcoals and tourists. Nowhere is this more apparent than in Tampere, the so-called Sauna Capital of the World, with more than 30 public saunas.

New sauna concepts are opening up and reviving sauna culture for the modern era, such as Saunaravintola (Sauna-Restaurant) Kuuma, which combines modern and inventive dining, a luxe bar scene, and a public sauna with outdoor plunge pool. Even the popular Tampere craft brewery, Pyynikin, has a sauna room you can rent out in their brewery where you can sip their latest beers while sweating it out with friends!

You can lose yourself in the incredible boreal forest

Finland’s land is about 75% covered in forest, making it extremely easy to get out of the city and into nature without much hassle or planning.

When in Tampere, we spent a morning immersing ourself into the forest in Kintulammi nature reserve, about 30 minutes outside of Tampere.

With our awesome wilderness guide, Markus from Boreal Quest, we learned about Finland’s flora and fauna – while battling mosquitos, learning to chop wood with an ax (without hurting ourselves), and ate delicious game meat Markus had hunted himself over a fire that we helped build.

Immersed in the serenity of the boreal forest, looking at one of Finland’s hundreds of thousands of lake as curls of smoke rose from the fire, I understood why the Finns have such an affinity for nature and silence.

Zagora vs Merzouga: Picking the Right Desert Trip from Marrakech

If you’re planning a desert trip from Marrakech, there are a lot of different options, and it can be quite confusing to say the least.

There are a lot of words bandied about – Zagora, Merzouga, Ouarzazate, Sahara – and it can be a bit much to decipher if you’re not familiar with Morocco’s geography.

When I was planning my trip to Morocco, I spent a lot of time researching the best desert tours from Marrakech, which was where I landed.

I ended up picking a Sahara desert tour which, ultimately, in fact never brought me to the Sahara at all (to be honest — most tours don’t).

According to the slayer of dreams and bringer of realness, Wikipedia, the dunes I visited were actually part of the “semi-arid Pre-Saharan Steppes and not part of the Sahara desert which lies some distance to the south.” Oops.

So, first things first, let’s clear up the terminology: most ‘Sahara’ tours bring you to Erg Chebbi and its surrounding ergs (massive sand dunes) which are not quite the Sahara per se, but are pretty damn impressive and pretty damn close.

These ‘Sahara’ tours in fact bring you to the tourist center of Merzouga, where you then embark on camelback into the ergs.

However, I spent several years of my life blissfully unaware of this fact, and most tourists will as well, and I think you’re basically close enough to say you’ve been to the Sahara Desert if you’ve been to Merzouga… but that’s up to you!

Zagora vs. Merzouga: What’s the Better Fit for Your Trip?

Choose Zagora if…

… You’re on a short trip

The Zagora desert is about 6 hours away from Marrakech, as opposed to Merzouga, which is about 10. There are basically zero options for a day trip or one night stay to Merzouga/the “Sahara” short of booking a private driver, and that would be so much driving time that I wouldn’t recommend that.

If you only have, say, 4 days in Marrakech and you want to see the desert, I’d recommend opting for a Zagora tour as it’s shorter and only will take up two days and one night of your trip, as opposed to a Merzouga desert trip which would take up nearly all of your time in Morocco.

However, bear in mind that the Zagora desert doesn’t have proper dunes in the same way that Merzouga has and is more of a rocky desert. While it is, literally, a desert, it likely won’t live up to your dreamy expectations of massive, coral-orange sand dunes. Deserts come in a variety of shapes and sizes, and the Zagora desert will not have dunes as you might expect.

… You’re on a tight budget

That said, because the desert trip from Marrakech to Zagora and back is far shorter and requires one less night of accommodation, it’s a bit cheaper than the other options (and involves less expenses that end up adding up, such as ‘suggested’ tips and guides and overpriced lunches)

If you want the chance to ride a camel and visit a rocky desert in Morocco but budget is a concern, I’d actually recommend doing just a day trip to the Palmeraie (there’s a camel + quad bike option that looks fun!) instead – it’s much cheaper and the surroundings aren’t that drastically different.

… You are flying in and out of Marrakech and don’t want to backtrack much

Because Zagora is closer to Marrakech than Merzouga, it is an easier option (read: about 8+ fewer hours driving) if you are flying in and out of Marrakech.

However, I generally recommend that you fly into one airport in Morocco or out of another to avoid tedious backtracking. Personally, I flew into Marrakech and then made my way up to Tangier and took the ferry to Spain, which is another common route that many people opt for. My itinerary looked like this: Marrakech – Sahara – Fes – Chefchaouen – Tangier – ferry to Tarifa, Spain.

If you’re going back to Marrakech, say, to fly back out or possibly to visit Essaouira or another coastal town, going to Zagora may be smarter (but again, I’d actually probably recommend the Palmerie instead, as it’s way closer and fairly similar in terms of landscape).

Choose Merzouga if…

… You want to say you’ve been to the Sahara Desert

Sahara desert in Morocco
Sand this orange? I’m going ahead and calling it the Sahara.

While, technically speaking, Merzouga is the gateway to the Sahara Desert and the ergs (sand dunes) you’ll find here are part of the “Pre-Saharan Steppe,” in popular speaking, everyone considers the dunes outside of Merzouga to be the Sahara Desert.

And looking around at the impressive sand dunes you’ll find everywhere, it’s not hard to see why that distinction is pretty much just nitpicking. You’re surrounded by sand and 150-meter-high dunes: go ahead and call it the Sahara (I did).

… You want the true camel-in-the-desert experience

Yes, the sands really are this color!

While I didn’t personally visit the Zagora Desert, I’ve read all the reviews and most people were a bit disappointed in their trip.

Mostly, they were disappointed that their camel ride was basically along a highway, and only the last bit of their ride went into the actual ‘sandy’ part of the Zagora.

That will definitely not be the case with Merzouga, where you immediately embark into impossibly high sand dunes that look picture-perfect and seem to go on endlessly.

Honestly, if you’re going to go 6+ hours into the desert, you may as well go all the way.

Plus, there are some truly fantastic desert campsites in Merzouga if you feel like glamping in the Sahara!

… You want to continue onwards to Fes and Northern Morocco

It’s quite a waste of time in my view to go from Marrakech to Merzouga and then back to Marrakech, unless you are flying in and out of Marrakech as your only option and aren’t planning to do anything else in Morocco.

Far better, in my mind, is to use Merzouga as an inconvenient triangulation point for future Morocco exploration. There are tours that go from Marrakech to Merzouga to Fes (this is the tour I recommend if you want to do that route).

It’s what I did when I visited Morocco and it saved me a full day of transit compared to going back to Marrakech and continuing onward. And since transportation in Morocco isn’t exactly the most comfortable, that’s saying something.

Choose either Zagora or Merzouga for…

… An incredible night under a starry sky

My astrophotography skills are nil, so this is definitely a stock photo, but I can tell you firsthand: even to the naked eye, the sky in the dunes of Merzouga is INCREDIBLE

Whether you opt for Merzouga or Zagora, either way, you’re far away from the light pollution and hustle and bustle of urban Moroccan life. If you’re lucky enough to have a cloudless sky, you’ll enjoy some of the most beautiful stars of your life.

However, the further you go east into Morocco towards the Algerian border, the more remote it gets and therefore the less light pollution you’ll find. If you’re into astrophotography and want to take some amazing photos of the Milky Way, I’d definitely choose Merzouga over Zagora as the stars there are truly incredible and worth the 3-day trek again.

… To stop at the Atlas Mountains, Ait Ben Haddou, and Ouarzazate

Atlas mountains in Morocco
The beautiful Atlas Mountains on the way to Merzouga from Marrakech

The tours follow a fairly similar itinerary and you’ll get to stop off in the Atlas Mountains, the UNESCO-listed kasbah of Ait Ben Haddou where Game of Thrones and Lawrence of Arabia were filmed, and Ouarzazate a.k.a. the Moroccan Universal Studios.

I loved Ait Ben Haddou and stopping in the Atlas Mountains, however briefly, so I was grateful that these were included. My trip to Merzouga also included a stop in the stunning Dades Gorge (trips to Zagora don’t) and I felt this was definitely a plus that the trip to Merzouga offered.

… An incredible but challenging experience

I don’t want to burst your bubble when planning an epic desert trip from Morocco but no matter which you choose, both desert excursions present their fair share of challenges. For one, both include several long days of driving – Zagora involves two looong car days, whereas Merzouga is three long days of driving with the final day being almost entirely all on the road. Also, camels hurt like HELL to ride.

Both are tiring and involve quite a few annoying quirks, such as constantly being upsold things like guides, unnecessary scarves that are supposedly ‘mandatory’ for the desert, and expensively mediocre food. Keep of all this in mind (I go into more detail on my Morocco desert guide). Don’t let these things ruin your trip, but be realistic about what to expect and you’ll be far less annoyed.

Just Tell Me Which To Pick: Zagora or Merzouga?

Merzouga. Honestly, I don’t think that going all the way to Zagora is worth it, especially when you can get to Merzouga which is a lot more impressive with just a little more time and patience.

If you have limited time, I’d probably opt for doing a camel ride through the Moroccan Palmeraie (there’s a camel + quad bike tour option as well as a sunset camel ride option). It’s a half-day excursion giving you plenty of time in Marrakech without the hassle of heading all the way into a lackluster desert.


The Zagora desert can’t quite compare to Merzouga

If you’ve settled on Zagora, then I’d recommend this tour by Ando Travel (not sponsored, just the best-rated option). They have one of the better reputations among tour operators in Morocco and they have a 4.3/5 rating on GetYourGuide, which is among the highest for this specific tour type. As always, read through recent reviews before committing.

»» Book your roundtrip Marrakech-Zagora desert trip today «« 

However, I’d really urge you to pick Merzouga vs. Zagora if you’re picking between those two.

In that case, I’m still sticking with Ando Travel as I’ve researched them pretty thoroughly and they seem to be well-reviewed by solo female travelers (I was nearly assaulted on my desert tour, so you have to be careful with who you book with).

As for going to Merzouga, this tour goes from Marrakech to Merzouga and back and has an overall pretty solid review (4.4/5 stars with over a thousand reviews). I feel comfortable recommending them to couples, families, and solo travelers, and you can check out the most recent reviews here to ensure nothing has changed since the time I wrote this article.

»» Book your roundtrip Marrakech-Merzouga desert trip today «« 

However, what I would recommend most strongly if you can is to plan to go from Marrakech to Merzouga and onwards to Fes and Chefchaouen. Chefchaouen in particular was the highlight of my Morocco experience and since it’s pretty much Instagram heaven, I’m sure it features heavily on many people’s hopeful Morocco itineraries.

In that case, rather than doubling back via Marrakech, I’d recommend finding a tour that moves onward to Fes. That used to be annoying, and when I did it I had to negotiate with my tour company to figure out a driver to take me onwards to Fes (which, surprise surprise, I got cheated on… which is why you really should never book a trip in a souk and instead use reliable booking services like GetYourGuide or Viator). Ando Travel also organizes this kind of trip, and I’m happy to recommend them here.

»» Book your Marrakech – Merzouga – Fes trip today «« 

Finally, be sure to read my guide to visiting the Sahara (aka Merzouga) before you go – there’s a lot in there I wish I had known before my trip.

And if you’re going to be in Marrakech, be sure to check out my Marrakech itinerary for how to spend 3 perfect days in Marrakech.

Where to Stay in Marrakech

Since I’m assuming you’re starting your desert tour in Marrakech, here are my top picks for where to stay in Marrakech if you haven’t yet figured out your accommodations.

Budget: Nondescript on the outside, Riad Dar Maria is gorgeous and cozy on the inside. Updated design makes the indoor courtyard a lovely place to relax, and comfortable private rooms with AC offer excellent value for the price. The riad is family-run and treats you like one of their own. Highly recommended by fellow travelers with a 9.5 average rating on Booking.com. Click here to see lowest prices and current availability.

Mid-range: The lovely Riad Enchanté lives up to its name – it will truly delight and enchant you. With stunning tilework, a rooftop terrace (with jacuzzi!), large rooms with AC, and amazing attention to detail (check out those lovely wooden doors), you’ll probably never want to leave this homey, delightful riad. Click here to see lowest prices and current availability.

Luxury: For five-star comfort at not insanely outrageous prices you can’t do much better than Villa Lavande, a traditional riad with a comfortable in-house hammam, a gorgeous pool, air conditioning (a must if you travel in summer), and helpful staff. Cooking lessons are available on-site in case you fancy learning how to make your own tajine.. or you can simply eat at the in-house restaurant beloved by guests. It’s located in the medina but away from the hustle and bustle, the best of both worlds. Click here to see lowest prices and current availability.

More Morocco Travel Resources

I’ve written quite a bit to help you plan the perfect trip to Morocco! First, start with my Morocco travel planning checklist – it walks you through every step of the planning process.

Next, check out my Morocco packing list with specific advice for what women should wear in Morocco.

If you are starting your trip in Marrakech, like most people do, I have a guide to the best riads in Marrakech on any budget, as well as a guide to spending 3 days in Marrakech with recommended tours and outings.

15 Useful Things to Know About the Northern Lights in Sweden

One thing that tops many travelers bucket lists is a trip up to the Arctic for a chance at glimpsing the beautiful, mysterious Northern lights that dance across the night sky.

If you are planning a trip to chase the Northern lights in Sweden, you likely have a lot of questions: How much will it cost? Do you need to do any tours to see the Northern lights? Where exactly should I go to have the best chance of seeing the lights? How long should I stay? And how the hell do I get the best photos of ti?

I’ve written this guide to help answer some of the questions I get about seeing the Northern lights in Sweden, mostly from people who have found this post about traveling to Swedish Lapland on a budget.

Here’s some good news: Sweden is more affordable than its Nordic neighbors to the right and left, and luckily, it is one of the better places to see the Northern lights for a variety of reasons.

Aaaand here’s some bad news: No matter what, the Northern lights are unpredictable, and while visiting Sweden on a budget is possible, it is still not cheap by any stretch of the imagination.

Hopefully, this guide will illuminate (ha) some of your questions and equip you with the knowledge you need to successfully plan a trip to see Sweden’s Northern lights. If you have any other questions, please drop me a message in the comments and I’ll answer within a few days!

You will need to go way more north than Stockholm to see the Northern lights

One big misconception about chasing the Northern lights in Sweden is that you can see them all over the country. Unfortunately, this is not so in most cases! If there is an extraordinary amount of solar activity and an especially clear night, you may be able to catch the occasional glimpse of the lights from the Swedish capital. I’ve actually met Swedes who have never seen the Northern lights in their own country!

However, generally, Stockholm is too far south to reliably see the Northern lights. You’ll want to head north to the Arctic Circle in order to have the best possible chance of seeing the Northern lights. The regional hub of Northern Sweden is Kiruna, and there is both a train station and a small airport there. You can easily fly to Kiruna from Stockholm in 1.5 hours on Norwegian or SAS (I flew one way with Norwegian and the other way with SAS as each airline offered cheaper tickets on different days).

northern-lights-budget

Alternately, you can take the train from Stockholm to Kiruna or Abisko, which is a popular option but a little more expensive than flying… though to be honest, I think if you consider the cost of getting to and from the airport in all directions, the train works out to be a better – and more comfortable – deal.

However, the train does take about 17 hours, leaving Stockholm at 6 PM and arriving in Abisko around 11 AM. So if you are super tight on time, or the thought of being on a train that long makes you antsy, you may prefer flying.

Abisko has the best chance of seeing the Northern lights in Sweden

There is a special microclimate in Abisko National Park as a result of Lake Torneträsk, which basically pushes cloud cover away from Abisko at night. In a major snow storm, this won’t be the case, but generally, Abisko enjoys relatively clear nights compared to elsewhere in Sweden and the Arctic. Scientists estimate that if you stay in Abisko for 3 days during aurora season, you have an 80% chance of seeing the Northern lights — those are some good odds!

Also, the population Abisko is tiny – some 85 actual residents, plus a small but robust number of tourists staying in hotels and guesthouses. The perk of this is that there won’t be a lot of light pollution in Abisko. I was able to see the Northern lights just outside the door of my hostel at STF Turiststation, after giving my eyes just a few seconds to adjust to the dark.

The great thing about staying at STF Turiststation is that it’s the only accommodation actually inside of Abisko National Park, so I was able to walk to the frozen-over Lake Torneträsk in about 10 minutes, giving me a great, unobstructed place to see and photograph the Northern lights.

The Northern lights in Sweden can be seen from roughly September to April

This sounds obvious, but it needs to be properly dark in order to see the Northern lights dancing overhead. And if you visit during the peak of summer, which runs from May to August, it is not going to get dark enough at night to see the lights.

In fact, from May 25 to July 19, the sun doesn’t go down at all in Arctic Sweden (using Abisko as a reference point).

Must see Northern lights in Abisko

However, even after the midnight sun ends, it still won’t get dark enough at night until around the end of August. Similarly, while the end of April will still be quite cold and there will be a lot of snow on the ground still, the days are getting longer — about 18 hours long at this point — which gives you precious few hours of actual dark night to see the lights.

But if there’s no solar activity, you won’t see the lights

However, even if you go to Sweden during the aurora season, you are not guaranteed a Northern lights show. The aurora depends on solar activity. To get a bit geeky on you, here’s roughly how it works. Powerful storms on our sun’s surface send particles through our solar system – some of which make it our own pale blue dot, Earth.

Normally, these solar particles just pass over the lower latitudes without any special show. But close to the Earth’s poles, these particles interact with the geomagnetic field, creating light shows when the particles from the sun meet particles from the earth. For a more detailed explanation, this breaks it down quite nicely.

northern lights stf turiststation

So, what does all of this science mean for you? Basically, no storms, no show. But generally, the sun is a pretty active guy. You can use this aurora tracker to predict how the aurora will be over the next 3 days. There’s a lot of information on that site, but basically, anything above a kp 5 (rare) will be visible down in southern Sweden, and anything above a kp 2 (more common) will be visible in the Abisko region.

Still, it’s all just predictions, and nothing is ever guaranteed with the aurora.

The best time of year to see the Northern lights depends on what activities you want to do

Since the aurora can be seen as long as the sky is dark – roughly September to April – pretty much any time within that band will give you opportunities to see Sweden’s Northern lights.

Theoretically, the more hours of darkness there are, the higher your chance of seeing the Northern lights is. However, the deeper you are into winter, the higher the chance of winter storms is. And of course, the Northern lights could be doing the most spectacular dance in the world over your head, and you’d never know it if the sky is blanketed in clouds.

The truth is that while you have a good chance of seeing the Northern lights in Sweden during this time, you shouldn’t plan your whole trip around it. Instead, I recommend planning your trip based on what activities you want to do outside of seeing the lights. This way, you’ll still have a magical and memorable trip, even if the lights and weather don’t cooperate.

When not seeing the Northern lights, dogsledding is a fun way to pass the time

Most people want to see the Northern lights as part of a winter-themed trip, combining it with activities such as dog-sledding, visiting with reindeer, snow-shoeing, and ice-trekking. If that’s the case, I recommend visiting in late October/early November or late January/early February. I personally visited around the  middle of February and saw the lights 3 times (3 nights in a row!), but still had sufficient daylight hours to enjoy activities like dog-sledding.

Keep in mind that if you visit during the polar night, which runs roughly from December 7 to January 5, you won’t have any daylight hours. While there will be some twilight-like light and not pitch blackness during part of the day, it may be a bit disorienting and some activities may not be as enjoyable.

If you want to do hiking, Northern Sweden is an absolutely amazing place for that. The Kungsleden trail is a massive 440 kilometers long and is one of the most famous trails in Sweden. Much of the trail runs through prime Northern lights spotting territory. While you certainly don’t have to hike all of it, you could do a small portion of the trek – such as from Abisko to Nikkaluokta, about 100 kilometers – or shorter day hikes on and around the Kungsleden.

The Kungsleden trail is open until the end of September, so you can definitely combine some hiking days with Northern lights spotting at night, staying in one of the STF huts along the trail or wild camping if you prefer.

You’re more likely to see the Northern lights in Sweden than in Norway or Iceland

Norway and Iceland are two of the most popular places to go searching for the Northern lights, but Sweden actually has a much better climate for seeing the Northern lights.

Basically, anything that shares a coast with the Atlantic is subject to lots of fussy weather. I mean, there’s a reason why the UK and Ireland have notoriously gloomy weather!

Iceland’s weather is infamous for being fickle, and the same goes for Norway. Because Sweden is a bit sheltered from the Atlantic by Norway, which acts as a buffer (in my highly scientific understanding), you have more clear nights and therefore a better chance of seeing the Northern lights.

Iceland is also not necessarily in the Arctic Circle with the highest amount of solar activity. The higher latitude you are, the more likely you are to see solar activity at night. So if the Northern lights are your ultimate goal, I’d definitely opt for Sweden over other countries as a result of the relatively milder weather.

The Northern Lights are not as bright as they look

Now, to burst your bubble a bit – the Northern lights are not quite as green as they look in the photos. The photos you’ve seen of Sweden’s northern lights aren’t photoshopped, though: that’s the work of long exposure.

Basically, your eyeball is taking in light at, well – the speed of light. Meanwhile, your camera is able to take in light for longer than the split second that light registers in your eye.

Most photos you see of the Northern lights were taken over the span of 3 seconds to 30 seconds, meaning that your camera has captured a lot of light detail that your eye necessarily can’t.

That said, the Northern lights are definitely not invisible – they look more like a faint green, with occasional brightening pops of brighter neon green. On my final night seeing Sweden’s Northern lights, I was treated to a magical show of greens and purples, bands of light moving rapidly across the sky. The lights were so bright that I was even able to capture them looking bright green with a simple smartphone (which is not typical!).

So, don’t go expecting exactly what you see in the photos, but at the same time, don’t worry – should you be lucky enough to spot the Northern lights, you’ll be duly impressed.

You will need a proper camera to photograph the lights

I mentioned that I got super lucky and was able to snap a photo of the lights with my smartphone one night, but that rarely happens, and still, it didn’t do the lights justice. I had much better luck with my actual camera.

I’ve since upgraded my camera gear from my trip to Sweden in 2015, and now I recommend the Sony A6000. It is an excellent entry-level camera that gives professional results. You need a camera which you can change all the settings on: namely, you need to be able to adjust aperture, shutter speed, and ISO. If you are looking for a great travel camera that is affordable, this is my top recommendation.

If you are looking for a more advanced camera, the Sony A7R III is the top-rated mirrorless camera in the game, but it costs a fortune, so it’s only worth getting if you are serious about your photography. When I have the money to upgrade my gear, this is without a doubt the camera I am getting.

But you will also need a tripod

In order to properly capture the Northern lights in Sweden, you will need a tripod. This is because you will need to keep the camera steady for a minimum of 2 seconds or longer in order to get a proper, non-shaky photo. While you may think you can hold still for 2 seconds, trust me – your hands shake naturally (and will do so even more in the snow!) and any photos you take with a long shutter speed will not turn out properly.

I recommend buying a sturdy tripod for traveling in Sweden. I have used this cheapo Amazon tripod, but a proper sturdy tripod is a good investment if you are planning on taking your photography seriously. This one by Vanguard is one of the highest-rated in the industry for the price.

If you don’t plan on pursuing photography beyond the Northern lights, just buy a cheap tripod, but if you are planning to get more serious about landscape photography I highly recommend making an investment in a sturdier tripod.

Another thing to consider is that you will want to use either a self-timer (most cameras come with a 2 second and a 10 second option – 2 seconds should be fine to reduce camera shake) or a remote function to take photos. The Sony A6000/A7R III both have the capability to turn your smartphone into a remote. However, if you already have a DSLR or mirrorless camera that doesn’t have this remote function, you will want to purchase a remote that is compatible with your camera brand, such as this Canon remote or this Nikon remote.

Get comfortable with manual settings before your trip

One big mistake people make when trying to photograph the Northern lights in Sweden is that they don’t get familiar with their camera and tripod beforehand, especially if they buy new gear.  Take the time to read your camera manual and attempt some simple night photos at home before your trip.

You will want to use the largest aperture (which, confusingly, is the smallest possible “f” number your lens is capable of). On many cameras, that is somewhere between f.2 and f.4. You’ll then want to play around with your shutter speed and ISO.

Basically, you want to use an ISO that allows you to get a 3+ second exposure without degrading the image quality too much. On my Sony A6000, my images get grainy above 1600, but higher quality cameras can be cranked up to 3200 or even higher before getting very noisy and ugly.

I’m just an amateur photographer, so this is just what I’ve found from my own experience, but this guide to choosing settings for the Northern lights will likely prove helpful.

The cold will zap your batteries – fast

One thing to considering when trying to photograph the Northern lights is that your camera batteries will drain faster than you ever thought possible – same with your phone if you’re using that as a remote when shooting.

To combat this, you’ll want to bring several back-up batteries. I have these cheap Sony A6000 batteries and they work great – the best part is that it charges two batteries at a time. Grab one or two packs for your trip – it’ll come in handy! I found two fully charged batteries were fine for me, but you may want a third or fourth as back-up if you are shooting for a long time or if the weather is especially cold.

Finally, a small Anker portable charger will be your phone’s best friend, since your phone battery will drain quickly, too.

You don’t need to go on a Northern lights tour, but they can be helpful

If you are lucky with the weather and the timing, there is no need for a Northern lights tour – getting a good photo of the aurora is simply a matter of walking out your front door and setting up your gear.

However, if the weather is going to be unpredictable during your stay, or the aurora forecast is on the low side, you may want to opt for a Northern lights tour. These guys are highly skilled at chasing the Northern lights in Sweden and will do everything in their power to try to get you to a place where you can see the lights, although of course, no one can offer a guarantee. Your Northern lights guides will also bring you to beautiful photography locations where you can have an interesting photo composition, so it may be worthwhile if you are really looking to get some killer photos.

For people traveling on a budget, a Northern lights tour can be quite expensive and actually not really necessary. I personally saw the lights 3 nights in a row during my 3 nights in Abisko – but I may have been exceptionally lucky. Still, the first two nights, I only saw tiny glimpses of the lights from behind the clouds, and perhaps had I gone with a tour guide they would have driven us to a less cloudy location and I could have gotten better photos.

It’s up to you – I’d base it on a combination of your budget, how badly you want to see the Northern lights in Sweden, and how likely you are to ever return to this part of the world. It is far cheaper to pay for a Northern lights tour than a whole ‘nother trip up North!

The Aurora Sky Station is a bit of a rip-off, but their tracker is awesome

Similar to what I wrote above about Northern lights tours, the Aurora Sky Station in Abisko is not really worth the money if you are on a budget.

For one, while you are elevated above Abisko at 900 meters, that generally doesn’t really make a difference in terms of cloud cover. If it is cloudy at sea level, it is likely to be cloudy at the Sky Station. For another, the Sky Station is just that – a station. If there is bad weather at that spot, you are kind of stuck there, and you don’t have the freedom of jumping in a car and driving around looking for better conditions.

They also reserve the right to cancel in case of bad weather and provide a ‘substitute activity’ without giving your money back, so it is a bit of a gamble. Several people have been unlucky with bad weather and not been happy with the replacement activity.

However, the Aurora Sky Station does have a really nice dining experience, where you can take a chairlift up to the Sky Station and have a 4-course meal influenced by Nordic cuisine and Swedish ingredients. It is rather expensive, of course, but if you are really aiming for an unforgettable Northern lights trip it’d be a special thing to add to your itinerary.

Still – the Aurora Sky Station has an awesome live aurora cam! I stayed at STF Turiststation nearby, and instead, what I did was stay warm and cozy inside the hotel and check the live aurora cam every few minutes for a flash of green or see if the clouds were parting – at which point I’d head out with my camera.

Stay as long as you can – even if you’re on a budget

I was visiting Sweden on a short weeklong break, and I gave myself 3 days in Abisko National Park in order to try to see the aurora. While I was super lucky and saw a glimpse of it every night, and one truly spectacular light show, I think that 3 nights is the bare minimum you should spend up north if you are trying to see the Northern lights in Sweden.

There are tons of activities you can enjoy during the day in Swedish Lapland, from husky sledding (a must-do) to snowshoeing to ice-climbing to snowmobiling to just going through wintry hikes in Abisko National Park. You can also ski at nearby Björkliden or go into town to Kiruna for a day of sightseeing in this surprisingly charming mining town.

Kiruna Church Sweden - the jumping off place to see the Northern lights

Many hotels and guesthouses offer free or low-cost snowshoes and cross-country skis during your stay, which is a great way to keep your costs down on a longer stay. Even just sitting in a charming guesthouse with a crackling fire and a cracking book is a good time – so I highly recommend extending your stay to however long is possible, especially since transport is one of the biggest costs and accommodations in Abisko are rather reasonable.

The longer you stay, the better your chances of seeing the Northern lights, so if you can stay for 5 days or better yet a week in the North, then all the better.

Don’t forget to dress warm!

This is yet another “duh” item, but seriously – don’t underestimate the cold! If you are chasing the Northern lights in Sweden, you may be outside for several hours at a time, at temperatures below freezing. A good jacket (I love my North Face parka), thermal layers like these from 32 Degrees, a tight-fitting hat, a warm scarf, and sturdy waterproof gloves are absolute essentials for visiting Arctic Sweden.

I’ve actually written a complete packing list for Northern Sweden, which you can find here.  If you don’t have proper winter gear, you will definitely want to buy it beforehand, as consumer goods in Sweden are quite expensive and you will pay a huge premium on clothing you buy in Sweden compared to what you can buy on Amazon back home.

frozen waterfalls in Abisko National Park

Where to Stay to See the Northern Lights in Sweden

Like I said, don’t expect cheap in Sweden, but at the same time, you can find a variety of accommodation options that are suitable for different budgets.

Budget: The best option for where to stay in Abisko if you are traveling on a budget is hands down Abisko Guesthouse. Prices here are extremely reasonable, but the rooms are quite small as a result, and the facilities are more akin to hostel than a hotel. Still, it has nice perks like free use of a traditional Swedish sauna! You won’t be staying in Abisko National Park itself (my preference) but it is a great location nonetheless, easily walkable to town where you can buy groceries and other necessities. It’s especially good if you want to plan a longer, active holiday because the prices are low and they have a lot of activities they can help you book, from snowmobiling to husky-sledding to ice-climbing and beyond. As it’s the most reasonable option by far, it does tend to book up, so click here to check rates, availability, and reviews well in advance of your trip.

Mid-Range: This is where I stayed when in Abisko – we were initially planning on staying elsewhere in Abisko, but a last-minute problem at our guesthouse left us getting booked in here. We certainly didn’t complain as it was quite an upgrade! STF Turiststation is located in Abisko National Park a short distance from the shores of the frozen lake. With two amazing, well-stocked kitchens (truly the best of any facility I’ve ever stayed at), tons of areas to lounge around in, extremely reasonably priced breakfast and lunch buffets, and two of their own saunas, STF is in my opinion the best place to stay in Northern Sweden. Click her to see rates, availability, photos, and reviews.

Luxury: Icehotel in Jukkasjarvi is famous for a reason – this gorgeous hotel is one-of-a-kind. What a lot of people don’t know, though, is that this hotel has both cold rooms made of ice and traditional hotel rooms called ‘warm rooms’ which are much more affordably priced. If you wanted, you could do one night in an ice room to have the crazy, once-in-a-lifetime experience and then spend a few nights in one of the warm rooms. The cold room is -5C — so very cold — but it comes with a sleeping bag with a liner, so that you will be kept warm even as you sleep in a room made of ice. Just note that Jukkasjarvi is far from Abisko, and it doesn’t have quite the same luck that Abisko does in terms of pushing the cloud cover away, but it is located very far from any source of light pollution and you still have an excellent chance of spotting the Northern lights  in Jukkasjarvi. The Icehotel understandably is quite popular, so book in advance if you have your heart set on visiting it. Click here to check rates, availability, reviews, and photos!

Enjoy this post? Pin it to save for reference!

Planning a Northern lights trip? Try chasing the Northern lights in Sweden. Swedish Lapland is one of the best places on earth to see the aurora borealis. Here are 15 things to know before planning a trip to Northern Sweden! Tips on Abisko, Kiruna, Jukkasjarvi / Ice Hotel and beyond.

A Spectacular Boat Tour Through the Vestmanna Bird Cliffs

The fog was so dense that driving through it almost made me queasy. I drove slowly, hugging each hairpin turn, hating that I had no idea just how far down the cliff edges went. It was like driving on top of a cloud. I’ve never had a fear of heights, but the sudden not-knowing of just how high we were was somehow terrifying.

We were quiet in the car, a little nervous about our upcoming excursion to the Vestmanna bird cliffs. Perhaps foolishly, we had scheduled it for the final day of our trip. At the time, we didn’t consider just how often fog in the Faroe Islands can offset even the best-laid plans (see: that time we camped out at the viewpoint at Lake Sørvágsvatn for two hours, only to have the fog stubbornly refuse to move, and left us unable to capture that classic “optical illusion” effect photo)

We descended from the foggy apex of the mountain pass, and in time, the colorful harbor town of Vestmanna came into focus. Clear, nearly fog-free focus.

We popped into the tourism center and sorted out our tickets for the boat tour through Vestmannabjørgini, the 700-meter high sea cliffs that are home to so many of the Faroe Islands’ bird life. The boat tour lasts two hours, traversing the rugged coast of the island of Streymoy, navigating narrow straits and sea grottos along the way.

We got on the tiny boat and began heading from the harbor towards Vestmannabjørgini, where the cliffs begin. Along the way, as we edged away from the town of Vestmanna, we passed ramshackle boathouses, errant sheep nibbling on grass, and tiny sheds perched atop impossibly steep cliffs.

As the town of Vestmanna disappeared, the water surrounding us seemed to brighten to a near-Caribbean shade of turquoise, despite the moody sky overhead.

Elsewhere, waterfalls tumbled into the sea, cutting jagged lines in a landscape straight out of Jurassic Park.

As we got out to the sea cliffs, a familiar nervousness began to gnaw at my stomach. Fun fact about me: I just basically probably shouldn’t travel. I have massive travel anxiety, which results in me showing up to airports several hours early convinced I will miss my flight and has me gripping armrests preparing my last will and testament basically every time the plane even has a slight jitter of turbulence. But worse than my anxiety is my motion sickness, which is especially bad on boats: a fact I often conveniently forget until I am actually on the boat.

Luckily, I was so gobsmacked by the scenery around me that I was able to push aside my slight seasickness and take in the beautiful scenery. The Vestmanna cliffs in the Faroe Islands are dizzyingly high, stretching over 2,000 feet into the sky: a height you can truly appreciate all the more at the choppy ocean base, surrounded by countless birds swooping above our heads.


For nearly an hour, I was completely able to forget the tumult in my stomach, thrilled by the birds who soared above me and the towering magnitude of the cliffs around me. For birdwatchers, Vestmanna is the stuff of dreams for birdwatchers. A few of the bird species who call these cliffs home are the razorbill, puffin, guillemot, and fulmar, among others.

Several people on our tour had thought to bring binoculars; I didn’t and resorted to looking through my zoom lens to get a better glance at the birds. I was unlucky and didn’t spot a puffin; my friend Megan got lucky (more like has better eyesight) and spotted two.

I tried to snap a few photos of the birds, but let’s just say I don’t have a career as a wildlife photographer anytime in the near future.

Eventually, my seasickness got the best of me. About an hour and fifteen minutes into our Vestmanna boat tour, I had to go sit inside, focus on my breathing and my pressure points, and try to keep my breakfast inside me.

I wasn’t the only one feeling sick – the choppiness of the water is no joke this far north in the Atlantic. I recommend bringing someseasickness bands or motion sickness pills (the non-drowsy variety unless you want to sleep all day) if you are in any way susceptible to seasickness.

Luckily, after some deep breathing and focusing on the horizon, I was able to go back out and snap a few more photos of the beautiful area around Vestmanna as we got back to the harbor.

I mean seriously – how pretty is this part of the Faroes?

How to Plan a Vestmanna Boat Tour

The Vestmanna Tourist Center organizes one or more boat trips daily during the peak season, which runs from April to September. Here are the departure times:

April: Weekdays and weekends at 10:15am

May 1st to September 30th:  Weekdays at 10:15am, 2:15pm and 4:20pm & weekends at 11:15am, 2:15pm and 4:20pm

I recommend booking in advance just in case as the boats are not very large and there is a possibility it could fill up, as seeing the Vestmanna bird cliffs is on many tourists’ wishlists for the Faroe Islands. I’d also recommend not booking it for your final day if possible, just in case a storm or foggy weather means that your boat can’t depart or that visibility will be really bad.

Show up at least 10 minutes early as the boats depart promptly on time.

Address: Fjarðarvegur 2, 350 Vestmanna, Streymoy

Phone Number: (+298) 471500

Email address: [email protected]

What to Pack for Your Vestmanna Boat Tour

If you’re planning on visiting Vestmanna to see the stunning sea cliffs during your stay, there are just a few extra things you should pack. If you get seasick I recommend bringing either these seasickness bands (which really work – I’ve used them before) or motion sickness pills. If buying a motion sickness medicine, make sure you buy a non-drowsy formulation. I accidentally took normal Dramamine once and nearly fell asleep on the boat. If you normally don’t get seasick, you won’t need any of these things – I am just awful on boats.

It can get quite cold out on the water as it is very windy and the air is both cold and high humidity, the kind of cold that really cuts through whatever you’re wearing. I recommend bringing a waterproof windbreaker at the very least – I use and love this Marmot PreCip rain jacket. I’d also recommend a hat that covers your ears, a scarf if the weather is especially chilly, and some gloves. I didn’t have gloves with me and I really regretted it, as my hands got quite cold but I wanted them out at all times so I could be taking photos. Bring a pair of lightweight, smartphone-compatible gloves.

I brought my Sony A6000 camera with its 18-105mm zoom lens. I loved having a versatile lens like this for Vestmanna, since you truly need a wide angle lens to even be able to come close to capturing the scale of the sea cliffs. However, 105mm isn’t quite enough zoom to get great photos of the birds themselves (as you’ve probably surmised from my photos). If you really want to be able to capture great photos of the birds, you should have something that is at least 200mm, but 300mm would be better.

Finally, if you’re a big birder, you’ll definitely want to bring along a pair of binoculars!

Note: I was hosted by Visit Faroe Islands on my trip to Vestmanna and the Faroe Islands. All opinions are my own. 

9 Reasons to Visit Val Di Non, Trentino’s Beautiful Valley

With the stunning backdrop of the Dolomites and the endless green of apple trees, which turn snow white with blossoms for a brief spell in spring, it’s hard not to fall for Val di Non.

This beautiful part of the Trentino region is less Insta-famous than its neighbor South Tyrol (also called Südtirol or Alto Adige). It’s certainly humbler, set up more for agriculture than hoards of tourists. But those who do dedicate a bit of time to exploring Trentino will find themselves richly rewarded.

I visited Val di Non in partnership with Visit Trentino and was blown away – this region is full of surprises. Whether it’s stunning narrow canyons that a kayak can barely squeeze through, castles from a bygone era, or the riot of blossoming wildflowers that greet you each spring, you’ll find yourself wowed over and over again by this humble region.

In case I haven’t yet convinced you to give Trentino a visit, here are 9 reasons why I think Val di Non is an essential stop on any visit to Northern Italy.

Val di Non’s got gorgeous lakes and valleys

Val di Non is incredibly photogenic, with its combination of valleys and mountains, lakes and canyons, and blues and greens. Better yet, the Instagrammers of the world have yet to descend upon it, meaning that it’s not hard to take original, beautiful photos pretty much anywhere you go in Val di Non — a must-visit stop on any Northern Italy road trip.

The valley is centered around the massive Lago di Santa Giustina, a manmade lake created by a dam which helps to keep this agricultural valley watered and running. On the hillside shores of the lake, you’ll find tiny villages interspersed amongst the fields of apple trees.

Having been to Italy four times now, this was the first time I had truly gotten off the beaten track of city after city and seen a more natural, rural side to Italian life. My grandmother grew up in a tiny village – Castagnole delle Lanze – in Piemonte before fleeing Italy in World War II. I visited her village when I was 12, after she had passed away, but beyond that brief afternoon visit I had never really gotten to see village life in Italy, nor how beautiful the countryside is.

Too often I think we associate Italy with its most famous cities – Rome, Florence, Milan, Bologna, Naples – without recognizing that the country stretches from South Tyrol to Lampedusa and covers terrain from the snowy peaks of the Dolomites to the rolling vineyards of Tuscany to the arid islands that lay just a stone’s throw from Northern Africa. This visit reminded me just how much of Italy I have left to see.

It’s heaven for castle lovers

The Val di Non region is home to the largest number of castles in Italy, a staggering 28 in such a small geographic area. While some of them are privately owned and therefore closed to tourists, others are able to be visited by the public. And all are easily admired from the roadside, such as this little gem I stumbled across while driving:

The two most important castles in the Val di Non are Castel Cles and Castel Thun. Castel Cles is particularly stunning, perched lakeside on a hill with lovely views of the valley and lake. The inside of the castle is closed to the public except during a few special events in the summer.

However, you can enjoy views of the castle from around the valley and especially from vantage points on Santa Giustina lake, best enjoyed by kayak.

If just looking from afar isn’t enough, you can also visit Castel Thun, which was built in the 12th century and is open to the public. You can also take the “Il Trenino dei Castelli” (the Castle Route Train) which allows you to see four different castles, culminating in Castel Thun, in one day. It departs almost every Saturday from Trento during the peak season (mid-April to mid-September) – check here for dates and more information – and costs 62 euros for an adult, full-day ticket.

Slow food is king in Val di Non

In Val di Non (and Trentino in general), slow food isn’t just a trend: it’s a way of life. With centuries of agriculture in its past ongoing into the present day, food is an essential part of the day-to-day. From the many apples that the region produces to its traditional cheese and meats, real home-cooked food comes naturally to this part of Italy.

You can’t miss traditional sausages, such as mortandela – not to be confused with Bologna’s mortadella, this pork sausage is more akin to a salami, smoked and aged to perfection. Other traditional meats include speck (a lightly smoked, prosciutto-like cold cut), carne salada (salted, cured meat), and lardo (thinly sliced, buttery pork fat).

The most interesting meat I tried was ciuìga, a pork and beef salami made with a healthy portion of radish. This traditional Slow Food-certified sausage goes back to the time when meat was expensive and scarce, and farmers tried to stretch out the meat they could use by using diced, boiled radish to fill out the sausage.

Traditional handmade pasta is also an important part of Trentino cuisine. I had delicious homemade ravioli with fresh cheese and wild herbs one day and a perfect gnocchi with gorgonzola, walnuts, and radicchio the next (for research, obviously).

And don’t even get me started on the pizza I had in Cles. I could rhapsodize about the perfect Italian pizza all day. Sorry, New York, you don’t even come close.

If you’re interested in slow food, you shouldn’t miss Maso Plaz, a small agritourism farm and restaurant not far from the small village of Brez. The ravioli pictured above are from here, as well as this gorgeous asparagus salad made with asparagus picked from his garden that morning.

The Novella Canyon can’t be missed

One of the most amazing features of the Val di Non area is the Novella Canyon, a stunning series of slot canyons that are best accessed via kayak. I went with Trentino Wild and loved the experience (even if my shoulders the next day most definitely did not — guys, kayaking is work).

We kayaked about 8 kilometers from our starting spot at Lago di San Giustina into the Novella Canyon, where we were lucky enough to access all 3 slot canyons (the water level varies during different times of the year and different weather conditions, so you can’t always access the latter two canyons).

It was an incredible experience to kayak through the canyon, in between sheer rock reaching skywards hundreds of feet so that you could barely peep the sun through the crack. At times, the canyon was so narrow that the sunlight would barely be able to penetrate through the crack, and we’d be kayaking through near-black crevices in the rock. I kept thinking we’d have to turn back, that our kayaks wouldn’t fit, but with the guidance of our instructor, we kept pushing through.

At times, water would trickle from the sky, not rain but rather tiny waterfalls falling from the canyon edges. Through the light, the streaks of rain looked like little shooting stars. It was beautiful — a truly can’t-miss experience when in Val di Non.

If you’d rather experience the canyon from up high, you can also walk above the canyons on a series of suspended boardwalks – contact the Parco Fluviale Novella if that’s more your speed than kayaking.

It’s home to beautiful churches like the Sanctuary of San Remedio

Visiting the Sanctuary of San Remedio was one of the highlights of my stay in Val di Non and the perfect way to end my trip to Trentino. While I’m not a religious person, I make for up for my heathen ways with outsized admiration for religious structures of all faiths. The Sanctuary of San Remedio is a truly special place.

It’s dedicated to the hermit Remedio, who was on his way to Trento when, as the story goes, his horse was torn to pieces by a bear. Supposedly, he then tamed the bear and rode it the rest of the way to Trento. You’ll excuse me if I have a healthy dose of skepticism for this story, but what’s indubitable is that the church is stunning.

Built atop a 70-meter high rock cropping, the Sanctuary is composed of several churches and chapels on the rock connected by a steep staircase with over 100 steps. The Sanctuary blends in with the stunning landscape around it, and if you’re quiet, you can hear the rushing water of the river and waterfalls below you, alongside the singing of birds.

Today, the Sanctuary is also home to a rehabilitated brown bear who was rescued from a private owner, nicknamed Bruno. He was sleeping or wandering about when I was there, so I wasn’t able to snap a photo of him.

But in my opinion, the walk to and from the Sanctuary of San Remedio from the nearby village of Sanzeno is just as beautiful. Winding through the canyon underneath rock headings so low you have to bow to pass through, I at times felt transported to Zion National Park in Utah with the sheer limestone cliffs rising up through the valley.

The walk isn’t difficult, about 45 minutes on relatively flat terrain, so it’s suitable for people of all ages, but you’ll have to duck or bow down in portions of the walk, where the path is literally carved into the rock heading.

I highly recommend this way of getting to the Sanctuary – it makes getting there all the more special. Along the way, I saw a few handwritten prayers left alongside the path, as the Sanctuary is a place where local people and people making pilgrimages go to pray for miracles. Plus, you’ll get to spot a waterfall!

The Dolomites are never far from eye’s view

While South Tyrol is home to many of the more famous stretches of the Dolomites, Trentino has the Brenta portion of the Dolomites, which are lovely and dusted with snow in the start of spring.

I’m a huge lover of being around the mountains. For me, it never lost its magic every time I caught a glimpse of the snow-capped peaks. I only had two days in the Val di Non, so I didn’t have enough time to do some proper hiking in the Brenta Dolomites, but I loved the peep of them I got every time the clouds and fog cleared.

I’ll definitely have to come back in summer or fall and hike the Dolomites sometime – those mountains are calling to me!

It’s full of cute traditional towns and villages

You definitely won’t find any big cities in Val di Non. In fact, the Non Valley’s largest town is Cles, with a population of around 7,000 people. Despite its small size, after visiting smaller villages in Val di Non like Romallo and Cagnò, Cles feels positively bustling.

When in Cles, don’t miss a meal at the delicious pizzeria Giardino, which was a staggering number of options for delicious, perfectly cooked Italian pizzas.

I chose one with local wild mushrooms called finferli, sausage, and a locally produced soft cheese called Casolet. Predictably, it was mindblowingly good.

Spring in Val di Non is absolutely magical

If you can go to Val di Non at any time of year, I’d highly recommend spring. If possible, try to time your visit in order to see the elusive apple blossoms, which cover the valley in a “white snow” of another type for a few short weeks in spring.

Unfortunately, I missed most of the blossom season by just a week, due to an unusually warm winter, but when I went to a higher altitude there were still a few apple trees in blossom!

But apple trees aside, you’ll also find tulips scattered at random – much unlike the neatly manicured rows of tulips you’ll find in the Netherlands – and wildflowers in blues, whites, purples, yellows, and so much more.

I lost count of the different kinds of flowers, wild and otherwise, that I saw during my time in Trentino.

It’s not that discovered… yet

Val di Non feels like the Goldilocks of off the beaten path travel in Italy. It’s built up enough that there’s no shortage of tourist infrastructure, such as hotels, restaurants, and tours to keep you busy, rested, and well fed during your stay. However, it’s also quietly under the radar, so you won’t be encountering too many other tourists, even if you visit during high season.

Trentino is popular with Italians and Germans, but the word of its beauty has yet to spread to the majority of travelers who visit Italy and make it the 5th most touristed destination in the world. If you’re looking for some nature and beauty on your next trip to Italy, Trentino is only a short drive away from other popular tourist destinations like Bologna, Verona, and Venice. It’s certainly worth your time to make a small detour to see the beauty for yourself — especially when you have so few people you’ll have to share it with.

Have you heard of Trentino? Is it on your list for a future Italy trip?

Note: Thanks so much to Visit Trentino, who sponsored my trip to the Trentino region, and to Val di Non for showing me the beauty of this part of Italy. All opinions expressed and food babies conceived are strictly my own.

10 Jaw-Dropping California Hikes You Can’t Miss

Growing up in California, it’s easy to take how beautiful the state is for granted. But the longer I’ve been living away from home (11 years now, more than a third of my life), the more I’ve come to appreciate just how beautiful and diverse the state is.

With a land mass just about the size of Spain, California is home to a stunning variety of landscapes: from arid deserts to lush pine forests. It’s grand on a scale that can’t be believed, home to both the tallest tree in the world (Hyperion in Sequoia National Park) and the tallest mountain in the contiguous United States (Mount Whitney in the Sierra Nevadas). It’s no surprise that California hikes are some of the most beautiful in the world as a result.

While I’d like to think I’m a California expert, sadly, it’s far from the case. More than a decade away from my home state has made California seem almost foreign and exotic when I go home. Though I know a lot about the Bay Area and Lake Tahoe, having grown up just outside San Francisco, so much of the state is still a mystery to me outside my one tiny area of awareness.

To help fill in the gaps, I got some travel bloggers to help me fill in my knowledge gaps of the top hikes in California that intrepid explorers simply can’t miss on their trip to the Golden State.

Southern California Hikes

Lost Palms Oasis, Joshua Tree National Park

By Michael of Time Travel Turtle

Most people, for obvious reasons, think of Joshua trees when they hear the name of Joshua Tree National Park. But in the south of the park, as the Mojave Desert turns into the Colorado Desert, the flora changes. In this part of the park, it’s all about the palms.

The best place to see the palms that grow in Joshua Tree National Park is at the Lost Palms Oasis. The hike to get there is a fantastic walk that is about 6 kilometers (3.5 miles) in each direction through some stunning desert landscapes with cacti, rock formations, and colorful flowers.

Even though it’s very dry here, palm trees are able to grow because of cracks in the ground that allow water to come up from subterranean reserves. It means you won’t see many of the palms until you get to the final destination – a large ravine where the tall trees are clumped together along the bed.

The hike begins from near the Cottonwood Spring Visitor Centre in the south of Joshua Tree National Park. There is a car park at the trailhead. It’s not one of the busiest hikes, which means the path isn’t too crowded. However, you will probably never be too far away from other hikers, which makes it nice and safe.

The return hike will probably take around 3 hours at a decent pace with a break at the oasis and is moderately difficult – there are some rough patches when you’ll need to scramble up and down rocky hills. It can be hot at any time of the year but especially in the summer. You should always carry sunscreen and lots of water. You may even want to reconsider hiking it on very hot summer days.


Willow Hole, Joshua Tree National Park

By Taryn of Happiest Outdoors

There are plenty of popular short hikes and nature trails in Joshua Tree National Park. But if you want to get off the beaten path, you have to hike to the Willow Hole. It’s an oasis in the middle of a remote part of the park. Most of Joshua Tree is open desert dotted with cactus, Joshua trees, and the odd rock outcropping.

But the Willow Hole is nestled in the middle of the Wonderland of Rocks, a huge labyrinth of strangely shaped rocks, boulders, and canyons. This watering hole attracts lots of wildlife so you might to be lucky enough to spot a coyote, jackrabbit or even the resident herd of bighorn sheep. I was thrilled to see a fox on my hike.

This moderate hike is about 7 miles round trip and will take most people 4-5 hours to complete. Be sure to bring plenty of water, a hat, and sunscreen as it can get really hot out there. Start your hike at the southern trailhead of the Boy Scout Trail on Park Boulevard. The beginning of the hike is on a sandy trail through Joshua trees and cacti. After a few miles, you’ll reach the Wonderland of Rocks and leave the desert.

For the rest of the hike, you wind through the rocks following dry streambeds called washes. There are a few signs to keep you on track, but pay attention to make sure you stay in the main wash as it can be easy to get off course. After a mile of meandering through the rock formations, you’ll arrive at the treed oasis of the Willow Hole. Take a break in the shade and stay quiet to see if you can spot some animals. When you’re ready, turn around and retrace your steps to the car.

Torrey Pines State Reserve, San Diego

best hikes in California

By Mimi of The Atlas Heart

Torrey Pines State Natural Reserve is one of the many spots where you can enjoy beautiful coastal hikes in San Diego. The park is located in north county and offers two easy and relaxing hikes with plenty of coastal breezes, and a little shade from the nearby eucalyptus trees (although I’d still recommend bringing a hat, sunscreen, and water for the desert environment). 

One aspect I love about the Torrey Pines hike is that although you still have desert fauna around you while you’re hiking, it’s not as dusty and hot as other hikes around San Diego – probably because of the proximity to the ocean. 

The park offers two hikes – the Razor Point Trail and the Yucca Point Trail – and you could easily complete both in a day. Between the views of the golden-tinged cliffs and the turquoise color of the breaking waves, they both make you sigh and remember just how pretty San Diego is. 

The Razor Point Trail is 1.3 miles and the Yucca Point Trail is 1.25 miles, and neither one of them have more than a 200-foot change in elevation. They each take about one hour to complete. Both offer great views of the coast, but if you actually want to go down to the beach, the Yucca Point Trail is the one to do. 

Torrey Pines Reserve is located between La Jolla and Del Mar, north of downtown San Diego. If you’re driving, you can use I-5 to take the Carmel Valley Road exit.

Keep in mind that the fee for parking in the South Beach entrance can be anywhere from $10-$20, depending on if it’s a weekend or not (hint: go during the week when possible). Try and avoid the times of 10 AM – 1 PM when the reserve is most crowded. 

If you don’t want to pay for parking, it’s free to simply walk into the reserve. Take the 101 bus or park along the beach. Alternatively, the North Beach entrance only costs $3-$6 for parking. 

Potato Chip Rock, Mount Woodson

By Patrick of German Backpacker

You might have seen the iconic picture of people standing on the thin “Potato Chip Rock“ somewhere on Instagram before. This fun picture opportunity is close to Poway at the Mt. Woodson summit, and therefore, it’s a nice day trip in southern California.

Make sure to start your day early, since the hike can get quite exhausting due to the heat and the elevation gain – there’s absolutely no shade on this trail. Another reason for an early start is to beat the queue to actually take a picture on the rock, which can get long especially on weekends. But it’s worth it!

The actual summit of the mountain isn’t very exciting and full of antennas blocking the view, so keep going a little bit further until you reach the famous rock. The whole trail takes about 4 miles one-way until you get there. Be careful when you actually climb on the rock – it’s not very high up in the air, but it’s still a little bit scary to climb over to the edge. I enjoyed the hike a lot and it’s a nice city escape for a day, just make sure to bring a lot of water and to get there as soon as possible in the morning.

Griffith Observatory, Los Angeles

By Sofie of Wonderful Wanderings

The Griffith Observatory in Los Angeles is a fun place to learn about our universe, but what makes it even better is the great views it offers and the fact that you can hike there! There are two trails at Griffith Park leading up to the observatory: the West Griffith Observatory Trail and the East Griffith Observatory Trail.

My friend and I drove up to the starting point of the West Trail and hiked the short 1 mile from there up to the observatory. Yes, the path goes uphill quite a bit, but it’s broad and flat so all-in-all it’s an easy hike.Just make sure to put on some sunscreen before you start if it’s a sunny day, because there’s no shade and it can get really hot over there.

The West Trail starts at the Greek Theatre, the East Trail at Ferndell Drive. There’s public parking by the start of both trails and if you want, you can take one trail up and the other one down, which results in a 2.1-mile hike. If you park by the start of the West Trail, make sure to use the free parking lot (watch out, it closes at sunset!) by the part of Ferndell Drive that has no street parking. If you go further up, there’s paid street parking. If you start your hike at the Greek Theatre, you can park there for free but only when there’s no event going on.

Mount Wilson, Pasadena

By Nancy of We Go With Kids

Located in Pasadena, California, Mount Wilson sits 5,710 feet above sea level and affords an amazing view of Downtown Los Angeles on a clear day. There are a number of trails you can take to the summit, but one of my favorites is to start at the Chantry Flat trailhead in Arcadia. Although the trailhead is quite popular and fills up quickly on the weekends, you will want to get an early start as the roundtrip journey of approximately 14 miles will take you a full 6-7 hours.

My favorite thing about the hike is the visually interesting things you see along the way. There’s a short one-mile detour to Sturtevant Falls, which I highly recommend, and numerous cabins and campgrounds along the way. And of course, when you reach the top, you’ll find Mount Wilson Observatory, where there is a handy water fountain that you can refill your bottles with. Although this is a hike that can be accomplished in one day, the availability of campgrounds makes this an easy introduction to backpacking, if you are so inclined.

The trail is popular among mountain bikers so it’s important to be on high alert. Although I personally love this hike, it is not one that I would recommend for new hikers or those that are not in physical shape. It is an arduous 6 miles to the top, a generous mile across the observatory grounds, and then another 6 or so miles back down. Instead of going back down the Chantry Flats trail, you can take the Observatory’s toll road to the Winter Creek trail which will lead you to about 1/2 mile from the Chantry Flats trailhead. My personal preference is always to avoid an out and back if possible, so I particularly like the availability of numerous options.

In general, the trail narrows at numerous points and is too steep to recommend for young children. Moreover, there is virtually no cell service (although there are pay phones at Mount Wilson Observatory), so you really are on your own once you embark.  If you don’t feel up to the complete hike, it is possible to drive up to the Observatory, so a one-way hike would be an option, if you are able to arrange transport ahead of time.

Northern California Hikes

Rodeo Beach, Marin Headlands

photo - Longest Bus Rides travel blog

By Jessica of Longest Bus Rides

Rodeo Beach lies in the Marin Headlands facing the vast Pacific Ocean. Arrive by car, bike, or bus just 20 minutes north of San Francisco. Take the first exit north after the Golden Gate Bridge. Both routes to the beach are really fun! The first route is flat and has a long 1-way tunnel through a hillside. Don’t go in if the stoplight is red!

The second route is hilly and phenomenal, especially at the golden hours just after sunrise and just before sunset. The whole world pulls off the road for photos of the Golden Gate Bridge from Hawk Hill. Be careful if you’re a photographer, as the area has become known for people getting their high-end cameras stolen at the sunrise hours.

The hiking is beautiful at all times of year, whether with a blue sky and turquoise waves crashing, or with the famous San Francisco fog rolling in. There’s a reason Instagram Meetups are held here! Your two hiking options both take you to cliff’s edges. The shorter, but less crowded option is accessed by first crossing the beach, then heading uphill.

Alternatively, head up the steep hill straight from the parking lot for a for a gorgeous view of the ocean and surfers below. Follow the cliffside trail high above the ocean. Or, keep inland and explore the old military bunkers used during World War II to triangulate the exact location of approaching enemy warships.

Hike for miles, stopping along the way for a picnic, if you like. Do an out-and-back hike, or a loop. Apart from the initial short steep uphill from the parking lot, the trail is flat. You can climb up steep hills to more bunkers for more views. This area is off leash dog friendly. Unlike other beaches, there aren’t many dogs, and all the owners are great about picking up after their dogs, so there’s no poop to step in.

Another hiking area in the Marin Headlands is Mt. Tamalpais, which has many trails, most of them with long steep sections.


Land’s End, San Francisco

By Jessica of Independent Travel Cats

Land’s End is a short coastal trail in San Francisco that offers great view fo the Golden Gate Bridge. Along the Land’s End hike you can see the ruins of Sutro baths, old shipwrecks, a war memorial, and small rocky beaches. I walked this trail a number of times when I lived in the SF Bay area and it was one of my favorite places to walk in the city.

Near the trailhead is a lookout point and a visitor center that you can visit before or after the hike. There is both parking available as well as a nearby bus stop near the trailhead.

The trail is less than 2 miles long and you can turn back whenever you wish. It is a relatively easy hike although there are steps and rough sections. The first section of the trail is ADA accessible. The trail is just a section of the California Coastal trail so you can keep going and make it into a much longer hike. You can keep going all the way to the Golden Gate Bridge but that is a much longer hike, about 4 miles. The Land’s End section of the trail also has small paths off of it at a few places where you can visit beaches, a war memorial, or even the Legion of Honor (a fine arts museum).

Popular places to visit nearby include Ocean Beach, the Camera Obscura, Golden Gate Park, Legion of Honor, the San Francisco Zoo, and Golden Gate Bridge.

Mount Whitney, Sierra Nevadas

By Jackie of Life of Doing

Hiking Mount Whitney is a once in a lifetime experience. It’s the highest mountain in California and the Sierra Nevadas at 14,505 feet/4,421 meters and over 7,100 feet/2,165 meters elevation gain. The strenuous day hike is 22 miles or 35 kilometers round trip and an out-and-back route. However, the hike is recommended over two days. Completion time varies based on altitude sickness, the number of breaks, weather, and training. Remember to stay hydrated, eat, and not overexert the body too hard.

Hikers will enjoy the various terrain along the route. Everyone starts at Whitney Portal which is a 15-minute drive from the main city, Lone Pine. Hikers go through waterfalls, forest areas, 99 switchbacks, potential snow, and jagged rocks. Along the Trail Crest, hikers may see the turquoise water from Guitar Lake in the distance. Reaching the summit is a huge milestone. Admire the surrounding mountainous views and take a photo with the Mount Whitney plaque.

Due to the trail’s popularity, all participants need to enter a lottery for a hiking date. Lottery occurs from February to mid-March, and hikers are notified of their date in April. Choosing a fall or winter date has a great chance of securing a date, albeit the weather will be unpredictable. Hikers must pick up their permit at the Visitor Center (at US-395 and CA-136) 1-2 days before the hike.

Visitors stay overnight in one of Lone Pine’s motels. The main street has a few restaurants, gas stations, a grocery store, and a Lone Pine Film History Museum. Camping is an option if hiking overnight. Reservations are required at the official Whitney Portal Campground. Reservations are not needed if camping along the trail at Outpost Camp (mile 4) or Trail Camp (mile 6). It’s an exhausting day, but we hope you enjoy this hike!

Half Dome, Yosemite National Park

By Jill of Jack and Jill Travel

Half Dome is the highlight of Yosemite National Park and hiking to the top of the formation should be on the bucket list of any hiker. There are various ways to do the hike, but the shortest one is still a 14-mile roundtrip hike with major elevation gain (4,800 feet from the Yosemite Valley trailhead). The last section of the hike involves pulling yourself up a steel cable on the flank of the granite dome. Wooden steps have been laid on to help with footing, but it’s still an upper body workout for sure.

Because of its popularity, a permit system has been implemented. You can get a permit to Half Dome by entering a lottery held in March, or rely on the 50 or so first-come-first-serve daily permits. You can only do the hike when the cables are up (early summer), and I recommend an early start to get the hardest part of the hike out of the way before the heat sets in.

Even though getting to the top of Half Dome is the goal of this hike, the getting there part is also part of the attraction. If you take Mist Trail, you’ll pass 2 of Yosemite’s famous waterfalls: Vernal Fall and Nevada Fall. There’s a reason this section of the hike is called Mist Trail. The trail takes you so close to these falls, there’s often a mist of water blowing in your face. So make sure you wear proper footwear and something quick-drying.

California is one of the most diverse and beautiful states in the US. These stunning California hikes are perfect for adventurers -- including Half Dome, Joshua Tree, and other gorgeous day hikes in California. Add these to your hiking bucket list!

Exploring the Wines of Turkey in Bodrum

Let me set the stage for you.

You’re in a beautiful port town, overlooking a harbor of hundreds of boats and yachts bobbing in the Mediterranean. Reaching out into the sea is a castle from the early 1400s. In the distance, next to the setting sun, you can see the Greek island of Kos.

There’s a pool overlooking the sea, and chairs where you can laze in the fading September sun, and oh, not to mention some of the most delicious food and wine in all of Turkey.

Do you ever leave? If your answer is no, thank you for justifying my laziness in Bodrum. Cheers to you.

I had big plans for Bodrum: I was going to walk to the castle, lie on the beach, visit the underwater archaeology museum….

… but that all floated away with my first balcony sunset.

The funny thing about being a travel blogger is that sometimes, the last thing you want to do is travel. Having seen Istanbul, Cappadocia, and Pamukkale in the course of about a week… I was ready to chill.

Luckily, the Marmara in Bodrum was the perfect place to do just that. I mean, just look at that pool and those views. It’s kind of criminal not to spend time at the hotel, no?

My time at the Marmara was basically spent sunning myself, popping into this beautiful pool, and slowly working my way through everything on the menu.

The star of the show? The breakfasts.

Let me preface this by saying that I am decidedly not a breakfast person. I could very easily skip breakfast most days. Brunch bores me — I’m an awful millennial, I know.

However, Turkish breakfasts are a thing of beauty and at no point in my entire month in Turkey did I have a better breakfast than my three days at the Marmara.

When I wasn’t sunning myself or gorging on breakfast, I was sampling wine. For research, you see.

Let it be known that I am a huge wine geek. As in, Jancis Robinson is kind of my role model, and I’ve read at least four or five books about the different wine varietals in my day. Hey, I’m from California. Wine is in my blood.

I didn’t know much about Turkish wine, but when The Marmara arranged a tasting of their own proprietary wine label, Vinkara Wines for me…. I was there, no questions asked.

One of my favorite things about Vinkara Winery is that they’re really putting a focus on Turkish native varietals, rather than jumping on the international varietal trend.

Sure, they have all the popular varietals – a Sauv Blanc, a Cab, a Syrah, a Chardonnay – but that’s not where their focus or their passion is. Instead, they’re focusing on revitalizing Turkish grapes that have fallen a bit by the wayside.

Winemaking in Turkey has fallen out of style, mostly because it’s so hard to turn a profit. Alcohol is taxed at extremely high rates, meaning that winemakers don’t have much of a margin to earn from. As a result, most of the grapes in Turkey are sold just as grapes or raisins, rather than turned into wine.

But for those winemakers who do brave the Turkish market and make wine anyway, the results are fantastic.

Narince is one of those grapes that had been nearly falling out of favor – but luckily winemakers are slowly bringing it back.

In the right hands, it’s absolutely delicious — full-bodied, structured, and complex with a lovely acidity to brighten it. A clear favorite for me.

Their red wine was also a favorite: Kalecik Karasi. Light in body like a pinot, full in flavor like a cabernet, but something all its own.

The same grape is also used to make their fantastic sparkling wine (little do people know, most champagnes and sparkling wines are made primarily with red wine grapes — they just remove the skins from making contact so that the color remains white-ish)

This is exactly why I believe so much in winemakers who nurture the forgotten grapes back to prominence. I had the pleasure of meeting with local winemakers in Emilia Romagna, Italy, who were doing the exact same thing, with equally delicious results.

After a few glasses of wine, I started to get lost in thought (as one does after several glasses of wine). I realized that what makes the world of wine so magical is the variety. If we coax every wine into tasting the same based on international standards… we risk diluting the beautiful diversity that makes wine so unique. The flavors and aromas hidden inside these little-known grapes are like living history. We must preserve it or risk losing it.

Just as travel helps us be more tolerant and appreciative of diversity, a good wine helps us appreciate the importance of soil and history.

I’ll drink to that.

Want to read more Turkey? Check out these things to do in Alanya, Turkey.

Note: I received a complimentary stay at The Marmara during my time in Bodrum. All opinions and wine hangovers are my own.

The Magic of the Blue Eye, Albania (Syri i Kalter) and How to Get There

The Blue Eye is one of the most beautiful sights in Southern Albania and an easy day trip from Saranda. Conveniently, the Blue Eye in Albania is also right on the way to the UNESCO World Heritage Site of Gjirokastra (also written Gjirokastër), Berat’s twin city.  

It’s quite easy to see both the Blue Eye (Syri i Kalter in Albanian language) and Gjirokastra together in a day trip if you are based in Saranda. If you have more time, you can visit them separately as well.

Visit the Blue Eye, Albania from Saranda

Don’t fall for the guided tours telling you it’s too difficult to see The Blue Eye in Albania on your own. With a bit of pluck and planning, you definitely can — and it’s worth every minute.

If you’ve done any research into transportation in Albania, you’ve probably bit your nails, questioned your plans to go, and got yourself super deep down a Google rabbit hole. 

Relax. Traveling in Albania is not nearly as hard as everyone makes it out to be. For one, Albanian people are quite possibly the friendliest people I’ve ever met. On my way to The Blue Eye, everyone was so helpful in pointing me to the right bus that I had absolutely no trouble finding it.

The Blue Eye, Albania -- aka Syri I Kalter -- a great day trip from Saranda

I’ve lost count of the Albanians who have helped me with directions, bought me coffee, offered me snacks and cakes, given me rides… all without expecting anything but a thank you in return (which, by the way, is pronounced fah-la-min-DAIR-it in Albanian, and you’ll delight everyone if you memorize it and use it prolifically!). That’s why I tell everyone who will listen that Albania is my favorite country I’ve traveled to.

That being said, it helps to have an idea of what to expect before you try to go to the Blue Eye, to relieve planning anxiety and make realistic plans, so I’ve gone ahead and laid it all out for you!


What is the Blue Eye (aka Syri I Kalter)?

The Blue Eye is one of the most iconic images from Albania, and with good reason. The Blue Eye / Syri I Kalter is one of those rare places that looks just as beautiful in pictures as it does in real life, because the colors are just that vivid. It’s as if real life had the saturation turned up to 100… but it’s just, you know, real life.


No one really knows how deep this fresh water spring of The Blue Eye goes down, because no one’s been able to dive to the bottom. It’s at least 50 meters deep, and probably way more! The Blue Eye is constantly gushing out freezing cold water, and the bravest amongst us (read: not me) flout the no swimming and no diving signs and take the plunge. You can see the force of the current, as it sends jumpers quickly downstream. It’s really quite impressive (and, let me reiterate, absolutely freezing).

If you love these crystal blue waters of Syri I Kalter, be sure to check out the beaches of the Albanian Riviera as well, just an hour or so north of Saranda — and trust me, the water is much warmer in those parts!

syri i kalter aka blue eye day trip from Saranda
Crystal clear waters everywhere

How to get to the Blue Eye (Syri I Kalter)?

First, find the bus (furgon) to Gjirokastra, which usually does hourly departures every hour on the hour from the “bus station” outside the ruins within Saranda’s city limits, which is around the intersection of Rruga Flamurit and Rruga Skenderbeu. Your host, or pretty much any Albanian person, should be able to direct you to the bus to Gjirokastra.

The bus to Gjirokastra/The Blue Eye should cost you 300 lek, a little over $2. Tell the bus driver you want to get off at Syri I Kalter or the Blue Eye – they’ll know what you’re talking about; this is a very common stop.

It takes about 30 minutes to get here. You’ll have to walk about 2 kilometers to the actual Blue Eye from where they drop you off. Don’t worry, the signs are well marked, and there is virtually no way you can get lost. Even if you’re me.

The water along the walkway to the Blue Eye is so gorgeous! AKA Syri I Kalter, Albania

To get back to Saranda from the Blue Eye, just wait outside the entrance on the opposite side of the street where you were dropped off (the side that would be headed back towards Saranda) and wait to flag down a bus with a sign in the window headed for Saranda/Sarandë.

Although, most likely, when the bus sees you on the side of the road by the Blue Eye sign, it will stop for you regardless of whether or not you are paying attention. Buses typically come once per hour, so if you’re lucky, you won’t wait long; if you just missed one, you may have to wait up to an hour.

Another option is to hitch a ride back from the Blue Eye to Saranda. I know that sounds inadvisable, but I assure you, hitchhiking in Albania is commonplace, easy, and incredibly safe.

I hitchhiked several times in Albania and never had any problems and never had to wait more than 15 minutes to get a ride (and that was a ride across international borders!) You could also combine this with the next stop, Gjirokastra, in which case you’d wait where they dropped you off and flag the next bus. Be prepared to wait… this is Albania, man.

Visit the Blue Eye, Albania

AN IMPORTANT CAVEAT FOR TRAVELING TO THE BLUE EYE: All of this was true and accurate at the time of publication. However, things change often and without warning in Albania.

Always double-check directions with the place you’re staying or ask a local on the day. It’s not hard to get around Albania because the people are so friendly and helpful, but you can’t always just go off Internet advice. I try, but things change quickly, so use this as a jumping off point to get an idea of what’s possible. Then once you’re there and on the ground, ask to confirm.

PS, you don’t need to buy any bus tickets in advance – they are always available for sale on the bus.


Like it? Pin it or share it!

17 Reasons Why Utah Is Pretty Much Another Planet

Allison hiking in utah

I’ll admit it: prior to going to Utah, my knowledge of the state was entirely gained from South Park parodies of Mormons.
But this state, with its five national parks — the third most national parks in a single state after California and Alaska — and countless under the radar state parks and hidden hikes, deserves more.

The landscape in Utah is like nowhere else on Earth. Combined with the desolation of the beautiful backroads, you’d be forgiven for thinking you’d somehow transported yourself to another world. I can’t believe I’m about to say this… Utah’s Martian landscape and hidden gems have wrested the title of most photogenic state in the country from my dear California. Forgive me, Golden State. It’s all Utah’s fault.

Because Utah has its own Grand Canyon with a decidedly Martian twist.


Because it’s perfectly normal for the desert to kiss the mountains.


Because oddly shaped rocks that look like faces are dime a dozen.


Because it’s perfectly normal to find Sahara-esque orange sand dunes next to purple-hued mountains


Because a 10 minute walk off a major highway will leave you feeling like you’ve been shot to another world


Because even when the landscapes seem to defy physics, wildflowers still shoot forth from the red earth


Because a color of purple that seems to exist nowhere else in nature is basically everywhere


Because the rocks here have windows with brilliant blue eyes.


Because even the less popular national parks are some of the most stunning in the entire country


Because the improbable bushes growing out of red rock only add magic to the rusty landscape


Because when they call something Angel’s Landing, they’re really not fucking around


Because even the clouds look like perfectly-placed UFOs


Because sometimes it’s just too good to be true.


Because who knew that the simple combination of snow melting and freezing millions of times could create this?


Because the colors of the sun setting low on the horizon is completely surreal.


Because mile by mile, the landscape changes, impossible to predict but so easy to love.


Because where else can you see the Milky Way from your front door?

Utah, the land of hikes, national parks, and more activities than you can ever dream of doing. From Moab to Zion and Bryce and beyond to the smaller hikes and hidden spots, there’s no place on Earth quite like Utah.