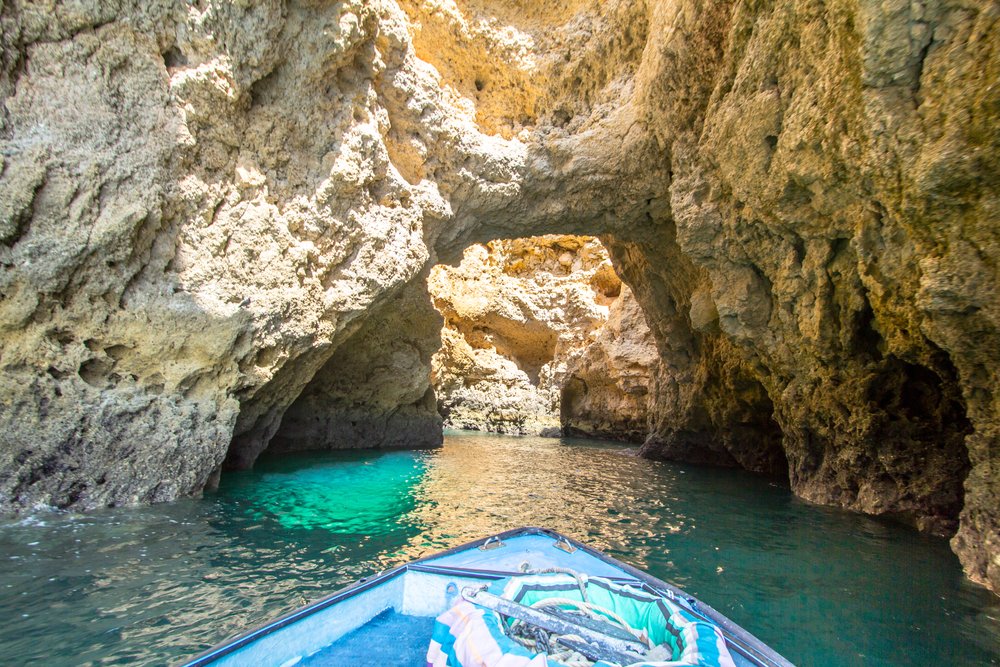
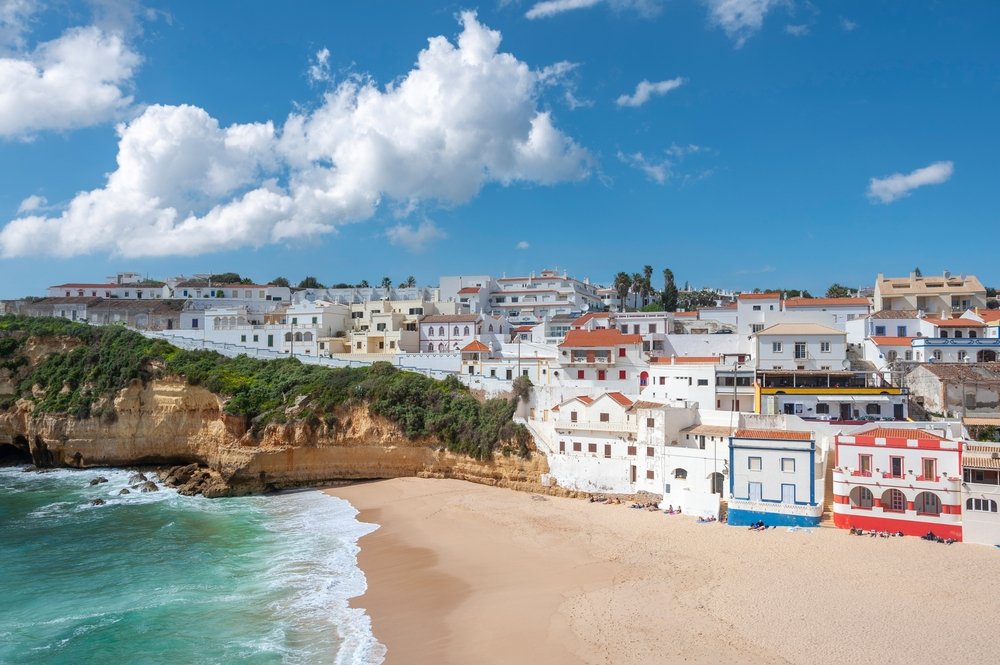
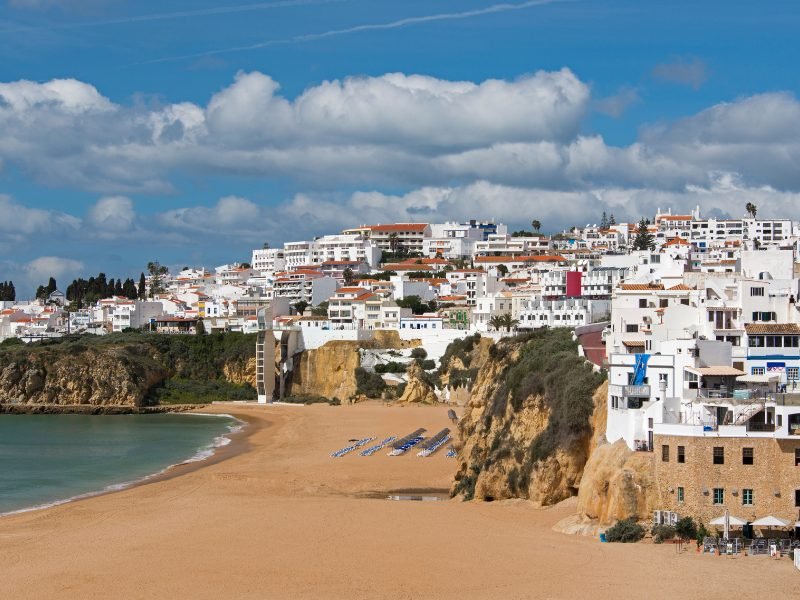
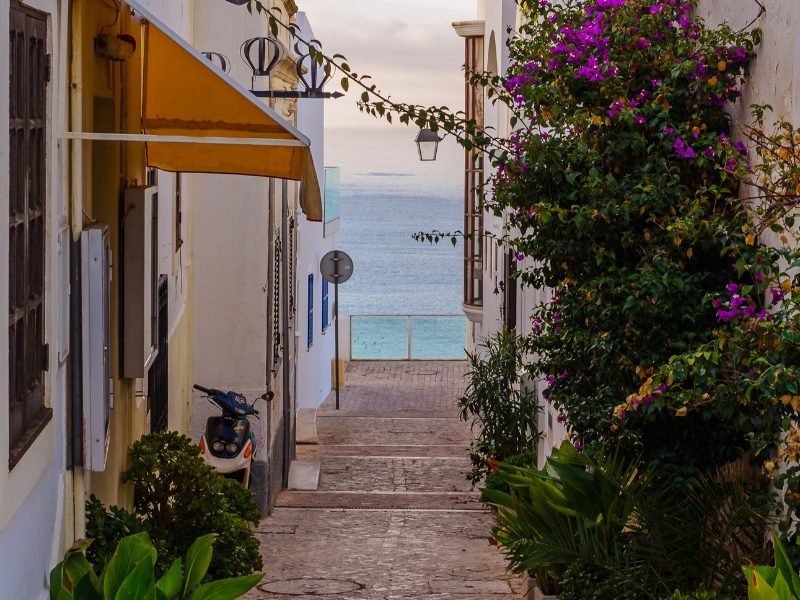
The Perfect 2 Days in Yellowstone Road Trip Itinerary

Seemingly endless opportunities for adventure wait for you on this Yellowstone National Park itinerary.

With 3,500 square miles of wilderness terrain, over 10,000 hydrothermal features, more than 500 active geysers, and approximately 1,000 miles of exciting hiking trails, it’s hard to know where to start in this giant outdoor playground.

Yellowstone was America’s first national park, and with so much beauty spread out across such a large terrain, it can be overwhelming.

Where do I go first? What Yellowstone attractions do I absolutely need to see?

There’s no need to feel overwhelmed by the massive selection of recreation and site seeing options in America’s first national park because we have put together the ultimate 2 days in Yellowstone road trip itinerary.
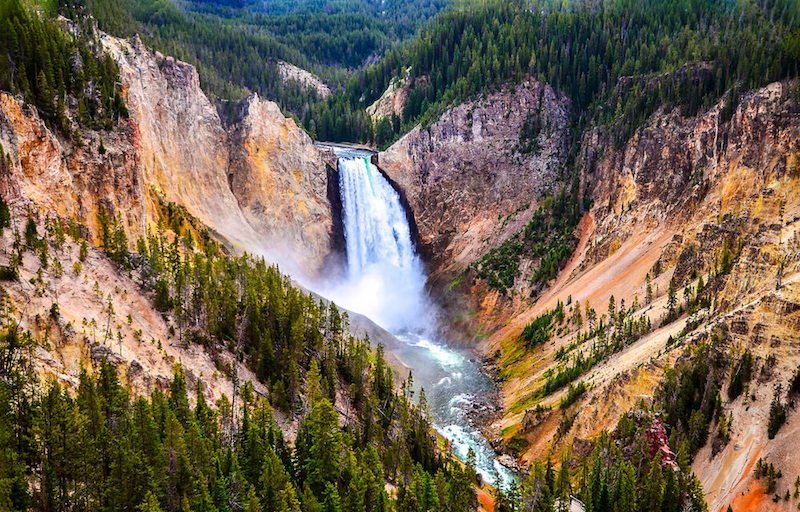
Photo of the waterfall at Grand Canyon of the Yellowstone (Lower Falls) surrounded by canyon and trees

You’ll get to make the most of your visit with famous attractions, insider tips, hidden gems, and a thoughtfully designed driving route!

Have your camera, binoculars, and park map handy while tackling this Yellowstone itinerary! 

We have a lot of exploring to do to tackle one of the USA’s most bucket list-worthy destinations in such a short amount of time.

Note: This post was originally written by Big Sky, Montana local Emily Lessard, who lives less than an hour from Yellowstone and visits frequently. The original post was written in 2020 and has been updated several times to reflect the editor's research trip to Yellowstone in June 2021. The post was most recently updated on August 7, 2023.

Quick Yellowstone Travel Guide
When to Go: While Yellowstone is beautiful in winter, all its main roads close off to passenger cars which means that you won’t be able to go on a self-drive. So the best time to visit Yellowstone National Park is in late spring, summer, and early fall.

Where to Stay: There are so many places to stay in Yellowstone both inside and outside the park but those inside can only be book directly at the Yellowstone National Park Lodges website!

However, if you don’t book early enough and find the accommodations inside the park full, you can stay at one of these cabins in West Yellowstone which is next to the park entrance, or The Adventure Inn if you want a luxurious stay and if you’re on a budget, Kelly Inn is the best option.

And if you’re unable to get accommodation in West Yellowstone, you can opt to stay in Jackson, WY especially if you plan to visit Grand Teton National Park as well. In that case, I recommend The Elk Country Inn for budget travelers, Wyoming Inn (mid-range boutique), and Teton Mountain Lodge and Spa for a luxury stay. And for a homey feel, I suggest staying at this cozy and luxurious cabin.
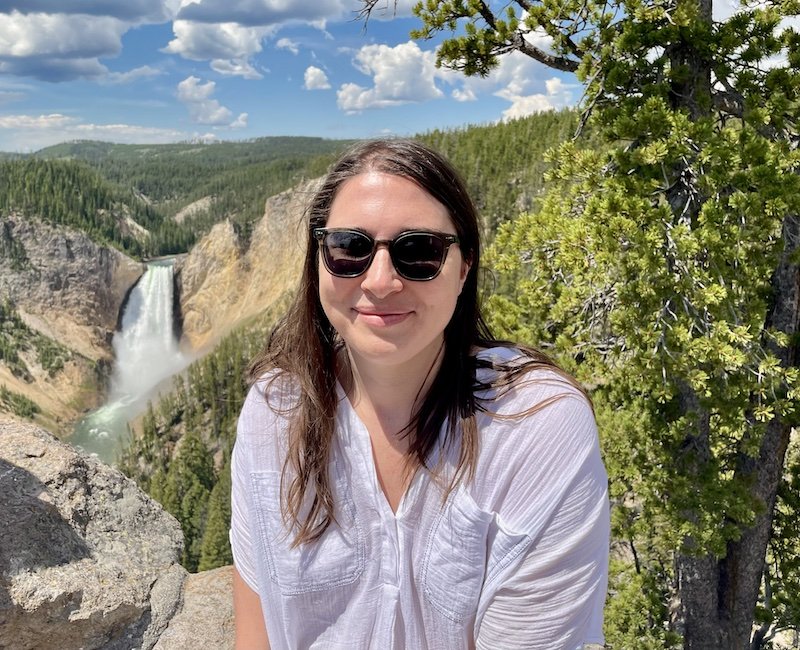
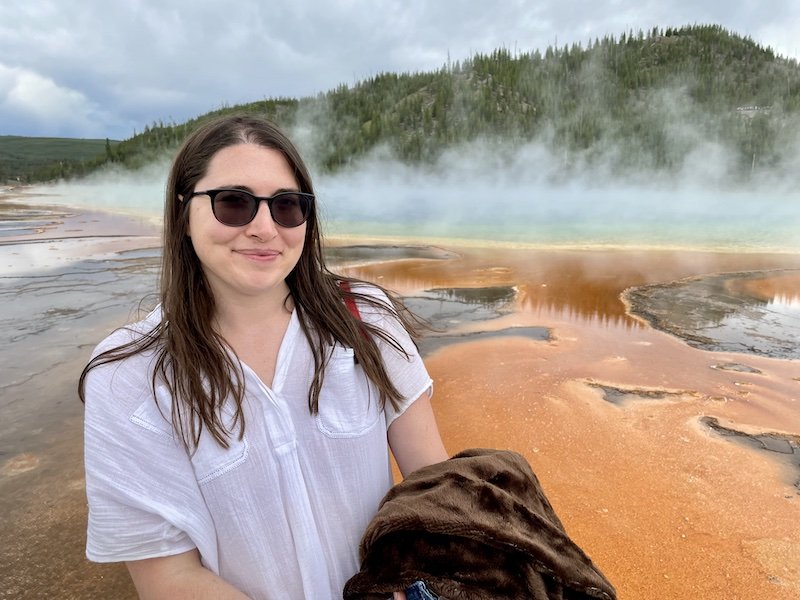
Allison in yellowstone national park

How to Get Around: A car is key for Yellowstone National Park; there is no shuttle, and without a car, you’d have to rely on tours. If you’re renting a car, compare car rentals and prices from here. Alternately, you can rent an RV or campervan via RVShare and save on accommodations.

Don’t want to drive or plan? You can book this two-day Yellowstone tour from Jackson, or this full-day Yellowstone tour from West Yellowstone. And if you plan to visit both Yellowstone and Grand Teton, then I recommend going for this two-day tour of both Grand Teton & Yellowstone.

3 Things Not to Forget to Pack: Binoculars are key for spotting wildlife like bears, elk, moose, and bison– I suggest these Nikon binoculars. For hikes, you’ll want a sturdy pair of hiking boots — I love my Ahnu boots — and some bear spray for safety reasons.

Know Before You Go: If you plan to visit multiple national parks in a year, the America the Beautiful Pass will save you a bundle! It costs $80 for an annual pass (for an entire vehicle traveling together) to all US national parks and federally managed sites.

How This 2 Day Yellowstone Itinerary Works
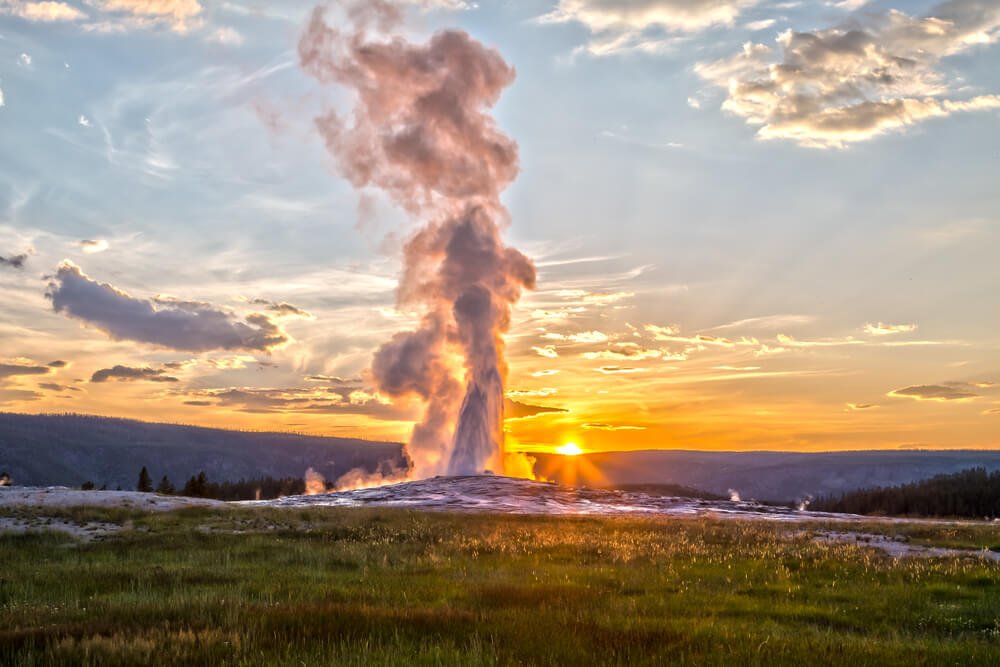
The Old Faithful geyser at sunset, a plume of steam shooting high into the air as the sun sets behind it, a classic sight on any Yellowstone itinerary.

Yellowstone is one of the largest national parks in America, so of course, there is simply no way you can see all of Yellowstone National Park in 2 days.

Since time is limited, we’ve picked the most essential sights in Yellowstone. I mean, you can’t visit Yellowstone and NOT go to the Grand Prismatic Spring or Old Faithful, right?

But as magical as those spots can be, they can also be rather crowded. With 4 million annual visitors, most of those in the summer months, you’re definitely not alone!

So we’ve also filled in the gaps between those busy-but-beautiful spots with some (relatively) off-the-beaten-path suggestions. 

These will allow you a chance to break away from the crowds a bit and experience the beauty of Yellowstone for yourself, away from masses of selfie sticks!
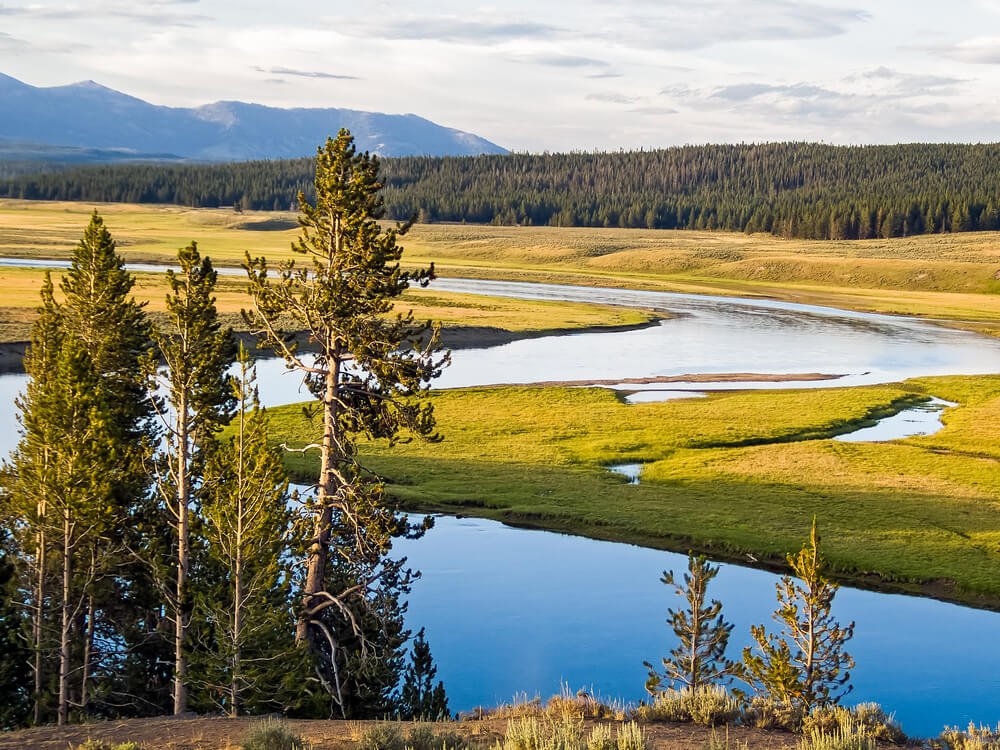
the yellowstone river in yellowstone

Of course, “off the beaten path” is relative to a place as well known as Yellowstone National Park! 

But Yellowstone is a park where most people simply drive between overlooks and drive-in spots, so allocating time for some of these short Yellowstone hikes that I’ve outlined is the best way to get away from the crowds.

This is the best way to experience the beauty of the park as it was intended to be experienced, before a time of mass tourism.

This 2 day Yellowstone itinerary is intended to be done by self-drivers, those with their own car or a rental car.

You don’t need any sort of 4×4 or special bells and whistles on your car, though if you are visiting in the early spring or fall, you may need tire chains depending on road conditions (check with the Yellowstone website for up-to-date information).
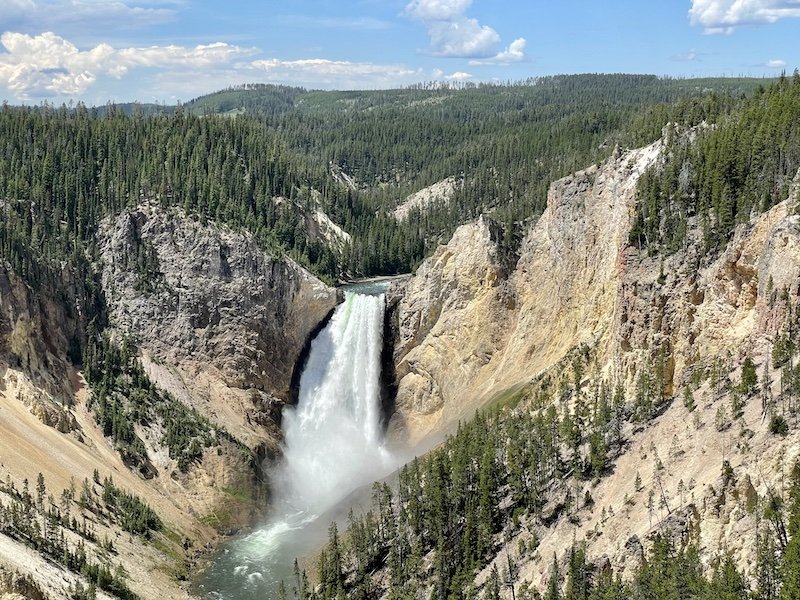
view of lower falls in yellowstone a beautiful sight

Be aware that Yellowstone is almost entirely closed to vehicle traffic in winter — more on this below.

Visiting Yellowstone in 2 days actually divides quite neatly due to the structure of the park’s main roads, which form a figure 8.

On the first day, we’ll tackle the lower loop, and on the second day, we’ll tackle the upper loop.

This way, you’ll see the main park highlights and some lesser-known spots without backtracking excessively and wasting precious time of your two days in Yellowstone!

Renting a Car for Yellowstone
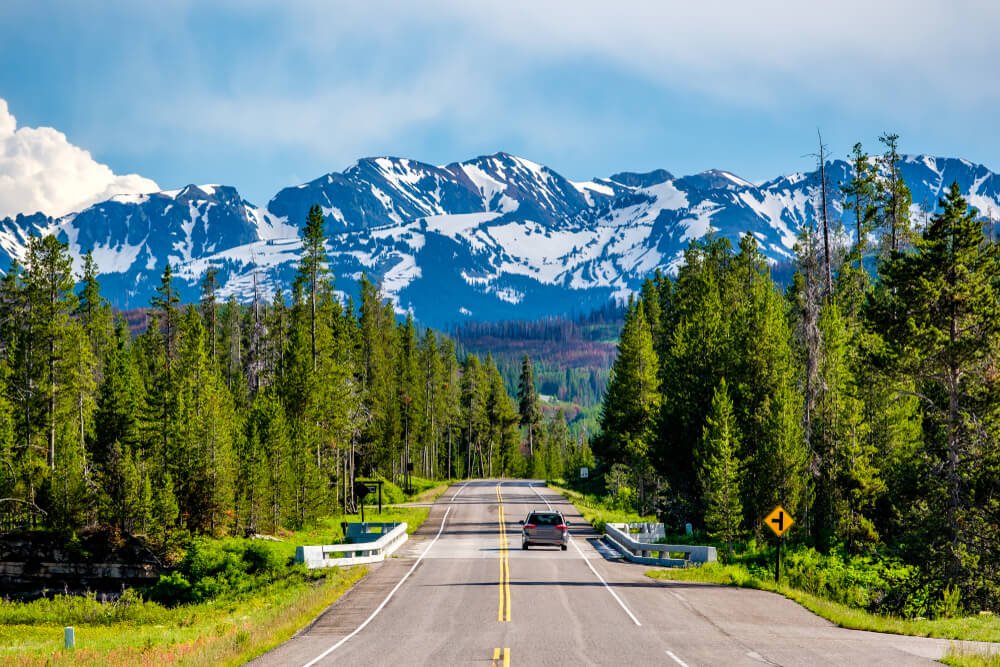
A car on the road heading towards snow-covered mountains on a Yellowstone road trip between Yellowstone and Grand Teton National Parks.

If you’re road tripping to Yellowstone from your home state, disregard this section.

If you need to fly in to get to Yellowstone, I suggest flying to Jackson Hole Airport (JAC).

In the peak summer season, 15 destinations fly directly to Jackson Hole, including NYC, Chicago, LA, Denver, Salt Lake City, Dallas, and others.

American Airlines, Delta Airlines, United Airlines fly to Jackson Hole year-round, and seasonally, Alaska and Frontier also service the airport.

At Jackson Hole Airport there are plenty of car rentals available.

Not sure where to get the best deal on your rental? I’ve rented cars dozens of times through various search engines and have settled on Discover Cars as the best car rental search aggregator – it sifts through dozens of trusted rental companies to find the cheapest price for your rental! Compare prices for your car rental here.

There is also the West Yellowstone Airport, but flying here is usually more expensive and car rentals are often pricier here. I don’t recommend this one if you are on a budget!

Another option is the Bozeman-Yellowstone airport in Montana, though this requires a 1.5-hour drive to the park. That said, you may be able to find cheaper car rentals via Bozeman.

How to Do 2 Days in Yellowstone Without a Car
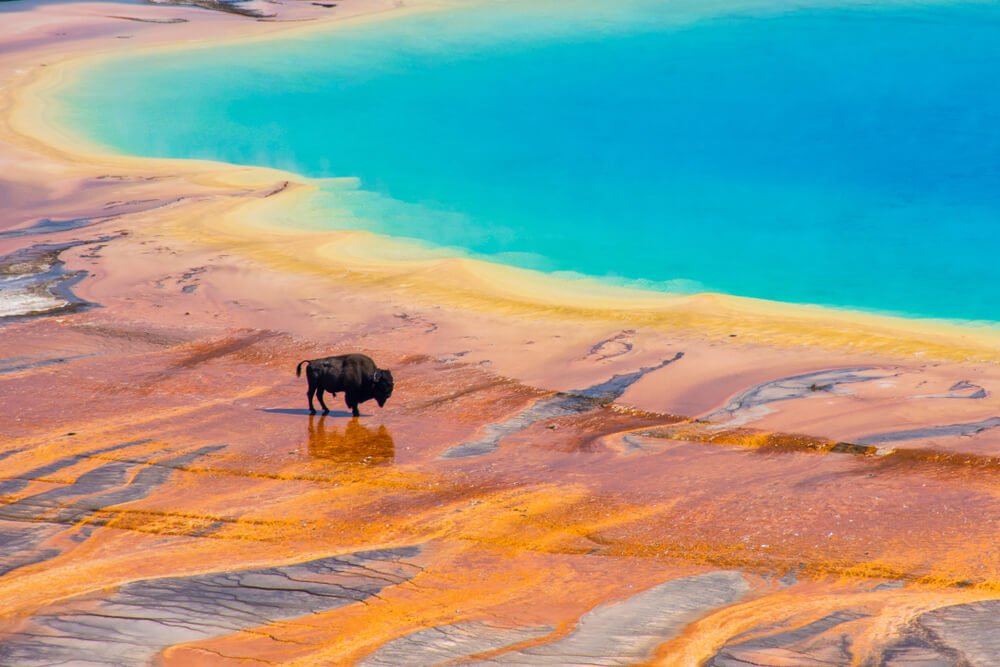
A bison on the edge of the orange part of Grand Prismatic Spring, the turquoise center of the spring is close by in the upper right corner of the photo.
This bison clearly didn’t read the “keep off” safety signs!

If you don’t have a car, you may be wondering how to tackle this 2 day Yellowstone itinerary. Honestly: it’d be basically impossible to do it without either A) your own car or B) a guided tour.

Unlike other national parks, Yellowstone does not have its own shuttle service, and there are no local buses that serve Yellowstone (just the area around Jackson Hole).

So, if you don’t have a car or don’t want to drive, you’ll definitely need to take a guided tour. I recommend staying in Jackson or West Yellowstone where most tours depart.

From Jackson: I recommend this two-day Yellowstone tour which covers both the Upper and Lower loops.

It’s a bit pricy but you will see all the best things to see in the park without missing out. Alternately, you could do this Lower Loop tour for Day 1, which pretty closely tracks this itinerary, and on Day 2, you could explore the lovely Jackson Hole area which has plenty to see!
Book your two-day Yellowstone tour here!

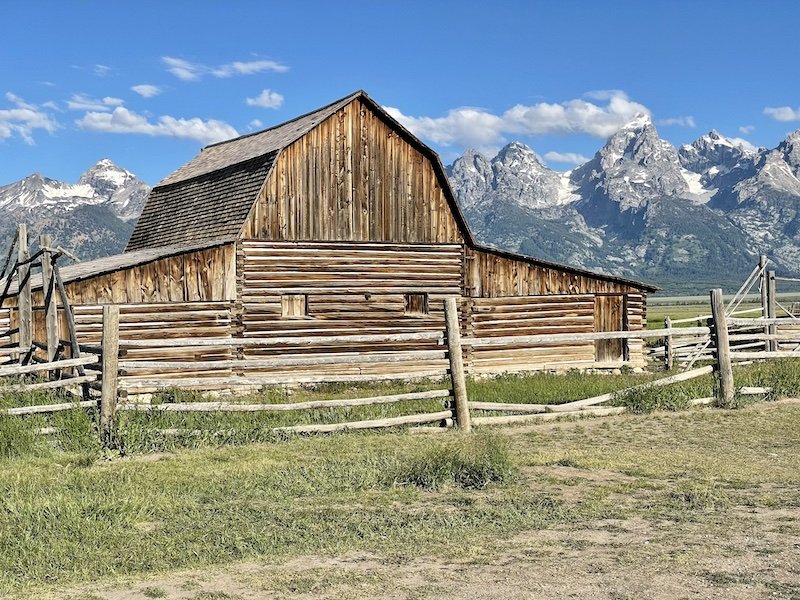
Mormon Row in Grand Teton National Park with an old farmhouse and mountains behind it on a sunny day with just a few clouds in the sky

Another option if you’re staying in Jackson is doubling up on National Parks and visiting two-in-one with this 2-day Grand Teton National Park and Yellowstone tour.

The parks are surprisingly close together and it’s quite easy to combine the two into a tour that’s been organized for this purpose. This tour is wildlife-focused so it’s perfect for people who are more interested in wildlife over landscapes.

From West Yellowstone: This full-day Yellowstone tour will cover most of the best things to see in the park in just one day, including most of the Lower Loop such as Old Faithful, Fountain Paint Pots, and Grand Prismatic Spring.

For your second day, you can go on a zipline adventure or rafting trip departing from West Yellowstone.

Best Time of Year to Visit Yellowstone
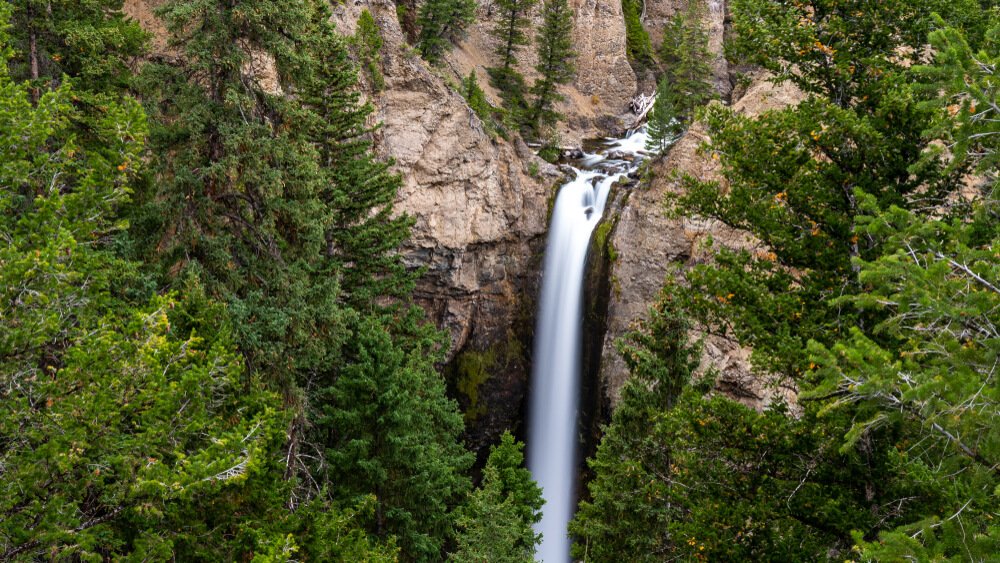
The waterfall at Tower Falls, a long exposure photo of a waterfall going off of a sheer cliff drop, surrounded by green trees in summer.

This Yellowstone itinerary is really only suitable for late spring, summer, and early fall, when you are able to drive yourself into the park and self-guide. 

This is because once there is significant snowfall, the main park roads in Yellowstone all close to passenger vehicles.

The only way to access the park becomes by snowcoach tour (which can get pricy!) or by snowmobile (even pricier, unless you happen to already own your own!).

While Yellowstone in winter is an absolutely incredible experience, and one that I have no qualms recommending, this itinerary for Yellowstone simply will not work in winter.
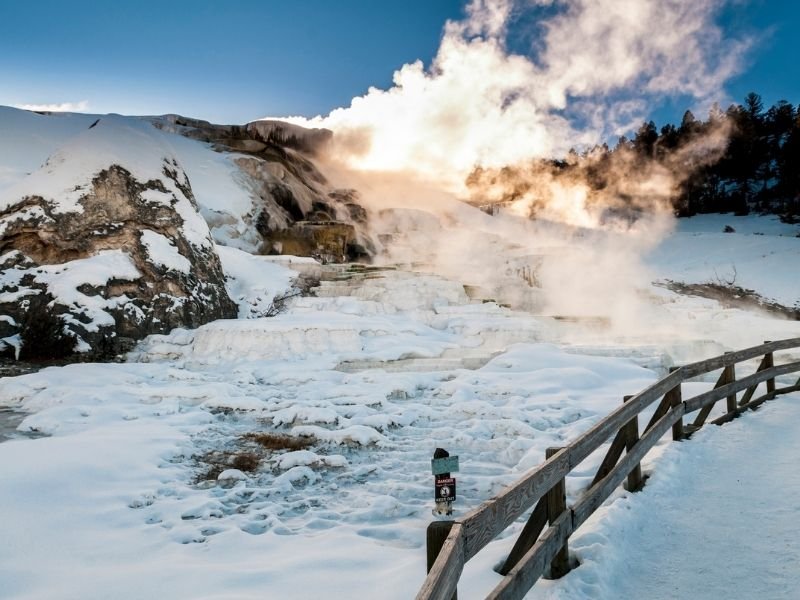
winter landscape in yellowstone

That’s simply because you won’t be able to access the roads needed in order to see the sights in the order suggested.

If you’re planning a winter Yellowstone trip, I suggest you read this post on 30 things to know before visiting Yellowstone in winter, written by the same Montana local who wrote this post!

I would suggest that the best time to visit the park would be in the shoulder season just before or just after summer.

May and September are brilliant months to visit Yellowstone, especially if you don’t have kids (or if you’re homeschooling), since the park definitely fills up with families during the summer vacation months. You’ll find better prices on accommodations as well outside of the peak season.

A nice thing to know about visiting Yellowstone in the summer is that temperatures are never that hot!

Even in July, the hottest month in the park, the average high temperature is 72 degrees F.

It can get quite cold in the evening due to the high elevation (8,000 feet!) though, so you’ll want to come prepared with layers for the morning and evening chill!

Where to Stay in Yellowstone
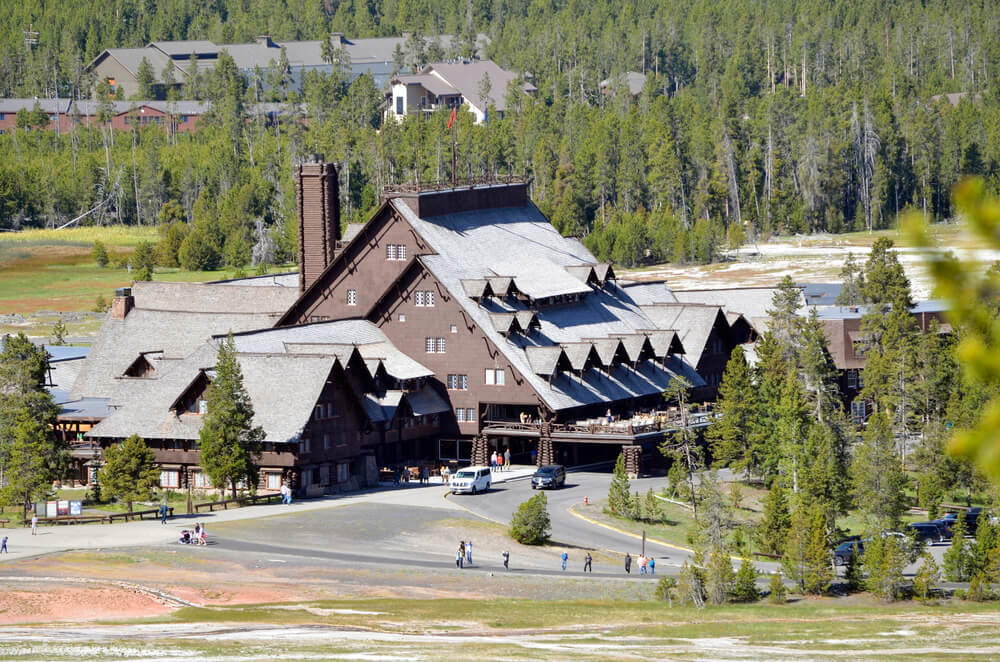
Old Faithful Lodge near the geyser, a large wooden mountain lodge surrounded by trees, a popular place to stay on a Yellowstone road trip
The Old Faithful Lodge in Yellowstone books up months and months in advance!

The Old Faithful Lodge in Yellowstone books up months and months in advance!

There are so many options for where to stay in Yellowstone! I’ll make a few suggestions both inside and outside of the park.

Between May and October, some lodges are open in Yellowstone Park. You can find the full list here, which is also where you can book the accommodations.

You cannot book these accommodations on other booking portals, only directly. You must book several months in advance… like, we’re talking 6+ months for places like the Old Faithful Inn and the Canyon Lodge!

The sunset at Old Faithful, a geyser spouting into the air with the setting sun showing up in a sunburst behind the geyser in Yellowstone National Park

If you didn’t book your lodge inside Yellowstone on time, or if you’d prefer to stay outside the park, I’d suggest either West Yellowstone, Idaho or Jackson, Wyoming as your base.

West Yellowstone is closer to the park entrance and is better for following this itinerary. It’s where I strongly recommend you stay!

However, Jackson is doable if you are also planning to visit Grand Teton National Park during your stay, and it can be done as long as you get an early start each day of this itinerary.

There are options that are further afield, like Gardiner, Montana, and Cody, Wyoming. However, these will definitely add extra travel time to your trip and may not be worth it for a short 2 days in Yellowstone itinerary.
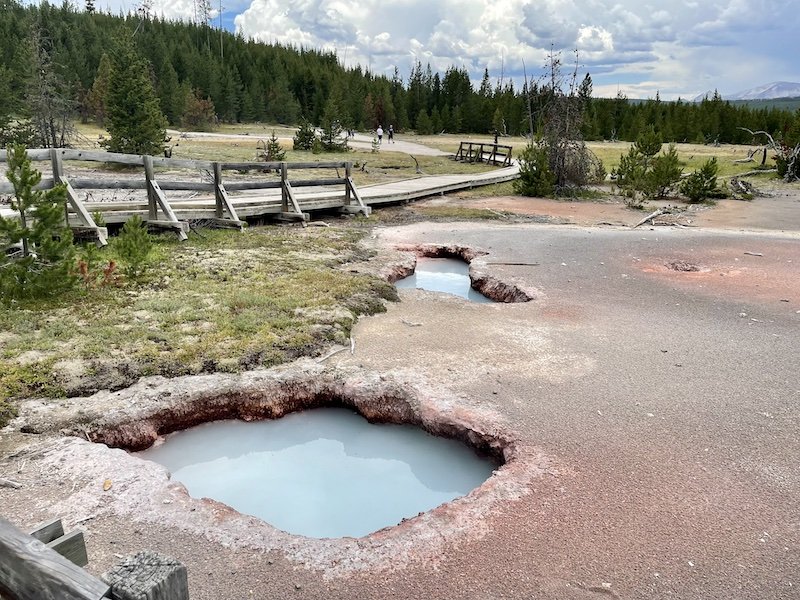
baby blue geysers in yellowstone and boardwalk

West Yellowstone, ID Accommodations

CABINS | If you want to stay in a self-contained cabin (great for social distance!), Explorer Cabins at Yellowstone is ideal.

The grounds are made up of 50 cabins which have plenty of space between them, and each unit is self-contained so there are no communal areas except for the fire pit (where you can toast your welcome s’mores!).

Plus, they’re dog-friendly, and just a few minutes from the West entrance to the park!
>> Check photos and reviews on Booking.com | Book on Hotels.com

VRBO | For a homey feel, I suggest this stylish and luxurious loft.

The cabin is perfectly located near Henry’s Lake and stylishly designed for your comfort. It is fully equipped with all the appliances you might need. It might be a little pricy but the comfort and serenity it provides will make up for that.
>> Check photos and reviews on Vrbo

BOUTIQUE | For design lovers who want a hint of luxury, I suggest the hip The Adventure Inn.

This stylish spot has a minimalist style, with a Scandinavian sensibility mashed up against a woodsy edge. It’s like a Brooklyn loft and a mountain cabin had a baby: it’s beautiful. 
>> Check photos and reviews on Booking.com | Book it on Hotels.com

BUDGET | If money is a concern but you want a place that’s comfortable, clean, and convenient, it doesn’t get much better than Kelly Inn.

This cozy, rustic hotel has perks like an indoor pool, sauna, and hot tub while not breaking the bank. However, the rooms are a little dated, but for the price, it’s perfect.
>> Check photos and reviews on Booking.com | Book it on Hotels.com
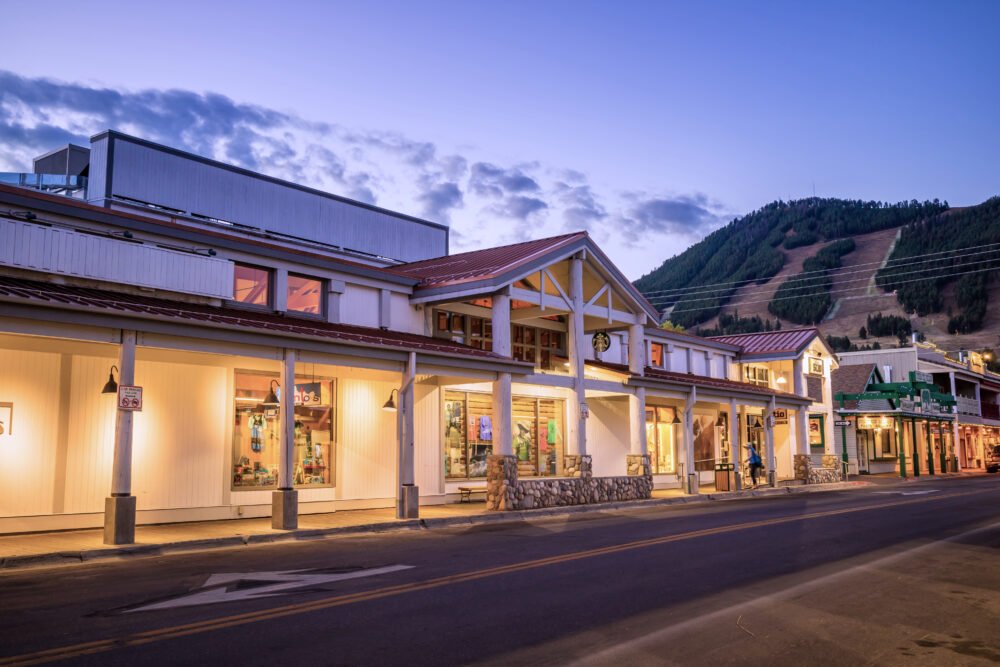
Downtown Jackson Hole in the winter

Jackson, WY Accommodations

BOUTIQUE | If the design and the personality of a hotel is important to you, I suggest Wyoming Inn.

This cozy inn features Western-style decor complete with a roaring fireplace, warm woodsy colors, rustic design touches, and large, modern rooms. 
>> Check photos and reviews on Booking.com | Book it on Hotels.com

BUDGET | If you’re traveling Yellowstone on a budget and want to stay in Jackson, I’d pick The Elk Country Inn.

It’s highly rated by fellow travelers and affordable (well, by Jackson standards). It’s located just 4 blocks from Town Square in central Jackson, and the rooms are modern, spacious, and clean.
>> Check photos and reviews on Booking.com | Book it on Hotels.com

LUXURY |  If cost is not a factor, the stunning Teton Mountain Lodge and Spa (a Noble House Resort) is a no-brainer.

Located in Teton Village, the rooms all have their own fireplace and cooking area, and there are rooms ranging from queen studios to two-level, two-bedroom suites.

There are indoor and outdoor pools and hot tubs (all heated year-round) and a massage and spa center for those who want a little luxury on their Yellowstone trip.
>> Check photos and reviews on Booking.com | Book it on Hotels.com

Your Perfect 2 Day Yellowstone National Park Itinerary

Day 1 of Your Yellowstone Itinerary
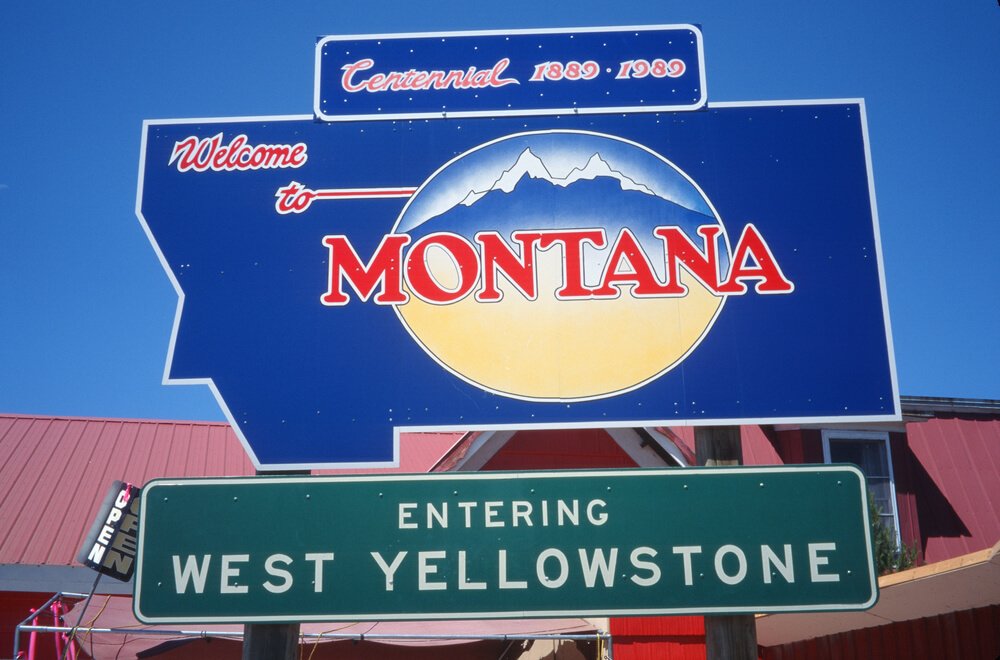
Sign that reads "Welcome to Montana, entering West Yellowstone".

Rise and shine for an early morning! After spending a restful night in the gateway town of West Yellowstone, you’re conveniently located right near Yellowstone National Park’s West Entrance.

The earlier you start, the better — traffic jams are common at the more popular entrances (West and South).

If you stay in Jackson Hole instead, you’ll want to get an even earlier start and plan a little extra time to get to Yellowstone.

You’ll likely want to start through the South Entrance on a scenic drive that includes some of Grand Teton National Park. You need to allow about 1.5 hours of driving time if you are starting in Jackson.

There’s no time to waste because your first day is going to take you on an exciting tour of the Yellowstone Lower Loop.

What’s the Lower Loop? Take a quick look at your map. Notice how Yellowstone National Park’s road system is shaped like a figure 8, which is broken into three loops, as follows:

Upper Loop: the northern circle of the figure 8

Lower Loop: the southern circle of the figure 8

Grand Loop: the outside perimeter of the figure 8

Most of the time, you’ll be traveling along Grand Loop Road on the outer perimeter, but we’ll break this Yellowstone itinerary into both the Lower (first day) and Upper (second day) loops, since you don’t have a lot of time!

Now that you have a better idea of where Day 1 is taking you, we’re ready to get into the fun stuff — the heart of this Yellowstone itinerary!

Start at the West Entrance.
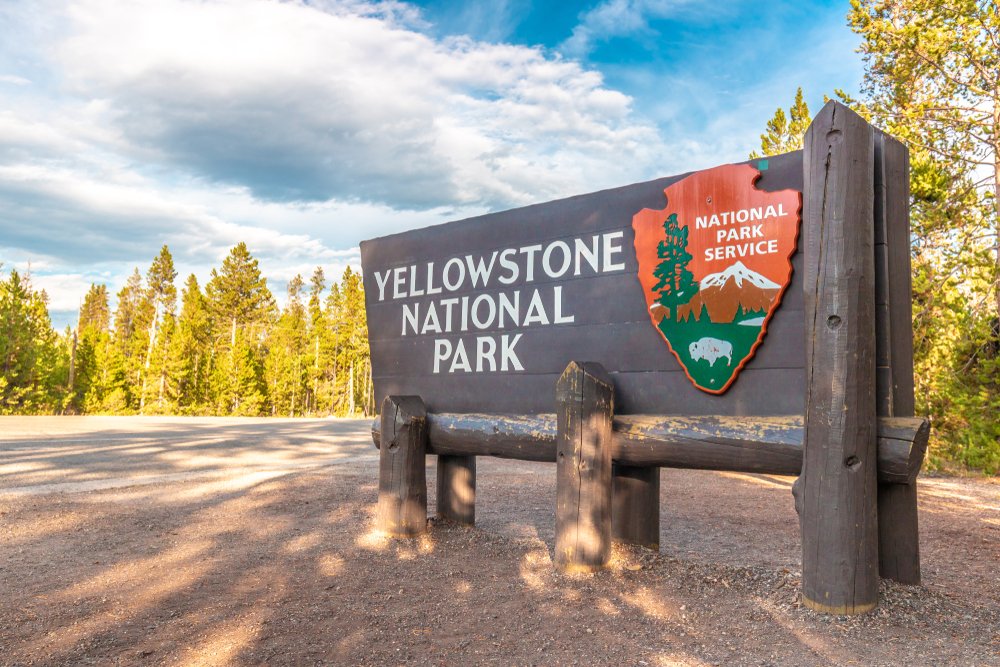
Sign that reads "Yellowstone National Park National Park Service", made of wood, surrounded by trees.

Welcome to Yellowstone! Excited for your last day of this quick-blitz Yellowstone itinerary?

This first section from the West Entrance to the Madison Junction is famous for phenomenal fly fishing.

The Madison River hugs the road providing the perfect view to spot anglers and the occasional moose wading the waters.

As you approach the Madison Junction, look to your right for a view of National Park Mountain standing 7,500 feet tall with the junction of the Firehole River and Gibbon River in the foreground.

We’re headed south at the junction to work the Lower Loop counterclockwise.

Firehole Canyon Drive
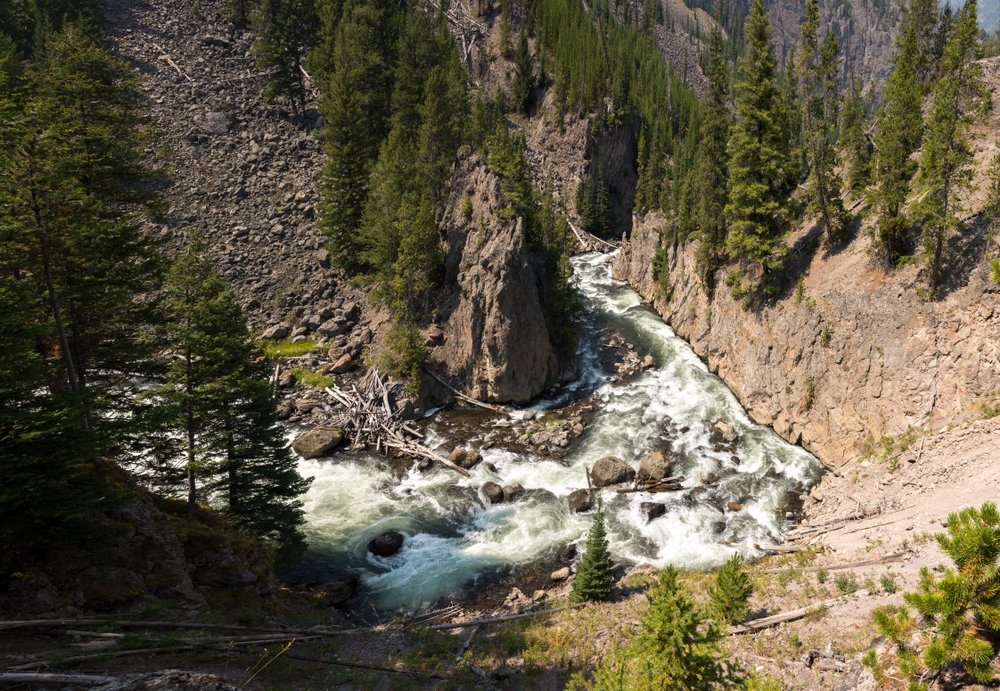
View of a rushing river, with rocks in the river bed, surrounded by mountains and trees.

Trust us… You do not want to miss the scenic Firehole Canyon Drive. The turn comes up pretty fast on the right, so be ready!

On this 2-mile detour, you’ll get an up-close look at the 40 ft tall Firehole Falls. We have a little bit more driving to do before the first hike of this Yellowstone road trip, but it’s coming!

For now, take a pullout and scope the hillsides with your binoculars. You’re bound to spot some wildlife in the Firehole River Valley.

Fountain Paint Pots
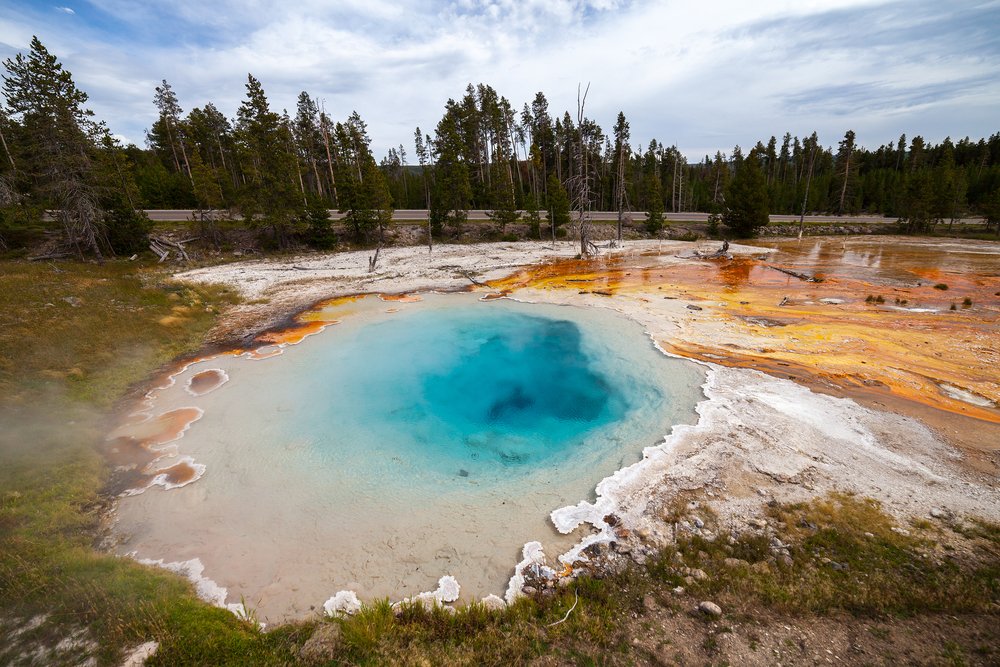
A geyser in Yellowstone, orangeish deposits on one side of it with a deep blue spring in the middle.

Yellowstone National Park is famous for its colorful hydrothermal pools and you’re going to witness them first hand.

This is part of the Lower Geyser Basin area, where you’ll find all sorts of colorful hot springs, mud pots, and stunning geothermal features.

The 0.6-mile loop at the Fountain Paint Pots will bring you past a variety of colorful pools. Don’t forget your camera!

Grand Prismatic Spring
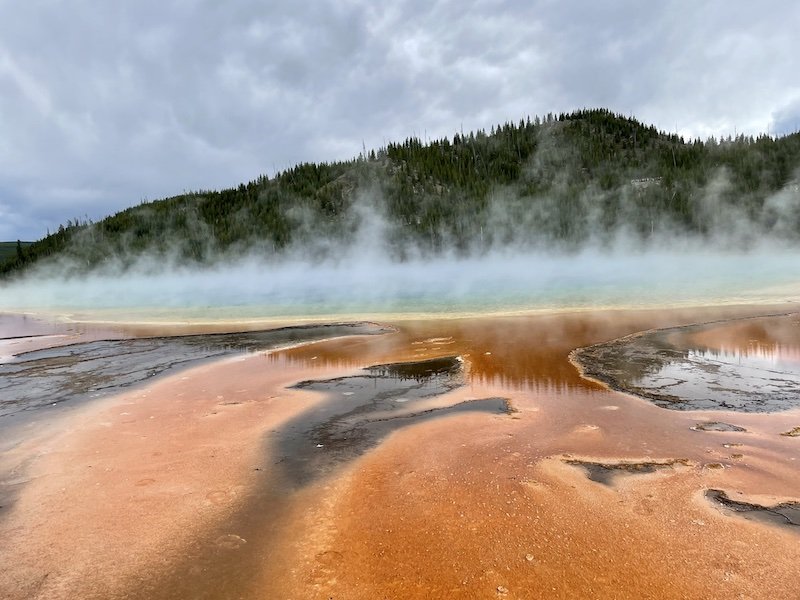
view of grand prismatic spring from up close and personal on the boardwalk

The next hot spring is surely one you have seen before in photographs, but there’s nothing quite like standing in front of the real thing with its beautiful rainbow of colors.

There’s no way you can skip putting this on your Yellowstone National Park itinerary — it’s probably why you came in the first place!

It’s located in the Midway Geyser Basin, which also includes the Excelsior Geyser, the Turquoise Pool, and the Opal Pool. 

Note: Always stay on the boardwalk or designated hiking trail – it’s illegal and extremely dangerous to walk off the path here!

If you’re visiting Yellowstone with kids, be sure to be extra cautious here!
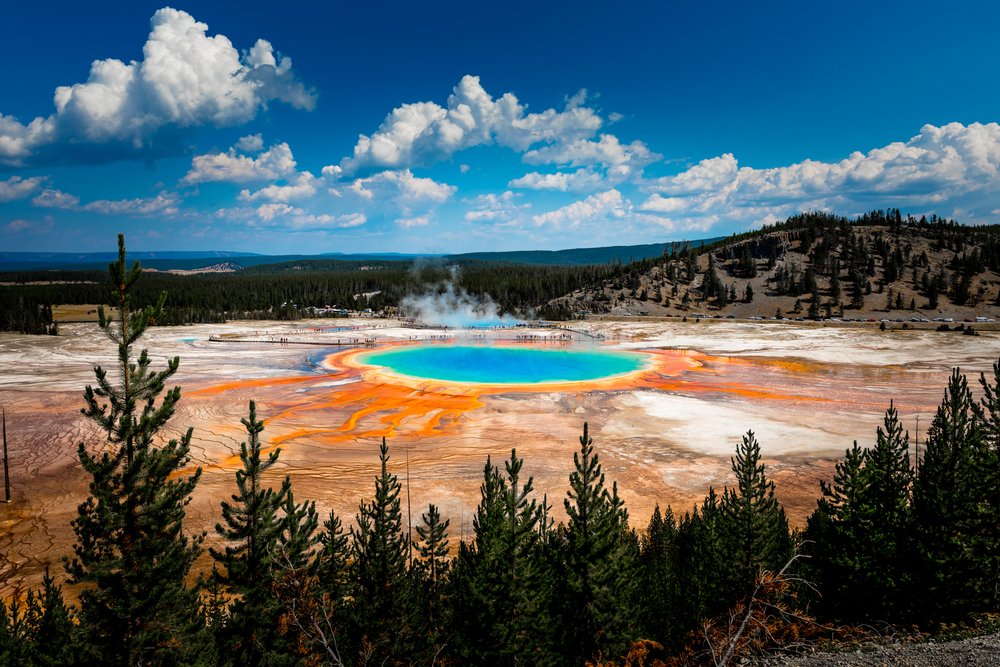
View of Grand Prismatic Spring and its orange and blue colors from afar, with a treeline in front of the view.

Most visitors stay on the lower boardwalk loop to see Grand Prismatic Spring, but if you’re looking for the best view available on foot, we know exactly where to go.

Drive to the Fairy Falls Trail parking lot and park your car. From there, head to the Grand Prismatic Spring lookout point, located about 0.6 miles into the Fairy Falls Trail, about a 20-minute walk one way.

From the trailhead, you’ll gain about 105 ft of elevation before ending up at the scenic overlook.

You could continue this hike all the way to Fairy Falls, which is a 5.4-mile roundtrip hike, that takes about 3 hours. 

However, with limited time on this Yellowstone itinerary, I think it’s best to just hike up to the lookout point and back.

Remember: Anytime you’re hiking in bear country, carry bear spray and understand how to use it. Yellowstone is home to both black bears and grizzly bears — both are dangerous, but grizzlies are particularly aggressive (and what you carry bear spray for).

You don’t want to use bear spray unless you have to, so make noise (talk to your companions or wear a bear bell) to announce yourself when in bear country. Bears don’t like surprises!

Old Faithful
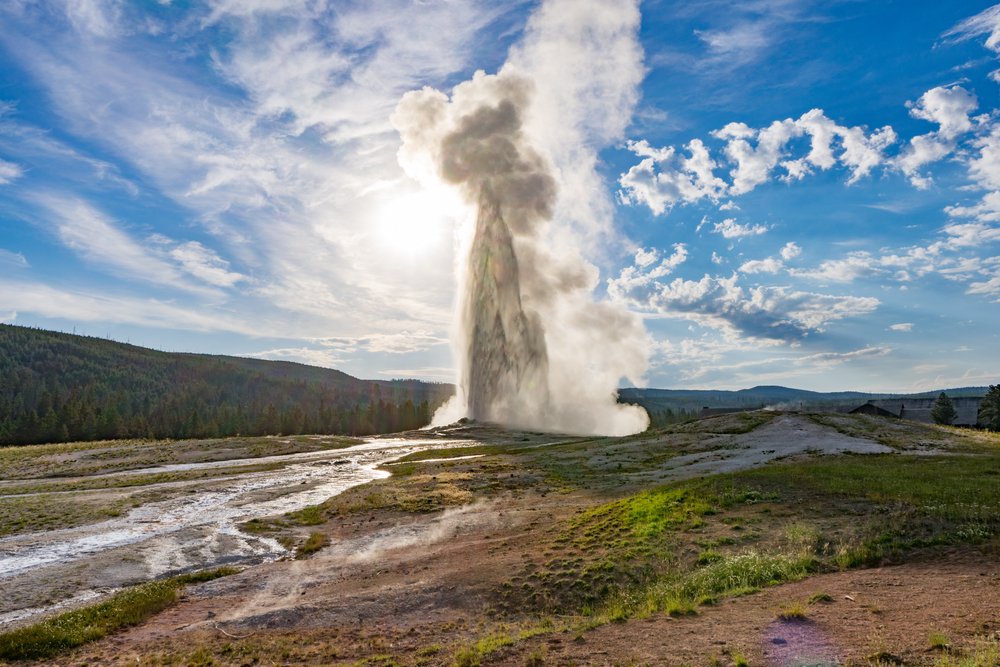
A geyser of steam bursting a hundred feet into the air, surrounded by a barren landscape, on a partly cloudy day with afternoon light.

Old Faithful is named such for its predictable eruptions which make it easy to schedule a trip around. 

Old Faithful is perhaps the most famous geyser in the world, so do expect crowding and lines, especially in the late afternoon when it’s most popular to visit this attraction.

It’s not the largest geyser in the park — that would be Steamboat Geyser, which is the world’s tallest active geyser — but it is the most predictable and thus the most popular to see.

The beautiful Old Faithful geyser is located in the Upper Geyser Basin, a separate part of the basin of Yellowstone than the previous springs on this itinerary.

You’ll find other geysers in the vicinity that are far less visited, such as the Morning Glory Pool, Bottomless Pit, Castle Geyser, and more.

Just outside the Old Faithful Visitor Center, there are rows of benches set in front of the geyser for a stadium-style viewing.

But… That’s not actually the best place to view the eruption of Old Faithful!

Insider tip: After checking the next eruption time in the visitor center, take the Observation Point – Geyser Hill Trail for a birds-eye view of Old Faithful!

This 2.3-mile loop is well worth the hike and will bring you past some less-trafficked thermal features like Doublet Pool and Giantess Geyser!

West Thumb Geyser Basin
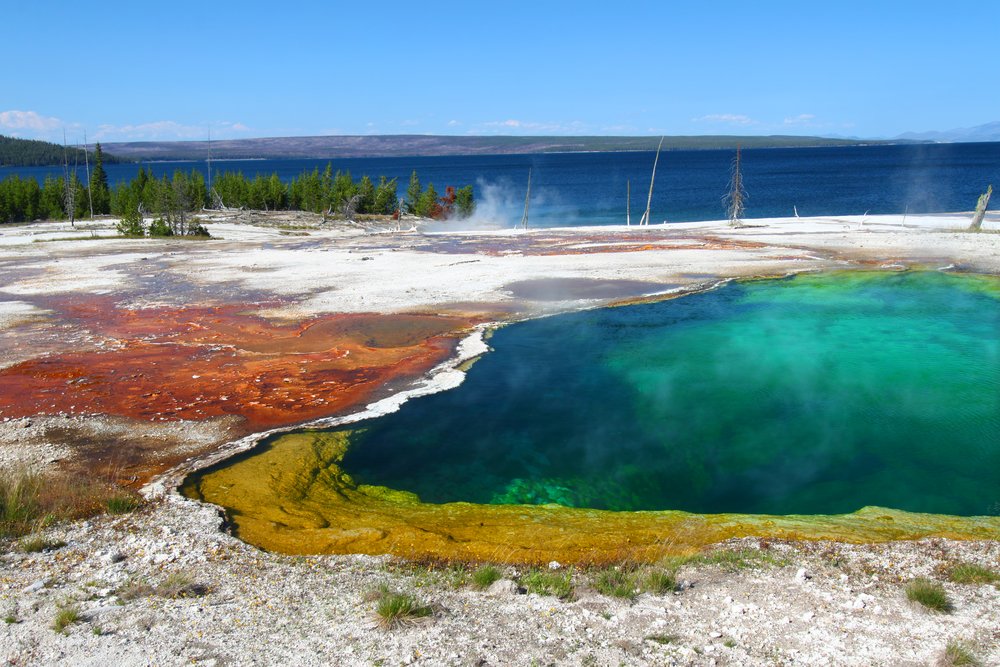
A deep blue and turquoise geyster, with orange and white mineral deposits beside it, next to a deep blue lake.

Take the boardwalk along Yellowstone Lake and check out the geysers that hug its banks.

This is also a perfect spot for a picnic lunch if you didn’t already stop for a bite at Old Faithful!

Note: If you’re getting peckish, you can stop in the Grant Village area as there are some amenities here

Hayden Valley
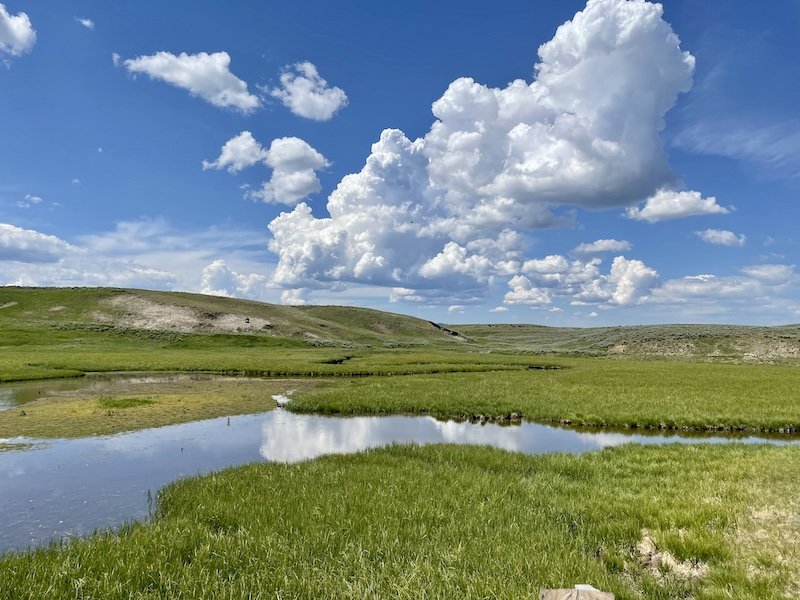
water and the hayden valley landscape

Hayden Valley wolves and grizzly bears on your must-see Yellowstone wildlife list? This is one of the best places to spot bears, wolves, and many other YNP residents roaming the valley.

Continue on Grand Loop road past the Yellowstone Lake, Lake Yellowstone Hotel, and the Fishing Bridge, where you can spot anglers trying to get a catch.

You’ll soon arrive at Hayden Valley, which you’ll likely notice because there are often cars pulled over here admiring the wildlife!

Be patient, scan the landscape with your binoculars, and use the pullouts off the main road for thorough searches.

Mud Volcano
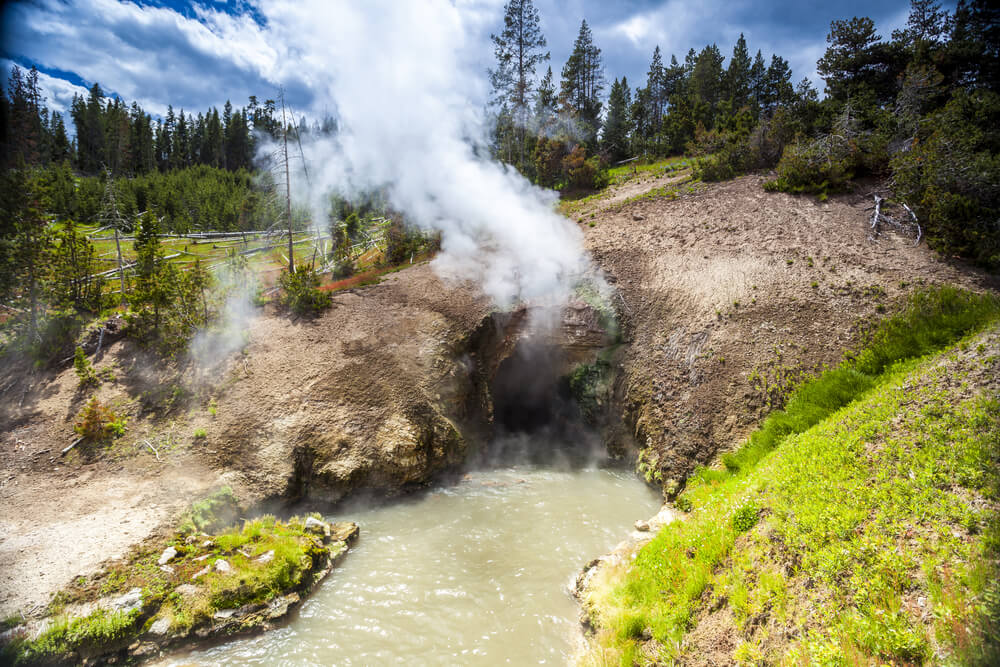
Bubbling mud pool in Yellowstone National Park with steam rising off the top at the Dragon's Mouth part of the loop

As you head north towards the Grand Canyon of the Yellowstone, you can stop off at the Mud Volcano, where you’ll see many incredible volcanic elements in one easy 0.8-mile loop trail. 

Don’t miss the Dragon’s Mouth part of the loop — it’s a brief detour but it’s an incredible sight to see!

You’ll also see Mud Caldron, Sizzling Basin, Churning Caldron, Black Dragons Caldron, Sour Lake, and Grizzy Fumarole as you pass through this short, boardwalk hike.

Grand Canyon of The Yellowstone
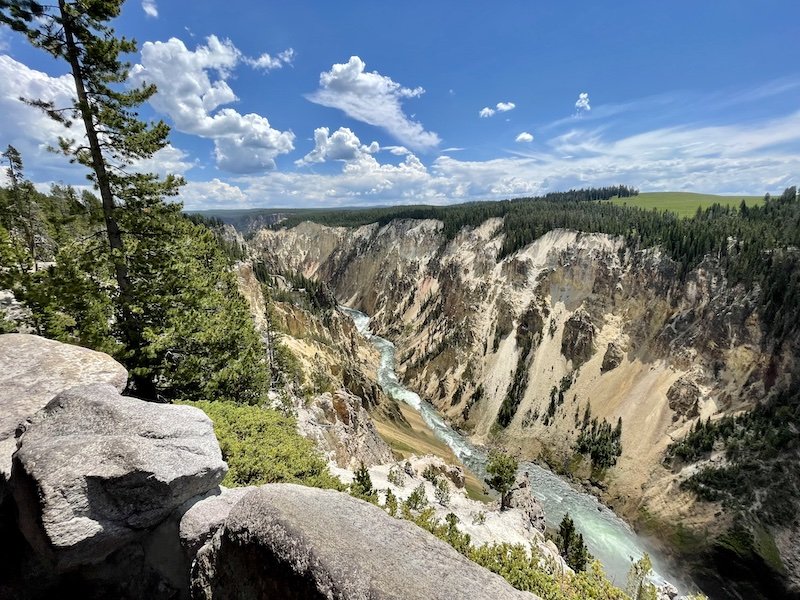
looking towards the grand canyon of the yellowstone large river with steep canyon walls

As you approach the Canyon Village area, turn right onto South Rim Drive towards Artist Point.

This is one of the most iconic viewpoints of the 308 ft tall Lower Falls. You definitely don’t want to miss the view on this short 0.1-mile paved walk!

view of lower falls in yellowstone a beautiful sight

Want a closer look? Take Uncle Tom’s Trail down to a viewpoint of the Lower Falls. Just remember that there are 328 steps: so easy to take down, so much harder to take back up!

There is also the shorter but still impressive Upper Falls, which are 109 feet but still massively impressive. Stop at the Upper Falls View for great photos.

Gibbon Falls
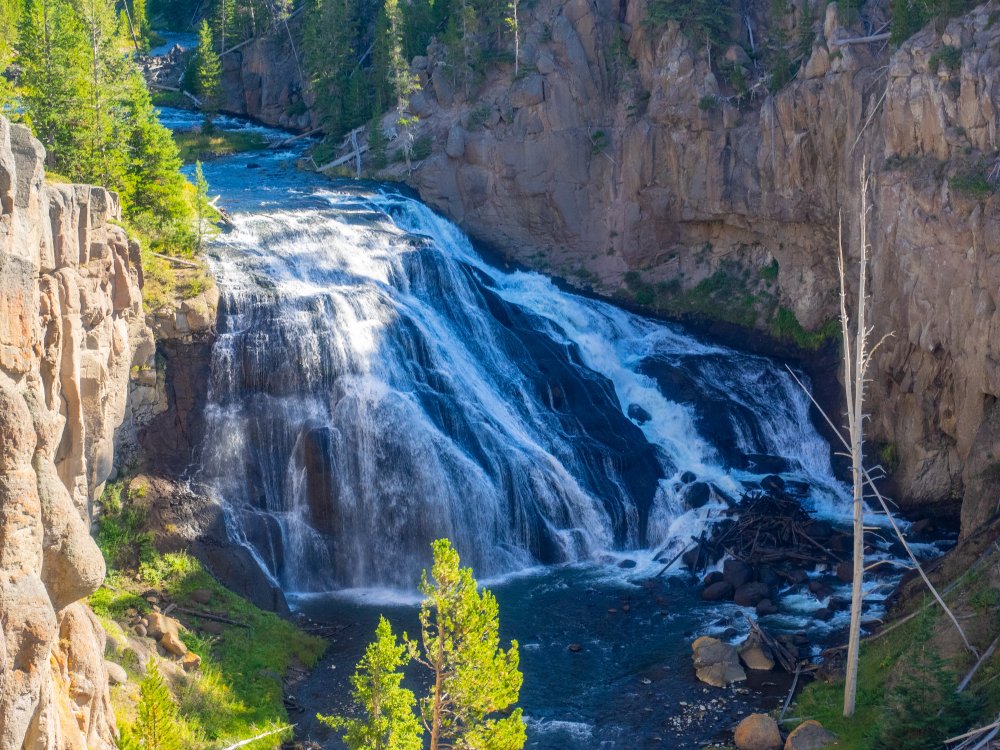
A waterfall in a river going over the steps of a tiered rock formation, forming a veil shape.

The 84 ft Gibbon Falls is another must-see waterfall. With its convenient location right off the road, there’s no reason not to stop and take a look!

There’s also an easy 0.5-mile roundtrip walk down to the falls if you’d like to get closer.

For a convenient starting point on your second day, we recommend camping at Madison Campground or Norris Campground.

If camping isn’t in the books for this Yellowstone road trip, there are cabins and hotel accommodations in the Canyon Village area near the Grand Canyon of the Yellowstone. Get a good sleep to tackle the next day of this Yellowstone itinerary!

Day 2 of Your Yellowstone Itinerary

Yellowstone River meandering through grassy plains surrounded by trees on a partly cloudy day.

There’s still so much to see, and an early start gives you a better chance for some exciting wildlife sightings!

Today, we are going to visit the best of the Upper Loop.

We’ll start at the Norris Geyser Basin Area and head North towards Mammoth Hot Springs to take the loop clockwise.

Obsidian Cliff

This National Historic Landmark is a neat way to start the day!

The obsidian from these cliffs was first collected by hunters and gatherers over 11,000 years ago and has been traced across the country along historic trade routes. Obsidian was once used to make arrow and spear heads!

Sheepeater Cliff
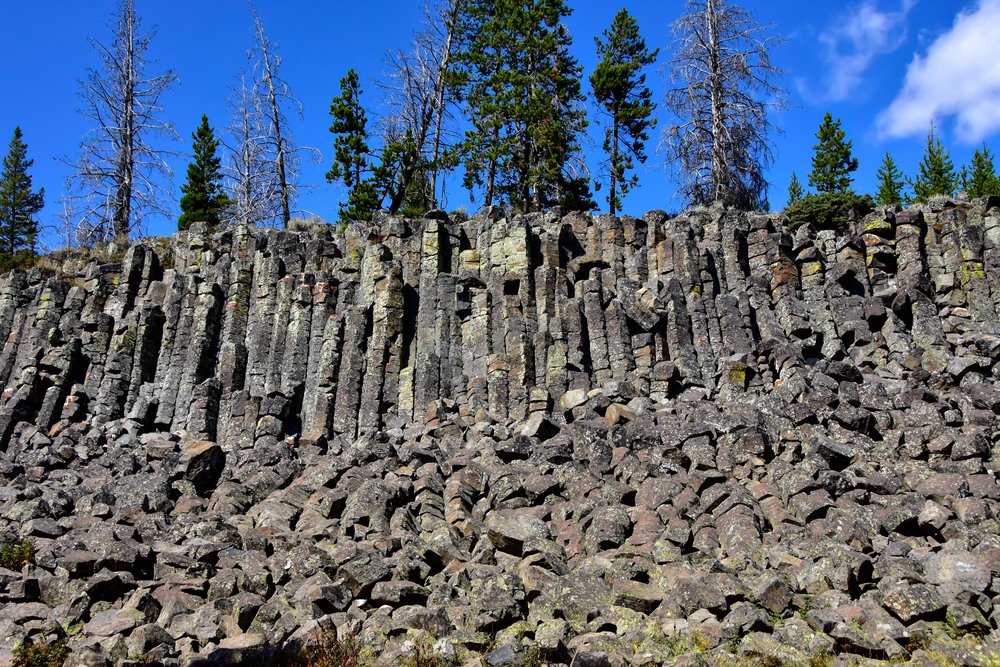
Gray basalt columns with lots of smaller, broken apart rocks at the base, on a sunny blue sky day with a patch of clouds.

Here’s another interesting geological site that’s worth the stop.

If you’re ready to give your legs a morning stretch, take the fishing trail out of the picnic area. Follow the trail about for about 0.5 miles to get awesome views of the Gardner River and a small falls.

How’s that for a morning stretch?

Mammoth Hot Springs
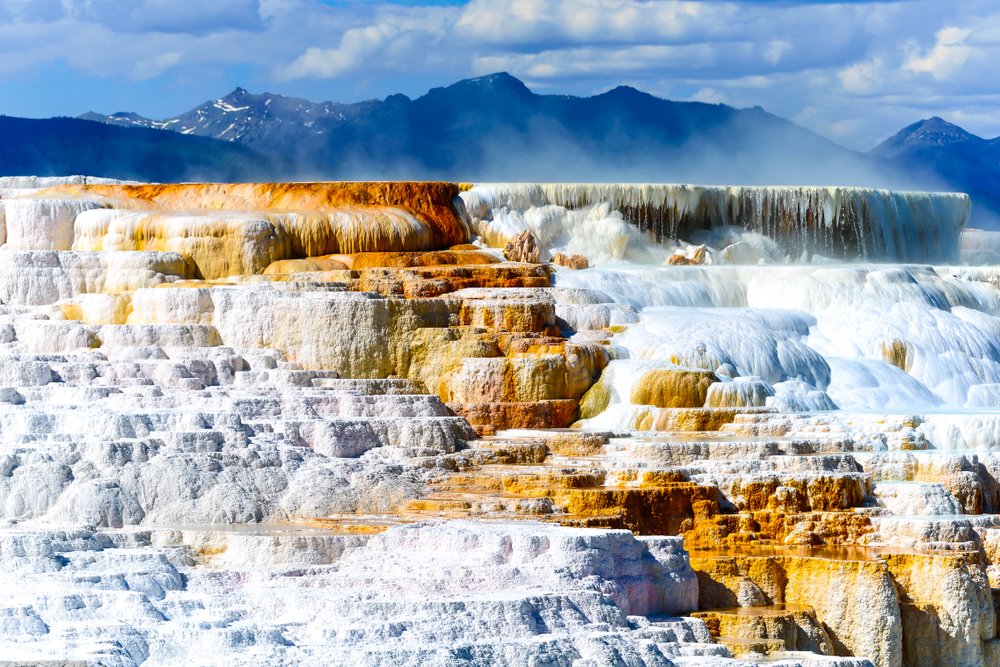
White and rust-colored calcium deposits form a travertine staircase of a hot spring at Mammoth Hot Springs, a must on your 2 days in Yellowstone.

Park in the Lower Terrace Parking Area and hop onto the intricate boardwalk paths that weave around the many hot springs. 

It’s easy to spend over an hour exploring these intriguing thermal features formed by travertine deposits over the millennia!

This is also a popular area to spot elk! 

Look in the grass below the terraces and around the cone-shaped Liberty Cap, which is one of the area’s most prominent feature standing at 37 ft tall.

Optional: Boiling River

A 7-minute drive from Mammoth Hot Springs, the Boiling River is one of the few hot springs in Yellowstone that you can actually swim in!

There is a designated soaking and swimming area where a hot spring mixes and mingles with the Gardner River, creating a bath-like temperature where you can soak and enjoy the geothermal features of Yellowstone for yourself!

At the time of the last update (6/2/2021), this hot spring is still closed due to the pandemic, but check the NPS website for updates to see if that’s changed!

Blacktail Plateau Drive
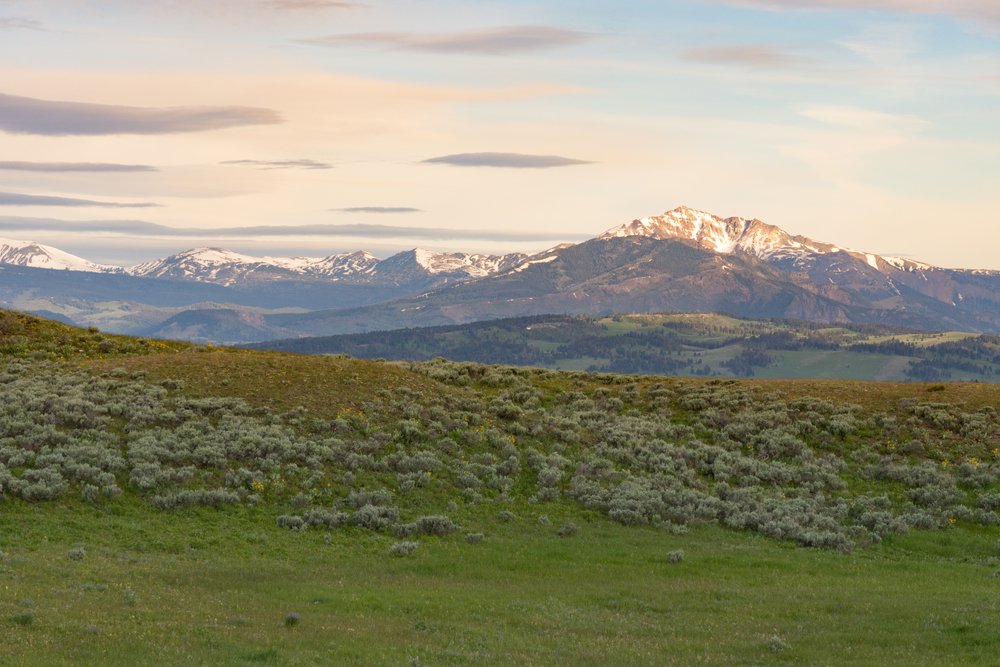
Late afternoon light falls onto the landscape on Blacktail Plateau, illuminating a distant mountain and a grassy plain.

After you’ve taken a thorough tour of the Mammoth Hot Springs, head west to continue on the Upper Loop.

This section is famous for wildlife viewings, so keep your eyes peeled. It’s never a bad idea to take the scenic route! Right? Turn onto the Blacktail Plateau Drive and get off the main road for 6 miles.

Petrified Tree
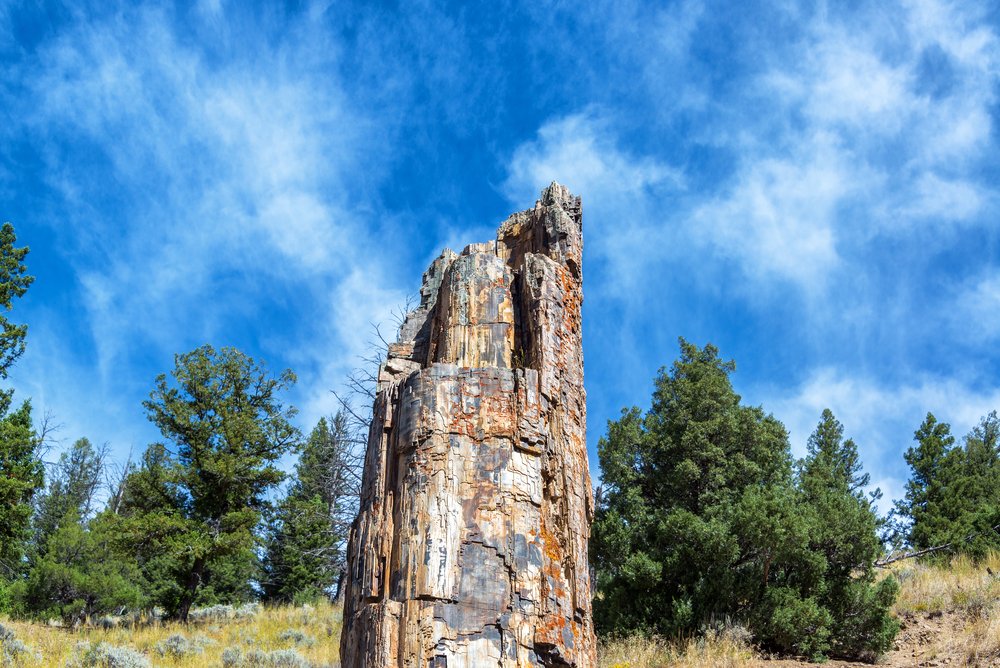
The trunk of a tree which has been petrified, surrounded by trees and blue sky.

Almost immediately after rejoining the main road, the turnoff for the Petrified Tree will be on the right, part of the Tower-Roosevelt area of the park.

Is it a tree or a rock? Worth the very short walk up the trail to get a closer look!

Tower Falls Optional Detour
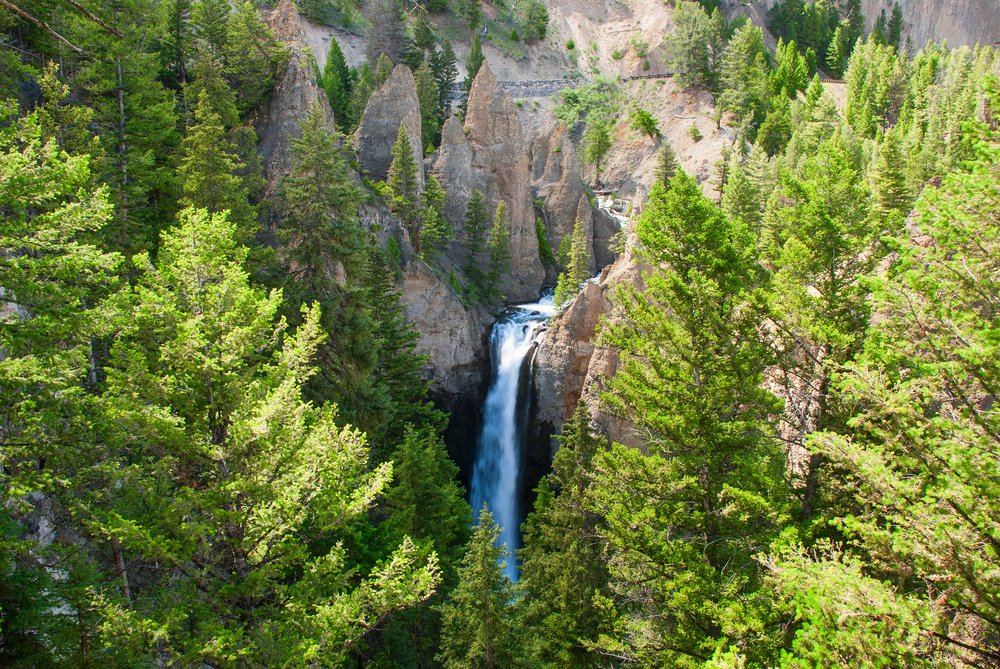
View of Tower Falls from above, a waterfall plunging into a pool below it, surrounded by rock formations and evergreen trees.

If you’re interested in checking out the 132-foot drop of Tower Falls, it’s only a short detour south at Tower Junction. The rock pinnacles framing the massive falls truly make it a sight to see. The trail to the viewpoint is less than one mile round-trip.

After the falls you will head back to the intersection and turn towards Lamar Valley… Have your binoculars in hand!

Insider tip: The Yellowstone River Picnic Area in the Lamar Valley is a great spot to stop for lunch with a side of wildlife spotting. It even comes equipped with a quiet scenic trail down to the Yellowstone River, where you might get a chance to see bald eagles.

Lamar Valley
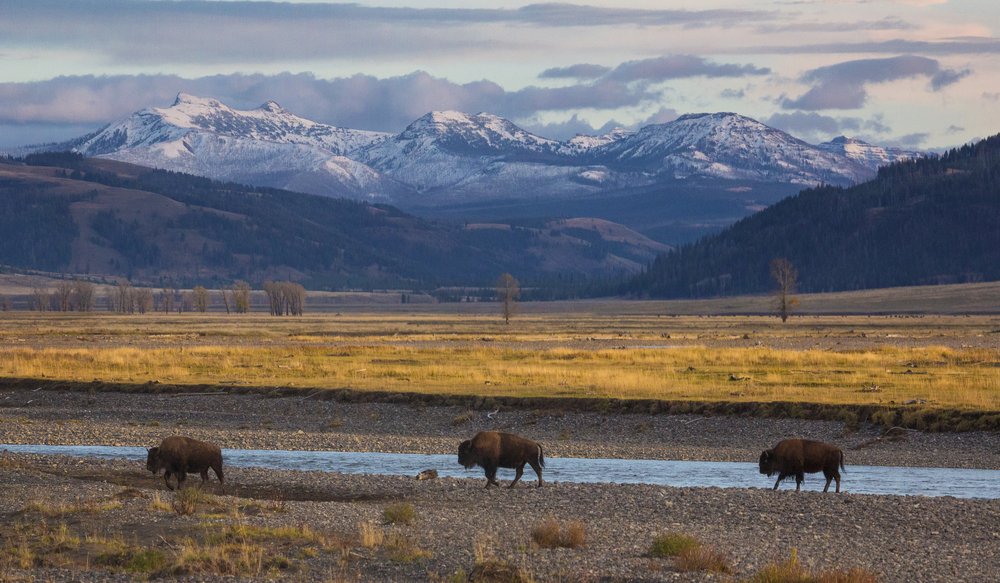
Three bison walking next to a small river, with yellow grass and several mountain peaks behind them.

Lamar Valley is a wildlife lover’s dream. Take your time driving through this section and use pullouts frequently to scan the hillsides with your binoculars or scope.

Bison and antelope sightings are almost a guarantee, but you’ll have to be very observant to spot the resident bear and wolf packs.

For a short hike following your wildlife safari, check out Trout Lake. The trailhead is a small signed pullout on the main road. This lollipop loop trail is only 0.6 miles, and offers beautiful mountain views!

Beartooth Highway
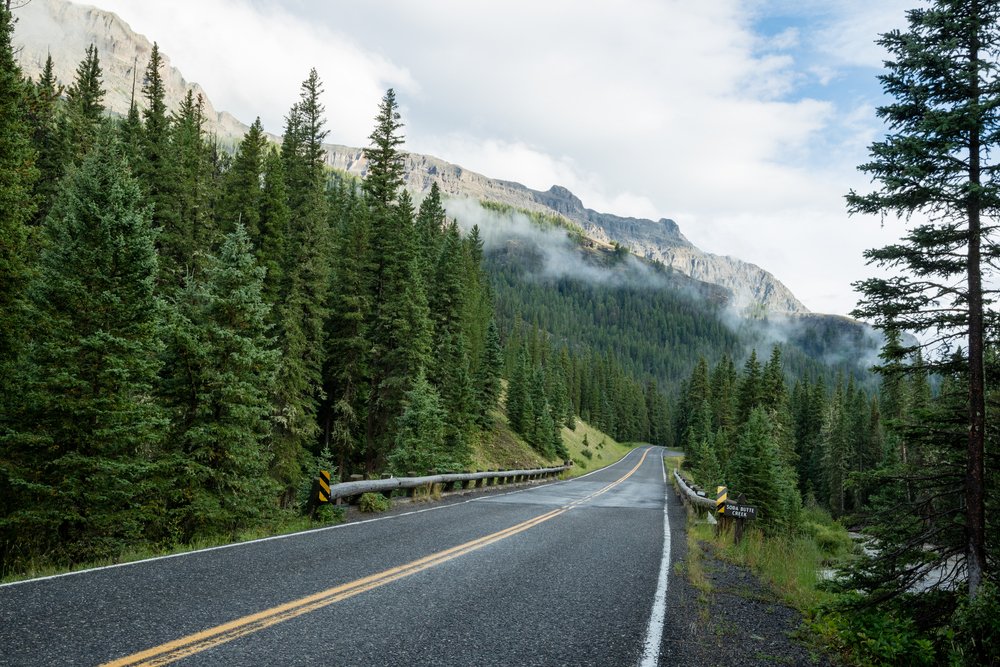
A view of a highway going through some pine trees with a slight bit of fog on some of the distant trees.

Note: As of the April 23, 2022 update, the NPS website states “The Beartooth Highway (US-212) between the Long Lake barricade, near the Top of the World store, and the Montana/Wyoming state line is closed for the season.” Road closures change frequently, so do check back!

As you approach Cooke City after your hike, prepare to say goodbye to Yellowstone National Park as you exit via the scenic Beartooth Highway via the Northeast Entrance to head towards the fun mountain town of Red Lodge!

This is where we leave you to discover your next adventure — hopefully you enjoyed this Yellowstone itinerary!

If You Have More Than 2 Days in Yellowstone…
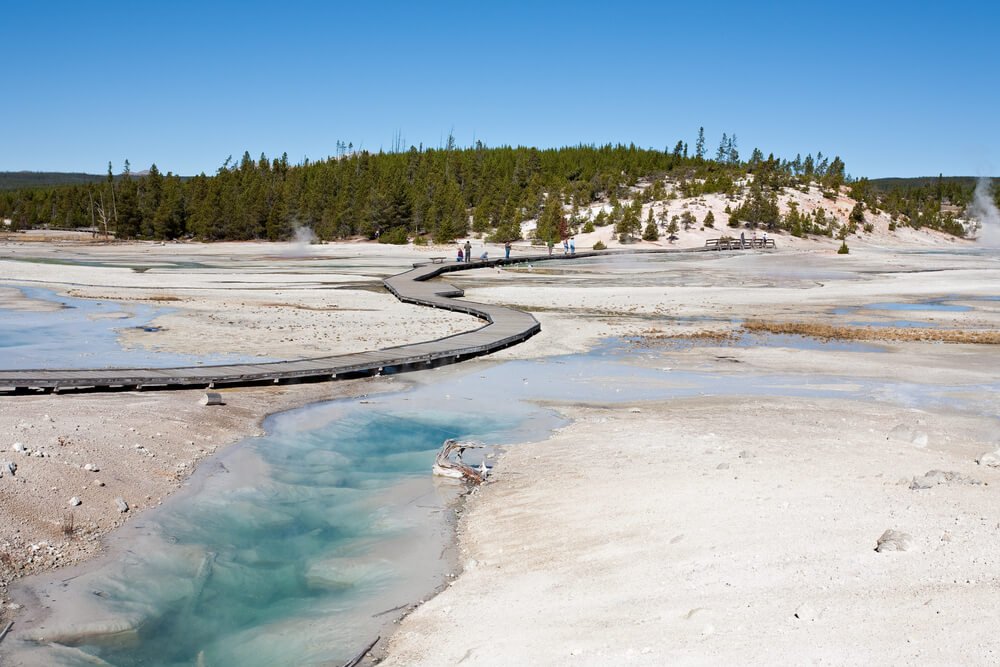
Turquoise and white geyser and geothermal area with a boardwalk trail and pine trees in the distance on a hill

I’d suggest getting off the beaten path (no, not literally — stay on those boardwalks, for your sake and the park’s!) and checking out some of the more sedate areas of the park.

One such area is Porcelain Basin, part of the Norris Geyser Basin area on the West side of the park. There are two loops which will have you see all of the Porcelain Basin area, and the total walking distance for tackling both of the loops is only 1.1 miles. 

Tired of all the driving and want to stretch your legs? Take a hike up Bunsen Peak, a 4.6-mile roundtrip hike that is moderate in difficulty but outstanding in views.

Enjoy views of Mammoth Hot Springs, the Yellowstone River, and other stunning sites from a bird’s eye view on this lesser-visited hike.

Another great hike is up Mount Washburn starting from Dunraven Pass, but this is for more serious hikers, as it’s about 7 miles with 1,200 feet of elevation gain while already at a certain altitude within the park!

What to Pack for 2 Days in Yellowstone

Allison in yellowstone national park

I have a full guide to what to pack for a road trip here, but here are the quick packing essentials for a 2-day itinerary for Yellowstone.

Travel Guides: While I’ve given you as much information as I can in this info-packed Yellowstone itinerary, there’s no denying that a dedicated travel guide does it better as they just have so much more time to dedicate to research! Combine our firsthand experience with a travel guide like this Moon Yellowstone & Grand Teton guide for a more epic adventure.

Binoculars: You’ll absolutely want a pair of good binoculars handy for all the wildlife spotting you’ll be doing! For an affordable option, I recommend these. If you want to take your wildlife-watching up a notch, I suggest these higher-quality binoculars.

Bear Bell for hiking: Clip this bear bell onto your belt/hiking pants/bag/etc. and you’ll be making a slight noise while you hike — keeping you safe from grizzlies! I also recommend bear spray if doing any hiking off the boardwalks.

Layered Clothing: Even if you are visiting Yellowstone in summer, due to the high elevation, it can get chilly at night so plan accordingly!

You’ll want at least 2 shirts (synthetic or wool, long and/or short sleeve depending on the season), 2 pairs of leggings or pants, 2 pairs shorts, 1 fleece outer layer, a waterproof jacket, beanie, gloves, and 3 pairs of socks.
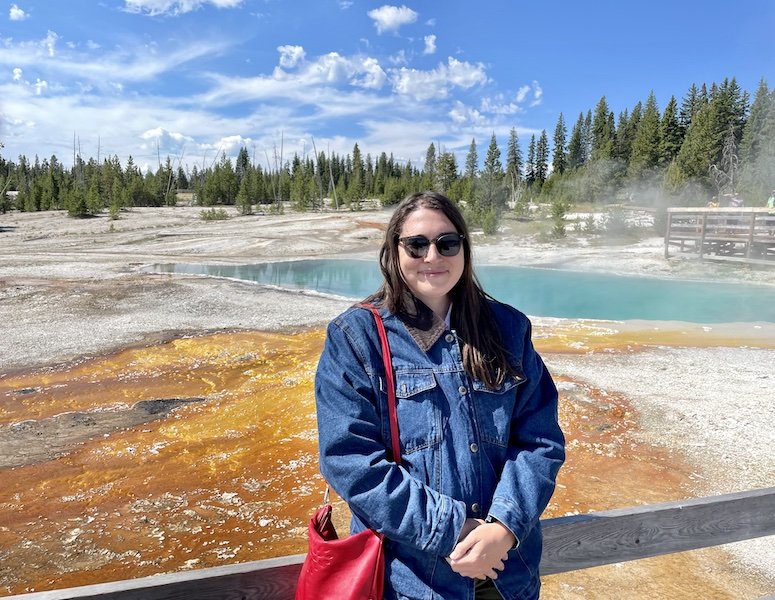
Allison at the geyers of yellowstone
I was very grateful to have a warm outer layer, even in summer!

Comfortable Footwear: You can go with sneakers or hiking boots (I love my Ahnu Sugarpine boots for women, and for men, I suggest theKEEN Durand boot.) However, if you pick sneakers, make sure they have good traction and are comfortable enough for 2-3 mile hikes.

Sunscreen: At 8,000 feet elevation, it’s so much easier to get sunburned even on a cloudy day (I learned this the hard way in Quito, Ecuador!). Bring and wear sunscreen every day of your trip, and be sure to reapply it every couple of hours. I like this chemical-free organic sunscreen.

Sunhat: I recommend a packable hat like this one which has a strap. It won’t blow off in gusts of wind (Yellowstone can get windy — it’s that high elevation!) and you can easily wear it on your back when you don’t feel like wearing it on your head.

Day pack: A compact day pack is helpful to have when in Yellowstone so you can easily put everything you need accessible and handy. I like this inexpensive and lightweight Osprey day pack.

Snacks: None of these Yellowstone hikes are particularly intense, but you should have some snacks just in case you get hungry and don’t want to waste time on your Yellowstone itinerary sitting down for a long lunch. Pack or pick up a picnic lunch or have plenty of snacks for the day. I recommend protein bars (I love CLIF bars), nuts, or other high-density snacks that give you a lot of energy for their weight.

Camera: I use and love my Sony A6000! It’s mirrorless, so it’s lightweight and perfect for a high-quality camera that won’t weigh your pack down. I suggest bringing a zoom lens for wildlife and a wide-angle lens for landscapes.

First aid kit: Don’t let things like blisters or scrapes ruin your Yellowstone trip! I recommend tossing a first aid kit like this HART Weekend First Aid kit in your day bag. It’s lightweight, but if you ever need it, you’ll be so glad to have it.

Headlamp (and extra batteries): If you want to do any sunrise or sunset hiking, I recommend bringing a headlamp like this Petzl headlamp.

Water filter bottle: While there are water fountains around Yellowstone, I still suggest having a water bottle with a filter so you can fill up anywhere there’s a water source!

There are a wide variety of water filtration systems and treatments, but I love the GRAYL Geopress, which allows you to filter water from any source — perfect for filling up on a hike if you see water. It’s compact and easy to use and filters out 99.99% of microplastics, viruses, bacteria, and particles.
How to Spend One Day in Milan: From Someone Who Lived There!

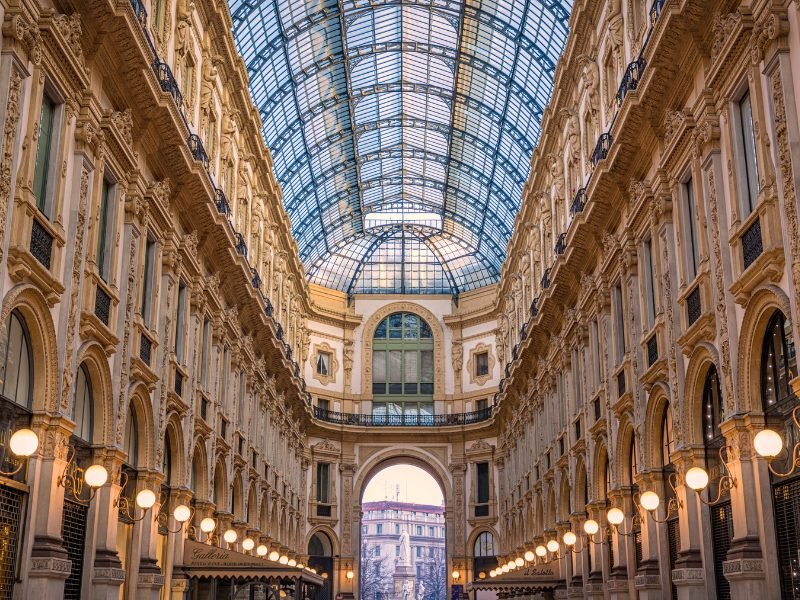
View of the arcade in Milan with lanterns and a glass roof

As Northern Italy’s largest and most important city, the lively metropolis Milan is a fantastic place to spend a weekend (or more!).

However, there may be some valid reasons you only have a day in Milan.

If your Italian itinerary is already looking a bit full, and you’re going to be busy visiting classic destinations such as Rome, Florence, and Venice, Milan may be one of the places that needs to get the cut.

Planning your trip to Milan at the last minute?

Here are my quick picks on what to do & where to stay!

 Top Milan Experiences:
1. Milan Duomo Cathedral & Terraces (skip the line entry)
2. The Last Supper Tour (must pre-book your time slot!)
3. Milan Aperitivo + Food Tour (best evening activity!)

🏨 Best Hotels:
1. The Carlton (luxury hotel with Grand Canal views)
2. San Marco Boutique Apartments (hip studios in lively Brera neighborhood)
3. La Casa Colorata (lovely apartment-style rooms with two saunas for guests!)

✈️ Flying in? Book an airport transfer with Welcome Pickups — they’ll greet you at the airport, help with bags, & bring you into the city, all pre-booked!
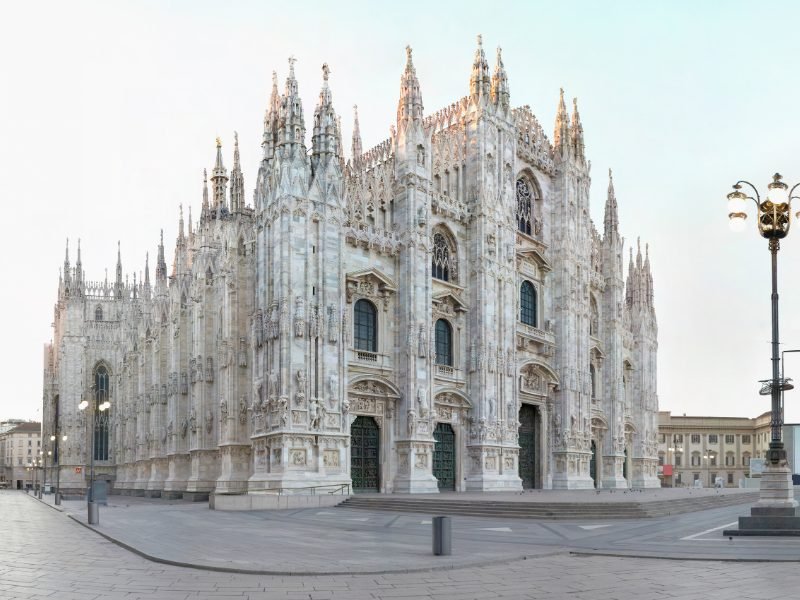
the facade of the milan duomo during the day time without too much of a crowd in front of it

Or maybe Milan is just your first gateway to a tour of Northern Italy, one that includes iconic destinations like Lake Como, Lake Garda, Verona, or the Dolomites.

Wherever your Italy endpoint, Milan is often a place where international flights land, so it’s hard to avoid.

Plus, it’s also home to some of Italy’s most iconic cultural sites, like the Duomo di Milano and the Last Supper, so a visit to Milan — even for just a day! — is absolutely worth it.

Take it from me: I spent nearly a decade living in Milan and even though I no longer call the city home, I visit it frequently on my return trips to Italy.

This one day in Milan itinerary will give you an overview of the key Milan landmarks that you don’t want to skip, as well as some tips for getting to and around the city.

Enjoy!

How to Get to Milan

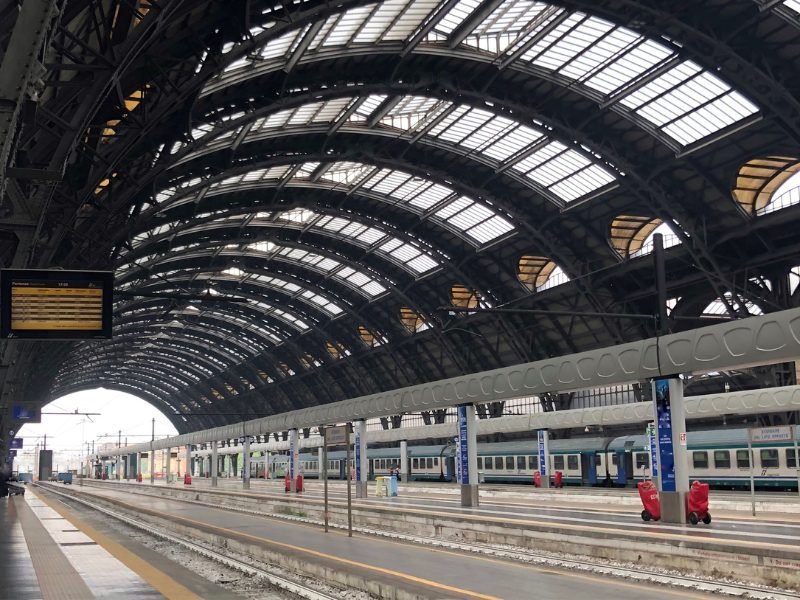
the milan train station with a beautiful open-style roof with iron work

Milan is Italy’s most important economic and financial center, as well as a super-developed industrial city in the northern Lombardy region.

For many people, Milan is their first stop in Italy, as the city has two large international airports, Milano Malpensa and Milano Linate. There’s also the nearby Bergamo airport which functions as a budget airline hub.

Milan is also home to an important train hub, Milano Centrale, which not only connects Milan to the rest of Italy, but also to other major European cities in the area.

If you’re flying into Milan with a lot of luggage or you just don’t want to deal with the stress of figuring out a new country’s public transit, you can pre-book a transfer into the city center through Welcome Pickups.

Pre-arranging transit with Welcome Pickups is one of my favorite travel hacks: when you arrive, an English-speaking driver already be at the airport awaiting your arrival (monitoring for any flight delays) and able to help with your baggage, all at the same flat rate as getting a taxi from the airport, all pre-paid and settled.

Moving Around in Milan

woman holding luggage on a street wearing a white shirt and jeans

The city has a very efficient urban transport system that includes metros, buses, trams, and local trains.

All of this public transit is perfect for travelers, since it all makes it incredibly easy to move around in town to explore different neighborhoods!

There are daily, weekly, and monthly passes available in the most important train and metro stations — of course, if you’re only visiting Milan for a day, you’ll only need a daily pass.

Helpful Tip: You can also download the official app to purchase tickets from your phone and have a useful city map in your pocket at all times.

Best Time to Visit Milan

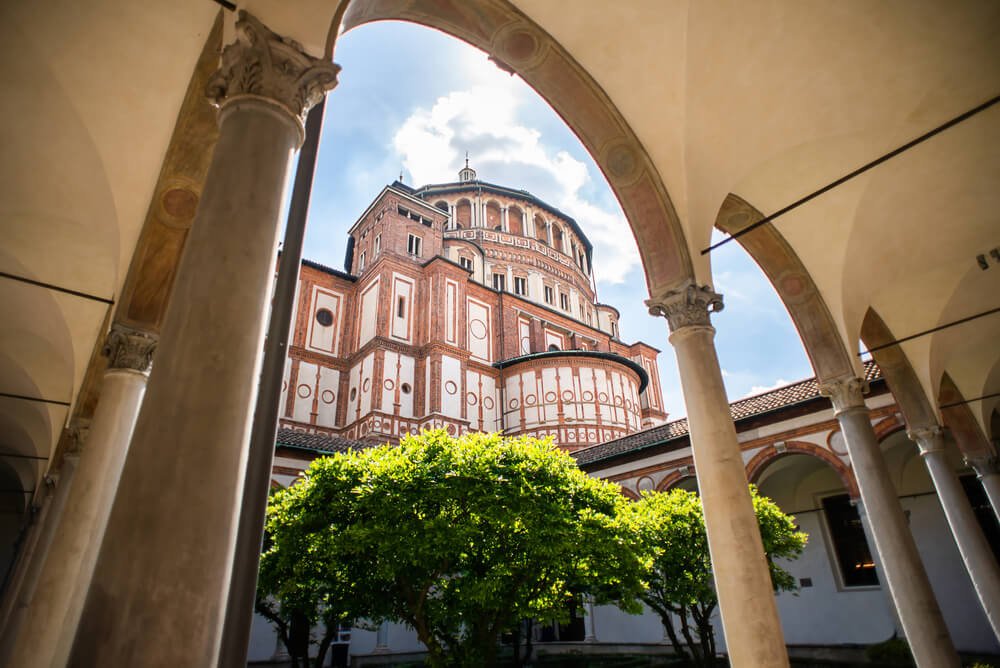
view of one of the most famous buildings in milan, a church that houses in the last supper, seen through archways of a courtyard on a sunny day

Even though Milan is not as popular among tourists as Venice, Rome, Naples, or Florence, the city still attracts tourists year-round.

Although winters can be a bit fierce in the northern areas of the country, Milan in winter doesn’t actually have as much snow as you might expect, so winters can be a great time to beat the crowds and find cheaper accommodation.

What you do have to expect in Milan is rain. It’s one of Italy’s rainiest destinations in any season!

Keep this in mind when packing, and remember to toss a high-quality raincoat in your luggage, like this Marmot PreCip or this cute yellow rain jacket (trust me, you’ll be glad you did!).

Summers in Milan are shorter than in the rest of the country, but they can still be quite hot and humid.

If you plan to visit in the summer do some online research before deciding what attractions to visit.

Many exhibitions and museums close for a few weeks or operate with reduced hours in August.

The hard-working Milanese take their summer break (the two central weeks of August) very seriously.

This means it’s the perfect chance to walk around and enjoy the virtually empty streets and free places to sit in the metro and buses.

However, this does also mean that many shops will be closed, so if you’re dying to visit Milan for a chance to go shopping, then spring and fall might be your best bet.

Know Before You Go…

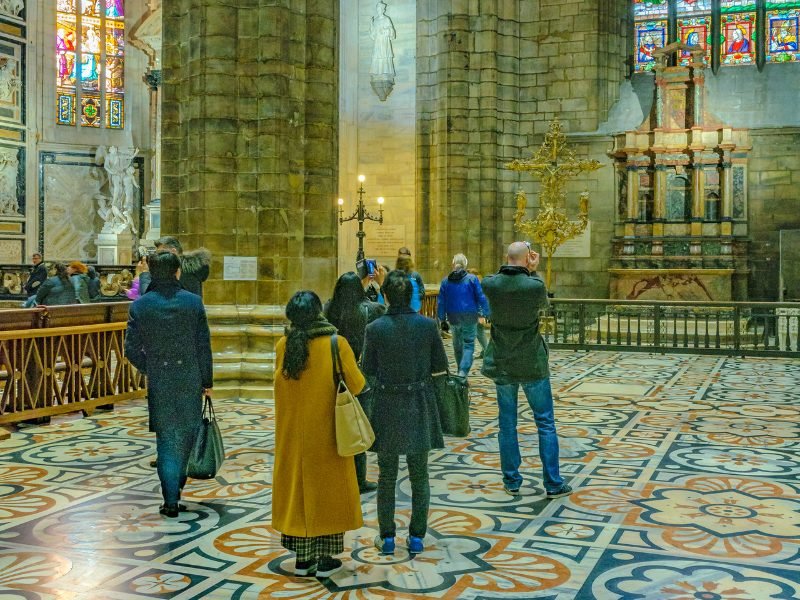
people inside the milan duomo visiting the city's most famous church and landmark, wearing appropriate covered up clothing

Despite not being Italy’s most touristed city, Milan is still rather popular. After all, it’s home to impressive art galleries, significant museums, and one of the most magnificent churches in Italy.

While all of that means you’re in for a great day in Milan, there will be long lines at the most important attractions, no matter the time of the year (yes, even winter).

The best suggestion I can give you is to plan your one day Milan itinerary in advance — that way, you can buy your entrance tickets to the key sights at least a few weeks before the trip and avoid the long lines.

Some landmarks, like time slots to view the the Last Supper, do sell out — so you’ll want to make sure you book anything important ASAP (luckily, buying online means you can take advantage of free cancellation if needed).

Also, if you are planning to stay the night in Milan, book your hotel in Milan in advance (and here’s our guide on where to stay — I suggest the Duomo area for quick visits to the city!)

How to Spend One Day in Milan

Start your day at the Duomo di Milano.

beautiful view of the milan duomo from the side a key european landmark

Beyond any shadow of a doubt, the right place to begin your one day in Milan tour is in the heart of the city center.

We’re talking, of course, about the city’s unique white marble cathedral, Milan’s Duomo, as well as the impressive Duomo Square (Piazza del Duomo) that surrounds it.

One of Italy’s most remarkable religious buildings as well as one of the largest churches in the world, the magnificent Cathedral of Milan is a breathtaking example of Gothic style.

The building was conceived from the inspiring ideas, dreams, and nightmares of Gian Galeazzo Visconti, a former Duke of Milan.

Although it was begun back in 1386, the construction of the Duomo took over six centuries to be completed — and the result is why the Duomo is so unique to behold.

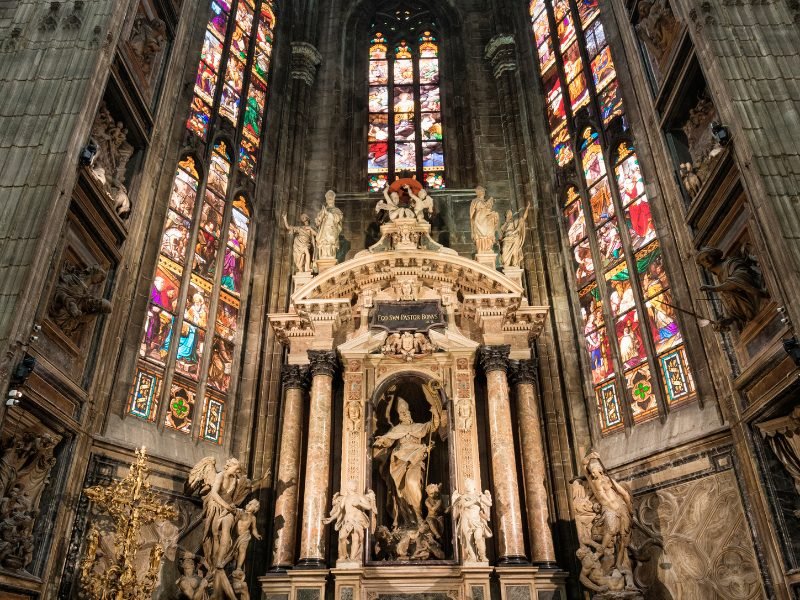
stained glass and sculpture at the very front and center of the church, extremely colorful and detailed

This lengthy construction period led to the building also featuring unique examples of other architectural styles that came after the Gothic period, including expressions of Baroque (as you’ll see in the Crypt), as well as Renaissance styles

The Duomo is the most popular attraction in the city and pretty much every visitor wants to at least check out the impressive stained glass windows from inside the church.

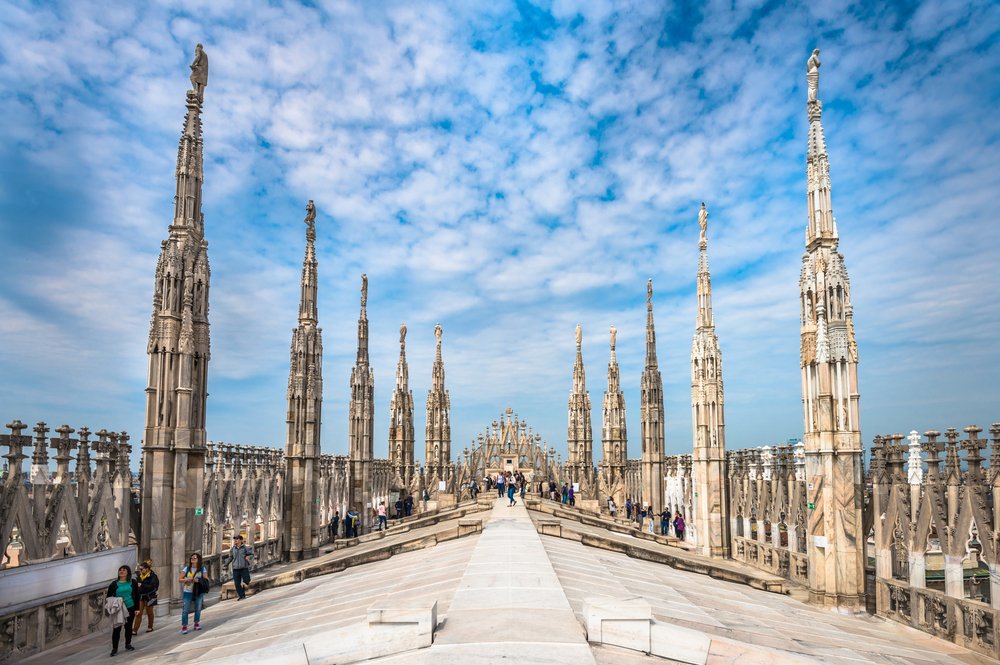
Best of all, you can even walk on its white roofs to experience a different perspective and view of the city center and Milan’s skyline.

The terraces of the milan duomo with brilliant blue sky with some patchy clouds

You can do so by booking a Cathedral and Rooftop Terraces guided tour like this one if you want some historical context given to you while you visit the sight.

If you prefer to DIY, you can access the building (and its terraces, which shouldn’t be skipped!) with a skip-the-line ticket without the tour to save some money.

Book a Guided TourBook Skip-the-Line Entry

Wander through the stunning Galleria Vittorio Emanuele II.

View of the arcade in Milan with lanterns and a glass roof

Opposite Piazza del Duomo, head to another famous place you’ll absolutely want to visit during your whirlwind day in Milan: the beloved covered arcade Galleria Vittoria Emanuele II.

This passageway’s appeal isn’t just because of its aristocratic flair and refined architectural style, but also because it’s the best way to get to Milan’s famous opera house, Teatro alla Scala, the next stop on this mini Milan itinerary.

Fun Fact: The construction of Galleria Vittorio Emanuele II started back in 1865 and it took twelve years to be completed.

Another Fun Fact: It’s the oldest active covered passage devoted to shopping in the country, housing both important high-end brand boutiques and a few traditional cafés. 

Admire the opulence of Milan’s Teatro alla Scala.

the interior of the la scala theater in milan with gilded boxes and red seats and beautiful lighting

As I’ve just mentioned, at one of the ends of the gallery stands the Duomo and its square.

At the opposite side, you’ll find the small but gorgeous Piazza alla Scala and the Scala Theater, the most important opera house in the country… which is saying something, as this is the country that invented opera!

Usually referred to as La Scala, this temple to opera and ballet in Milan first opened its doors to the public in 1778.

While the theater is also home to one of the most prestigious ballet academies in Europe, it also has its own chorus, the famous Filarmonica Della Scala orchestra.

It’s possible to book tickets for the ballet or the opera to experience a wonderful night at La Scala — check the schedule for the theater here.

The 2023-2024 season begins on December 3, right in time for Milan’s winter!

If you don’t have time for a show, or there are just no shows when you are visiting Milan, you can simply visit the theater and its museum by booking a guided visit that includes a skip-the-line ticket!

For those curious about the stories and myths of this legendary venue, this Italy Hidden Experiences tour reveals tons of historic details and curious secrets about the theater.
Although there’s still a lot to see near the Duomo and La Scala, a day would never be enough to explore the medieval squares and other impressive churches in the area. 

If you’re still in the mood to see the best of Milan in a day or less, your next stop will leave you speechless…

Book Your Guided VisitBook Your Hidden Experiences Tour

Visit the Santa Maria delle Grazie to see the Last Supper.

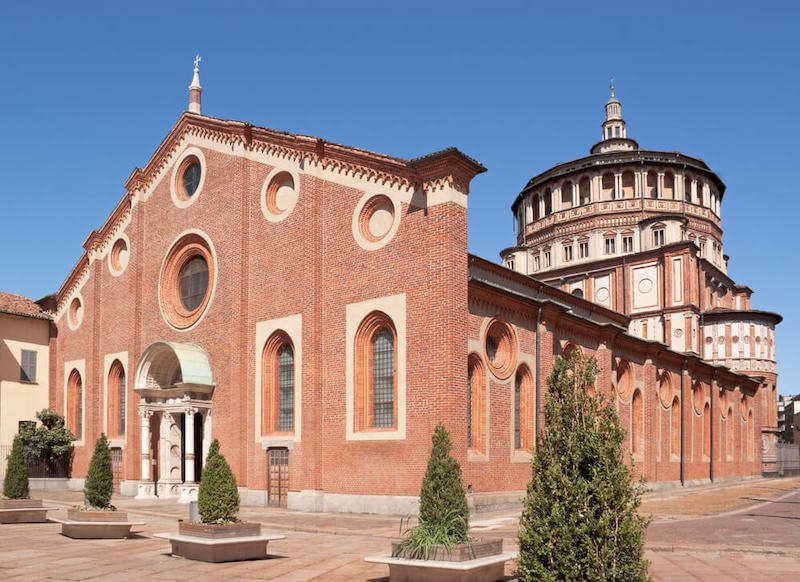
the red brick building of the church which holds the last supper inside iet

In fact, if you can only visit Milan for one day, there’s one more thing that you don’t want to miss in addition to the Duomo, and that is one of the greatest masterpieces of all time, the Last Supper. 

This UNESCO World Heritage site includes both the church Santa Maria Delle Grazie and the famed Last Supper painting by Leonardo Da Vinci. 

The painting is located on a wall of the refectory that was originally part of a large monastic complex, which belonged to the Dominican order.

Considered one of the most important works of art in the city, this Milan landmark attracts hundreds of tourists all year round and at any hour of the day. 

With this popularity in mind, it’s easy to see why booking your entrance ticket in advance and getting to the place at least 30 minutes before the beginning of the tour is crucial for a flawless experience.  

Plan ahead and book an organized visit at least a couple of weeks (better yet, at least a month) before the actual trip! Note that a tour is the only way to visit the famous painting.

the beautiful artwork of the last supper in milan, a famous painting of jesus with his disciples sitting around him

Keep in mind that the guided visit includes a visit to the old refectory where all visitors are allotted a 15-minute time frame to admire the painting. 

The tour also gives you the chance to learn about the incredible history behind the masterpiece as well as the reconstruction works that were necessary inside the building after the bombing of Milan during WWII.

Not far from this church, you can walk to the nearby Basilica of Saint Ambrogio, another important religious building in the city.

The basilica is among the oldest churches in town as well as Milan’s best-preserved example of Lombard Romanesque architecture. 

Fun Fact: Saint Ambrogio is also Milan’s patron saint and is celebrated all over the city with special events in December!

Book your time slot for the Last Supper in advance here!

Step into Sforza Castle and Sempione Park.

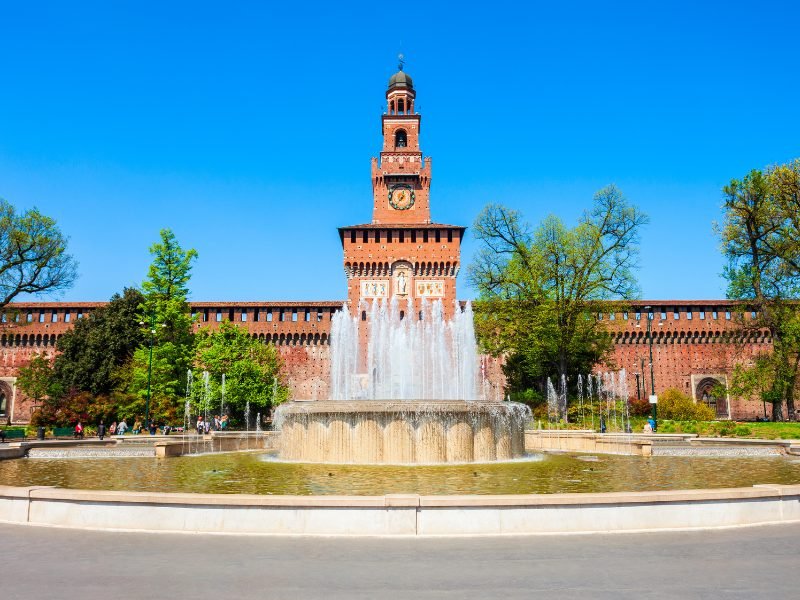
the front of the sforza castle in milan with a fountain

Just steps from Santa Maria delle Grazie Church, one of Milan’s most distinctive locations is the medieval Sforza Castle (also known as Sforzesco Castle), a place you shouldn’t pass up the chance to explore.

There are several interesting museums located in the old rooms and different wings of the fortress, most of them related to the medieval history of Milan, including paintings, musical instruments, and other masterpieces.

Since you’re on a tight schedule and you might not have enough time to visit the Duomo, the Scala Opera House, the Last Supper, and the museums, it might be best to save the museums inside the castle for your next trip to Milan!

For this one, you can simply enter the huge building and wander around the different courtyards and incredible corners that remain open to the public. 

Visit the lovely Sempione Park and its key monuments.

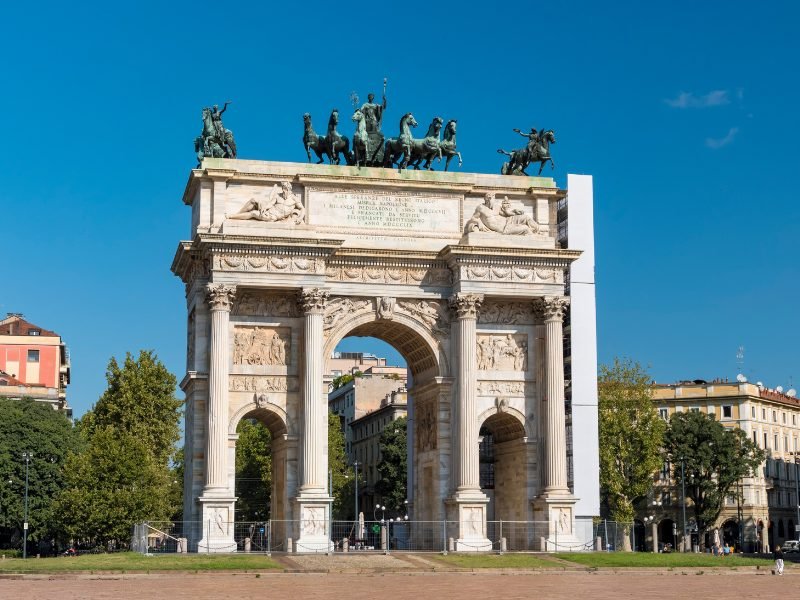
the triumphal arch in milan's sempione park

Once you’ve checked out the different open spaces, ancient arches, and wooden bridges part of the castle, it’s a good idea to walk to the back area of the fortification and explore the immense Sempione Park.

This immense green area is Milan’s most important park, a perfect place for a picnic, a walk in nature, or simply for a restful stop after so many hours walking on the (fairly uncomfortable, though rather photogenic) cobblestone streets of Milan.

In the park, don’t forget to pay a visit to the impressive Arch of Peace (Arco della Pace), a triumphal arch also known as Porta della Pace (or Gate of Peace)

The gate dates back to the nineteenth century in its current form, but it has ancient roots.

The gate you see today was built over an ancient gate located on the former Roman Walls that once surrounded, protected, and granted access to the ancient Roman city of Mediolanum, today Milan.

A curious fact about the arch is that it faces the so-called Strada del Sempione, or Sempione Road.

This route is still in use today and connects Milan to Paris through the Sempione Pass in the Alps, something the many locals don’t even know!

End the day the Milanese way with an aperitivo.

two hands clinking together an aperol spritz for aperitivo time at the end of the day in milan

The Milanese society enjoys spending time and chatting with friends every day after work or during the weekend before going to dinner. 

The way they love to do so is by gathering in any of the many bars and aperitivo spots in the city.

Here, for a fixed price it’s possible to enjoy a drink (which can be wine or a cocktail) and nibble on tasty snacks and finger food. 

This is the typical Milanese aperitivo, a ritual that no local misses when the opportunity comes up!

If you’re not sure where to go for the best aperitivo experience, one great option is to book this aperitivo tour with a variety of local street food to sample along the way, and you won’t be sorry, because it packs in a lot! 

In fact, during this guided experience, you’ll discover the different ways of relishing the aperitivo Milanese and taste different versions of the aperitivo including cocktails made with typical Milanese spirits (like Aperol, Cinzano, Amaro).

On top of all this, you’ll get to sample wines from the northern regions of the country, paired with delicious local Italian cheeses, cold cuts, and other snacks. 

What’s more, at the end of the tour you will be given the chance to try an espresso coffee and a piece of patisserie!

Having an aperitivo in Milan is one of the most traditional rituals that you can experience during your trip.

If you ask me, it’s the best way to transition from the afternoon to the evening, and it’ll certainly be one of the things that makes your one day in Milan utterly unforgettable! 

Book your Milan Aperitivo + Food Tour here!

The Ultimate Lisbon to Algarve Road Trip: 13 Best Stops Along the Way!

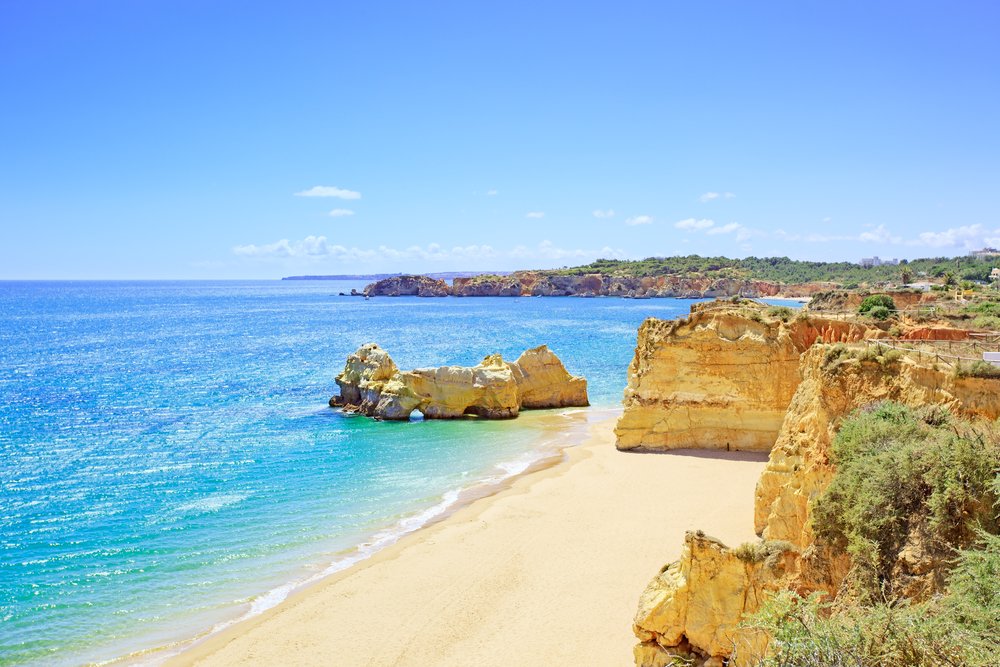
The beach of Praia de Rocha with sandy white beach and cliffs and stunning ocean views

Picture this: warm sandy beaches, striking natural beauty, and gorgeous coastlines as far as the eye can see.

If this sounds like a dream come true, then read on, and learn about one of Europe’s most perfect summer vacation destinations, the Algarve.

The Algarve is the southernmost region of Portugal and the country’s most popular summer destination. 

The region draws thousands of visitors each summer, especially from Northern European countries, and for good reason! I’d want to escape those frigid winters too.

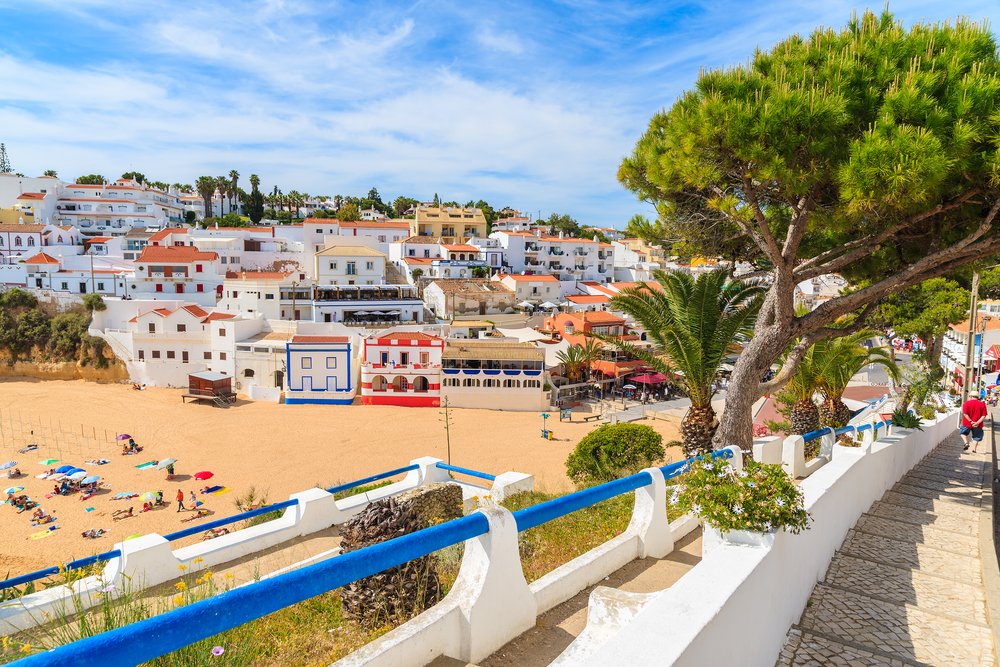
Colorful beach houses with tourists on the beach sands at Algarve, Portugal in the town of Carvoeiro, a popular Algarve destination

The Algarve is blessed with beautiful weather almost year-round, with hot summers and pleasant winters. 

Dramatic coastline, wonderful sandy beaches, unique rock formations, and charming seaside towns make the Algarve a must-see European destination.

I visited the Algarve twice while living in Lisbon, and was absolutely delighted to explore its beautiful towns and stunning beaches. 

aljezur algarve town with beach and beautiful landscape

On these trips, I also explored the lovely Alentejo region between Lisbon and the Algarve, which is just full of hidden gems well worth a quick detour on your way to the Algarve’s sunny shores. 

What better way to explore this lesser-known region of Portugal than a road trip?

This Lisbon to Algarve itinerary will guide you through the highlights between Portugal’s capital and the popular Algarve. 

My Top 3 Algarve Experiences

#1 TOP PICK

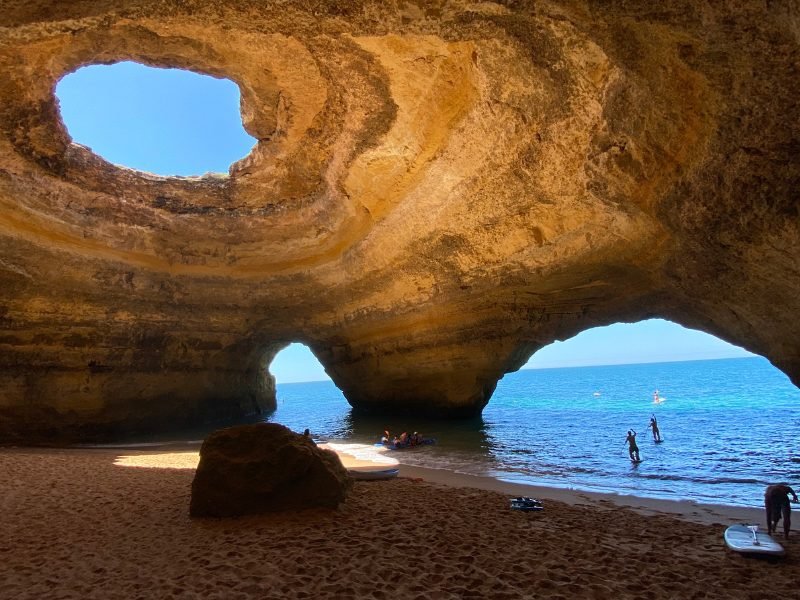
the view of the benagil caves in portugal on the algarve coast with several openings to the sea and sky and some people visiting with kayaks

⭐️⭐️⭐️⭐️⭐️
Benagil Caves Tour from Portimão
✔️ See the epic Benagil Caves by speedboat
✔️ Sunset option for added magic

↳ Book it

#2 PICK

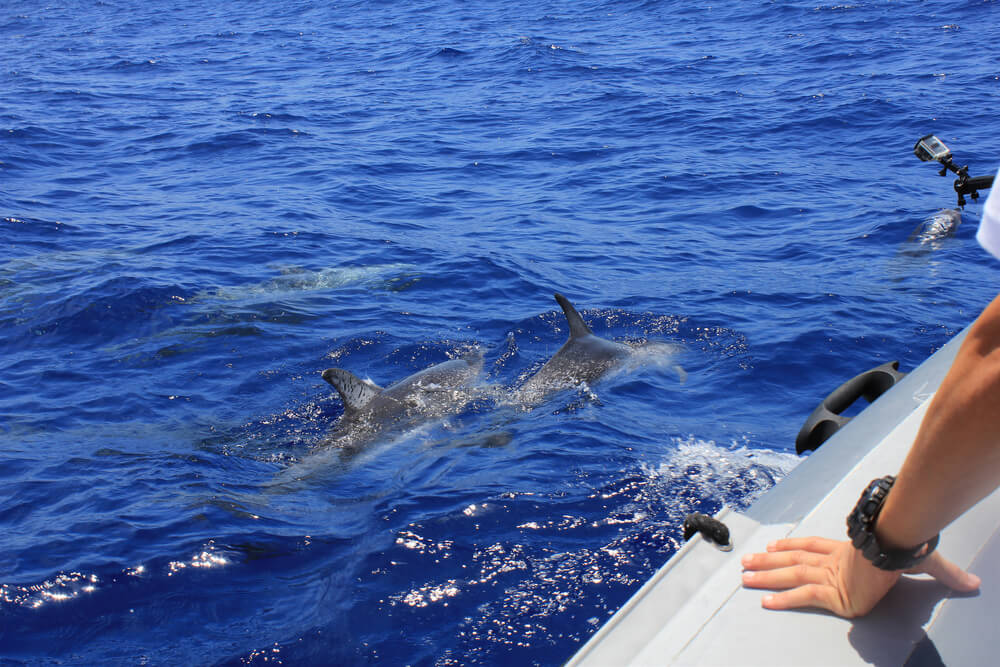
view of dolphins near a boat in madeira

Dolphin Watching Tour from Lagos
✔️ Led by a marine biologist
✔️ 1.5 hour Atlantic Ocean dolphin safari

↳ Book it

#3 PICK

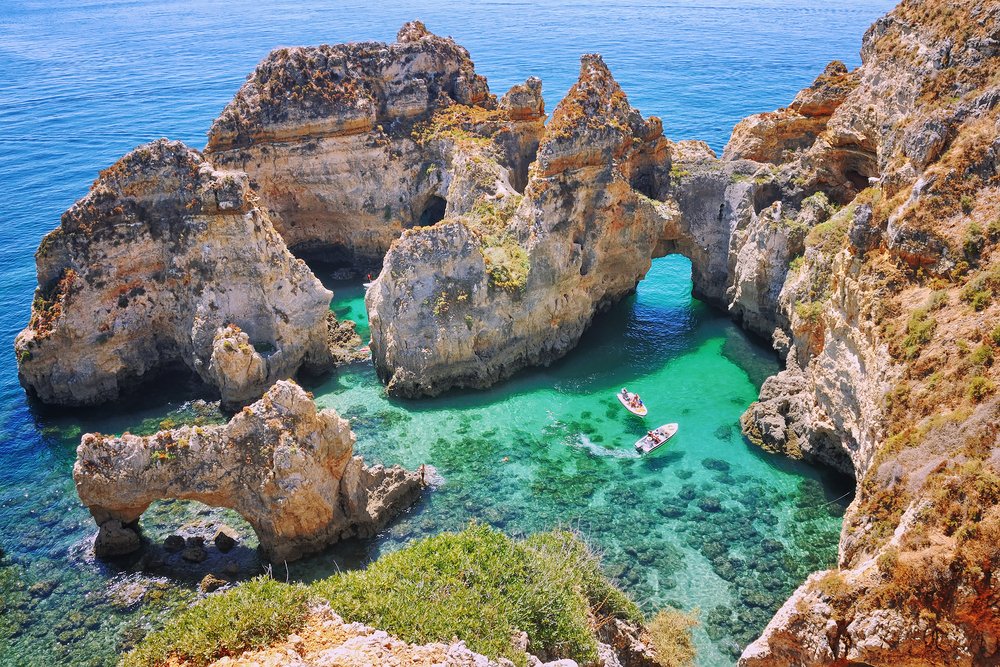
crystalline blue waters of the rock formations around ponta de piedade

Ponta da Piedade Boat Cruise from Lagos
✔️ Small group cruise between arches and cliffs of Ponta da Piedade
✔️ Glide past scenic beaches and hidden coves

↳ Book it

Things to Know Before Doing a Road Trip from Lisbon to the Algarve

Before diving into this itinerary for a road trip from Lisbon to the Algarve, let’s cover some of the basics. 

Driving from Lisbon to the Algarve

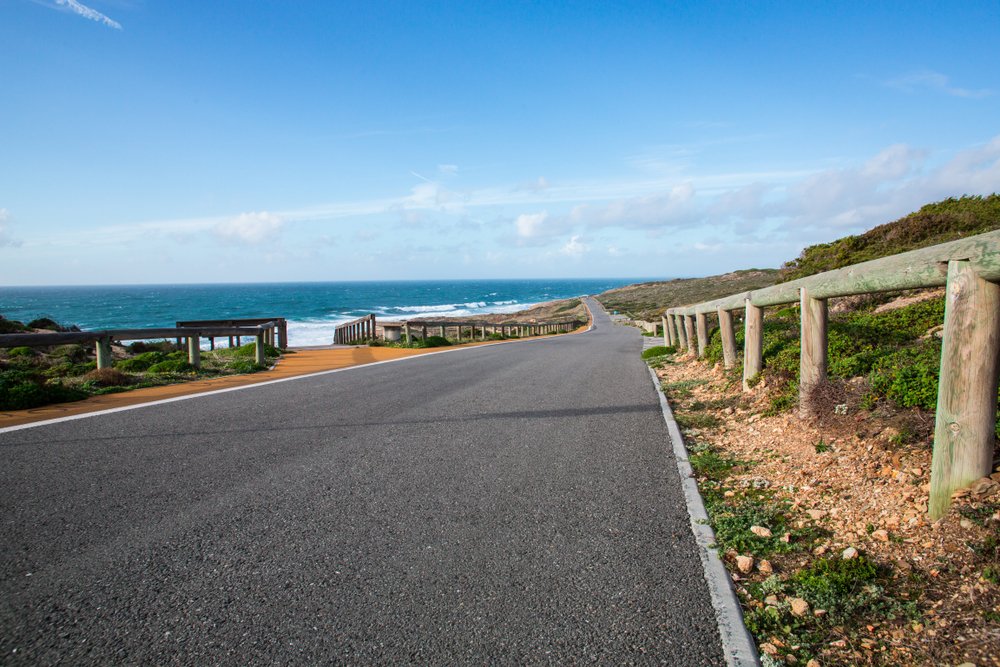
A scenic beach road in the Lisbon to Algarve drive

Let’s start with some good news: the scenic drive from Lisbon to the Algarve couldn’t be easier.

The roads are in good condition, and you can find your way around with the help of Google Maps or any other navigation app.

As an international traveler, you’ll want to ensure you meet the document requirements to drive in Portugal.

US citizens don’t need an international driving permit for Portugal, but citizens of other countries may need this. 

In any case, nearby countries like Spain require the IDP of all foreign drivers, so it might be worth looking into it if you’re looking for adventures beyond Portugal. 

An international driving permit and car keys

The biggest thing to keep in mind when driving in Portugal is the toll roads. 

For the most part, it’s fairly easy to pay tolls as you go. Most toll booths will take cards too, but always carry some cash, just in case!

If you’re looking for an easy way to avoid any toll road issues, go ahead and get a Via Verde transponder in your rental car. 

This system allows you to pass through toll booths without paying anything at the booth. All tolls are automatically collected from your credit or debit card.

Renting a Car in Portugal

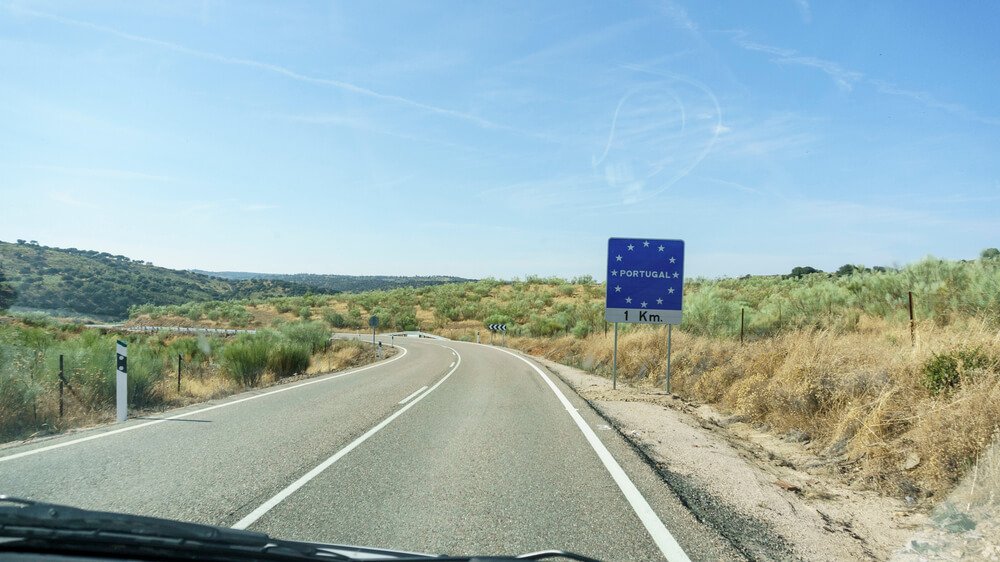
road sign when entering portugal

Tip: I have a full guide to renting a car in Portugal here — but here’s the the quick tips

When looking for a rental car, I always use Discover Cars to search for the best deal for multiple reasons.

I also always search from the airport as my pick-up destination, because the prices are usually the best here… inside the city center, it can be a lot pricier.

It’s also best to plan to return to your original pick-up point via car to avoid hefty one-way fees!

Tip: Make sure you book your car rental with full coverage insurance for peace of mind — it starts at only $7 per day, cheaper than you’d get at a rental agency!

🚗 Best Portugal Rental Car Prices: Discover Cars

This search engine not only looks at the typical rental car agencies (which can be $$$), it also looks at local, small Portuguese rental agencies that may offer better deals. Their pricing is straightforward (no bait-and-switches) and they offer free cancellation if you need it.

➜ Check rental prices in Lisbon with Discover Cars here!

Best Time for a Lisbon to Algarve Road Trip

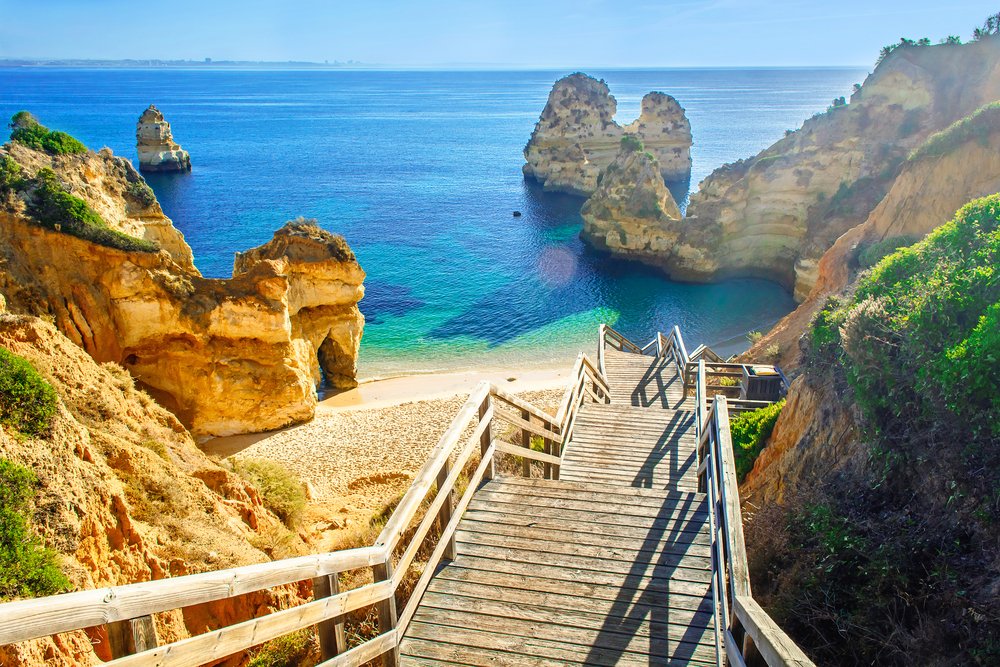
Wooden footbridge to beautiful beach Praia do Camilo near Lagos in algarve region

As you can probably imagine, with its gorgeous beaches and beautiful landscapes, summer is the most popular time for visiting the Algarve. 

From June to September, the whole region can get quite crowded with international visitors, so if you’re looking for a less hectic experience, be sure to plan your trip outside these months. 

With that said, the shoulder seasons are the best options for a road trip from Lisbon to the Algarve, especially mid-March to May, or October. 

You’ll find nice weather to enjoy the beaches of the Algarve, all while avoiding traffic along the way and crowded attractions at your destinations.

You could even do this road trip in winter, but I’ll be honest, it’s not the best time to really appreciate the Algarve. While the weather’s usually pleasant for walking around, you won’t be able to enjoy the beaches, which are the region’s highlights.

How Long Does it Take to Road Trip Lisbon to the Algarve?

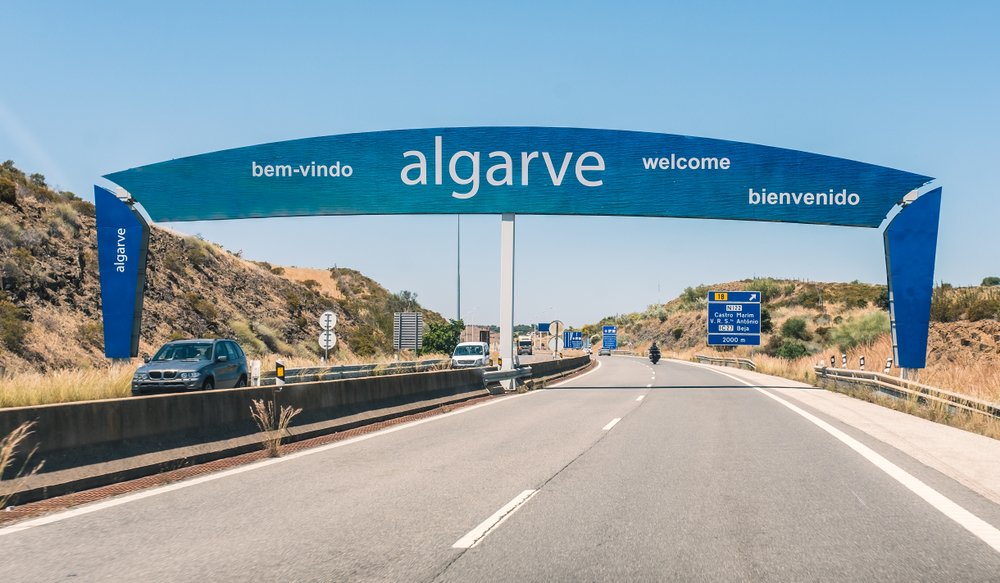
A street sign welcoming you to the Algarve region of Portugal from points north like Lisbon while on a motorway in Portugal

How far is Algarve from Lisbon? The short answer is it depends!

If you take the trip in a straight shot, driving from Lisbon to the Algarve can be a fairly short journey.

Without stops, you can complete the Lisbon to Faro drive in a little under three hours. 

If your goal is the western Algarve, you can get to Lisbon to Faro by car in just around three hours as well.

However, that speed would come at a high cost, as you would be missing many gorgeous places along the way.

For just a couple examples, you’d be missing the Setúbal Peninsula, the city of Évora, and the spectacular coastline of the Alentejo region.

If you can’t pass up a good detour or three, taking two days can be the perfect amount of time to drive from Lisbon to the Algarve, with an overnight stop in Évora and some time to explore Alentejo. 

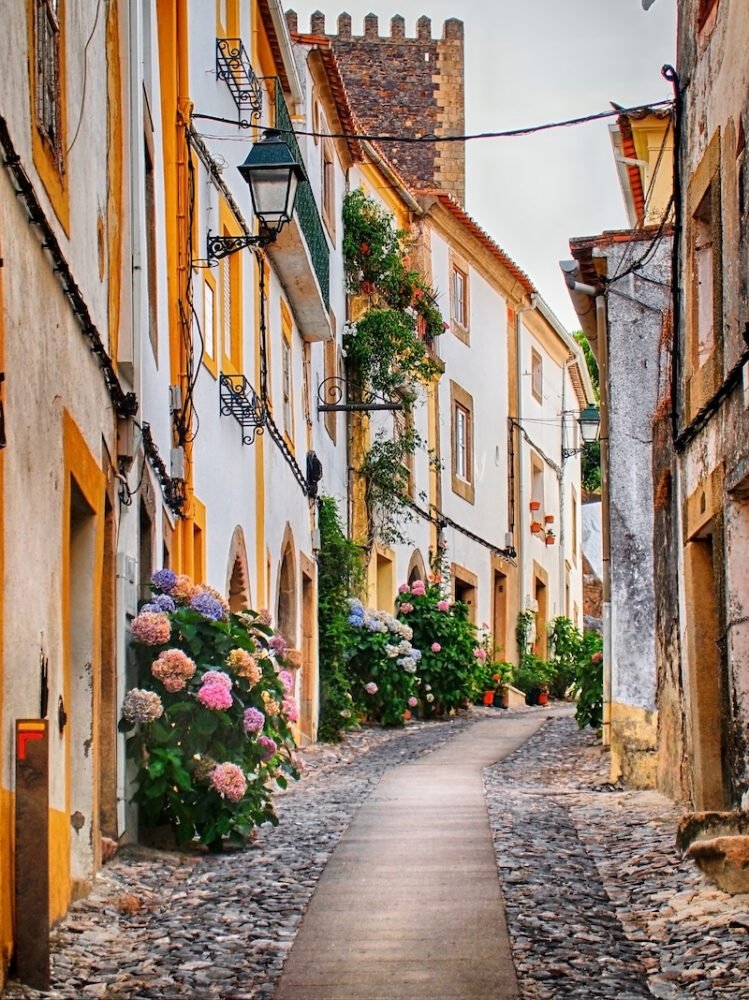
A typical street in Alentejo's villages, Castelo de Vide. Cobblestone path with a straight paved path through it, lots of flower bushes, old houses

Many people tend to drive straight to Lagos, Albufeira, or Faro, skipping the westernmost part of the Algarve… which is one of my favorite parts of the region!

However, this Lisbon to Algarve itinerary includes a third day to see a path less taken, and some of the amazing sights this Algarve route has to offer.

If time’s not an issue and you’re still hungry for more adventures, you could even take longer than three days to road trip Lisbon to the Algarve.

The Alentejo region is home to some of the wildest and most spectacular beaches, so you could plan a few extra stops along the way and really enjoy some luxurious time on their sunny sands!

This itinerary includes the stops you should not miss between Lisbon and the Algarve.

Depending on the season and weather, you may want to skip some beaches, but be sure to stop by Évora, Sines, and Sagres

Day 1: Lisbon to Évora

Drive from Lisbon to Costa da Caparica

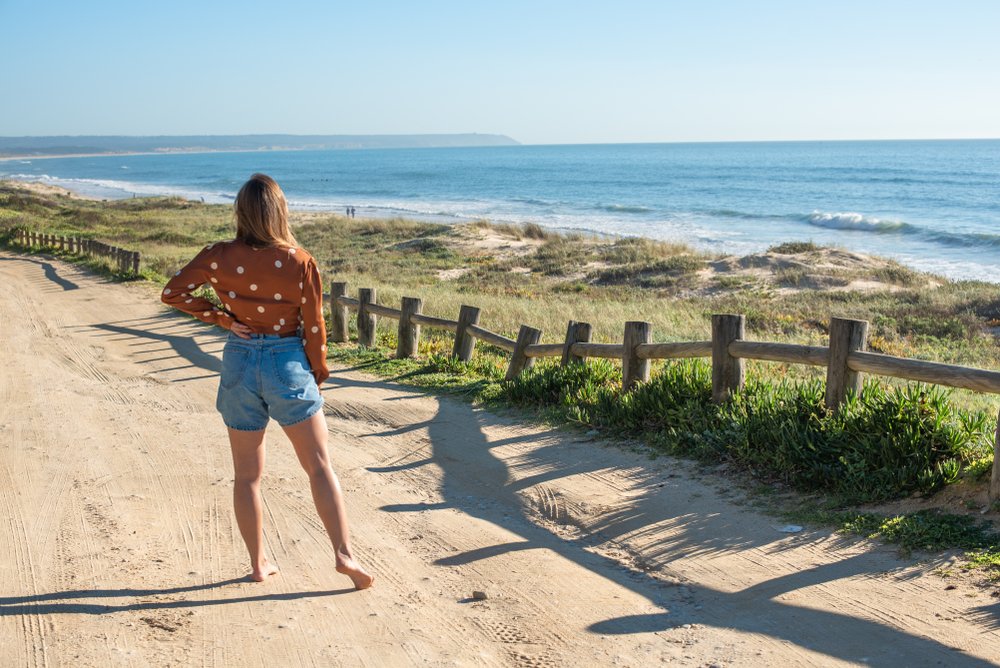
woman standing in front of the beach, with a fence between the trail and the beach, looking out onto the view

Start your Lisbon to Faro road trip off on the right note with a quick drive from Lisbon across the river to Costa da Caparica

The cozy little coastal town boasts a long beach with a lovely promenade. In summer, Costa da Caparica is a popular beach destination.

If you’re traveling during the off-season, it’s still a lovely place to go for a walk along the ocean and have a coffee while admiring the view.

The long sandy beach continues south for roughly 30 kilometers until the estuary of Albufeira Lake.

Have breakfast, spend some time strolling along the beach to stretch your legs, then get ready to drive south to your next destination.  

Drive to Cabo Espichel.

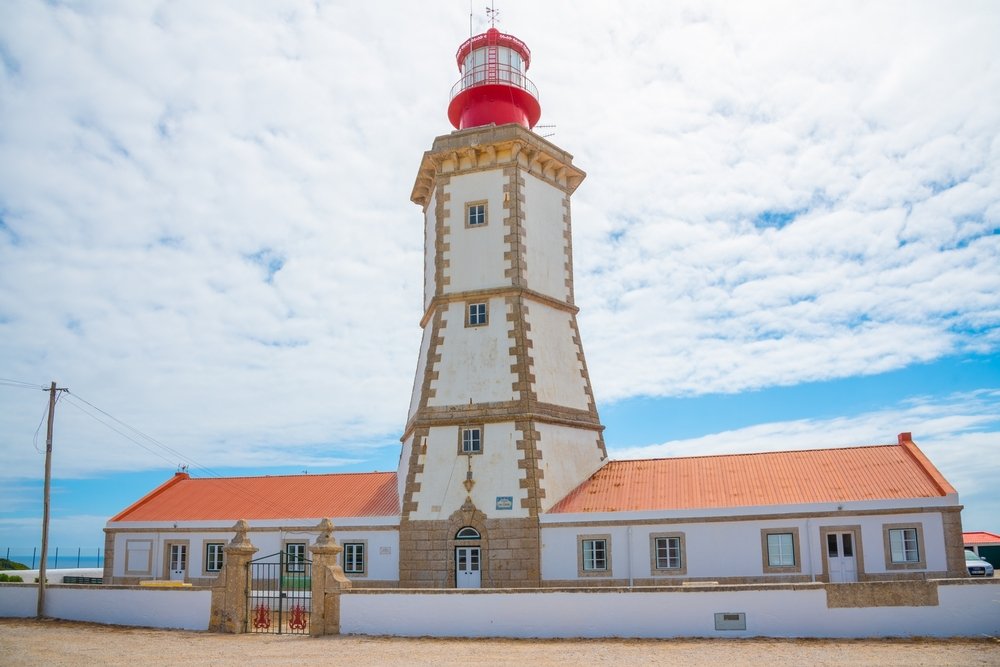
Near view of a lighthouse named Cabo Espichel at Portugal

From Costa da Caparica, drive to Cabo Espichel, a stunning headlands area overlooking the Atlantic Ocean with a historical lighthouse and beautiful church. 

The observation point at Cabo Espichel offers spectacular views of the dramatic coastline and the gorgeous Praia dos Lagosteiros.

Spend some time walking around the lighthouse and visiting the Santuario de Nossa Senhora do Cabo Espichel.

The area is a bit isolated, but the views are breathtaking. Just be sure to bring an extra layer, as it can get very windy!

Explore Sesimbra.

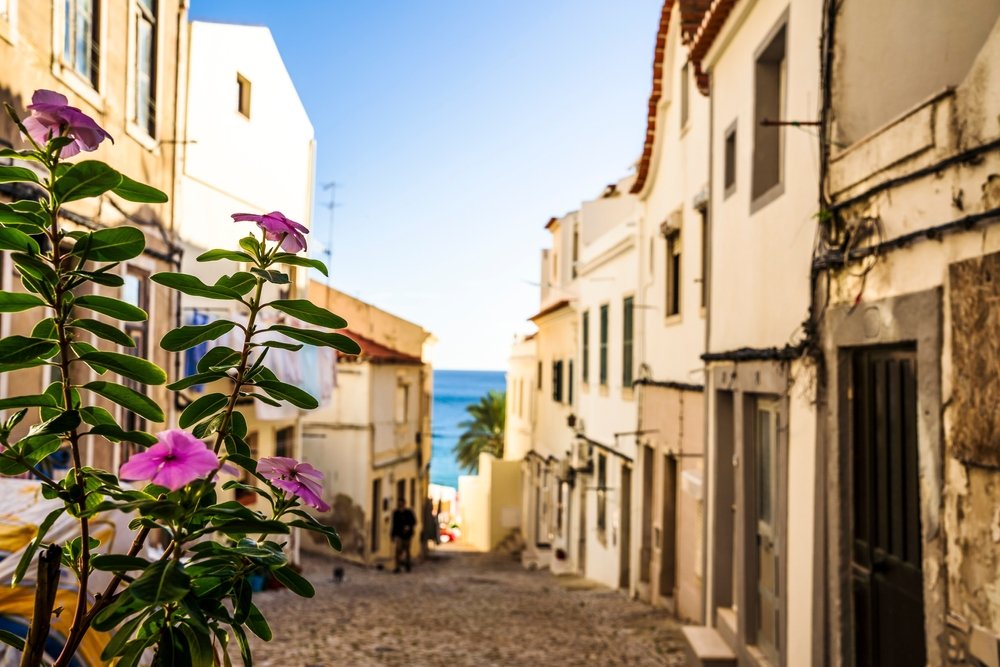
Charming street of Sesimbra with flowers in the foreground and the ocean in the backdrop

From Cabo Espichel, it’s only a short drive to the small and charming seaside town of Sesimbra

A truly unique destination, the town lies within the Arrábida Natural Park, a protected coastal park occupying the south of the Setúbal Peninsula.

The natural park is known for its lush vegetation and gorgeous secluded beaches, such as Praia do Ribeiro do Cavalo, Praia de Galapinhos, and Praia da Figueirinha

The beaches are popular among locals but not extremely crowded due to the complicated access of its out-of-the-way beaches.

However, if you’re up to the challenge, you can take in the beautiful expanse of nature without all the crowds!

A view from Saint James  fortress to the town of Sesimbra

While you’re in Sesimbra, be sure to spend a couple of hours exploring the small town, checking out the views from the Forte de Santiago de Sesimbra, and visiting the hilltop Sesimbra Castle

Access to the historical monuments is free, but bring some cash if you want to stop at the castle’s café.

If you decide to stay for lunch in Sesimbra, you absolutely have to try the Portuguese specialties at Casa Mateus.

If you don’t eat fish or meat, Aloha Café serves tasty vegetarian dishes and has a lovely terrace overlooking the sea.

Stop by Setúbal

Aerial view of Portinho da Arrábida beach, in Setúbal, Portugal, with brilliant turquoise water and white houses with terra cotta red roofs

From Sesimbra, make your way along the coast to Setúbal.

Along the way, as if the views from the road weren’t enough, you can stop by the picturesque little bay of Portinho da Arrábida

If you didn’t eat back in Sesimbra, or just want to have a bite in a quaint place with gorgeous sea views, stop by O Farol.

Keep on driving for roughly half an hour until you reach Setúbal. The city is quite big, but you can explore the historical center in around an hour. 

Saint Philip castle overlooking the sea and harbor area and Setubal city while road tripping from Lisbon to the Algarve

First, stop by Forte de São Filipe, a 16th-century castle overlooking the city, and check out the beautiful chapel covered in the traditional Portuguese azulejos.

The entry is free, and the lovely on-site café is perfect for a coffee with a view.

In Setúbal, stroll through the port, check out the colorful dolphin sculptures, and visit Our Lady of Grace Cathedral.

If you have extra time, check out Praça do Bocage with its lovely Church São Julião.

Drive from Setubal to Évora

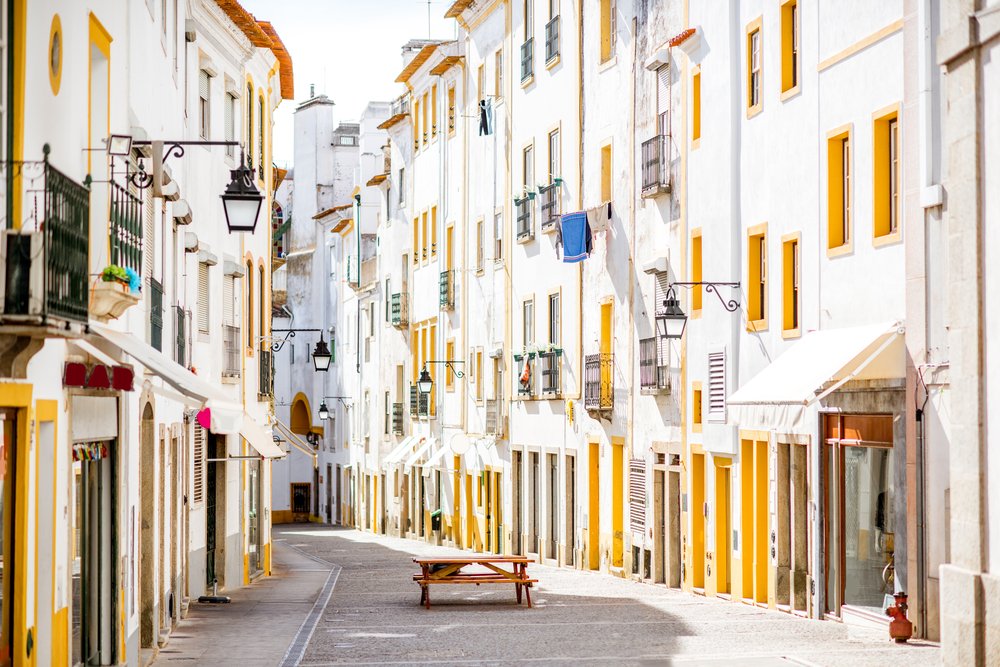
Street view of the residential buildings in Evora City with white walls and colorful yellow windows and door frames and a bench in the middle of the street

From Setubal to Évora, driving takes roughly an hour.

You’ll likely get to Évora in the afternoon, giving you a bit of time to explore the city before dinner.

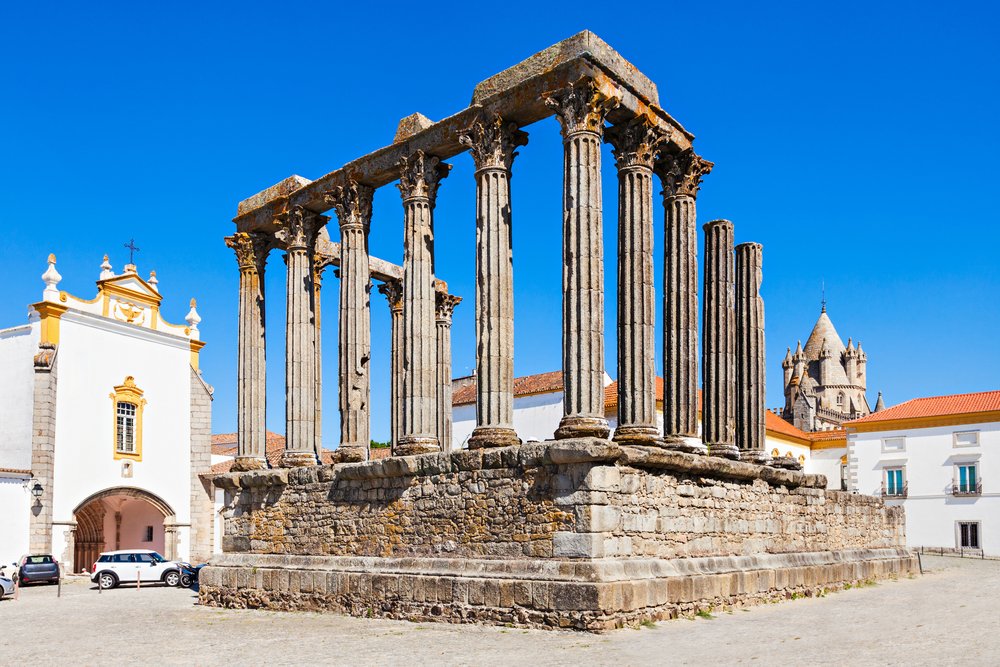
Évora is best known for its well-preserved ancient Roman temple, also known as the Temple of Diana.

The beautiful temple is within Évora’s historical center, which became a UNESCO World Heritage Site in 1986.

A well-preserved Roman temple located in the UNESCO world heritage site city of Evora, Portugal

The Roman Temple of Évora is in a square near the cathedral, and there’s no fee to enter so you may as well check it out! 

The temple dates to the 1st century CE and was built in what used to be the city’s main public square. 

Over the course of the Middle Ages, the temple was incorporated into the structure of a castle, but in the late 19th century, the medieval structures were demolished and the temple restored to its former beauty. 

After admiring the temple, explore Évora’s stunning historical center.
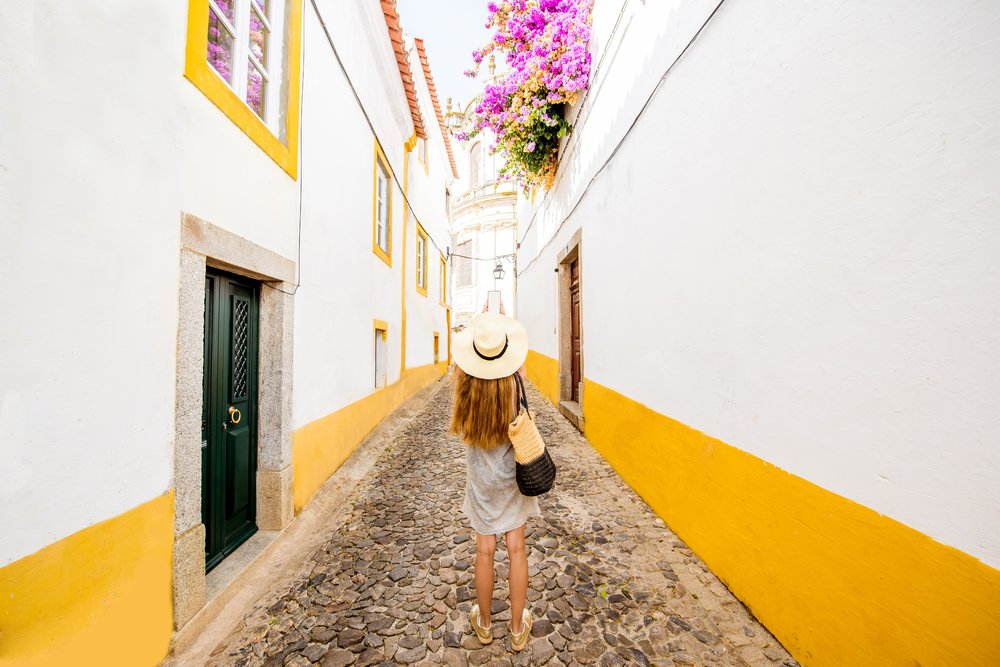
Blondish-brown haired woman with a white hat in the white and yellow streets of Evora, Portugal with pink flowers blooming and cobblestone streets

You will likely arrive too late to enter any of the monuments, but you can walk around and visit everything the following morning. 

Discover the lovely Praça do Giraldo with its iconic fountain and the Santo Antão Church and go for a stroll in the charming park Jardim Público de Évora.

Grab a delicious Alentejan dinner in Évora.

Alentejo food on a ceramic tile plate in front of a church

After that, go ahead and check into your accommodation for the night and head out for dinner. 

Lucky for you, Évora is a great place to try Alentejo’s cuisine!

Check out TascaTosca & Wine Restaurant or the lovely outdoor terrace at Páteo. 

Migas de porco preto (black Iberian pork) and favada real de caça (bean stew with meat) are among the most traditional dishes, and they’re both delicious.

For the vegetarian traveler, Açorda à Alentejana is a great option.

Suggested Évora Accommodations:

B&B | Valeriana Exclusive Guesthouse for stunning terrace views, elegantly designed rooms, and quick access to downtown sights.
Check rates & availability here

Boutique | Templo Boutique Hotel for a central location, spacious rooms with luxe marble bathrooms, and lovely minimalist design. 
Check rates & availability here

Day 2: Évora to Sagres

Visit Évora’s landmarks

Morning light on this view of the cathedral in Portuguese town of Evora. The cathedral is made of tan stones with a circular stained glass window and lots of castle-like design elements. There is no one there and the sky is clear.

After a good night’s sleep, it’s time to spend the morning of your second day visiting Évora’s key landmarks. 

The first place to visit is the Cathedral of Évora, a stunning cathedral that took centuries to finish.

Construction started in 1280 but wouldn’t be finished until 1746! As a result, you’ll find an eclectic blend of architectural influences that reflect its many centuries of renovations and additions.

For just €4.50, you get full access to the cathedral, the museum, the cloisters, and the rooftop, which offers sweeping city views — not a bad deal at all!

Next, head to the Church of St. Francis, better known for housing the Chapel of the Bones

Capela dos Ossos (Chapel of Bones) in Evora, Portugal with skulls, leg and arm bones, creating a visual mosaic that is both disturbing and beautiful

Truly a macabre sight to behold, the interior of the small chapel is covered with human bones belonging to five thousand skeletons!

These skeletons were exhumed by the Franciscan monks during the medieval times to free up the land taken up by cemeteries.

After that grim bit of local history, you can visit the beautiful Gothic church and the monastery on the same site.

All these sites are included in a mere 6€ entry fee which also includes access to the terrace and the museum. 

Although the bone chapel is the main attraction, don’t miss the other areas of the church!

Drive from Évora to Sines

the fortress in sines portugal with a cannon pointing out to sea on a mostly clear day with the city visible in the background

After visiting Évora’s key landmarks, it’s time to keep driving south toward the Algarve.

Your first stop along the way is Sines, a city on the coast of Alentejo, around 1.5 hours from Évora.

The city is home to long sandy beaches and a charming historical center, as well as several attractions worth stopping by and giving yourself a break on this drive from Lisbon to Algarve.

You can visit the castle of Sines for free and admire the lovely sea view from its terraces.

Within the castle, you can also check out the collection of the Sines Museum.

Sines is better known as the birthplace of Portuguese explorer Vasco Da Gama, whose statue stands looking out to the sea next to the Castle of Sines

Vasco da Gama Statue and Sines church bell house close up with a sunny sky as the backdrop, not a cloud in sight.

The main beach by the city center is also dedicated to Vasco da Gama. Go for a stroll, or lie out in the sun for an hour or two if the weather is nice.

Spend any extra time exploring the historical center of Sines and stop for lunch.

For a delicious meal, you’ve got a couple great options – you can have an authentic meal at the family-run little restaurant Adega de Sines or try the vegetarian dishes at Veg&tal

If you have extra time after lunch, drive to the lighthouse, Farol de Sines, and check out the coastal view.

Stop in Azenha do Mar and Bordeira.

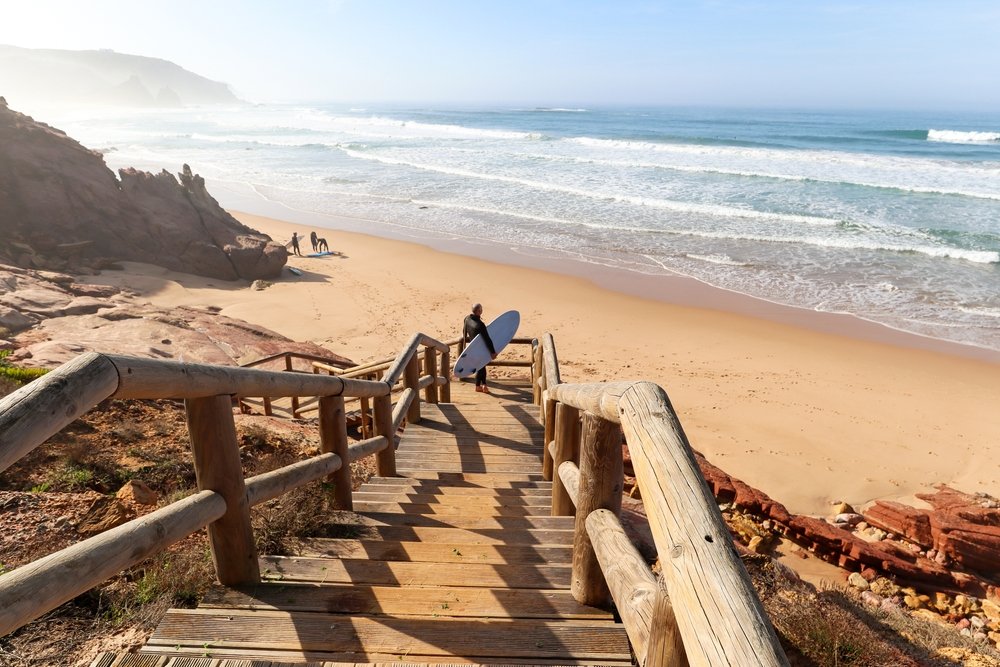
 A surfer on the stairway going down to the beach of Praia de Odeceixe, a few other surfers on the beach but it is otherwise uncrowded and peaceful

From Sines, start driving south toward Sagres.

You’ll drive through the beautiful Parque Natural do Sudoeste Alentejano e Costa Vicentina, a spectacular natural park that’s home to some of the most beautiful beaches in Portugal.

You’ll have no shortage of options for places to stop along the way and enjoy beautiful coastal walks. 

Stop by Azenha do Mar to admire the dramatic coastline and rock formations, and stroll along the lovely coastal path to check out more gorgeous views.

Just south of Azenha do Mar, you can also stop by the stunning Praia de Odeceixe, a sliver of sand at the mouth of the Ribeira de Seixe river. This is also a popular spot to watch surfers!

Stop for a drink at Bar da Praia or head down to the beach for a walk or a swim.

Further south, you can also stop by Bordeira and admire the coastal view from the observation deck Pontal da Carrapateira

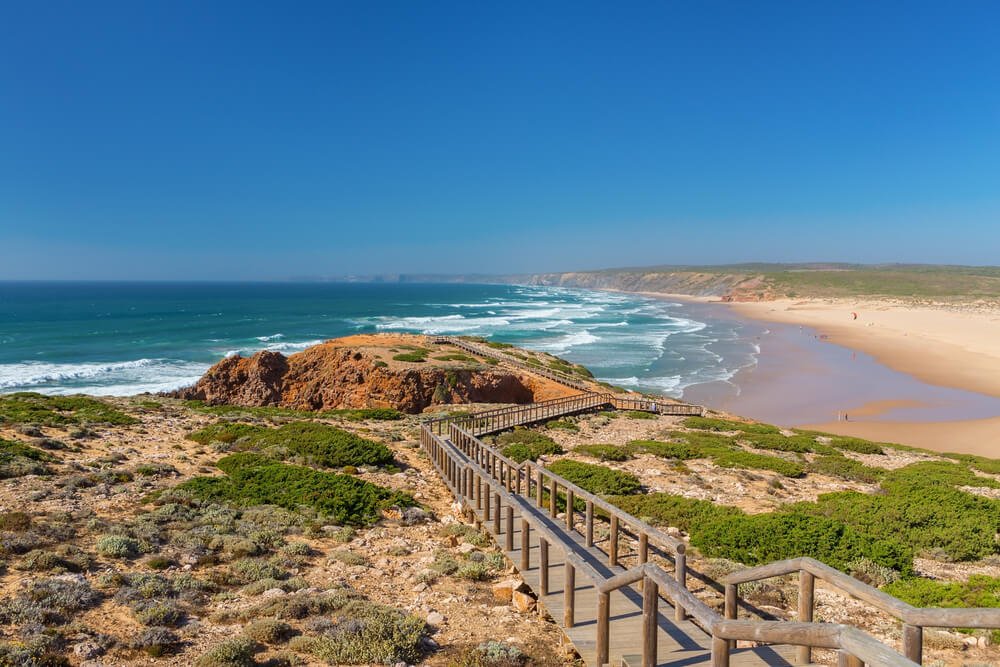
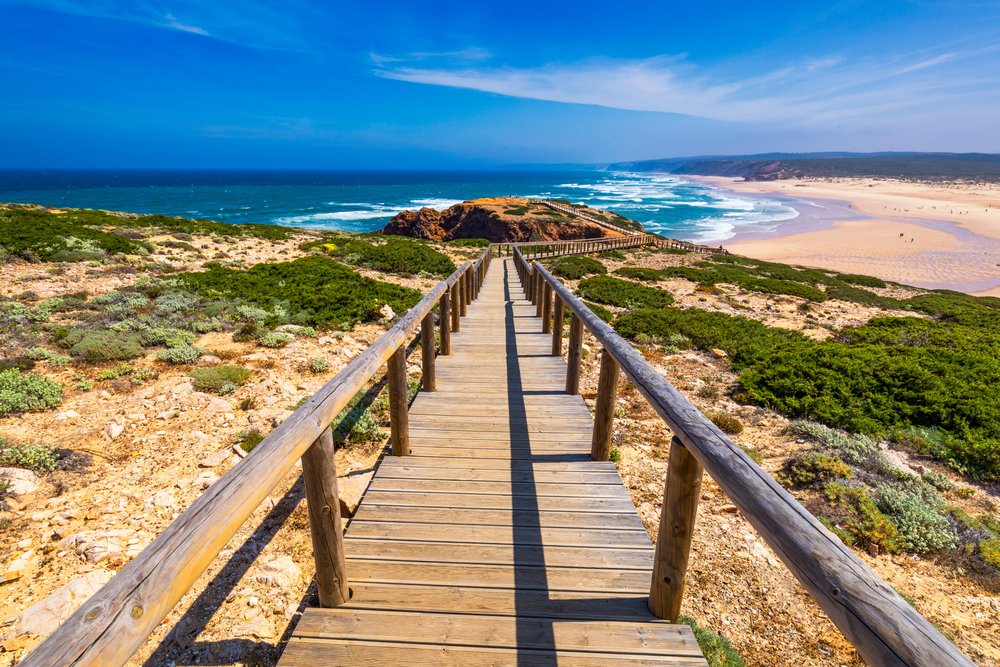
Boardwalk at Praia da Bordeira with a stunning ocean view as you walk along the boardwalk on Portugal's southern coast on a sunny day

A beautiful walkway along the cliffs will allow you to check out breathtaking views of the coast and the nearby Praia da Bordeira.

The spot is also great to take in an unforgettable sunset!

From Bordeira, you’ll only need to drive for about 20 minutes to Sagres, your stop for the night.

The entire drive from Sines to Sagres takes around two hours without stops, so plan accordingly if you want to stop and enjoy any of the coastal walks.

Have dinner and spend the night in Sagres

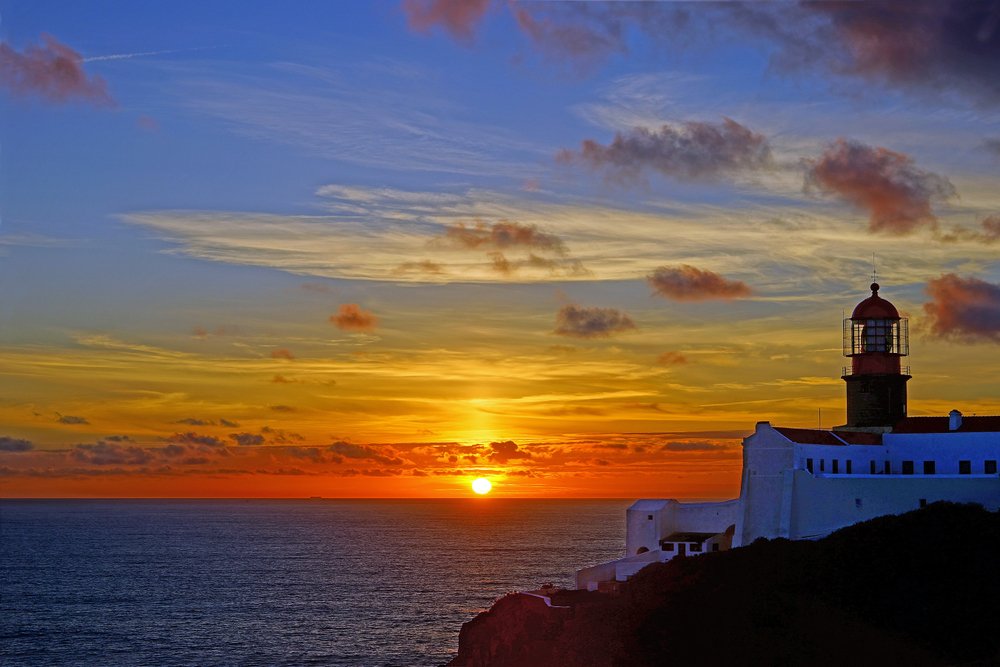
A silhouette of the Cabo Sao Vicente Lighthouse at sunset near Sagres while on a road trip from Lisbon to the Algarve

Sagres is at the far southeastern point of continental Europe.

The coast is marked by two important points, Cape St. Vincent to the east and Sagres Point to the south.

Spend any time you have left in the evening exploring the small town of Sagres and have dinner at one of the many great restaurants in town.

The local specialties are fish and seafood dishes, so be sure to try them at A Sereia or Adega dos Arcos.

Now get some rest, because we have a busy final day of our Lisbon to Algarve road trip tomorrow!

Suggested Sagres Accommodations:

Boutique Hotel | Memmo Baleeira for a stunning design hotel overlooking the Costa Vicentina. Pool with ocean & sunset views, a fire pit, & delicious in-house dining options!
Check availability and rates here

B&B | Mareta View for a clean, quiet B&B with stunning ocean views, hot tub, sun loungers & shaded cabana, & beautiful grounds.
Check availability and rates here

Day 3: Sagres to Faro

Explore some more of Sagres by daylight.

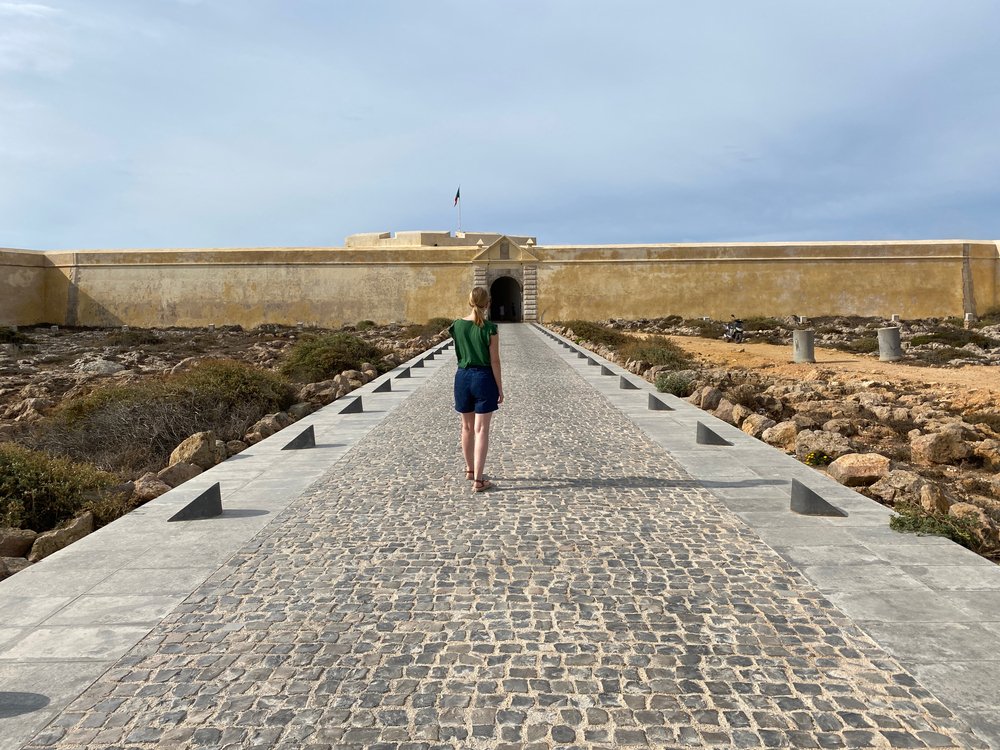
Tourist woman on paved road to entrance of historic Sagres Fortress (Fortaleza de Sagres), old landmark ruin attraction in the Algarve region of Portugal

Begin the last day of your road trip by exploring the two viewpoints in Sagres, Cape St. Vincent and Sagres Point

At Cape St. Vincent, check out the lighthouse and the Fort of Santo António de Belixe

At Sagres Point, walk to the Cape Sagres viewpoint, check out the lighthouse, and visit the Igreja de Nossa Senhora da Graça.

If you want to visit the Sagres Fortress, it has a €3.50 entry fee for adults. Close to the fortress, check out the massive Compass Rose

In the nearby maze-like structure, A Voz do Mar (The Voice of the Sea), you can listen to the crashing sound of the waves roaring in through an opening in the cliff!

Drive from Sagres to Lagos.

View from a miradouro (lookout spot) looking from above onto Ponta da Piedade, where you can see two boats with tourists between this famous group of rocks in the ocean.

Driving east from Sagres, you’ll explore the famous coast of the Algarve, with its beautiful coastal towns, impressive rock formations, and enchanting beaches.

The first town you’ll reach is Lagos. This is a popular end point for some Algarve routes, like a Lisbon to Lagos road trip, though we’ll end this particular road trip in Faro, further east.

The charming city of Lagos is best known for its stunning scenic spot, Ponta da Piedade.

Its name, literally ‘piety point’, will make sense when you see how a view this beautiful would inspire even the most secular among us to murmur in wonder!

Head over to Miradouro da Ponta da Piedade to admire the impressive cliffs and rock formations emerging from the crystalline waters. 

The spot is also popular for boat tours through the grottoes, caves, and rock formations around Ponta da Piedade.

The boat tour costs about €20 per person (book online to reserve your spot!), but it’s well worth it — it’s such a memorable way to explore the stunning coastline!

Beautiful view of cliffs of the Ponta da Piedade on Algarve coast, taking a boat tour through the stunning cave formations

Close to Ponta da Piedade, you’ll find two of the most popular beaches in Lagos, Praia do Camilo and Praia de Dona Ana.

Both beaches are impressive to see from above and just as beautiful to sunbathe and swim, but be warned!

They tend to be extremely crowded during peak summer months. 

Even if you decide not to brave the crowd, or just don’t feel like descending hundreds of steps to the beach, it’s still worth checking them out from above.

view of a famous algarve beach from above, praia camilo, with wooden staircase going down to the beach by many, many steps. the beach below is empty and the weather is beautiful.

After exploring the coast and admiring the spectacular views, head to Old Town Lagos and get delightfully lost in its small alleys and charming squares. 

While you’re there, be sure to visit Igreja de Santa Maria de Lagos and walk around the seaside Castle of Lagos.

Don’t linger too long though — get ready to move onto our next (and almost final) stop on this Lisbon to Algarve drive, where we’ll have a delicious lunch.

Stop for lunch in Portimão.

A selection of best portuguese tapas - smoked ham, salami, chorizo sausages, a variety of cheese, crackers, liver pate and several traditional jams

From Lagos, drive half an hour to the nearby town of Portimão to have lunch and check out a few more gorgeous beaches. 

If you’re feeling hungry when you get into town, head to the lively area right behind Praia da Rocha for lunch.

You can’t go wrong with tapas at Tapas ò Destapas or try the seafood dishes at Branquinho.

Praia da Rocha is by far the main attraction in Portimão!

The huge sandy beach features spectacular rock formations at the far eastern end, where it meets Praia dos Três Castelos

Beach and rock formation known as Praia da Rocha in travel destination Portimao on a sunny summer day with no one on the beach, peaceful day.

As much as it can be tempting to spend all your time in the sand and the surf, be sure to check out the gorgeous scenic spot Miradouro dos Três Castelos for a picture-perfect view of the beach from above.

In the historic center of Portimão, check out the lively town market selling everything from fruits and vegetables to fresh fish and pastries.

Lastly, before getting back on the road, visit the 15th-century Igreja de Nossa Senhora da Conceição with its Baroque gilded altar.

You can also take a 1.5-hour speedboat ride to the Benagil Caves from Portimão, take a 2.5-hour kayak tour of the caves, or wait to see them from Albufeira.

Drive to Carvoeiro.

City near the beach in Carvoeiro in the Algarve in Portugal, rocky coastline, soft sand, white-washed houses with colorful blue, red, and yellow details.

For your next stop along the beautiful coast of the Algarve, check out the small town of Carvoeiro and its spectacular rocky coastline. 

Stroll along the to reach Algar Seco, where you can discover hidden caves and spectacular viewpoints over the sea.

Carvoeiro has a small but charming historic center and a beautiful sandy beach enclosed within the cliffs.

The nearby Miradouro da Senhora da Encarnação offers lovely coastal views of the beach and the white houses on top of the cliffs.

Stop by Albufeira.

The cityscape of Albufeira with its many white buildings with red roofs next to a peaceful beach with some umbrellas out but no one on the beach yet

Albufeira is your last stop before reaching Faro, the capital of the Algarve, which you can use as your home base for your stay in the region. 

Albufeira is only half an hour from Carvoeiro and roughly 40 minutes from Faro. The town is a former fishing village turned popular vacation destination.

If you’re interested in a coastal base, you can also stay in Albufeira for all your explorations. 

Albufeira is also a great place for activities such as this Caves & Dolphin Watching Boat Tour and this Benagil Caves Tour by Kayak or SUP.

The town boasts gorgeous beaches within walking distance and lively nightlife, but it can be extremely crowded during summer.

However, if you’re able to handle the crowds, it is conveniently located roughly halfway along the Algarve coast, so it’s ideal as a base.

view of albufeira old town with scooter, steps, and bougainvillea, and sea in the distant background.

To start off your time in the city, wander around Albufeira Old Town with its beautiful architecture and narrow alleyways.

After, check out the viewing platform at Elevador do Peneco, and stroll along the sandy beaches. 

Praia do Túnel is connected to the old town by a tunnel, while Praia dos Pescadores extends to the west until Miradouro do Pau da Bandeira, a scenic viewpoint overlooking Albufeira and its beaches.

You can stay for dinner in Albufeira or continue driving to Faro, depending on where you’re staying for the rest of your vacation in the Algarve. 

In Albufeira, you’ll find a diverse offering of restaurants, with many international options.

Both Prazeres and Três Coroas are wonderful restaurants offering a delicious mix of Portuguese and international dishes.

Drive to Faro

The old town streets of farrow with portuguese street tile (calcada portuguesa) and white walls with yellow and blue and gray stripes along the bottom of the wall

Time to wrap up this Lisbon to the Algarve road trip by heading to our last destination!

Luckily, Faro is just a short drive west of Albufeira and is the main city in Algarve. 

Unlike most nearby towns of the Algarve, Faro is a bit inland, separated from the sea by the Parque Natural da Ria Formosa.

The city is known for the 19th-century gateway Arco da Vila, along with beautiful churches, and cool museums.

Stone archway revealing the rest of Faro old town with white walls and gray stonework

While you’re there, visit the cathedral of Santa Maria and check out the exhibitions at the Municipal Museum of Faro.

If you enjoyed the prior bone church, you can also take a peek at the small bone chapel and ornate altar inside Igreja do Carmo

Faro Marina and the nearby Jardim Manuel Bivar are lovely spots to go for a walk while enjoying the gorgeous weather that the region is famous for.

For delicious Portuguese dishes, try Tasca do Ricky and Tascaria Chafariz. Faro also has many international dining options.

Suggested Faro Accommodations:

Hotel | Hotel Faro & Beach Club has stunning amenities like a rooftop bar, fitness center, outdoor pool, & in-house hammam-style steam room & sauna. It’s central to town & has a free shuttle to its private beach club 5 miles away in Praia de Faro.
Check availability and rates here

Luxury Guesthouse | Opus One enjoys beautiful rooms (some with multiple floors!), air conditioning, lush furnishings with individualized design, an outdoor pool/hot tub, & a sauna.
Check availability and rates here

Other Must-See Places in the Algarve

The famous Benagil cave which people are reaching by kayak and paddle board, with arches and openings in the stone to look out to the sea and to the sky

The coast of the Algarve west of Faro is the most popular and where most of the vacation attractions are. 

Aside from the places you may have already seen along the way, be sure to check out the beautiful Benagil Cave, and the spectacular beach Praia dos Três Irmãos.

Other can’t-miss spots include the small town Armação de Pêra with the nearby beaches, and Praia da Falésia, a long sandy beach backed by tall, red cliffs. 

East of Faro, visit the charming town of Olhão and the city and beaches of Tavira. This last stretch of coastline before the Spanish border is a succession of long sandy beaches and small towns. 

This area is great if you want to escape the crowds of the more popular places in the west.

The Essential 2 Days in Glacier National Park Itinerary

There’s a place where mountains disappear into alpine lakes, wildlife roams free and abundant, and breathtaking views await around every turn.

Welcome to Glacier National Park, set in Montana’s Rocky Mountains!

Part of the world’s first international peace park, Glacier NP is located in northern Montana and is seamed to Waterton Lakes National Park at the border of Canada and the USA.

Many of the roads in this mountainous paradise are only open from July – October due to snowpack. 

view of avalanche lake in glacier national park

It’s important to plan your trip accordingly and check on road conditions if you wish to see all the park’s driving attractions. 

Even in mid-summer, be prepared for chilly weather and the possible snow flurry that can catch many visitors by surprise!

Glacier National Park is home to many species of animals, hundreds of miles of hiking trails, glacial blue creeks, and scenic roads that wrap around the mountainsides for some of the best views in the country. 

There’s no wonder why it’s on so many traveler’s bucket lists!

This post was written in June of 2020 by Emily Lessard, a Montana local who lives in Big Sky, MT and hikes in Montana and Wyoming's National Parks frequently! It was updated most recently on August 3, 2023 to reflect changes that have occurred since then.

Planning for Glacier At A Glance

view of avalanche lake hike in glacier national park


When to Go: There is no doubt that Glacier National park is impressive all year round but most of its beautiful driving roads are only open from July to October due to snowpack.

This means that summer is the best time to visit Glacier National Park (though parts of it are accessible in winter too), but keep in mind that it’s also its peak season so you’ll need to go early to bit the crowds.

If you don’t mind that Going-to-the-Sun-Road will be closed, spring in Glacier National Park is a fantastic time to visit!.

Where to Stay: Glacier National Park has several in-park lodges to stay at.

Pick Many Glacier Hotel for stunning mountainous views or Rising Sun Motor Inn and Cabins for budget and mid-range travelers.

the many glacier hotel in glacier national park on the water

In that case, I recommend Glacier Outdoor Center (stunning chalet), Great Northern Resort (Lodge) for mid-range travelers, or Wonderstone at Glacier for a luxurious stay in Columbia Falls. And for a homey feel, I suggest staying at this cozy and luxurious cabin.

How to Get Around: A car is crucial for Glacier National Park! There are shuttle services within the park but I don’t advise relying on them as they can be slow, crowded and they don’t go to some areas within the park that are interesting to see.

If you’re renting a car, compare car rentals and prices from here.

Alternately, you can rent an RV or campervan via RVShare and save on accommodations.

road in going to the sun road in glacier national park

3 Things Not to Forget to Pack: Binoculars are key for spotting wildlife like bears, elk, moose, and bison– I suggest these Nikon binoculars. For hikes, you’ll want a sturdy pair of hiking boots — I love my Ahnu boots — and some bear spray for safety reasons.

Know Before You Go: If you plan to visit multiple national parks in a year, the America the Beautiful Pass will save you a bundle! It costs $80 for an annual pass (for an entire vehicle traveling together) to all US national parks and federally managed sites.

Before You Visit Glacier National Park…

Swiftcurrent pass in glacier national park

This Glacier National Park itinerary assumes that you have an entrance pass to Going-to-the-Sun Road, which requires a separate reservation due to the massive demand for this part of the park.

This Glacier National Park reservation system has been in place for several years to maintain the natural environment and keep this area from getting too crowded.

First, try to get tickets. You will see the option on recreation.gov to buy entry passes to the park.

Do not be fooled, entry passes do not get you into the Going-to-the-Sun Road entrance! This is just to enter other parts of the park.

In order to enter via the West Entrance, which is the most popular, you will need both the entrance ticket and the Going-to-the-Sun road ticket. 

fish creek campground area of going to the sun road

If you have a National Park Pass, such as the America the Beautiful pass, that will allow you to waive the entrance ticket.

However, it does not get you the Going-to-the-Sun Road ticket either. 

Landing a ticket to that entrance is the hardest part! The tickets are released online 60 days in advance on the rolling day window.

That means if you want a seven-day reservation ticket for July 1st, you can purchase that ticket 60 days prior to July 1st. It is then valid for that whole week. 

These tickets in advance typically sell out within 5 minutes for days in demand! 

landscape of st marys lake at going to the sun road in glacier national park

The park also releases a small batch of the tickets 2 days before at 8:00 AM MST, giving visitors a second chance to score a chance to see Glacier National Park. 

Most of the time, both options sell out, leaving travelers frustrated and hopeless. 

Luckily there are a few tricks to get around this (ethically) with the exceptions listed on recreation.gov!

horseback ride on going to the sun road

Those include having camping reservations at Fish Creek Campground and Apgar Campground.

You can also stay in a lodge or chalet along the Going-to-the-Sun Road corridor.

One of the most practical options is by booking a horseback ride, guided hike, or boat tour that uses Going-the-Sun Road.

Renting a Car for Glacier National Park

tunnel on going to the sun road with snow still on the landscape

If you’re visiting Glacier National Park in your vehicle, you can skip to the next section.

If you’re flying into Glacier, Glacier Park International Airport in Kalispell is the closest airport to fly into as it offers the easiest access.

If your trip also involves visiting both Grand Teton and Yellowstone National Parks, you may want to look into flying into Bozeman.

If you choose to fly into Glacier, I recommend renting a car from Kalispell airport.

Not sure where to get the best deal on your rental? I’ve rented cars dozens of times through various search engines and have settled on DiscoverCars as the best car rental search aggregator – it sifts through dozens of trusted rental companies to find the cheapest price for your rental! Compare prices for your car rental here!

I recommend driving as the best way to experience the park, since you have the freedom to stop at any of the scenic pullouts for epic views!

Parking lots can get full, but aside from the trailhead parking lots, there tends to be a rather quick-moving flow of people, so having your own car is definitely more convenient than other options, such as a bus tour.

If you really can’t rent a car or just don’t want to, there are other options, including taking a red bus tour or utilizing the limited free shuttle.

What to Pack for 2 Days in Glacier National Park

view of glacier with a goat in the backdrop

I have an article about what to pack for a road trip here, but for a quick rundown, here are the essentials to pack for a 2 day Glacier National Park itinerary.

Travel Guides: I have included everything that I think will be useful in this Glacier National Park itinerary but sometimes guides offer a lot more information than I can fit in one article.

Together with my personal experience and this best of Glacier National park guide, you will be guaranteed an amazing time in the park.

Layered Clothing: Being on a high elevation, Glacier National park gets chilly even in the summer months, especially at night so plan accordingly!

For summer or early fall, you’ll want at least 2 shirts (synthetic or wool, long and/or short sleeve depending on the season), 2 pairs of leggings or pants, 2 pairs of shorts, 1 fleece outer layer, a waterproof jacket, a beanie, gloves, and 3 pairs of socks.

Comfortable Footwear: The best way to enjoy Glacier National park is by hiking so it’s important that you pack a sturdy and comfortable pair of hiking boots.

I love my Ahnu Sugarpine boots for women, and for men, I suggest the KEEN Durand boot.

landscapes of glacier n ational park with the highline trail in sight

Sunscreen: With several mountains exceeding an elevation of 10,000 feet, you can be sure that you’ll get sunburned even on cloudy days if you don’t wear sunscreen — believe me, I learned this the hard way. Now that I know better, I always carry this chemical-free organic sunscreen

Sunhat: I recommend a lightweight but packable hat like this one that has a strap on to prevent it from being blown away by the outbursts of wind. And you can even wear it on your back if you get tired of wearing it on your head.

Day pack: A lightweight daypack is very essential when hiking the beautiful trails of Glacier National Park to put all your day hiking essentials in a place that can easily be accessed even when walking!  I like this inexpensive and lightweight Osprey day pack. The best part is that it has mesh panels on the back to allow for airflow.

Snacks: Though none of the Glacier National Park trails are extreme, I recommend having some snacks in your daypack should you get hungry and don’t want to waste time sitting down to have a big lunch.

I suggest you make or pick up a picnic lunch before you make your way to the park. Alternatively, you can pack a number of snacks like protein bars (I love CLIF bars), nuts, or other high-density snacks that give you a lot of caloric energy for their weight!

Camera: I can never go anywhere without my Sony A6000 — I love it! It’s mirrorless, lightweight, and perfect for capturing good-quality photos of the amazing wildlife of Glacier National Park.

Unlike a D-SLR, it won’t weigh you down but since it’s just the body, I suggest bringing a zoom lens for wildlife and a wide-angle lens for landscapes.

Swiftcurrent pass in glacier national park

First aid kit: Don’t let things like blisters or scrapes ruin your Glacier trip! I recommend putting a first aid kit like this HART Weekend First Aid kit in your day bag. It’s lightweight, but if you ever need it, you’ll be so glad to have it.

Headlamp (and extra batteries): I recommend bringing a headlamp like this Petzl headlamp if you plan on going for a sunrise or sunset hiking.

Water filter bottle: While there are water fountains and bottle filling stations in Glacier, I still suggest having a water bottle with a filter so you can fill up anywhere there’s a water source — like all the beautiful alpine lakes around you!

There is a variety of water filtration systems but I personally have and love the GRAYL Geopress, which makes filtering water from any source easy. It’s compact and easy to use and filters out 99.99% of microplastics, viruses, bacteria, and other nasty particles, making water instantly safe to drink without plastic waste.

Bug Spray: Keep away those little monsters by packing and using this bug spray.

Where to Stay in Glacier National Park

The Many Glacier Hotel is the most popular place to stay in Glacier NP

There are a number of options for where to stay in Glacier National Park, both inside and outside the park but the former requires booking way in advance — more than 6 months before your trip. Below are some of the places to stay both inside and outside the park.

In-Park Accommodations

CLASSIC LODGE | If you’re all about beautiful views, then I recommend staying at Many Glacier Hotel. This lakefront hotel is perfectly located to give you outstanding mountainous views with just a peep in the window or its balcony.

It has exposed wooden beams and a large fireplace in its dining area adding to its already impressive features.

>> Check photos and reviews on Hotels.com

BUDGET INN | Located along the Going-to-the-Sun Road, Rising Sun Motor Inn & Cabins offers both cabins and guestrooms perfect for budget travelers. The rooms are super clean with large windows that offer amazing views.

>> Check photos and reviews on Hotels.com

Though everyone would want to stay inside the park, it’s just not possible all the time as it requires a lot of planning and a booking of over 6 months in advance.

If you find yourself in that situation, you can still enjoy Glacier National Park by staying outside the park in either East Glacier or West Glacier. Both towns are near the park so accessibility with not be an issue.

You can also find accommodation in Columbia Falls, Hungry Horse, or even Coram but East Glacier and West Glacier offer much more possibilities in terms of activities and accessibility.

East Glacier Accommodations

COTTAGE | If you’re looking for both mountainous and lake views, then I suggest staying at this beautiful cottage.

With a private bathroom and a tub, a well-equipped kitchen, and a large outdoor deck with a grill, this cottage will take your experience at Glacier to the next level.

The cottage has 2 bedrooms but the convertible sofa in the living room adds an extra sleeping space for a big group! And let’s not forget the fireplace in the living — perfect to cozy up on those chilly nights.

>> Check photos and reviews on Vrbo

BUDGET | Exceptional, clean, and great location are some of the qualities that describe Mountain Pine Motel. This little motel is owned by a family that has poured their hearts into making it a comfortable place to stay at.

Each room has a private bathroom, a refrigerator, a microwave, and a comfortable bed that will help you save some money without sacrificing comfort.

>> Check photos and reviews on Hotels.com 

LUXURY | Sitting on the edge of Glacier National park, St. Mary Lodge and Resort is the perfect hotel if you want to experience luxury at its best.

This rustic hotel offers soaring views on the mountain with spacious rooms that are perfectly decorated in woody colors to create a distinct appeal.

>> Check photos and reviews on Booking.com | Book it on Hotels.com

West Glacier Accommodations

BOUTIQUE | Located near the entrance of the park and Going to the Sun Road, Great Northern Resort (Lodge) is the perfect place for travelers who want a taste of luxury with a mid-range budget.

This charming and rustic cabin features exposed wooden beams that bring out the beauty of its interior, large bedrooms, big bathrooms, a sports court, a natural pool, and a lovely garden to walk around. There might not be TVs in the rooms but who needs a TV with all the stunning views outside.

>> Check photos and reviews on Booking.com | Book it on Hotels.com

CABIN | Staying at Glacier Outdoor Center is the closest you can ever get to getting a comfortable and amazing stay on a budget! It might not be much of a budget but it’s a steal for what you’ll get at that rate.

The cabin features a large deck that overlooks the beautiful mountains, a fully furnished kitchen, a large living area with an open concept, and a cozy interior with a brand new look that will make you feel right at home — everything in this cabin will make you want to extend your stay.

>> Check photos and reviews on Booking.com | Book it on Hotels.com

Your Perfect Glacier National Park Itinerary

Day 1 of Your Glacier National Park Road Trip

Your adventure in Glacier begins in east Glacier National Park in Many Glacier, which boasts the some of the best mountain views in the entire park!

The Many Glacier Road runs just north of the famous Going-to-the-Sun Road. With all there is to see on this less commonly explored route, it is well worth exploring for a full day. 

From the small town on the Blackfoot Indian Reservation (home to the Siksikaitsitapi people), Babb, head towards the Many Glacier Entrance to begin the first day of your Glacier National Park adventure! 

Many Glacier 

Ask any park employee or former visitor what their favorite area of Glacier National Park is, and the answer will likely be Many Glacier.

The first few miles of road are pretty socked in with vegetation, but drive cautiously because this is a popular area for wildlife crossings! Watch as the landscape begins to reveal itself. 

Lake Sherburne

Now, this is where it starts to get really good. Get your camera ready!

As you near the lake, the sky-scraping mountains of the Lewis Range begin to come into view to the west.

Trumpeter swans can occasionally be spotted swimming along the shores in the fall and spring.

Grinnell Lake


As you continue on the Many Glacier Road, there are lots of scenic turnouts providing photogenic views of the rocky peaks.

Keep on the road toward the Many Glacier Hotel.

There, you’ll head over to the docks and hop on a boat shuttle to get to your first hike of the day, Grinnell Lake!

There is a small fee for taking the shuttle and one transfer is required to reach the trailhead.

Although hikers can forgo the boat shuttle and hike from the hotel area, this convenient and scenic ferry shaves 5 miles off the round-trip distance, making the total excursion a manageable 3 miles.

Expect this day hike to take about 2-3 hours with a 20-minute boat shuttle, making it a great option for those who have a limited amount of time. 

When you land at the final dock, follow the signs toward the Grinnell Lake Trail.

After about 1/2 mile you’ll be met by a suspension bridge that extends over the glacial blue stream. Just before crossing the bridge, check out the side trail (to the left) that will take you to a beautiful hidden waterfall. It’s worth the very short uphill climb for the view that awaits!

Back on the main route, cross the bridge one hiker at a time. 

Just a little bit farther and… there it is! The magnificent Grinnell Lake with Grinnell Glacier nestled in the nearby peak in the background.

This is a great spot for a group photo and a snack break. There are no bad views here!

On the way back to the Many Glacier Hotel, you can take the shuttle boat again or opt to hike around the lake adding some extra miles and opportunities to see wildlife like mountain goats or even bears (this is why you should bring bear spray!)

The choice is yours, but plan accordingly because there is much to see here… if you can’t tell already! 

Many Glacier Hotel

That hike was something else, and now your legs deserve a little break at the stunning patio of the Many Glacier Hotel.

Relax in the comfy chairs along the hotel’s deck and lawn while you hydrate and have a bite to eat.

We know this is the exact view you have been dreaming of! 

Book your stay at Many Glacier Hotel!

Redrock Falls

When you’ve taken plenty of photos and are ready to depart the Many Glacier Hotel, continue on the main road toward Swiftcurrent.

Watch for bighorn sheep along the roadway!

At the end of the road, you’ll find a campground, general store, dining options, and a visitor center.

Redrock Falls is accessed via the Swiftcurrent Pass Trailhead, which is near a campground and Swiftcurrent Lake.

This trail is famous for its moose sightings and, like all other areas of the park, sees the occasional bear.

This easy 3.5-mile out-and-back trail has very little elevation gain and is good for all abilities. Huckleberry ice cream waits for you at the general store!

That’s all for today! Spend tonight in one of the conveniently located campgrounds or lodging accommodations.

Rest up, refuel, and get ready for another exciting day in Glacier National Park. 

Day 2 of Your Glacier National Park Road Trip

Wasn’t the Many Glacier area of the park beautiful? You may feel like there’s no way it can get any better, but it’s about to!

Today you’ll be exploring the well known scenic drive, the Going-to-the-Sun Road, which covers much of the west side of the park.

This route stretches 50 miles across the park, and is often snowed in until late June or even July!

Be sure you have a permit to access Going-to-the-Sun Road, which is addressed above!

St. Mary Lake 

Since we’re still on the eastern side of the park, today will begin from the St. Mary Entrance.

As you drive alongside St. Mary Lake, you will pass by several scenic turnouts.

Take the time to pull off the main road and enjoy the mountain views! 

Be sure to snap a photo of the scenic Wild Goose Island in the middle of Saint Mary Lake!

You may want to also take the time to hike to St. Mary Falls on one end of the lake — it’s a short 1.7-mile out-and-back hike that’s worth the extra mileage!

Rising Sun

Our first official stop of the day is going to be at Rising Sun!

Here you will find the easy 0.5-mile out and back trail that brings you along the rocky shore of St. Mary Lake.

This is the perfect morning walk for uninterrupted views of the dramatic peaks on the far side of the lake. 

Sun Point Nature Trail

Take in your last bit of the beautiful St. Mary Lake with another easy hike on the 1.7-mile out and back Sun Point Nature Trail.

With epic views and frequent wildlife sightings, this is one you just can’t miss. 

If you want to cover a little more distance than what we have planned, a visit to St. Mary and Virginia Falls will add on a few miles.

We still have quite a bit of ground left to cover today, so plan accordingly! 

Logan Pass

Welcome to the highest point on the Going-to-the-Sun Road at 6,646 feet!

You’ll have the perfect view of the towering Clements and Reynolds Mountains in the Lewis Range!

Take your binoculars out and see if you can spot any bighorn sheep roaming in the scree fields.

Bird Woman Falls Overlook

Continuing on the main road, it’s all downhill from here… elevation wise, that is, the good views only continue!

Not far after the famous flows of the Weeping Wall, the overlook for Bird Woman Falls is a must-see attraction on the right side of the road.

You will find varying information on the actual height of this waterfall.

The signs at the overlook list 492 feet, while the World Waterfall Database says the falls is 960 feet.

Go see for yourself! Which measurement do you think is correct?

Trail of the Cedars Nature Trail and Avalanche Lake 

Enter the magical forest of giant old-growth cedars! Some of these massive trees tower over 80 feet tall.

The trees are easily accessed via the Trail of the Cedars Nature Trail right near the Avalanche Creek Picnic Area.

The boardwalk trail weaves through the trees offering appearances by the icy blue waters of Avalanche Creek.

That was a beautiful scenic drive along the Going-to-the-Sun Road, but by now you’re probably ready to get a good hike in to really stretch out your legs!

From the Trail of Cedars, follow signs to the Avalanche Lake Trail.

This 5.7-mile out-and-back trail is a moderate hike along Avalanche Creek and leads up to astonishing views of Avalanche Lake.

The trail is nicely shaded for most of the way, which makes it perfect for warmer mid-afternoon hikes in the summertime. 

It’s definitely one of the best hikes in Glacier National Park!

Lake McDonald

The famous rainbow-colored rocks of the Lake McDonald shores wait for you at the end of the Going-to-the-Sun Road.

This is the largest lake in Glacier National Park — a park of many, many lakes!

You may have seen photos of the shores sprinkled over social media, but now you get to see the real thing, no filter needed!

Some of the best places to view the lake are the Sprague Creek Picnic Area and the Apgar Village Area.

Well, here we are with the perfect way to end your Glacier National Park road trip.

This is where we leave you to find your next adventure in the little town of West Glacier.

Happy trails!

3 Days in Acadia National Park: Itinerary for a Perfect Trip

Rocky cliff walls meet the Atlantic Ocean in Acadia National Park on Maine’s Mount Desert Island.

Commonly known as Vacationland, Maine offers everything from delicious locally sourced seafood to beautiful outdoor terrain. There’s something for everyone to enjoy here!

Bar Harbor, Maine is the lively gateway community to Acadia National Park. With fun shops, walking trails, and restaurants, Bar Harbor makes a perfect basecamp for your Acadia adventure.

Choose from the many New England-style bed and breakfasts, modern hotels, or even campgrounds when you go to book your trip accommodations.

Grab your map, camera, hiking gear, and National Park Pass for a fun 3-day tour of Acadia National Park and Mount Desert Island — some of the best places to visit in Maine!

rocky shoreline at acadia national park in maine
PLANNING FOR ACADIA AT A GLANCE:  

When to Go: Since the winter temperatures go below zero and the main road through the park closes during winter, early spring, summer, and fall are the best times to visit Acadia National Park. 

Where to Stay: Unlike most National Parks that have park lodges, Acadia has none — except for camping grounds. 

There are 3 developed camping groups but I recommend camping at Blackwoods Campground on the East side of the island or Seawall Campground on the West side. These camping grounds are open seasonally (between May to October) but you'll need to book 6 months in advance from the official website directly.

However, if you find all the campgrounds booked out or you're just not into camping, you can find a number of hotels, lodges, cabins, etc. in Bar Harbor town or other areas of Mount Desert Island like Northeast Harbor, Southwest Harbor, or even Bass Harbor.

If you opt for Bar Harbor, I recommend staying at The Inn on Mount Desert which is not far from the park and it's in a few minutes walk to several shops and restaurants, Holiday Inn Bar Harbor Regency Hotel for a luxurious stay, Chiltern Inn for a romantic treat and Eden Village Motel and Cottages if you're looking for a more affordable option.

If you don't get accommodation in Bar Harbor, another beautiful area to stay on Mount Desert Island is Southwest Harbor. Drydock Inn & Cafe is what I recommend for budget travelers, and Harbor Ridge for stunning views of the mountains of Acadia National Park with a touch of luxury. 

And if you prefer a homey feel, this charming Log Home is a perfect choice. 

How to Get Around: It's easy to get around Acadia since there is only one main road! Park shuttles are available but I don't advise heavily relying on them as they can be crowded and slow. This means that the best way to get around the park at your pace and see all the major spots is by driving. If you're renting a car, compare car rentals and prices here. Alternately, you can rent an RV or campervan via RVShare and save on accommodations.  

3 Things Not to Forget to Pack: Binoculars are key for spotting wildlife -- I suggest these Nikon binoculars. For hikes, you'll want a sturdy pair of hiking boots -- I love my Ahnu boots -- and chemical-free organic sunscreen to protect your skin.

Know Before You Go: If you plan to visit multiple national parks in a year, the America the Beautiful Pass will save you a bundle! It costs $80 for an annual pass (for an entire vehicle traveling together) to all US national parks and federally managed sites.  

Renting a Car for Acadia National Park

looking down on a lake in acadia national park from a rock at the top of a hiking area

If you’re road-tripping Acadia with your own vehicle, you can skip to the next section!

If you plan to fly to Acadia, I suggest flying into Bangor International Airport (BGR) as it’s the easiest connection and you can easily rent a car from there to connect to Bar Harbor, Maine.

At Bangor International Airport there are plenty of car rentals available.

Not sure where to get the best deal on your rental? I’ve rented cars dozens of times through various search engines and have settled on Discover Cars as the best car rental search aggregator – it sifts through dozens of trusted rental companies to find the cheapest price for your rental! Compare prices renting in Maine here.

What to Pack for 3 Days in Acadia National Park

sunset over acadia national park -- water and rocks and trees

You can check out my complete road trip packing list but for a quick overview, here are the travel essentials you shouldn’t leave behind when going to Acadia National pack.

Travel Guides: This 3-day itinerary for Acadia National Park has everything I think you’ll need but if you want a more detailed guide, I recommend taking this Acadia National Park & Mount Desert Island guide as it includes every little detail that I may not have been able to fit in one single post. So together with my personal experience and the detailed info in this guide, you’ll be on your way to having an amazing time in Acadia.

Layered Clothing: Even in the summer months, Maine is not known for having normal summer temperatures and it’s the same for Acadia, so you’ll need to pack clothes in layers.

For summer or early fall, I suggest taking at least 2 shirts (synthetic or wool, long and/or short sleeve depending on the season), 2 pairs of leggings or pants, 2 pairs of shorts, 1 fleece outer layer, a waterproof jacket, a beanie, gloves, and 3 pairs of socks.

Comfortable Footwear: Acadia is all about enjoying the outdoors by either hiking or climbing some rocks and you’ll need a good and sturdy pair of hiking boots for that. I love my Ahnu Sugarpine boots for women, and for men, I suggest the KEEN Durand boot.

Sunscreen: After being sunburned a few times, I learned not to ever leave sunscreen behind. Bring and wear sunscreen every day of your trip, and be sure to reapply it every couple of hours. I like this chemical-free organic sunscreen.

Sunhat: Take a packable sunhat like this one. It has a strap to prevent it from being blown away and you can easily wear it on your back if you get tired of wearing it on the head.

Day pack: Keep all your daily travel items organized and easy to reach in a daypack. I like this inexpensive and lightweight Osprey daypack and it’s not only durable but it also has mesh panels on the back to allow for airflow.

Snacks: To stay strong and energetic while hiking in the park, I recommend taking some snacks. Pack or pick a picnic or throw a number of energy-giving snacks in your daypack. I recommend protein bars (I love CLIF bars), nuts, or other high-density snacks.

Camera: If you want a lightweight and good quality camera, I recommend Sony A6000 — I’ve been using it for years and I am happy I found it! However, you’ll need to bring a zoom lens for wildlife and a wide-angle lens for landscapes since it’s just the body.

First aid kit: Don’t let blisters or scrapes inconvenience your experience in Acadia. I suggest taking this HART Weekend First Aid kit as it has everything you might need and it’s super lightweight.

Water filter bottle: Though there are water fountains at most picnicking areas in Acadia, I still recommend taking a water bottle with a filter so you can fill up anywhere there’s a water source.

There are quite a number of water filtration systems but I love GRAYL Geopress! With it, you can filter water from any source, and it filters out 99.99% of microplastics, viruses, bacteria, and other nasty particles making the water instantly safe to drink.

Bug Spray: Don’t let bug bites ruin your trip — take this bug spray.

Where to Stay in Acadia National Park

road in acadia national park

Unlike most National Parks that have park lodges, Acadia has none except for camping grounds.

For campers, Camping in Acadia is a great way to experience the park even better with a touch of luxury as its camping grounds offer a bit more comfort compared to other typical camping grounds.

The park has 3 developed camping grounds with the 2 most popular on Mount Desert Island — Blackwoods Campground and Seawall Campground.

I recommend staying at Blackwoods Campground as it’s closer to the main attractions of the park. But Seawall is equally good if you don’t find availability at Blackwoods.

These accommodations can only be booked on the official website and way in advance — like 6 months before your trip.

If you don’t find a spot at any of those camping grounds or you prefer sleeping in a hotel, lodge, or cabin, then you can find a variety of accommodations in Bar Harbour.

Bar Harbour Accommodations

BUDGET | If you’re looking for something budget-friendly (well at least compared to other places in the area), I recommend staying at Eden Village Motel and Cottages.

It is located just 4mi away from Acadia National park, the rooms are clean and they come with basic appliances you might need for your stay — a kitchenette, coffee maker, and a cable TV.

>> Check photos and reviews on Booking.com | Book it on Hotels.com

BOUTIQUE | The Inn on Mount Desert has got to be the highly-rated hotel on Bar Harbor.

Located near the park and within a 5 minutes’ walk to various shops and restaurants, this hotel offers both a modern and old charm to its guests.

The rooms are very clean and you don’t have to worry about what to do when it rains as there are a number of indoor activities especially for people who want to stay fit and active.

>> Check photos and reviews on Booking.com | Book it on Hotels.com

LUXURY | If you want to enjoy Acadia with a touch of luxury, I recommend staying at Holiday Inn Bar Harbor Regency Hotel.

With soaring views of the Frenchman’s Bay, an outdoor pool, and a hot tub, nothing speaks the language of luxury like this resort.

The hotel features big cozy rooms with large windows to enjoy the views. And if you feel like unwinding, you can have a drink at their bar or cozy up next to the fireplace in the lounging area.

>> Check photos and reviews on Booking.com | Book it on Hotels.com

VRBO | If you want a full home to yourself while exploring Acadia National Park, I suggest staying at this beautiful and lovely log home.

With its inviting front porch and large windows, you’re bound to fall in love with the house immediately. It offers views of Raccoon Cove, Frenchman Bay, and the mountains of Mount Desert Island.

This 2 floored house can easily sleep up to 6 people and has everything that will make your stay memorable — from a big bathroom with a tub, a walk-in closet, a fully equipped kitchen, a fireplace to direct access to the shore.

>> Check photos and reviews on Vrbo

Day 1 of your Acadia National Park itinerary

Afternoon Sun at Sand Beach

Since you’ve just arrived on Mount Desert Island, a little relaxation by the ocean is in order before we start tackling all the things to do in Acadia National Park!

Although most of the coastline on the island is rocky cliff faces, there is one sandy ocean beach hidden inside Acadia National Park for all to enjoy!

Sand Beach is about a 20-minute drive from the Bar Harbor town center and is one of the first attractions along the Park Loop Road. The parking area tends to fill up early, so be prepared to scout for a parking spot.

The beach is staffed with park lifeguards to make swimming in the chilly water safe for all the brave souls that choose to do so. Sand Beach is the perfect spot to set up for a sunny afternoon with a cooler, beach chairs, and plenty of sunblock.  

If you’re not interested in swimming, there’s still plenty to do in this area, such as searching through tide pools to see who’s swimming around and walking the 290-meter shoreline to search for shells and sand dollars.

There are a couple of fun trails that take off from this area too. One of the nearby trailheads is for the Great Head Loop Trail, which starts on the east side of Sand Beach. The shorter loop option is 1.6 miles around and offers spectacular panoramic views of the area, including a scenic overlook of Sand Beach.

If you want to add a more challenging hike to your Acadia itinerary on the first day, the trailhead for the Beehive Trail, a tough but rewarding 1.6-mile loop, is located right near Sand Beach.

Stroll Bar Harbor

After soaking up the sun and relaxing the afternoon away, it’s time to head into town and enjoy all the cool things to do in Bar Harbor.

Bar Harbor is a charming New England coastal community with quirky boutique shops and amazing seafood restaurants.

Before dinner, take a walk along the Shore Path, which begins at the Town Pier. This short path offers beautiful views of the boats anchored in the harbor for the evening.

Dinner at The Terrace Grille

Dine right on the water next to the Town Pier. The outdoor seating is decorated with beautiful yellow umbrellas and offers five-star views of Frenchman Bay and the Porcupine Islands. Not only are the views great, but the food is too!

Keep it classic with a boiled Maine Lobster or indulge and order the Maine Lobster Bake, which comes with all the goods including New England clam chowder, steamed mussels and clams, over one pound of Maine Lobster, seasonal sides, and homemade blueberry pie!

Grab a cone at Mount Desert Island Ice Cream

Hope you saved room for dessert. Is any evening by the ocean complete without an ice cream cone? You already know the answer to that question!

The ice cream from Mount Desert Island Ice Cream is unlike any you’ve had before. Maybe it’s the premium flavors mixed with the ocean air, or maybe it’s the care that goes into every homemade batch. Yum!

Day 2 of your Acadia National Park itinerary

Drive the Park Loop Road

Roll the windows down and let in that warm sea breeze as you head out to tour Acadia’s Park Loop Road. Turn on your favorite playlist and enjoy the ride!

The 27-mile road that loops around Acadia National Park is the best scenic drive in the area, taking visitors from the ocean to the mountains and everywhere in between. Set aside at least 4 hours for the drive. There are lots of places to stop along the way, but here are some of the best sights:

First Stop: Hulls Cove Visitor Center

Begin your scenic drive around Acadia National Park at the Hulls Cove Visitor Center.

Here you can chat with a park ranger about your plans for the day, pick up a park map, buy souvenirs, and learn about the park’s natural and cultural history. The climb up the center’s 52 steps is sure to get your blood flowing!

Second Stop: Sieur de Monts

Sieur de Monts is the heart of Acadia National Park and one of the first attractions you’ll see when driving the scenic Park Loop Road.

This area is home to many sights, including the Sieur de Monts Spring, Acadia Nature Center, Wild Gardens of Acadia, Abbe Museum, and historic memorial paths.

Hiking around in this area is a great way to spot wildlife and a variety of native plants too!

Third Stop: Thunder Hole

Have your camera ready for this awesome feature!

Thunder Hole is appropriately named after the booming sound the ocean waves make as they slam against the rocky shore while pushing air and settled water to the surface.

The small rocky inlet at Thunder Hole may not be as wild at low tide, but wait for some choppy water to come in with the high tide, and you’re sure to hear what all the hype is about.

Fourth Stop: Otter Point

Less than a mile past Thunder Hole, there will be a parking area for Otter Point.

This rocky shoreline is named after Acadia National Park’s spunky river otters. The most impressive feature at this stop is Otter Cliff, which stands an impressive 110 ft high!

This is a great spot to hang out in the sun and watch the ocean waves crash over the rocks.

Fifth Stop: Lunch at Jordan Pond House Restaurant

After a morning of sightseeing, it’s time for a well-earned lunch break. Famous for their mouth-watering popovers, the Jordan Pond House Restaurant is every foodie’s dream come true.

In addition to the freshly made popovers, the menu is also loaded with fresh seafood options and entrees to satisfy every craving.

Last stop: Jordan Pond Loop Trail

It’s time to get a little hike in. Wouldn’t you agree?

The beautiful 3.5 loop trail around Jordan Pond is the perfect place. This scenic hike will take you along the shore of the pond. Sturdy shoes are recommended for this trail.

Although most of the terrain is level or boardwalk trail, there are a couple of sections of uneven rocky terrain.

Dinner at Leary’s Landing Irish Pub

After your drive around the Park Loop Road, take some time to relax at your campsite or hotel before heading out for an evening in Bar Harbor.

There’s nothing better than a meal from Leary’s Landing Irish Pub. Conveniently located right in town, this lively restaurant offers everything from bangers and mash to hardy Maine Lobster Rolls.

Don’t forget to add in one of their specialty cocktails!

Day 3 of your Acadia National Park itinerary

Sunrise at Cadillac Mountain

When you watch the sun come up from the summit of Cadillac Mountain, you’re watching the first sunrise in the entire country!

I hope you’re a morning person or can pretend to be one to experience this phenomenal sight.

Some folks choose to make the 3.5-mile hike to the top of the mountain to watch the sunrise, but you can drive to the lookout to sleep in a little longer. 

From Bar Harbor, it only takes about 20 minutes to drive up to the lookout.

Hike the Cadillac Mountain Summit Trail Loop

If you chose to drive up to the Cadillac Mountain lookout, there’s still a nice hike waiting for you at the top.

The Summit Trail is an easy half-mile loop that offers amazing views of the ocean and rocky shoreline during the golden morning hours.

Hike down the trail before the sun makes its appearance to find a secluded viewing spot. Don’t forget warm clothes, blankets, and hot beverages!

Breakfast at the Lighthouse Inn & Restaurant

An early morning adventure must be rewarded by a filling breakfast! Pack in a morning meal that will have you energized for the next fun activity in Acadia National Park at the Lighthouse Inn & Restaurant.

Whether you choose homemade blueberry pancakes with real maple syrup or the Fisherman’s Delight specialty omelette, you won’t be leaving hungry!

Take a Scenic Cruise

Until this morning, you’ve been admiring the Atlantic Ocean from shore. It’s time to get a new perspective!

At Sea Princess Nature Cruises, passengers can get out on the water for a chance to spot seals, osprey, and other ocean wildlife. The morning cruise is typically 3 hours long, and fills up in advance, so book early!

The boat makes a stopover at Little Cranberry Island, where passengers can see the 200-year-old fishing village and briefly explore the area.

In the last three days, you’ve watched the first sunrise in the USA, splashed around in the Atlantic Ocean, tried some of Maine’s famous seafood, and taken a scenic morning cruise. Now, it’s time to discover your next adventure in Vacationland!

Pin This 3 Day Acadia National Park Itinerary!

How to Spend One Day in Madrid: Your Perfect Mini-Itinerary (2023 Update)

Madrid is one of the most vibrant cities in the world, and if you’ve allotted yourself only one day in Madrid, you’ve got your work cut out for you.

As the capital of Spain, Madrid is home to innumerable unique neighborhoods, countless dining opportunities, endless culture.

In a word, Madrid is inexhaustible, and you’ll always find more to do in this magical city.

Planning your trip to Madrid at the last minute?

Here are my quick picks on what to do & where to stay!

💃 Top Madrid Experiences:
1. Flamenco Show at Torres Bermejas (with dinner and drinks)
2. Royal Palace Skip-the-Line & Tour (#1 attraction!)
3. Prado Museum Skip-the-Line & Tour (the Louvre of Spain)

🏨 Best Hotels:
1. Hotel Riu Plaza España (21st floor rooftop pool!)
2. Hotel Regina (central & budget pick)
3. Only YOU Boutique Hotel (in a restored palace!)

✈️ Flying in? Book an airport transfer with Welcome Pickups — they’ll greet you at the airport, help with bags, & bring you into the city, all pre-booked!
The Puerta de Alcala is a monument in the Plaza de la Independencia ("Independence Square") in Madrid, Spain. It was commissioned by King Carlos III, with construction beginning in 1778.

But since you only have one day in Madrid, concessions must be made so that you see the best of what the city has to offer in a limited time.

I’ve collected all my highlights of my many days in Madrid to create a perfect one day itinerary for you to follow.

If you have two days in Madrid, I also have a guide for that!

How I Planned This One Day in Madrid Itinerary

Madrid, Spain cityscape above Gran Via shopping street, with lots of cars and pedestrians in a busy intersection on one day in madrid

Consider this post your plan of attack for seeing as much of Madrid in a day as you possibly can.

Whether you’re just in Madrid for a quick layover before your Mallorca itinerary or Madrid is one of many cities on a whistle-stop one-week tour of Europe, this Madrid travel guide will help you see as much possible given the time constraints.

I’ve specifically created this post to have you traveling around Madrid as independently as possible without sacrificing the context and enrichment that the occasional paid experience can provide.

If planning your day in Madrid starts to stress you out, you could always book a full day Madrid sightseeing tour.

I personally always have a lot more fun when I mix and match fortuitous wandering, guided activities, and lots of walking while I’m sightseeing.

Old Luxury Residential Buildings In Madrid Salamanca district, with rounded red architecture on corner

For this one day in Madrid itinerary, I nix hop-on, hop-off buses and guided city tours in exchange for long but purposeful walks through the city which make a point of seeing key architectural and historical gems.

I offset the potential lack of context by also opting for a handful of special tours and experiences, namely, a tour of the Palacio Real (the only way to see the interior) and a flamenco show in the evening.

Since time is limited, I also suggest skip-the-line tickets when they make sense to maximize your time and appreciation of the city.

I find that this is the way you’re best able to make the most of your time in Madrid while also not feeling like cattle being carted around from point A to point B (which is how I feel at the end of an all-day city tour).

Getting Into Madrid

the ceiling of terminal 4 in madrid barajas airport

If you arrive to Madrid by plane, you’ll most likely fly into Madrid Barajas Airport.

It’s a large and frankly rather overwhelming airport, but you can get into the city center by a variety of ways: organized pick-up, taxi, bus, train, or metro.

Of these five options, I recommend either an organized pick-up or the bus. Taxis can overcharge travelers, the train is less convenient than it sounds, and the metro can be overwhelming.

Organized Pick Up

Metropolis hotel in Madrid in a beautiful summer night, Spain

This is by far the easiest way and it’s my #1 recommendation if you want a smooth entry to Madrid.

I like to use Welcome Pickups: it’s typically a few dollars more than a taxi or Uber, but you’ll be greeted at the airport by your dedicated driver.

They’ll help you with your bags, and you’ll get driven in without having to worry about getting a taxi or figuring out the subway — all pre-paid and no hassle.

Book your arrival with Welcome Pickups here!

Taxi

Taking a taxi is definitely possible.

In theory, there is a flat 30 euro fee for destinations in the city center; however, it’s not unheard of for taxi scams to happen, so I hesitate to strongly recommend a taxi.

If you’re not a confident international traveler, I’d pay a few euros more for an organized pickup like with Welcome — it’ll save you some headache for a minimal additional fee.

Metro

gran via metro

There are two metro stations at Madrid-Barajas Airport: one at Terminal 2 and one at Terminal 4.

If you are arriving at one of those terminals, the metro is fairly easy, but it will involve at least one transfer (and likely two).

Otherwise, if landing at Terminal 1 or 3, you have to take the airport shuttle, which is annoying and can take longer than you’d expect (Madrid Barajas is huge!).

Metro line 8 serves the airport, but it won’t bring you all the way into central Madrid. It is, however, a cheap option, at only 3 euros for a train ticket.

If you’re staying in Puerta del Sol (where I recommend), you’ll want to transfer first at Mar de Cristal to line 4 towards Arguelles. Then you’ll transfer again at Goya, heading towards Cuatro Caminos on line 2, but getting off at Sol.

There are other ways to get to Sol (i.e. line 8 to line 1 to line 2, line 8 to line 4 to line 1) but none that don’t require at least two transfers.

Train

madrid atocha railway station with modernist design and no one in the frame

From the airport, you can take the train to Atocha central railway station for under 3 euros.

Sounds great… in theory!

However, the train station is located at Terminal 4, and if you’re at one of the other terminals, you’ll need to take the airport shuttle there, which is time-consuming, so this is not as convenient as it sounds.

Plus, Atocha is not quite where I recommend staying for this Madrid itinerary, so it’s a bit of a walk from the train station to Puerta del Sol (about 30 minutes)

Airport Bus

This is the easiest way to get to Madrid Airport on a budget, in my opinion.

The bus serves Terminals 1, 2, and 4. If you land at terminal 3, you’ll need to take a shuttle bus first.

It’s 5 euros, so it’s a little more than the metro or the train, but it’s a lot more straightforward. It also runs 24/7 so it’s good if you have a flight at a strange hour.

The bus stops at Plaza de Cibeles and Atocha (daytime only) — neither are particularly close to Puerta del Sol so you will have to walk approximately 15 minutes to Plaza de Cibeles or 30 minutes from Atocha.

Getting Around Madrid

the metro sol station

Once you’re in the city, it’s easy to get around by foot or by public transit.

Madrid has a fantastic metro system that will zip you around the city center pretty easily via public transport if you choose.

However, this Madrid itinerary is designed to be entirely walkable, with no need to use the metro stations unless you get tired.

However, if you plan to visit other parts of the city that are not outlined on this itinerary — such as visiting the Bernabéu Stadium, home to the Real Madrid team and a must-visit for football fans — you’ll want to take the subway or a taxi/Uber.

Another option is buying hop-on, hop-off bus tickets, which conveniently connect the main Madrid attractions on a single bus line.

However, I don’t think it’s necessary for this itinerary unless you are traveling with young ones who can’t handle much walking or your group includes people with mobility limitations who may find the amount of walking on this Madrid itinerary to be a bit excessive.

One Day in Madrid Map

One Day in Madrid Itinerary

Morning: Breakfast, A Palace, & A Walk in the Park

Start your day the Spanish way with churros con chocolate.

Churros with a cup of coffee in Madrid
Churros con chocolate, the breakfast of champions

While to you and me, churros may be a dessert dish, in Spain, churros are a beloved breakfast treat, and nowhere sells more delicious churros than Chocolatería San Ginés.

Running for over a hundred years, this 24/7 achocolatería sells deliciously simple churros fried to perfection, served with coffee and lightly-sweetened chocolate.

Churros in Spain are a bit different than their Mexican counterparts: in Spain, they don’t use the cinnamon-sugar on the outside of the churro, making them a bit more savory (until you dip them in melted chocolate, at least!).

They’re also a bit thinner and more crispy, whereas the ones I’ve had in Mexico have been a little thicker and more custardy on the inside.

Head to the Royal Palace.

A symmetrical view of an ornate gray colored palace

A tour of Madrid’s Palacio Real is a must-do while you’re visiting the Spanish capital.

This is one of the top tourist attractions in Spain, so expect long lines. Beat the crowds by booking a skip-the-line ticket, which you can buy online here.

The palace is massive — as in, largest still-functional royal palace in Europe big, and this is a continent that likes its castles. We’re talking nearly 3,500 rooms big and 135,000 square meters of floor area (imagine those heating bills…).

I recommend going with a guided tour which helps you get an understanding of what you’re seeing and put the massive ostentation and wealth into perspective.

Madrid Royal Palace Hall interior view with beautiful decoration in Spain

This tour is 2 hours and allows you early access privileges to beat the crowds.

It covers all the best highlights of the Palacio Real: the Throne Room, Banquet Hall, Royal Apartments, exclusive artwork by the most famous artists in Spain, and time to walk around the beautiful Royal Gardens.

I’m not the biggest tour person, but I highly recommend this tour. I love having the opportunity to hear the royal stories which are able to bring this marvelous yet imposing palace to life.

Save time and book your skip-the-line ticket today

Marvel at the Catedral de la Almudena.

Side view of a beautiful European church with people walking around in front and a cloudy sky

Not far from Palacio Real is your next stop on this one day Madrid tour, Almudena Cathedral. To be precise, it’s the Catedral de Santa María La Real de La Almudena, which is quite a mouthful.

This cathedral blends Gothic and Neoclassical elements into a synthesis of beauty, yet it’s a surprisingly young cathedral.

The church took over a hundred years to be built, starting in 1883, yet didn’t finish construction until 1993!

Why so fractured? Its construction was interrupted by the Spanish Civil War and didn’t get picked up again until halfway through the 20th century.

The interior is a true marvel of architecture, showing its modernity with a variety of artistic styles on the interior, ranging from more traditional historical elements to those inspired by more modern elements.

The ceiling of the nave is particularly interesting, more inspired by geometry than traditional Christian artistic elements.

Check out the happening Plaza Mayor.

A man on a horse statue and red buildings in the background

As with any great European capital, Madrid is home to several beautful plazas that are the heart of city life.

Plaza Mayor is nearly 500 years old located at the heart of what was once Old Madrid.

Skip the cafés, which are all a bit tourist-trappy, and just wander through and do some people watching as you pass.

Walk through Puerta del Sol.

Symmetical red building with a fountain in the center and pink flowers

Just a few blocks down the road from Plaza Mayor is yet another important square in Madrid, Puerta del Sol.

One thing you’ll notice as you walk through Puerta del Sol is the placard for Kilometer 0.

All the radial roads in Madrid emanate out from this central point, with address numbers closer to Kilometer 0 being smaller and getting larger as they make their way throughout the city.

It’s an interesting quirk of city planning, and while not incredibly interesting, it is cool to stand at the “center” of Madrid!

Stroll down Calle de Alcalá to Retiro Park.

Ornate white palace with a Spain flag and an empty road in front of it

This is one of the longest streets in Madrid, and it’s the best way to walk to your next destination, Puerta de Alcalá, which marks the beginning of Retiro Park.

On the way, you’ll get a chance to marvel at some of Madrid’s most beautiful architecture.

Stop and snap some photos at the Círculo de Bellas Artes as well as Palacio de Cibeles and its namesake fountain.

Wander through the magical Retiro Park.

A building with clear glass walls and yellow details next to a lake on a sunny day

Retiro Park is to Madrid what Central Park is to New York City: an seemingly neverending oasis of calm in the middle of a vibrant metropolis.

I largely urge you to put away your phone and your Madrid checklist for a bit and just enjoy strolling around the park and people-watching.

But, since you do only have a day in Madrid and this is your one chance to make the best of it!

While in Retiro Park, make a point of seeing the Palacio de Cristal (the crystal palace, pictured above), the Estanque Grande del Retiro (artificial lake with a massive monument), and La Roseleda del Retiro (rose garden).

Afternoon: Lunch & Museum Hopping

Grab lunch near Retiro Park.

A bowl of red soup topped with meat and croutons at a Spanish restaurant.

A central location like Retiro Park would usually be full of tourist traps, but this is Spain, where bad food is nearly criminal.

There are a few places especially worth keeping an eye out for once you’ve finished your stroll through Retiro Park and are starting to feel the first grumblings of post-churro hunger.

If you’d like to try some Andalusian specialties, check out Lambuzo. Their salmorejo (chilled tomato soup which I love far more than gazpacho) is to die to for!

Another great place for traditional Spanish food is the lovely El Perro y la Galleta. I suggest you order mostly from the ‘entrantes’ and sample as much as you possibly can!

My favorites are the berenjas rebozadas (fried eggplant) and the croquetas de cocido (delicious bechamel and meat stuffed fried croquettes).

Get cultured at the Prado, Spain’s top musuem.

The front view of the famous Prado art museum with a statue in front, a must visit on your one day in Spain itinerary

I know that if you only have one day in Madrid, you don’t want to spend the entirety of it in a museum!

However, do please make an exception for the Prado, which is one of the world’s top art museums. It’d be like going to Paris and never seeing the Louvre.

Lines to enter the Prado are often quite long, and with only 24 hours in Madrid, you have super-limited time.

I strongly suggest buying a skip-the-line ticket so you can maximize your time — and skip waiting in a line that can often stretch around the block in the hot Spanish sun!

This museum contains art from the 12th century through the 19th century, and of particular note are its collections of paintings by Velazquez, El Greco (my favorite!), and Goya.

Beat the crowds and book your skip-the-line entry here!

Check out San Jerónimo el Real.

A stone and brick church with a tree in front and a grassy hill

This monastery dates back to the 1500s and has been remodeled beautifully, staying true to the original Neo-Gothic architecture while maintaining it for the ages.

At one point, this now-humble-looking church was once the official Royal Church of Madrid. Now, this stunning monastery overlooking the Prado from its vantage point on the hill is popular with tourists.

The interior is open from 8:30 AM to 1:30 PM and then from 5:30 PM to 8:30 PM; at all other times, you’ll have to admire it from the outside. Entrance is free.

Wander through the Botanic Garden.

View of a park with a fountain and roses in both background and foreground.

This beautiful Botanic Garden is well worth the affordable 4 euro entry price, and a short 30-minute stroll through the park would be time well spent on your one day in Madrid.

Home to over 5,000 different species of plants, there are 90,000 flowers and plants in the garden… not to mention 1,500 trees and literally a million more individual plants in the herbarium!

Most interesting is the greenhouse which has recreated a desert climate — one of the only places in Europe where you can actually experience a realistic desert.

Visit the Museo Nacional Centro de Arte Reina Sofía.

Reflection of a traditional architecture building reflected by a modern building

If two museums in a day is pushing it for you, feel free to skip this one.

But if you’re a fan of Picasso, Dalí, Miró, and other famous Spanish modernists, you won’t want to miss this museum focusing on the country’s most innovative 20th-century artists.

If there’s one central piece you shouldn’t miss at this museum, it’s Picasso’s greatest work, Guernica, a tour-de-force of artistic social commentary against the evils of war.

It’s one of the most important paintings of the 20th century (if not all time) and must be seen in person to be believed.

Tip: Book your tickets to Reina Sofia online in advance to save time.

Evening: A Stroll Down Gran Via, Dinner & A Flamenco Show

Walk down La Gran Via.

A grand European boulevard with a building with an angel on top of the roof

Walk up the shady pedestrian street, Paseo del Prado, until you reach Fuente de Cibeles again.

This time, instead of taking Calle de Alcalá, wander down La Gran Via, the most famous boulevard in Madrid.

Primarily composed of architecture influenced by Art Nouveau and Art Deco movements, you’ll see innumerable interesting buildings as you walk down the boulevard.

A few of the most iconic buildings you’ll walk past are the angel-topped Metropolis Hotel, the Torre de Madrid, and Edificio Grassy.

Stop for people-watching in Plaza de España.

A giant statue in the middle of the park with two skyscrapers around it.

Your stroll down Gran Via will end at yet another iconic Madrid building, Edificio España, another one of the tallest buildings in Madrid.

In front of it, you’ll find the large public space Plaza de España, a great place for people-watching!

Check out ancient history at Templo de Debod.

A few arches and a larger stone edifice that make up the Temple of Debod, an actual Egyptian temple in Madrid.

Finally, make your way over to the Templo de Debod, a reconstructed Egyptian temple in the middle of a public park!

The temple was gifted to Spain by Egypt in 1968 after the Aswan Dam was constructed, which put this temple and others at risk.

It was rebuilt and opened to the public in 1972, and it is free for all to see.

It’s one of the few authentic pieces of Egyptian architecture that you can see (outside of, well, Egypt…) that’s not in a museum!

Cap off the night with dinner and a show.

A female flamenco dancer in a dark room swirling her scarf around artistically.

Finish your day in Madrid in the most epic way possible: a flamenco show at the legendery Torres Bermejas, one of the best places to see flamenco in Madrid.

Order some tapas and sangria while you watch talented performers bring the art of flamenco to life.

Flamenco is a unique blend of dance and theater, marked by nuanced hand and facial gestures.

Besides that, it also utilizes rhythmic tapping of the feet and castanets held in the hands, and incorporating the dress and scarf to create fluid, beautiful movements.

It’s a really beautiful art form you won’t see outside of Spain, so if you will only be in Madrid for one day, you really should make a point of seeing a performance!

Book your flamenco show tickets here!

Where to Stay If You Only Have One Day in Madrid

A view of a famous Madrid boulevard all lit up in pink and orange with sunset colors.

Boutique Luxury: For a chic boutique hotel in Madrid, look to Only YOU Boutique Hotel!

With a central location that makes following this itinerary a breeze, a relaxing Thai-inspired spa center, a gorgeously decorated lobby, an outdoor lounge area, large rooms with high ceilings, and individualized rooms packed with personality, you won’t find much better for the price in Madrid.


Book online here.

Mid-Range with Views: Remember the beautiful Edificio España from our itinerary? Well, it turns out that the building is actually a hotel: Hotel Riu Plaza España!

You can check out incredible views from any one of the 27 floors, sweeping over Gran Via, Parque Oeste, and Madrid’s skyline as far as the eye can see. Amenities include a 21st-floor outdoor pool, 27th floor terrace bar, and a 24/7 gym.

Book online here.

Budget: The chic but budget-friendly Hotel Regina is a fantastic budget-friendly option just 2 minutes away from Puerta del Sol, right in the heart of Madrid (making this itinerary super easy to follow to the T).

Rooms are minimalist but stylish, with bold graphic designs and pops of color.

Book online here.

5 Things Not To Forget For a Trip to Madrid

A light-haired woman with a smartphone taking a photo of a famous Madrid landmark.

A secure daybag: While travel in Madrid is safe, pickpocketing is a major issue.

Thwart would-be pickpocketers with a chic, sleek backpack with double-interlocking zippers, slash-proof construction, & RFID blockers!

I’ve carried this exact PacSafe backpack to 30+ countries with me, and it’s my #1 travel companion.

Pick from one of seven colors — I have and love the classic black one!

Despite all its security features, it’s really quite classic and stylish, without anything that screams “I’m a tourist, target me!”

A pacsafe citysafe backpack

Comfortable walking shoes: This one day in Madrid itinerary has you walking a lot — so you’re going to need the best possible shoes for your trip!

I strongly recommend an ultra-comfortable walking sandal like these Birkenstocks, which mold to your foot for the most perfect custom fit imaginable.

You do have to wear them for a few days first to get that perfect contour, but once you do, you’ll never want to take them off.

In fact, I literally mourn the day each year it gets too cold to keep wearing Birkenstocks, and one day I may just rock socks with sandals to keep Birkenstock season going just a little longer.

I’ve had my pair of Gizeh sandals for 3 years and they are still fantastic.

brown birkenstock sandals with two straps slide on style

Portable charger: As an electronics-addict, I’m always running out of juice while running around the city on my travels.

Bring a portable charger to save yourself many headaches while traveling in Europe!

Anker is a reliable brand and this portable charger is what I personally use.

Plug in USB charger from powerbank input mobile phone or smartphone on wooden floor, Top view.

Spain guidebook: While you may only have one day in Madrid, hopefully you have more time allotted for the rest of your time in Spain!

If you do, be sure to snag a guidebook — while of course I love blogs, I also think guidebooks are essential for learning the basics of traveling a country, as they cover everything from tipping culture to common scams to useful phrases.

I typically use Lonely Planet guidebooks, so I’d recommend their Spain version.

a series of guidebooks on europe and other places to travel

Travel insurance: No matter where you travel in the world, travel insurance is a necessity and should be factored into your trip budget.

Trust me, you don’t want to have a second thought about seeking medical care abroad if something goes wrong on your trip.

Travel insurance also covers you in case of trip cancellation, theft, baggage delays, and other emergencies. It’s a must-have in my opinion.

I use and rely on SafetyWing‘s Nomad Insurance to keep me safe and insured throughout 60+ countries of travel!

With prices starting around $11/week of travel, it’s pretty much a no-brainer for stress-free travel coverage.

The Perfect 7-Day Mighty 5 Utah Road Trip Itinerary

Anybody who loves the outdoors needs to visit the incredible state of Utah!

Utah has so many options including phenomenal national parks (five of them!), hot springs, ski resorts, and more!

Pack your bags and your camera because this 7-day Utah itinerary has all of Utah’s unique destinations laid out in the perfect order.

I’ve ensured you hit all the top attractions and snag some of those drool-worthy Instagram pictures you see plaguing your feed, as well as suggesting a few off-the-beaten-path gems, while road tripping the Mighty 5 in Utah!

PLANNING FOR UTAH AT A GLANCE: 

When to Go: With mellow summers and stunning snow-covered winters, Utah is beautiful all year round but since you'll be spending a tremendous amount of time in the outdoors, I suggest going in the months of April-May and September-October. But if I had to pick just one month to go, I'd choose October — the crowds are fewer, the weather is appealing, and fall foliage is in full swing. 

Where to Stay: For this itinerary, you'll have sleepovers in Salt Lake City, Moab, Bryce Canyon National Park, and Springdale or Zion.

For the first overnight stay in Salt Lake City, I recommend staying at Kimpton Hotel Monaco for a luxurious stay in downtown SLC.

Moab has several accommodations but for something exclusive, I suggest staying at either Moab Red Stone Inn or Moab Springs Ranch. And if you prefer glamping, Under Canvas Moab is unmatched when it comes to comfort and style.

And for a sleepover near Bryce Canyon National Park, Stone Canyon Inn or Bryce Canyon Log Cabins in nearby Tropic is what I recommend or you can even opt for camping within the park itself at any of its 2 campgrounds.

And as for your last days on your Utah road trip in Springdale, you can either choose to camp inside Zion but if you can't find a campsite or just don't want to, then you can stay at either Cable Mountain Lodge or Springhill Suites in Springdale. Both of these places offer incredible Zion views.

How to Get Around: You're definitely going to need a car while road tripping Utah. If you don't know where to rent one from, you can compare car rentals and prices from here. Alternately, you can rent an RV or campervan via RVShare and save on accommodations. 

Best Activities: Want to fully enjoy your Utah road trip without the hustles of planning? Booking some activities will help you with that. You can book a horseback excursion on a canyon trail ride, an ATV tour, a Bryce Canyon National Park guided Tour, or a Moab Sound and Light Show tour.

3 Things Not to Forget to Pack:  A sturdy pair of hiking boots will serve you well -- I love my Ahnu boots. A dual purpose phone mount and charger will come in very handy and you'll be happy to have a roadside emergency kit should your car break down while road tripping.

Road trip pro tip: Purchase an annual pass (AKA the America the Beautiful Pass) to save money on the entrance fees for the multiple locations in this itinerary run by the NPS!

When to Plan Your Mighty 5 Utah Road Trip

Empty road going through Zion National Park with mountains on either side and orange autumn trees alongside the road

Utah is incredible any time of the year. With tepid summers and gorgeous snow-covered winters, there is never a season that doesn’t reveal jaw-dropping landscapes.

But since you’ll be cruising the highways and spending enormous amounts of time in the outdoors if you’re doing a Mighty 5 road trip, I suggest the months of April-May and September-October.

Late September and early October is a great time if you want to see some fall foliage in places like Zion!). If I had to pick the best month to visit Utah, I’d pick October — fewer crowds, better weather, and gorgeous foliage!

Going in the shoulder season will allow some crowds to dissipate at the popular sites and puts you ahead of snow closures. These months are considered the off season for crowds, and the weather has never failed me during these months.

Tips for Planning Your Utah National Parks Road Trip Itinerary

green tent outside of the landscape of zion national park a beautiful red rock landscape in utah

Prep for the parks. This Utah road trip means you will need to pay for entrance to at least 4 separate national parks, 5 if you also visit the interior of Capitol Reef and don’t just pass through. Each park can easily charge a $30 admission fee, so if you’re planning to enter more than two parks, an America the Beautiful pass will save you money! Buy it online at REI.

Time it wisely. Spring and fall, in my opinion, are the best times to visit Utah! Skip summer unless you’re willing to handle the heat (and school vacation crowds), and winter unless you’re a confident winter driver as many parts of Utah experience snow.

Cell service is spotty. Don’t always count on having cell phone service while driving in Utah! There are many long stretches of highway with very little service. Be prepared by having your maps downloaded offline.

Places on the map are not always as direct or close as they look. There are many routes that, at first glance, appear to be doable… but when you plug it into your maps app, you find they’re rather far apart! I’ve omitted a few notable places from this itinerary for that reason, such as Monument Valley, which is hard to squeeze into a 7-day Utah itinerary.

Utah Road Trip FAQs

Allison visiting Mesa Arch in Canyonlands national park sitting in the middle of Mesa Arch

How many days do you need to visit the Utah National Parks?

There are five incredible national parks in Utah (hence their collective nickname, the Mighty 5!). One week in Utah is enough time to catch a glimpse of each of the five national parks, but to see them in full, you could easily spend a month in Utah’s national parks and not see it all!

What are the best national parks to visit in Utah?

All of them, but this itinerary focuses the most time on Arches National Park, Bryce Canyon National Park, and Zion National Park, with briefer part-day trips to Canyonlands National Park and Capitol Reef National Park.

How do I plan a road trip to Utah?

The first step is to determine your itinerary: where are you flying or driving into, and how many days do you have from there?

Below, I’ll offer a few different routing ideas for driving around Utah, but generally, this itinerary assumes you’ll fly into Salt Lake City and then have seven days to explore Utah by car. 

If you have longer, you can absolutely spend more time at each site, but 7 days is the bare minimum to complete a Mighty 5 road trip!

The Mighty 5: Your Perfect 7 Day Utah Road Trip Itinerary

Day 1: Salt Lake City

A view of the skyline of Salt Lake City with enormous mountains towering over the city.

Salt Lake City International Airport is a hub for flights and car rentals as well as the perfect starting and ending point for exploring Utah.

I suggest booking your arrival and departure tickets from here, as it creates the perfect loop for your 7 day Utah road trip. 

Another option would be to fly into Las Vegas, in which case, your route itinerary would look like the following: Las Vegas – Zion – Bryce Canyon – Capitol Reef – Moab – back to Vegas or SLC. 

You could also add on a few days at the Grand Canyon and Grand Staircase-Escalante National Monument as well Page, AZ easily with this kind of itinerary. 

If that sounds more like the itinerary you want to follow, check out my Southwest road trip post, which does a roundtrip from Las Vegas to Moab and back, touching all Mighty 5, the Grand Canyon, and Page’s landmarks like Antelope Canyon and Horseshoe Bend.

However, for the purposes of this 7 day itinerary, let’s assume you’re flying into SLC, as it’s the easiest for routing purposes, plus SLC is a great airport hub!

Not sure where to get the best deal on your rental? I’ve rented cars dozens of times through various search engines and have settled on Discover Cars as the best site to rent with in the USA – it searches dozens of rental companies to find the cheapest price for your rental! Compare car rentals for your trip here!

Salt Lake City is in the heart of Utah, nestled among the Wasatch and Oquirrh Mountain Range it is surrounded with fantastic opportunities for fun.

Here’s how you should spend your day in SLC! If you have two days, read our two-day Salt Lake City itinerary.

Check-in to the Kimpton Hotel Monaco Salt Lake City

This luxury hotel is such a delight for the eyes!

Swirling colorful carpet draws you into the warm space of the lobby while modern vintage furniture gives the Kimpton Hotel Monaco an inviting atmosphere.

The rooms are adorned in old-world style with flashes of flair from the 1950s.

Hotel Monaco is perfectly situated in downtown SLC, making exploring the city extremely accessible.

Book your stay online here!

Grab a coffee and start your day

Begin your morning by making the 3 block walk to Campos Coffee.

Snag a seat in their stylish cafe and order up a delicious cappuccino with a side of Cran-Apple Toast.

Campos coffee offers an inviting, wide-open atmosphere adorned with a steampunk theme. Enjoy a quiet morning here as the city will quickly wake up.

Wander around downtown SLC

Giant Mormon church with cherry blossoms blooming in the spring and other spring flowers

Salt Lake City is known for its outdoor squares and parks. Once you’ve properly caffeinated, head to one of the year-round farmer’s markets for food, fun, and Utah flair.

There are several downtown areas that offer farmers’ markets at different times a year. A couple of options include Liberty ParkSugar House, and Downtown Farmers Markets.

Most of these markets only take place on Fridays and Saturdays but if you’re lucky enough to catch one, they’re worth the visit.

Fresh fruits and vegetables line the streets along with homemade gifts and local artists displaying their talents. It’s easy to spend a few hours wandering the streets.

While you’re on foot, consider seeking out some of Salt Lake’s most known and gorgeously constructed monuments such as the Mormon Temple, the State Capitol, and Temple Square. There’s a ton of historical sightseeing in downtown SLC, so be sure to pack your most comfortable shoes.

Hit the hiking trails

View of Salt Lake City in the far distance from the trail to the Living Room on a partly cloudy day.

Salt Lake City is filled with tons of outdoor options as well!

One of the most fun and accessible hiking trails is The Living Room. Lying just 10 minutes from downtown, this 2.2-mile out-and-back hike leads to incredible views of Downtown and the surrounding landscape.

Sit above the horizon on “chairs” made from surrounding rock and enjoy the afternoon high above the city.

If you desire some trails that require a bit more of a time commitment consider looking into Mount Timpanogos Trail or summit Grandeur Point. Both of the trails lead to exquisite views.

If you’re visiting in the fall, the colors of the changing leaves along both trails are breathtaking!

I also have a full guide to the best hikes near Salt Lake City here in case you want to extend your trip a bit and do a day hike or two!

Grab a delicious dinner in the city

Head back to the city and clean up for dinner.

Salt Lake is filled with phenomenal restaurants that’ll please any palate. A few of my favorites are Settebello for pizza or Red Iguana for Mexican.

Settebello offers insanely delicious Neapolitan style pizza wood-fired to perfection with a fluffy, buttery crust. Their bruschetta is simple and delicious, piled high with fresh tomatoes on divinely toasted bread. 

If a cuisine south of the border sounds more enticing, Red Iguana is the hot spot for you. Dubbed as Utah’s “killer Mexican food,” they have all the specialties including chimichangas and indulgent Mexican desserts that go down well with a custom-made margarita!

Day 2: Moab

Sign for the town of Moab which reads "Moab Again & Again The Adventure Never Ends" with a desert landscape in a background.

Day two of this Utah road trip is all about hiking and soaking up some of Utah’s most iconic scenery in Moab!

3.5 hours south of Salt Lake via an incredibly scenic drive lies 3 parks that are so breathtakingly beautiful, it’ll take two days to explore.

Dead Horse Point State ParkCanyonlands National Park, and Arches National Park all lie within miles of each other but the landscapes of each are so totally different.

Here’s how you should spend your first day in beautiful Moab.

Start the day with a delicious breakfast

As you roll into the quaint city of Moab, consider stopping for breakfast at the Love Muffin Cafe to fuel your hiking day.

They have all the breakfast classics including breakfast burritos, quiches and scones set in a brightly colored, eclectic cafe.

I’ve also heard rave reviews of Moab Cafe. Although I’ve never personally visited, it sounds like it’s worth checking out!

Head to Dead Horse Point State Park

An overlook in Dead Horse Point State Park where you can see a bend in the Colorado River that has hollowed out a canyon, with red rocks in layers on the sides of the canyon.

Dead Horse Point State Park is the perfect introduction to the beauty of Moab.

It’s a sprawling 5,000-acre park set high among the desert landscape with towering cliffs and unrivaled views of the Canyonlands in the distance.

There are several pull-outs along the drive to the parking lot that are all worth the extra stops.

But to truly experience the spectacular sights, hike the Dead Horse Rim Loop Trail. This trail is a 5-mile loop that canvasses the rim of the canyon.

The most prominent view from the trail is hands down the overlook at the point of the Colorado River — it’s stunning!

Dead Horse Point also has a trail system for mountain bikers as well. If you’ve come prepared to bike, the park Intrepid Trail is a 16-mile single-track trail on dirt roads that offers the same unrivaled views with a bit more adrenaline.

Head towards Canyonlands National Park

A view of Canyonlands National Park as seen through the empty space of a rock arch, Mesa Arch, looking out onto the landscape.

Rest your feet and make the short 12-minute drive over to Canyonlands National Park to the park entrance at the Island in the Sky Visitor Center.

Canyonlands is a massive park that has 3 different districts. For the sake of time, I recommend visiting the nearest and most accessible district called the Island In The Sky.

Here, you’ll find a comprehensive visitors center with rangers who are more than willing to help you plan your afternoon. 

The Island In The Sky is the only paved district in Canyonlands National Park with easy access to well-marked trails; the Needles is beautiful but more remote and not quite suited for such a quick trip to Utah, and the Maze and the Rivers (consisting of the Colorado River and the Green River) are even more remote.

On your drive into the park stop at the Grand View Point Overlook. The overlook totally lives up to its name as it reveals jaw-dropping views into Monument Basin as you ascend via a scenic drive. You can also take the trail, which is an easy 1.8-mile hike.

Another iconic sight is Mesa Arch, a short and easy 0.7-mile trail that leads you to an arch that’s perched perfectly on the edge of Canyonlands Cliffs.

After a few dramatic photos of Mesa Arch, head over to Upheaval Dome, the last trek of the day. Upheaval Dome is attractive because of its odd geology and wild folklore that surrounds its creation.

An easy 2-mile wide trail takes you along the rim of the Dome and gives you a panoramic view of just how weird and wonderful the geology truly is.

Grab a drink to toast your hikes

After an entire day of hiking, you deserve a beer!

Back in the city of Moab is Moab Brewery. The perfect place to end your first day in the spectacular Utah desert. Moab Brewery is always fun, always lively, and always has plenty of beer!

The atmosphere is a fun mix of outdoorsman bar vibes. Kayaks hang from the ceiling and pool tables fill the corners.

You’ll find a massive selection of microbrewed beers including ambers, lagers, Hefeweizens and IPAs.

They’re also a full-service restaurant, so grab dinner and hang around for a bit.

Check into your Moab accommodations

A lit up canvas glamping tent with a dark night sky with lots of visible stars.

There are several different options when it comes to accommodations in Moab. These include hotels, Airbnb, glamping, and camping.

If you’re wanting more of the comforts of home, there are plenty of commercial hotels located in the heart of Moab.

For something more unique look into the Moab Red Stone Inn or Moab Springs Ranch. Both offer a more low-key, secluded fee.

As for glamping, Under Canvas Moab knocks it out of the park in terms of comfort, style, and entertainment, and is frequently cited as one of the best glamping lodges in the entire United States.

Book your stay at Under Canvas Moab here!

If you’re wanting to go all in and camp under the stars, there are plenty of campgrounds dispersed in and around the city.

To find these, I recommend checking out my entire write-up on Utah’s incredible dispersed campsites or by using some well-known campground finder apps including The Dyrt, iOverlander, or  rec.gov website.

Day 3: Arches National Park

Wake up early while the city of Moab is still sleeping and get a head start on Arches National Park.

Arches National Park is one of Utah’s top attractions and draws over 1.5 million visitors a year. Because of its popularity, it’s important to beat the crowds if you want to experience Arches in all its glory.

Start with a sunrise hike to Delicate Arch

A view of the famous Delicate Arch, a Utah road trip must, taken at sunrise with the light falling on the left side of the arch.

The iconic Delicate Arch should be your first destination and you should plan to hike it before the sun rises.

To make this possible, check the local times of the sunrise and plan to head out about an hour and half before this.

You’ll need a headlamp or flashlight for the first part of the 1.5-mile hike to Delicate Arch, as it will still be dark outside.

If you timed it correctly, you’ll reach Delicate Arch just as the sun begins to beam on its east side.

It’s an amazing experience to see the surrounding landscape wake up and to watch Delicate Arch glow under the newly risen sun.

Wander the Devils Garden

A nearly empty trail in Devils Garden in Arches National Park with red sand on the trail and views of the red rocks and arches around it.

After you’ve captured photos of Utah’s most iconic arch, continue driving on Arches Entrance Road until you reach the Devils Garden Trailhead.

This 7-mile trail can easily be broken up into something more manageable (2-3 miles) while still offering insane views of the otherworldly landscape.

Massive boulders, tunnels, and arches are the highlight of this trail, as well as its tranquility.

Devils Garden is much less crowded than the surrounding trails and offers a great opportunity to bask in the uniqueness of Utah in peace.

On the way back, be sure to stop in Fiery Furnace which has some of the best views and reddest rocks in Arches.

Snap some final photos of Arches

A trail leading up to a red rock formation which features a rock "balancing" on top of another rock, with the moon rising in the background.

As you meander your way back to the entrance, take this chance to capture some stunning photos at the multiple pull-outs spread throughout the park.

Balanced Rock, the Windows, Double Arch, and Petrified Dunes Lookout are just a few spots worth a quick stop.

You also should make sure to visit the longest arch in the entire park, Landscape Arch, which is accessible via an easy 1.9-mile out-and-back trail.

The day should still be early enough to capture the stunning lighting and natural beauty of the surrounding rock formations.

Grab lunch and gas before hitting the road

Highway 70 going through Moab with red rocks and desert landscape around it.

Stop off in Moab for a bite to eat and gas up the car before you hit the road again to head towards your next destination.

The afternoon will be spent driving to Bryce Canyon National Park. The 4-hour drive from Arches National Park to Bryce Canyon National Park is absolutely stunning.

You’ll leave Arches and head West on highway 70. As you leave the desert landscape of Moab you’ll be transported into the mountainous scenery as you head south through Highway 24.

If you don’t want to visit Capitol Reef National Park, you can shave an hour or two off your drive time by skipping Highway 24, instead going a more direct route to Bryce via Highway 72 and Fishlake National Forest. However, for the purposes of this post, we’ll go the scenic route so you can visit Capitol Reef!

Stop quickly in Capitol Reef National Park

the sign to enter capitol reef national park

With only 7 days in Utah, it’s hard to tackle all of the Mighty 5 and do them proper justice. 

This Utah itinerary focuses more heavily on the Southern Utah national parks, but that doesn’t mean we can’t pop into Capitol Reef on the way to Bryce from Moab!

We won’t have time to take on some of the best hikes in Capitol Reef, but we can definitely see a few of the most beautiful landmarks there that are easy to access by car.

As you near Torrey, be sure to stop off at Factory Butte, a stunning and off-the-beaten-path land formation that looks like it could be something out of Mars. It’s right off Highway 24 so you can’t miss it.

For a quick but scenic spin through the park, stick to the parts of the park near Torrey that are accessible via Highway 24, all centered around the Visitor Center. 

This includes the Fruita Schoolhouse, the Petroglyphs, Hickman Natural Bridge, and the gorgeous views at Panorama Point.

If you have a national park pass, as you should, then you can also visit a few places within the park within an easy drive. That would include Fruita Barn, the Gifford Homestead, and if you have time for a hike, the Cassidy Arch Trailis a phenomenal 3.1-mile out-and-back with one of the best views in all of Capitol Reef, rated as moderate.

Arrive in Bryce Canyon National Park

allison looking over the edge of bryce canyon and its orange hoodoos

As you turn south and head towards Bryce, the topography changes one final time into a mix of bright red cliffs, canyons, and hoodoos.

The first sighting of a hoodoo along a scenic drive is a great indication that Bryce Canyon is just around the corner!

The city of Bryce is a small, quiet town that lies minutes outside the National Park. Although limited on hotels and restaurants, it’s easy to find a place to have dinner and a warm place to sleep.

You can also stay in nearby Escalante, which is halfway between Capitol Reef and Bryce Canyon and is home to Yonder Escalante, a great accommodation choice with cute cabins and Airstreams available for rent.

Grab dinner and hit the sheets

Hell’s Backbone Grill & Farm, Big Fish Family Restaurant and Stone Hearth Grille are a few restaurants that cater to weary travelers looking for a hearty meal.

As far as hotels, check out the Stone Canyon Inn or Bryce Canyon Log Cabins in nearby Tropic.

Each resort is immaculately maintained and offers stunning views of Bryce Canyon in a private setting.

Of course, Bryce Canyon is also brimming with campgrounds. There are two campgrounds inside the park, North Campground and Sunset Campground, as well as options for backcountry camping.

Day 4: Bryce Canyon

A brilliant view over the hoodoos in Bryce Canyon. Hoodoos are vertical finger-like rock formations formed by erosion over time.

Bryce Canyon is purely about the landscape!

With the largest concentration of hoodoos and brightly colored cliffs, Bryce Canyon is a geologic wonder that resembles Mars. 

Hikers will adore the plethora of beauty that is easily accessible via the trails in the park! 

While the classic Bryce Canyon Rim Trail would be amazing to do, at 11 miles roundtrip, it’s not doable for this itinerary, so save it for a return trip. We’ve listed a few shorter day hikes that are better suited for one day in Bryce instead.

Do a hoodoo hike

the hoodoos of bryce canyon

There are several different ways to enjoy one day in Bryce in an adventurous and active way!

Hike the Navajo Loop Trail or Queens Garden Loop inside the core section of the park to experience the topography from within the canyon.

Navajo Loop is a personal favorite and you’ll enjoy absolutely stunning views from everywhere on this canyon trail!

… Or hop on a horse or ATV!

Man on a brown horse wearing a cowboy hat and looking over the canyon views.

If your feet are exhausted from the previous days’ hikes, no worries — there’s still plenty of ways to experience Bryce Canyon without needing to hike.

Hop on a horse for a horseback excursion on a canyon trail ride or pump up your adrenaline with an ATV tour!

Either is a great way to stay active and see the best that Utah’s Mighty 5 have to offer without overexerting yourself.

Book your horseback excursion on a canyon trail ride now!

Get the best sunset view in Utah

Sun setting over a canyon full of red and white hoodoo landforms.

As the sun begins to set, head to Sunset Point to watch the most phenomenal sunset cover the canyon.

It’s probably the best place to catch the sunset in all of Utah, with its hoodoos, red rocks, and wide-open skies.

As the skies begin to darken, catch the glory of the stars, as Bryce is part of the world-renowned International Dark Skies club.

Of course, if you’re too tired for sunrise — or you just want to double up on the beauty of Bryce — another option is to do an early wakeup call the following morning at Sunrise Point, which offers a great vista from a viewpoint better oriented for the rising sun.

Day 5: Springdale and Zion

Wake up early and start the 2 hour drive to Springdale, Utah.

What makes the Beehive State so unique is the opportunity to experience dramatic landscape changes over the miles and the drive from Bryce to Springdale is a prime example of this.

Start at the East Entrance of Zion

A sign which reads "Zion National Park, National Park Service" on the road leading to the national park with mountains in the background.

Head south down highway 89. From here, you’ll hit the East Entrance of Zion National Park first.

I recommend coming in from this direction because it allows you to drive through the entire length of Zion before hitting the main headquarters of the Park.

There are no words to describe the beauty of Zion. Sky-high mountains loom over deep purple slot canyons, multi-layered rock formations weave among the cliff sides, and wild animals can be seen crossing the street.

The beauty will captivate you all the way to the visitors center where you’ll catch a park shuttle to the epic water hike of The Narrows.

Hike to the Narrows

People hiking in knee-deep water in hiking sticks in a slot canyon with purplish rocks and pale green water.

The Narrows is by far the top trail in Zion for discovering the interior slot canyons, and it’s a must-see on the bucket lists of hikers everywhere.

Some visitors rent waders and gear from the nearby Zion Outfitters but I don’t see this step as absolutely necessary. If you’re wanting to save money, it’s perfectly acceptable to hike without being outfitted.

Waterproof hiking shoes, however, are absolutely needed, or you’ll be regretting it. Trust me.

Jump on the shuttle and head to the last stop, Temple of Sinawava. From here, make the 1-mile paved hike into The Narrows.

The beauty of this hike is you can make it as long, or as short as you desire. The entire trail will be water wading while you explore between two towering canyon walls that tend to change color as the sun orbits over.

Get in as much, or as little, hiking in as you like and head back to the visitors center to claim a campsite.

Grab a campsite or check into a hotel

Lime green camping tent contrasting against the red and orange rock landscapes of Zion with Watchman mountain in the distance.

The Watchman Campground is the only public campground in the park and fills up quickly.

This is a gorgeous, shaded campground sitting at the foot of the Mountains with a paved walking path along the Colorado River and within walking distance to the bustling city of Springdale.

If you can’t (or don’t want to) snag one of the limited campsites in Zion, there are plenty of wonderful hotels in Springdale.

I recommend Cable Mountain Lodge or Springhill Suites, with their stunning floor-to-ceiling windowed lobby with incredible Zion views. Another classic is the Zion Lodge which must be booked months and months in advance.

Head to the city and grab a bite to eat at The Spotted Dog (American), Zion Pizza and Noodle (pizza), or the Whiptail Grill (Mexican).

Shop around the many unique, handcrafted stores and head back to camp to enjoy a night under the stars or to your hotel for some creature comforts in a beautiful setting.

Day 6: Zion National Park

Grab a delicious cup of coffee before hitting the trail

Woman hiking Angels Landing, a ridge hike with a chain assist, with views of the valley in Zion National Park on all sides.

Wake up early and hit Deep Creek Coffee for a pre-hike meal and hand-crafted coffee. You’ll need the energy for this hike!

Today’s trail, Angels Landing, is a strenuous uphill hike to the tops of Zion so you’ll need to properly fuel your body.

If you’re feeling extra energized this morning, rent a bike from Zion Cycles and skip the shuttle!

You can bike to the trailhead of Angels Landing as well as the rest of the park. Although a big undertaking, it’s a great alternative to beating the crowds.

 Angels Landing is arguably THE top hike in Zion and for a good reason. This 5-mile trail climbs up and over the canyons of Zion and gives you a birds-eye view of the true beauty of the park.

Summiting Angels Landing is an exhilarating experience! As you ascend, you’ll be assisted by chains that are hanging off the sheer cliffside offering a heart-pounding experience.

Once at the top you’re greeted by the most epic view on earth. Catch your breath and enjoy the beauty before you.

Want a different view? Head up to Observation Point. While normally this is a harder hike than Angel’s Landing, the East Rim to East Mesa approach is closed due to the danger of rockfall.

 The easier route via East Mesa is still accessible though, and is only rated as moderate. It involves a 6.7-mile out-and-back trail with only 700 feet of elevation gain (the hard Observation Point trail involves well over 2,000 feet of elevation gain!). 

For this trailhead, I suggest you park at the intersection of Beaver and Fir Roads if you don’t have a high-clearance vehicle.

 Celebrate your summit with a drink

Descend Angels Landing and head back to town for a celebratory beer at Zion Brewery.

Located creekside to the Colorado River, Zion Brewery has the perfect patio to enjoy the afternoon while you recharge and reminisce.

Once you’ve had a beer… or three, cool off at the riverbank or tackle a shorter Zion hike around sunset for even more epic views.

Hit Zion Canyon Overlook Trail for sunset

For a great view worthy of the final full day of your Utah itinerary, head to Zion Canyon Overlook Trail for sunset.

It’s a super short trail, less than 1 mile out-and-back and rated as easy, though there is about 400 feet of elevation gain. It’s absolutely worth it!

Parking is limited so you may have to circle around for a spot. Give yourself some extra time to find parking if you’re going at sunset as it is a popular sunset spot.

Day 7: Back to Salt Lake City

Brilliant turquoise hot spring in the middle of nowhere in Utah.

The last leg of your journey will be spent making the 4.5-hour drive back to Salt Lake City.

Don’t let the longer drive intimidate you, there are plenty of stops you can make along the way to break up the drive.

A few options I recommend are visiting the ghost town of Grafton, stretching your legs at Cedar Breaks National Monument or soaking in the natural hot springs along the way.

As you head north to Salt Lake City, you’ll conveniently pass two opportunities to soak in Utah’s many natural hot springs.

Mystic Hot Springs and Meadow Hot Springs are both located off Highway 15 and welcome tourists to enjoy the soothing heated waters. It’s the perfect ending to your 7-day road trip across Utah.

I hope this 7 day Utah itinerary inspires you to get out and enjoy this beautiful and truly unique state!

What to Pack for an Utah Road Trip

I have a complete USA road trip packing list that you can go through before your trip to know everything to take but below is a rundown.

Travel guides

This Utah road trip itinerary is packed with so much useful information but Travel guides are useful resources to have for deeper insights as they dedicate more time and resources to research. So, to fully arm yourself with knowledge and tips before doing the mighty 5 Utah Road Trip, I recommend combining my personal experience with this highly-rated Fodor’s Utah travel guide.

Phone Mount & Car Charger

Though cell network is not the best while road tripping Utah, you’ll still need your phone whether it’s to check maps or take photos, so it’s essential to have a car charger. And for navigating, a phone mount is gold! It takes away the pressure of having to check your phone while driving (which you shouldn’t do btw) or even asking your front-seat passenger all the time. I honestly can’t imagine going on a road trip without this dual-purpose phone mount and charger!

Snacks

Road trips just go better with snacks and let’s not forget how quickly hanger can kick in especially if you don’t want to keep stopping just to get something to eat. Pack a few snacks — and not just the sweet ones but a mix of sweets and salty ones too.

Rehydration packets

Rehydration packets are life savers when it comes to road trips! From long hikes, fatigue, uncoordinated meal times, scorching sun, there are so many incidences that can cause dehydration.

I always carry some rehydration packets for every road trip I go on and they’ve been great at keeping me hydrated. There are quite many on the market but I recommend these ones.

Bug spray and after-bite care

Nothing takes away the fun of enjoying a scenic hike like bug bites. I know it and I’ve been there — nowadays I never leave home without this lemon eucalyptus-based mosquito repellent, it’s a natural and DEET-free solution that works well on even the most stubborn mosquitos!

Unfortunately, it is sometimes inevitable to avoid bug bites regardless of how committed you were to applying and re-applying bug spray every couple of hours. In that case, this After Bite itch eraser will instantly soothe any bug bites.

Sunscreen

Most people don’t know this but the windshield doesn’t protect you against all UV rays. While they protect against UVB rays (which cause sunburn), most do not block UVA rays, which cause aging and skin cancer and that’s why it’s important to wear sunscreen even when driving.

On top of that, you’ll need it on hikes, beach days, or every time you go under the sun. You could probably get away with a cheaper sunscreen but since my face is kind of sensitive to chemical sunscreens, I need something gentle and I found that in this sunscreen.

And unlike the myth that some skin tones and races don’t need sunscreen, I am here to tell you that you need it as sun cancer doesn’t discriminate based on skin tone. So whether you’re white, pale like me, Black, Latina, or Asian, you need sunscreen!

If you’re hiking, don’t forget about your scalp either — I often end up with a burned scalp and it’s no fun, often leading to headaches. Buy a special sunscreen for hair and scalp to avoid this!

Rain jacket

Do you hate hiking in soaked clothes? Me too! You could have the perfect Utah road trip itinerary but that won’t stop it from raining but that also doesn’t mean you should just waste your day and wait for it to end while hiding in your hotel room!

Get yourself the Marmot PreCip rain jacket (there’s a women’s version and a men’s version). I’ve used mine for years doing all sorts of activities, from biking to hiking and traveling.

And the best part about this jacket is that it keeps me dry when it rains without making me uncomfortably hot like other rain jackets due to the zippered arm-pits which provide ventilation.

External batteries

The Anker external battery pack is a travel must. While you can charge your phone while driving, you may want to charge other devices — a camera, a drone, portable speakers, an e-reader — as well.

Or if you notice your battery is running low while you’re out hiking or sightseeing, you can just start charging right away without having to return to your car. It holds several charges on a single battery pack and will last days at a time.

Read Next

I have so many posts to help you plan an epic trip through the Southwest, from general packing guides to quotes to inspire your trip to detailed itineraries just like this one for neighboring states!

Here are my suggestions for where to go next.

What to Pack for a Road Trip: The Ultimate Road Trip Packing List
Road Trip Quotes: The Best Road Trip Quotes & Instagram Captions
Arizona Road Trip: The Perfect 7 Day Arizona Road Trip Itinerary
Southwest USA Road Trip (Nevada, Arizona, & Utah): The Ultimate Southwest Road Trip Itinerary for 10-14 Days
Idaho Road Trip: The Best Idaho Road Trip Itinerary
Montana Road Trip: The Perfect 10 Day Montana Road Trip Itinerary

Madeira Itinerary: A Road Trip Route for 3, 4, or 5 Days!

a woman standing underneath a waterfall in madeira island

Off the coast of Morocco, strewn in the Atlantic Ocean, you’ll find the Portuguese island of Madeira.

A diverse landscape — laurel forests, sheer cliff faces, towering waterfalls, and stunning beaches — makes the volcanic island of Madeira is the perfect destination to visit any time of the year!

I spent an incredible week doing a Madeira road trip in 2020, driving along the coast, hiking in the mountains, swimming in natural pools, and exploring delightful fishing villages.

The Madeira itinerary below is my condensed itinerary, designed for those who have a shorter time in Madeira, whether that’s 3, 4, or 5 days on the island.

view of marina da quinta grande in madeira

But you could easily spend two weeks in Madeira exploring the hiking trails and visiting charming towns.

Personally, I recommend spending at least four days on the island to see all the highlights and best things to do. However, if you’re short on time, three days are fine too.

I’ve included the absolute musts of a Madeira road trip route in the first three days of this itinerary.

The other two days of this Madeira itinerary allow you to explore a bit more of the island and try some really cool activities — if you can spare the time!

Luckily, the island is small, so you won’t need to drive long distances to see as much as possible (but you will want to rent a car — more on that here!)

Getting Around For This Madeira Road Trip

view of madeira roads

To be able to follow this itinerary for Madeira, you’ll need to rent a car.

The island is just not very accessible by public transportation, at least not in the short timeframes we’re dealing with, when we’re talking about 3 to 5 days in Madeira.

Luckily, driving in Madeira isn’t too difficult, but you’ll want to be sure you reserve your rental car in advance, especially during high season. Island inventories are always limited!

When looking for a rental car, I always use Discover Cars to search for the best deal for multiple reasons: namely, its larger inventory, its clear pricing, its cheap full coverage insurance, and its free cancellation policy.

🚗 Best Madeira Rental Car Prices: Discover Cars

This search engine not only looks at the typical rental car agencies (which can be $$$), it also looks at local, small Portuguese rental agencies that may offer better deals. Their pricing is straightforward (no bait-and-switches) and they offer free cancellation if you need it.

➜ Check rental prices in Madeira with Discover Cars here!

Tip: Make sure you book your car rental with full coverage insurance for peace of mind — it starts at only $7 per day, cheaper than you’d get at a rental agency!

Day 1 of Your Madeira Itinerary: Explore Funchal

the city center of funchal with trees and beautiful flowers and blue sky and free of people

The airport in Madeira is close to the island’s capital, Funchal.

The city is an ideal base to explore the whole island, as it’s perfectly located almost halfway along the southern coast.

You can dedicate your first day after landing to exploring the city, then go on day trips around the island.

Discover Funchal’s historic center.

the downtown of funchal with road signs painted on the road ground indicating one-way and no-traffic spots

Start by heading to the historical center of Funchal, where you can wander around the charming streets, visit beautiful churches, and stroll through lovely parks.

The city center is small and easy to explore on foot so you don’t need a car for this part of your Madeira itinerary.

First up is a visit to the Funchal Cathedral, a 15th-century Gothic church and one of the few buildings dating back to the period of the island’s colonization. 

The cathedral features three naves and a decorated Mudéjar ceiling.

the ornate gilded interior of the funchal catehdral, with lots of altarpieces in the nave, wooden chairs that serve as pews, and otherwise white walls with wooden detail in the parts that are not decorative

The ceiling, beautifully restored in 2021, is illuminated during visiting hours, allowing you to appreciate its intricate details.

After visiting the cathedral, you can explore the surrounding area!

Stroll along the streets covered in the typical calçada portuguesa (decorative sidewalks) and check out the colonial architecture. 

Not far from the cathedral, you can go shopping for local products at the Mercado dos Lavradores.

At the far east of Funchal Old Town, you can check out Forte de São Tiago, a seaside fortress painted in a bright yellow, once used to protect the city from pirate attacks.

the mustard yellow fort de sao tiago, against the backdrop of azure blue ocean and three sailboats in the distance

While you can’t access the interior of the fortress, you can wander around and even relax on the concrete beach right by it, where you can also go swimming.

Walk around Funchal’s Marina and head to the beautiful Santa Catarina Park.

The park looks more like a landscaped garden, with sculptures, colorful flower beds, curated walkways, and even a lovely little lake with swans and ducks.

Have lunch in Funchal’s Old Town.

historic street in the old town of funchal with cars parked on one side of the street, overcast sky, tree

Before you continue exploring the city, stop for lunch at one of the many restaurants in the Old Town for a delicious chance to refuel. 

Regional Flavours is a lively restaurant serving traditional Madeirense food, particularly delicious seafood dishes.

Be sure to try the tasty local bread, bolo do caco, and especially the swordfish with banana and passion fruit sauce!

Catch the cable car to Monte.

monte cable car in the center of funchal

After lunch, it’s time to enjoy a panoramic view of Funchal from above. 

Catch the Funchal cable car and head up to Monte, a hilltop area known for its hiking trails, viewpoints, and beautiful gardens.

The ride up will already reward you with stunning city views, but the wonders of this experience are just beginning!

Note: The Monte cable car costs €12.50 for an adult ticket

Explore the Monte Palace Tropical Garden.

monte garden in madeira with beautiful landscape, ponds, and views

One of the main sights in the area is the Monte Palace Tropical Garden, a gorgeous garden with multiple levels.

It houses a rich collection of tropical plants along with koi ponds and a lake with swans and ducks.

You can also admire beautiful peacocks and other birds roaming the garden.

Inside the garden, visit the Monte Palace Madeira Museum to check out beautiful sculptures and a collection of minerals from all over the world.

The entrance to the garden is €12.50 for adults, and it’s open daily except for Christmas Day.

Explore more of Monte.

Beautiful view of the Igreja de Nossa Senhora do Monte church in Funchal on the island Madeira

There’s plenty of other things to see and do in the Monte area!

I highly recommend visiting the beautiful Igreja de Nossa Senhora do Monte and exploring the hiking trails.

The City Levada leads down to the beautiful Madeira Botanical Garden, another gorgeous garden worth visiting.

Head back to Funchal center in the quirkiest way possible.

a man waiting looking at his phone while wearing all white and a straw hat, next to a wicker basket used to transport tourists down the hill

A unique way to descend back to Funchal center is in a wicker basket!

That’s right, Madeira has a century-old tradition, that of the Monte toboggans or sledges, born as a quick way to reach Funchal from Monte.

This unique public transportation means originated in the early 19th century, but later became a tourist attraction for obvious reasons! 

Two toboggan drivers, usually wearing white uniforms and straw hats, transport people downhill from the Monte church to the Livramento area in Funchal.

Try it for a fun and adrenaline-filled ride back to Funchal!

Go on a dolphin and whale watching tour.

view of dolphins near a boat in madeira

The perfect way to end your first day in Madeira is with a dolphin and whale-watching tour!

You’ll find plenty of options in Funchal (here’s a guide to our favorite choices!), but be sure to book in advance, especially during the peak summer months.

If you visit Madeira between May and late September, you can join this 3-hour Sunset Dolphin and Whale Watching Tour starting at 6:30 PM.

You’ll head out to Cabo Girão where you can admire the dramatic coastline from the boat or even go swimming.

While wildlife sightings are not a guarantee, with a bit of luck, you’ll spot dolphins, whales, and sea turtles in their natural habitat!

You also get a complimentary drink to sip as you watch the sunset from the boat for a perfectly relaxing evening.

Book your sunset dolphin and whale watching cruise!

a madeira sailboat out on the water on a sunny, clear day

In winter, you may want to join an afternoon tour, like this 3-hour Dolphin and Whale Watching Catamaran Cruise, starting at 3 PM.

The cruise allows you to admire the beautiful coastline of Madeira and have a chance to spot dolphins, whales, and turtles. 

If you choose this option, you may want to switch things around and visit Monte earlier, possibly before lunchtime, since you can’t go up by cable car after 6 PM.

Book your afternoon dolphin and whale watching catamaran cruise here!

Day 2 of Your Madeira Itinerary: Hiking in the Mountains

Madeira is famous for its spectacular hiking trails, and the best area is between Pico do Arieiro and Pico Ruivo, two of the highest peaks on the island.

Luckily, Pico do Arieiro is easy to reach from Funchal, with just a 40-minute drive!

Hike from Pico do Arieiro to Pico Ruivo.

"Stairs to heaven" nicknamed for its breathtaking view at famous mountain footpath from Pico do Arieiro to Pico Ruivo on the Portuguese Madeira island

Pico do Arieiro is the third-highest peak on Madeira. Looking out from 1,818 meters, the mountain peak offers spectacular views over the clouds. 

The great thing about this place is that you can drive nearly all the way up. From the parking lot, it’s just a short walk to the spectacular viewpoints.

For the best views, head up to the peak right before sunrise.

You’ll have to wake up very early, but watching the sun rising from the clouds is a sight you won’t soon forget. 

There’s no reason you can’t do it on your own (except hitting the snooze button), but you can also do a guided sunrise hiking tour if you prefer transportation and a guide sorted for you, especially if you’re not a morning person.

Bring warm clothes even in summer as it can get very cold and windy at the top! 

From Pico do Arieiro, you can follow a walking trail to the highest peak in Madeira, Pico Ruivo

people on the summit of Pico Ruivo, climbing the final stone stairway to reach the top, for views over Madeira Island, high above the clouds

The trail, PR1 Vereda do Areeiro, can be a bit challenging, but if you’re even moderately fit, you should be able to do it.

Along the way, you’ll also come across Madeira’s second-highest peak, Pico das Torres.

The trail is around 7 km one way, which takes roughly 3.5 hours due to the changes in elevation.

Shortly after the trailhead, the path separates into two trails, one passing through Pico das Torres (east trail) and the other going straight to Pico Ruivo (west trail).

The west trail is the most recent, and despite being slightly shorter, it has steeper climbs.

Note that as of spring 2023, the east trail passing by Pico das Torres was closed.

If that’s still the case when you visit, you’ll have to return along the same trail.

Overall, the return hike will take between 7 and 8 hours, so plan accordingly.

If you get to Pico do Arieiro by sunrise, you’ll finish the hike by the early afternoon. 

Oh, and remember: In any case, bring water and food to stay fueled on your hike!

Visit the charming Santana.

two colorful typical madeira houses with thatched roofs and birds of paradise flowers in front

If you have time and energy left after the hike, you can drive from Pico do Arieiro to Santana, Madeira’s most iconic village (and one of Portugal’s cutest villages, period!)

The drive only takes around 45 minutes and passes through the lush greenery of Parque Natural do Ribeiro Frio and along a portion of the northern coast.

The main reason to visit Santana is to admire the charming traditional houses.

The triangular houses with straw roofs look like something out of a fairytale, with the doors and windows painted beautifully in bright colors.

You can find these traditional houses surrounded by charming little gardens right in the center of Santana.

Before reaching Santana, you can stop to check out the lovely beach Praia do Faial and the nearby coastal viewpoint Miradouro do Guindaste.

the stunning view from Miradouro do Guindaste with high cliffs facing the atlantic ocean, Madeira Island

If you need a break or a pick-me-up, stop by Delicias da Bia for coffee and tasty baked goods.

Just south of Santana, you can explore the Aguage Waterfall

If you’re looking for less touristy places to visit in Madeira, this is one of them.

Just park at the end of the road and follow the short trail to the waterfall — it’s half-mile roundtrip hike, with only about 90 feet of elevation change.

Certainly easier than the previous hike!

Have dinner in Funchal.

Alley in the old town with restaurants, by night, orange lamplight casting a color over the scene of people eating dinner late at night, Funchal, Madeira

Drive back to Funchal in time for dinner. 
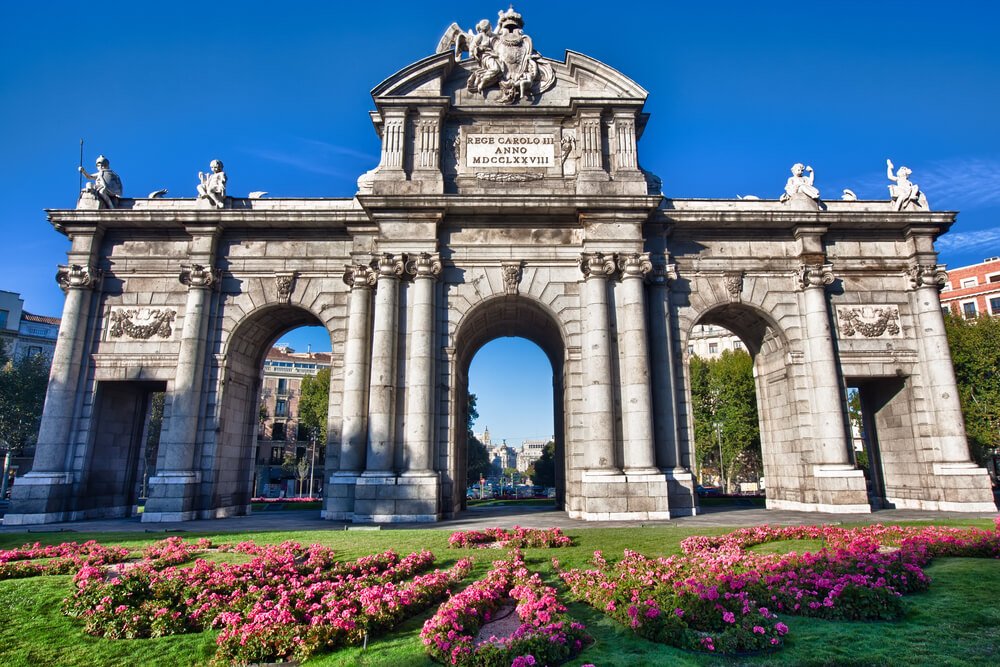
If you eat meat, La Vaca Negra is a great spot for delicious steaks. 

If you prefer fish or international dishes like pasta or risotto, head to Leeno’s Bar & Restaurant.

They also have a few vegetarian options.

Day 3 of Your Madeira Itinerary: Explore Madeira’s Coastline

After hiking in the mountains, it’s time to enjoy Madeira’s beautiful coast!

If the weather is good enough, we’ll also go for a relaxing swim in some natural pools.

Visit Seixal.

Amazing nature landscape in Seixal, Madeira, Portugal, europe with natural lava rock swimming pool

Continue your Madeira road trip by driving around 50 minutes from Funchal to Seixal, a small coastal town in northwestern Madeira.

The town features a beautiful promenade offering sweeping coastal views, but it’s better known for its gorgeous natural pools.

The best thing about Seixal’s natural pools is that they are free to access!

Park your car at the parking lot of Poça do Mata Sete and check out the various pools all around. 

Depending on the season of your visit, you may be lucky enough to have the place all to yourself.

Stop by Ribeira da Janela.

Girl looking at Ribeira da Janela islet between a cave in Madeira, through an arch, looking at the sea

Driving farther west toward Porto Moniz, you’ll pass by the small town of Ribeira da Janela.

In the upper part of town, stop by Miradouro da Eira da Achada to enjoy the coastal view.

The town overlooks a set of sea stacks just off the coast, jutting up from the sea like a hand jutting up from the sea.

Drive down to the coast and be sure to enjoy the lovely view from Miradouro Ilheus da Ribeira da Janela.

Swim in the natural pools of Porto Moniz. 

Lava pools in Porto Moniz, Madeira, with ramps and stairway accesses to the pools

After Ribeira da Janela, drive for 10 minutes to Porto Moniz.

The main attraction in town is the complex of natural pools formed within the volcanic rock formations, made more accessible with paved access and stair entries into the pools.

Unlike those in Seixal, the natural pools in Porto Moniz have a small entry fee of €3.

However, the pools are much bigger and better maintained than those in Seixal and the volcanic rocks around the pools create a truly marvelous scenic view!

You can spend a couple of hours sunbathing and swimming in the refreshing waters of the natural pools, then go for lunch. 

Sea View Restaurante is conveniently located right by the pools, serving delicious seafood dishes with a beautiful view.

Another option, Conchinha, is a great alternative for tasty sandwiches, salads, and tapas.

Catch the Achadas da Cruz cable car.

Achadas da Cruz cable railway near Porto Moniz, with the scenery of Madeira's coastline in the background

After lunch, drive for around 20 minutes to Achadas da Cruz

The small town is best known for the spectacular cable car connecting the upper town to the coastal hamlet Fajã da Quebrada Nova.
The cable car ride goes down an extremely steep cliff and provides stunning views.

Once you get down, you can enjoy a pleasant ride along the coast and through the tranquil little hamlet.

Just note that the cable car may not run if it’s very windy, so check the weather before you go! 

It’s also a great deal compared to the Monte cable car — a return ride is only €5!

Drive along the southern coast, stopping at Ponta do Pargo.

Farol da Ponta do Pargo Ilha da Madeira. Lighthouse Ponta do Pargo

From Achadas da Cruz, drive along the southern coast toward Funchal. 

Depending on how much time you have, you can stop at several places along the way.

However, I recommend planning this so you can reach Cabo Girão in time for a beautiful sunset. 

The drive from Achadas da Cruz to Cabo Girão takes around one hour without stopping.

The first stop is Ponta do Pargo, where you can check out the lighthouse and some truly spectacular views from Farol da Ponta do Pargo.

Continue on to Jardim do Mar.

Jardim do Mar village with Promenade at beautiful coast of Madeira island, brilliant blue sea and paved pathway with palm tree and rocky terrain at the end of the path

Next, drive by the quaint fishing village of Paul do Mar (stopping if you want to) and further along the coast to Jardim do Mar.

In Jardim do Mar, you can walk along the beautiful seaside promenade and wander through the narrow alleyways lined with beautiful flowers. 

If you have time for a little break, check out the delightful Maktub Guest House and have a refreshing drink or a tasty dessert in their lovely garden.

See one of Madeira’s prettiest waterfalls.

girl with her hands raised, hair wet, underneath the Cascata dos Anjos waterfall in madeira, on the cliffside road

Keep driving east along the coast, and you’ll pass by one of the most spectacular sights in Madeira.

Roughly 15 minutes from Jardim do Mar, you’ll come across Cascata dos Anjos, a waterfall cascading off the cliff directly onto the road.

When I visited this place, you could literally drive through the waterfall!

However, the popularity of the place and the danger of falling rocks have since led to the closure of the road to vehicles.

Pedestrian access is still allowed, but you should prepare for crowds of people.

Watch the sunset from Cabo Girão.

view from the side of the cabo girao skywalk

Cabo Girão is a great spot to watch the sunset in Madeira, both for its location and for its epic viewing platform! 

The Cabo Girão Skywalk is a modern observation deck with a glass platform overlooking the ocean.

This is one of the best coastal views in Madeira and is easily accessible by car!

Note that there’s a small fee, €2, to access the Skywalk.

Have dinner in Câmara de Lobos.

view of camara de lobos fishing village in madeira

For a change of scenery, you can stop off for dinner in Câmara de Lobos, a small town just 10 minutes before Funchal.

The charming seaside town was the landing place of João Gonçalves Zarco, the Portuguese explorer who discovered Madeira.

The town is also known for a life-size statue of Winston Churchill, who visited Madeira in 1950. 

In the bay area, close to Churchill’s statue, you can find many wonderful restaurants where you can stop for dinner.

Minerva is a great spot offering all kinds of dishes, including vegetarian options.

Day 4 of Your Madeira Itinerary: Coastal Walks

If you only have one more day to spend in Madeira, you can explore the eastern coastline.

In particular, we’ll focus on the beautiful Ponta de São Lourenço!

Walk the Vereda da Ponta de São Lourenço.

Landscape and Rock formations at the coast of Ponta de São Lourenço, with people walking along the path as well, on a sunny day

From Funchal, drive for around 40 minutes until you reach the roundabout where you can park your car and begin the Ponta de São Lourenço trail.

The hiking trail is easy to walk and easy to follow, with clear signs as well as many portions of walkways and stairs.

The return hike takes around two hours without stops, but you’ll come across many gorgeous viewpoints that you’ll just have to stop for!

So ignore the 2-hour guideline and basically plan on spending the entire morning here.

At Miradouro de São Lourenço you can check out spectacular rock formations emerging from the deep blue water, and maybe descend to the wild São Lourenço Beach.

view of sea stacks at the end of the Miradouro de São Lourenço with wild atlantic ocean waves beating against the landscape and creating erosion over time

Before the last portion, which is the steepest, you’ll come across a small café, Casa do Sardinha.

This is the only café around, so expect the food to be overpriced. 

However, you can have a coffee or a drink before you continue the hike. Personally, I’d recommend bringing a few snacks instead of buying food here.

The last climb will lead you to Miradouro Ponta do Furado, where you can enjoy sweeping views of Madeira’s dramatic coastline. In front of you, the deserted Ilhéu da Cevada stretches into the Atlantic Ocean. 

After taking some time to check out the view, walk back to the car and drive to your next destination.

Have lunch in Caniçal.

Beach of Canical near Ponta de Sao Lourenco in Madeira, Portugal with gorgeous landscape and dark sand and a small beach shack or restaurant

The charming Caniçal is a small coastal village 10 minutes from Ponta de São Lourenço. 

The fishing village is maybe best known for the Whale Museum, an innovative museum dedicated to the history of whaling, which was once the village’s core activity.

The museum now promotes scientific research and conservation projects to protect marine life in Madeira.

You can visit the museum or explore the fishing village and stop for lunch.

Try the fish dishes at Tasquinha do Pescador or grab a quick bite at Tasca do Samão.

Relax by the pool or go hiking in Porto da Cruz.

From Caniçal, drive north to Porto da Cruz.

Here, you can choose between relaxing at the beautiful public swimming pool or hiking up the impressive mountain peak Penha de Águia

The hike is quite steep and challenging, but it rewards visitors with awe-inspiring views.

The full hike is quite intense — only 4 miles long return but gaining 5,000 feet of altitude in that period — so it’s only for expert hikers.

You can also just go as far as you want and stop and turn around after you’ve had enough!

If you prefer spending a few hours soaking in the sun, check out the Piscina do Porto da Cruz.

There is a small entry fee (about one euro), but you can stay as long as you want and swim in lovely pools overlooking the little bay.

If you want to enjoy a lovely view from above without hiking Penha de Águia, head to Cabeço do Cerrado viewpoint, just a 5-minute drive from the center of Porto da Cruz.

Another lovely viewpoint is Pico do Fortim, which you can easily reach on foot from the public pool.

Visit the Cristo Rei and have dinner in Caniço.

The Christ the King statue is a Catholic monument on Madeira island, seen at sunset, with the large statue against the horizon

Before returning to Funchal, head to Caniço to enjoy the sunset from the Cristo Rei

Like Lisbon, Madeira has its own statue of “Christ the King”.

The statue was built in 1927, four years before the ultra-famous Christ the Redeemer in Rio de Janeiro.

After enjoying the beautiful coastal views in the soft sunset light, head to the center of Caniço for dinner. 

Go to A Traineira for a great choice of delightful seafood, or try the cozy La Terraça for traditional dishes, from seafood and meat to tasty vegetarian tapas.

Day 5 of Your Madeira Itinerary: Choose Your Adventure!

For your fifth and final day in Madeira, you’ve got your choice between nature, culture, and wine!

Whether you want to explore more natural sights, check out museums and parks in Funchal, or go on a wine tasting tour, here are 3 ideas for your final day of this Madeira itinerary. 

Discover Madeira’s waterfalls.

Madeira waterfall - 25 Fontes or 25 Springs in English, with lots of small waterfalls dripping into a natural pool, with lush greenery around the spring

If you want to explore more natural sights and check out some of the most impressive waterfalls in Madeira, drive west and inland.

Prepare for some spectacular hikes immersed in the lush vegetation of the Valley of Rabaçal!

The two main trails are Levada das 25 Fontes and Levada do Risco

The first trail is just over 4 km long and takes around three hours out and back.

You’ll walk through the impressive Laurissilva Forest along beautiful trails until you reach the stunning lagoon and waterfall. 

After admiring, and maybe bathing in, the Lagoa das 25 Fontes, head back along the same trail until you find the fork and take the path to the Risco Waterfall

huge tall waterfall with misty landscape in the mountains

This trail is shorter and easier. You’ll walk through a similar landscape and reach the spectacular waterfall in under one hour. 

These trails are both quite popular, so be prepared for crowds, especially if you visit during peak season.

Since you’ll be spending several hours in nature, bring plenty of water and some food. 

Spend the day in Funchal.

a very narrow and steep road in madeira's main city of funchal, with plants growing on the sides of buildings

An alternative to exploring the waterfalls is to spend the day in Funchal and check out some museums and any parks or gardens you didn’t manage to visit on the first day.

This is a great option if the weather is not ideal for walking around or you’re too tired for more hiking. 

To learn about Madeira’s history, visit the interactive museum Madeira Story Centre.

If you like art, check out the beautiful collection at the Sacred Art Museum of Funchal

If you have a passion for soccer, there’s an entire museum dedicated to Cristiano Ronaldo.

Madeira is Ronaldo’s birthplace, and you can see how much pride locals take in this fact from the big statue outside the museum!  

view of two glasses of madeira wine next to cups of coffee, on a table on a terrace, with a view of funchal behind it

Another great way to get to know Funchal is to join a guided tour like this Food and Wine Walking Tour.

During the 3-hour activity, you’ll learn about Funchal’s history and admire its architecture while stopping along the way for 11 food and 6 drink tastings, including seafood, sweets, wine, and the local drink, poncha!

Book your history, food, and wine walking tour here!

Join a full-day wine tour.

View of house and vineyard in mountain village in northern part of Madeira island, Portugal

You can find many full-day wine tours departing from Funchal, perfect for an easy day exploring Madeira’s wineries! 

This 8-hour Wine Tour with Lunch takes you on a culinary excursion of western Madeira, starting from Câmara de Lobos and passing through São Vicente and Porto Moniz.

You get to visit vineyards, enjoy tasty local products, appreciate stunning coastal views, and learn about local wine production.

Book your full-day wine tour with lunch here!

Vineyard at the Levada do Norte on Madeira

This Skywalk & Madeira Wine Tasting Tour is a great alternative and includes stops in the beautiful Serra d’Água, Paúl da Serra, Porto Moniz, and São Vicente.

The tour also includes a stop at Cabo Girão, in case you didn’t see it on the third day. 

This tour includes plenty of wine and local product tastings as well!

Book your Madeira wine tasting and Skywalk tour here!

Where to Stay in Madeira

the city center of funchal with trees and beautiful flowers and blue sky and free of people

This Madeira itinerary has you staying in Funchal for the duration of your trip.

Even if you’re doing a Madeira road trip, Funchal’s central location means that it’s more convenient to return there each night instead of moving location every night or every other night.

Budget: Hotel Madeira

Hotel Madeira is surprisingly budget-friendly given its amenities and location!

Situated just a bit outside of the city center (but not too far a walk), the hotel provides a peaceful and relaxed environment.

Even though it’s a fairly affordable hotel, you can still enjoy a small rooftop pool complete with sun loungers offer a refreshing escape, the perfect place to relax after a busy day.

The rooms at Hotel Madeira have been recently given a refresh, designed with a funky and colorful touch.

Despite their size, the rooms are thoughtfully decorated, with little colorful details that add a touch of personality.

Perfect for those who want to get up and go, Hotel Madeira offers a free breakfast that provides you with the fuel you need to tackle this Madeira itinerary!

Check availability, prices, room types, and reviews here!

Mid-Range: Barceló Funchal Oldtown

Barceló Funchal Oldtown offers a delightful mid-range place to stay in Funchal with all the amenities you’d need.

The best part is its outdoor rooftop swimming pool, complete with comfortable beds for lounging, sun chairs, and a bar, where guests can sip cocktails and admire the city views.

The hotel’s lobby area has a funky, contemporary design, with modern furniture and an artistic chandelier, which extends into another bar area.

The rooms at Barceló Funchal Oldtown are spacious and minimalist, featuring working areas, flat-screen TVs, and some even have balconies.

The modern, marble bathrooms are equipped with step-in rain showers and modern vanities for a spa-like home experience.

Additionally, breakfast is included, for a delicious and easy start to each day!

Check availability, prices, room types, and reviews here!

Luxury: Savoy Palace

The Savoy Palace is the perfect Funchal luxury hotel, as it’s part of the Leading Hotels of the World brand, which guarantees a world-class experience for its guests.

The hotel has several outdoor swimming pools to choose from — some heated for year-round enjoyment!

The clear highlight is the rooftop infinity pool, where guests can swim while enjoying breathtaking views of the Atlantic, creating the perfect backdrop for capturing epic photos and unforgettable memories.

The hotel also features a vast rooftop terrace with panoramic views of Funchal city.

For those seeking even more relaxation than a pool can offer, the spa area offers a range of amenities for an extra charge, including an indoor plunge pool, hot tub, hammam, sauna, and massage rooms.

Other amenities include on-site parking and a complimentary breakfast.

The rooms at the Savoy are gorgeous, with huge spacious rooms and luxurious furnishings that don’t feel overdone.

Mostly, the focus is on the windows and the beautiful views just outside them: some even have floor-to-ceiling windows that reveal sea views.

The bathrooms are also are designed to provide a spa-like experience, complete with two sinks, spacious showers, and some even offering soaking tubs for ultimate relaxation.

Check availability, prices, room types, and reviews here!

Nice Itinerary: How to Make the Most of 2 Days in Nice!

architecture of nice with brilliant colors

Nestled on the luxurious French Riviera, the vibrant city of Nice charms visitors with its turquoise waters, stunning beaches, and an overall artistic allure.

While you could easily spend a whole week wandering around the streets of this coastal gem, our 2-Day itinerary is your perfect guide if your time on the Riviera is limited.

Nice really began to boom during the Belle Epoque period in the 19th century, and this is reflected by its beautiful architecture.

iconic buildings of nice with palm trees around it

Many Nice landmarks, like the iconic Promenade des Anglais, were built during this time.

Over centuries, this unique city has attracted renowned artists and thinkers including Henri Matisse, Marc Chagall, and Friedrich Nietzsche: all finding inspiration in the vibrant colors and captivating landscapes of the region.

This cultural legacy is preserved in museums, galleries, and the artistic ambiance that defines Nice and the French Riviera in general.

With just two days in Nice to explore, follow our guide to experience the essence of Nice’s southern chic.

From strolling along the iconic Promenade des Anglais to immersing yourself in the vibrant Old Town, this article is your guide to experiencing the best of Nice in a limited timeframe.

Getting to Nice

vibrant view of the cours saleya market from a more birds-eye-view angle so you can fully see how colorful it is

Nice is well-connected by transportation, with the Nice Côte d’Azur Airport (NCE) just 4 miles away from the center of Nice.

If you’re flying into Nice, you can rent a car, take public transportation, or take a taxi to get to Cannes. The drive takes about 10-15 minutes, depending on traffic.

If you need a taxi, I recommend booking an airport transfer through Welcome Pickups.

It’s competitive with local taxi prices, but having it pre-booked gives you peace of mind upon arrival — especially since you know your driver will be waiting for you at the airport!

Book an airport pickup from Nice airport here!

If you’re renting a car during your time in Nice, I recommend looking for the best rental car deals on Discover Cars.

They search over 500 agencies (including small local ones other car rental search engines skip over) and make pricing clear and easy, with no bait and switches.

Check rental car prices from Nice here!

That said, I recommend waiting to rent a car until you’re ready to leave the Nice area and explore more of Provence or the French Riviera.

Parking in Nice is a hassle and you won’t need a car for this Nice itinerary, as everything is within walking distance!

Train station in Nice, with blue train arriving at a train track in the semi open air train terminal

There are easy train rides to Nice from all over France, as this city is a major transportation hub for Southern France.

Navigating different countries’ rail service websites can be difficult, so I make it easy on myself by booking train and bus tickets via Omio — it’s one interface for all European train companies!

If you’re arriving by train, it couldn’t be easier as the train station is right in the heart of town.

If you have a lot of luggage, you may want to take a taxi rather than walk or take public transportation.

Day 1 of Your Nice Itinerary 

 
Get a feel for the city wandering along Promenade des Anglais.

a stop along the promenade anglais with a sea view

 
Stretching for 7 km (that’s just over four miles) along the azure waters of the Baie des Anges (Bay of Angels), this picturesque promenade offers breathtaking views, lined with stunning Belle Époque architecture and Grand Hôtels

Taking a leisurely stroll and basking in the sun on La Prom’ (as the locals call it) is one of the favorite activities of the Niçois, and just a few steps should be enough to explain why! 

As you wander, marvel at the iconic landmarks, such as the Hôtel Negresco, a Belle Époque masterpiece.

view of a building on the nice waterfront promenade

Be sure to admire the stunning Place Massena, adorned with ornate fountains and charming gardens, all with a fresh sea breeze to start your perfect first day in Nice.  

The Promenade des Anglais owes its name to the predominantly English tourists who came to Nice in the 19th century in search of wellness, health and leisure on the beautiful Mediterranean Coast. 

the promenade of the nice riviera

Today, la Prom’ is still a favorite amongst tourists and locals alike, who like to jog or cycle along the promenade, all while admiring the architectural masterpieces of this unique avenue.

Opulent balconies, intricate moldings and colorful façades all make this part of Nice a sort of open-air museum, showcasing architectural excellence. 

Immerse yourself in the historic heart and soul of Nice.

historic building in the center of old town nice, cute and narrow streets

The Promenade des Anglais will lead you from the airport in the west to the old town in the east.

Le Vieux-Nice is a well-preserved historic neighborhood. Although quite a touristy area, the Old Town is beloved by locals and visitors alike.

What’s not to love about its vibrant labyrinth of cobblestone, narrow and winding streets, beautifully lined with colorful façades and hectic market stalls?

colorful houses of old nice with painted shutters

Dotted by charming boutiques, artisan shops and trendy cafés, this area boasts a variety of historic landmarks and monuments.

It’s no wonder Nice was declared a UNESCO World Heritage Site in 2021!

Below, I’ll list some of the most important landmarks you shouldn’t miss in the Old Quarter.

You can also take a tour of Old Nice so you don’t have to visit each of these landmarks independently.

There are different themed tours of Vieux Nice, such as this 4-hour food and history walking tour of Old Nice, and this 2-hour history walking tour of Old Nice and Castle Hill.

Book your Vieux Nice food tour or walking tour here!

Admire the Fontaine du Soleil.

statue of a boy in a fountain with red architecture all around

First, you should admire the Fontaine du Soleil, a monumental fountain located in Place Rossetti.

The fountain depicts Apollo, the Greek god of the sun, surrounded by mythical sea creatures.

The plaza itself is lovely too, with its brick red painted architecture.

Stop by Maison Auer for delicious chocolates.

Another must-visit is Maison Auer on the very picturesque Rue Saint-François de Paule, which offers a variety of exquisite chocolates.

Five generations of chocolatiers, combined with an enchanting interior styled in Florentine fashion, make this quaint gem a local favorite!

Take in the beautiful Cathédrale Sainte-Réparate.

a beautiful historic cathedral in nice with a belltower and red architecture around it

Another worthy stop is the Cathédrale Sainte-Réparate.

It was officially built in the 17th century, though its primitive structure however dates back to the 11th century.

Inspired by the Church of Saint Susanna in Rome, the Cathédrale Sainte-Réparate features a dome adorned with vibrant, glazed tiles in the Genoese style.

Wander through the vibrant Cours Saleya.

view of the cours saleya market and the nice seafront and sand and palm trees

Be sure to stop by the bustling Cours Saleya, which runs parallel to the sea and cuts through the heart of the Old Town, one of the most important arteries in the historic center.

This iconic street is home to a bustling daily food and flower market every morning. Be sure to look for the art dealers if you’re visiting on a Monday!

To enjoy a drink on this lively street, locals recommend Le Bateleur.

Admire the architecture of the Palais de la Préfecture.

historic palace in light pink or light red architecture with white detailing and molding and many arches in the facade of it

Keep your eyes open for the Palais de la Préfecture, an impressive architectural masterpiece dating back to the 16th century.

Once belonging to the Dukes of Savoy, a dynasty that ruled Nice from the 13th century through the Renaissance until the city was finally ceded to the French Republic — not until 1860!

Peruse the museum at Palais Lascaris.

Explore the Palais Lascaris, a splendid 17th-century Genoese palace that now houses a museum.

Step inside to admire the opulent decor, intricate frescoes, and an impressive collection of musical instruments.

Stop by the Chapelle de la Miséricorde.

the famous chapel of nice with its beautiful but fading facade

A few steps further, be sure to visit the the Chapelle de la Miséricorde.

This stunning Baroque chapel adorned with intricate artwork and gilded details is considered one of the most beautiful chapels in Nice.

Visit Nice’s historic fish market.

Heading north from Old Nice, you’ll come across Place Saint-François.

This is where the iconic fish market, a cultural institution in Nice, has taken place around the Fontaine des Dauphins every day (except Mondays) since 1930.

Climb for the clock tower for an epic view over Nice.

the famous clock tower of nice on a clear blue sky day

Another place to visit is Tour Saint François, which was built as the bell tower in the 13th century before being transformed into a clock tower after the French Revolution.

Those brave enough to climb the 288 steps will be rewarded with a magnificent 360° view of Nice. Note that the admission fee is €6.

Savor the delicious local cuisine Niçoise.

hand holding a bowl of seafood stew

To truly get to know a city, you have to taste it! Immerse yourself in the flavors of Nice and savor a variety of traditional dishes.

Treat your taste buds to the iconic salade Niçoise, a refreshing salad of fresh vegetables, tuna, anchovies, and olives, drizzled with olive oil.

Of course, there’s the famous seafood stew, bouillabaisse.

Another must-try is socca, a chickpea pancake originating from Liguria that is crispy on the outside and soft on the inside.

Its earthy flavors and unique texture make it a beloved local favorite!

If you’re craving a comforting and flavorful summer dish, you can’t go wrong with the iconic ratatouille.

ratatouille with red pepper, tomatoes and green beans, served in an orange cocotte ceramic bowl, with fork, spoon and bread

A hearty, chunky vegetable stew with a summer-ripe medley of eggplant, zucchini, tomatoes, and bell peppers — how can it go wrong?

To complement your meal, don’t forget to pair it with a glass of local rosé — French wine geeks know that Provence is known for its exceptional rosé wines, light and delicately fruity!

If you want someone to do all the legwork of finding the best restaurants for you — and getting to taste a small portion of all the food that makes Nice so distinctly Provencal — you can take a food tour!

This food tour takes 3 hours and covers many of the dishes mentioned above, like socca, local olive oils, pissaladière, tapenade, rosé wines, and also some local Nice sweets like lavender biscuits!

Book your Nice food tour here!

Take a hike up the scenic Castle Hill.

the castle hill area of nice with mosaic and beautiful foliage

After that lunch, it’s time for a (short) hike up Castle Hill, locally known as La Colline du Château.

It’s worth the walk once you reach its summit and witness a breathtaking panoramic view of Nice that’s like a postcard come to life!

From this elevated vista, you’ll be treated to a mesmerizing vista of Nice’s cityscape, stretching out before you in all its splendor.

The city is framed on the other side by the sparkling waters of the Mediterranean Sea provide a stunning backdrop, with a clear view of the busy port.

view of nice from the castle hill

However, don’t be fooled by the park’s name into searching for an actual castle!

Fun fact: the château was actually destroyed by King Louis XIV in 1706, before the city of Nice was ceded to France!

Still, while wandering through the grounds, you’ll come across a few scattered remnants of the ancient citadel that once stood proudly on Castle Hill.

fake waterfall in nice's castle hill area

One of the most lovely places on Castle Hill is the artificial waterfall, which emerges from Nice’s main source of drinking water, the Canal de la Vésubie.

Be aware! Every day at noon, a cannon (a fake cannon, to be precise) is fired, but don’t be alarmed.

The Niçois just have a thing for keeping traditions, and this one dates back to 1862.

Catch the sunset at Promenade du Paillon.

the lovely promenade de paillon at dusk with the light slowly fading

As the sun begins its descent to the west, head to the Promenade du Paillon, a beautiful urban park that stretches from the Old Town to the more modern part of the city. 

Take some time to unwind here surrounded by the gardens, lush lawns, and fountains. 

When you’re ready, stroll down the boulevard and the Jardin Albert I towards the beaches to find a serene spot to relish the kaleidoscope of colors as the sun sets over the Mediterranean, casting a golden glow upon the city.

Have a delicious and hearty meal.  

nice france restaurants in old town street

In the evening, it’s time to continue your foodie journey through the culinary treasures of Nice! 

Chez Acchiardo, an esteemed establishment that has graced the culinary scene since 1927, comes highly recommended.

Enjoy the mouthwatering robust flavors of daube niçoise, a beef stew simmered to perfection with red wine and a delicate infusion of Mediterranean herbs.  

At Lou Balico you’ll have the pleasure of savoring their exquisite rendition of merda de can, green gnocchi adorned with a pistou sauce crafted the Ligurian way, without pine nuts.  

Day Two of Your Nice Itinerary

Skip the crowds at one of the city’s prestigious museums  

the red painted exterior of the musee matisse with mint green shutters

Nice has a variety of world-renowned museums to offer and you should try to include at least one in your Nice itinerary.

It’s well worth it to get up early to be the first in line and skip the crowds, saving you some precious time! 

Here are the top museums we recommend.

  • Musée Matisse is a tribute to the renowned artist Henri Matisse showcasing a remarkable collection of his works, from his early works to his later masterpieces.

    The museum is situated in the beautiful neighborhood of Cimiez, in a splendid 17th-century Genoese villa surrounded by a serene garden.
a sign leading to the famous. musee marc chagall a famous french painter
  • Musée Chagall is dedicated to the life and works of the renowned Russian-French artist Marc Chagall, an influential Impressionist artist.

    Housed in a distinctive building design by architect André Hermant, Musée Chagall is also located in Cimiez.

    Chagall’s works are known for their vibrant colors, dreamlike imagery, and rich symbolism.

    His art often draws inspiration from his Jewish heritage, Russian folklore, biblical themes, and personal experiences. 
  • Musée d’Art Moderne et d’Art Contemporain (MAMAC) is the place to be for art enthusiasts who want to have their finger on the pulse of what’s happening in contemporary art.

    It offers a sometimes-captivating, sometimes-confusing journey through the ever-evolving world of modern and contemporary art.

    The museum building itself is a striking architectural masterpiece, designed by Yves Bayard and Henri Vidal. 
the historic musee massena with a villa like structure and palm trees in central nice
  • Villa Masséna serves as a museum dedicated to the history and art of Nice, with works and artifacts related to the city’s past.

    Situated on the famous Promenade des Anglais, the villa is among the many iconic symbols of the city’s rich heritage and tendency towards opulence. 

Visit the Russian Orthodox Cathedral. 

the onion domes of the russian orthodox cathedral in brilliant teel colors while there is lots of gold and pink or salmon painted exterior of the church

Don’t miss the magnificent Russian Orthodox Cathedral, an architectural marvel with its gilded domes and ornate interiors.

Step into a realm of tranquility as you admire the Byzantine-style frescoes and intricate iconostasis. 

The cathedral provides a fascinating glimpse into Nice’s historical ties with the Russian aristocracy.

Also known as Cathédrale Saint Nicolas, this is the largest Russian Orthodox Cathedral built outside of Russia, and an important place of worship for the local Orthodox community.   

Have lunch at the Quartier du Port.

the port area or marina of nice with brilliant colored building sin the background and hill

The Quartier du Port, or the Port District, is a vibrant and charming neighborhood, offering a unique blend of historical charm and maritime ambiance. 

Originally constructed in the 18th century to serve as a liaison for the Duke of Savoy with other kingdoms, the port nowadays primarily serves leisure, ferries to Corsica, nautical sports and yachts. 

You can enjoy a beautiful walk from Negresco Hôtel on Promenade des Anglais to the yacht club. 

The port is also a popular area for a drink or a meal, with numerous bars and restaurants offering views of the boats.

For a truly luxurious meal, make sure to book your table in advance at Le Plongeoir.  

Take a boat ride somewhere luxe.

While you’re in the port area, why not explore somewhere else on the Riviera by boat from Nice?

There are countless Nice boat tours that take you to various places along the Riviera in different kinds of boats, from everything from speedboats to RIB boats to sailboats!

Here are a few suggestions:

Spend the rest of the day tanning under the blue striped umbrellas.

blue and white striped umbrellas on the beach

What better way to end your 2 days in Nice than basking in the sun the city is so known for?

While you can absolutely could a few hours on one of the city beaches in Nice, why do that when there’s an even better option?

We recommend heading to Saint-Jean-Cap-Ferrat, the picturesque peninsula just a few minutes’ drive from Nice.

Known for its natural beauty, extravagant villas, and stunning coastal views, Saint-Jean-Cap-Ferrat offers secluded coves, crystal-clear waters and pristine beaches far from the crowds.

You won’t regret the small detour!

Where to Stay in Nice

architecture of one of the villas of nice in the ornate style

Budget: Résidence Lamartine

For an affordable but still lovely hotel, check out Résidence Lamartine.

This elegant home has been converted into a selection of apartments perfect for those who want less of that traditional hotel feel.

It’s great for a short visit to Nice, since it’s just a 5-minute walk from the Nice-Ville Train Station, yet it’s still only a 10-minute walk from the Promenade des Anglais and the beautiful Nice beaches.

This is also a great budget choice because it has a small kitchenette (microwave, a stove hob, and a small fridge) so you can buy local Nice produce and self-cater during your stay!

Everything was renovated in 2017, so expect modernity furnishings and details — but then be wowed by the old-world charm, like its floor-to-ceiling doors that open up to a wrought-iron balconette!

There’s also a small garden area as well as a lounge area where you can relax on plush green velvet sofas or play a round of pool.

Check availability, rates, room types, and reviews here!

Mid-Range: Hôtel Apollinaire Nice

For a luxurious but not wallet-breaking stay, Hôtel Apollinaire Nice is an excellent option.

A short walk from Old Nice, Castle Hill, and the Promenade des Anglais, this boutique hotel in the prime Carabacel neighborhood will give you a memorable stay.

Vintage-meets-modern is the design aesthetic here: just check out their bar area, with its upholstered and steel bar stools against a tiled geometric bar counter

Inside, the rooms are spacious and modern — think subtle animal-print floors, minimalist white-linen beds, and funky lighting details — all with ingenious up-to-date details like USB sockets for your electronics! 

Some rooms, like the King Suite, even have a deep soaking tub with a window in case you want to soak in some views from the tub!

This is another hotel where each room is rather personalized with its own aesthetic, so look through the different room types available to find the one that matches what you want best.

Check availability, rates, rooms, and reviews here!

Luxury: Hotel Le Negresco

The famed Hotel Le Negresco is as iconic inside as it is from its exterior! 

Entering the hotel, you’ll immediately be greeted by grandeur appropriate of the building’s standing as Belle Époque masterpiece.

Exquisite candelabras and chandeliers, original gilded crown molding, a marble floor so shiny you can see your reflection in it… and we haven’t even reached reception yet.

All the public areas are this intriguing — from the sitting room with its entirely glass dome to perfectly let in the light to its library-chic warmly lit bar area to its its quirky carousel-inspired restaurant — but now let’s move onto the rooms.

There’s a variety of room types: pick between a mid-century modern inspired one, with a unique headboard and velvet cushy chairs, or a more old-world luxury one, with floor to ceiling curtains, wicker chairs, an upholstered seating area — all with a Mediterranean view!

The rooms are very unique, so I suggest looking through the room types available on Booking to be sure you find the one that matches your aesthetic desires.

And of course, don’t forget its private beach club area!

Check availability, rates, rooms, and reviews here!